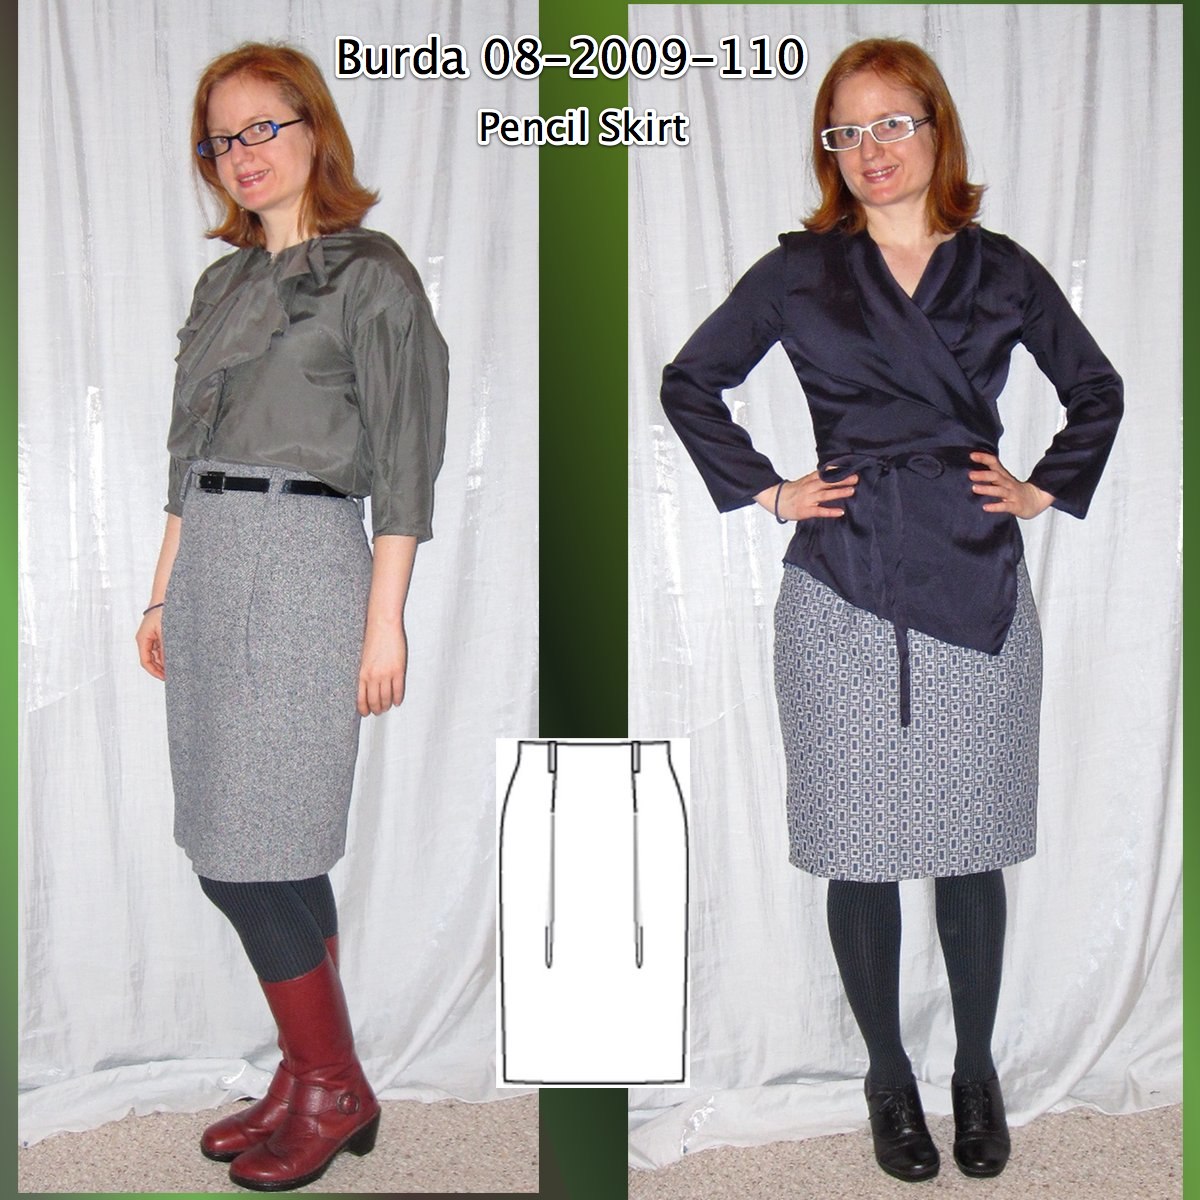
I have been totally into pencil skirts lately so I've been trying out the various Burda magazine patterns. This one is Burda 08-2009-110. I like the higher waist and the front pleats, which give it a little more of an interesting shape.
I made two of these, first in wool tweed from The Carol Collection and then in the rectangles fabric leftover from my Butterick 5321 pleat front sheath when I realized I didn't have any print skirts that matched my navy wrap blouse from Burda 02-2009-123.
For the first I did a swayback adjustment by folding a wedge out of the back below the waistline. Unfortunately, I shouldn't have done this because the back waistline dips down and the belt rides above the skirt. I do like the belt loops, but I left them off for the second skirt as I planned to wear it with the blouse that would cover them.
I shortened the skirt three inches by folding out the pattern above the slit. I cut the slit as drafted but it ended up cutting way, way too high (almost to my bum) and I ended up sewing the top 1.5 inches closed. For the rectangles version, I kept the same length adjustment but shortened the slit by those 1.5 inches.
The pattern includes a facing, but my wool tweed was quite scratchy and I didn't want any of it on the inside. So I fully lined it, using the same pattern as for the outer fabric. This is the method I use for getting a clean, machine stitched lining insertion with an invisible zipper. I am sure I am not the first to come up with it, but in looking at other zipper tutorials I didn't find anything exactly like it--probably because it's so slapdash!
Machine Stitched Lining with an Invisible Zip Tutorial
1. Fully construct the skirt (or dress) and install the invisible zipper in your fashion fabric. Then construct the lining other than the seam for the zipper, which should be left completely unsewn.
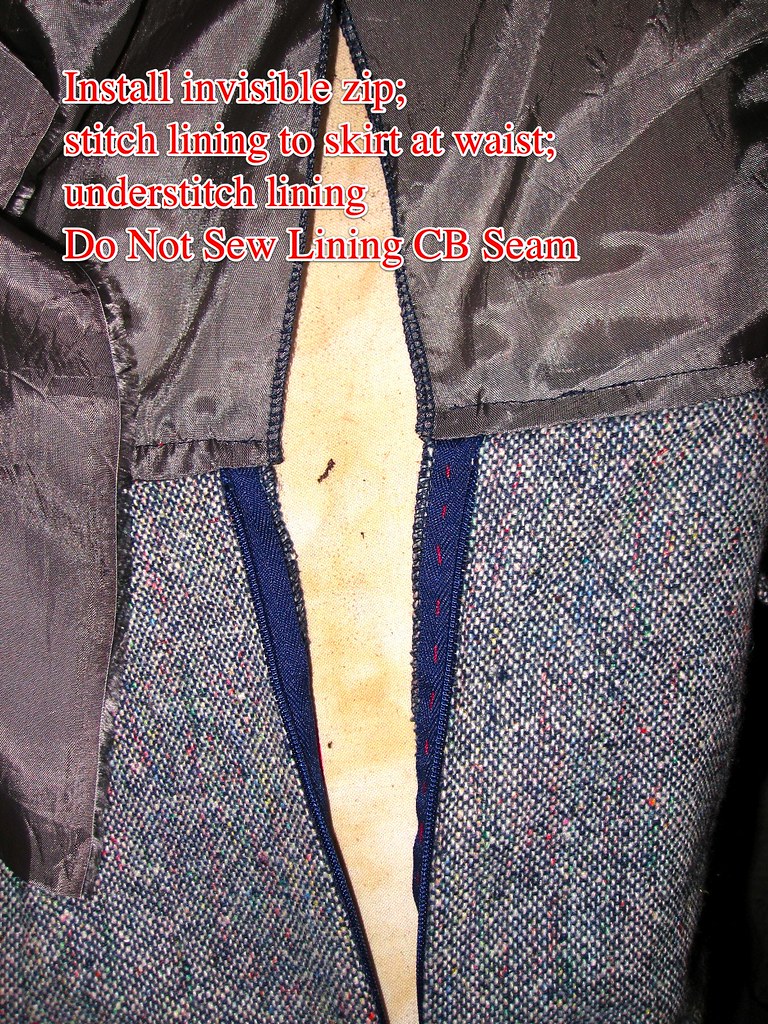
2. As shown above, stitch the lining to the fashion fabric at the waistband (neckline for a dress), catching the upper edges of the zipper tape and putting your stitch line just slightly above the upper zipper stops. If you prefer, you can stitch 1/4 inch above the upper zipper stops and finish with a hook and eye, which allows you to get a crisper corner on that upper edge. Generally I'm ok with the slightly rounded corner you get by stitching all the way to the zipper teeth.
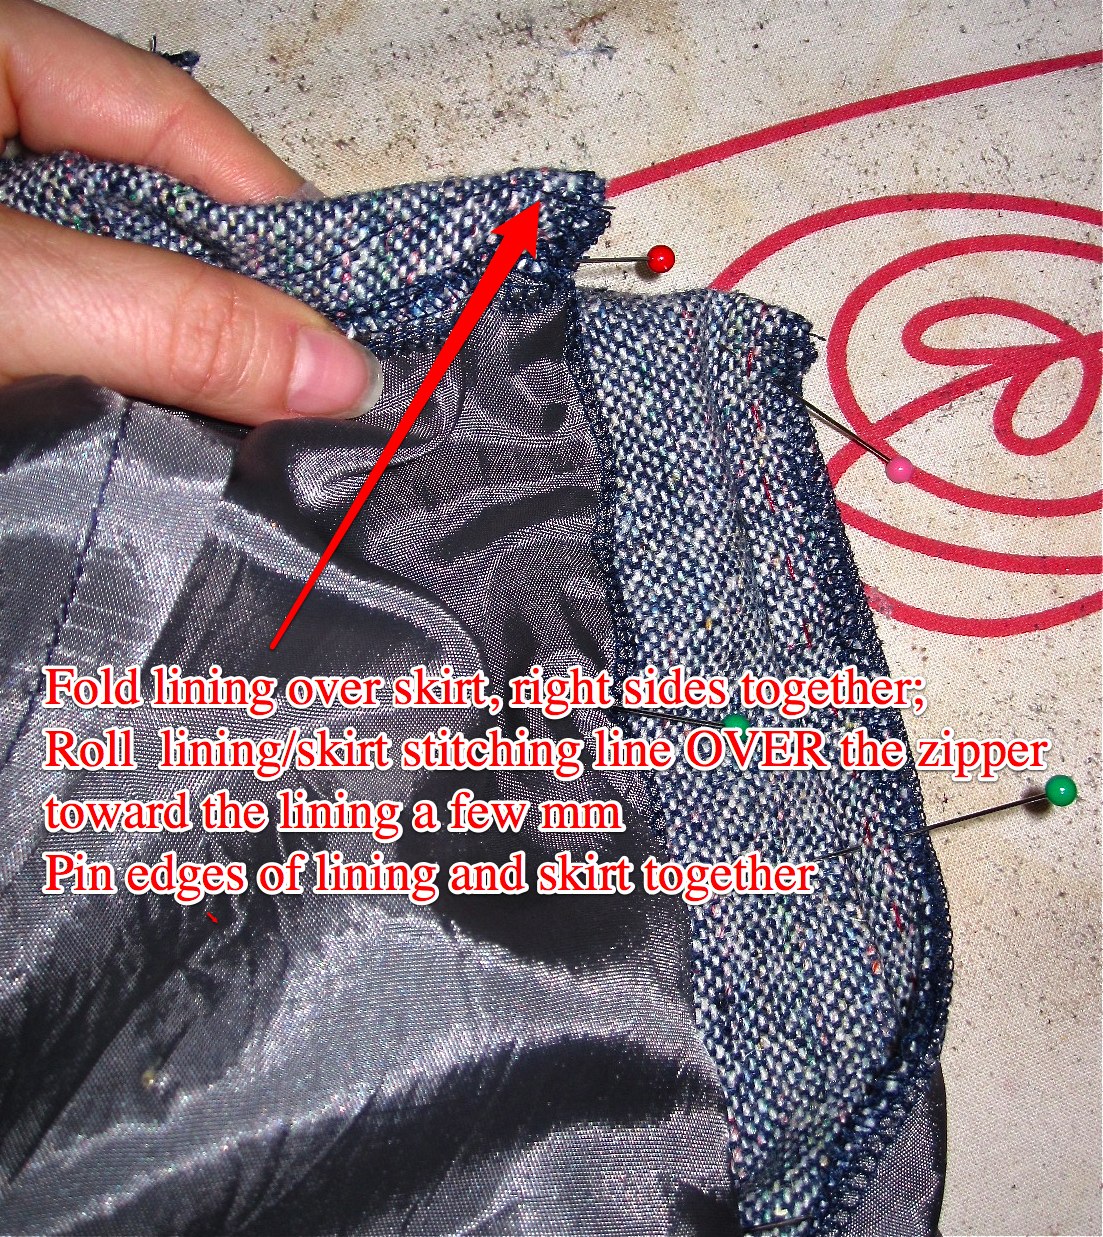
3. Next, place your fashion fabric and lining right sides together, matching outer edges. THIS IS IMPORTANT: Roll your fashion fabric over your lining slightly, so that the waistline seam (where the lining and fashion fabric are sewn together--in a dress this would be the neckline seam) rolls over to the inside a few millimeters. This is what will give you a nice look on the outside and keep the lining from peeking out above the zipper.

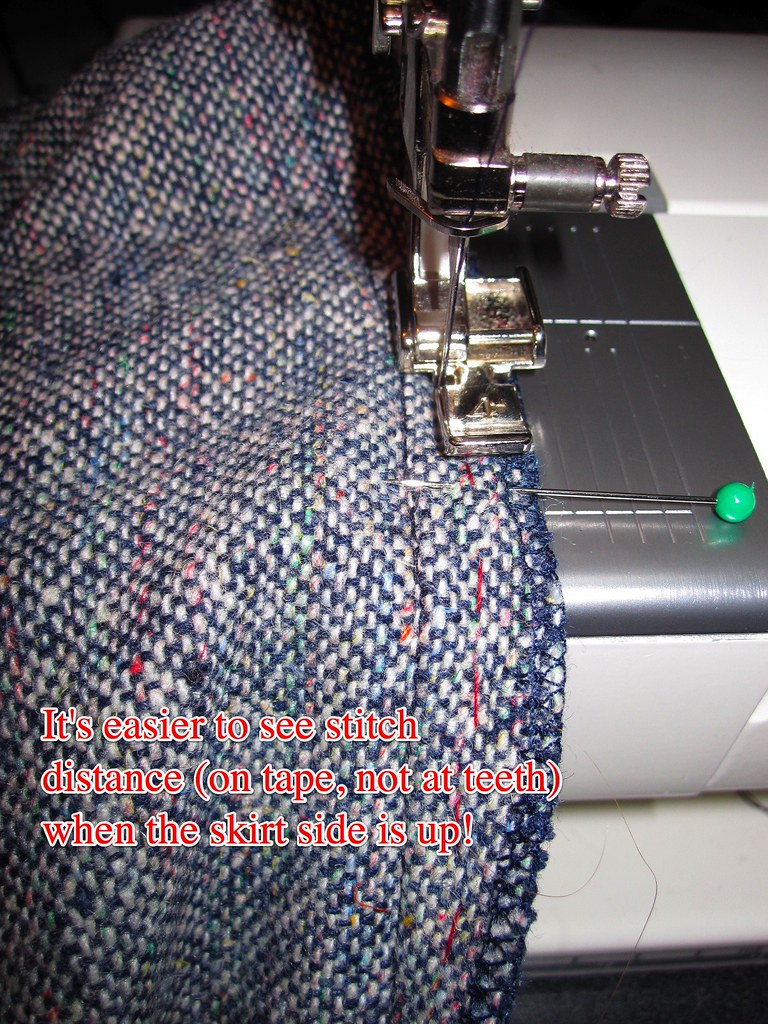
4. Pin those outer edges together, right sides together, maintaining that roll of the fashion fabric to the inside, then use your zipper foot to stitch the lining to the zipper tape. Don't get too close to your zipper teeth or you will make the zipper too difficult to open and close, but be sure to be close enough to catch in the zipper tape. Luckily, if you miss the zipper tape you can just sew another stitch line closer to the teeth, you don't have to rip out the original, too wide line. It's a lot easier to get the spacing right on the side where the fashion fabric is up because you can see your zipper seam line.
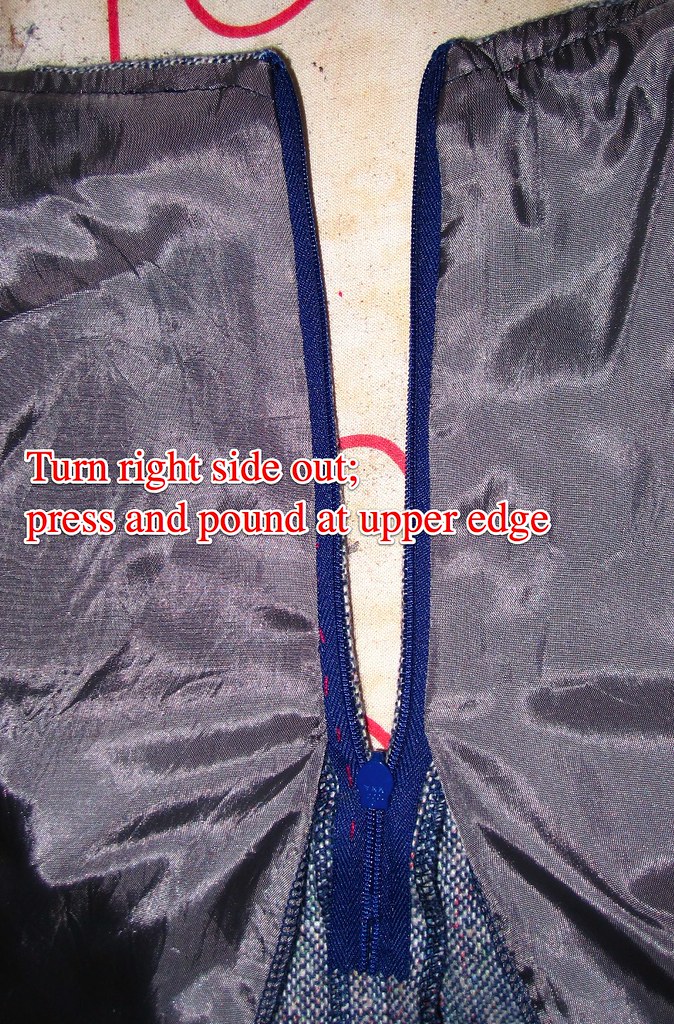

5. Turn the skirt right side out. You are almost there--you can see that the lining has enclosed the zipper tapes and it's already looking good on the inside (I was lazy and did not remove my basting stitch for the invisible zip; I only baste one side in, as explained here. The upper edge is going to have some bulk because the ends of the zipper tape are squished in there, so give it a good steam press and then pound. Then match up the lining edges, right sides together. I generally leave an unsewn opening of a couple of inches just to make sure I don't have any trouble opening the zipper all the way. Stitch the lining seam and press open.
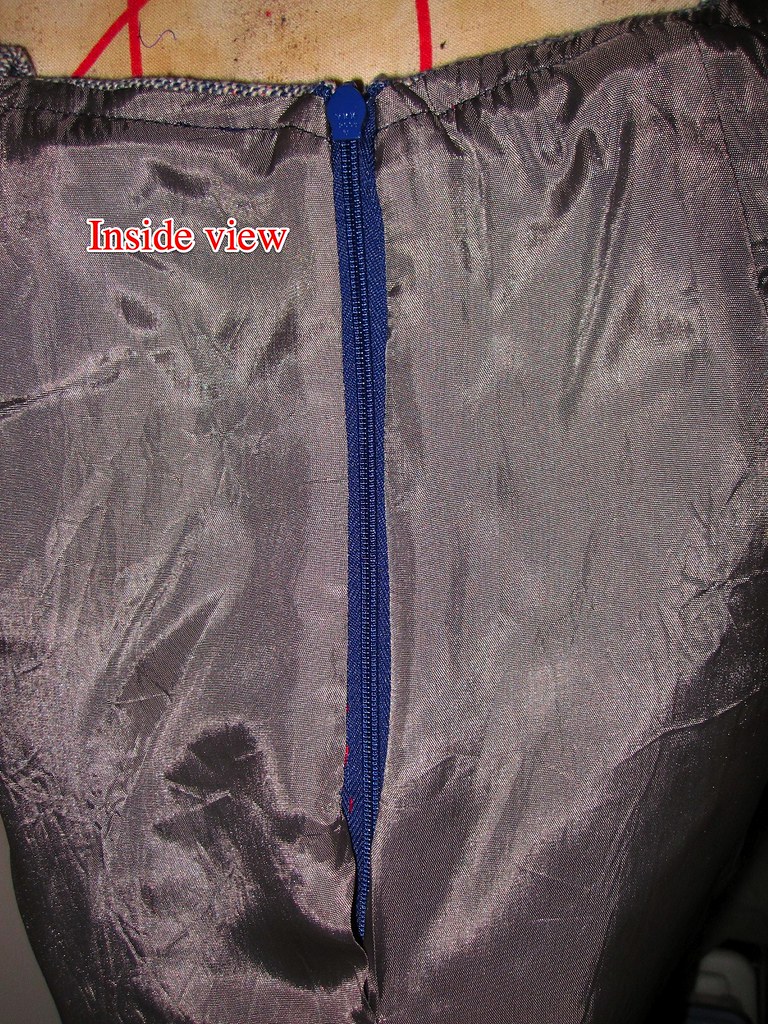
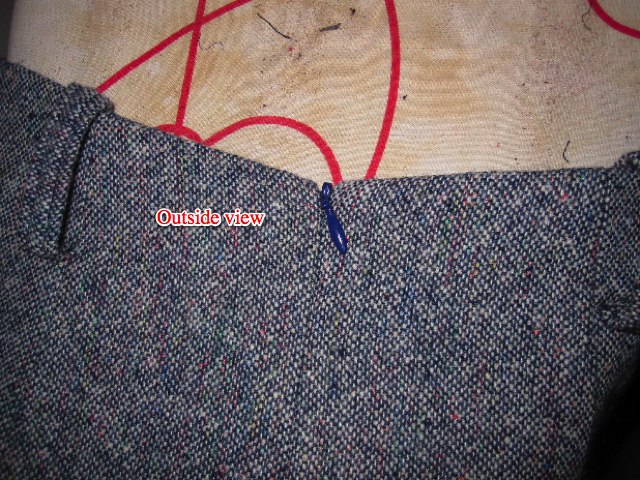
And voila! It looks great on the outside and the inside and didn't involve any hand sewing of the lining to the zipper tape.
All photos of this project are here and the pattern review is here.
===========
The plan for New York!!!! We will meet this Friday, March 26, at Crisp at 12:30 for lunch and then on to shopping. It is at 110 W. 40th between Broadway and 7th, very close to Bryant Park. The weather does not sound like it will be eat outside weather, but a girl can hope. Please let me know if you will join!


.jpg)


36 comments:
Great tutorial! I'd never heard of this method before I beta-tested a Colette Patterns dress and they had this same technique in the instructions. It's so simple and yet I never thought to do it until someone showed me!
Love that pencil skirt, too. I'm going to have to get some more skirt fabrics in the stash...
Oh, if only you'd posted this a month earlier... just finished two lined dresses and that hand-sewing of the lining to the invisible zip wasn't much fun. Which reminds me I need to finish my review of the pattern for Patternreview ... will link to your tutorial if PR will let me!
That is a beautiful invisible zipper you have there. I've never attempted to insert an invisible zipper, but when the time comes I'll be referring back to your tutorial. Thanks
Thanks for this cool tutorial! You are stylin' in your cute skirts!
I work a few blocks from there so I think I can come join for lunch at Crisp for sewing talk, though I only get an hour for lunch and will have to likely skip much actual fabric shopping.
Great skirt and tutorial!
Awesome skirts! This is how I do it, too. So glad to see I'm not the only one!
Great tutorial. Did you use a regular zip foot?
Angela
Great pencil skirts and thanks for the tutorial
Thanks for the tutorial, I added it to my collection. Skirts looks fab!
Fantastic tutorial! Thanks so much for posting this--I will definitely need it soon.
I would love to meet you and the others for lunch, but this particular Friday I'll be out of town. Please let us know when you come back.
I'll be there on Friday -- as myself.
I'm book-markin' that tutorial. I can never remember the correct order to sew everything. Thanks!
Great skirt too!
I can't understand why the Big 4pattern companies still advise handstitching the lining to the zipper in their instructions. I think it is because these instructions may be hard to explain in paper format?
Dawn at Two On Two Off posted a similar tutorial with a facing last summer. I am embarrassed to admit that it took me a while to realize that the method could be used on dresses as well. Duh!
Nice skirts! I have been checking out the skirt patterns but missed this one. Looks like a good work skirt.
Lovely skirts - that style suits you so well! Thanks for the excellent tutorial - very clearly explained and illustrated.
I so wish I could come to your NYC lunch but London is just too far away! However, I know the area where you are meeting very well so I can picture exactly where you are going to be and will be there in spirit! Have a great time.
Thanks for the tutorial! That's a great skirt, and a good pattern to keep in mind (I'd rather sew something more entertaining than a "mere" pencil skirt, too!). I especially love the combination of a silky blouse/tweed skirt, and boots, oh my! Must be my inner anglophile. Pass the crumpets, please!
Thank you for the tutorial. Nice skirt!
I will join for lunch and, if I can sneak away from the office for long enough, for a bit of shopping. Thank you for welcoming new/all people.
Thank you! I just made my first lined pencil skirt and am loving the option to not do all that handstitching next time. :)
Thank you for this great tutorial.
I loooooove this skirt on you. It is super flattering. Thanks also for the tutorial!
I have that pattern marked as one I want to try - you have moved it up on my list!! Looks great!
Beautiful skirts! And thank you for this great tutorial!
great tute! I am definitely going to use it in the future. And I love that skirt on you. Very flattering.
Thank you for the tutorial, very very useful! I will definitely use it on my next project.
Thank you! I just used this tutorial and the bodice lining one to install my very first lining in my very first dress, and I'm novice, and it was incredibly helpful.
(If anyone else has Angela's question---I found a piping foot really helpful to sew next to the zipper, but not too close.)
Cute skirt, but I love the tops you've paired it with. Can you remind me what pattern the one on the right is made from? At least I hope you made it.
Nevermind. I didn't read very closely the first time. (Blush!)
Good tutorial. I'm glad to see what these patterns look like on a real person. You always look great.
Trena,
Being an audio visual person I cannot wrap my mind around the tutorial. However it really looks like nice technique that I'd love to learn and use.
I've seen the Video tutorial you made for lining the dress using a machine and it made so much sense to me.
Could i please put in a request - Would it be possible for you to do a video tutorial for this technique please??
Its just a request. Please feel free to ignore if you can't do it. And yes, I'd really understand if you were not able to do so. Tutorials do take so much time/effort/energy.
Kay
I should have read your blog 3 years ago. I've only discovered this method by accident a few months ago.
It does pay to blog and sew.
Trena, never mind. I finally figured it out. :) I read each line again and again till I got it. Thank you for the tutorial.
This is fantastic - thank you! I just tried this on a dress with great results. One thing I ended up doing that I found useful, was when stitching the lining to the zipper tape, I used the invisible zipper foot (I have a cheap $5 one) with the zipper in the groove and the needle on the outside - that way I knew where the zipper coil was and could stitch at an even distance.
Thanks again for your wonderful tutorials!
Thanks - this was great! One thing I found useful was when I stitched the lining down, I used my cheap invisible zipper foot with the needle on the outside and the coil in the right groove - that way I could stay an even distance from the coil.
Thanks again for your wonderful tutorials!
Thanks so much for this tutorial. I just used it very successfully on a dress. :)
Post a Comment