Friday, March 29, 2013

Burda 12-2011-105, Rosebud Wrap Skirt

Burda 12-2011-105 Thumbnail

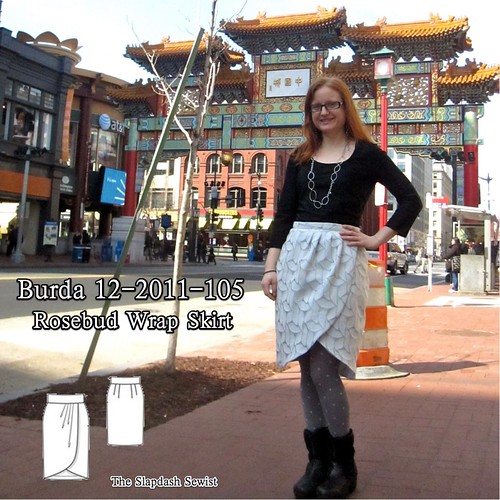
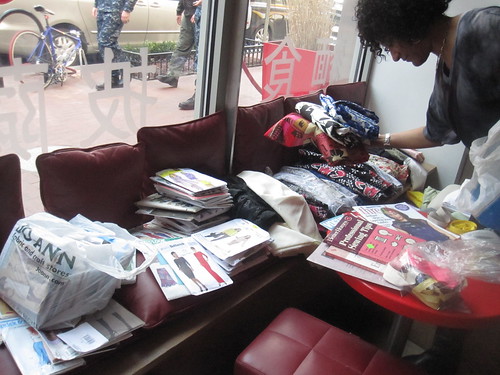
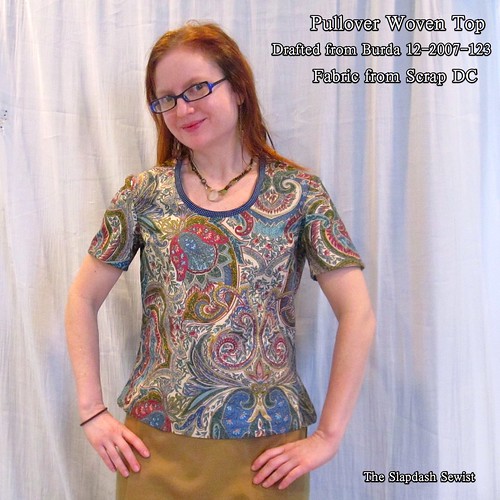
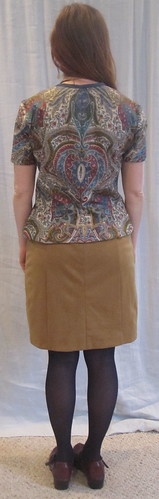
It is pattern stash contest time!  It's a good exercise in getting to long-planned projects.  My first entry is   Burda 12-2011-105 (available for purchase at the link--I am not affiliated in any way and do not receive compensation).  I finished this skirt the night before our DC-area meetup, and Sewandwrite was kind enough to take the fun photos.  I haven't yet confessed the fabric.  It is a Fabric Mart Maggy London piece; I received it on Thursday, washed it that night, and sewed it on Friday.  It never had time to hit the stash, which means it barely counts, right?

Length Alteration


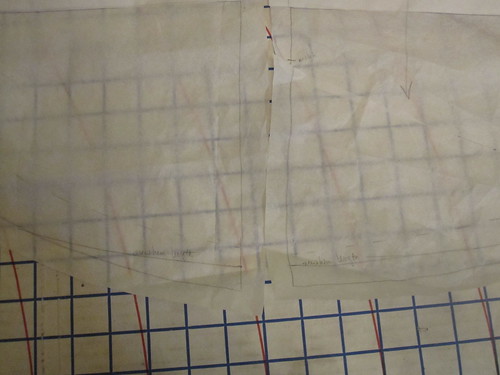
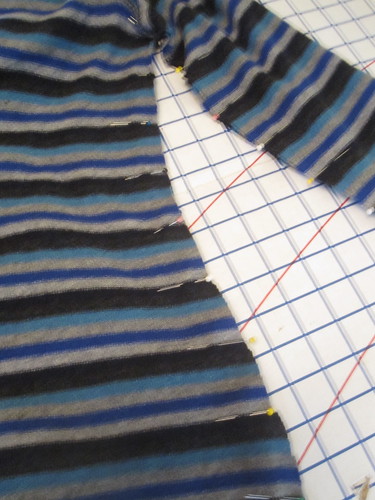
Because the skirt can't be shortened in hemming without losing the shape/design elements, I took forever trying to figure out the right length.  After trying a couple different tissue fits, I decided to shorten it 1 1/2 inches.  I took out the length about 2/3 way down on the front pieces (I folded out an equal amount of length from the back piece).  I just smoothed out the curves when cutting.


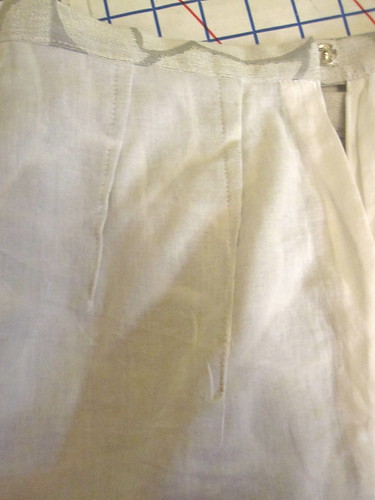
The skirt is meant to be hemmed with a facing, but I decided to do a full lining instead.  I wanted to protect my skin from the scratchy metallic jacquard.  I generally put in the zipper of a skirt as the last part of basic construction so I can do final fitting, but with my finish method the zipper had to be done in the middle.  That's ok, because you have a fitting opportunity in crossing the fronts over one another.

First, sew the side seams of the fashion fabric and the lining.

Second, put the zipper in the center back seam of the fashion fabric (which I added; this is supposed to be cut on the fold but I don't like the way side zippers can stiffen the side seam in an asymmetrical way).  Stitch the center back seam of the lining from the hem to the bottom of the zipper opening.

Trim Underlining at Hem

Third, trim 1/4 inch off the lower edge of the lining for turn of cloth.


Fashion Fabric and Underlining Sewn Together at Hem


Fourth, pin and stitch the lining and fashion fabric together along the hem edge, right sides together.


Press With Turn of Cloth


Turn and press, folding slightly into the fashion fabric rather than right at the seam--that's what the turn of cloth is for.  This will prevent the lining from flashing.


Fashion Fabric and Lining as one at Darts


Fifth, carefully match up the waist edges of the fashion and lining fabrics.  Make sure that the length is perfect.  Pin and stitch the darts and pleats in the fashion fabric and lining as one.

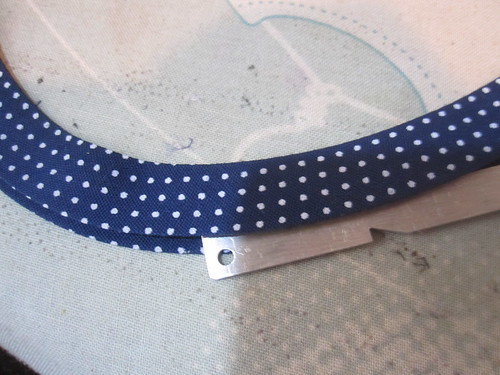
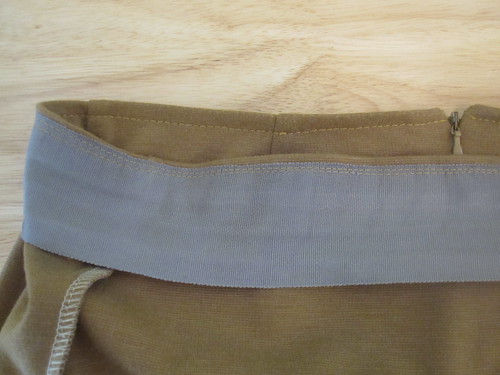
Sixth, fold the right front over the left front.  Baste in place.  Then finish the waist.  I used a straight waistband in a single piece; the pattern calls for a shaped waistband with front and back pieces but I felt it would make the waist just a little too high.  You could also finish with bias tape or a waist facing.


Change Hem for Next Time


When I make it again, I will keep the 1 1/2 inch all around shortening, and take an additional 3/4 inch off by reshaping the front pieces to shave off length very close to the bottom/side seam, and shortening the back accordingly.  Taking any more length out of the body of the skirt will raise the crossover too much but it is just slightly too long in the back.


Random Pleats as Drafted

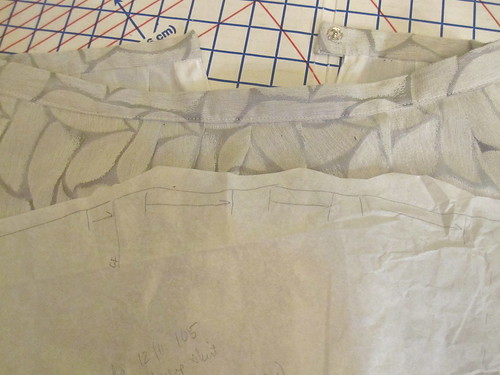
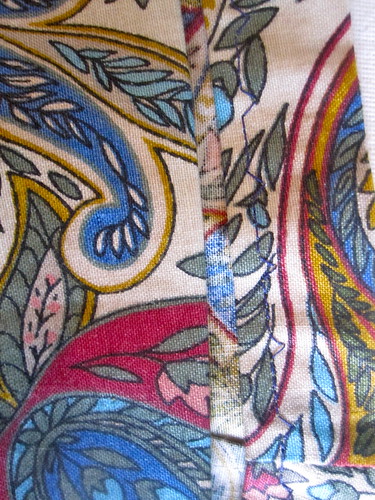
The right front--the top piece of the front--has four pleats in it.  They are of random widths and just looked weird when sewn as drafted.  I unstitched them and redid it with evenly spaced pleats of the same width.  I reduced the amount that was to be pleated out by probably 1 inch total for a wider, more secure crossover.

Front
Back Closeup


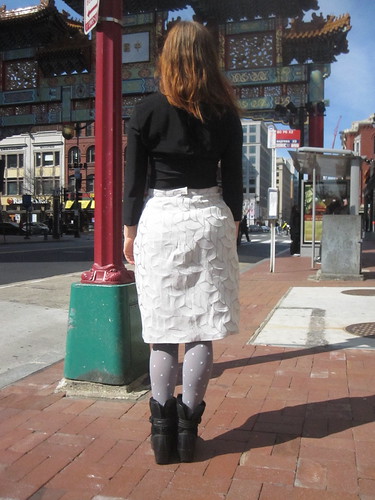
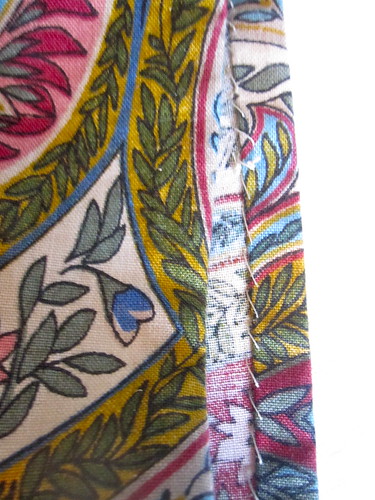
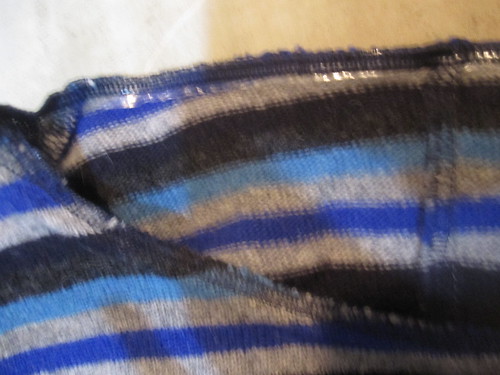
In hindsight, cotton batiste was not a good choice for lining this skirt.  It is definitely comfortable, but especially with my somewhat velcro-y fashion fabric, I should have chosen a slippery lining.  I have some trouble with the back fashion fabric and lining sitting strangely with one another, so that the back hem appears to be puckering.  The length of the two pieces is perfectly matched (minus my turn of cloth), but the batiste causes the pieces and the wrapover to grab each other and interact in weird ways. Oh well.  This skirt is, alas, not long for the world.  The metallic threads in the jacquard are already poking out all over the place and eventually it will just look ratty.

Other than my operator error in choosing poorly on the lining fabric, I really like this pattern and the final skirt.  It is bikeable, though off the bike there's a danger it will flash the shorts I always wear under skirts to avoid leers (or at least disappoint the leerers).  I'm certain this isn't the last skirt I'll make from this pattern.  I think it might be fun to make it in a more formal wool for a nice contrast between menswear fabric and a decidedly womenswear look.

All photos are here and the pattern review is here.

Thursday, March 28, 2013

DC Area Sewing Meetup: Wish You Were Here!

Nikki, Our Organizer


It is so fun to talk about sewing in real life!

It had been a while since we last had a DC-area sewing meetup, so Nikki took the initiative to organize through the message board at Pattern Review (for some reason it literally did not occur to me to announce it on my blog until I left the house and was biking toward the restaurant).  We met at the Vapiano in Chinatown, which is convenient to all five metro lines.  It turned out to be a great place for a meetup.  Everyone orders their food separately at the counter, but the dining experience is not fast food.  We were able to take over a big corner of the restaurant with plenty of space to chat and to swap for a couple of hours.


Hanging Out


People came from near and far--I think Baltimore was our furthest trekker. I think I was closest. The restaurant is only a little over a mile from my house (lucky me!).

Everyone was decked out in their fanciest sewn duds.


The Group


We circulated around getting to know one another and reconnecting, talking through sewing puzzles.

Recent Sewing Project


DD brought a recent project, the Vogue 8881 high-low hem tee.  Everyone had fun admiring her excellent coverstitched hem, and we all agreed that we now want this pattern.


All that's left of brunch!


First things first, we had to eat.  You can see how much we enjoyed the food here.

Swap Bench


Once we had our sustenance, it was time to get to swapping.  We collectively brought a truly huge volume of fabric and patterns.  Everyone went home happy (especially those of us who managed to get rid of slightly more than we took...very slightly).

Perusing a Swap Books


In addition to fabric and patterns, a few people brought sewing books.  Sewandwrite graciously arranged to take our excess home to donate to an organization.  She braved the meetup despite a recent ankle injury.

I apologize, I don't know everyone's PR/Internet name.  Please let me know if you want to be tagged!

All photos are here.

DC Sewing Meetup 3-2013

Here's what followed me home.  The cotton knit is a Marcy Tilton, and it just happens to have "grayed jade," one of this year's Pantone colors, in it.  Next is a wonderfully soft cotton print in coral.  I am hoping to eke out Butterick 5490.  The wool herringbone was forced upon me by Nikki, who pointed out that I couldn't possibly resist a wonderful work-appropriate fabric for a skirt.  And finally, the rayon burnout was just too fun to leave behind.  Clio has recently been contemplating the possibilities of sheer, and, well, I'm copying her.

Thursday, March 21, 2013

Basic Woven Pullover Top

Woven Tee Thumbnail

I have been so thrilled with my TNT t-shirt draft that I've been wanting the same for a woven pullover top.  I have made many Simplicity 2938 tank tops, but (1) a recent attempt to add sleeves to the pattern was a disaster, and (2) I don't always want the front pleat detail or the front princess seams to break up a print.

 I started with Burda 12-2007-123 and got it about 85% of the way there last year when I was attempting to duplicate the DVF Grandie Top.  As warm weather approaches (I hope?  pretty please?), my thoughts turned again to a basic pullover woven tank so I pulled out my pattern and brought it over the finish line...or at least to 95%.  I went to ScrapDC to find a muslin fabric and found this perfect piece!  I think I need to shorten it a teeny bit between the shoulder and bust in the front and the hem is difficult, as explained below.

In the closeup photo it looks like the hips are winging out (the dreaded Mickey Mouse Hips where they stick out like round ears), but I think it's just the camera angle.  You can see in the full-length shots that the hips have an appropriate but not excessive amount of ease.  In the fitting process, I narrowed them as much as possible.  If I take out more than a smidge of width they will be too tight and the top will ride up.  I could also make them less obvious by adding to the waist, thus reducing the curve.  But the point of this top is that I want to be able to wear it without a belt, so I don't want to give up the waist definition.

Hand Sleeve Hem

I will most likely make this pattern sleeveless most of the time, but I wanted to make sure it could accommodate sleeves as well.  For this piece, I thought I would baste the sleeves in to confirm they worked and then take them off and have it as a tank.

But I actually liked the way the sleeves looked so I kept them.  I didn't have much length for a hem allowance, so I did a narrow hand hem on the sleeves.

Machine Blind Hem


For the lower hem I used a machine blind stitch.

I found the lower hem the most difficult part of the whole top!  The long back darts meant that the lower edge was too wide to be folded up.  I had to put mirror darts into the hem allowance before I could get the hem to sit smoothly.  I would like to figure out a way to make the hem easier on later editions.  I might need to use a hem facing.

Bias Tape Wider on Underside

I finished the neckline with vintage(?) bias tape from Scrap.  The tape was folded so that one edge is longer than the other.  Maybe all commercial bias tape is still done like that--I haven't bought bias tape in forever because I make my own.

Sew Bias Tape with Blind Hem Foot


Because of the fold, I could sew with confidence right at the edge of the shorter side, knowing the longer side underneath the garment would catch.

I used my blind hem foot and clicked the needle to the right.  I ran the shield thingy (don't know the actual name of the metal part) along the fold, and had the needle to the right of the shield to catch the tape.


Bias Tape Finish


I would normally do a double-fold bias tape finish in a two-step process, but with the fold of this I was able to stitch it in one.
 

Front
Back


I suspect this fabric is a home dec; it's a rather stiff cotton that had a satiny finish on it.  The pre-wash took out a little of the stiffness and the finish.

Anyway, it was an oddly shaped remnant, and only the front or the back could be sewn with the paisley in a symmetric pattern.

With the symmetry in the front, it was very "Behold my sacred heart and my exploding spleen!"  From the back, it is more, "Observe the elegant architecture of my spine."  So I went with placing the symmetry in the back.

One thing I realized when making this and deciding on the length is that skirts and jeans call for different lengths.  I wear skirts at natural waist, but even my relatively high-waisted jeans are well below natural waist.  On the pattern I marked a hem 1 1/2 inches shorter for tops to be worn with jeans.

Now I'm eager to find ways to chop up and reassemble the pattern!  Any suggestions for tops that start with a woven pullover base?

All photos are here and the pattern review is here.

=================================


Source: lyst.com via Trena on Pinterest


The skirt is Burda 01-2008-127, which I made three years ago in a green silk.  I'd always meant to come back to the pattern, and this Halogen Seamed Pencil Skirt ($69 at Nordstrom)--a favorite of Corporette readers--reminded me.


Petersham Waistband


I re-used the petersham waistband of the fail skirt that ended up with my niece.  I wasn't sure whether it would be uncomfortable to put a non-stretch waist treatment on a stretch skirt, but it wears well.

I wish I'd thought to stitch the petersham to the wrong side of the skirt rather than the right side of the skirt before folding it down and topstitching.  The seam allowance of the ponte makes a noticeable ridge in wearing.  If the seam allowance was hanging over the petersham, rather than underneath, it wouldn't show.


Side


In the past, I've always made ponte skirts as a simple two-piecer with an elastic waist.  I realized with the last one that I really needed to add back darts.  With that much work, it's better just to make them real skirts rather than elastic waist.  I don't mind putting in zippers.  It's a flattering skirt in a nice shape, though there is a little bit of tummy-danger-zone arrow-pointing depending on how recently I've eaten.

I have a couple of ponte pencil skirts planned--unlike woven pencil skirts, they are fairly bikeable--so I took the time to perfect the pattern and it's on my TNT bulletin board. Although now I'm wondering if there's a way to eliminate the side seam....

Thursday, March 14, 2013

ScrapDC: (Re)Fashion for a Song


Heather of Scrap DC
I read in the paper about a new local non-profit thrift store with a unique focus:  it's a thrift store exclusively for craft supplies.  Well, I had to check this out for myself!  I am totally spoiled because it's a 10 minute walk from my house.  By metro, it's accessible from the New York Ave. metro stop on the Red line.  I live at Shaw/Howard U on the Green line and found the walk easy and safe.

ScrapDC was sparked by the original Scrap in Portland.  Co-Directors Karen and Heather were so inspired that they had to bring the concept to DC!  That's Heather at left, playing in...I mean organizing...the pretty paper collection.  The organization is 100% volunteer run.


Scrap DC Entrance


As you approach the store--a ground level unit in an artists' building--you are greeted by a colorful bulletin board.


Boutique Necklace Detail


The door opens to reveal the RE-Boutique in front of you, where local artists have gorgeous pieces for sale (at great prices).  I love the detail on this wool felt and bead necklace--definitely a statement piece!


Yarn


As you turn to one side and then the other, you are amazed at how much can be available for your browsing pleasure in such a small space.  To the left are beads and patterns (25 cents!!!), with an ingenious yarn caddy over in the corner.

Crafters


When you turn the other direction, there is so much to see I can't list it all!  Pretty papers, paint, clay, not to mention fellow crafters!  So much inspiration.


Fabric


And oh, did I mention fabric?  This isn't even all of it, there's more opposite this wall.  There is bad news/good news for us fabric stashers.  The bad news is that Scrap has had so much fabric donated that they're not accepting any more.  The good news is that they have a ton of fabric and it's all $1.50/yd!  There are some fun, funky, vintagey pieces, as well as some standard sewing fabric.  I was looking for a nice cotton to muslin a woven pullover top I am adapting from a Burda pattern to be a TNT, and found the perfect piece.


Zippers
If you're not a fabric stasher, (1) well, bless your heart, and (2) how about vintage notions?  Can you resist those?  Check out these metal teeth zipper!  And read it and weep on my vintage notion haul:  adorable navy microdot bias tape and TWO vintage belt kits.  I felt too guilty to completely clean out all the awesome stuff, so there's plenty left.  Notions are 50 cents each.  Seriously.  There is also a big box of laces and trims.


Gift Bags


You don't even need to actually craft to take advantage of Scrap.   Making up goodie bags for a birthday party or shower?  Be green *and* economical by raiding their huge selection of gift bags.  Throw in some of the fun vintage stationery for good measure.

And speaking of parties, are you planning a kids' birthday party in the DC area anytime soon?  Because Scrap will do parties!  At the bargain price of $120 for 8 kids and 4 adults ($10/person!) they will provide all the supplies for a craft the kids will love and you won't have to clean up after.  In Heather's words, "We want them to be a fun celebration that engages the creativity of the kids (or adults). We'll make a festive atmosphere with decorations (reused of course) and each party will select a project to work on. Then we'll make an organized, or not so organized, mess with the materials and just enjoy!"

Patterns
Heather was kind enough to do an interview with me.  Here's what she has to say!

If money, time, and space were no impediment, what would your vision be for Scrap within the community?

"This could fill pages...but in a nutshell...I see SCRAP as an organization that encourages a culture of reuse and creativity. Physically, this involves a huge warehouse that:
- serves as a space to drop off/pick up awesome materials
- serves as a gallery and boutique space to support local artists
- serves as a workshop/class/party location for anyone who wants to play and learn"

Laces and Trims
I recall that you have a day job. Can you describe how you fit everything in?

"My co-director is awesome and does a lot of the more immediate things that I can't take action on to right away. We also have a handful of committed volunteers who take responsibility for running store hours or working on outside projects. So really, the team of people surrounding SCRAP is what makes it happen."

What is your favorite craft or craft supply? Has that evolved as you've gotten deeper into reuse through Scrap?

"I like making functional things...bags, stationary, journals etc. I generally find myself inspired by a material--cool fabric or textured paper--that I decide I need to take home and make something out of. Feeling inspired by the raw materials is what made me fall in love with creative reuse in the first place and it's still a big part of what I love about it today!"

Front

Here's a sneak peek of my ScrapDC project.  The fabric and bias tape for the top are both from Scrap.  The fabric was $1.50 and the bias tape was $0.50--a $2 top!

All photos from Scrap are here.

ScrapDC is located at 52 O Street NW.  It's open every Thursday from noon to 8 pm, the first Friday of each month from 6 to 9 pm (April 5 is the next one), and the third Saturday of each month from 10 am to 1 pm.  Which means it's open this Saturday!  Check the calendar for special events.

When I visited on the third Saturday last month the store was hopping.  Everyone was so inspired and there was lots of brainstorming about challenging and unusual projects.  DC is a career-focused and somewhat serious town, and it's easy to forget that it has an art scene at all.  My visit was a great reminder that there is definitely more to DC than 9 to 5.

For those of you not in the DC area, check out this list of Creative Reuse Centers in the US and share what you discover!


Tuesday, March 5, 2013

Variations on a Tee #6: Classic T-Shirt Dress

Striped Tee Dress Thumbnail

Here is a recent project using my TNT t-shirt pattern (I just extended it from the lower edge); the pattern started life as a Burda, but has been extensively altered to fit me.  I bought this wonderful striped wool jersey in NYC a couple years ago for $10/yd.  I bought it to become a sweater, because I am perpetually undersupplied on winter tops.  But the problem is I like dresses more than separates!  So when I realized that I could get a dress out of this 1 1/2 yards (the fabric was incredibly wide), well there went the sweater idea.

Source: farfetch.com via Trena on Pinterest


I put myself in Rossio in Lisbon (the backdrop is a picture I took on my trip).  A much more exotic location than my bedroom where the photos were actually taken.

Stripes have been in style for several seasons now, so I am actually trendy for once.  This wool sweaterdress by Rag and Bone is $350.  It makes my semi-splurgey $10/yd wool ($15 for the 1.5 yard dress, plus a negligible amount of thread and elastic) certainly look like a bargain.


Cut Single Layer

For some reason, whenever I am cutting stripes and plaids it just can't be easy.  Either the fabric is printed slightly off grain, or you can't see the stripes/plaid from the wrong side, or something annoying.  Finally with this project, cutting was easy!  The stripes are woven in, so they are on-grain and clearly visible on both sides of the fabric.  For the back, I cut one layer, then flipped it over, lining up the stripes, and cut the other layer.  For the front and back, and was able to cut them side by side, lined up along the same stripe.  I even managed, for the first time ever, some degree of stripe matching at the sleeves.  It was very exciting.


Pin at Stripe Juncture for Matching


For some reason the photos for this project are blurry, sorry about that.

At any rate, all the careful cutting in the world doesn't help if you don't do careful sewing.  I matched up the stripes and then pinned on every black stripe, as you can see at right.  I used the walking foot to ensure I didn't distort the fabric in sewing.

The end result is amazingly perfect.  I can't tell you how proud I am of these perfectly matched stripes!

Serge Clear Elastic to Neckline
Twin Needle Stitching at Neckline


To finish the neckline I serged clear elastic to the wrong side (stretching the elastic the barest amount possible--the lowest setting on my elasticator foot is too much gathering so I did it with the regular foot), then folded the fabric over the edge of the elastic and topstitched with a twin needle.  It creates a nice, non-distracting finish.

Hat Front
The one sewn item of which I have actually been in need this winter is a slim hat that I can wear under my helmet for the bike commute. 
Too Much?
I had been shoving my velveteen beret under the helmet, but it made the helmet way too small and the strap too tight under my chin and the front was always threatening to droop over my eyes and my ears weren't quite covered.  And yet I lived with this for months!

With this project, I had enough fabric left over to make a beanie.  I drafted a pattern based on this one (I would have used it, but I don't have a printer!).  I made the hat extra long so I could have a deep enough hem for two layers of fabric on my ears and I put an elastic casing in the lower edge so the hat always stays over my ears.  It was super easy and fits under my helmet 1000 times better than my velveteen beret.  My ears have not been cold since!  (I made this in early January.)

I don't think I'll be wearing them together, however.  Although maybe I will start a new trend?  I feel like this totally could have been a thing in the 80s, but even with the endless 80s revival it's all in an ironic sort of way, not the true exuberance of the 80s, when a matching hat and dress would have been the ultimate in cool.

Front Accessorized

I have been having trouble with skirt length lately.  For a long time, I hemmed skirts right at the knee, but it isn't the most flattering length.  I have a hard time knowing how high above the knee to go that is both flattering and professional.  I hemmed this one pretty short, and haven't worn it to work.  While in the throes of this, I ran across an interesting image/article on skirt length for women--it's not fashion advice, it's about the impossible position women are put in to somehow find the perfect, non-existent line between "sexy" and "slutty."  

I started working on this on a Saturday. I had a party to go to that night and didn't even have a thought about finishing on time.  And yet, even with the stripe matching, this only took 3 hours from start to finish!  My perfectly engineered t-shirt pattern made fitting a cinch.  I blinged it up by pinning a bunch of brooches to a chain and wore a wide belt.  I felt tres chic!

All photos are here.