Showing posts with label McCall. Show all posts

Friday, October 18, 2013

McCall 6744, Grecian Knit Dress

M6744 Thumbnail

I did a ton of sewing for trip to Greece (as I think you can tell by all my recent posts). So much so that I didn't end up taking everything with me! McCall 6744 didn't make it into the suitcase, though I do like it as a casual summer dress.  You might recognize this fabric from Vogue 1282--I made the top out of the leftovers after finishing the dress.  I was surprised how much I had left considering I did "stripe" matching, both vertical and horizontal, with the flower motifs.

Do you like how "ethereal" the photos are?  Yeah, I discovered a fingerprint smudge on the camera lens after my photographer had already taken all the pictures.  Oh well!

Small Bust Adjustment

Many of the previous reviewers noted that the front bodice gapes; almost all of them had to wear a camisole underneath.  So I took a fairly aggressive amount out of the crossover on the front bodice to prevent that--you can see the three tucks I took in the photo at left.

While I don't have gaping and don't need a camisole, I ended up with a similar problem as with Vogue 8870 (my high-low hem birthday dress) where the bodice is short at center front and blouses a lot at the side seams.  That goes more with the style of this dress so I'm fine with it, though it benefits greatly from (of course!) a sash.

I think I just don't care for crossover styles where the crossover is shallow, ending just a few inches from center front.  A crossover that goes all the way to the side seam is easier to adjust for a small bust without distortion and more flattering and wearable for me, not to mention more secure.  I'm going to have to stay away from these styles in the future.

Shoulder Gather

There is not much to say about this simple dress.  One of the nice features is the shoulder gather.  It gives some shoulder coverage without a sleeve and allows for plenty of volume in the bodice to get the grecian drape.

Clear Elastic for Shoulder Gather


To make the gather I sewed the shoulder seam with the sewing machine rather than the serger, and then pressed the seam open.  I machine-basted long gathering stitches starting about two inches from the already finished neckline and ending about 1/2 inch from where the sleeve hem would be stitched down.  I pulled the gathering stitches tight, and from the right side stitched in the ditch, catching clear elastic underneath to keep the gathers in place.  Then I removed the gathering stitches and hemmed the sleeve.  The gathers could have ended further from the sleeve hem, as it does pull up a bit.


Front
Although it didn't make the cut for the suitcase (I thought it would be weird to be wearing two things in the same fabric in photos, and I liked the top better), I do like this dress despite the weirdness with the crossover bodice.  The pattern also has a plain tank bodice, a racerback tank bodice, and a crossover skirt option, so it's quite versatile.

I timed the sewing of it poorly. I wore it on the day the photos were taking, but I won't get to wear it again until late next Spring when it is warm again!  We've had some crisp days in DC though luckily it hasn't gotten truly cold for good yet, but this is just too summery to get away with in mid-October.

All photos are here and the pattern review is here.

Thursday, October 10, 2013

Achievement Unlocked: Fly Front Shorts

M5391 Thumbnail

So the fly front has bedeviled me for years.  Decades, even.  Something about it seemed so complicated, and it seemed to require more precision than I have the patience for.  I've read at least dozens and possibly hundreds of tutorials, but it has never clicked for me.

Hiking was the main activity I had planned for our Greece trip.  Since the only non-exercise shorts I own are my Adventure Shorts, I decided to add another pair to the stable.  And I also decided it was time to face my biggest fear:  the fly front zipper.

Elizabeth of SEWN recommended the fly instructions from Kwik Sew 3614, so I bought it at the last sale.  The instructions seemed good, although when I actually started following them I realized that step 4 is missing several crucial words and phrases:  "Move zipper toward as far as it will go without puckering underneath (edge of zipper is not even with extension).  Using a zipper foot, ."  I mean really, comma-space-period?  The missing word after "toward" I can maybe see getting by a very bad, very lazy proofreader, but comma-space-period is ridiculous.

EDIT:  Thank you, Elizabeth!  She supplied the missing text: "Move zipper toward right fly extension as far as it will go without puckering underneath (edge of zipper is not even with extension). Using a zipper foot, stitch only through zipper tape and right fly extension.

I also pulled up Debbie Cook's truly excellent jeans fly tutorial to keep Kwik Sew honest, though I had to mirror-image it in my head because a jeans fly is the same for men and women, while a women's dress fly is reversed.

Fly Opening

In the end, I don't know why I was so exercised about this!  I went slowly and completed each step without trying to think further ahead, and it came out perfectly.  I am always telling people that most sewing is not difficult, it just involves a LOT of simple steps.  There are a very few exceptions--I found bound buttonholes difficult, some origami patterns make my head explode, and sharp corners are extremely fiddly to execute--but most things are not that hard when you break them down.  And it turns out the fly is one of them.

For the pattern, I used the sloper developed in Annette Hickman's class.  She had to cancel the third session of the 3-session class due to a family emergency, so my pattern is not totally final.  The shortness of the shorts hides the fact that there is still a little bit of cascading wrinkling on the back legs.  Someday this will be solved.  Someday.  Also, the front needs a little more room over the belly.

Slant Pocket Construction

Another thing I faced was the slant pocket.   I copied the pocket and side piece as well as the leg width from McCall 5391.  I have never successfully made slant pockets that sit flush and don't poke out, and I didn't fully succeed here.  I interfaced the slant edge on the pocket, as instructed by M5391, but I should have interfaced along the opening edge of the yoke and then taped the seam when I sewed it, too.

Ribbon Stabilizer for Pocket

I retrofitted the pocket opening edge with ribbon for as far as I could reach after construction, but it is too little, too late.   The pockets poke out a bit in wearing and always will.


Center Back Seam with waistband


Redeeming itself from the typos in the instructions, I used the curved waistband from KS3614.  What fabulous drafting!  I will be using this waistband again and again.  I have been looking for years for a great curved waistband for my body (Burda's are ok but not wonderful for me).  Something about the way the grain is at CB it just snugs right against the body.  I taped the upper edge of the waist with ribbon to keep my very stretchy fabric stable.

Hike from Fira to Oia

The shorts star in another favorite photo from the trip, from our hike from Fira to Oia on Santorini.  Oia is reputed to have the best sunsets in the world, and there is a lovely cliffside hike from Fira (the main city) to Oia, where at some points you can see the ocean on both sides of the island.  Unfortunately, we didn't leave Fira until 4:30 so we had to hustle the 7 mile hike to get to Oia on time for sunset.  We made it in the nick of time! (You can see the photos from the trip here; the photos from this particular hike are here.)

All photos are here and the pattern review is here.

Tuesday, July 16, 2013

Retro Striped Bikini, McCall 5400 and Burda 01-2012-128

Retro Striped Bikini Thumbnail-1 (1)

Burda 01-2012-127/128 bottoms, McCall 5400 View E top.  I got the striped fabric from G Street's $2.97/yd table in February 2012.  I assumed it was a polyester knit, but after I'd already cut the whole thing out, taking extra special care with all the stripes, I wet a scrap to make sure it would be opaque with my mesh lining.  And then when it got all papery and stiff I realized it was rayon.  Ugggghhhh.  It was too late, though, and I didn't have anything else in stash suitable anyway.  I using the lining as underlining to help the pieces keep their shape and it held up ok...for one wear.  The bottoms are already pilled.  I'm glad I considered this a muslin all along.  At least I moved 1 1/4 yards out of stash.


Finish Keyhole Opening in Top
Top: right side out; Bottom: right sides together

One of the features I really love about the top is the keyhole opening between the upper and lower front bodice.  McCall's directions have you sew the fashion fabric and the lining separately, sew them together at the top, and then turn under the seam allowances at the keyhole opening and stitch in place by hand.  I underlined, rather than do a regular lining.

Since I thought hand stitching wouldn't look great there, I started by clipping into the seam allowance on either side of the keyhole opening and sewing the lining and fashion fabric right sides together between the clips.

Top Inside Finish

Then I sewed the upper bodice and lower bodice together, treating fashion fabric and lining as one.  I used my serger for this, and was careful to get the seam allowance exactly right at the clip so the two lines of stitching would line up.

Then I turned the seam allowance down, and tacked it to the lining only (which was still open at the bottom, so I could easily separate the two layers) on either side of the keyhole opening to keep it from showing.

Front Chevron

This makes for a nice tidy opening.  Note that the opening in the upper bodice is longer than in the lower bodice, so markings are important.  The ruched effect on the upper bodice is accomplished by pulling the tie through the keyhole and over the upper edge and knotting it.

The upper front bodice is drafted to be cut on the fold, but because I wanted the chevron effect of the stripes I cut it with a center front seam.

Gather Tie

The top pattern is drafted with a narrow halter strap that is stitched on either side of the front, i.e., not adjustable.  Several reviewers mentioned that the strap was (1) skimpy, and (2) too long.  Rather than mess with all that, I used the pattern for the center front tie to cut straps as well.  After comparing the length with straps on a RTW halter top I had, it turned out to be pretty much the same size.

The tie is drafted as a rectangle, but I angled the ends on both the bust tie and the halter ties.  I cut the halter ties on the bias for another chevron effect.  I gathered them slightly before attaching to the upper bodice, right sides together.  The tie's raw edge was later covered by the elastic and turned under.

My top is quite a bit shorter than drafted--more of a midi top than a tankini.

===========

The bottoms are available in 34-42.  I would normally cut a 38 for the hip, but this was drafted for a stretch woven (with a side zip!) and I was using a knit.  I went for the 34 with generous seam allowances in case I needed more room.  That turned out to be the perfect size, so I recommend going down two sizes if you make this pattern in a knit.

My other concern was that the crotch would be too narrow at the front, as the illustration shows it to be rather skinny.  In fact, it has the opposite problem, a bit of scrunchy fabric for the toe-of-the-camel look.  I will shave off a teeny bit of width when I make this again, but only a touch because I'd rather have scrunched fabric than inadequate coverage.

The concern I didn't think of was that with the bottoms being so high waisted I really needed a swayback adjustment!  I had to do one after the fact by just shaving some length off the back of the panties from the waist, but that was only a makeshift solution.  For a really good fit, I would need a center back seam, but I think that would be more distracting than a little swayback bunching, so I will just take the length out a few inches below the upper edge and take some width off the back's side seams.

Lift Knife to Serge Elastic

I have very little to say about construction of the bottoms, they were really easy and went together with no problems!  To finish the edges (waist, legs, lower edge of top) I first zigzagged elastic in place.  Before elastic, the back of the leg opening was rather gapey and slack.  My first try I stretched the elastic to 95%+ on the back, with no stretch along the front leg.  That was too tight so I picked it out and stretched the elastic to about 80% on the back.  I can live with this but I think it is still slightly tighter than needed.  Next time I will do 70-75%.  Next time I will also be sewing with proper swimsuit fabric with good recovery, which will help too.

After the elastic was in place, I serged it in place with the knife lifted so I didn't accidentally cut into the elastic.  This was purely for aesthetics.  What can I say, I like things to look nice on the inside!  Then I turned it under and zigzagged in place.  I'm really not crazy about how homemade-y the zigzagging on the outside looks, but it is not noticeable from more than two feet away, so I will just stick with that method.

Top-Front
Bottoms-Side
I'm so annoyed I didn't notice the front waist was turned under!


I couldn't get perfect stripe matching on the bottoms because of the curves of the seams.  I am sure a print-matching master like Amanda S. could have worked some magic on them, but it is beyond my skill level.  However, some of the stripes match and that's good enough for me!

Sailor Salute

I had another trip to the beach, this time to the Outer Banks of North Carolina, so of course I needed a new suit.  I was curious to try the high-waisted trend and see how it would work for me.  I was afraid that it might emphasize my round belly but in fact it is either neutral or actively flattering to that sensitive area, much to my great surprise.  I'll take it!

I felt adorable in this suit, and my photographer obliged with lots of photos on the deck of the awesome beach house (this was another family event, and they rented the beach house and invited us as guests--score!).  I had never been to the OBX and was suspicious that it couldn't be as awesome as everyone always said.  Well, I loved it!  The water is not dirty or too cold, the waves are very mild, the beaches are smooth and sandy, and with the sea breeze it was not too hot and humid at all.  I could definitely see staying there for a week someday; we were just there for a very brief "long" weekend (one afternoon and one full day).

I ordered some real swimsuit fabric for another of these and a Bombshell (yes, I am a lemming).  I am planning a vacation in September that will include beaches (I hope) so these projects can't languish for too long...

The bottoms are reviewed here, the top is reviewed here, and all photos are here.


Thursday, June 13, 2013

McCall 6069, Knit Cowl Dress

M6069 Thumbnail

More stashbusting!  It had actually been a really long time since I made an easy knit dress.  I had forgotten how quick and instant gratification they are!

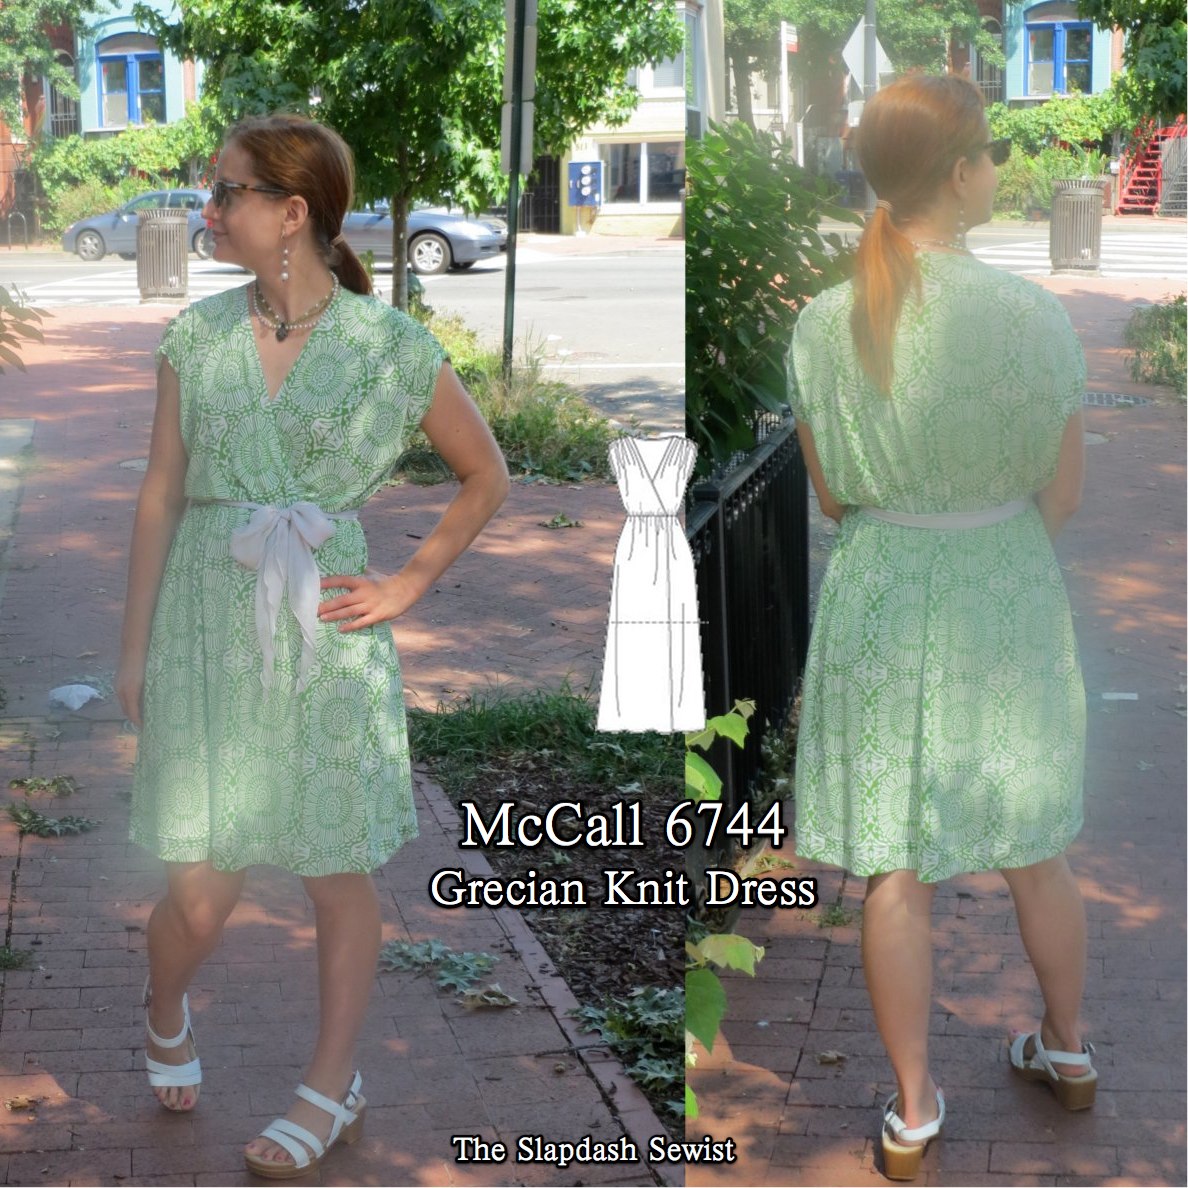
I made M6069 for the first time 
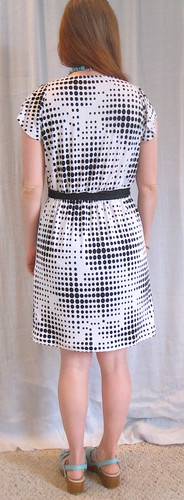
in the turquoise polka-dot border print quite a while ago, in 2010.  I don't *love* that dress.  The double cowl is awkward to wear, and I made it a little too long but hemming it shorter would interfere with the border effect.  When I passed it up again last week, I decided it was time to rotate it out of the closet.  I contemplated my stash and ran across this polka dot knit that seemed the logical replacement.

I have a love/hate relationship with black and white.  I love the way it looks on other people, and any time I see someone in a really great black and white print dress I want to make one immediately.  But then when I'm getting dressed in the morning, I want to wear a bright color.  The thought of wearing funereal black, even with some white in it, is too much for me, especially right when I wake up (I am not a morning person).  I rarely wear my black and white pieces; I literally never wear all black.

This dress may have broken the spell.  I think the key for me is that the print is black-on-white; the larger proportion of white keeps it bright and fresh.  Prints that are white-on-black, with black the predominant color, feel too somber to me.  Of course, the first time I wore it I met some friends after work for happy hour and to watch one of their husband's band perform.  Of the six of us, five were in black and white.  I'm not kidding.  Two stripes, two polka dots, and one print.  I felt like a noncomformist, just like all my friends.

Silk Front
Silk Back


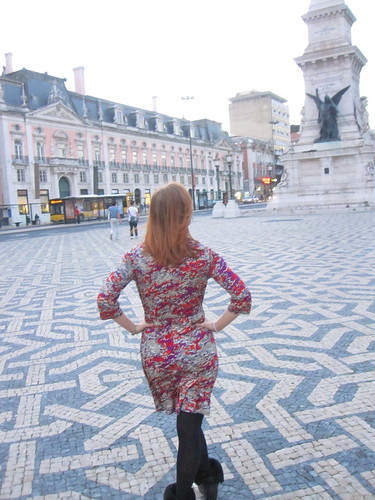
When I was packing for Portugal last Fall I unexpectedly found myself with time to make one more piece to go in the suitcase.  So I inventoried my packing plan and found that what I needed was a nice dress that would travel well but really sparkle at night and would be suitable for cooler weather.  I was surprised I didn't already have anything that fit the bill, but my knit dresses are generally pretty casual and my dressy dresses don't pack well.

This pattern came to mind, and I had some luscious silk jersey from Michael's Fabrics.  I used my TNT t shirt pattern to draft a plain back and made it up.  It came out gorgeous!  (If I do say so myself.)  The luxurious fabric, the saturated colors, the flattering shape.  When I finished it, I thought, "This casual elegance is exactly what I want for my entire wardrobe."   I don't know that I've managed to effectuate that thought, but I still love the dress.

Back Neckline Finish

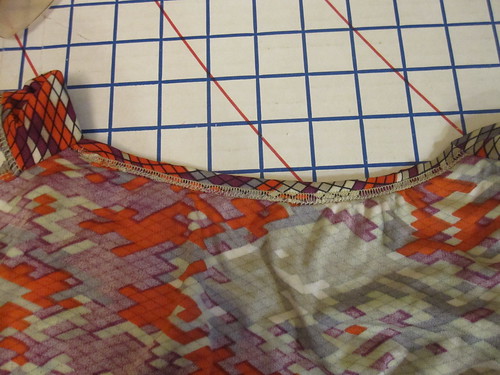
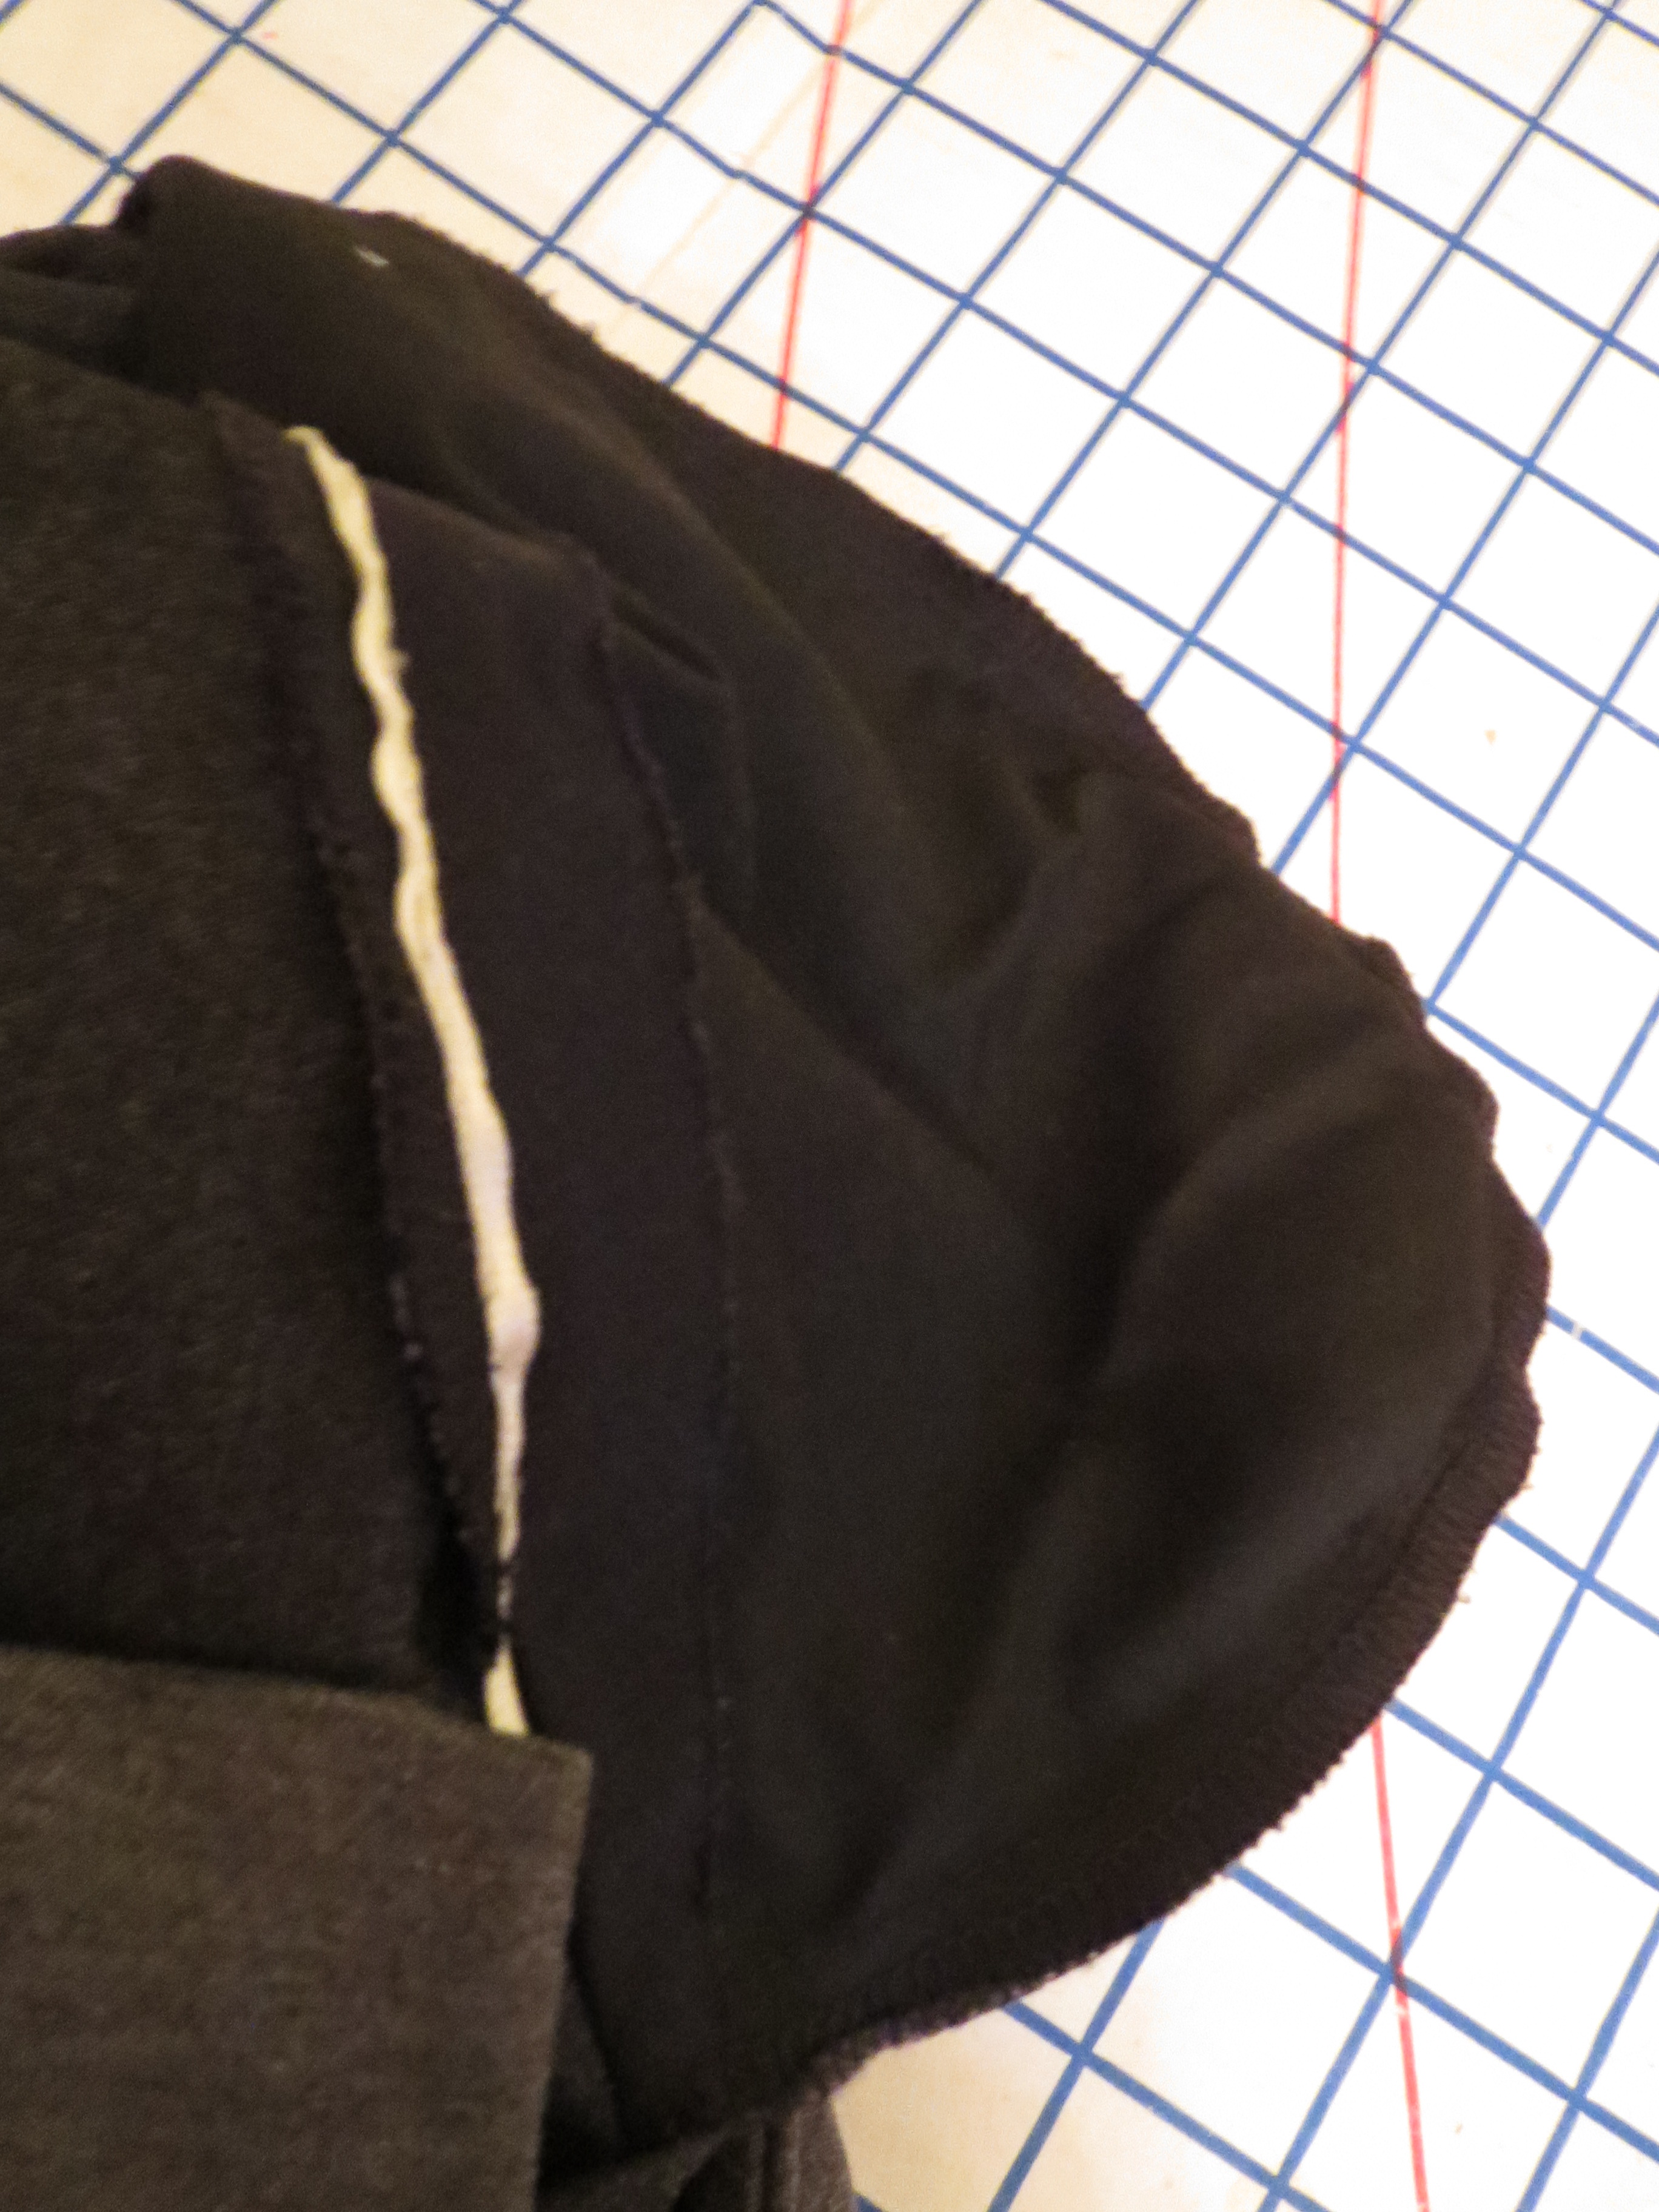
Details on that dress are using the serger to attach clear elastic to the wrong side of the back neckline and then turning under and twin-needling for a neat finish, and cuffs on the sleeves (only because I didn't have enough fabric to cut the sleeves the length I wanted so I had to add scrap cuffs!).

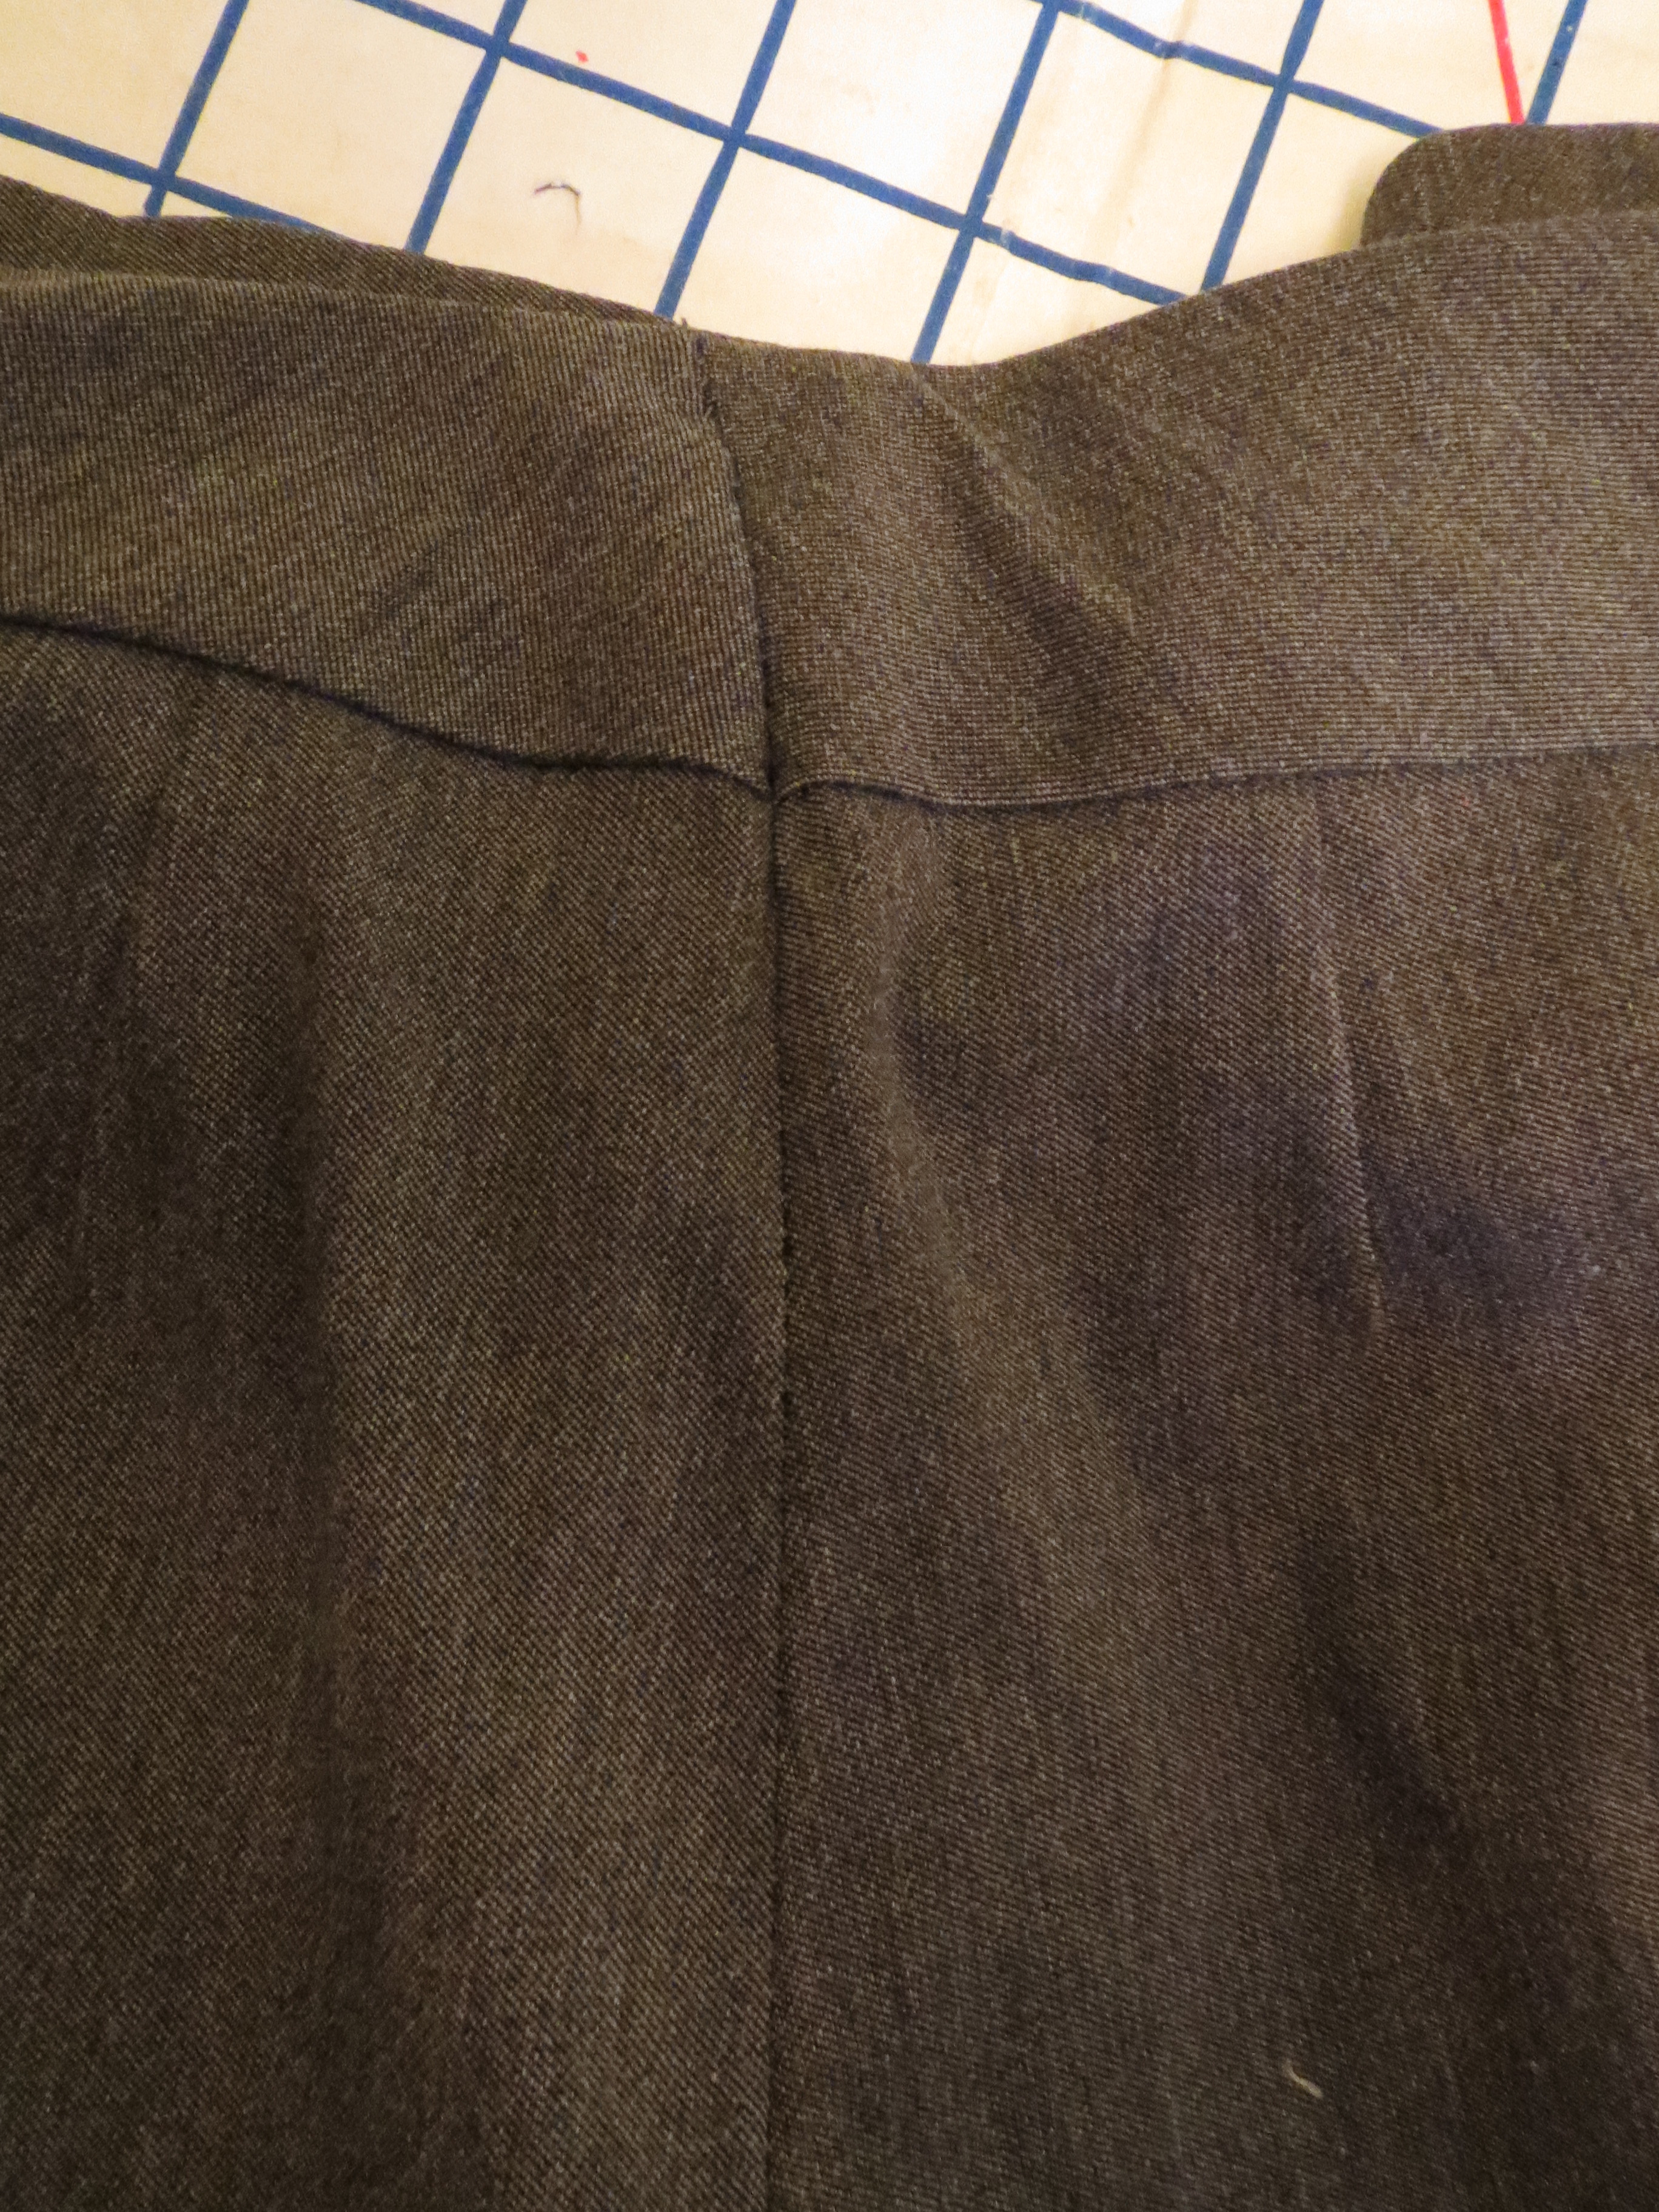
When I drafted the back for the silk jersey version, I somehow made it an inch too short at the waistline.  WTF?  So I had to shorten the front to match.  This turned out to be a fortuitous error, as the dress is much more flattering on me with the waistline raised by an inch.  The sloppy waistline location is part of what I didn't like about the turquoise version.  So I retained that for this version.

Since I'd already drafted the back, it was really easy to make the latest iteration.  I finished in under four hours, and the only trouble I had was the shoulder length of the front and the back not matching up.  I was annoyed with myself for doing such a poor job of drafting the back piece.  Well, when I pulled the turquoise version off the hanger to put it in the giveaway pile I remembered that I was supposed to put some pleats in the front shoulder to take up that extra width.  D'oh!  The cowl lays fine without them, luckily.

Extended Cowl Facing

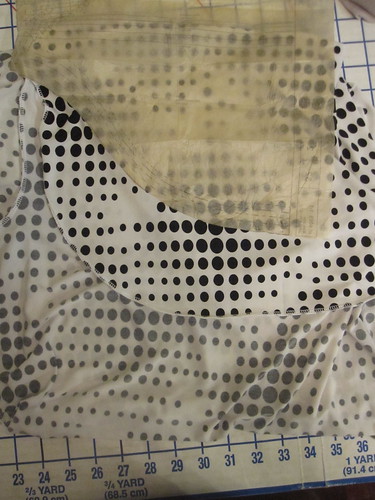
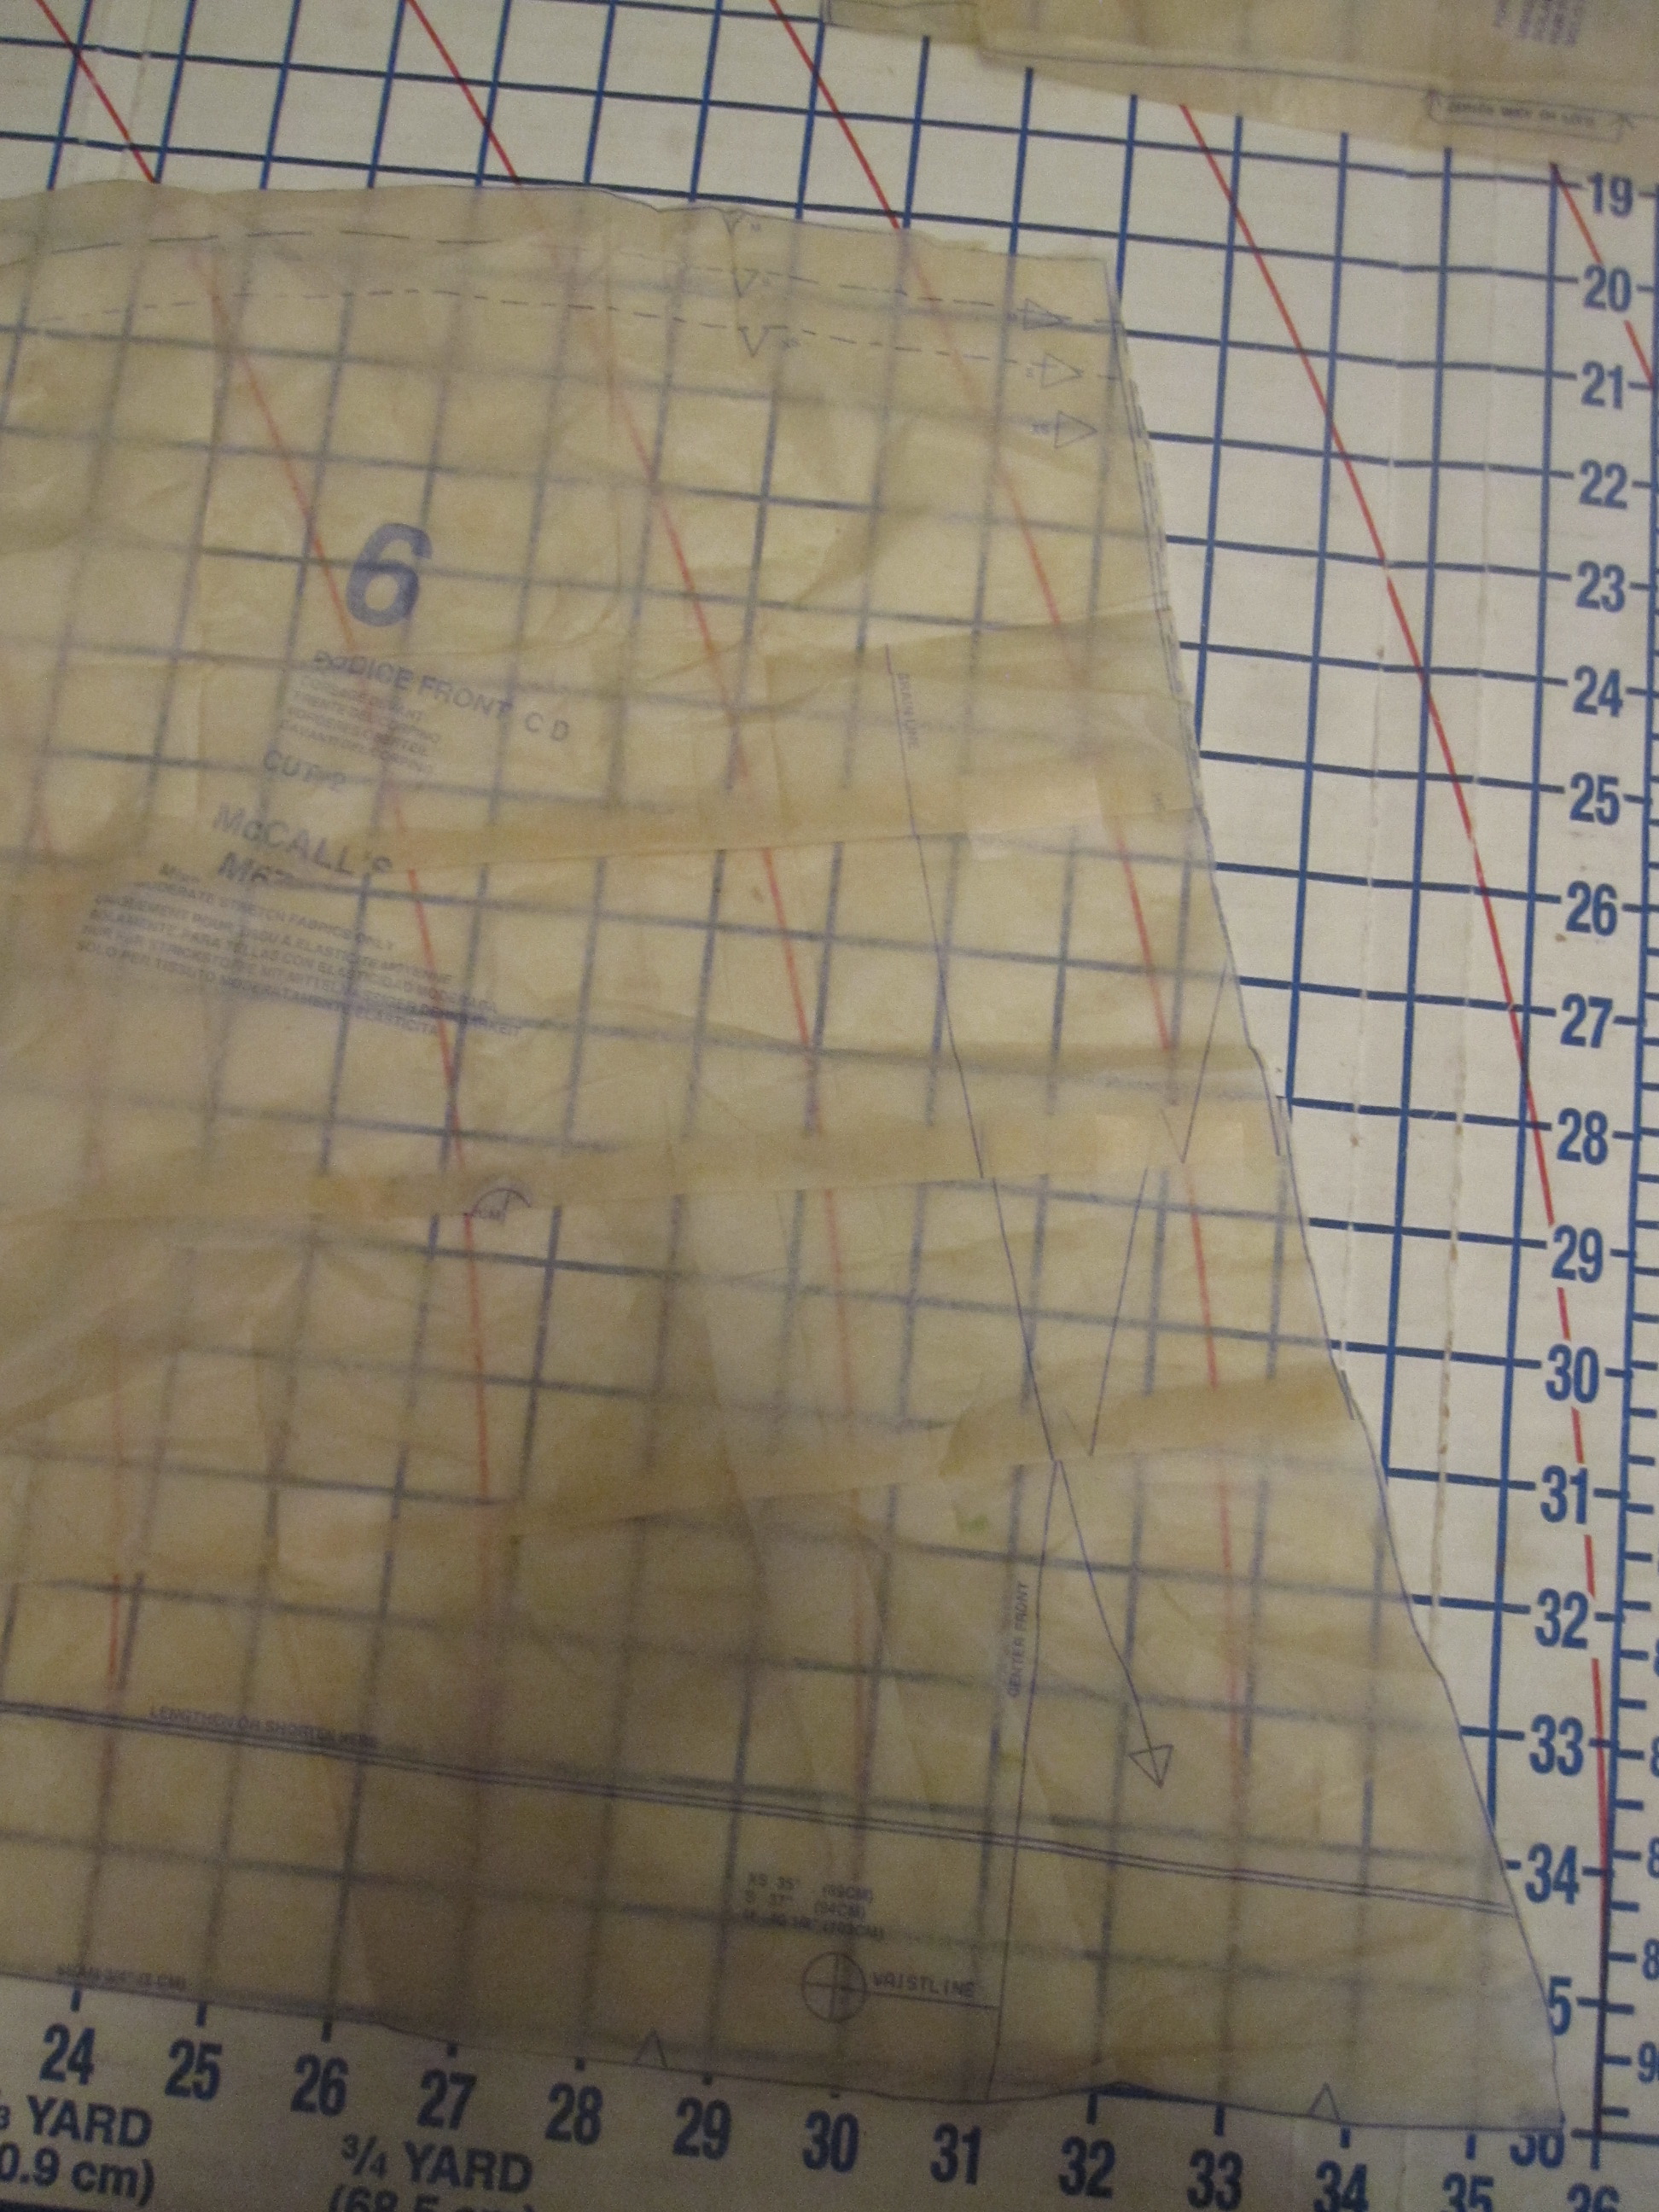
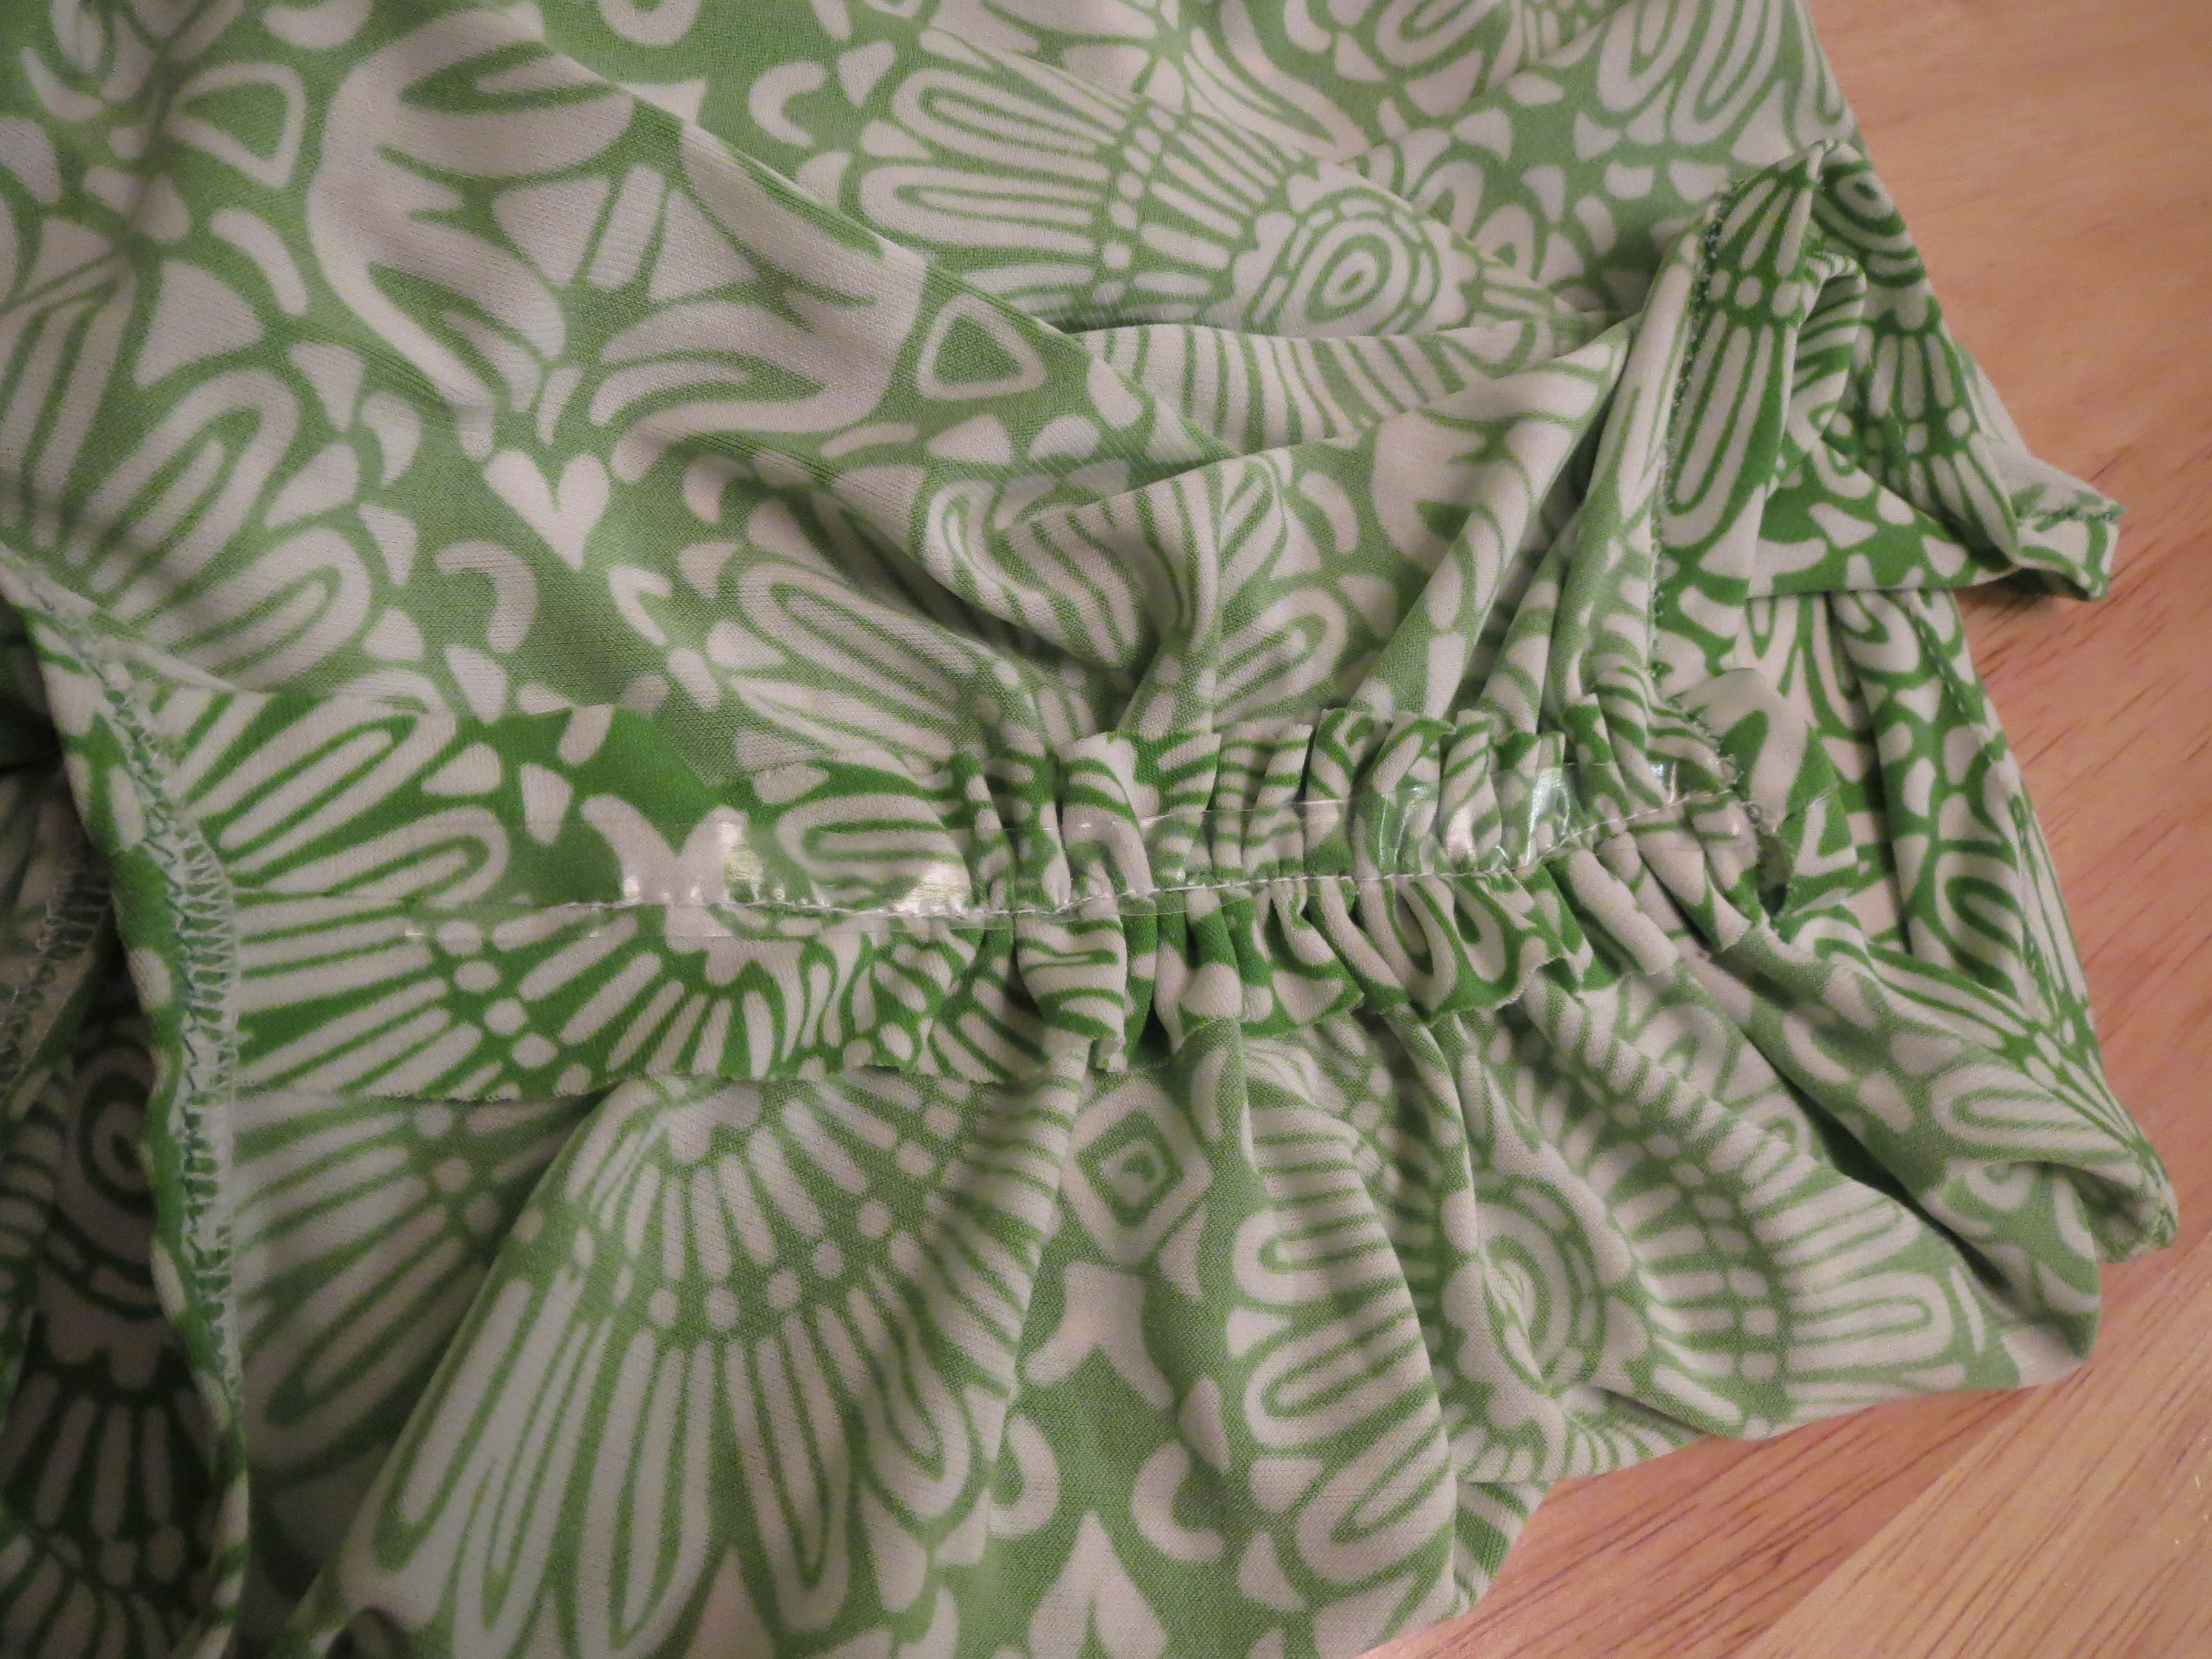
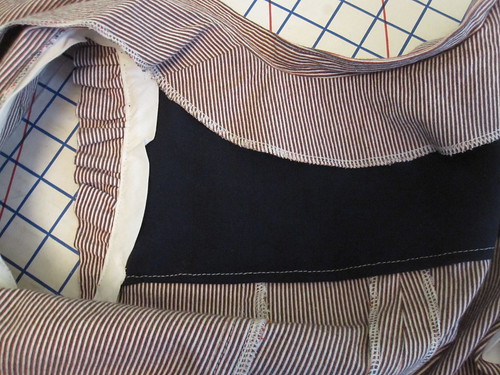
My secret for cowl necks is to extend the self-facing as long as you have fabric for. My ideal preference is for the facing to extend all the way below the armscye, but that takes up a huge amount of fabric and I didn't have enough here (and it would have required drafting the facing piece).  Here you can see how much fabric I added to this project.  I also caught the cowl facing into the armscye for an inch or two so it would stay folded toward the front.  As a result, the cowl stays firmly in place in wearing.  There is no chance of all of that fabric flipping to the outside. 

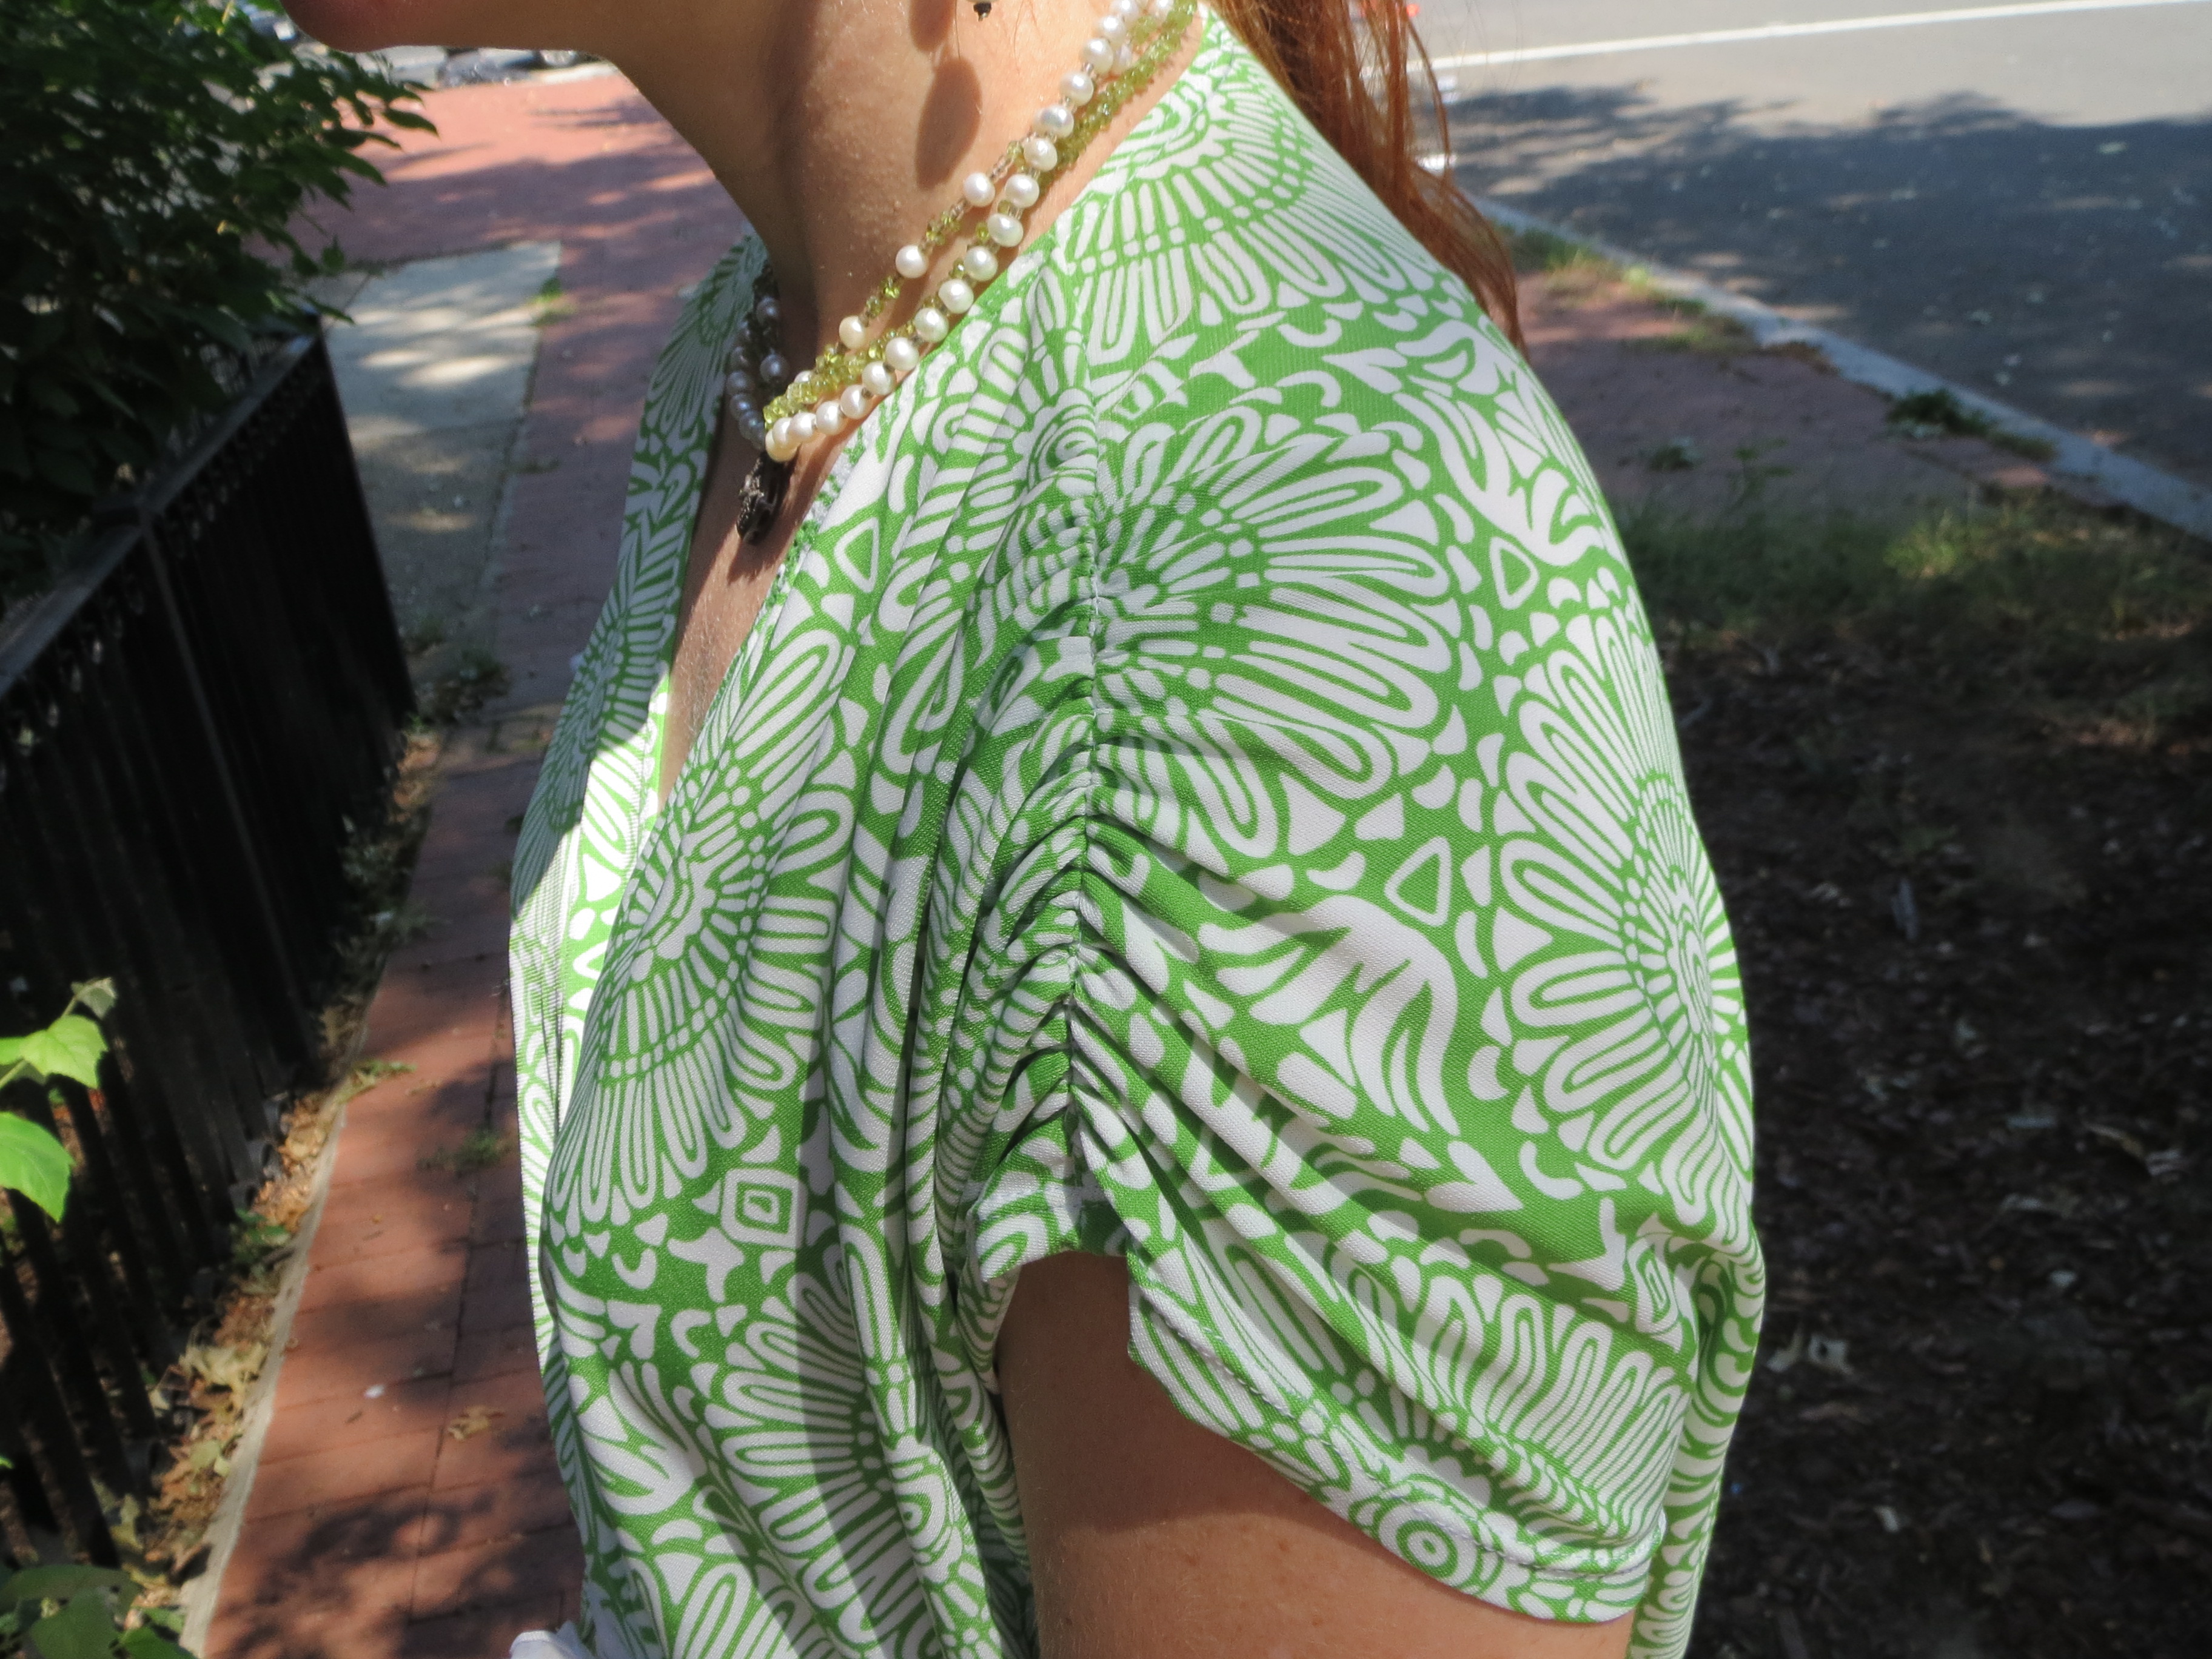
I used the flutter sleeve from 
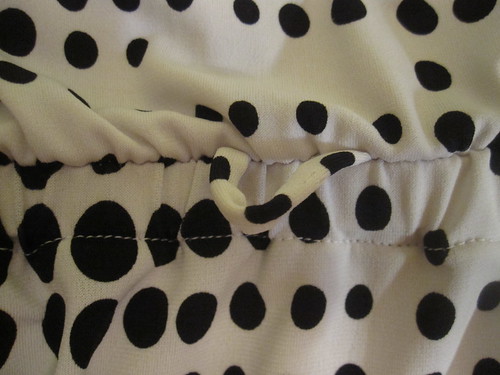
Burda 03-2008-113 for a little shoulder coverage from the sun without any added heat retention.  To make it really easy, I didn't hem the sleeve.  This jersey is lightweight without much body, and the thought of trying to wrestle a hem onto the circular curve was too much.  The lower hem was easy, though, as it is on the crossgrain and I used a line of dots as a guide to get it perfectly straight for my twin-needle hem.

Badge Loop

I added a badge hanging loop to the waistline.  I am so into this right now!

B/W Side
B/W Back

The downside of the black-on-white print is that the fabric is slightly sheer.  I lined the skirt part only with tricot from Golden D'Or in Dallas.  The front bodice is essentially self-lined with the long cowl and with a flesh-tone bra the back bodice doesn't show anything.


This isn't super-old stash, but it's been lurking around for 3 years.  I got it from Fabric.com in May 2010.  In all, I used 1 3/4 yard black and white polka dot and a little over half yard (0.58 yard) of the tricot.

I'm so happy with this little dress!  I don't think it will get passed over like its predecessor, and I already know the style travels well.  I just need someplace exotic to take it...

All photos are here and the pattern review is here.

==============================

Dangit!  Missing Fabric at Side Seam

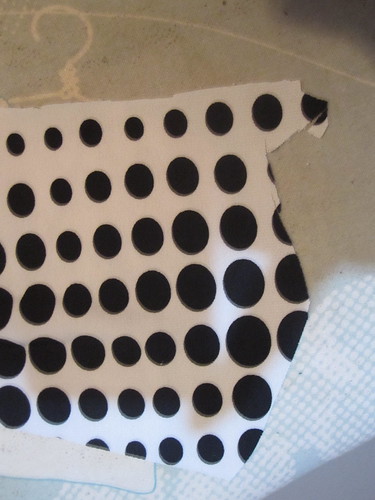
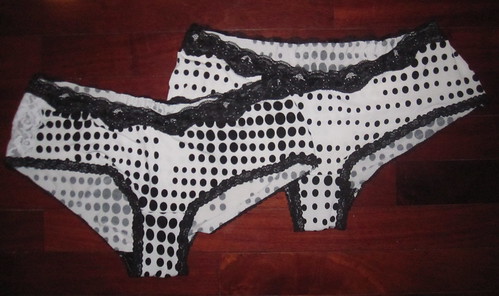
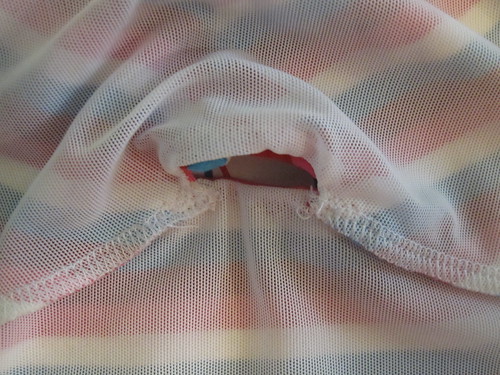
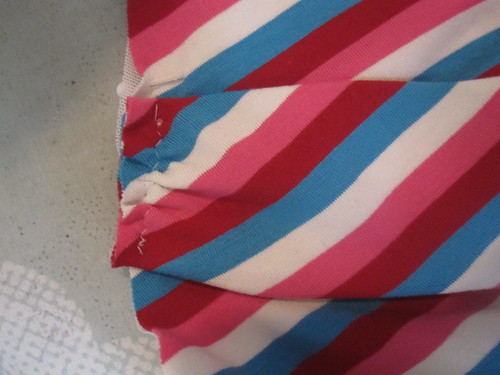
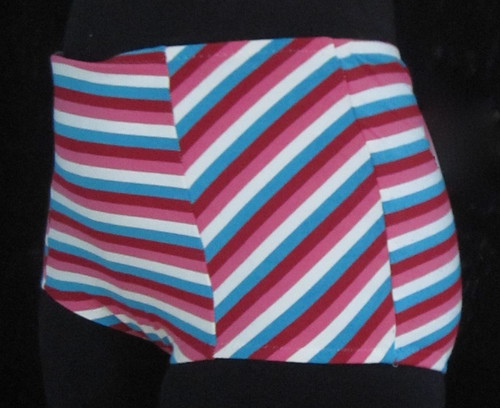
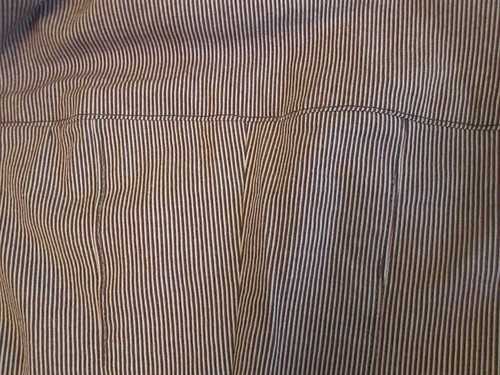
I used up all the full length yardage, which is the criterion for the stash contest (as I understand it).  But I had enough scraps left for 2 pairs of panties.  Or so I thought, until I looked at the bottom layer front piece.  You can see at left that there was a big divot in one of the side seams.  Curses!

I contemplated for a moment.  The missing part was too large to absorb into the 1/4" seam allowance of my perfectly fitted custom pattern.  Time for a random lace insertion!

Stitch on Lace Insertion


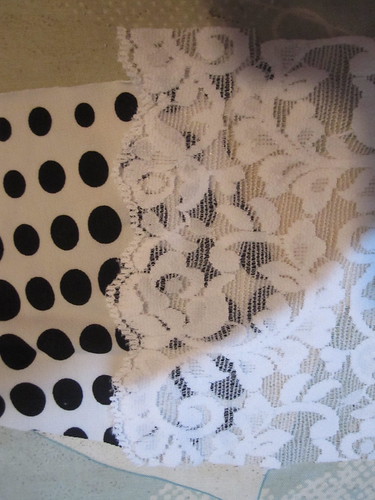
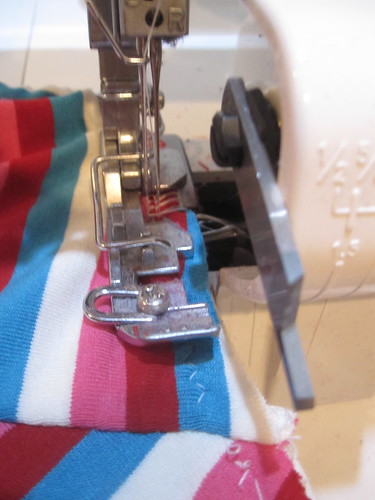
I put the scalloped side of some stretch lace over the side with the jagged seam line, extending about 1/2 inch beyond the missing fabric.  I zigzagged over the scallops, and then trimmed away the polka dotted fabric underneath.

Trim off Lace Insertion


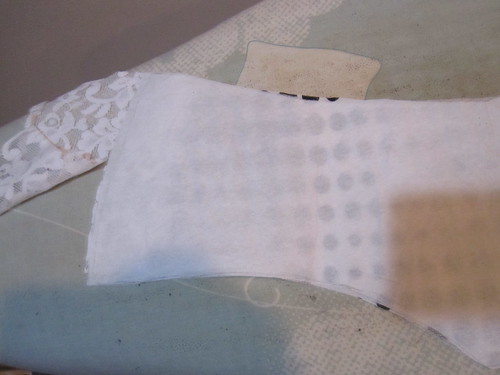
Next, I laid the pattern back over the piece and trimmed away the lace, leaving a perfectly shaped piece of fabric.  I constructed the panties as usual.

After all that, I truly did have only scraps remaining.  Well, scraps, a cute dress, and two new pairs for the drawer. The only downside of these is that it amuses me greatly to wear unmentionables I've made out of leftover fabric with the dress they match, but I'm afraid these will show through the skirt, despite my tricot lining. So I have to wear them with unmatching clothes. *sigh*

Unmentionables from Scraps


Thursday, January 24, 2013

McCall 4394, Palmer-Pletsch Princess Seam Jacket

M4394 Thumbnail


You may recall that when we went to Fabric Mart, this somewhat scratchy nylon jacquard was the only piece I regretted.  I had bought it thinking sheath dress (honestly, I'm not sure why I thought an ivory sheath dress would be a good idea in the first place.  I blame the fabric haze). Anyway, I realized when I got it home that it was in no way suitable for a dress.

I thought it might make a nice jacket, but the ivory color wasn't turning me on as a jacket.  Then I got the idea to dye it, as nylon takes dye to some extent.  So then I thought I'd dye it orange and make it into a jacket for me.

I usually sew for my mom for Christmas (I occasionally even take pictures, but then never get around to posting the projects).  The only two people I'll sew for are my mom and my niece, because they both like whatever I make for them.  I don't take requests!  Purple is her favorite color, so I decided to dye the fabric purple and make a jacket for her.

In snoop shopping I ran across this casual Eileen Fisher Open Front Three Quarter Sleeve Coat ($468).  I really like the causal open look and thought the longer length would suit my mom.


M4394 Envelope

M4394 Front-Back ViewsI had McCall 4394, a Palmer/Pletsch wardrobe, in my stash.  This pattern is now long out of print, but it has nice classic elements.  I may give the princess top a try at some point.

I also appreciate the fitting/alteration lines printed on the pattern. That is a big advantage of the Palmer/Pletsch line. I did a full bicep adjustment, in addition to a swayback, as mentioned below.

M4394 Side


One of the things I really like about the draft is that it has nice shaping through the back.  Too often, center back seams are straight, when nobody is straight in the back!

I also did a small swayback adjustment.  It's hard to get my mom to give me a set of current measurements, and I don't know all the adjustments she needs.  But I figured I was safe with a swayback adjustment.


My one gripe about this pattern is that the pocket placement is very low.  I mean, I'm short, but I don't know that I'm *that* short.  To be able to put my hands in the pocket I had to be pulling up the coat a bit.  Check the placement before you make it.


Back


The pattern is drafted with a two-piece sleeve that naturally curves toward the front, to follow the anatomical shape of the arm.  It's a nice detail.


The jacket isn't designed with a closure.  I thought I had made it with an overlap so I could put buttons on, but due to the lack of measurements that was not the case.  We bought a frog closure from Joann in white.  I figured I'd dip it into dye and hopefully it would take a little color.  Well, it turns out those frogs are extremely dyeable!  I wasn't crazy about the super dark purple as compared with the pastel purple of the jacket, but my mom said she liked it so I sewed it on and that was that.


Stashbusting Lining


I forgot that I was really working hard to make sure this got done on time, and didn't take any in-progress photos.  This is the only photo I have of the inside, showing my two different linings.  I was in stashbusting mode and didn't want to buy a new lining.  The body lining (the red-purple) is leftover from a skirt I made for her a couple years ago.  I've made her several tops to coordinate with the skirt.  I thought it would be nice to wear the jacket with the skirt and show off the matching lining.

The blue-purple sleeve lining is the last of of the Fabric.com Vera Wang silk/rayon satin in that color.  


Crafty and Friends


I've covered my mom's face for her privacy (that's Helen Mirren smiling in the front view photos).  Here's a star whose face I *can* show, Crafty.  He is a retired racing greyhound and the nephew of my family's beloved Smash.  We have always been a dog family, but this is the first time we have ever had a dog that likes toys.  He loves them!  Especially squeaky toys.  He squeaks them for a while, then tosses them in the air for a while, the squeaks again.  He knows his toys by name, so if you tell him to go get Pink Bear, he comes back with Pink Bear.  It is adorable.  He is wary of paparazzi, so any time I tried to sneak up on him to get an action shot he just looked at me reproachfully.

All photos are here and the pattern review is here.

Tuesday, December 13, 2011

A Visit to the White House and a New Dress

State Dining Room
When we did the Tweed Ride, my friend Courtney mentioned that she was thinking of planning a White House holiday tour and asked if I'd like to join. I said of course, and asked her who her friend is. To see the White House (at least for people who live here--I don't know how out-of-towners do it) you have to have a friend who works there and can get you in. It turns out that her job is considered part of the White House and she *is* the friend. How wonderful! So yesterday morning we headed over to see the White House all dressed up for the holidays.
Felt Trees--Want
The decorations were somewhat modest for, well, the White House--a mansion of size and importance--in keeping with the economic times, but they were all clever, festive, and still tasteful. I just LOVED these felt trees in the entrance area. I don't decorate for the holidays because I'm not religious and because I always travel to Texas, but I could actually see having one of these adorable little trees. And check out the giant felt Bo!


Button Bo! Bo was quite a decorative theme. There was a Bo in just about every room/display. My absolute favorite was this Bo made of buttons! Could you die? It was just so clever and absolutely adorable. This wasn't the only place that buttons showed up. I glanced down at the tree skirt of the large family tree (decorated by the children of active duty service members) and noticed that the tree skirt was sprinkled with what appeared to be antique and vintage military buttons. Clearly, one of the decorators knows a little something about sewing.


Gingerbread White House Display The annual Gingerbread White House is always a big attraction. It keeps getting more and more elaborate and amazing and this year was no exception in this perfect replica of the White House in white chocolate. Apparently, it took six weeks to make. It was surrounded by macaron trees. I think white chocolate is gross so I'm ok with many pounds of it being used to make a decorative objects, but I had to object to wasting perfectly good macarons--very difficult to come by in the States--on decoration! Though the trees were cute.


McCall 6363 at the White House Of course I had to have a new dress for my visit! I bought this giant border print fabric on G Street's $2.97/yd table last November and thought the red flowers would be holiday-evocative without being too literal. I made it into another McCall 6363 knockoff, as described in this blog post. I didn't make any changes to the pattern--even did the same picot elastic trim on the neckline! I'll try to get a better picture of it later but there's really nothing new to tell about it. All photos of McCall 6363 are here


Trena at the Portico


Again in keeping with the festive spirit--and the quite cold weather--I wore my Vogue 8307 Armani-style coat. It's just about getting too cold to wear this, but I love the cheery color and the shape of the collar so I've been wearing it as much as possible until it gets well and truly below freezing.


Washington Monument, White House, Flag Here's my parting shot as we walked out of the White House and back to real life. I love the way the clean lines of the White House, the Washington Monument in the distance, and the colors of the flag converge. It was quite a different feeling to be on the inside of the White House grounds looking out, and not one I'll repeat too often LOL.

With all the real trees in the White House, and the wonderful decorations, and the high school choir singing wonderful a capella carols, this is a magical way to get in the holiday spirit!

All the White House photos are here.

Friday, December 2, 2011

McCall 6279 Trench dress

M6279 Thumbnail

I fell in love with McCall 6279 as soon as it came out. Although I bought the Butterick 5598 Suzi Chin trench dress when it came out a couple of months later, I like the McCall better and when I found this seersucker-esque fabric on the $2.97/yd table at G Street I couldn't wait to make it.

Pseudo SBA I cut my usual size in the pattern, 8 at the shoulder and bust, 10/12 (somewhere in between) at the waist, and 12/14 at the hip. As usual for a princess seam, I flattened the bust curve on the side front for a small bust adjustment. Once it was put together it was still a little loose at the bust and waist, so I took in the side seam on the front only to fine tune the fit.

Back (Unstyled) In addition to the SBA, I did a swayback adjustment similar to this as per usual. I have a hard time fitting dresses without a waist seam--to get a true fit would require so much distortion that it would change the grainline and alter the hang of the fabric. So you can see there is still some swayback bunching. I would be hesitant to take it in more, however, because it could use a smidge more room along the back princess seams for the booty. It is not tight, but it is more fitted in that area than the rest of the dress and I'd like just another inch of ease. If I tried to take more width out at the swayback, the curve back there would become too extreme and would point and pooch over the booty. I guess this is what is meant by over-fitting.

Self-Drafted Back Facing I have not made too many items with a back yoke and a collar, so I can't recall how the neckline is usually finished (I probably should have looked it up). The directions for this dress have you tuck the neckline's raw edges into the collar sandwich. With my fairly thick fabric, I thought that would look sloppy, so I created a back neck facing. This was not a perfect solution as it added bulk to an already bulky seam (two layers of collar plus inner and outer yoke), but it did give a neat finish to the neckline. I will have to research this issue before I make the pattern again.

Questionable Topstitching I thought the tiny pinstripes of this fabric would work better with the pieces, creating fun directional stripes effects, but instead it just looks sloppy (and I forgot to cut the back yoke on crossgrain, boo). I tried to rescue it with some topstitching, but that just made it worse, as you can see at right.

I never use the marked button placement on a pattern; because I am short and have a very specific preference on where the top buttoned button is placed (about 1/2" above the center hook of my bra--I have no cleavage, so I can totally get away with this for work) the marked placement never works. But although I actually carefully marked the two rows of buttonholes on the dress, using a ruler and everything, they came out so uneven!!! I couldn't really tell until I had cut open the buttonholes and sewn on the buttons, so nothing to be done.

Front I really love the look of this pattern, but this dress is a fail for me. When I got it to a point of try-on-ability, I realized to my horror that this seersucker stripe of white, charcoal, and red resolves into the color of chewed up gum at a distance of more than 12 inches. The bluish-pink color is the same hue--though a different shade--than my skin, as you can see in this photo. Wearing it as a jumper with the red shirt makes it a little better, but it is just too disappointing. I also don't like the armscye finish; the bias tape kind of sticks out and doesn't lay well.

I wore the dress one time--the day I took the photos--and then gave it to a co-worker who is almost the exact same size and shape as me, but with long dark hair and a rosier complexion (no blue undertones). She reports that it fits like a glove and the color looks fine on her. I hope she wears it to work one day!

Although this project was a fail, the pattern definitely is not. I spent 6 months on the hunt for the right fabric earlier this year and now I have to go on it again! I'm still contemplating the copper denim I got in New York, but still thinking it would be too much.

All photos are here and the pattern review is here.

=============

Brenda asked about the bra strap keepers I bought at Steinlauf & Stoller. They do not seem to appear on the S&S website (I've looked before and also just confirmed). Dritz calls them "shoulder strap guards", I call them bra strap keepers. When I described what I was looking for to the guy working the counter--a little length of ribbon with snaps on each end that you sew into the shoulder seam to keep your bra strap in place--he figured out what I was talking about. They are in bins at the front of the store. Your best bet is to call or email asking for the name of them and whether they'll sell them by mail. They come in black, white, and beige, and are 90 cents per pair (at least in-store they are). These little things are invaluable! I hope you can get some.

=============

Still haven't heard from Abby or Lydia re: the stash purge I have up for grabs.  Neither of you left any contact information. If you're still interested, please leave a comment on this post with an email address where I can reach you. Don't write out the full email address to avoid spam harvesters--write it something like "example at yahoo."  (Anyone else in the DC area is welcome to respond as well--you come pick up the fabric, and you must take the whole lot.)  Will be listing it on Freecycle soon.