Friday, August 26, 2011

Stashoholism Confessional: Gifts from Foreign Lands

Sari from India 8-2011

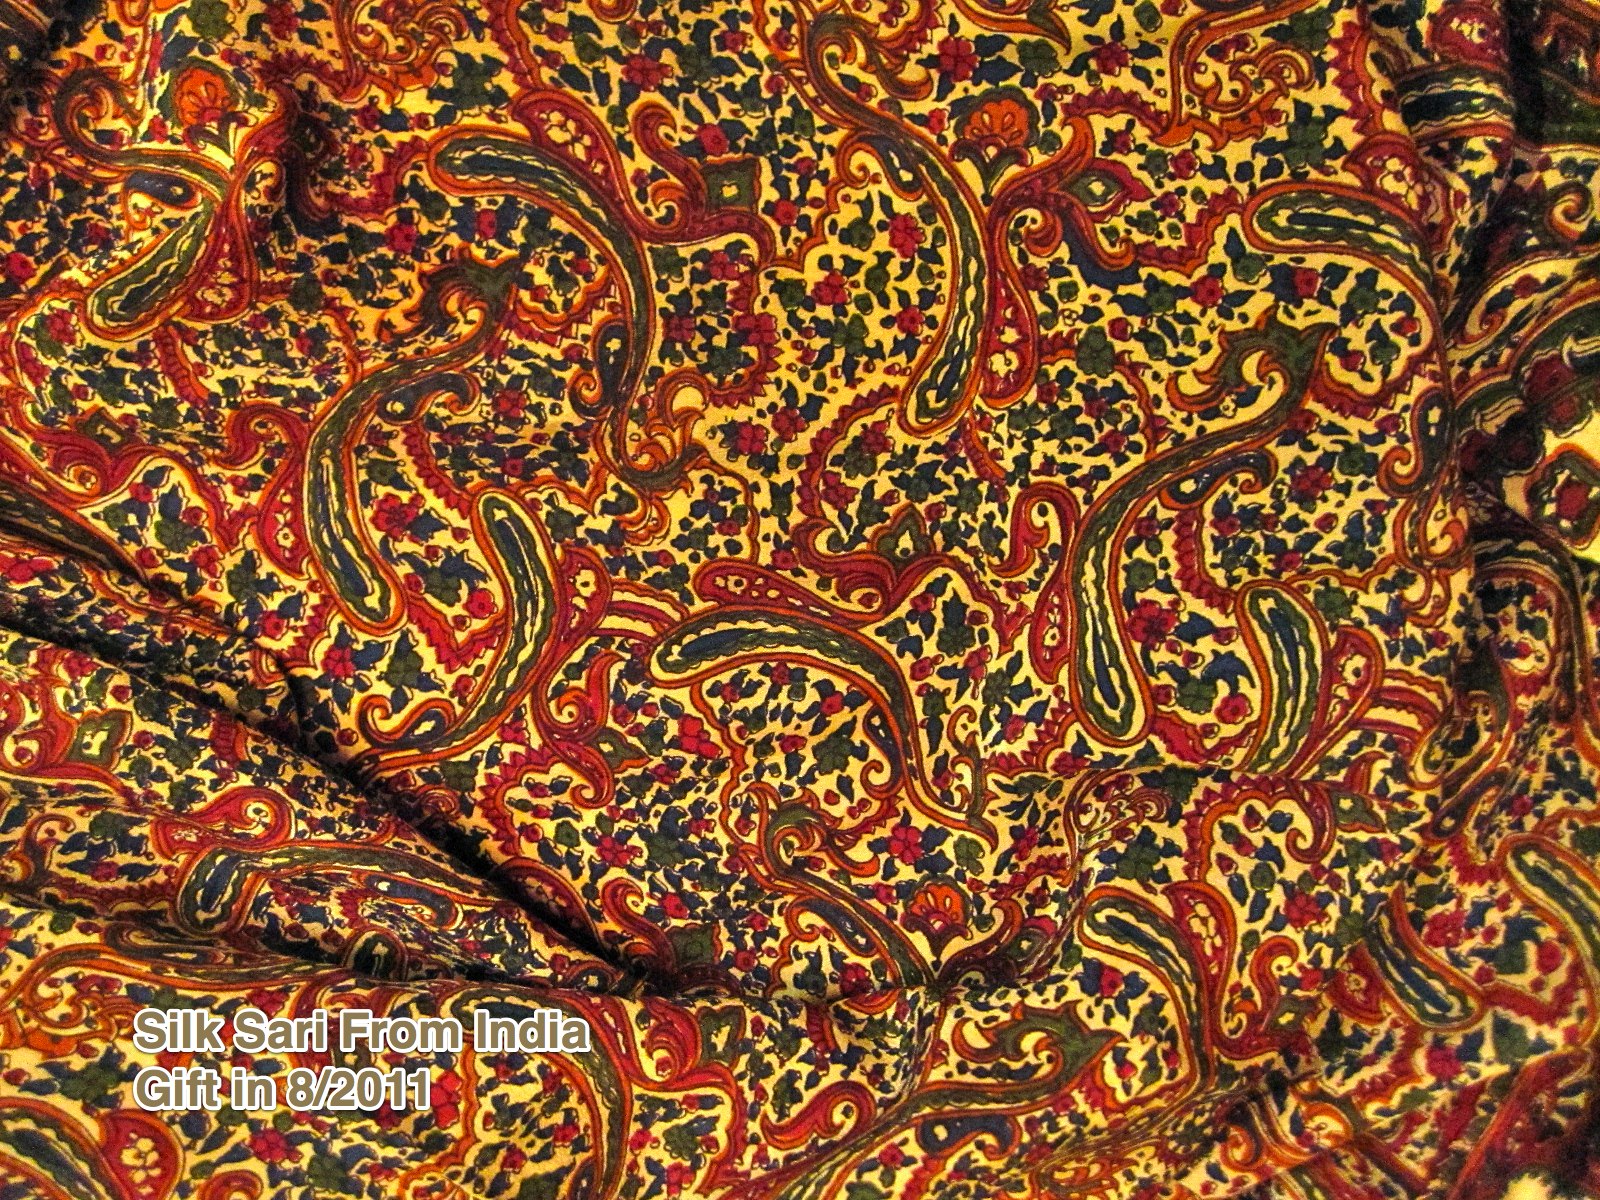
*Somebody* went to India without me (for work!) at the beginning of the month. India is one of my top destinations, so I was pretty jealous. I let him know that he would need to bring me back a present, and it should probably be a sari. I like a man who can take direction, because when I surprised him at the airport he forked it over. It is gorgeous! And I took a tiny sample from one end (the ends aren't finished) to burn--it is 100% silk. This is a truly special gift, and I was completely touched by it.

I don't want this gift to sit on the shelf, and Burda has totally come through for me the past two months. When I got the fabric I immediately thought of the Antik Batik exclusive design from August, Burda 08-2011-142 (line drawing on the left). Love the drapey look and luxurious use of fabric (the sari is huge, I think something along the lines of 7 usable yards). But then September arrived, and I was equally drawn in by the cover dress, Burda 09-2011-104, the line drawing on the right. The Antik Batik is still the front runner, I think, because I like the long sleeves. However, I have read through the directions several times and am still completely in the dark about how the skirt construction works. I'm really going to have to figure out that fabric starching-for-cutting thing before undertaking this project.

======================

Donna and Trena

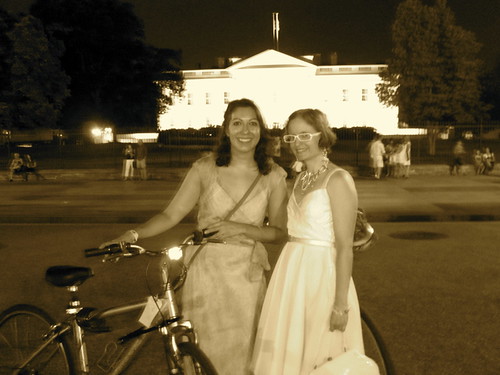
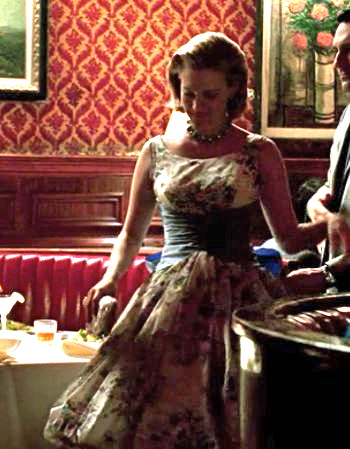
My next indiscretion I blame entirely on my participation in the Dandies & Quaintrelles Full Moon Ride! I wrote about it on my other blog, but suffice it to say it is incredibly fun and an opportunity for dress up. I wore my McCall 5045 50s style dress--the dress code is white or light colors, and vintage style is always welcome.


G Street Fabrics, 8-2011 
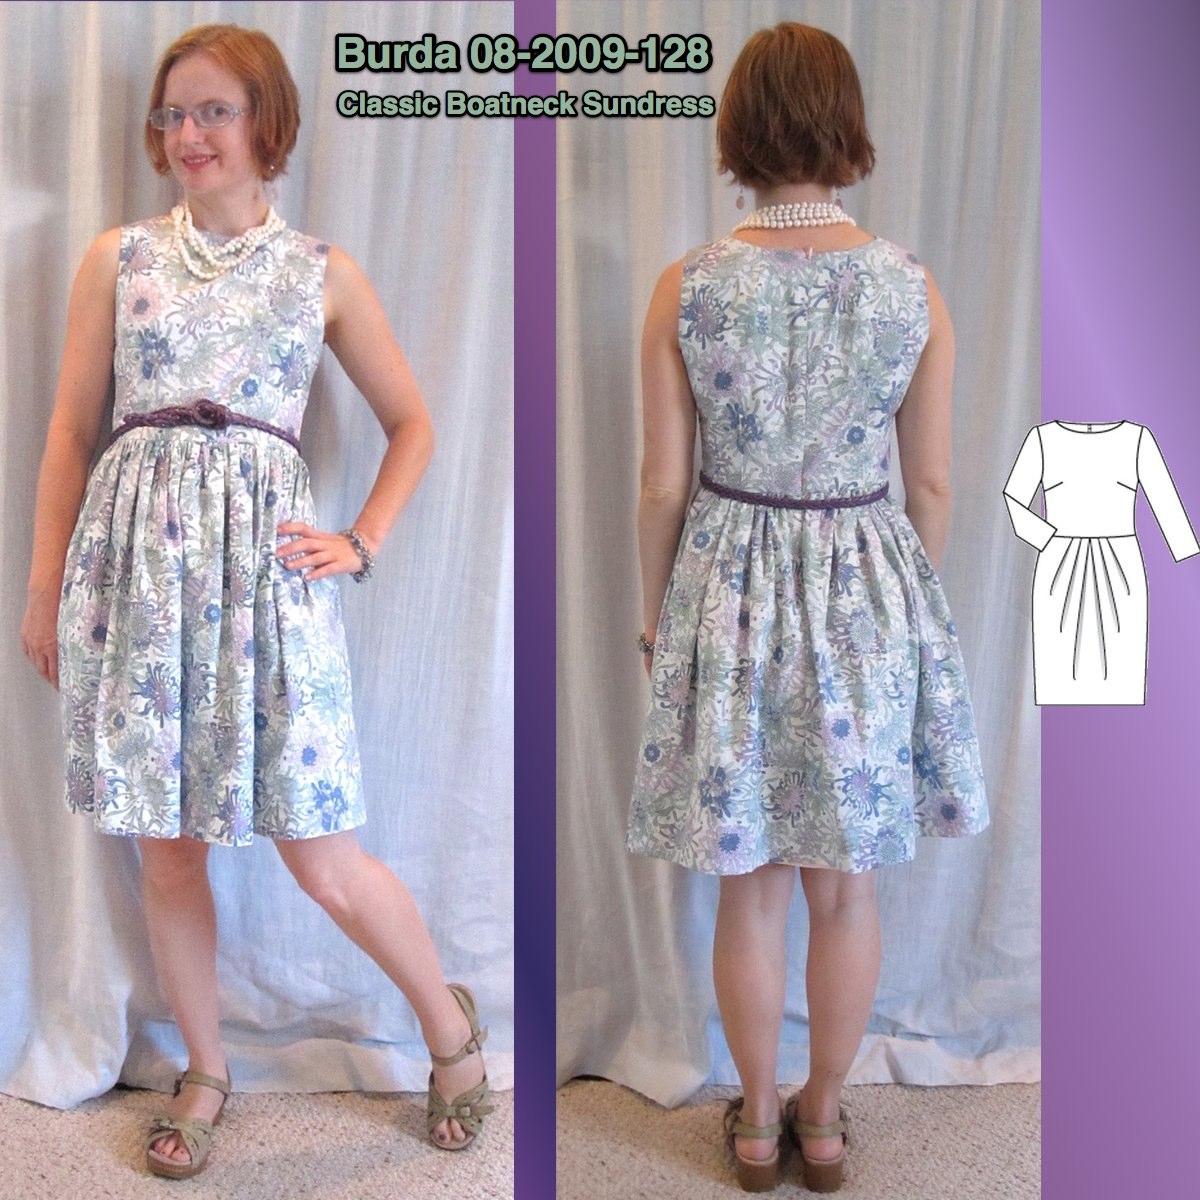
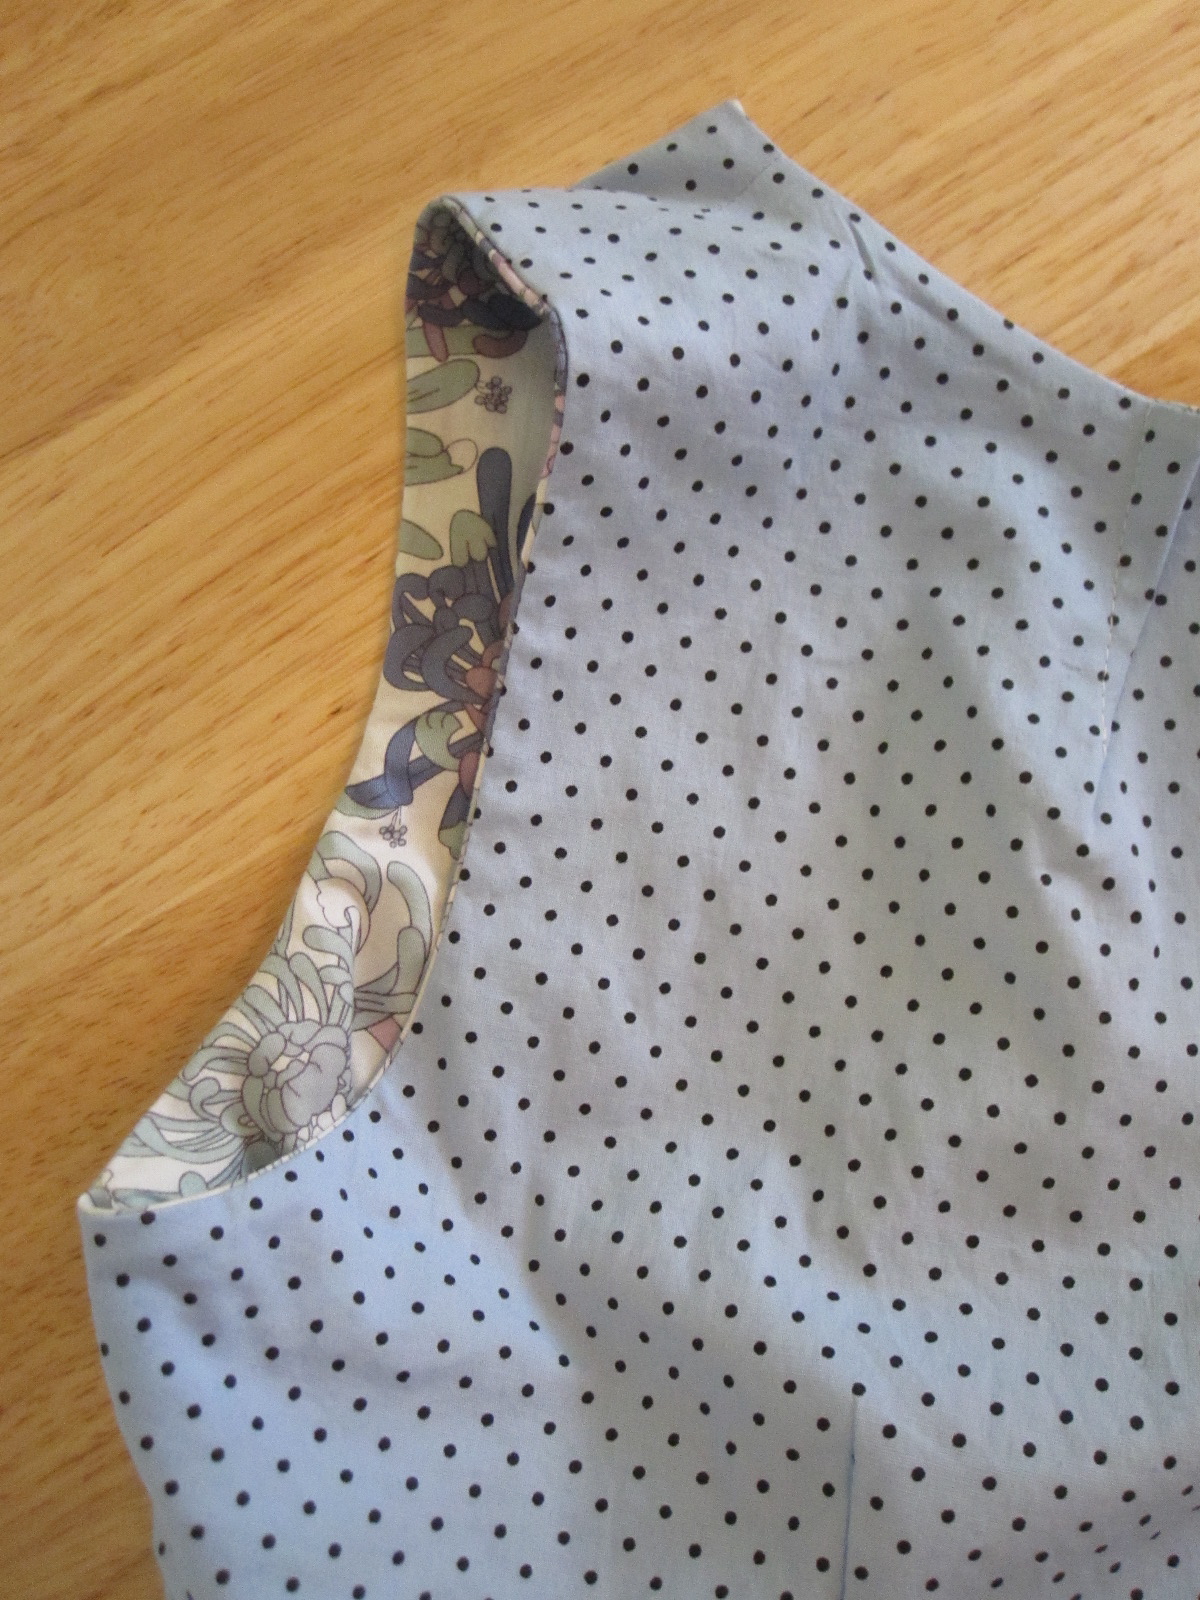
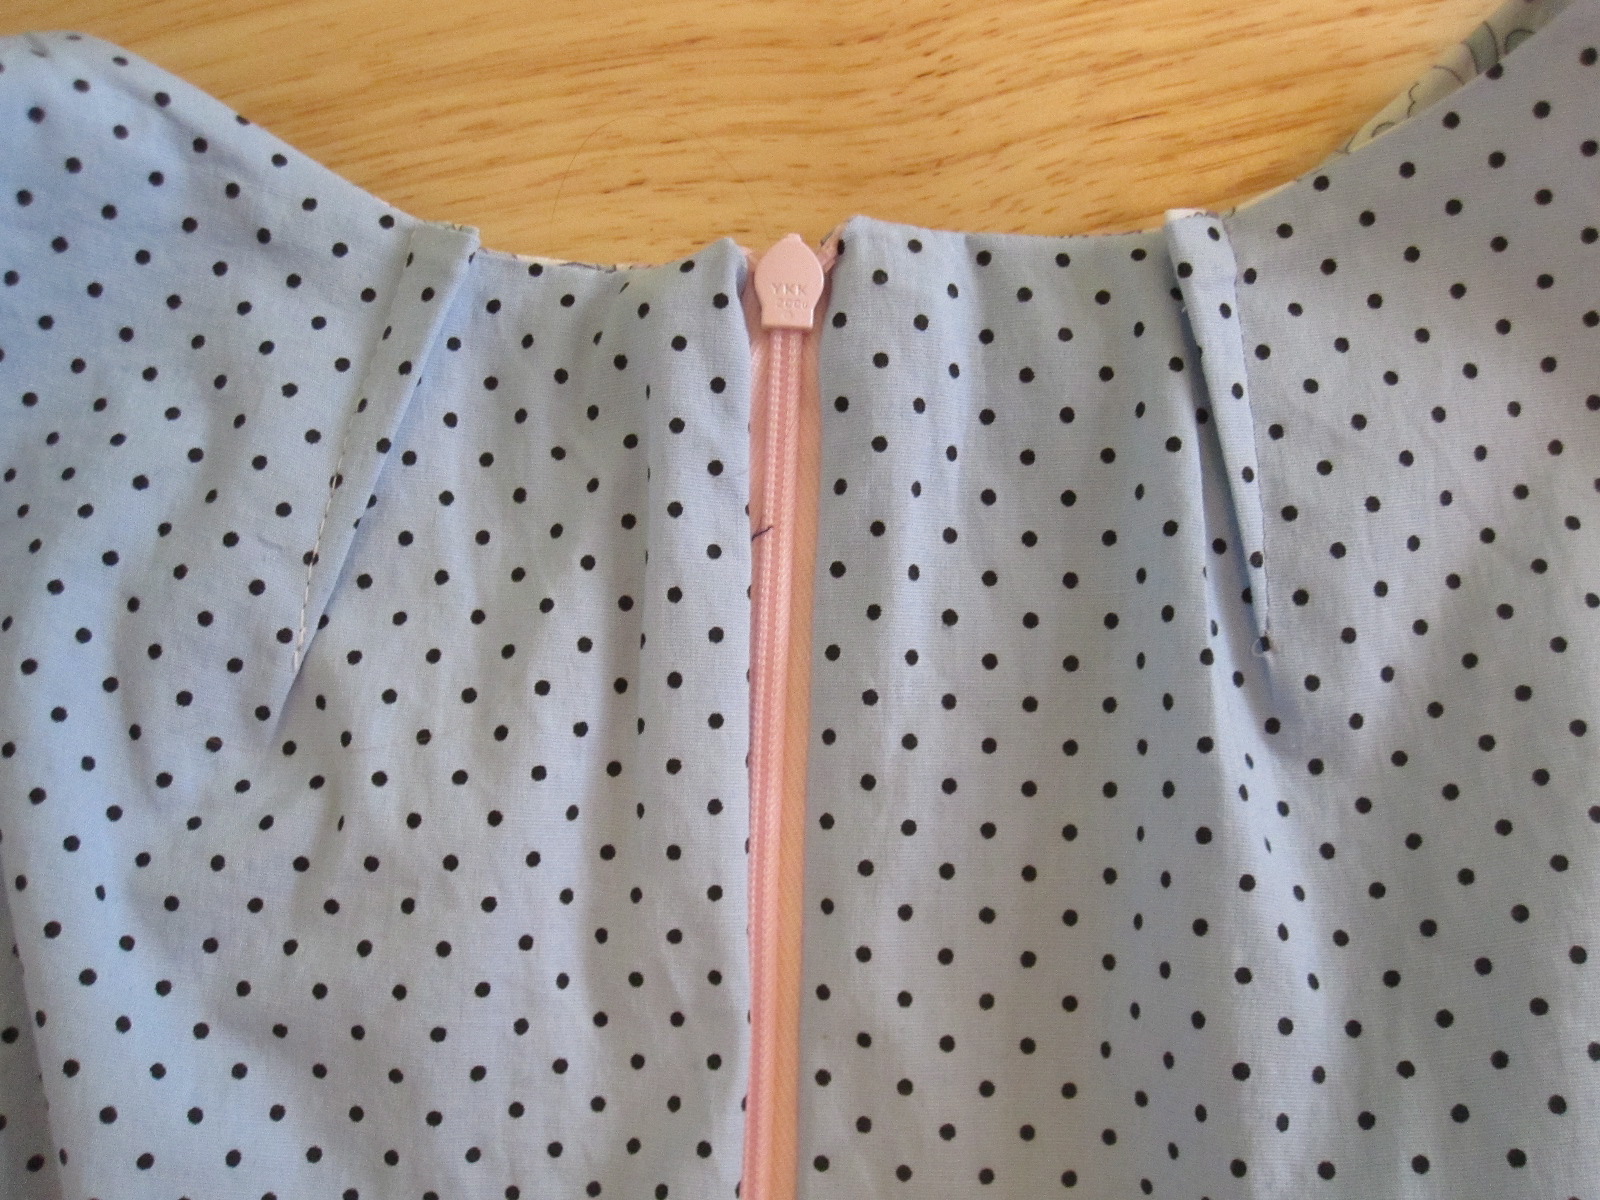
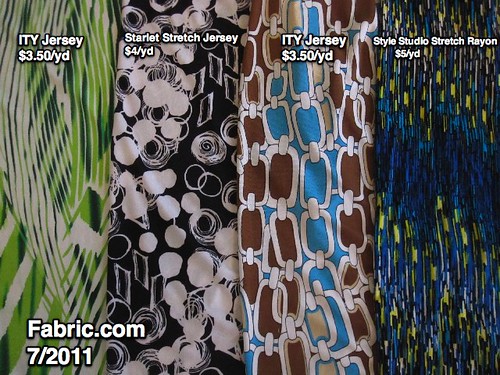
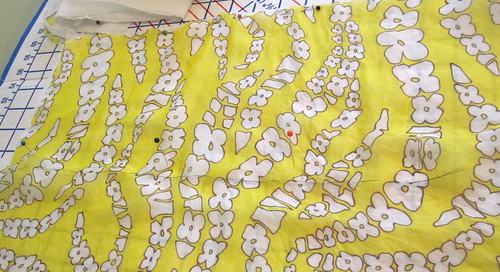
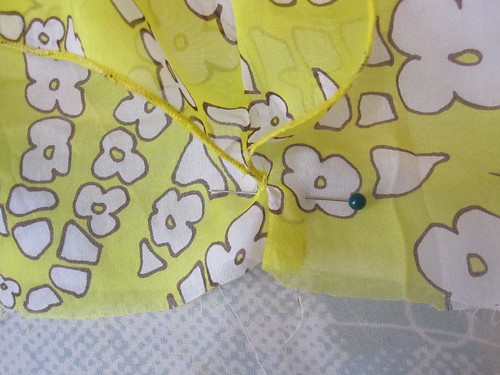
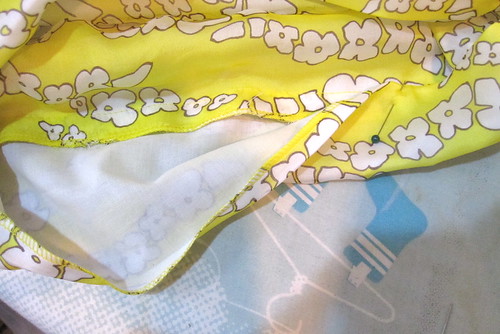
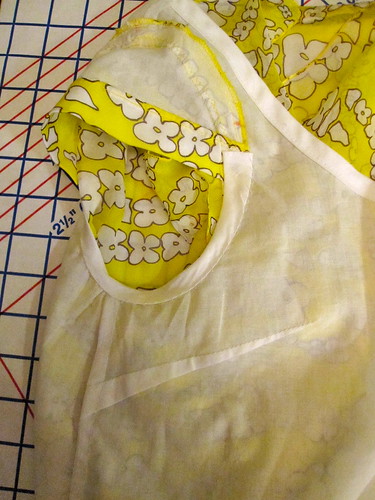
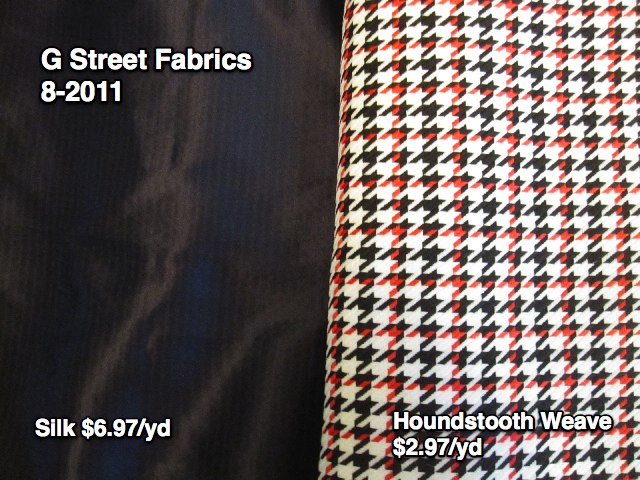
So when I went to G Street Fabrics for the usual Fashion Sewing Club meeting the next morning I mind was buzzing with Full Moon Ride outfit ideas. I had to check out the $2.97/yd table and the $6.97/yd silk table, as usual. And was tempted, as usual. And fell, as usual. The silk is totally excusable, I just bought a yard for lining the bodice of my final Burda 08-2009-128 boatneck dress. The houndstooth, though, I mean I was in such a vintage frame of mind. The fabric is polyester, make no mistake, but it is definitely the old school kind. The houndstooth is woven, not printed. How great will this be in an unfitted shift with a white jacket (not that I currently own one) over it? So great, that's how great. Totally mod.

======================

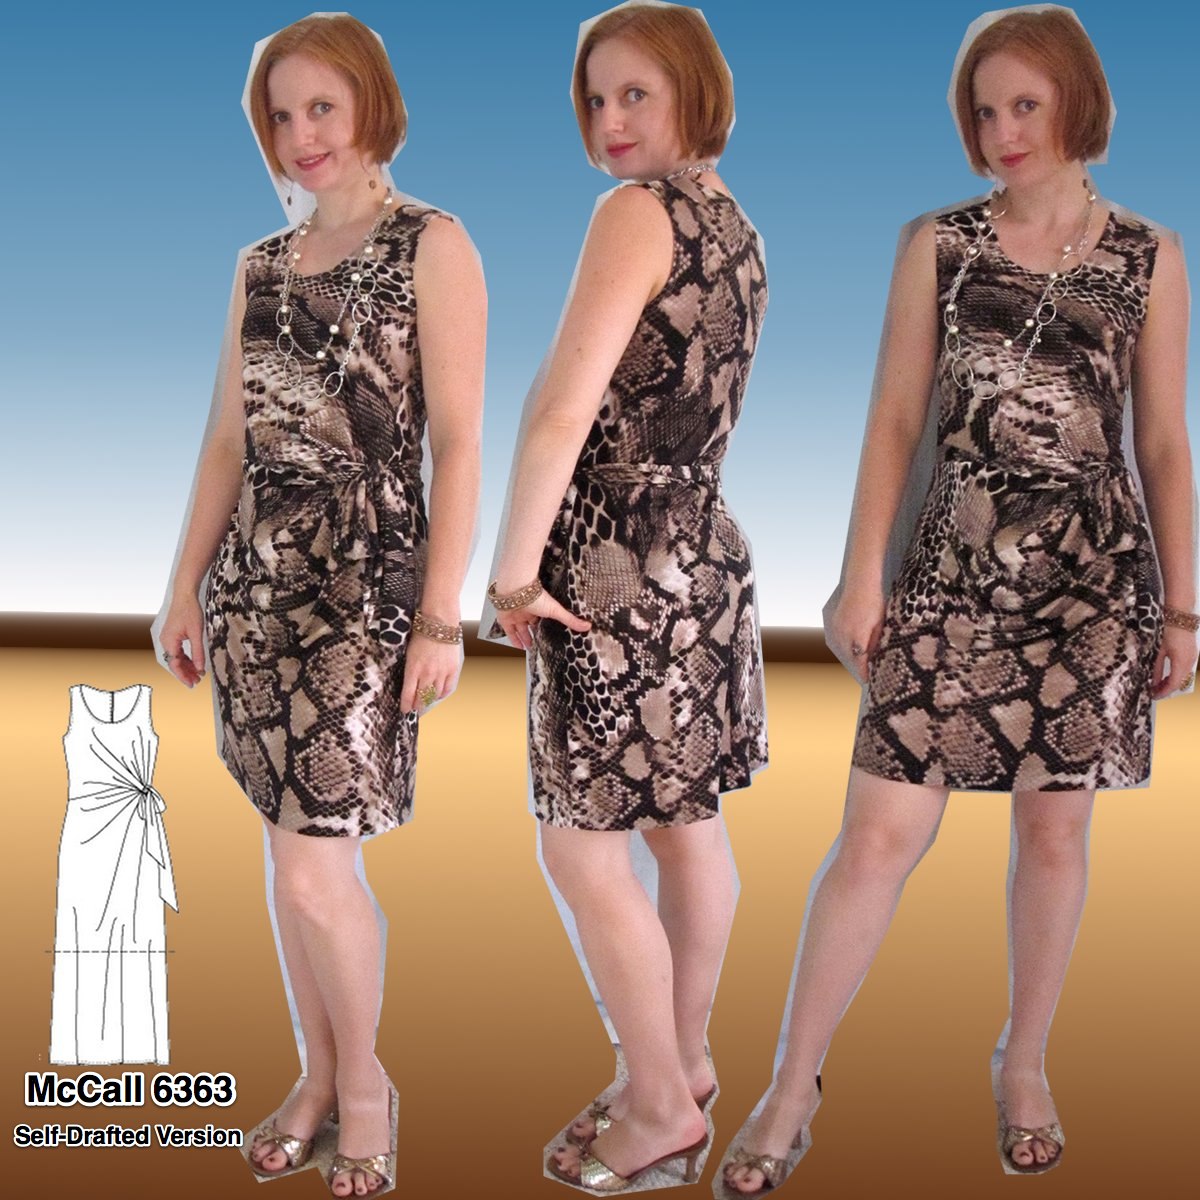
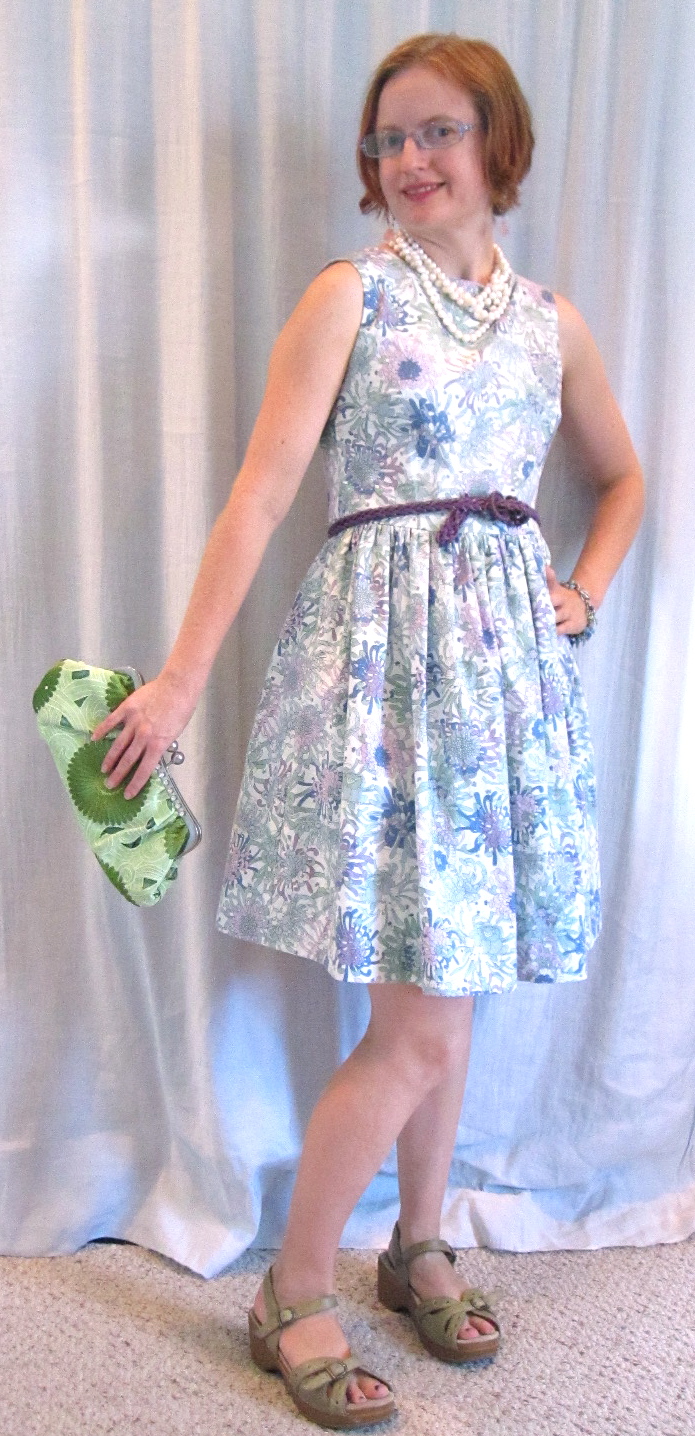
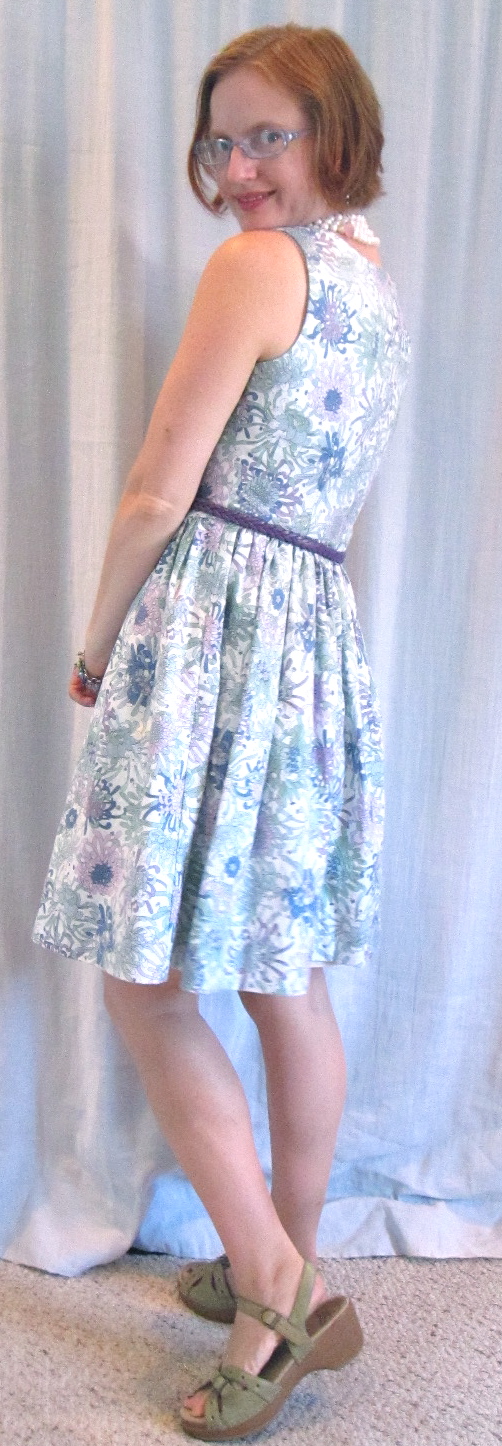
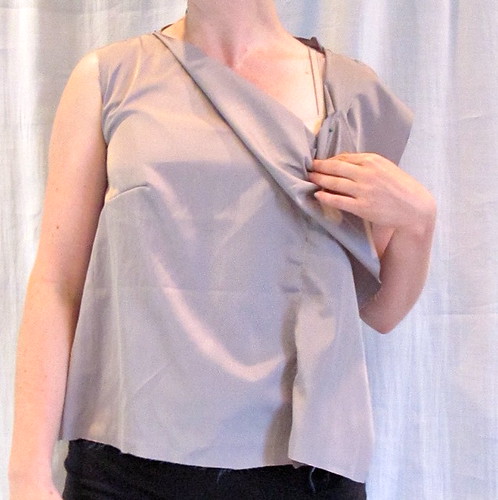
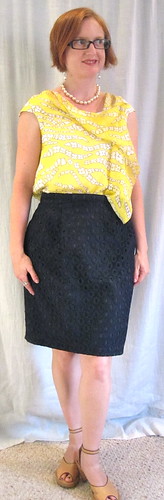
Thank you so much for the nice comments you left on my McCall 6363 knockoff post! So, here's why the photos came out so well.

First of all, I was taking the pictures in the afternoon. My photo "studio" is a piece of fabric looped over my canopy-less canopy bed. I usually take photos in the morning before work. It faces west, so when I try to take pictures in the evening the setting sun reflects off my glasses. I took these photos before going out for the evening so I didn't wear glasses to avoid the glare. I have made my peace with wearing glasses, and consider them fun face jewelry. But let's face it, nobody ever had the mousy secretary put glasses *on* in the movies to reveal that she is a gorgeous vixen.

Since I wasn't going to wear glasses, I figured I should put makeup on to define my eyes, as I have blonde lashes and eyebrows.

Then I had taken a shower. My hair was taking a long time to dry so I used the blow dryer. While I was blowing it dry, I figured I might as well haphazardly apply a round brush.

So, that is me when I actually make an effort. Don't get used to it.


======================

I have a bunch of questions I plan to answer soon, but today I need to work on my birthday dress! I am being whisked out of town for the weekend (far enough inland to avoid the hurricane, it looks like) to celebrate my birthday with hiking and nature, so I've got work fast today to get my dress ready for Wednesday.

Tuesday, August 23, 2011

McCall 6363, Mock Wrap-ish Knit Dress (Self-Drafted)

M6363 Thumbnail

I first became aware of McCall 6363 when Debbie Cook did a series of posts on it. You all know how I love a knit dress, and a knit dress with interest and tummy disguise? Fuggedaboutit. I had to have it. When I went looking for the pattern I realized why I'd never seen it before, as it is available only in plus sizes.

Debbie's ultimate conclusion on the pattern was "Don't buy it," so perhaps it is lucky it only comes in plus and I had to draft my own. I bought the pattern to study the pieces and use the instructions.

Pattern Drafting

To draft this pattern, you start with a basic t-shirt dress. I used Burda 01-2009-106. Can I tell you how nice it was to trace a pattern that already came in size 34 and didn't have to be graded, and is on the old, less dense pattern pieces? It was sooooo easy. I raised and slightly widened the neckline, but otherwise used it as is.

The back is used as is. All I did was alter it for swayback.

For the front pattern piece, I first doubled it so I had a full size piece (the front is cut single layer).

Next, I marked the waistline all the way across the piece and cut from the left side almost all the way over to the right, leaving a little hinge in the seam allowance. If I were to do this again, I would split it 1" or 1.5" above the marked waistline. I found that having the growth right at the waistline means that the weight of it falls below the waist, so I lose a little bit of waist definition.

I spread the bodice up almost to 90 degrees (in examining the M6363 pattern piece I extended the grainline full length and then created a horizontal grainline to determine the angle at which their bodice is tilted) and then filled that in with a diamond of tissue, rounding the extending edge.

The front grainline runs down CF of the skirt, and the bodice bends over to be almost on crossgrain. I was surprised by how little fabric this took (my fabric was 60 wide, though). I had only 1 5/8 yard, but the front and back fit together along the width of the fabric so I only needed the length of the dress, a little more than a yard. I have plenty left for making panties.

My pattern piece is not shaped entirely like the McCall's. On theirs, the right side (without the tissue extension) runs straight down from the armscye, while mine is sharply angled. I think they did not split the pattern all the way to the side seam, but stopped short of it and added the extension to 2/3 of the bodice rather than the entire bodice (a possible alternative I discuss in my video).

Debbie Cook observed (and I confirmed) that the front neckline and shoulders on M6363 are not symmetrical. She thought that might be necessary to compensate for the differences in grainline and volume. Mine is symmetrical and I have no trouble with the way it sits--but keep in mind that I am flat-chested, which makes things easier fitting-wise (in this instance, at any rate).

Once the pattern is created, it is very simple to cut out and sew. The dress is just four pieces, a front, back, and two ties. I cut my ties 6 inches wide and about 25 inches long.

The Growth To construct, you first create "the growth." It is my guess that the drafter of the McCall pattern was influenced by Japanese design. The idea of adding a growth seems similar to some of the pieces in Drape Drape 2, as well as what I've seen of Pattern Magic (never seen the book in person, just on blogs).

Anyway, you first hem the tip of the growth to create an opening. The sew together along the edges until you get to the waistline (i.e., the end of the tissue extension and back on the original pattern).

Front Closeup

Next you place your ties and sew the side seams. This is where I found McCall's directions confusing. In the McCall version, both ties are sewn to the right side, a fact that they do not actually come out and say. The growth radiates from the left side and then is pulled across the body to the right. One tie is sewn to the outside of the dress, and the other to the inside. The inside tie is pulled through the hem on the growth. I did mine differently, with the outside tie sewn into the left side, the side from which the growth radiates. It is pulled across the back. The inside tie is sewn to the right side, the side to which the growth will be pulled. This closeup shows the draping.

I found it hard to take photos and explain how this works, so I used my new favorite blogging toy and made another video:


Twin Needle Finish To finish the neckline and armscye I used a twin needle. For the neckline, I used clear elastic slightly shorter than the length of the neckline to ensure that it stayed snug. I have never made my base pattern, Burda 01-2009-106, as drafted. A Burda size 34 is usually perfect for me at the shoulders and bust and #106 is meant to be close fitting, but I found this somewhat large. I'm not sure if it's all the result of my added tissue or not.

Blind Hem The hem on the M6363 pattern is straight and I used the same on mine. I think that is the right call, though the hem drapes a little weird at the front. Tweaking the depth of the hem didn't seem to correct it, so I think it's just a function of the extra fabric. I did not want to call attention to the not-perfectly-parallel-to-the-ground hem by using a double line of straight thread, so I used a machine blind hem. It came out truly invisible in this fairly substantial poly knit.

It would be fun to experiment more with this pattern. As mentioned in the video, I would like to see if there's a way to make the growth work if drafted smaller and pulled the other direction (pulled left instead of right). As I was playing with it, I realized the design principle is somewhat similar to the Vogue 2064 Donna Karan top and dress I made several years ago, only without the wrap skirt.

M6363 Back I didn't know exactly what to expect when I had this all put together, but I was pleasantly surprised! I love the casual-chic vibe this dress gives off, and the slightly bloused front is right on trend.

I made this as a muslin for my Very Special Silk Jersey that I am determined to sew after 3 years, but unfortunately it came out more trendy than I thought. I don't know how long that blousing will be in style, so it's out of the running for the Very Special Fabric. I definitely plan to make another for Fall/Winter, though. Maybe my chain link fabric, to play with the stripes? The snakeskin pattern on the fabric for this dress is vertical, and I love the way the vertical design gets modified by the front pattern piece.

This was a totally fun project, and I promise you that anyone with a t-shirt dress pattern can make this happen. I urge you to give it a try!

All photos are here and the pattern review is here.

Friday, August 19, 2011

Burda 08-2009-128, Classic Boatneck Sundress

Burda 08-2009-128 Thumbnail

As mentioned about my backless walkway dress, although I have avoided boatnecks in the past as unflattering to a small chest, I found that I really liked the neckline on that dress. I liked it so much that I immediately made a back-ful version of it. The bodice is from Burda 08-2009-128.

I bought this fabric from Fabric.com in May 2010. This print is part of the Alexander Henry "London Calling" collection, a not so subtle attempt to cash in the public's love for Liberty of London. At $8/yd, it was pricey for me. I was disappointed in the print when it arrived, as I expected it to be more saturated. I don't wear much by way of pastel. The fabric itself is nice, though nothing like Liberty lawn. It is thicker, a little coarser, and although was listed as 100% cotton has a small degree of stretch that can only come from lycra. That said, it is still nice fabric. Anyway, I couldn't picture this as much of anything because of the pale colors, but it seemed perfect for this project.

Mad Men S1E2


The full-skirted boatneck dress is a classic look, which is partly why it appealed to me. Although I guess by "classic" I mean "50s" since both of these images are 1950s. Audrey Hepburn is genuine '50s, of course. She is the ultimate wearer of the boatneck. Betty Draper is meant to be in the 50s. Yes, I am finally watching Mad Men now that I have the Netflix. I've only watched the first two episodes, but I felt it was too perfect that she was wearing this dress in the second episode as I was working on this post!

I have one more of these planned. I made this one in the last few days of the One Pattern, Many Looks contest last month and briefly considered trying to bang the next one out, but decided to wait. I think I will lower the front neckline slightly in the next version.

Narrow Shoulder Alteration I found when I muslined the front bodice for my backless dress that the neckline was much too wide. I consulted Fit for Real People, which I finally purchased, for a narrow shoulder alteration. I had to bring in the shoulder 3/4 of an inch, and after completing this version see that I can probably bring it in another 3/8 of an inch for a total adjustment of over 1 inch! I knew I had narrow shoulders, but wow. The photo on the right is not the actual pattern piece, just an illustration I quickly drew up. The pencil is the original line and the purple is the new shoulder. I basically just moved the shoulder over, then redrew the armscye and neckline, tapering to the original line.

Because the fabric has a little stretch, I didn't want to lose that quality by using non-stretch lining. I visited the stash and found this light blue with black pin dots and a little stretch. Perfect! I used the all-machine clean-finish technique illustrated in this post. I took the opportunity to make a video of how to turn it right side out! I'm not going to be winning any cinematography awards, but it hard to do this yourself with a tripod and know exactly where the frame is.


Clean FInish I'm happy with the way the lining came out. Trimming the armscye and neckline edges of the lining 1/8" before lining up the cut edges of the lining and fashion fabric and sewing really makes a difference. It creates such a lovely turn of cloth, as you can see on the straps and the armscye at left. The polka dots also turned out really cute with the fashion fabric.

Back Neck Darts; Zip When it was finished I found that the back neck was rather gapey. As back neck darts are a common feature of 50s patterns I figured adding them would look appropriate rather than an ad hoc fix (ahem). The darts worked perfectly to snug up the back neck, but created a little bit of gaping in the front neckline. This is what makes me think I should narrow the shoulders even more.

Burda 08-2009-128 Side

As usual I pleated the skirt lining rather than gathering it to reduce bulk at the waistline. I used french seams on the skirt, and took a deep machine blind hem to get plenty of weight to it.


All in all, I am happy with the way this project came out. I think I managed to find the best use for this fabric, and I love the classic look of the dress. It is also very comfortable to wear.

All photos are here and the pattern review is here.

Friday, August 12, 2011

My Walk Away Dress (as in, watch me as I ...)

Walkaway Dress Thumbnail

I always felt the vintage reissue Butterick 4790 Walkaway Dress was misnamed. First of all, I made this dress and let me tell it did not just take me an afternoon! I made my bias tape so that added some time, but even if you use commercial bias tape all that binding takes a while. And second of all, to me the term seems to mean that people might not notice you coming but all eyes will be on you as you walk away. So this is *my* walkaway dress! Demure and sweet from the front, and eye-catching (if not eye-popping) from the back.

I've already described my pattern drafting process for this dress, so now on to the construction. I made it out of a sturdy wax print cotton that a dear friend who is living in Liberia this year bought at the market in Monrovia. She said that this fish print is all the rage, and every time they come out with a new colorway all the women rush down to the market to get it.

The cotton has plenty of body and opacity and didn't need to be lined, so I finished the neckline and armscye of the front bodice with bias tape. As mentioned in the pattern drafting post, in order to get in and out of this dress I needed a variety of closures and release points. There is the back tie, of course; and also a side zip in the skirt and buttons on the shoulder straps.

Fold Down Self Facing To get a nice finish at the shoulders I first interfaced the self-facing where the buttonhole or buttons would be sewn.

Next, I sewed the bias tape to the shoulder edge with a half inch seam allowance.

Beautiful Finish!Finally, I folded along the self-facing line. I am not a technical writer and every time I try it does give me new respect for the writers of pattern directions. So this description is inartful. So, you have your seam allowance with bias tape attached. What you want to do is have the self-facing extend beyond where the bias tape will be. So you fold along the self facing line, so the two layers of self-facing extend above the sa/bias tape. Then stitch, right sides together.

When you turn it right side out you end up with a beautiful clean finish. Although I could have used a touch more length on the self-facing, as it turned out.

Finish Upper Edge of Back Strap
I did a similar type of finish for the back strap shoulder edge, although it's less complicated to explain and the photo is more useful. Interface and fold down the self-facing, stitch in place, turn right side out. Use the seam allowance at the self-facing as a guide for turning the rest of the seam allowance under. I could have done something fancy, like double-folded the seam allowance to hide the serged edge, or more bias tape, but I didn't want it to be too thick and plus I kind of enjoyed doing some simple, basic style sewing.

After all this was done I put in the buttonholes and buttons.

Back Strap Caught in Back Tie Because the wrong side of the tie would show when tied, I did line the tie portion of the back. Here I chose a contrasting navy rather than a self-lining, which I think helps emphasize the knot in a cute way.

To get a nice-looking, non-droopy tie, I interfaced the tie portion of the lining. I caught the back strap between the tie and lining, as shown in the photo, and stitched the tie and lining together along the top and bottom edges, turning right side out at the side seam.

Bias Tape Extends at Side Seam Once the tie portion of the back bodice was complete, I stitched it to the front bodice at the side seam. I spent some time debating whether I wanted to put in a full side zip, running from armscye past the waist seam, or just a short skirt zip. I concluded that I wanted to be able to press the seam allowances at the side seams onto the front so I could get a neater finish at the armscye and there would be no danger the SA would peek out at the top and bottom of the back bodice. If I made this again, I would probably do a full side zip. It is a pain to put the dress on, as I have to tie it in the front, then turn around, and if I need to tighten the tie it is nearly impossible. I think it would be a little easier with a full zip.

Fold Bias Tape Over Tie However, I did get a nice finish at the side seams, so I got something for my trade off! I lined up the finished upper edge of the lined tie with the finished upper edge of the front bodice, allowing the bias tape to extend, then stitched the side seam and pressed the seam allowance toward the front bodice. Then I folded the bias tape down over the seam allowance and hand-stitched in pace for a neat finish.

Skirt Elastic Casing The skirt was easy, just a dirndl rectangle with one seam. I put an invisible zip into the seam and used it as the left side seam. Then I gathered the front half of the skirt and stitched to the front bodice, pressing the seam allowances open. I turned down the remainder of the seam allowance on the back half of the skirt and stitched it down for a casing. The elastic is tacked near the zipper and near the right side seam. I had to pull it fairly tight to keep the skirt from drooping in the back.

Selvage Hem

I could find no evidence on the internet that it is a tradition in Africa to use the selvage as the hem, as I have heard asserted. It makes sense to me, as it saves you hand-stitching. Certainly, the elaborate printing on the selvage of this fabric was meant to be enjoyed and appreciated by someone! So I made it as my hem.

Front Back Closeup Love this dress! It is so much fun for our super hot days and I feel like it is a great use of the print. I have never cared for the boat neck on me, because I have always felt like it emphasizes the smallness of my chest. However, I found this very flattering. So much so that I actually made a full-bodice version of the dress shortly after finishing this one.

I did not have my usual stylist to take these photos so the knot in the real life photos is a little wonky. The dress form photo illustrates the ideal.

I did not even realize there was a similar Simplicity pattern, as pointed out by Amanda S. I made the real thing contemporaneous with the muslin and was in it as much for the thrill of pattern drafting as the style itself.

All photos are here and the pattern review is here.

Tuesday, August 9, 2011

Pattern Drafting: Backless Dress

My Fashion "Illustration"

There are two reasons I will never be a real designer. Well, many more than two, but two specific to this project:

1) I don't really have any of my own ideas. For this project, I saw a girl on the street wearing a dress that showed a triangle of skin in the back above an elasticated waist and loved the way it looked. So I took off from there.

and

2) I cannot draw. Man, I really cannot draw. And believe it or not I took art classes for a few years in the not too recent past. I liked the watercolor abstraction part, but the drawing part had me in tears every week. On Project Runway when it's a contest to see whose look(s) will be produced in a group challenge, they have 30 minutes to sketch and then do a presentation to whomever is doing the deciding (usually the celebrity judge of the moment). A few people have gone in without sketches. They haven't fared well. The ones who get chosen are generally not necessarily the best designers, but the best illustrators, who draw not only the clothes but fabulous stylized girls that everyone wants to be. Needless to say, my fabulous stylized stick figures would not get me very far. Nor would my beauteous drawings of clothing, as seen above.

Prep Notes From the glimpse of the girl on the street in her dress with back interest I moved on to my idea for a dress. I contemplated how to draft the back pattern piece, as you can see in the sketches, and then worked out the construction details, as you can see in the notes (you can see the largest version of that photo here if for some reason you have a desire to read it).

My plan was to start with an already drafted bodice and alter it from there. I thought that was another reason I'd never be a designer: no knowledge of how to draft from scratch, and no desire to create my own blocks. However, Kathleen Fasanella wrote that real pattern makers take existing patterns that fit well and alter them for the details they want. This is sort of the block or sloper concept, but if I understand her correctly it's even less formal than that. It is, in fact, exactly what I do when I "design." Of course, as Kathleen often points out, there is a different between designing and pattern-making, but they are somewhat blurred in the context of a home sewist creating patterns to fit her own vision.

I figured it would be easy enough to find a pattern that I already know fits me well, but, if you can believe it, I have apparently not made a dress with a plain darted bodice in the recorded past. I mean, I'm sure I've done it at some point, but I looked at all my 232 pattern reviews on PR and unless I accidentally missed one, there are no plain, darted bodices on the list. Wow. Back Bodice Draft So I had to start with an untested pattern. I thought of The Selfish Seamstress's Paris dress, Burda 08-2009-128. I looked it up and it was perfect.

I traced out the pattern and then got to work marking up the back bodice. I followed my original drawings, marking the line for the back tie piece starting right at the armscye for maximum bra coverage. The tie gave me some trouble, as real life didn't match my drawing. If I had stayed inside the armscye curve it would have ended up really skinny, so I extended into that curve. In the end this worked out fine and is not restrictive or weird.

Muslin Front The front was not so great. I mean, the general shape was fine, but the shoulders were way too wide, like falling off wide, and the bust dart was oddly long. I have finally purchased Fit for Real People, so I looked up how to narrow shoulders in there rather than making it up by taking the width out of CF as I have it pinned here. I'll talk about that alteration on a later project, but suffice it to say that I had to narrow the shoulders 3/4 of an inch. The boat neck on this pattern exaggerated the problem, because the shoulders are drafted as wide as possible for the neckline, but I should probably alter the shoulders on every pattern I make by at least 1/2 inch. It is so annoying to do a thousand alterations so I'm not committed to it.

Muslin Side From the side I could see that I needed to lengthen the back tie piece to run down the entire side seam. I had intended to have a gap there of about an inch, to keep the back as bare as possible. To check the fit of the muslin I pinned a piece of elastic in the back to signify the skirt. You can see that the front bodice buckles in that inch between the bottom of the tie piece and the elastic of the skirt. I had no reason to believe it wouldn't do that in the real thing, so I determined to extend the tie piece along the side seam all the way to the seam allowance for the skirt.

Muslin Back I had *no* idea how long to make the ties, so for the muslin I made them super long and then determined the proper length from there. Although I had folded out the back dart when drafting the tie piece, I saw that it needed a little more width pinched out like a vertical dart from the bottom. And the straps needed to be a little wider on the inside. I added about 1/2 inch of width to the upper straps, and really wish I had added more for the final product as it is still a little skimpy and therefore fussy with bra straps (yes, there is a bra under there!).

When I showed her the finished dress on Skype, Cidell felt that the back was obscenely low. However, that is truly an optical illusion. The bodice sits slightly above natural waist, and as you can see by the line of elastic marking the skirt placement it is a good six inches above any kind of plumber's crack situation, and 3 inches above these relatively high-waisted shorts.

Back "Bodice" Pattern Here is the final pattern, as cut. The drafting actually went quite smoothly and was much easier than expected. Although the sewing got a little complicated in terms of finishes, when I realized that for a person who lives alone and has to tie herself into this dress rather than have a helper do it, I had to be able to separate the straps at the shoulder. You can see the extensions on the shoulder for the button "placket" (there is an identical extension on the front bodice shoulder).

Stay tuned for the final result...

Friday, August 5, 2011

Stashoholism Confessional: Knits Edition and The September Issue Movie Review

Fabric.com 7-2011

Knits are my downfall, man. There are a bunch of knit dress patterns I want to try (not least one from a Knip Mode I bought in the Netherlands and painfully translated the instructions for). Do I have knits in stash? Of course I do. And yet, I have fallen. Fabric.com sucked me in with its discounts and free shipping.

The green stalks and the brown and aqua chain fabric are Stretch Jersey ITY Knits. All the other ITYs I have seen, purchased, and used have had a micro-rib type texture, like very miniature slinky. These are slick and a little shiny with an even more micro-ribbed texture, so small that it hardly exists, which I find a little odd. I am not sure if I had not yet experienced the full range of ITY (which stands for "interlock twist yarn, as I understand it, implying some sort of texture) or if they are mislabeled. The hand is a bit like a nylon knit, but they are 92% poly, 8% lycra. I was impressed by the high lycra content on the website. It is actually not that stretchy, but has excellent recovery. I'm not sure I would recommend this due to the shininess, which I think looks a little cheap, and how thin it is (both items will need a slip), but I will be perfectly content sewing up the fabrics.

B5454 Line DrawingThe chain link (impulse purchase in honor of Cidell, who loves this classic preppy stuff) will likely become another Butterick 5454 wrap dress, with a collar and cuffs to mimic the classic DVF style, although I am tempted to find an origami-type pattern that allows for play with directional "stripes." I guess I could cut the stripes diagonally for the bodice of the wrap dress, as the pattern is drafted. For the green stalks, I am not quite decided. Maybe the aforementioned Knip Mode.

The black and white is the Starlet Stretch Jersey. This I can unequivocally not recommend. Ugh. Very thin and sheer with an icky plasticky hand so reminiscent of the early polyesters that gave it a bad name. While I almost always avoid polyester wovens, I am all about poly knits in general (until my budget arrives at silk jersey for every project). It has good recovery and is colorfast, unlike the cottons (fade) and rayons (no recovery) I have experienced. It doesn't make me sweat more than other knits. Actually, I am somewhat cursed because the sweatiest fabric of all for me? Silk. Even in winter. Forget wearing it in summer.

I was really disappointed in this one because the point of the whole order was this print. I plan to make a purple skirt for my mom and wanted a black and white top to match. I'm just going to use it as a muslin to see if she likes the style I choose (not that I've chosen a style).

I took a chance on the Style Studio Stretch Rayon Jersey Knit. I have never found a rayon knit that wasn't poor quality. All the rayons I've tried have absolutely no recovery, crease permanently and become shiny along the creases, and pill instantly. I fell in love with this print and was excited to see that Fabric.com had made one of their videos of it. I hadn't looked at one before but assumed it would explore the qualities of the fabric. Well the video, which is no longer up, was totally useless! They just showed two lengths of folded fabric sitting on a table and talked about the prints. I was thinking they would hold up a single layer for the camera, give it a tug to show stretch and recovery, and give some idea of the thickness and the drape. I mean, the prints we can see in still shots!

Anyway, I made Burda 04-2009-110 recently in a lightweight rayon thinking it would be a good nightgown. But the rayon fabric just spread and spread and spread and at this point the neckline is down to my navel. I want to make the pattern as a real dress, and this print in all my favorite colors sucked me in. In person, the fabric is relatively beefy for a rayon knit and seems to have good recovery. It pre-washed well, without the shiny creasing. It's now $3.50/yd (bought too soon!). I can't guarantee how it will perform but I think it's worth a shot at that price.

===============


I finally signed up for Netflix (streaming only). Why yes, I do live in 2004, why do you ask? Would you like to see my cell phone? It's the new flip phone style! I am so cool! Smart phone? Well, I don't know. It remembers all the phone numbers I tell it to. That seems pretty smart.

I have a medium-sized DVD collection (maybe 30?) and haven't rented a movie since I moved to DC 9 years ago, so it had gotten to the point where I finally tired of all my movies and I caved. My first order of business was to watch The September Issue, a documentary about Anna Wintour and the creating of the massive September issue of Vogue. One of the movies in my collection is The Devil Wears Prada. Love it! (And it's one of those rare cases where the movie is better than the book.)

The September Issue is sort of an answer to TDWP. It shows Ms. Wintour being tough and critical, sure, but in the context of being an editor who has to be the one to make the final decision. It also shows how she has to manage up to her publisher and to her advertisers and that she is making the business work. The "fashion is stupid" role that Andi plays when she first starts at the magazine is played in The September Issue by Ms. Wintour's siblings, who consider her work silly and useless. I can't say that she was totally humanized, and I'm sure she is not pleasant to work for, but it was a fascinating look into a world in which I will never directly live, but that influences me every day as I get dressed. Aside from which, she must have a sense of humor somewhere--she employs Andre Leon Talley! Although I'm sure ALT would object to the notion of himself as an "employee," I assume money is involved somehow.

Last night I started watching Valentino, The Last Emperor. Loving it so far! (I am incapable of watching a movie at one sitting now, as I am so long out of practice.)

Any movie recs for me, fashion or non-fashion? I have a weakness for rom coms, as long as they are not too terrible.
How to Lose a Guy in Ten Days: terrible.
The Proposal: not too terrible.

Tuesday, August 2, 2011

Burda 07-2011-105, Drapey Yellow Silk Top

Burda 07-2011-105 Thumbnail

When I got the July issue of BurdaStyle magazine, 07-2011-105 immediately caught my eye. I love the drape of the silk at the shoulder and it seemed like a simple pattern to showcase a stunning fabric. It is in the vein of the giant sack that Burda has been showing for the past two years, but I imagined it with a cinched bottom band. The drop waist is not a style that has worked for me in the past due to my pear shape, but I see it all over the place and think it looks cute on other people. I decided to expand my horizons.

Muslin 1.0, Too Low The fabric I chose is a beautiful sheer yellow silk from Kashi at Metro Textiles in June 2009, an impulse purchase made on the strength of the color. He called it a Thai silk; it had a bit more body than chiffon before pre-washing, though it mostly lost it in the washing.

Before cutting into this relatively expensive fabric ($10/yd), I muslined. I know, collective gasp. One of the reasons I muslined was to determine if this really needed to be cut on the bias. The muslin looked fine on straight of grain, so I cut the real thing on straight of grain. It might have helped to cut the batiste lining on the bias, but no way would I ever EVER try to cut silk chiffon on the bias. It would be the death of me.

In the first iteration, altered only to narrow the bust dart for an SBA, the stitching line that creates the flounce was too low, and I also felt to far over to the side. While it looked ok with the flounce all tucked up and arranged for final wearing, it exposed my bra underneath that. With sheer fabric, I didn't want to take that chance.

Left Front with Moved Placement Line

I modified the pattern to move the front stitching line one inch toward the center on both left and right front and raise it by 3/4 inch. Only a teeny skimpy flounce remained on the left front, so I added an inch back to the flounce, as you can see in the brown pattern tissue addition. Rather than re-make the muslin, I just sewed the placement line 1 inch closer to the middle and 3/4 inch higher. No more show through.

Back Pattern I also found that the back was too tight. I had not adjusted for a broad back because the style is drafted to be large, but it turned out I needed more room not just at the shoulder blades but also the hip. So instead of doing my usual L shaped adjustment, I split and spread from hem to shoulder to add width. I had taken a swayback adjustment in the muslin and found that the back tended to ride up to my natural waist rather than stay dropped over the hip, so I undid the swayback adjustment to give myself more length to the hip.

Rather than have to wear a separate camisole (unthinkable in this heat, truly), I drafted a lining for the front from the right front piece, which conveniently had the center front marked. For the back lining, I used the back pattern but dropped the neckline an inch so the lining would not peek out. The lining is Vogue Fabric's cotton batiste ($3.50/yd).

Thread Tracing Placement Line Man, dealing with silk chiffon sucks. Why do I keep torturing myself with it? I really need to learn how to do the starching thing. But where do you spray it? I don't have any outdoor space and I don't want to spray a bunch of starch inside my house to create a permanent film of stickiness!

Anyway, to mark the placement line on the fronts, I thread traced. I put the pattern piece down on top of my cardboard cutting mat and the put the cut piece of fabric on top of it, in the process realizing that my cut piece of fabric bore very little resemblance to the pattern piece. Moving on. I then stuck pins straight down into the cardboard about an inch and a half on either side of the placement line, like a beetle on a specimen card. Then I thread traced. Even so, my thread traced line wandered amiably like a country creek but it gave me an approximation of an idea of where to line up the two pieces!

Seam Allowance Clipped Under Flounce The pattern is designed to have a contrast band run the whole length of the bottom, including onto the flounce. However, I wanted to have a casing at the bottom, so it required a little engineering. My plan was to finish the flounces with a serger rolled hem and sew the seams as French seams. So I did not add seam allowance to the flounces, while the shoulders and the SA below the flounce stick out from the pattern as "notches," as you can see above on the right front pattern piece and in this closeup of the two front pattern pieces.

French Seam Under Flounce Before I serger-finished the flounce edges, I clipped horizontally below the flounces to create the seam allowances. Then I finished the edges up to the end of the clip before sewing the french seam underneath. I couldn't get the serger in all the way, so the final little bit is just a machine zigzag, but I I was happy with the way my idea played out; it looked great once the band was sewn on.

Topstitch Band on Front

I attached the band as per my usual procedure for things like this. Rather than first sew it to the right side and then attempt the impossibility of stitching in the ditch while catching the underside of the fabric, I sewed the band first to the wrong side then turned over and topstitched to the right side. I left an opening in the seam on the left side, the side closest to the flounce, for the tie.

Armscye Finish The lining was constructed separately, the neckline finished with a bias binding. The lining and fashion fabric are sewn together at the armscye and the lower band. The armscye on this was oddly tight as drafted and I had to trim off about half an inch at the lower half of the armscye and probably could have done more. I added a small cap sleeve (I stupidly used the sleeve from a knit dress and it had to be drastically shortened to allow for any arm movement). The armscye below the sleeve is finished with bias tape, which I hand-stitched to the lining to keep in place.


The last step is attaching the strap to the flounce and creating the drape. The directions for this in the magazine were atrocious, and the line drawing makes it look extremely complicated. In fact, it is super easy. I made my first video to show how it's done! Exciting.

1. Sew your fronts wrong sides together to create the flounces.

2. Pin strap to the corner of the left front (larger) flounce; stitch.

3. Pull the corner of the right front through underneath the strap and arrange.

Front with Lace Skirt Side with Jeans I obviously showed no creativity in the color of the bottoms that I paired this top with, which I did not realize until I was putting together the collage. Oh well, navy is a good match for yellow.

I'm not going to call this project a fail, but my instinct that this silhouette wouldn't work for me is confirmed. I was envisioning something like this DVF, and in the muslin the elastic banded bottom seemed to work, but when the real thing came together it just didn't look any kind of good with elastic. I don't know if I didn't have enough length or width or if the batiste + silk was just too thick at the band, but it looks like a balloon rather than a sophisticated top.

I took out the elastic and just did a tie, but the style is still not flattering. You can really see the sackiness with the eyelet skirt. I think this is a style that works for apple and rectangle shapes but is hard for pears. Most tops in this style are made with jersey and I think there's a reason for that. Even lightweight silk and cotton batiste have too much body.

It is also a little fussy to wear, as the short end wants to flip up over the neck (as you can see in the jeans photo in the thumbnail at the top).

However, I do like it tucked into the lace skirt so I have a way to wear it that doesn't make me look like the Stay Puft Marshmallow Man.

All photos are here and the pattern review is here.