Friday, April 26, 2013

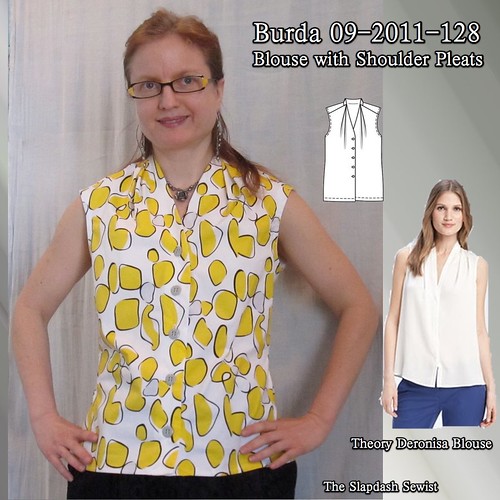
Burda 09-2011-128, Theory Deronisa Blouse

Burda 09-2011-128 Thumbnail

Source: ssense.com via Trena on Pinterest


I don't wear too many blouses, and I'm not sure why.  I think part of it is that a very traditional collar-with-stand blouse just isn't interesting enough for me!  It makes me feel too cookie-cutter lawyer-y (even though none of my co-workers dress like that either).

However, Burda publishes some interesting variations on the theme, including this Burda 09-2011-128.  I don't know that it struck me at the time, but when I was doing some snoop shopping last year I ran across the Theory "Deronisa" blouse, $200 and available in various colors.  I remembered this pattern and could see the possibilities in it more.

This was sort of a wearable muslin--made with fabric from Robin's swap party!--intended to see if the pattern would be nice for a silk with long sleeves (redrafting the shoulder to remove the extension.  I think it will work, though it is (mostly) past long sleeve weather so it will probably be a project for next Fall.
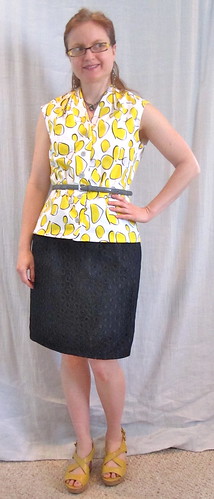
Front


My main alteration to this was to add a CB seam and back darts.  It would otherwise be fairly shapeless, though to give Burda credit the Deronisa blouse is rather shapeless as well.  I used my basic woven pullover top to get the shape of the back seam and the darts.  Makes life so easy!


I did not do anything for an SBA.  I thought I might end up needing to narrow the front pleats, but I don't feel that this is excessively large over the bust. 


Made by Evyline did an excellent photo tutorial on the unusual collar construction.  I won't repeat her work--definitely check it out if you plan to make this.


 Just to pique your interest, the collar is in the back only. The front extends past the back bodice, drafted in a length to meet the collar, so the blouse is a consistent height from the front to the back. I think it's a great way to get the extra formality/crispness of a collar without being too much.  The front darts are rotated into the neckline pleats.
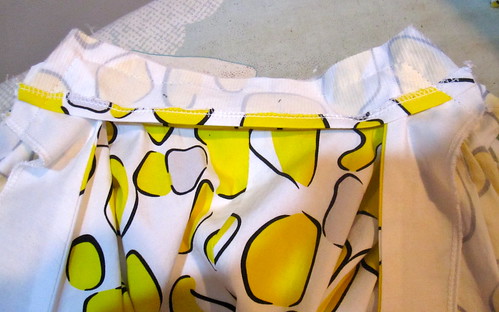


Fold SA of Inner Collar Under

You first stitch the outer collar in place, then finish it by stitching the inner collar over it.  Be sure to fold under the seam allowance of the inner collar before pinning it in place so it will be neatly tucked under when turned to the inside.
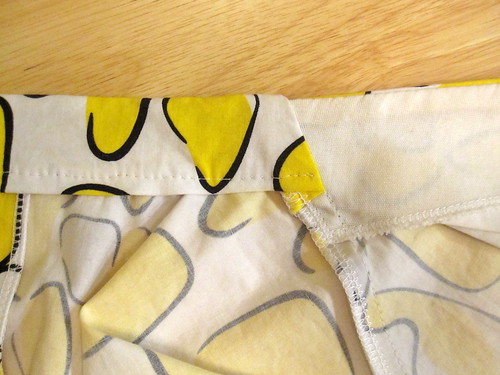
Finished Collar/Facing Intersection, Inside

You can see that rather than radically trim the side seam of the collar, I left it pretty wide and focused on turning it inward to create a neat corner.  I find that when I clip very close to the seams on collars, it is actually harder for me to get a sharp point than if I clip the long edge close and leave the short edge longer and concentrate on folding the SA in and pressing in place.
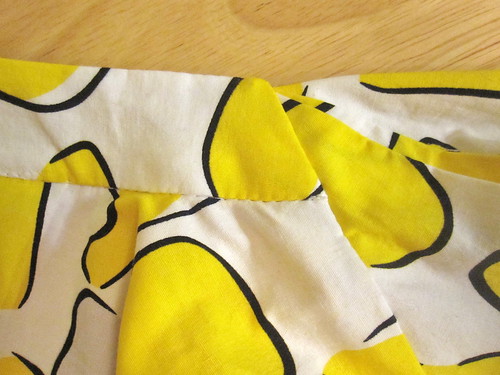
Finished Collar Pleat Intersection, Outside

Here's what the collar looks like on the outside when it's finished.  Feel free to observe my truly horrendous attempt at stitching in the ditch.  I never stitch in the ditch; this is why.  Next time I would probably either topstitch, or more likely hand stitch the inner collar to the SA.
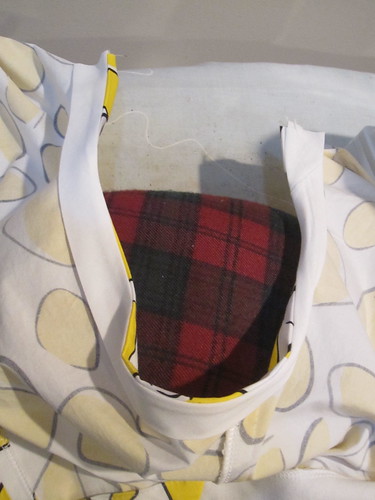
Finish Armscye Before Side Seam

I finished the armscyes with bias tape before sewing the side seams, mostly because I am really lazy about measuring bias tape and the opening it's meant to finish to get an exact length.  I don't know that this was the best method; at the very least, I should have extended the bias tape 1/2 inch beyond the edge of the fashion fabric on each end.

My house made (to pretend that we are at a fancy bistro) bias tape is too wide.  I may need to go in and trim it, leaving a raw edge because it folds under on itself and threatens to show.
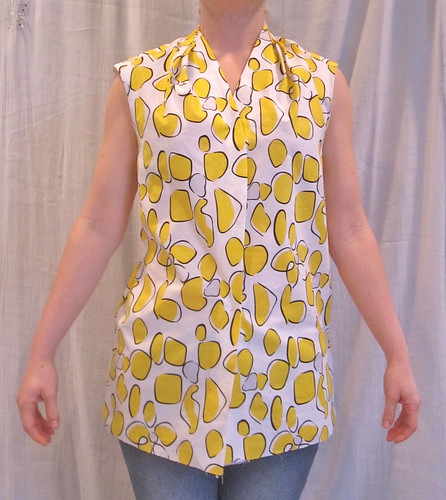
Length as Drafted


It is drafted CRAZY long.  There is also a dress length for this pattern.  There is no indication the shirt is meant to be a tunic but that's about the length they have marked for the blouse hem.  I ended up shortening it by 5 inches.
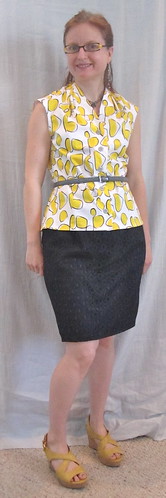
Front
Back


I keep talking about all the sloppy things I did in making this (and while we're on the subject, the hem is totally crooked), but actually for the most part I think it is quite well done, if I do say so myself.  The pleats came out sharp, and the front facing finish is crisp.  The corners of the collar are not *perfectly* flush with the front, but pretty darn close.

I like the blouse a lot, but I'm not crazy about the shape of the armscye.  It just sits a little weird.  I don't know how much of that is related to my extra-wide bias tape and crisp fabric, though.  I am definitely interested in making the pattern again.

I've paired it here the my Burda 09-2008-108 skirt, in wool with a lace overlay.

All photos are here and the pattern review is here.

Thursday, April 18, 2013

Burda 09-2007-101: I Keep My Promises

Paisley Front, Pockets

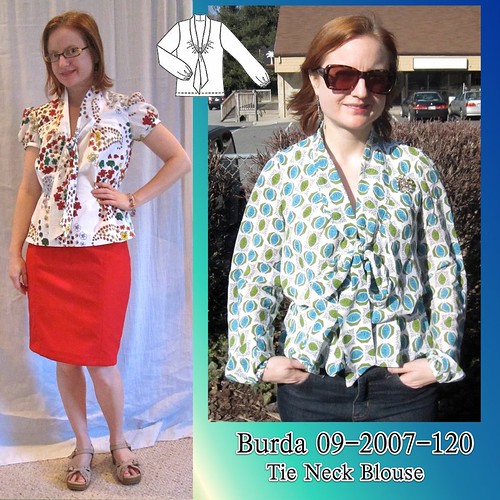
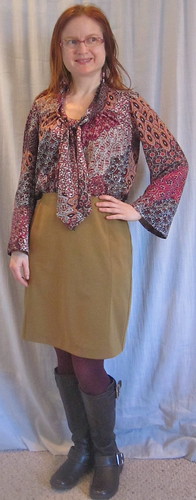
So remember the fabric orgy that was November for me?  With the glorious trip to Fabric Mart?  (Not to mention the trip to NYC.)  This lovely paisley print rayon challis ($5.99/yd) is one of the fabrics I bought on that trip, and I promised to make it into Burda 09-2007-101 at my earliest convenience.


Burda 09-2007-120 Thumbnail


Well, I did.  I can't remember exactly when--sometime late December or early January.  I don't have anything to add to my blog post of the two earlier versions of this blouse, so this is just to show that I really do sew (some) of that fabric I buy.

Paisley Back

I only thing did a couple things slightly differently.  I put a simple hem into the sleeve, rather than gather it with elastic as prescribed by the pattern.  I wondered if it would annoy me or be weird, but other than looking like I have no hands from the back, I actually like it quite a bit.  It's not a top for doing too many dishes in, though.

I raised the neckline up another inch, and instead of having it tie I stitched a separate loop of fabric to center front that the ends pull through for a mock tie, as I did for Simplicity 2305, which reduces the weight significantly so the CF isn't pulled down.


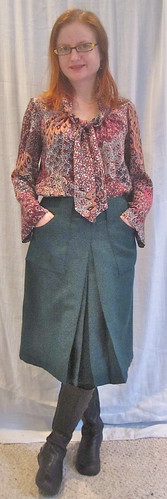
It's a nice match for both the green wool Burda 11-2009-120 skirt--though I am dissatisfied with the length and am going to have to rip out all that topstitching on the inverted pleats, again, to shorten it, again.  It's juuuuuust barely acceptable with boots, but absolutely cannot be worn with any other footwear.  It's a good skirt and I'd like to get more wear out of it in Spring and Fall.


Paisley and Mustard, Front


I also like it with the Burda 01-2008-127 mustard ponte skirt, for a different look with the fitted bottom.

The rayon was easy to sew.  I'm always nervous about the durability of rayon, so I sewed it with French seams.  So far it's holding up, but with my, ahem, deep closet it only got a few wears this season.


All photos are here and the pattern review of the previous versions is here.

Friday, April 12, 2013

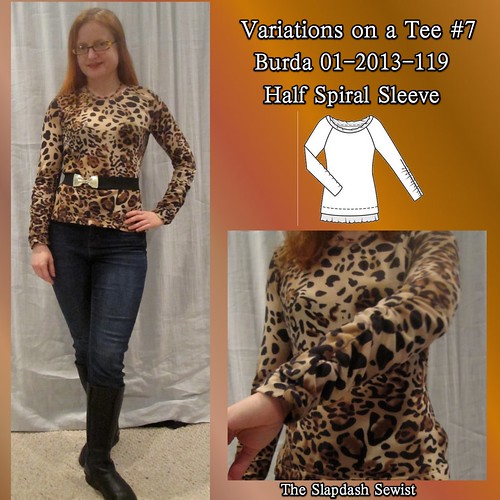
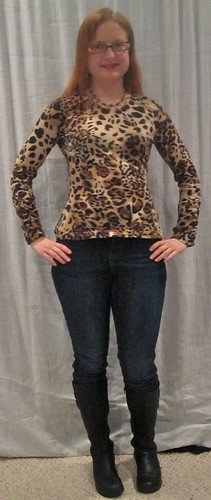
Variations on a Tee # 7: Half Spiral Sleeve

Burda 01-2013-119 Thumbnail

I am way behind in blogging.  I actually made this top in the nick of time for Jungle January!

The variation on this tee is that I used the sleeve from Burda 01-2013-119.  A while back on Pinterest I saw these Handmade by Carolyn spiral leggings.  I was fascinated, and loved the way they draped.  I vowed to use the idea for a sleeve eventually.  Well, lo and behold January's Burda arrived with the pattern already drafted for me.  I would still like to do a full spiral eventually, but I am in love with this sleeve.

Three Quarter View


The Burda pattern is a raglan sleeve tee, but it was very easy to transfer this feature to my set-in sleeve block.  I traced the sleeve head onto tissue, and then set the tissue on the Burda tracing sheet.  I lined up the underarm corners of the sleeve patterns, ignored the raglan sleeve head, and traced down the body of the sleeve.  The raglan sleeve was a bit wider than my set-in sleeve, so I just sort of centered my sleeve over the raglan pattern and blended.  The photos of this process were useless, because of the maze of Burda tracing sheets.

The sleeve was long for me, so I folded out 1 1/2 inches of length.  It was still pretty long and the next time I made it I shortened it a little more.

It is very hard to get a picture of your own arm.   Hopefully the photos give you some sense of what this looks like!


Sleeve Progression

The sleeve is easy to construct.

First, sew the gathered seam, starting it with a little dart.   I serged the seam first, then used the sewing machine to put the dart in the top.

Stretch Clear Elastic While Applying


Next, I gathered the seam using clear elastic.  I threaded the elastic through my buttonhole foot and then pulled is as taut as I could while stitching it over the seam.

That's it.  From here on out you treat the sleeve as you would any other.


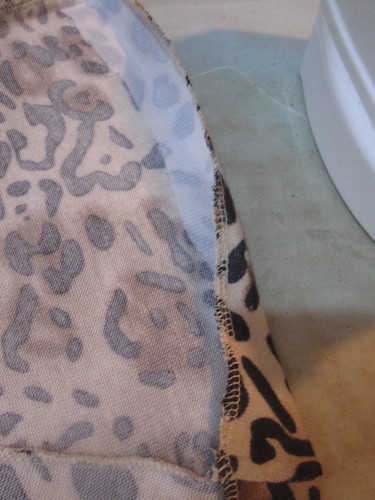
Interface Hem


This sweaterknit ($4.99/yd from Fabrics 4 Less in NYC last November) is lightweight and a little difficult to handle.  In order to turn up the hem with a minimum of drama, I fused a strip of knit interfacing to the hem allowance before turning it up.  Although the interfacing has some stretch, it doesn't stretch nearly as much as the fabric.  However, since the hem is the widest part of the top, the lack of stretch is not a problem.


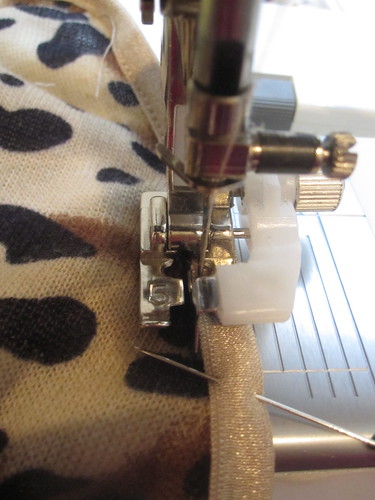
Use Blind Hem Foot on Foldover Elastic


I finished the neckline with foldover elastic.  I sewed the first pass using a zigzag, then folded the elastic over to the front.

I used the blind hem foot as a stitch guide, clicking the needle to the right to stitch juuuuust along the edge of the FOE.  The result is awesome!

I'm still working on the proper proportion of FOE to neckline.  1:1 results in a saggy neckline.  I think here I did it 80% as long as the neckline.  However, with my lightweight fabric it took a bit more than I wanted and raised the neckline to slightly higher than I would prefer.


Front Unbelted
Back

This sleeve is just awesome.  I've always liked the look of ruched sleeves, but they can just be too much fabric.  This gives the look without the bulk.  There is not a big bunch of gathering at the wrist to get dragged through dishwater, and it doesn't do weird things under a coat.  I've used it on another tee since and am sure it will show up for years to come!


Have I mentioned in the last five minutes how much I *love* having a TNT tee that will be the perfect fit and the perfect length right off the tissue?  Love.

All photos are here and the pattern review is here.


======================

You know how hard it is to find time to sew after work and taking care of everything else?  So does The Onion.  The linked article is uncomfortably dead-on, in the most amusing kind of way (disclaimer:  I actually like my job).

I have been feeling really pressed for time lately, and I really don't know why.  I've been getting more responsibility at work, but it hasn't required me to work extra hours.  I do spend a lot more time *thinking* about work outside of work.  Nothing else has changed.  It's not clear why this change is causing me to feel the strain.  At any rate, it has been affecting my blogging and I apologize for being a bit scarce lately.  I'm not going to pressure myself to "produce"--this is my hobby!  So I will probably continue to be scarce for a while and hopefully will eventually get over whatever this is.  I've still been sewing a lot and have a large backlog of projects to share.

Wednesday, April 10, 2013

A Visit to the Cherry Blossoms

Sunset


I will apologize in advance for having no sewing nexus here!  The weather turned unexpectedly hot and I didn't have anything new to wear to the cherry blossoms this year.  I didn't have a photographer with me, either, and the photo I asked a stranger to take barely shows the dress I was wearing (my Burda 06-2008-108 shirtdress with a cherry blossom-evocative print).


Even without a new dress, I wouldn't miss the cherry blossoms!

I visited after work on Monday, and got there just about sunset.  I loved this venerable old tree.


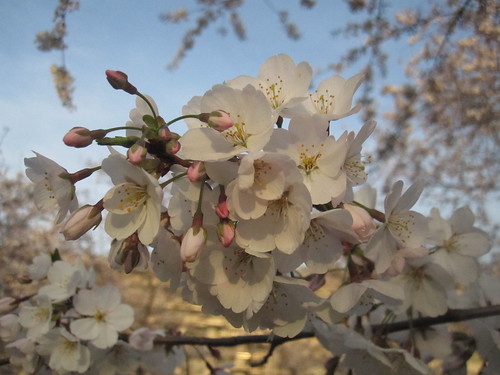
Blossoms and Buds


We had an unusually cold Spring, so the blossoms--which were originally forecast for peak bloom on March 25, because of our mild winter--were still not quite there when I visited on Monday.

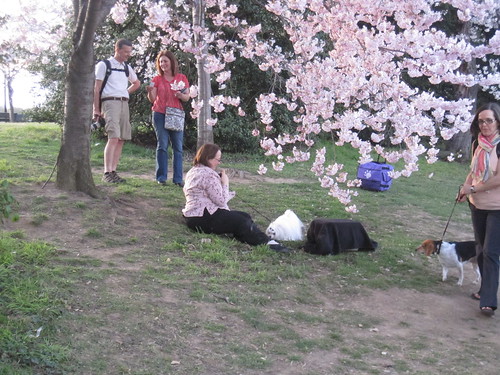
Pet Photo Session


I shared my blossom experience from people all over the world, everyone drinking them in and trying to get the best shots.  This one was a first for me:  a pet photo shoot.  This impeccably-groomed dog  was having none of sitting on the black-covered pedestal and posing decoratively under the blossoms.  None of it.  I do not know if the second dog in the picture was waiting his turn, or just a bystander.


Dead tree, Duck

Every year I'm surprised that this dead tree has survived a culling.  Its bare branches do make for a wonderful photo op, though.  Here I waited for the duck to paddle to just the right spot before snapping the photo.

Monument Reflected


The Washington Monument is getting covered in scaffolding to finally repair the damage from our Great DC Earthquake of 2011 (I use this ironically--I grew up in Southern California and while it was certainly strong enough to feel, it was not a big earthquake).  The scaffolding has its own charm.

Jefferson in the Distance


There is nothing more picturesque than blossoms and water!

Trena


A kind stranger took my photo.  The lighting was bad, but the flash version of the photo was terrifying. Luckily, I was not the star of this show.

Sunset


As the sun went down I headed home.  Can't wait for next year's!

All photos are here.

Tuesday, April 2, 2013

Silk Exhibit and Silk Confession

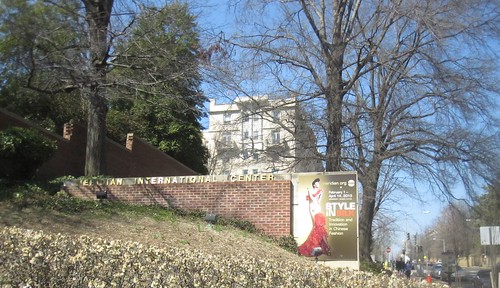
Meridian International Center

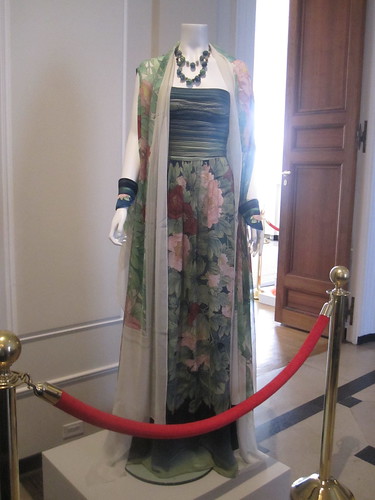
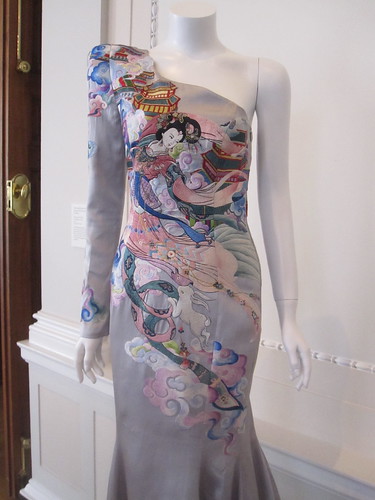
Hand-Painted Dress

The Meridian International Center, across from Meridian Hill/Malcolm X Park on 16th St. NW, is having an exhibit on silk from China through April 14.  The exhibit is free to visit.  I never even knew this place existed but it is a really lovely space--almost on a par with the Hillwood mansion (and, bonus, a 15 minute walk from my house).  Nikki found out about it and we visited after the DC meetup.

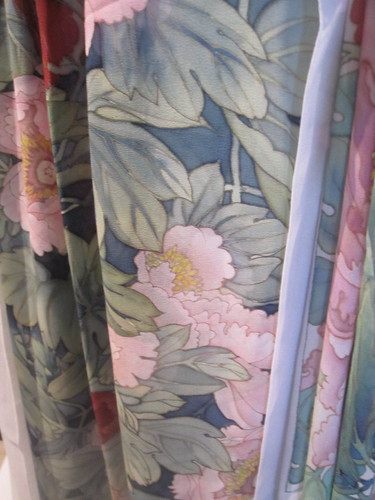
Closeup of Hand Painted Flowers


The dress above is made of hand-painted fabric.  The perfect detail is pretty breathtaking.  I can barely draw stick figures.  I like the cuffs that are part of the ensemble.  They are an interesting, avant garde touch and yet somehow don't scream "trying too hard."


Paper Cutout Closeup


The exhibit starts with folk art displays on the silk-making process.  This paper cutout--part of a set of four--kind of blew my mind.  There are also some brightly-colored folk art pieces, which are sort of in a naive style but have a sophisticated grasp of color.  I adored the blue-green piece.

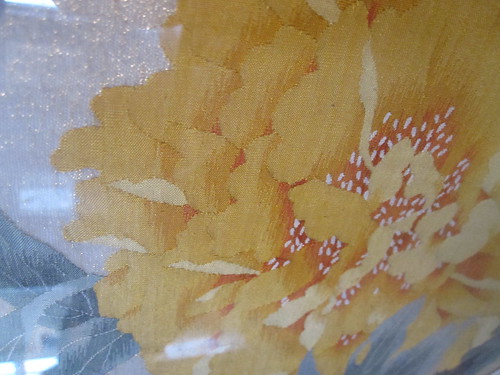
Based on Ancient Embroidery


Then come the silk samples.  There are reproductions of pieces that show Chinese silk-making techniques over millenia.   Nikki and I could not decide whether this reproduction embroidery had been done by hand or machine.  It is in a split stitch, and the stitches are so perfectly precise and even it seems impossible that a human could accomplish it!


Tapestry


The depth on this silk tapestry is astounding.  The tiny, perfect length fibers!  The shading and coloration!

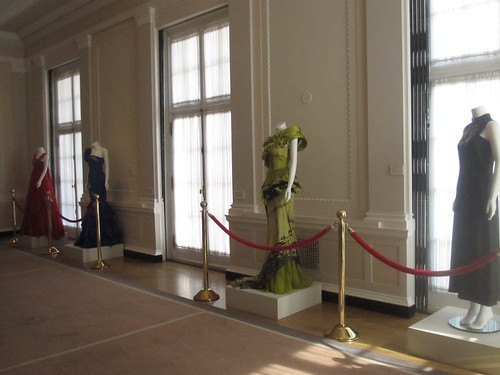
Silk Dresses

The last room displays several evening gowns of the "more is more" school of design.  There was a lot to look at on each piece.

There is also a can't-miss video playing on a loop in this room.  It's worth watching the whole thing.

Embroidery

Nikki and I were mesmerized by this heavily embroidered Pop-Art-Meets-Tradition gown.  The pieces of the dress had been embroidered individually and then assembled, which I thought was curious.  We decided this means it was probably machine embroidered, as a machine would need flat pieces to work with.

I was so pleased that Nikki had found out about this exhibit.  What a gem.  And I couldn't believe it was free!  The docent was incredibly kind.  She seemed very excited to have us there and made sure we knew about the upcoming Festival des Artistes, which will be held this weekend at the Duke Ellington School of the Arts.   The Festival will feature artists from China, Iraq, Israel, Peru, Brazil, the Gambia, and many other countries around the world.  So if you don't have weekend plans yet...

All photos are here.

===================

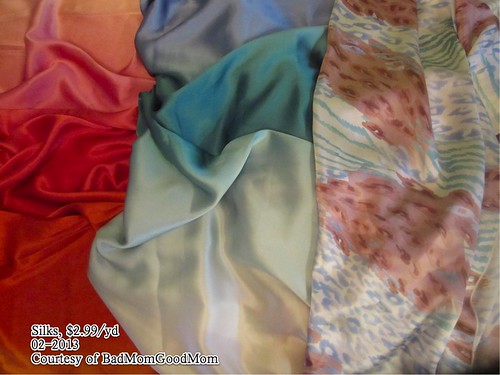
Silks 2-2013

A while back BadMomGoodMom mentioned finding some silks at her local jobber for $2.99/yd.  It was so entirely tempting that I asked her if she'd be willing to get some for me.  She was kind enough to oblige and found these three beautiful pieces for me.  The two on the left are ombres.  The print on the right is so Downton Abbey, right?  Though I don't normally go for pale colors, I just love it.  I think Burda 03-2013-113 may be just the ticket.  It's evocative of a vintage look without being costumey.  I am normally highly skeptical of a dropped waist, but this one doesn't look like it would be too tummy-terrible.
Fabric Mart 3-2013

Fabric Mart, you are my downfall!  For the turquoise cotton damask, I think I will finally tackle Vogue 8576 (now out of print).  I really like the style but it has a thousand pattern pieces so I've been putting it off.

The wool might become formal shorts.  Is this crazy?  I mean, the idea of me in shorts is crazy anyway, but wool seems to defeat the purpose of shorts.  But I like the look of this wool, with a slight hint of sparkle, for dressy shorts.

You've already seen the silver damask.  You can see that I again used the "wrong" side of the fabric, as with my Oscar de la Renta knockoff (which was also a Maggy London fabric).

The last piece is what prompted the order.  I need to make a rule against ordering anything online after 10 pm.  For some reason, this gold pleated knit grabbed me and wouldn't let go.  I don't know.  The boyfriend will LOVE it in a body-conscious summer date night dress, and the pleats will feel a bit camouflaging of the belly.  Whether I actually have the guts to wear a body-conscious dress made out of this stuff is a whole other question.  Though it is a knit, it has very little stretch because of the gold metallic coating (which I will wear on the inside, using the lighter non-metallic gold as the right side).  The pleats came out of a prewash completely intact, which was a pleasant surprise.