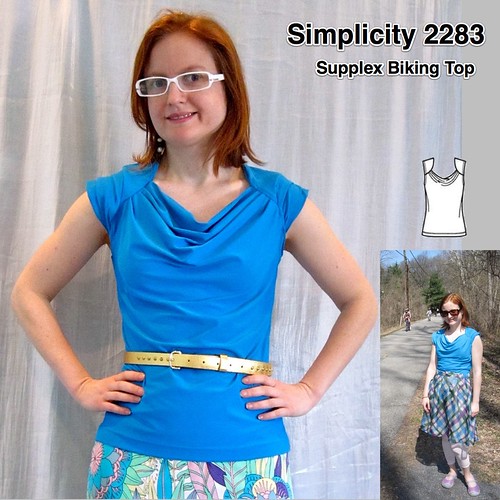
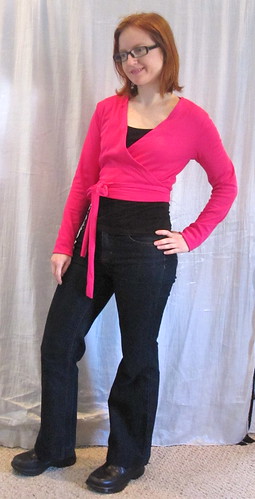
I love me a good knit cowl top, so I had to give Simplicity 2283 a try for one of my Supplex piece. I was intrigued by the front shoulder yoke.
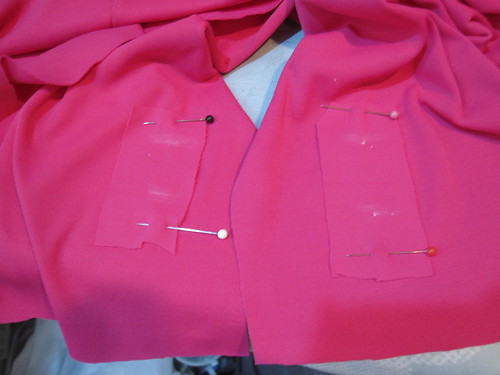
The key to a pleasant cowl wearing experience is an adequate cowl facing. If you have enough self-facing coverage, you can put the top on in the morning and not think about it for the rest of the day. If the facing is skimpy, you will spend every spare moment making sure the facing hasn't flipped to the outside or is otherwise visible.
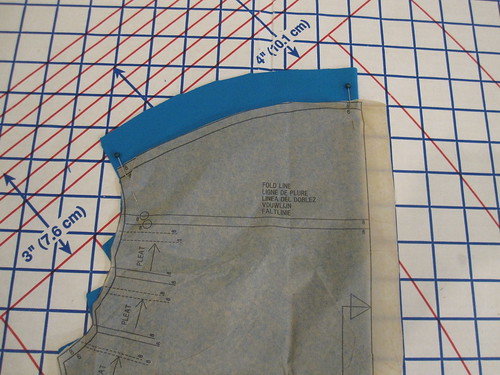
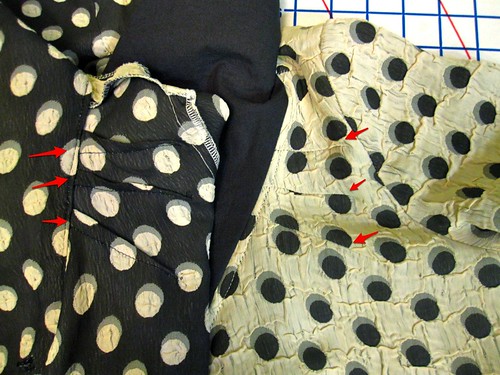
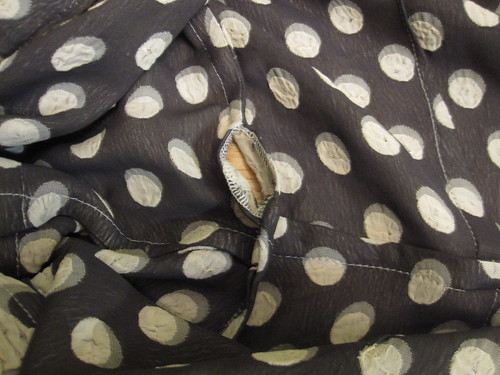
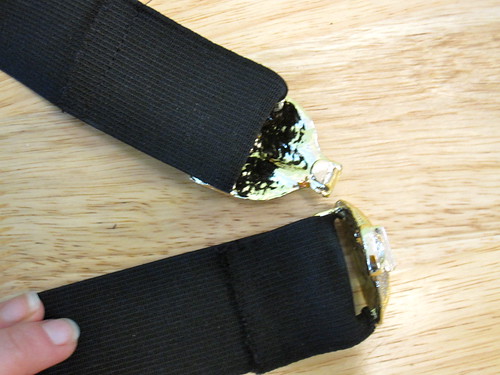
The facing on this was pretty good as drafted, but it is my opinion that you can always go longer. So I added an inch in cutting. As you can see on the inside, it is securely caught into the yoke seam and there is enough length hanging down at center front that the facing is not going to flip out. I had no troubles with it while wearing for bike riding (though admittedly I was wearing a fleece the whole time other than for the photos).
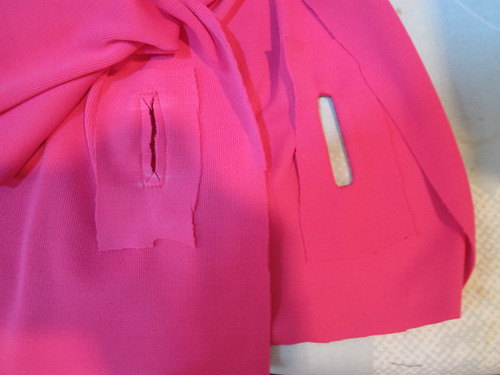
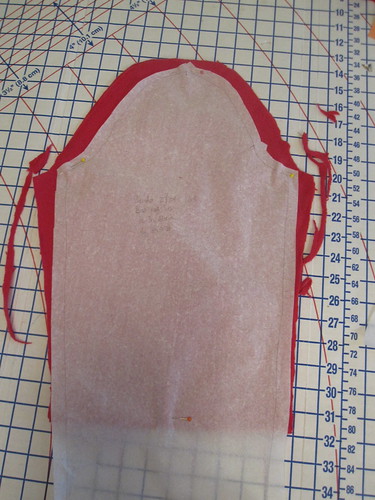
As mentioned, for biking tops I want some shoulder coverage for sun protection but in general don't want a full sleeve because of, well, armpit sweating, to be graphic. Extending the shoulder here wasn't going to be easy because of the yoke. I wasn't even considering the funky sleeve until I saw SewWil's pattern review. Her sleeves are great and look breezy and comfortable, so I cut the fun little pleated sleeve.
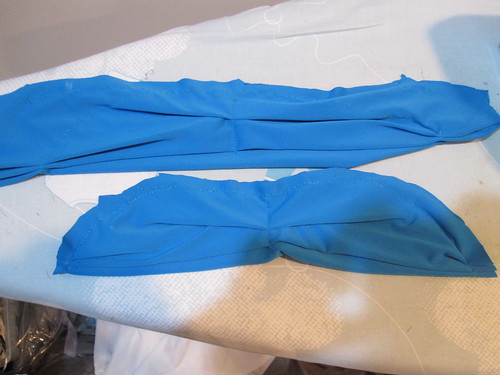 On SewWil and on the model it looks like there is plenty of room for a breeze under the arm, but on my I found that the sleeve amounted to a giant wad of fabric in my armpit as the armscye is quite high on me.
 Never one to give up, I decided to turn the sleeves into cap sleeves. I marked the pleated, finished sleeve units with arcs, stitched along my marking, and cut 1/2" away from the stitching for a seam allowance. I then sewed in the sleeves and turned under and stitched the lower part of the armscye. This gives me the shoulder coverage I want with the underarm ventilation I need. If you look closely (or not even that closely) at the photos you'll see that the sleeves are not quite symmetric. Oh well! If I do this again, though, I will fix the sleeve in the drafting/cutting process, not after it is sewn.
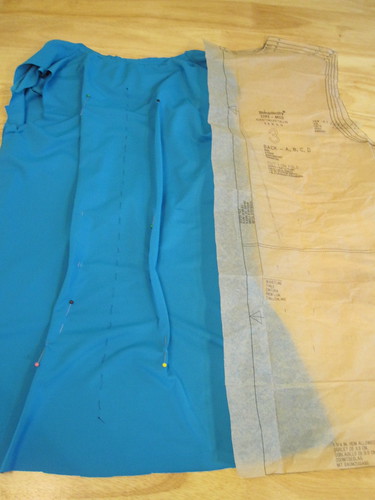
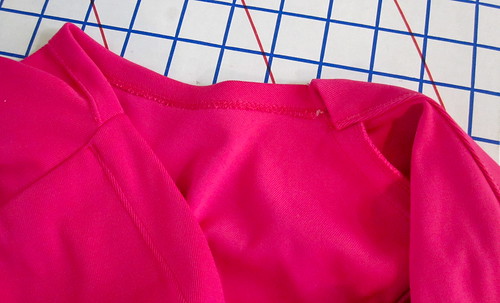
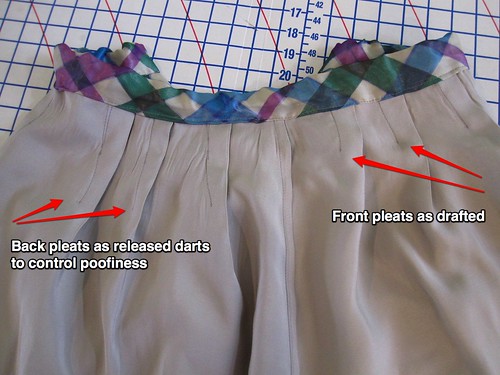
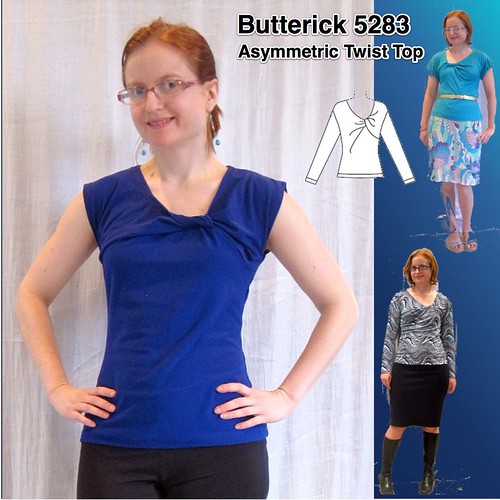
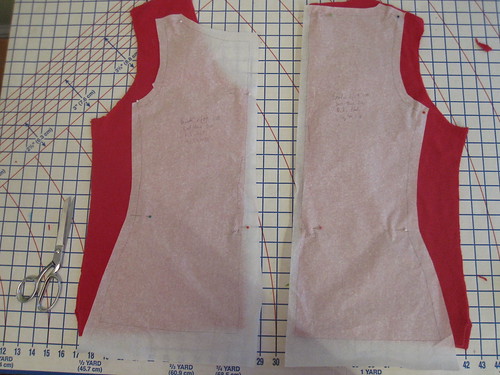
When making the back darts in my B5283 twist top, the hardest part was figuring out where, exactly, center back was. So for this project I thread-traced center back before unpinning the pattern tissue. So very uncharacteristic of me.
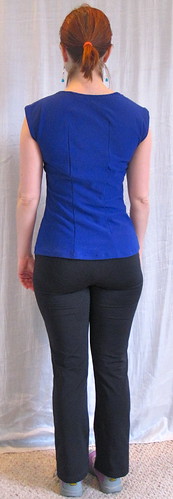
Having CB marked made it a lot easier to place the darts, and also made it easier to transfer those darts to the pattern tissue for next time. The shape of my darts matches the idiosyncratic shape of my body. Most of the dart volume is not at the waist but below it at my swayback, and the width of my latissimus muscles means they have to go up nearly to the shoulder to avoid a puff at the top.
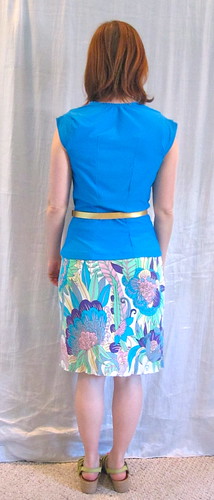
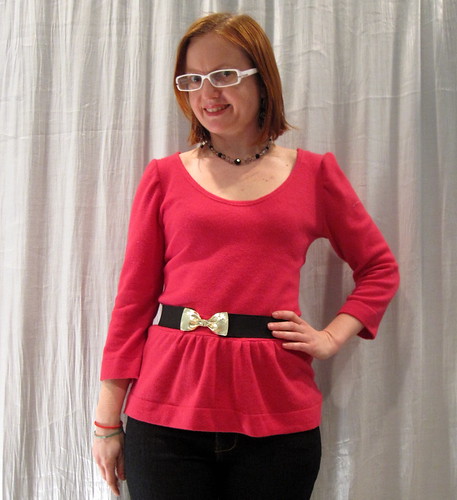
Pretend I had had the sense to make sure the back was not caught up above the belt before taking this photo. But on the right side, where the belt has not taken up a fold, you can see that it sits fairly flat on my back rather than ballooning out over my swayback.
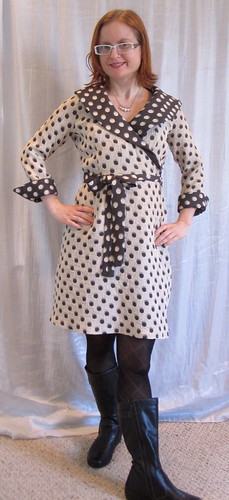
The only thing I don't like about this pattern is that it can't be turned into a dress! The cowl width in the front sort of cascades all the way down to the hemline and would not translate well to a full length piece.
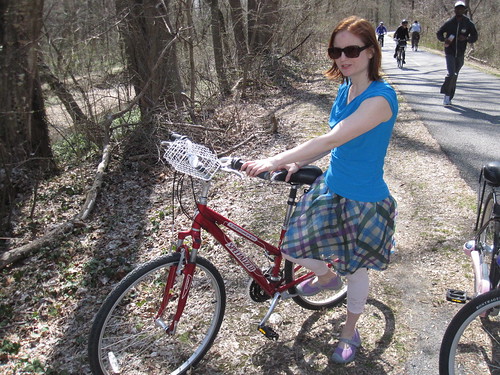
As you can see I've already tested it out! It gets the thumbs up.
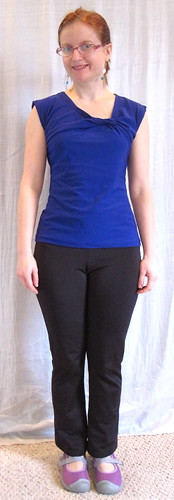
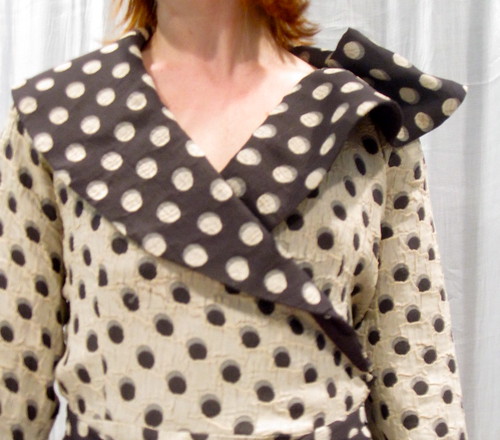
I love the sweetheart look of the neckline, that the narrower cowl that is not too low cut, that the facing that stays firmly in place, and the interesting yoke. I did not interface the yoke as directed in the pattern because of the thickness of my fabric--I feared it would be way too stiff and sit awkwardly--though now that it's done I think I should have. I would recommend interfacing if you're using anything less than a double knit.
All photos are here and the pattern review is here.
=====================
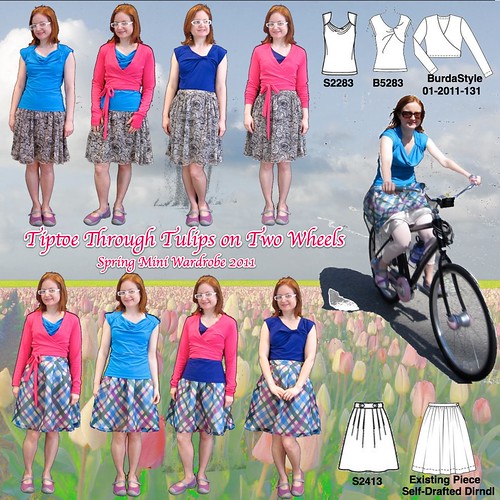
And that is the last piece in my Mini Wardrobe for the PR contest. The challenge was to start with an existing piece in the closet, sew four pieces during the contest period, and end up with at least 6 outfits. I managed to pull off 8!
I started with my self-drafted black and white print dirndl biking skirt from last March.
Then I added two tops, this one and the B5283 twist top.
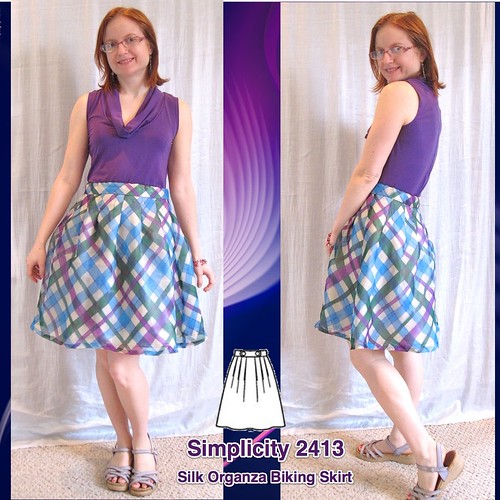
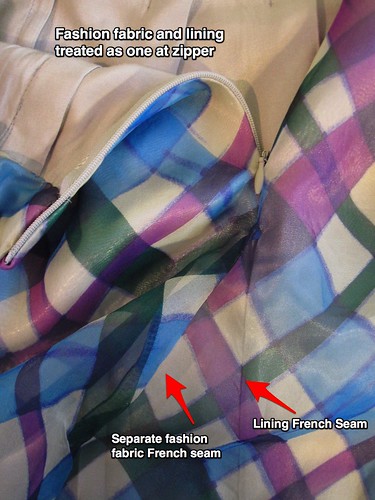
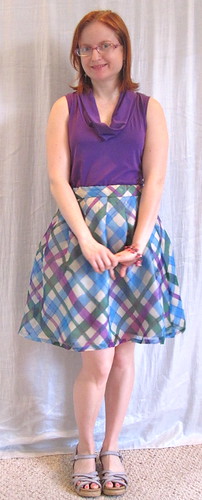
Next, I needed another skirt, the S2413 pleated silk organza number. Oh, and by the way, I wear biking shorts under the skirts. I'm not going around flashing.
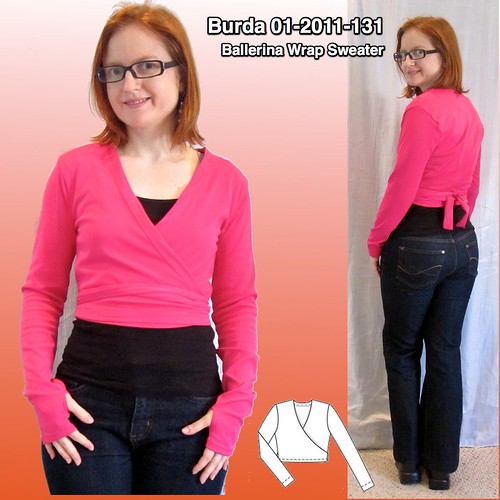
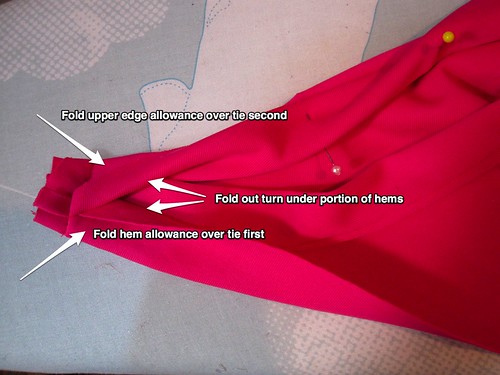
Finally, a topper in the form of this Burda 01-2011-131 wrap sweater.
I love all these pieces individually and I love how they work together. I still have more sewing to do for the trip--more tops and more skirts, which will be fun, and more rain gear which makes me want to die. I muslined the pullover rain jacket last weekend and have not been able to motivate to cut it out this week. I need to pull up my big girl panties and just get started. Then I can reward myself with fun, bright, cheerful sewing (not that it is fun, bright, or cheerful in our persistent, endless winter; it is killing me, people).
All photos for the mini-wardrobe, showing each look as well as the disaggregated pieces, are here.


.jpg)


.jpg)


