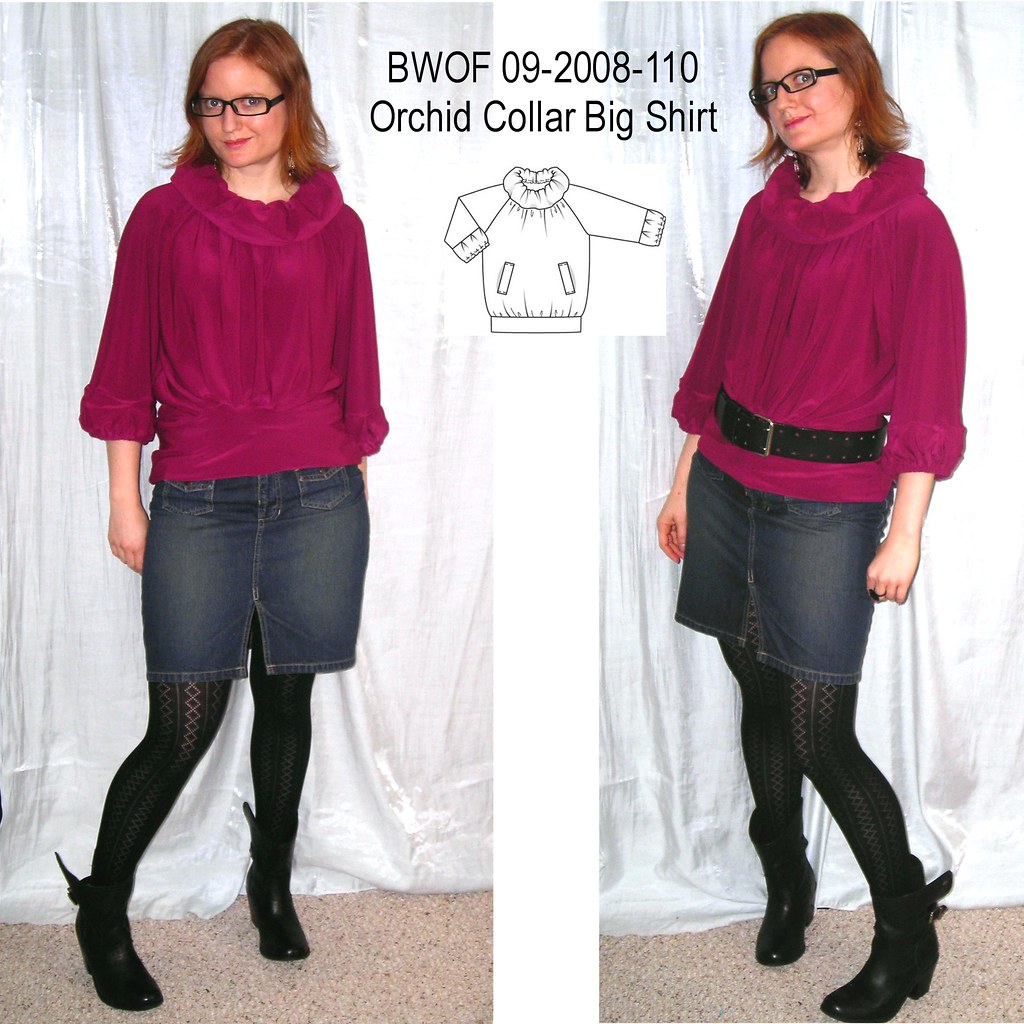
The people have spoken! Team Circus Sideshow stuffed the ballot box as the polls were closing, but in the end 61% voted Luscious Lioness. This poll thing is fun! And because their will happens to agree with mine, so it shall be done. The collar stays poofy on BWOF 09-2008-110.

I didn't intend to go with the narrow unfitted hip band as designed in BWOF, though I was tempted when I saw Marita Kinnula's minidress version. This is super-cute as a minidress. Along with Daniel V's orchid neck blouse, what won me over was that the silhouette could be adapted to match that of Simplicity 4020, seen at left. This has been a favorite pattern on PR two years in a row mostly for the kimono top view (which I've made) but which also has a cool 80s-ish dolman sleeve top with a wide hip band. I love the top but don't wear it too often because the wide neckline is fussy to wear, so I wanted something that could sub into my wardrobe. In pulling the Simplicity 4020 top out to look at the length of the top and the hip band I hit upon a solution to fix the neck so this project was like two tops for the price of one!
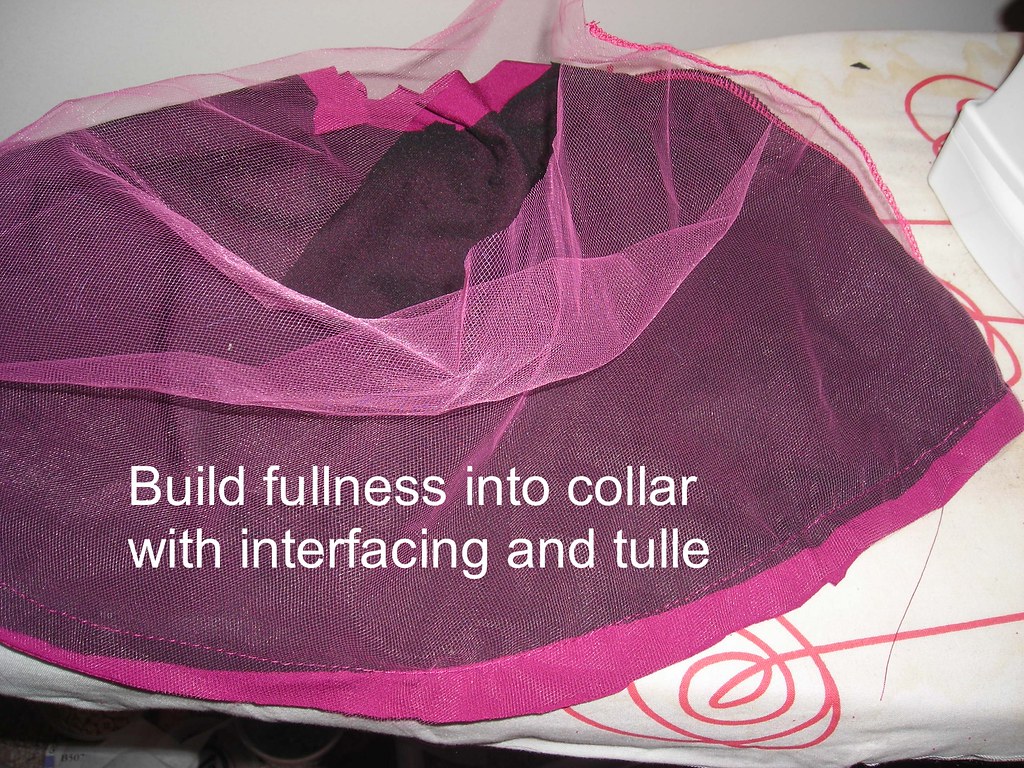 So, in planning the top I was certain I wanted the collar to be very poofy, so I did some samples and decided to use a knit interfacing purchased at Jomar. I wish I'd bought more interfacing while I was there. A bus ride to Philly is pretty cheap... I also added a layer of tulle, which I have found to be a great way to add body without bulk. The photo at right shows the tulle basted in with the gathering stitch.
This project was the sewing course for BWOF's 09/2008 issue, so I thought it would be no sweat. I am generally aggrieved by their selection of projects for the sewing course. It seems that they usually choose the most ridiculously easy project in the entire magazine as the sewing course. This project was intended to include single welt pockets so that qualifies as a difficult design element, but the rest of the project is an easy peasy unfitted knit top.
And THEN, after all that, they don't show or discuss the only difficult construction step (other than the aforementioned pockets): sewing the gathered edge of the collar in place. BWOF's order of construction is to sew the smaller ungathered edge of the collar right sides together with the neck, then gather the larger edge, and then "[f]old collar half to inside and pin in place over joining seam. Work from the right side of the garment to stitch exactly in line of collar joining seam, catching inside half." There is no illustration. It's not that I don't get it--I understand exactly what they're saying--it just seems needlessly hard. Why sew the easy half of the collar in place using the easy method? And then try to mess with a bunch of gathering out of your line of sight while you're trying to be exact in your seam? And after all that end up with a mess of gathering and raw edges inside your neckline where it's likely to flip out and show at any second? No thank you.
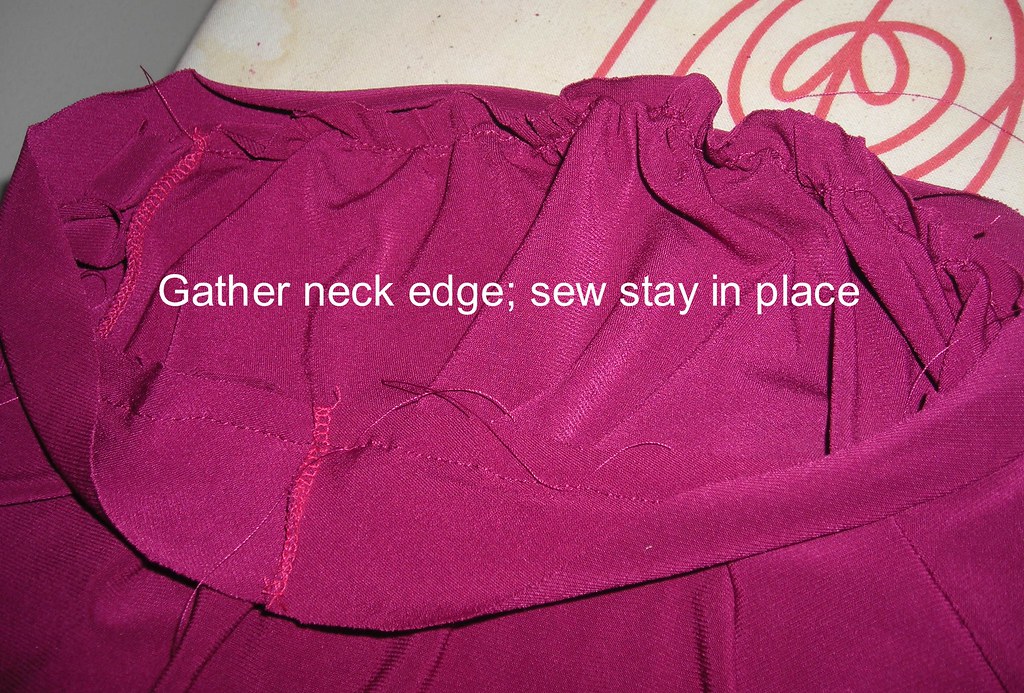
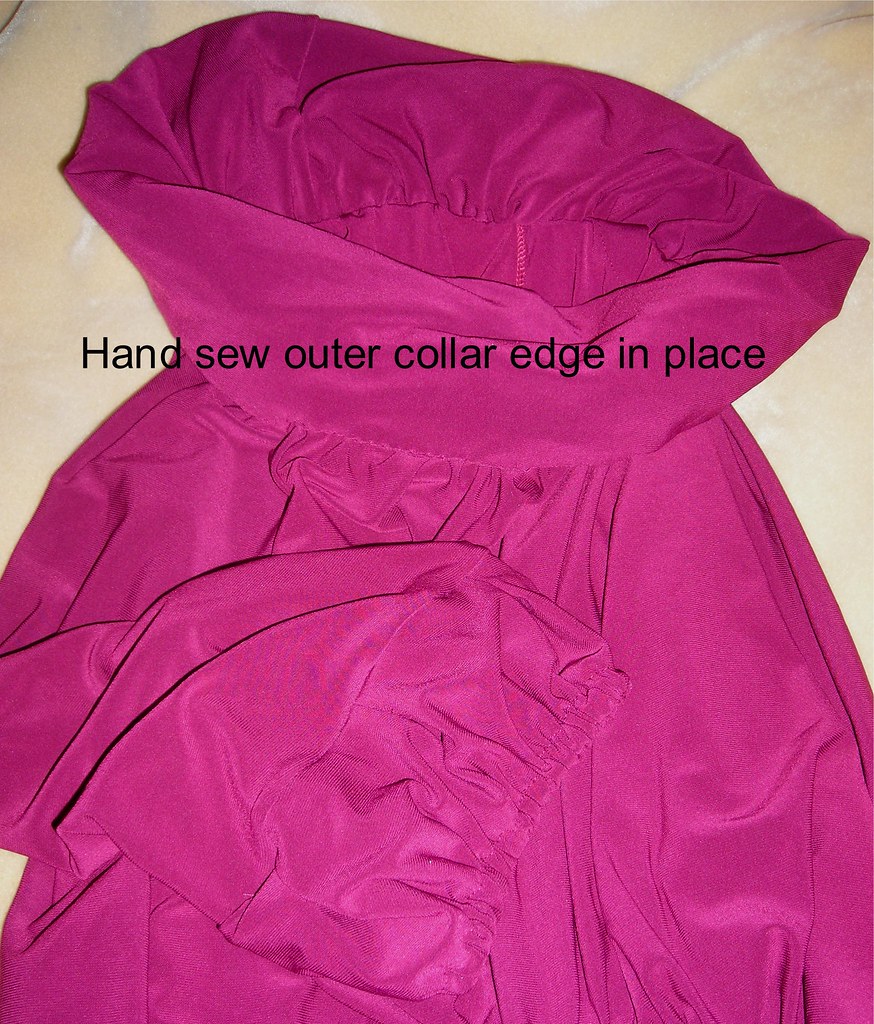
My method of collar construction:
-Cut out a neck stay, just the first inch of the collar pattern on the narrow ungathered side.
-Sew the center seam of the stay.
-Gather the neckline to the stay, and then sew the stay in place, right side to right side.
-Gather the wider edge of the collar (including tulle) and sew in place on the inside (right side of collar to wrong side of shirt).
-Fold the collar over (fold the narrow edge over to the outside of the shirt), push up the stay, fold the seam allowances inward (I didn't interface them so this would be easier), and hand-stitch the narrow edge (as seen in the photo above right) of the collar to the stay right next to the stay seamline.
The collar flops down and hides the hand finishing and there is a clean finish on the inside.
To get the length and hem band look that I wanted I cut about 7 inches off the bottom of most of the shirt, cutting into a gentle bell curve at the center front with a maximum of 11 inches. I concentrated the gathering at center front and center back to avoid giving myself a muffin top, and the CF had to be cut a lot shorter to keep the shirt from billowing too much at the gathers.
I cut the hip band 10 inches wide for a finished (doubled) width of 4 1/2 inches. I tapered it at the sides; the upper edges (plural because it's doubled) are an inch narrower than the lower edge.
I had also intended to do simple sleeve bands as in Simplicity 4020, but in seeing it made up by others I actually liked BWOF's needlessly complicated sleeve cuffs. To scale to my frame I had to cut 2 1/2 inches off the bottoms of the sleeves and use a shorter length of elastic in the casing--11 inches versus 12 3/4.
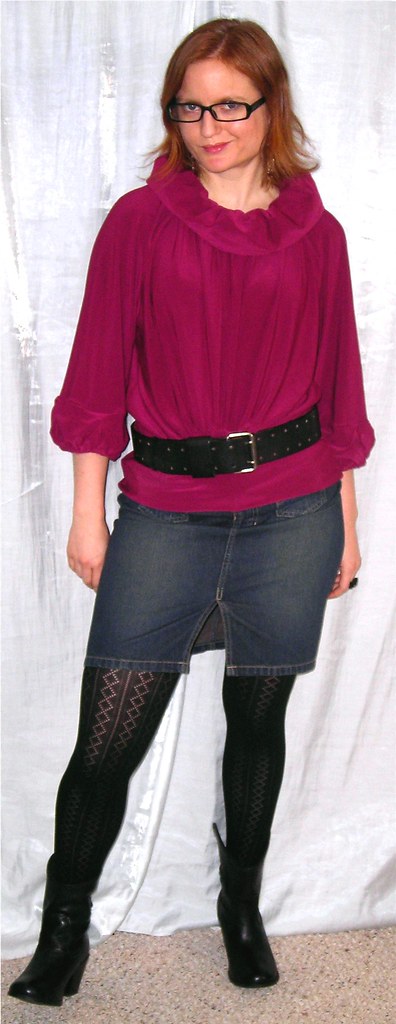 I am actually really loving this shirt now that it's done. I feel like it's very different from my usual Retro-Fantasy Ultra-Femme Rainbow-and-Unicorn-Stickers-Level-Girly style--more rocker chick than fairy sprite. I tried to convey this in the photos. I am loving it accessorized with a tough black belt. Trivia: I actually inherited the belt from my grandfather. It was in his closet when he passed away. It is a totally tough (or "tuff" as the hipsteremo kids would say) rocker belt and I can't imagine him ever wearing it, but I love that I have something of his that I can wear.
Oh, and as another aside, I was intrigued by the comments that called this a bold color. In my wardrobe hot pink is practically a neutral. In fact, anything that's not a print is a neutral. It never even occurred to me that the color could be considered bold and therefore a design element in itself! I suppose that tells you something about my (lack of) taste.
The review is here.
========================
I can't remember who suggested widening blog columns last week and can't find the post, but whoever did, thank you! Please let me know if the newly widened main post column does not work on your screen. How comfortably it fits on the screen appears to vary by computer and I don't want the text to run off the edges!


.jpg)


21 comments:
Very pretty top! I really love the color and the fit....
Aaah maaaaan, it is so übercool! Great, great job.
LOL - that last picture is deadly. It looks fantastic! Great job on making it fit your size!!
Awesome - this is a great look for you, I love how you styled it.
I copied the pattern for this but hadnt got round to making it up. Your pictures have convinced me that I need to do so NOW! (and in a more exciting colour than I first thought).
Great top. Enjoy.
Looks like a fun top to wear. It really suits you!
Seeing it made up now, this really does work and I love the styling. Great top!
And while bolder colors/prints are the mainstay of my wardrobe too, I do consider them when I sew as a design element, it's not a taste thing, just a too much thing, and I don't see where you have no taste: most of these are things I would buy, and I happen to have great taste.
Now doesn't it look good, I like the shorter version as well:-)
Based on the final product, I change my answer. I like the finished top - prefer it with the belt, FWIW. Good job.
Well, it turned out fantastic. I love the whole outfit, super cool boots!
True fashionista- absolutely fabulous, from the glasses and all the way down to the boots. And the fuchsia against your red hair is brilliant!
Great outcome! I lov that it is your Grandfather's belt.
That's a great color on you. I hope I can work with the Patrone, I'm still trying to fall in love with BWOF.
This shirt came out very cute! I had been eyeing that pattern and still wasn't sure....but after seeing it on you, I love it! The final product is great, you did a good job!
bravo...
This looks great on you. Nice job.
It turned out great - looks very cute the way you have dressed it. Glad you stayed with your vision and ignored us doubters.
That's teriffic! I love how you shaped it at the bottom to make it less overwelming and to suit your frame. I really like the belt
I love it! And I like your version much better than BWOF's. You're going to get a lot of comments on this when you wear it.
Cute as a button!
Okay, I admit it, I voted circus sideshow... But I should have had faith and waited to see the completed product! You rock that outfit!
Post a Comment