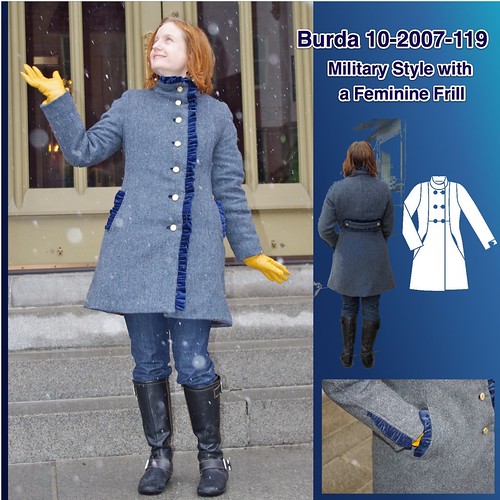
I have loved
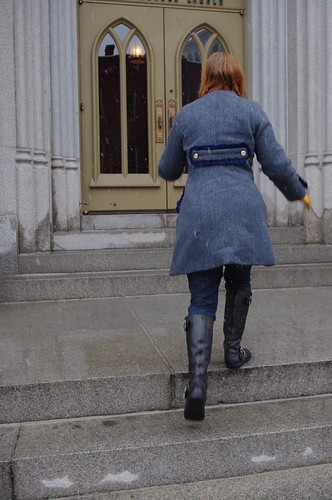
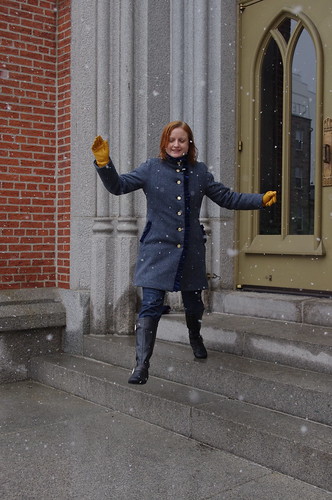
Burda 10-2007-119 ever since it came out in the magazine. Love the shoulder princess lines and the vaguely military appeal. At the time, though, I wasn't confident in my skills to think I could make a coat. Discovering Pattern Review and blogging has really helped me to grow! I changed the style to single breasted and eliminated that decorative seam in the front panel.
The outer fabric is a wool herringbone from
The Carol Collection that I had block fused in New York
on LindsayT's recommendation. What a luxury! It was awesome to just cut into this fabric and sew it up without a couple hours of fusing in there.

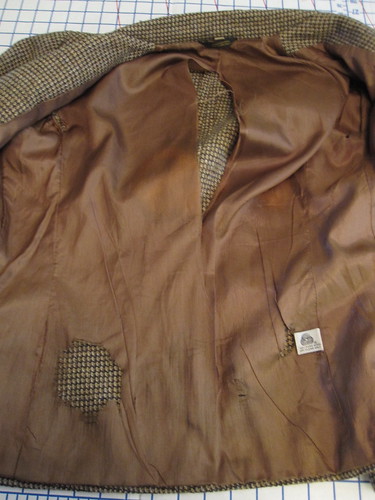
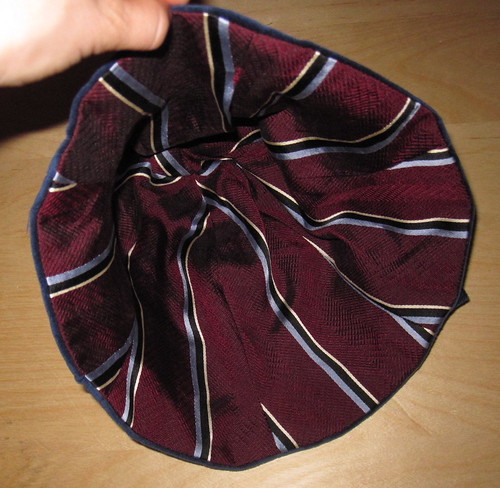
I lined it with
tie silk from FabricMart, in 2008 Cidell and I split two 10 yard bundles ($20/bundle). I have used it previously in
an obi, as
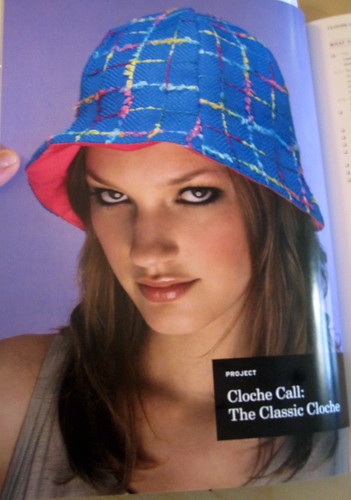
lining for a hat, and to make
wine gift bags. I think it is fantastic for coat lining because it is stable and sturdy, and silk is so warm and luxurious. I had to use two different fabrics because there wasn't enough of either. I had enough of the paisley-ish (used as trim in
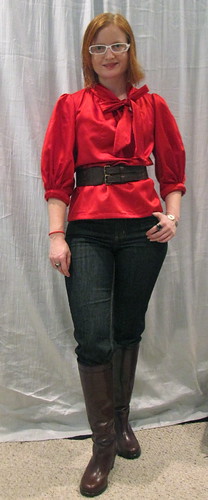
this blouse) for the body, and used the striped for the sleeves. They coordinate well enough, and I brought the stripe in more with a big pocket in the lining. The buttons are also FabricMart, from a 4 pound bag.
The coat is interlined with a wool/silk/cotton from my
Fabric.com Vera Wang $1.99/yd binge last January. I have to say, though I bought too much of that fabric (probably), I have sewn up a surprising amount of it. I'm not quite up to half, but I have certainly sewn down a quarter of it--and considering I started with 46 yards, that's not nothing. I was hoping to make a skirt with the rest of the interlining fabric, but working with it confirmed that it is just too wrinkly for clothes. Great for interlining, though.
I started this project by serger-constructing the interlining. I did not get off to a propitious start as the first seam off the machine was the center back seam--except that there was one large shoulder in the middle of my neck. Hmmm. The downside of a shoulder princess garment is that it's not instantly obvious which is the center back and which is the side back seam. However, not having to ease those seams as in an armscye princess is worth momentary confusion and dumb moves.
The trim is the only pricey thing about this coat. At
$12/yd from Fabric.com, the cotton velveteen is an expensive fabric by my standards. But I had a vision in my head and if $12/yd fabric is what it took I would pay $12/yd.
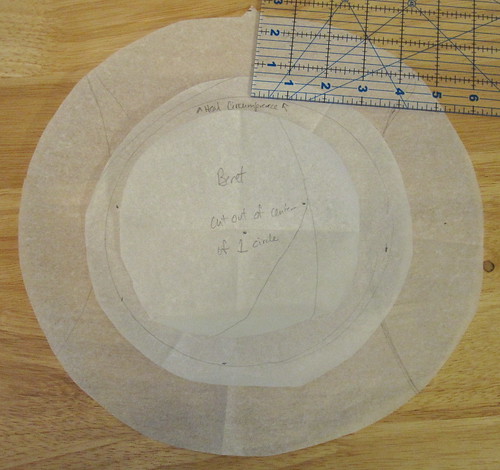
I had about six inches over two yards of the herringbone. The coat is drafted to below-knee length (on a petite, or should I say alleged petite given Burda's ersatz petite-ing). I wanted a mid-thigh coat so I shortened the length 4 inches. This turned out highly fortuitous as I had exactly the right amount of fabric--we're talking about one extra inch of fabric. I actually managed to make a coat with a self-faced front! I like the contrast facing (as seen
here and
here), but in this case I didn't want to do it. I definitely did not want velveteen as the facing since it would pick up lint, stick to my clothes, and start looking shabby before the rest of the coat, but I didn't want to introduce a third fabric, either. Relief!
As previously discussed, my new technique for this coat was
bound buttonholes. I will say no more about that trauma. The other new thing I tried was topstitching. I had been admiring the topstitched seams on the RTW coats hanging on the coat rack at the gym (love this surreptitious opportunity to look at all different coats). I thought that to get the dimensional effect you had to do a welted seam or something, but I figured I'd just give normal topstitching a try. It worked! That great look is not complicated at all!
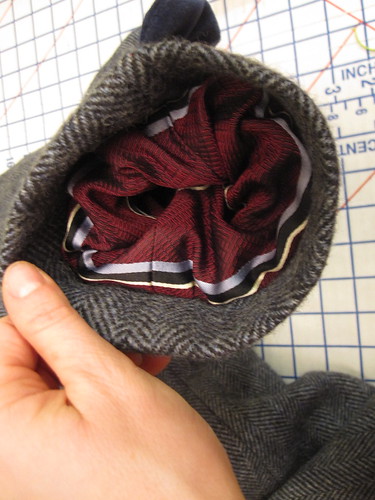
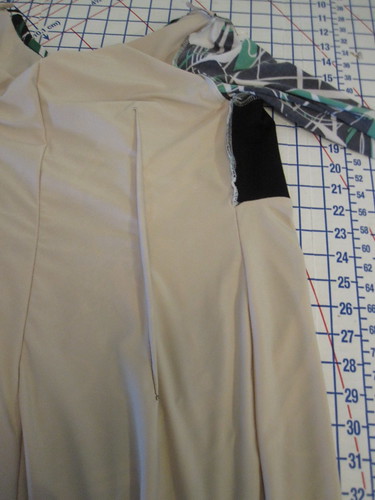
As usual, I reinforced the pocket seamline with ribbon to keep the pocket line from stretching out. When it is cold, I generally walk with my hands in my pockets for extra warmth. I was not thinking when I sewed the pockets and sewed them with a normal 1/2" seam instead of a slightly smaller seam allowance to roll them toward the inside. I used the tie silk as the front half of the pocket to reduce bulk, so it's lucky that I decided to ruffle the pocket opening as it hides that contrast fabric. Here's a
view of the completed pocket.
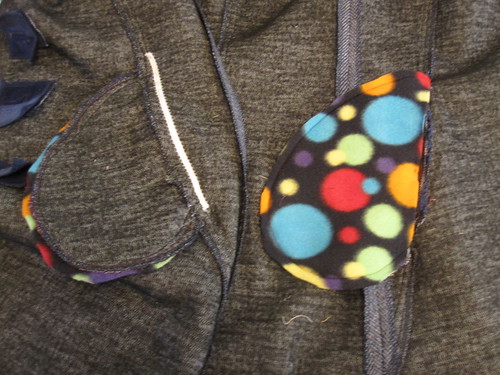
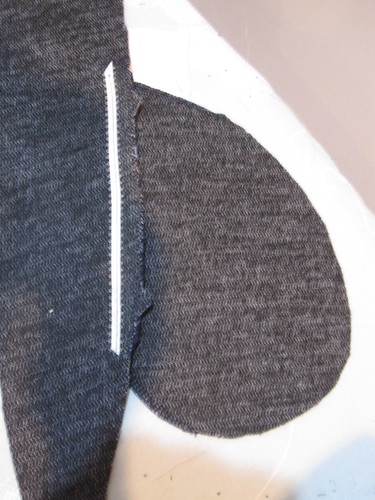
For even more warmth in the pockets, I lined them with fleece. I cut out fleece pieces based on the pocket pattern, cut off the opening edge seam allowance, and sewed them outside the seamline to the pocket seam allowances. I placed the fleece on the front of the pocket for an extra layer of wind blocking.
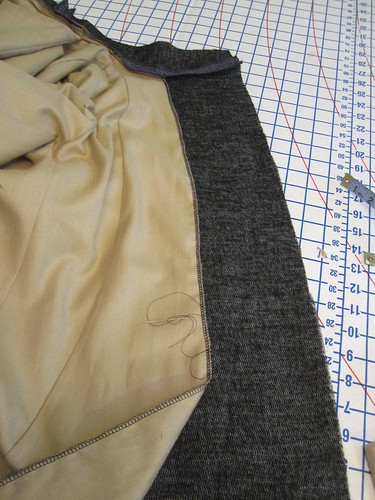
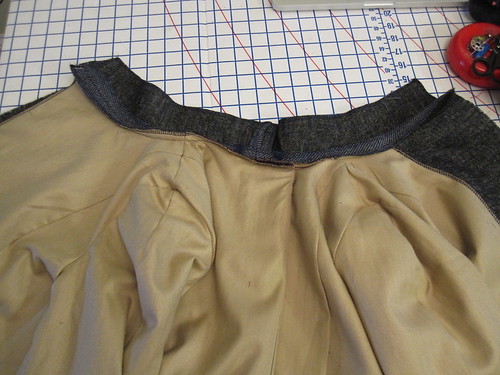
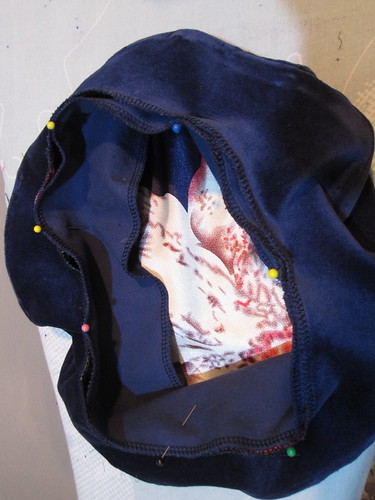
I separately constructed the outer shell, lining, and interlining. The interlining was cut to match the lining with its center back ease pleat. To put them together, I lined up the lining and interlining at the neckline edge, pleated them together for the CB ease pleat, and
stitched as one to the inner collar, as seen above. I hand tacked the interlining to the lining at the shoulder and underarms as well to keep it from shifting, and sewed the interlining and lining as one at the sleeve hem. I trimmed the interlining an inch above the lower hem and it hangs free inside the coat. I extended the interlining all the way to the front opening edge on the left side and sewed the buttons through the outer fabric, interlining, and facing to secure. For the right front opening edge with the buttonholes, I trimmed the interlining a couple inches short of the edge and then invisibly hand-stitched the interlining to the facing to keep it from shifting around.
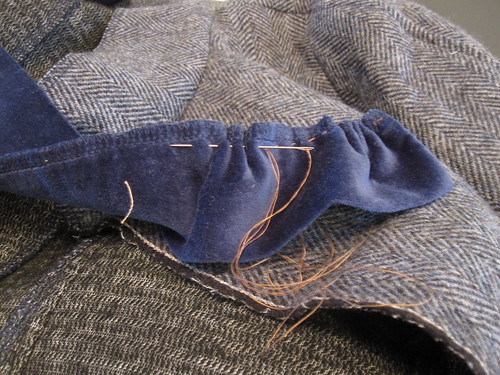
My original plan was to serger gather the ruffles. I adjust the differential settings as high as they go and...nothing. Absolutely no effect on the velveteen. OK, fine, I'll just use the sewing machine to run a basting stitch. Um, no. The velveteen was way too thick for that the work. So I had to gather all the ruffles by hand. I thought it would take forever, but it actually only took the length of Legally Blonde. I didn't bother to locate my thimble until I was almost done, and my fingers were pretty sore. I don't think I pricked myself, though.
I was pretty proud of myself on the
cuff frills. I actually had to calculate the final length of the sleeves in advance to properly place them. I ran the running stitch so the frill would create a wedge shape, narrow at the top and the full width at the bottom. The cuff frills are one of my favorite features.
I was so scared about setting in the sleeves. The Tuxedo Jacket of Doom has scarred me for life. As I was cutting, I realized that I had forgotten to
alter the pattern for a broad back. As a quick and dirty fix, I swung out the armscye of the side back about an inch and then tapered back into the side seam. With this additional length in the armscye, the sleevecap needed no easing. It went in like a dream. Since Kathleen Fasanella asserts that
sleeve cap ease is bogus and I have noticed no mobility problems (I mean, it's a coat--I'm not going to be doing yoga in it), I may do this in the future for coats.
One of the big places where coats fail me, I find, is where the wind whips in through the sleeve opening. This is especially a problem on a bike, where your hands are positioned for maximum exposure of the opening to the whoosh of oncoming wind. I have been biking a lot this winter using my
Capital Bikeshare membership. As an aside, I LOVE it--I did not anticipate how much I would use it. If you're in the DC area you should really consider joining. Being able to take one way trips and not having to deal with locking up my bike (not to mention I carry it up to the third floor for the season) are huge.
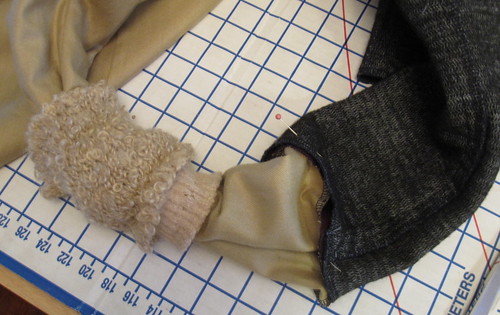
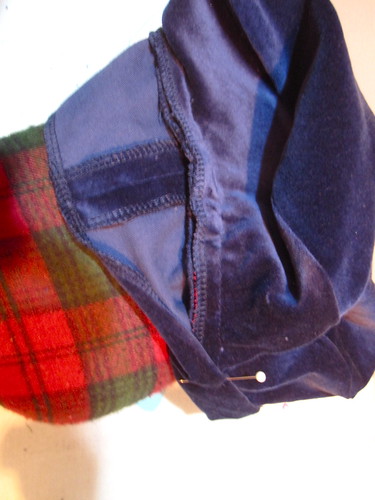
For years I wore
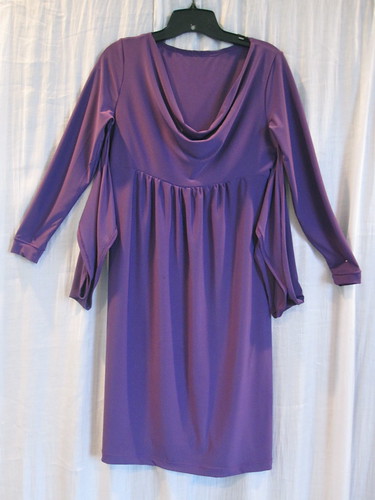
these gloves, which I didn't even like very much due to the blah color. But that woolly (synthetic) cuff kept my arms safe from the wind so I didn't give them up until there were holes in all the fingers. I cut off the cuff and slid it over the lining/interlining sleeve before bagging the sleeves. Once the sleeve edges were sewn, I hand tacked the woolly cuff in place at the bottom of the lining. The sleeve opening is not beautiful to look into, but it seals that opening over my wrist and no wind is coming through that sucker. I did this to a lesser extent on my purple coat just using fleece. It will be a feature in all my winter coats from now on.
I did my first successful bagging of the lower hem. It was very exciting.
I used my digital camera to place the back half-belt correctly. I pinned it on, took a picture, adjusted, took a picture, etc. It was tedious but handy, as I'd been having no luck using my paper tape double.
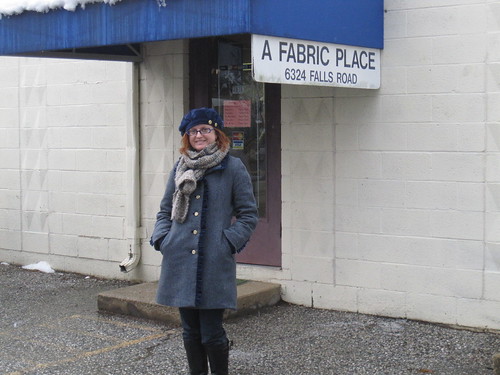
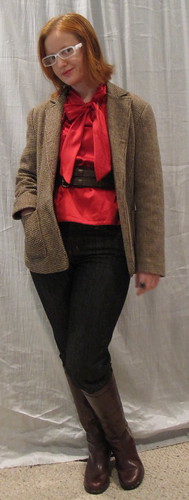
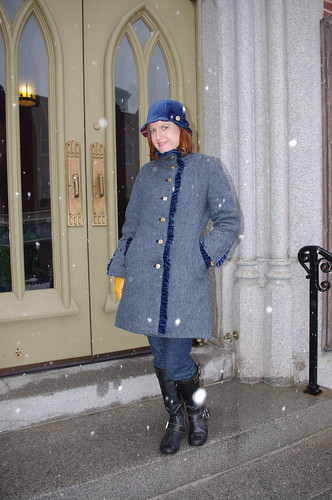
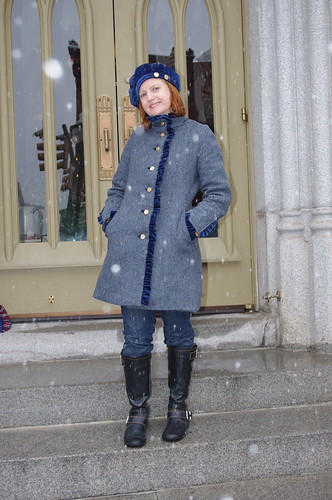
I went to Baltimore on Friday to hang out with
Cidell. Well, I told her it was to hang out. Really it was to force her to take photos! So there are a ton of them and they are great. It was even snowing. You can't plan that. We took pictures, did a little shopping (more on that later), and ate awesome pizza at
Pepe's before I hit the MARC to go back home. I had been avoiding wearing the coat, not wanting to get it wrinkled, but I see that I managed to sit on the back in a wrinkly way. Oh well.
This coat took three weeks to make and I thought I'd never finish. But I wanted to get all the details right so I'd be happy with it for several years. I hate to say it, but I am kind of over
my purple coat. I have been wearing it a ton this winter because it has been so unusually freaking cold, and I feel shapeless and schlumpy in it (may have to do with the weather). I didn't want that to happen with this one, though it's not warm enough to replace the purple (it's no good below freezing and really only starts to be useful a couple degrees above).
All photos are
here and the pattern review is
here.

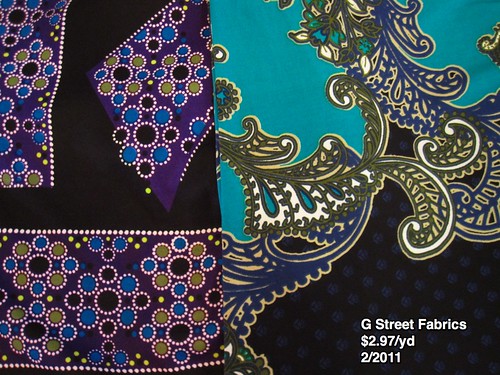
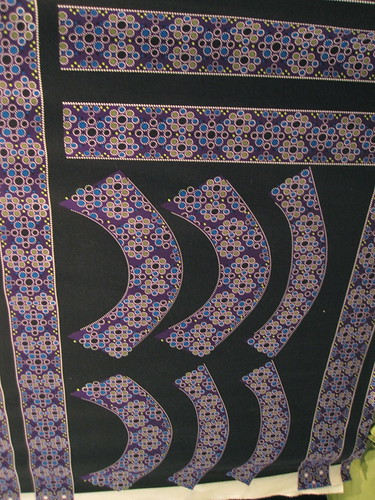
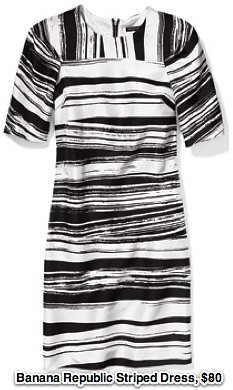
 The white parts of the print are rather sheer, so I determined about halfway through construction that the dress needed to be lined. It is a rather standard thin poly knit, so the lining was a good idea anyway for a dress to be worn in cooler weather. To keep the lining from shifting around too much, it is sewn to the dress as one at the back neckline and the armscyes and then caught into the back darts. It made sewing more difficult than necessary, but it behaves very well. The sleeves are unlined.
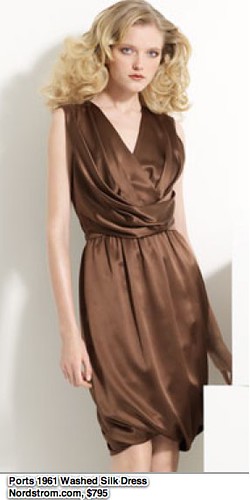
 The front is partially lined as drafted, as there is an underlayer below the front crossover. After I completed this I realized it's actually very similar in style to the Kate Middleton/Issa Dress (the original, not mine) and would make an easy substitute for such a project, although it is a faux front crossover, which is caught in the side seam, rather than ties (could easily be converted). To jigger the lining in, I sewed the front to the back with both linings as one at the side seams above the waist, and treated the lining and fashion fabric layers separately below the front waistline seam. Rather than gather the front lining at the waistline as for the fashion fabric, I pleated it to reduce bulk.
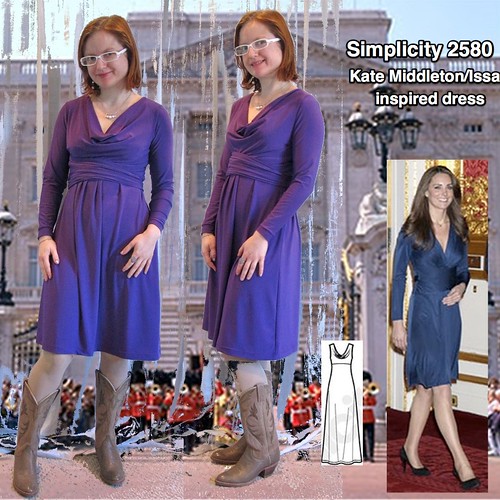
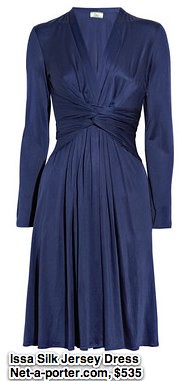
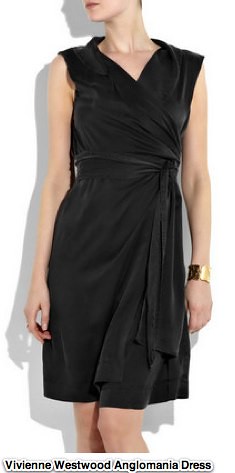
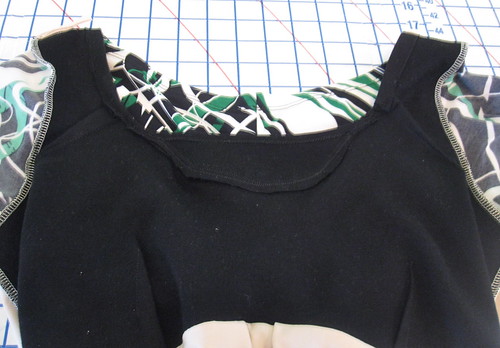 The front underlayer is the only thing I don't like about this dress. It is drafted as a low V neck that is not intended to show under the crossover. However, I liked the idea of it as a faux camisole so I cut it with a higher scoop neck out of black double knit purchased from Kashi at Metro Textiles in NYC in November 2009. It is very odd for Burda, but this is so hugely gapey. You can see where I cut out a scoop at the top and replaced it with a narrower scoop, but this hardly made a dent in how gapey it is. The neckline is several inches wider than I am. I then added neckline darts, which took care of the problem. If I were to make this again, I would take about 3.5 inches out of the neckline width.
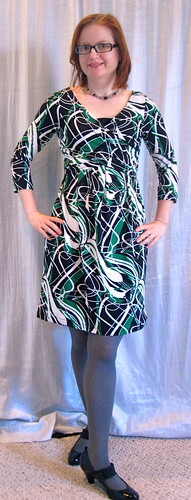


.jpg)


.jpg)


