Friday, February 18, 2011

A Visit to Michael's Fabrics & Stashoholism Confessional Plus IBOL Time!

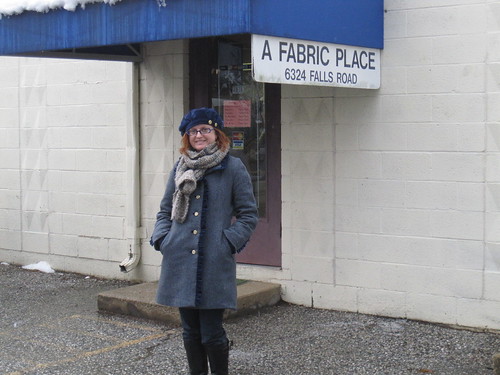
A Fabric Place
When I went to Baltimore to do my coat photoshoot spend time with Cidell we visited Baltimore's excellent fabric store, A Fabric Place--known online as Michael's Fabrics. It was my first visit to the store, and it could easily have turned dangerous. However, I still had my willpower and I managed to walk away empty-handed.
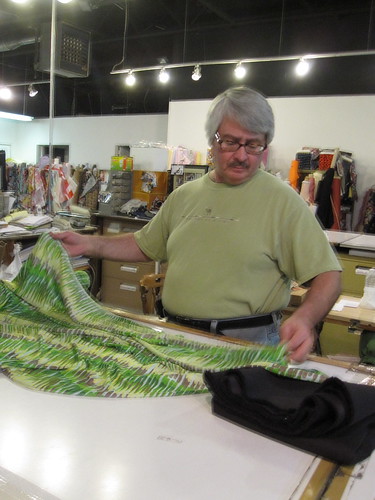

Michael of Michael's Fabrics/A Fabric Place


The man himself was there! Michael is both personable and knowledgeable and was very happy to give us all the time we needed with him. We appreciated it because the store was suprisingly crowded. I think this is a good sign for home sewing and local fabric stores.
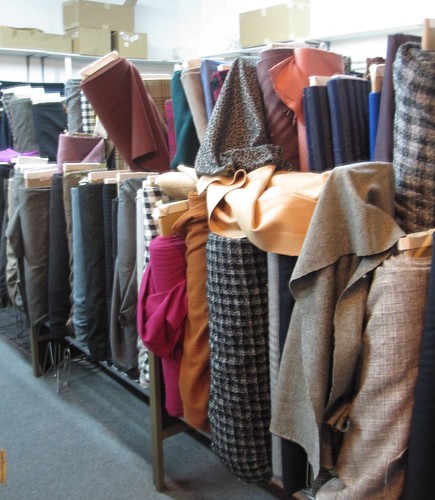
Wools

The store is much larger than you would think and is organized into several rooms. In the back at the left is the wool room. In addition to beautiful wool coatings and outerwear fabrics, they carry the most gorgeous suitings. You can also find fabrics in here for tailored shirts and whatever you need to look sharp.
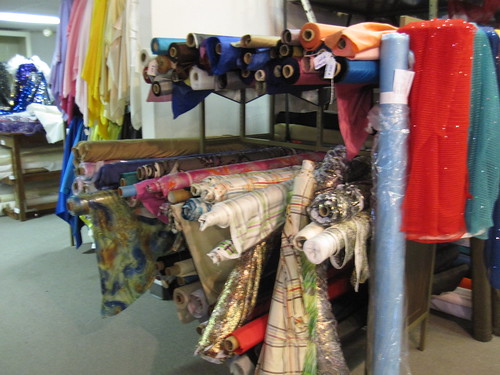
Silk Jerseys

I was most tempted by the silk jerseys. A whole table of them in the most gorgeous prints! There was a butterfly print that was really hard to walk away from. The prices in the store are in line with general prices for high quality fabrics. So they're not cheap, but they are not inflated either. The $18-24/yd price kept me from indulging in this table, and only my good manners kept me from rolling around in it!
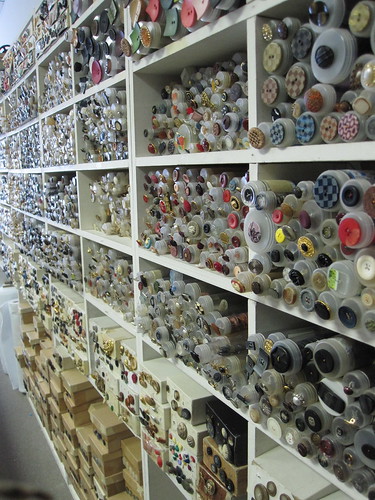
Buttons

In addition to the fabric rooms there is a notions and trims room. I LOVED the wall of buttons--so beautiful and truly a button for any project you could possibly conceive of. This room also has ribbons, which Cidell assures are very good quality, and trims galore.
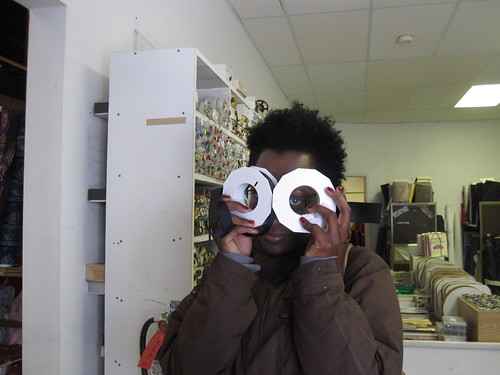
Cidell Feels Shy

Cidell was feeling a bit camera shy so here she is demonstrating the ribbon.

There is also a room for special occasion fabrics--all the sequins your little heart could ever desire. The main room contains the cottons and unbelievable silk charmeuse prints in all my favorite colors. And among the cottons you will find a selection of Liberty of London--it is so rare to see these gorgeous fabrics in person. I just sighed over them.

Cidell and I were discussing how if one could get away from being a stasher, every project could be made of "expensive" fabric. I calculate the approximate cost of each of my garments and it is unusual to have one that costs more than $20. But I don't count the time value of the money invested in the fabric that sat on the shelf for months or years, and I don't factor in the depreciation value of my giant inventory of stash. If I added these to get a true cost, I would probably be paying closer to $12 or $15 per yard than $5. It is interesting.

But truthfully, I love having a stash. I do wish I had a little less (and now I do have a teeny bit less--see IBOL note below) and I definitely do not want it to grow. But a room full of possibility makes my heart sing, even if sometimes the array of choices paralyzes me.

All the photos of A Fabric Place are here.


========================
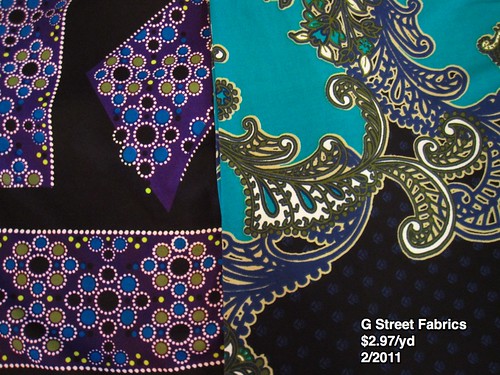
G Street 2-2011

And speaking of which, here is what I recently added to the stash.
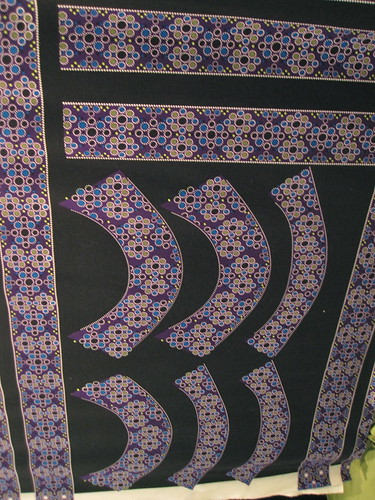
Large Print/Motif/Cutaway Pattern Pieces? Pattern Review's Stash Contest is underway (nearly done actually). Every year in January and February the contest encourages you to sew up older stash (this year, at least 6 months old). I always try to focus on stash sewing in these two months, though this year I haven't done as much because a newer wool just *had* to be sewn up before winter's end.

However, I have done a few stash projects, including sewing up a knit print in what I consider Fall/Winter colors purchased at Jomar over a year ago. So when I went to G Street Fabrics for the monthly Fashion Sewing Club (my first visit to this den of temptation in the new year) I decided that I could replace that Fall/Winter knit print with the right hand turquoise and olive ITY.

I was also drawn to the crazy purple print fabric. It is a heavy weight knit like a ponte, though I don't know if it is actually a double knit or not. The motifs on it are huge. I couldn't think of any object to put for scale in the photo at right, but that is about 2 yards of length. It looks like it could be pre-printed pattern pieces that are to be cut out for midriff bands and hem bands, though the curved pieces baffle me. They are too wide to be for a neckline and too curved to be for a waistline. It needs a pattern with a lot of pieces to chop up the motifs. I don't have any heavy weight knit prints, so I decided there was a place for it in stash, especially as my awesome, awesome Butterick 5382 pleat neck long sleeve dress in similar fabric is pilled almost beyond wearability--although that probably should have cautioned me against buying this one!

========================
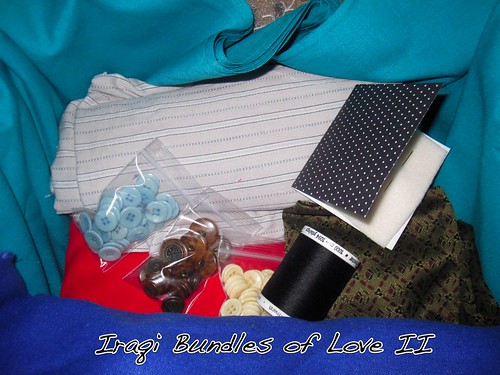
IBOL II

Last but not least, it's IBOL time again! IBOL guy is looking for 500 Iraqi Bundles of Love to be sent for a special project. This is your opportunity to share your bounty of fabric, thread, notions, and sundries with Iraqi women who have suffered through decades of embargo and war and have a hard time clothing their families. You can send a USPS medium flat rate box to an APO address for $12.95. It's easy--I did mine last week. Lots more information on the IBOL blog.

If you want to participate, leave a comment on the IBOL blog asking for the info and IBOL guy will email you the address and give you links to detailed information on what is most needed (large pieces--this is where garment sewists have the advantage over quilters) and how to create and send a bundle (it involves a specific customs form, the 2976A).

Since they are trying to get right around 500 bundles, he is needing to track who will be sending bundles and how many so you must get the info directly from him. I forgot to photograph my most recent bundle before mailing it, so this is a repost of last year's photo.

Tuesday, February 15, 2011

Issa/Kate Middleton-Inspired Dress, Simplicity 2580

S2580 Kate Middleton Dress Thumbnail

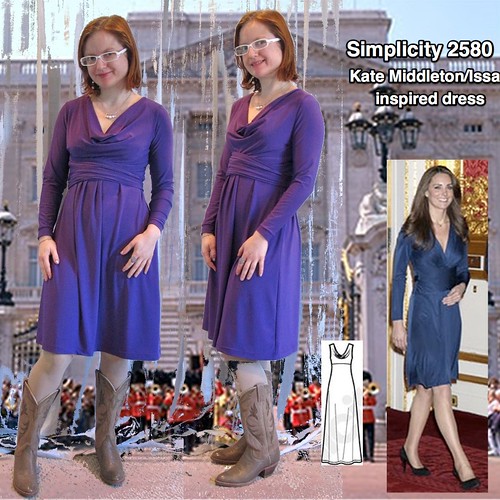
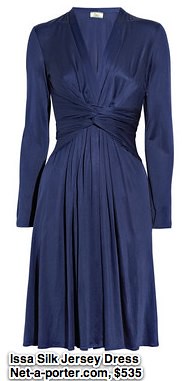
I don't have any real thoughts on the royal wedding, but I did love the dress Kate Middleton wore to announce her engagement. It is elegant but totally suitable for day, not flashy or sexy but not dowdy, and fit her very well. This Issa dress is listed on Net-a-Porter for $535--not an outrageous price for a silk jersey dress--but has been sold out since the engagement press conference. (As an aside, I am so happy to live a life wherein none of its details need be revealed at a press conference. Nobody cares what I do, and I like it that way.)

Issa | Long-sleeved silk-jersey dress | NET-A-PORTER.COM

Net-a-porter has several shots of the dress and allows you to zoom in for details, which is a great way to get a better look at the dress. It turns out that it has ties that can be configured different ways to get that drape overlay look, which I realized when the back view showed the ties knotted. You can see that they style the example differently than Kate wore it (though the model photo shows the ties overlapped as Kate did).

My goal for this project--my last project of 2010 (along with the previously shown ruffle shoulder top and a sleeveless cowl top in my TNT Simplicity 4539 in the rest of the fabric)--was to be "inspired" by the dress, rather than copy it. The original has a low V neckline, but I thought a cowl neckline would work to replicate the feel, while being a little more suitable for my day job needs. I had already made Simplicity 2580 as a top, and knew it would work for me. Furthermore, I don't care for ties that tie in the back, as it feels somewhat juvenile to me and can be uncomfortable when sitting at a desk. So I did attached bands rather than ties. Finally, it's in purple rather than the original sapphire (and observe my big sparkly cocktail ring!).

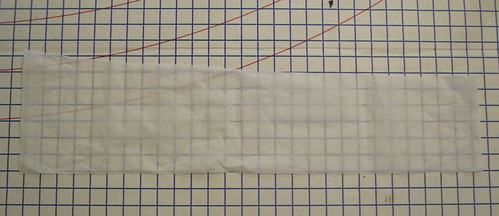
Band Pattern

My bands are basically two loops sewn into the side seams. The drape overlay pattern piece is 7.5 inches tall at the outer edge, 6 inches tall at the inner edge, and 28 inches wide (negative 2 inches of ease), inclusive of 1/2 inch allowances. I stitched the taller edge just below the sleeve seam (aka armpit)and kept the straight lower edge straight. My fabric--a Vera Wang polyester knit from Fabric.com, $5.99/yd, last December (I never put it away so it never technically became stash)--is lightweight and drapey but anything thicker will require a little more engineering, as one band must be tucked entirely under the other where they cross at one side seam. A better solution might be one band that loops all the way around the body and one band that covers only the front (sewn into both side seams). Or you could do ties, which would be easy!

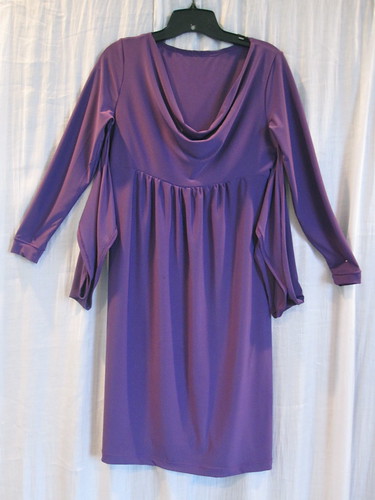
Unglamorous Hanger View

Although this wears very well, you can see that the hanger view is quite unglamorous! To wear, you can either put it on with both bands hanging as shown in this shot and then pull the bands over your head (knits are wonderful). Or you can loop the bands over the dress before putting it on. I've done both ways, just depending on the position of the bands when I put it on! Once it's on, you have to futz with the bands a bit until they are arranged to your liking.

In addition to adding the bands, I also did a swayback adjustment and added width to the skirt pieces from the hip to the upper edge by just cutting straight up from the hip rather than curving in for the waist. I wanted to get the same flow that the original dress has. I gathered the extra fabric along the upper edge, concentrating the gathers near CF and CB. The seam and the gathers are hidden by the bands (though the back requires a bit of fussing to get the seam covered; it naturally wants to be about an inch below the seam) and you are left with just the nice sway.


Side

I also added long sleeves ending in a cuff. I just took the sleeve from another Simplicity knit top pattern, modified a bit to reduce sleevecap ease. I had actually intended the sleeves to be 3/4, but when it was done they were close to full length and I really liked it. I was able to eke some cuffs out of the very final scraps of this fabric (the rest of the scraps became ruffles on the ruffle shoulder tee--there was nothing left of this 3 yards of fabric) to get the right length. The cuffs ended up slightly different lengths, but I did not want to unpick serging and twin needle topstitching so I think they're going to stay that way!

Obviously, I am not the first to knock off this dress, but this gaggle of art students quite amused me. They each made their own version of the dress and wore the dresses--with matching engagement rings--to Buckingham Palace. The motivation is unclear, whether they wanted to be a tourist attraction or make some sort of trenchant criticism of royal fashion, who knows? My motivation was simply to have a pretty dress!

The first time I wore this dress to work (the first day it was warm enough to wear cowboy boots), a colleague with whom I work closely wore a gorgeous blue silk dress (much prettier than this, but a similar feel) that she said she'd bought *before* the engagement announcement but hadn't had a chance to wear before the hoopla. She had deemed it safe to bring out only that day. We often find ourselves accidentally coordinating, but it was ridiculous that we both wore our Kate Middleton dresses for the first time on the same day!

You can see that I have finally learned how to fuzzy crop in Gimp, using this tutorial, though obviously I need a little more practice (or a more uniform background for the fuzzy crop shots) as there is a lot of noise remaining. I enjoyed putting myself towering over Buckingham Palace.

All photos are here and the pattern review is here

Friday, February 11, 2011

Outfit of the Week: On the Hunt

Outfit of the Week

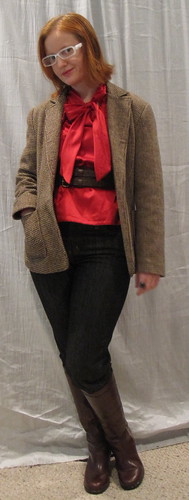
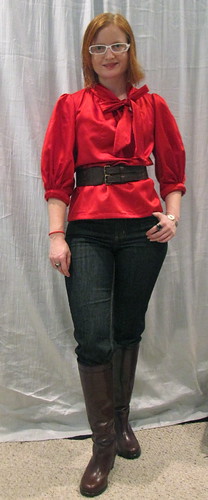
A couple weeks ago one of my colleagues wore fitted black pants with boots over them, a black t-shirt, and a red blazer to work. She said that her husband asked her as she walked out the door if she was off to hunt some foxes. It was adorable, both the outfit and the comment. I shamelessly ripped her off that weekend (I also SWF-ed her on her hairdresser, lol).

Outfit of the Week


I was choosing an outfit that was suitable both for date night and for going to see a band play the next day (Jenny and the Holzers). I figured skinny jeans could be both sexy and funky.

For the red, I chose my silk cotton McCall 5708 Hilary Duff blouse and some RTW jeans, accented with a wide brown belt and brown boots. For the proper hunty, tweedy, English vibe I topped it with a blazer I bought in a vintage store when I was in high school. If it wasn't vintage when I bought it, I guess it has probably become so since!

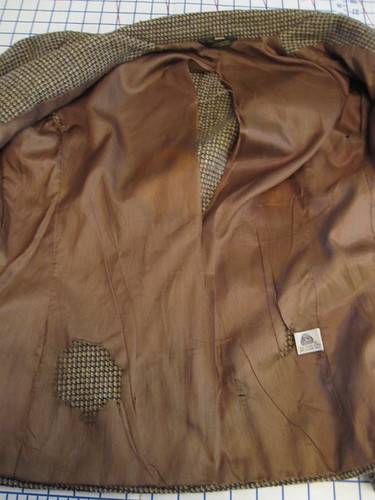
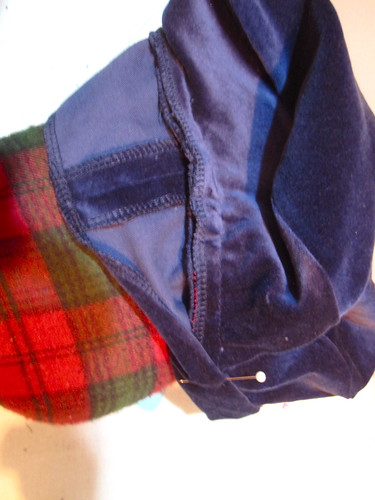
Tattered Lining in a Vintage Blazer


I go through phases of wearing and not wearing this jacket, so it hasn't been in heavy rotation for the past 20ish years(!!!!--good heavens, that's scary), but it is old enough and has been worn enough that the lining is in shreds. I'm going to have to suck it up and use LindsayT's tutorial to replace it. Eventually.

The English Hunt is a look that never goes out of fashion (though fox hunting itself has, thank goodness). What do you have in your closet to evoke this classic style?

Wednesday, February 9, 2011

Accessorizing the Frilled Coat: Cloche and Beret

In winter, staying warm has a lot to do with the coat, but it's also all about the accessories. I love hats in general, but in winter they are not optional as far as I'm concerned. I had ordered 1.5 yards of the velveteen in case I did need it for the facings, so I had plenty left to play with when my frilled coat was done. I was a little concerned it might end up too matchy matchy, but I had to go ahead and make some velveteen hats.

Saturday Night Hat Cloche Thumbnail

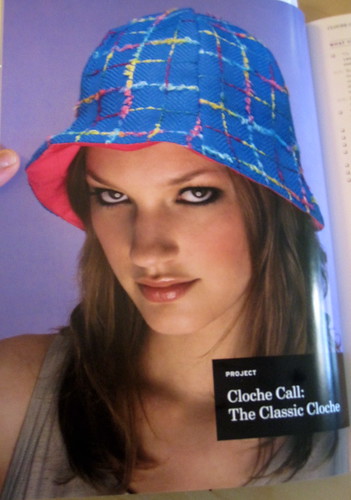
Classic Cloche Project


First up was the cloche from Saturday Night Hat. I previously made the newsboy. Although I still have and wear the hat, I wasn't crazy about the pattern as it was a little too puffy. The cloche looked like a good, standard pattern with no weird issues. I liked that the lining peeks out a little and thought it was a good opportunity to bring one of the lining tie silks into the mix.

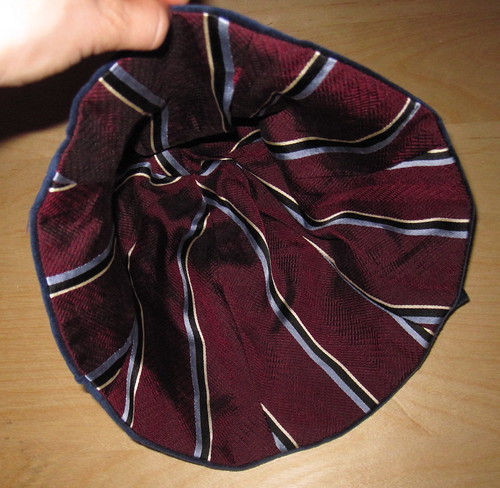
Lining

The cloche is made of six identical panels. All patterns in Saturday Night Hat are one size and drafted for a 23 inch head. I shrank the pattern on the copy machine to fit my 21.5" head, but in measuring the pattern (seam allowances are conveniently marked) I realized I would do better with the original pattern and slightly larger seam allowances on a few of the panels.

I used the striped tie silk for the lining, as I didn't have enough of the paisley tie silk. I thought the stripes might be fun with the panels. They are fine but I think to make a cute striped hat using this pattern the panels would need to be cut on the bias in alternating directions. I used the lining to test the fit on the pattern.

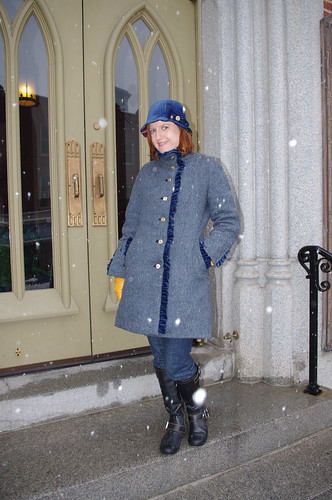
Cloche and Coat

The fit just needed a little bit of tweaking for circumference, but I found the hat to be drafted a little short. The narrowest part that should fit snugly around the forehead is a little high up on the head. This is similar to the issue I had with the newsboy--the hat must be worn very high on the head to have the right visual effect. For next time I have altered the pattern to add half an inch to the length about 3.5 inches from the top of the pattern piece, which should put the hat more firmly on my head.

I decorated it with a little bow and a button. The hat is quite cute, but not very useful as a winter hat because of the length issue. It does nothing for the ears and feels very insecure sitting so high on the head. A small puff of wind would blow it away. I think this is a better design for a Spring and Summer sun hat (with a slightly longer brim) than a Fall/Winter warmth hat.

All the Saturday Night Hat photos are here and the cloche pattern review is here.


============================

The insecurity of the cloche was not a problem, as I had actually planned to make two hats!

Velveteen Beret Thumbnail

Neighborhood Gal published a great tutorial for a beret back in December. The beret seems to be the hat this season. It's not a craze like the newsboy was, but I think of all the winter hats I see there are more berets than any other one style. Unlike Beangirl, I have had a longstanding love affair with the beret. My dad purchased a classic red beret at Disneyland (he grew up in LA) as a teenager that I rediscovered in high school. I named it Pierre and wore it all the time. I bought myself a classic red beret in Paris, just because. So the tutorial got me thinking about a beret, and a velveteen beret seems just about perfect.

The instructions are very clear, though I am math challenged. At first I ended up drawing a circle so huge it would have covered me to the shoulders. I really don't know how that happened, or why I didn't notice how big it was until I was done. I think it had to do with using a piece of tissue paper, a pin, and a pencil as a compass. It's really not an ideal setup.

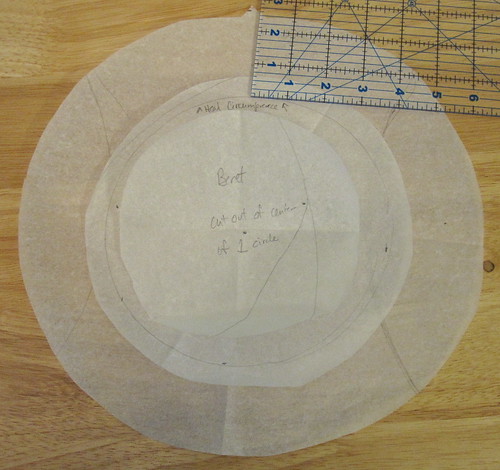
Beret Pattern Stack Visit the tutorial, but basically you draw a circle the size of your head and then another circle with the radius of the circle the size of your head plus another 2.5 inches (including seam allowance). I tried 3 but it was too much. You cut two of the larger circles of fabric and from one of them you cut out the circle the size of your head, minus seam allowance.

Determining where to draw the seam allowance required me to think a little--normally you draw the seam allowance on the outside of the seam line, but for this project you draw the seam allowance inside the seam line--i.e., the small circle you cut out of the center of one of your large circles will actually be smaller than the size of your head by its seam allowance.

In the photo you see my pattern pieces. There is the large circle (cut 2). Then you see my reference piece that shows my head circumference. You can see that I originally cut this piece out with the seam allowance on the outside before thinking about how it would actually work. The top-most circle is the actual circle I cut out of one of the large circles with the seam allowance inside my head circumference mark.

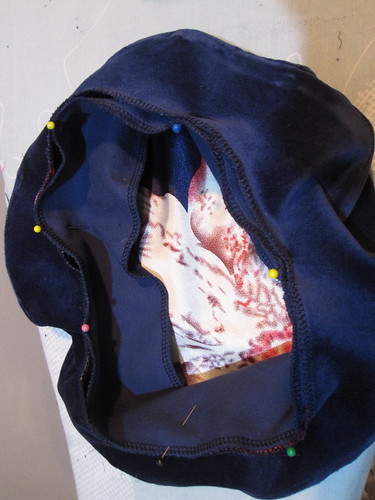
I started by constructing the hat and the lining. Then I placed the lining inside the hat and serged the edges together. You can see I used some of the leftover silk from my McCall 5579 4th of July kimono-style dress.

Pin band to Inside of Hat


As is my normal practice binding an edge, I first pinned the band to the inside of the hat and sewed in place.


Fold Band Over to Outside for Topstitching


Once the first pass is sewn, you then fold the band over to the outside, fold under the raw edge, pin in place, and topstitch. This is so much easier than the traditional way pattern instructions advise, of pinning the binding first to the outside, then turning to the inside and engaging in a nerve-wracking stitch in the ditch situation from the outside in which you do not catch the underside of the binding half the time. Here, I topstitched rather than stitched in the ditch because I liked the look.

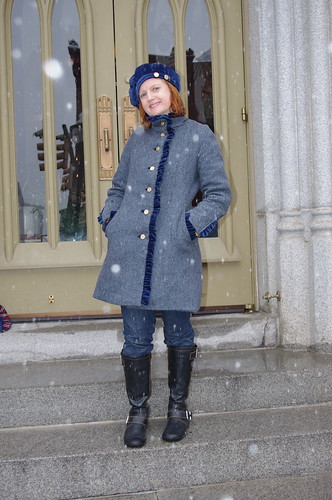
Coat and Beret


And voila! So easy! I sewed on two buttons as decoration. I get a ton of compliments on the hat, even more than on the coat! Considering that I spent 3 weeks on one and about 1 hour on the other, it seems a little unfair. `-)

All photos of the beret project are here and the beret pattern review is here.

Thursday, February 3, 2011

Stashoholism Confessional: It Doesn't Count if It's a Gift, Right?

Gifts from Cidell 1-2011

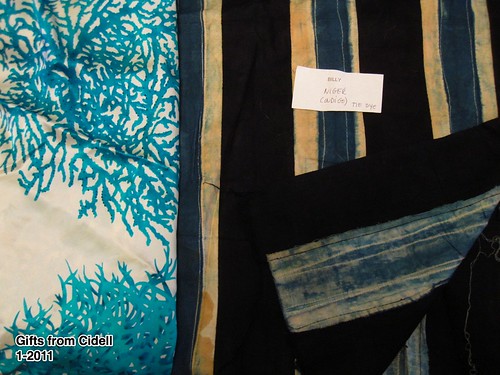
I love visiting Cidell. She takes pictures that make me feel pretty *and* I didn't leave empty-handed. She gave me the silk print I have been coveting since she showed it off after coming home from China. The turquoise of the coral is exactly my color. She also passed along the cool striped piece from Africa, collected by a friend of hers.

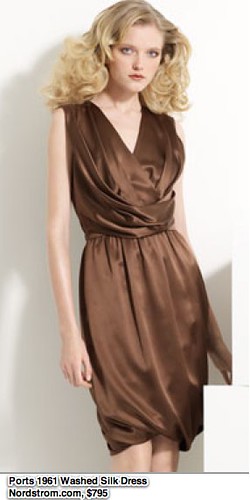
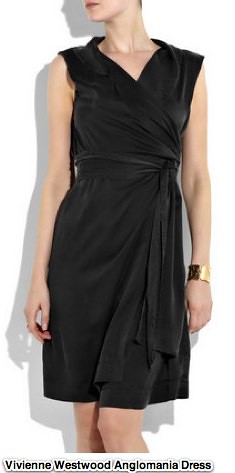
Ports 1961 Draped Washed Silk Charmeuse Dress | Nordstrom.com Vivienne Westwood Anglomania Silk Charmeuse Dress As soon as new fabric comes into the stash, I must daydream about what it should become. I went looking for silk charmeuse inspiration. For the most part, I make dresses that are not tailored, but do have some fitting somewhere, often a separate midriff or a fitted waistline seam. This silk charmeuse is very lightweight and drapey, and wouldn't want to be a fitted piece. I adore the draping on the Ports 1961 dress, especially that tummy-disguising waist drape. The Vivienne Westwood seems very understated for her, but so beautiful! You just can't go wrong with a wrap dress of any shape or style.


However, the current front runner is Burda 03-2009-116 for the silk. It is somewhat fitted at the bodice, but in small enough pieces that the silk should hold up to it. I like that the skirt is princess seams because the coral motif is huge and I think will be best broken up into pieces to avoid large white spaces. I love my Butterick 5243 dress in knit with a similar yoke/sleeve combination so I think this dress would be flattering for me as well.


The African piece, from Niger and dyed with indigo, is a really interesting textile: the lighter colored striped piece is tie-dyed in stripes (LOVE LOVE LOVE that the stitching line used to fold the fabric for dying remained undyed and visible), and the darker stripes were dyed separately. Then the strips were seamed together with a narrow seam allowance, the seam allowances pressed toward the lighter stripes. The fabric was already fraying along those long seams so before the pre-wash I serged all the edges. It was a little tedious. But I enjoyed experiencing the project the way the original seamstress (I assume it was a woman) did. For the pre-wash, I tossed in a couple pairs of jeans that needed their color refreshed as dye catchers.

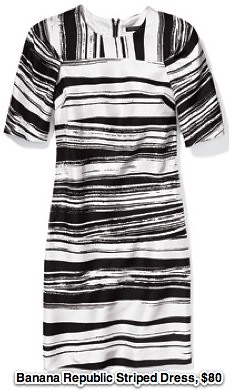
Banana Republic Striped Dress I sew with stripes very rarely. For some reason, I just don't picture myself in them, although I had a classic black-and-white striped tee that I wore for years (we're talking at least a decade) and still haven't been able to get rid of, even though it is now too small. So I really needed some help here. I love this Banana Republic dress, with its simple shape and directional yoke. It looks like it would be flattering to a wide variety of figure types. I have no idea when this dress was sold or if it's still in stores, I found it on a style blog.

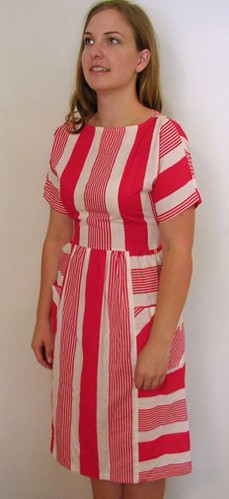
Striped Dress, Etsy.com


For more directional stripe fun, I love this piece from Etsy! Alas, I don't know the seller because it showed up in a google image search and when I went to Etsy it said the page didn't exist. I found a pattern in one of my Japanese books that has a similar horizontal insert in the skirt, without the waist seam. It was my front runner until I actually held the fabric up to me. The stripes are so bold that when placed vertically they look like the archetypal prison uniform.


Michael Kors Striped Sheath I suppose I could just reverse the direction of the stripes, but I think the winner is this simple Michael Kors sheath. In draping the fabric over my body, I could see that it is a great match for the Kors. The simple pattern and unfitted shape will be best for the somewhat stiff stripes.

I was so tickled to find these two different images to sell the same dress. It appears that Michael Kors and Dillards have very different customers, considering they are buying the same item. Kors is selling sophisticated ice queen glam, and Dillard's is selling the soccer mom next door. I guess I'm somewhere in between, but let's face it, probably closer to the soccer mom (even though I don't have kids).

Burda published two fairly unshaped shifts last year, 1-2010-130 and 03-2010-104, each just a front and back with horizontal bust darts. I think either of them will work, with a little tweaking at the neckline. The big question is going to be whether I can wear a dress without a center back swayback-adjusted seam. I seriously doubt it. I see plenty of stripe matching in my future!

You can check out all my inspiration photos for these two fabrics here (scroll down to the bottom)

==============================

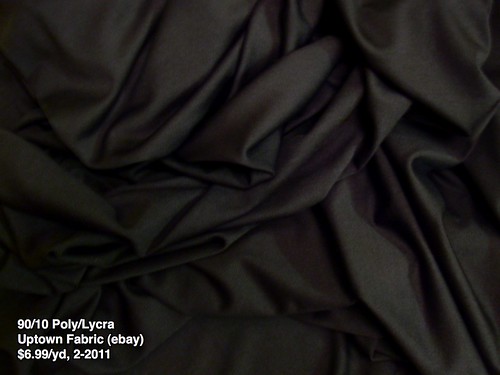
Uptown Poly Lycra 2-2011 Even in my time of self-imposed austerity (alleged), I did buy some fabric. But I exercised mindfulness--this is a hole in my fabric collection and something for which I will have a fairly immediate need--and, alas, it wasn't fun to buy.

I am uncontainedly excited about the bike trip Cidell and I are doing in The Netherlands in May. We have been warned to expect a lot of rain. For sun, I plan to bike in a skirt with leggings, but in rain I will want yoga pants with rain pants over. I have only one pair of yoga pants so I need to make more. I love the yoga pants I have, they are perfectly shaped and the fabric is so nice. Cidell suggested I check the fiber content and then search for that content online. So smart. I found this 90% polyester/10% lycra for $6.99/yd from Uptown Fabric, an eBay retailer located in Georgia (US, not former Soviet Union). They offer free shipping, which is awesome, and shipped promptly by USPS priority mail. They allow returns. This was my first time to buy fabric on eBay.

The fabric is, unfortunately, not as heavy nor quite as nice as my yoga pants. But it has about the same opacity and will do, as I don't think I'll get a chance to go to NYC between now and the trip(!!!) to look for my yoga pant fabric. Now to get started on those yoga pants. And the rain pants. And the rain cape. And... You'll be seeing a lot of bike sewing!