Showing posts sorted by relevance for query broad back. Sort by date Show all posts

Tuesday, June 19, 2012

Burda 05-2011-108, Panel Princess Dress: The Muslins

Burda 05-2011-108 Thumbnail

I spent a lot of time on this dress, Burda 05-2011-108 (available for purchase from BurdaStyle at the link--I am not affiliated or compensated, just trying to be helpful), so I have a lot to say!  I realized it will make waaaaaay too long of a post to say it all at once, so bear with me.

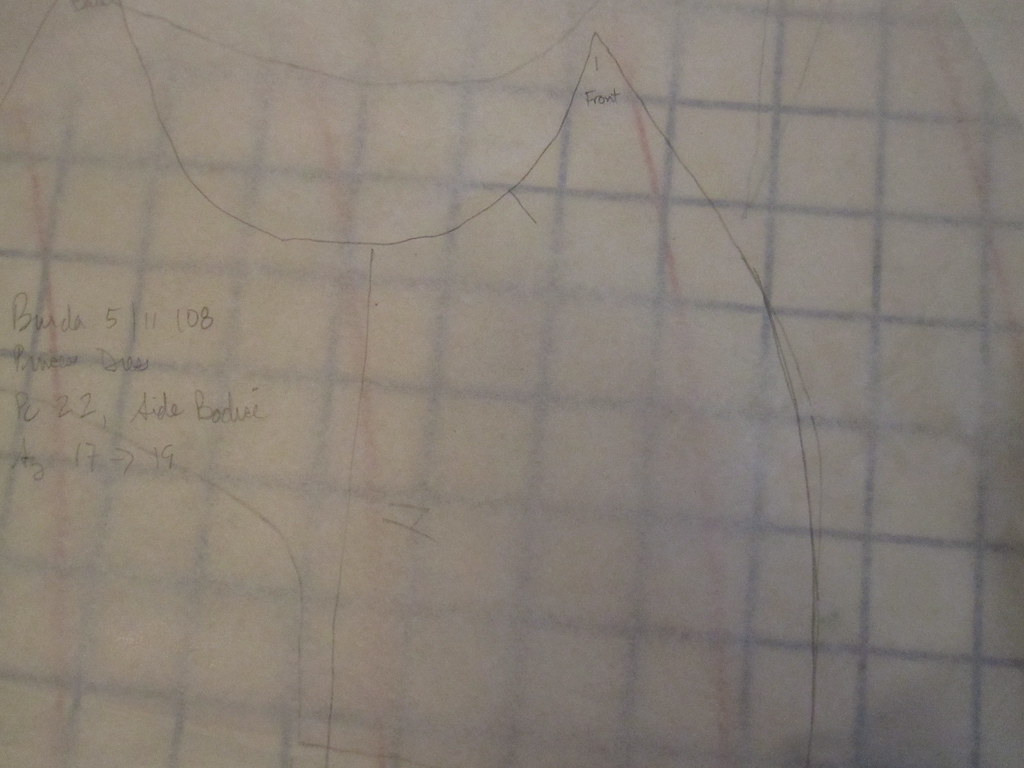
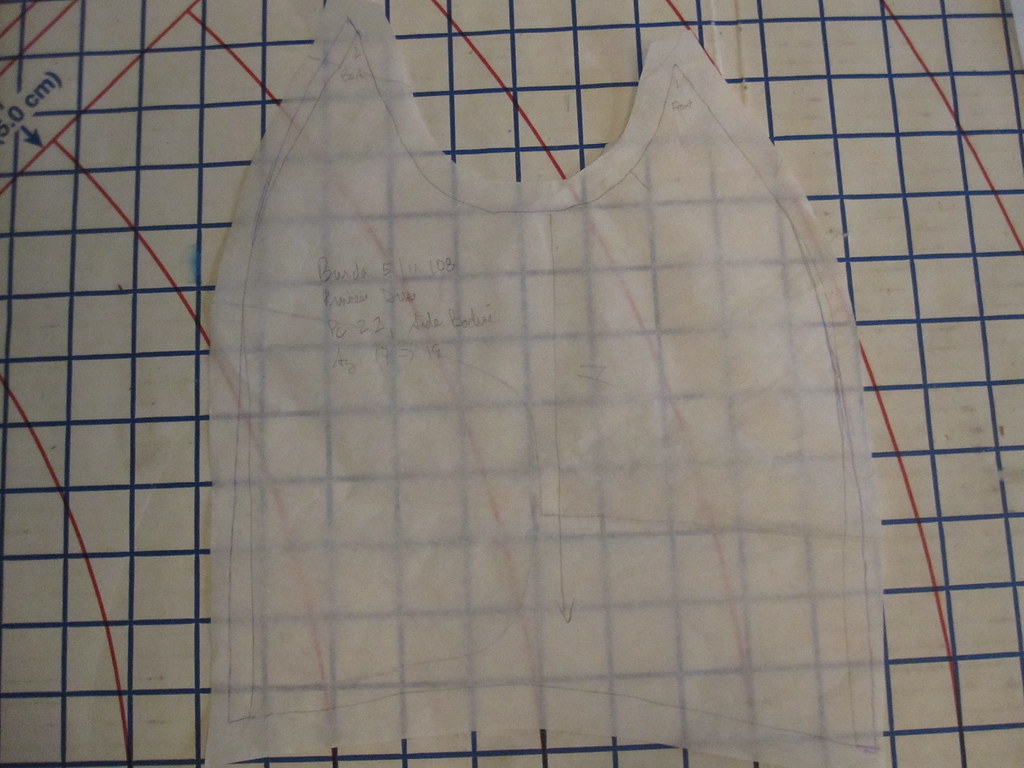
Widen Shoulder Straps/Narrow Neckline v.1

I made not one, but two bodice muslins.  However, before I even started the muslins I narrowed the neckline and widened the shoulder strap, as you can see at left.

As drafted that shoulder is so narrow that it wouldn't cover a bra strap, not to mention would be a nightmare to line.


Small Bust Adjustment


I also made a small bust adjustment by flattening the curve on the side panel piece. I found it very helpful in working with this side panel piece (no side seam) to mark the front and the back of it. I wrote on the pattern piece, and also added a notch at the back so that I would have no trouble on the cut pieces.


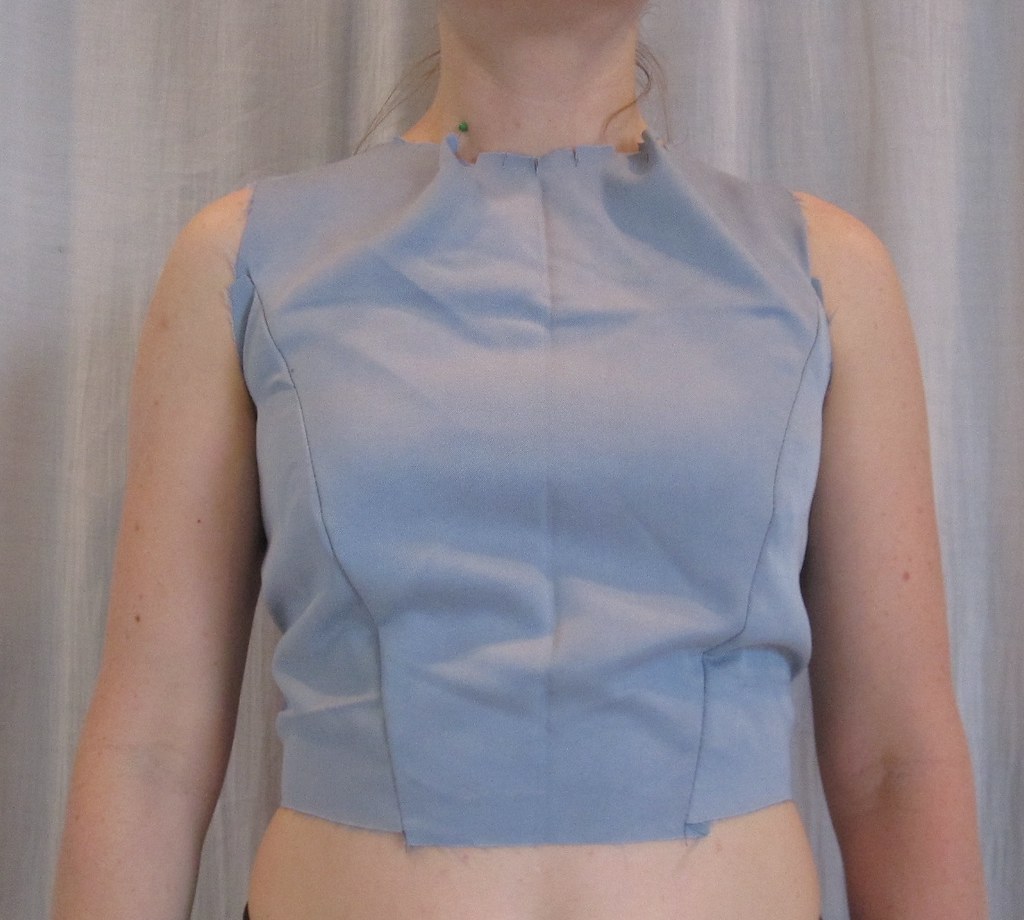
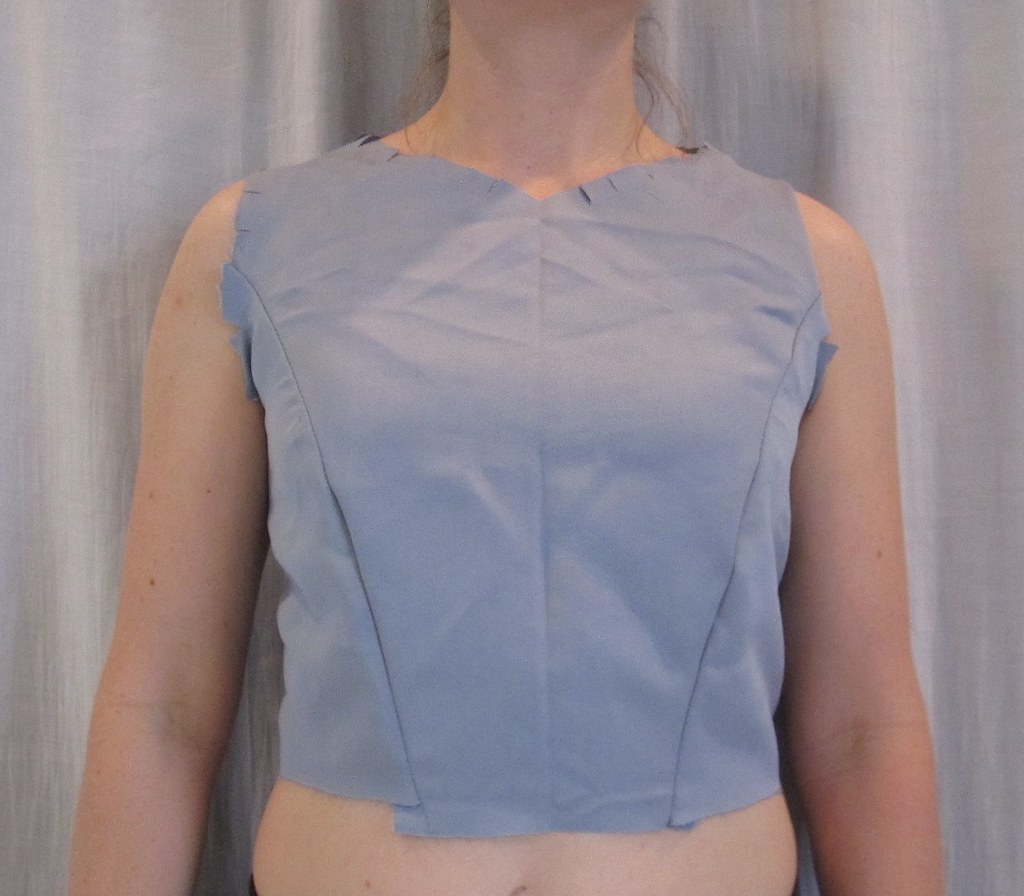
Muslin 1 Front
I knew to expect the neckline to be too wide, both from the photos in the magazine and from the reviews on Pattern Review. I'm not really sure why Burda does this. I made a dress several years ago (never got around to reviewing it) that had the same problem. Looking back at the magazine photo I could see that's how the dress was drafted? I honestly don't know if it's a drafting error or a design feature. I'm not sure in what universe a gaping neckline is a design feature, but I think it's clear that none of us live in Burda's universe.

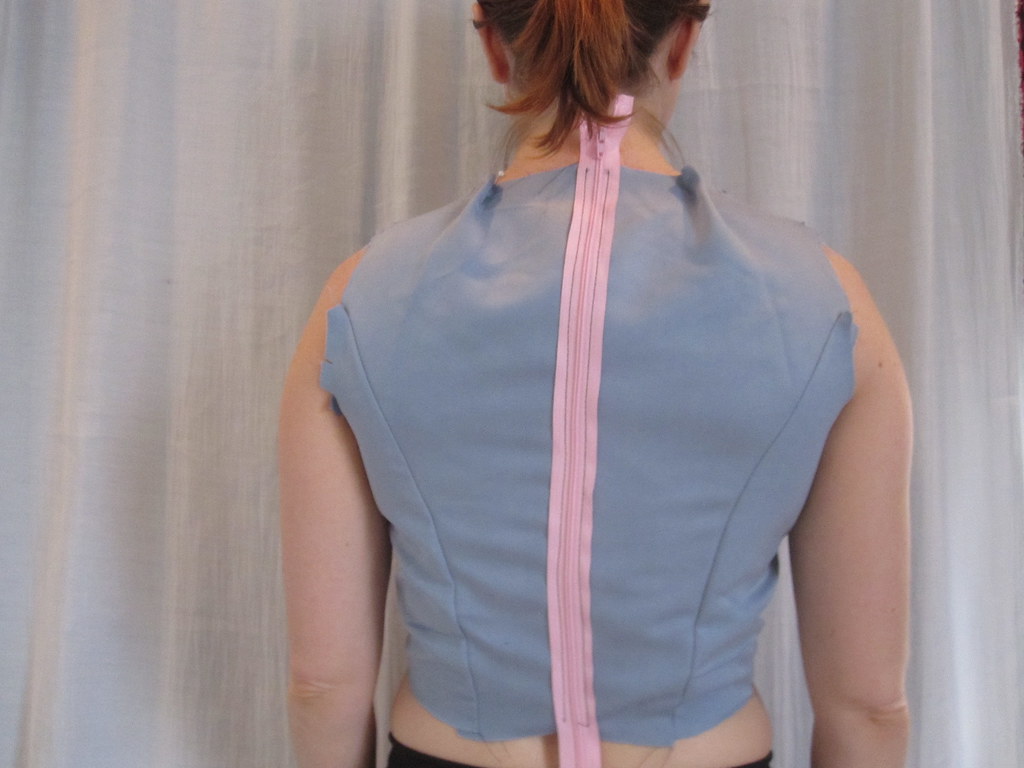
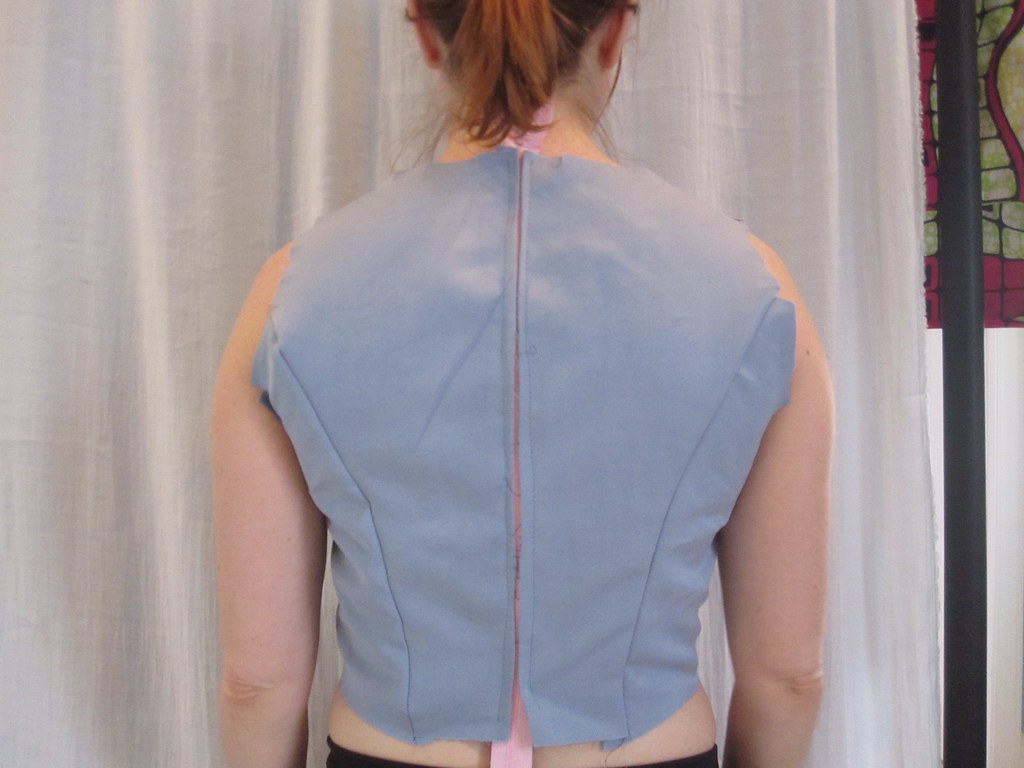
Muslin 1 Back


I also found I needed just a touch more room in the upper back.  It's not totally evident in the photo, but it was pretty tight across the latissimus with some impeded movement.  A Broad Back Adjustment is normal for me so I expected it.

The back neckline was just as gapey as the front.


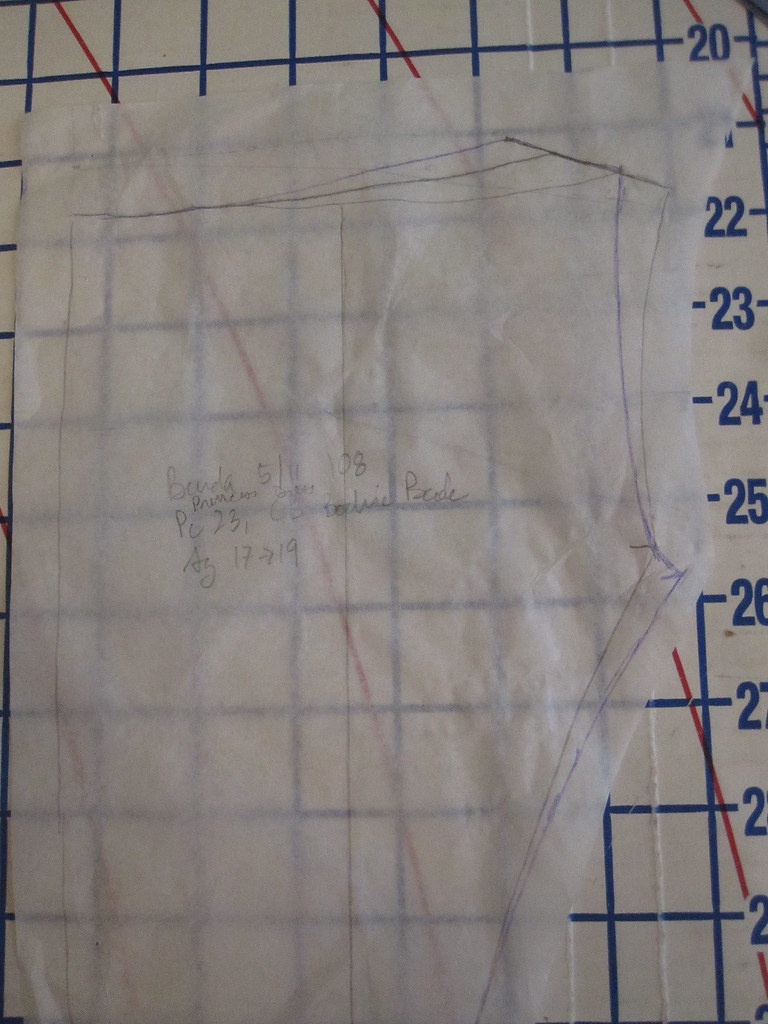
Widen Shoulder Straps/Narrow Neckline v.2


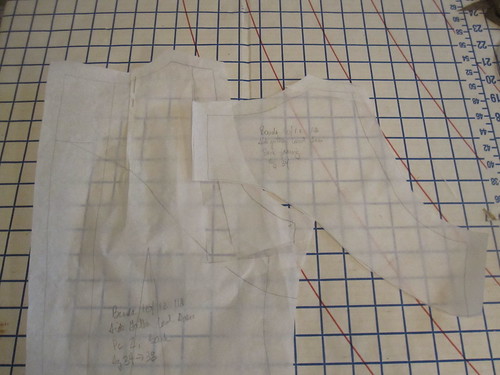
Here you can see where I have redrawn the shoulder straps closer into the neckline--I simply moved the shoulder straps inward.


You can also see my Broad Back Adjustment on the upper back piece, extending from the armscye.


Broad Back Adjustment and Add to Side Seams


  Here you can see my Broad Back Adjustment on the side piece. I added a little width to the side panel at the top of the back seam.

I also added to the side seams on both the bodice and skirt, but in fitting the actual dress ended up taking that width out.  My muslin fabric was more tightly woven than the fashion fabric, and adding the skirt may have made a difference in fit.


Muslin 2 Front


Here is Muslin 2, much improved!  I found the front neckline still a little bit gapey, which is not evident in the photo because I am standing up unnaturally straight.

Muslin 2 Back


Lower Neckline


The back is much more comfortable with the added room.  The pull lines you could see a little bit of in the first muslin are gone.

The back neckline looks good, too.  No more gaping.  (Why, Burda, why?)


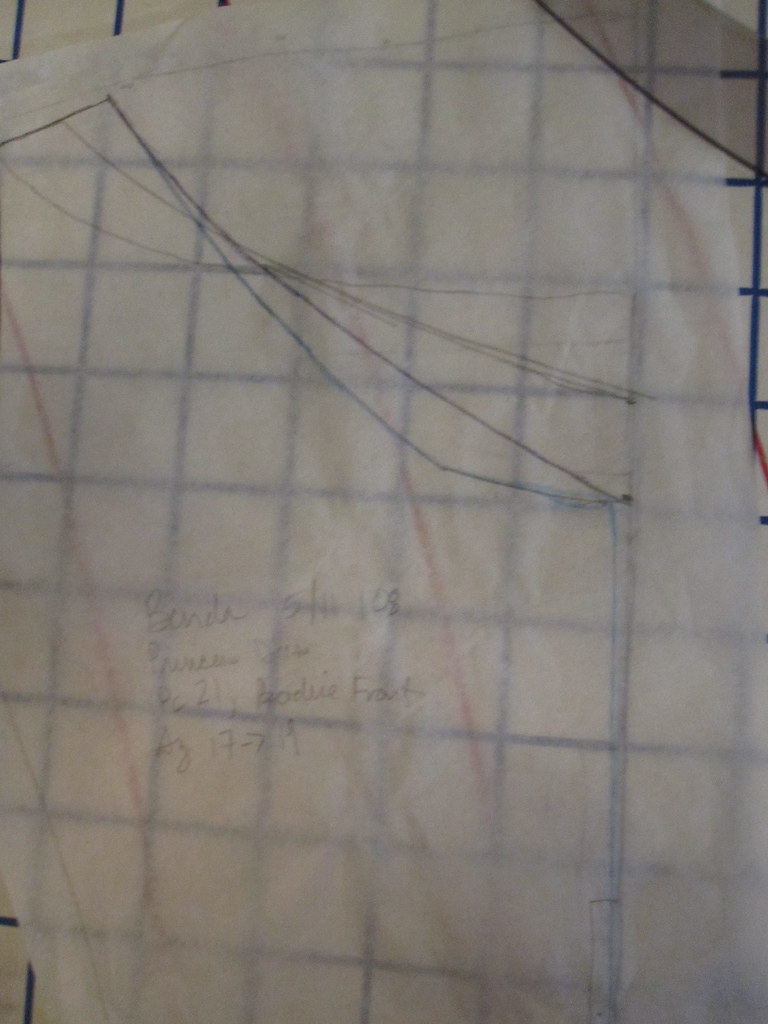
In addition to narrowing the front neckline just a little bit more (you can see the three lines in the photo at left--I ended up narrowing the neckline by over 1 inch).

I also lowered the neckline. A high neckline is just not flattering on my short, flat-chested self. The neckline is lowered two inches from its original draft.

Now it was time to undertake the truly arduous process of cutting the fabric.  What's worse than stripes?  Zigzag stripes.  Worse than plaid, even.


All photos are here.  You can read about how I lined the bodice here and construction details of the real dress here.  The pattern review is here.

Friday, August 30, 2013

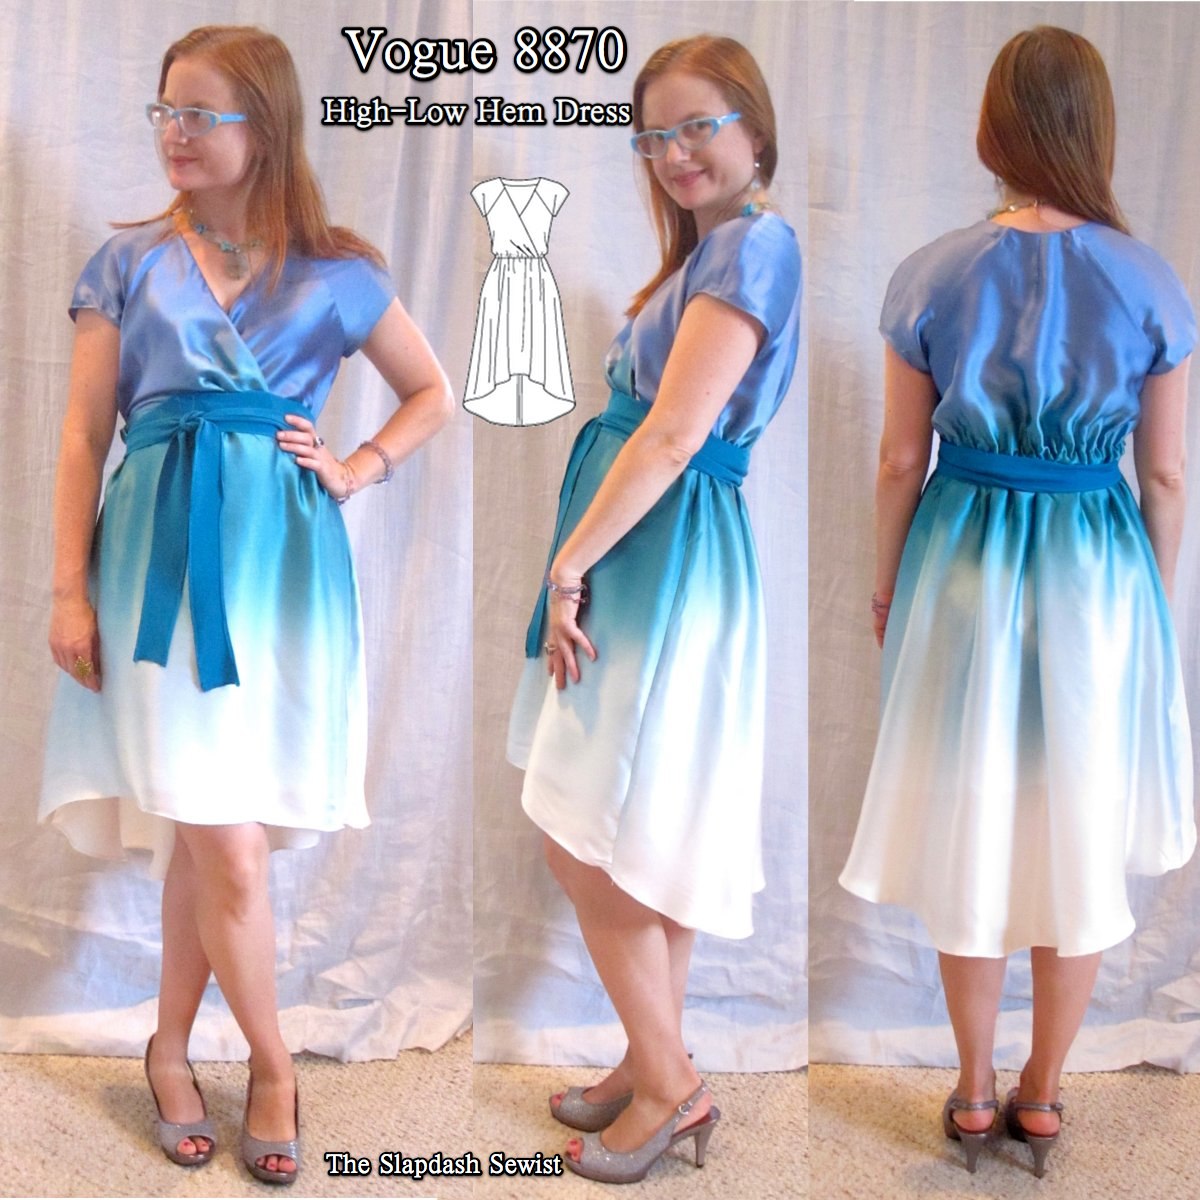
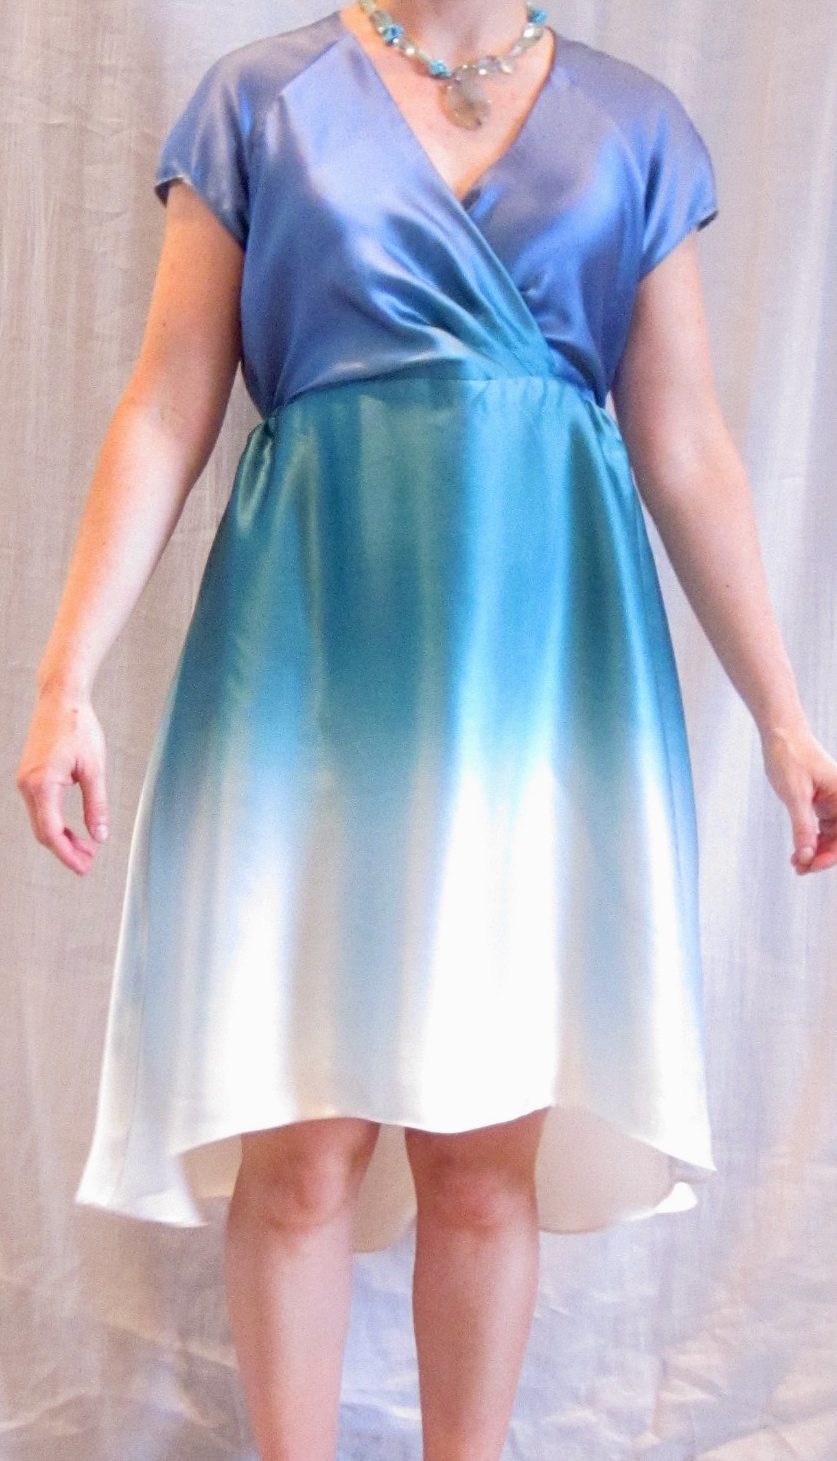
Vogue 8870, High-Low Hem Surplice Birthday Dress

V8870 Thumbnail

It takes me a long time to warm up to a trendy trend, like the high-low hem.  At first I hate it.  Then I am skeptical.  Then I see some cute examples.  Then I am ready. This process can take years. 


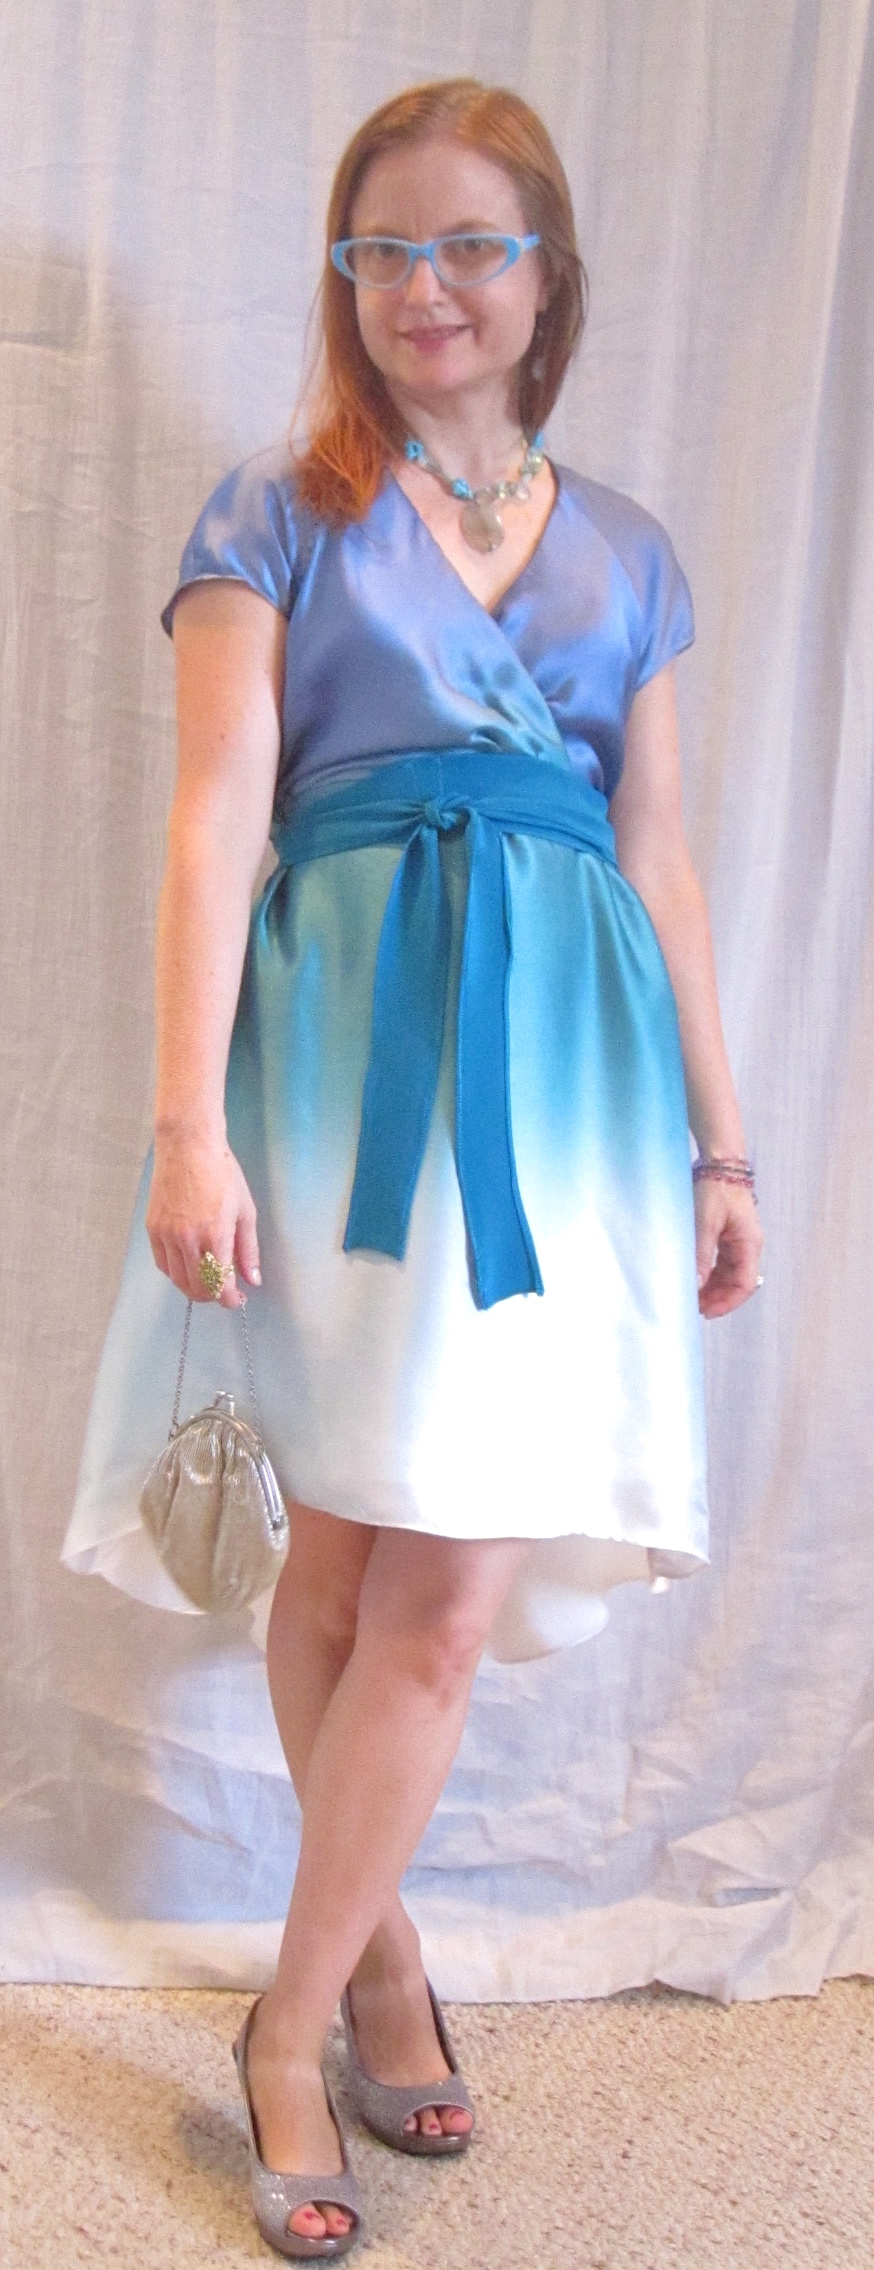
After seeing several cute iterations of this pattern on PR, I decided I could take the plunge with the high-low trend (I may be willing to do the trend, but I am not willing to butcher the English language by calling it "hi-lo") using Vogue 8870, sized XS-XXL.  I even went bold with double trending by using this ombre silk, one of the gorgeous pieces BadMomGoodMom picked up for me for a song.

After I had the dress almost done I saw this Lela Rose for Fall 2013.  It looks like my trends should last through at least next season!


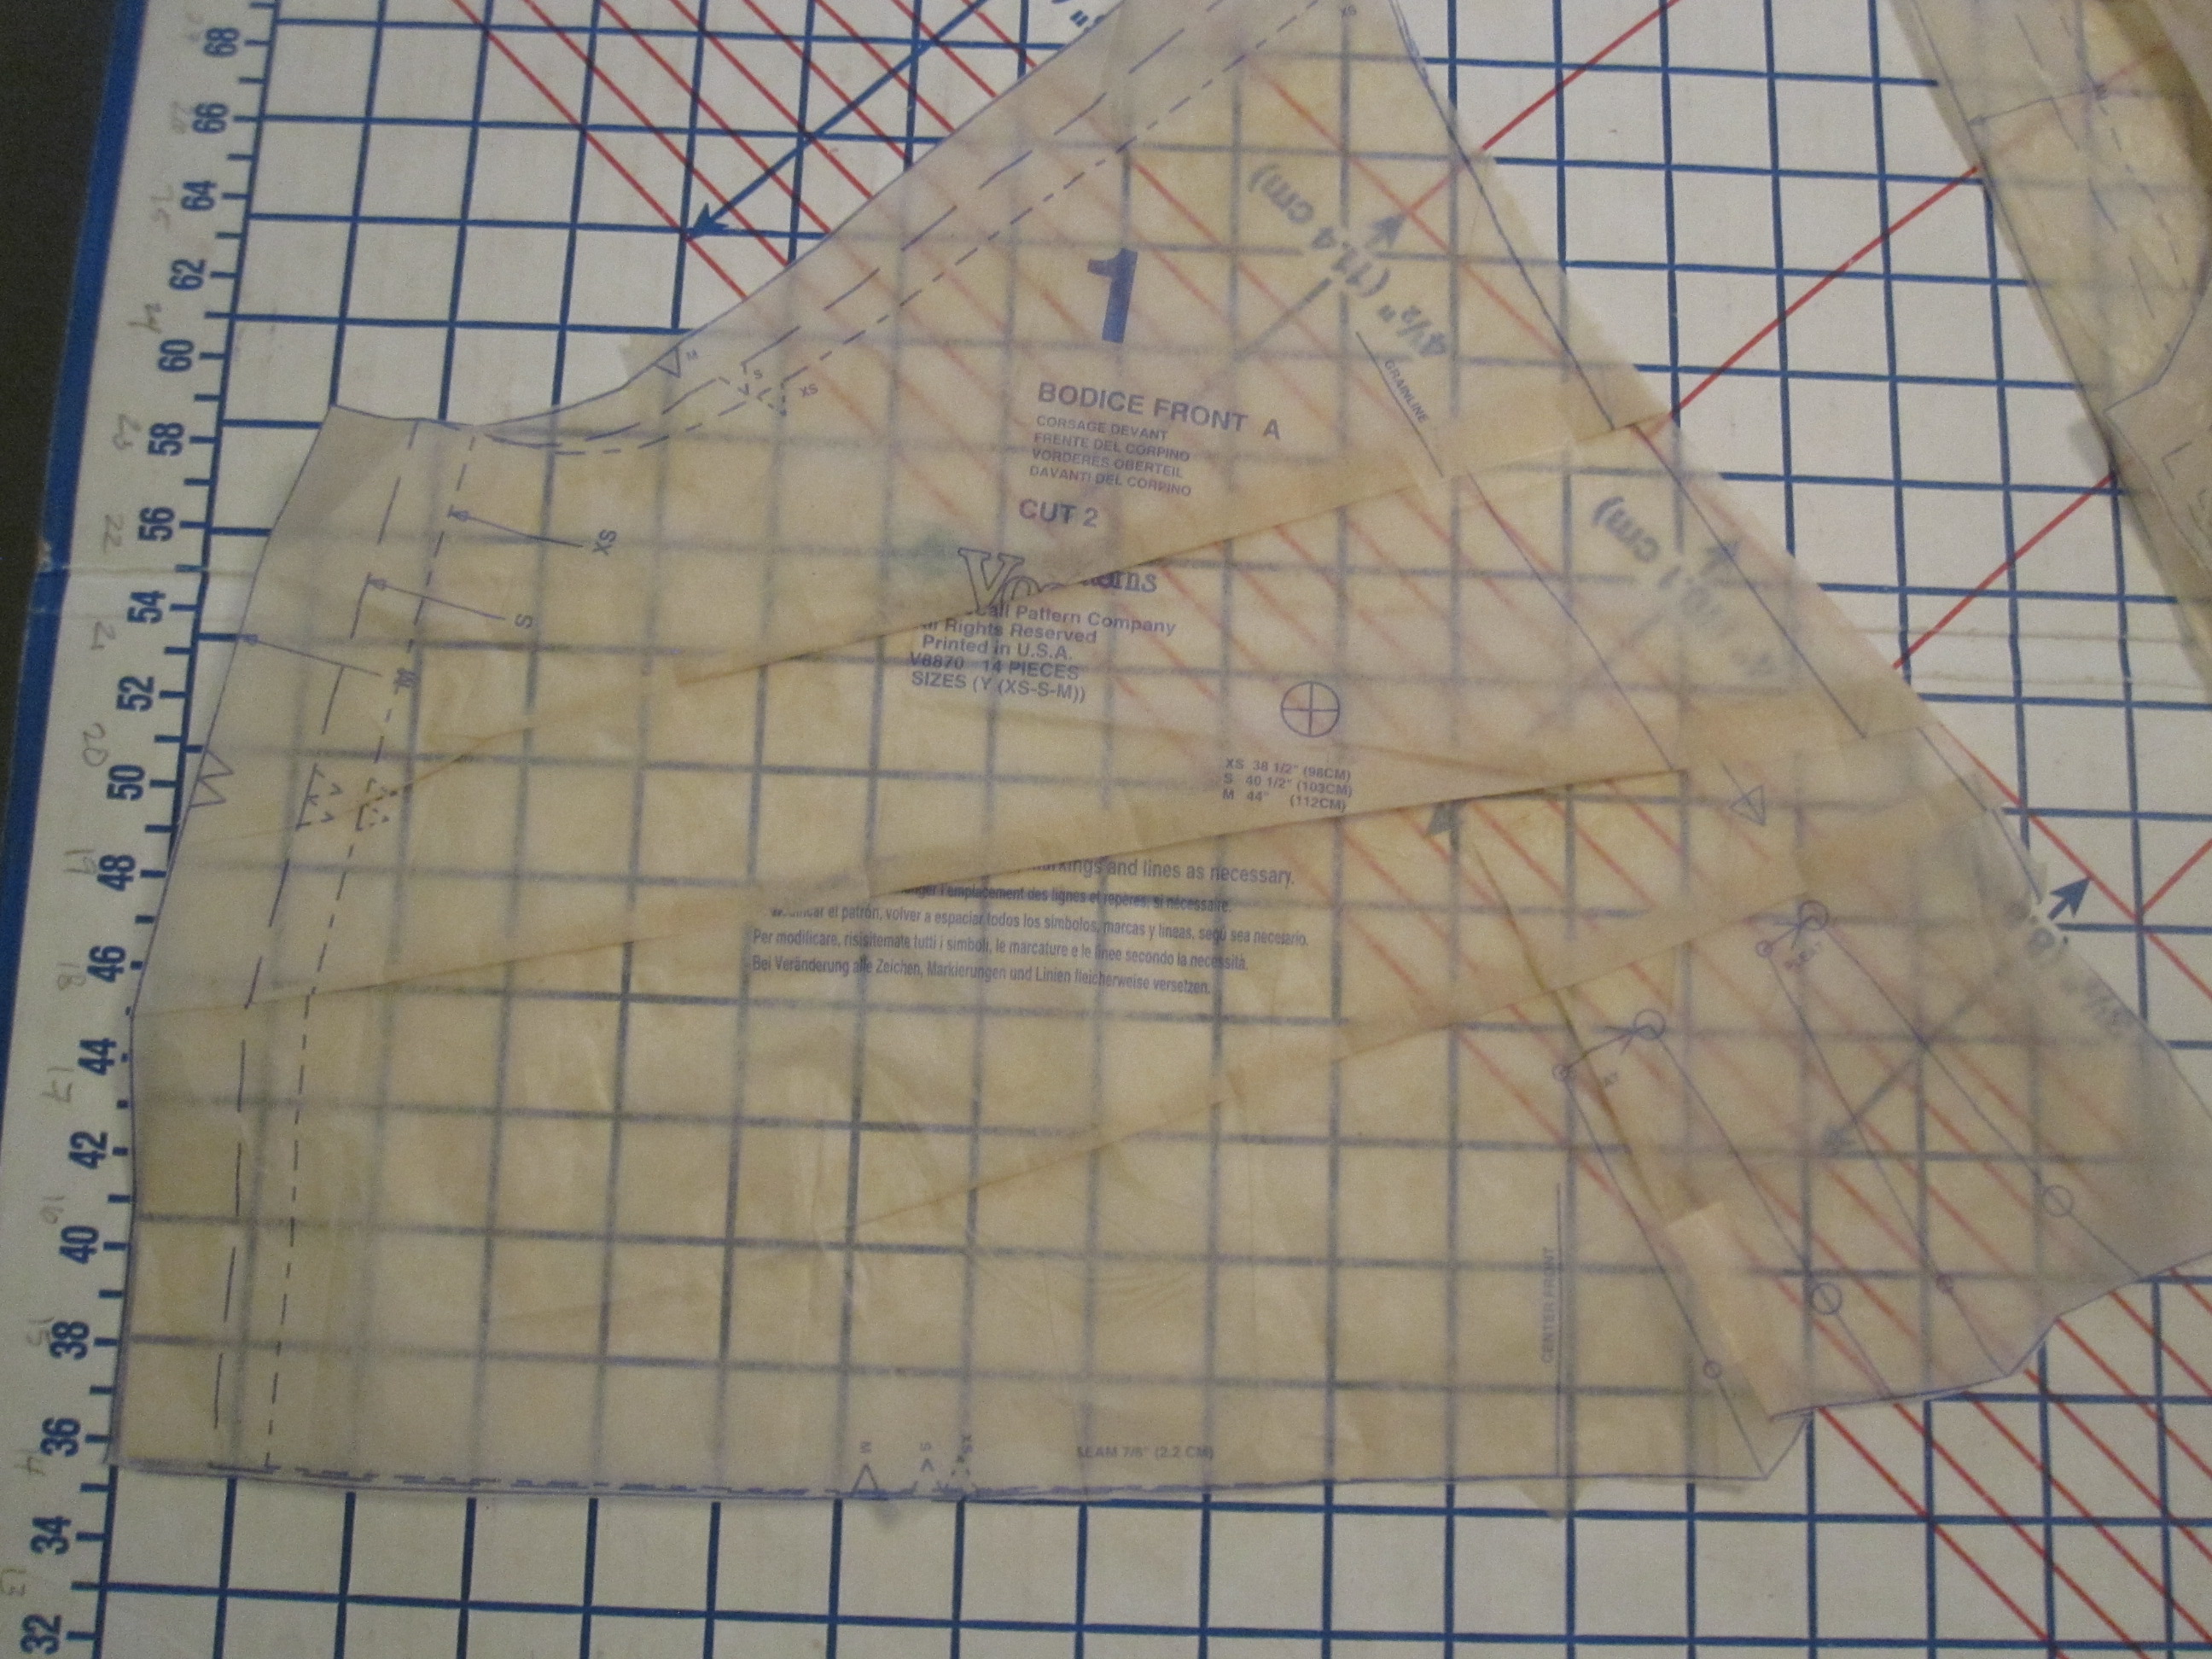
Broad Back Adjustment


I did my usual adjustments, including a broad back.  I should have been more aggressive with the broad back.  I didn't want the hassle of bringing the adjustment into the raglan sleeve, so I just did it on the bodice piece, and I don't have as much movement through the back and shoulders as I would like.


There was universal praise for this pattern among those who have sewn it, but I had an *awful* time with it.  I think the flowing silk charmeuse added a level of complexity the pattern could not take.

Back Neck Dart

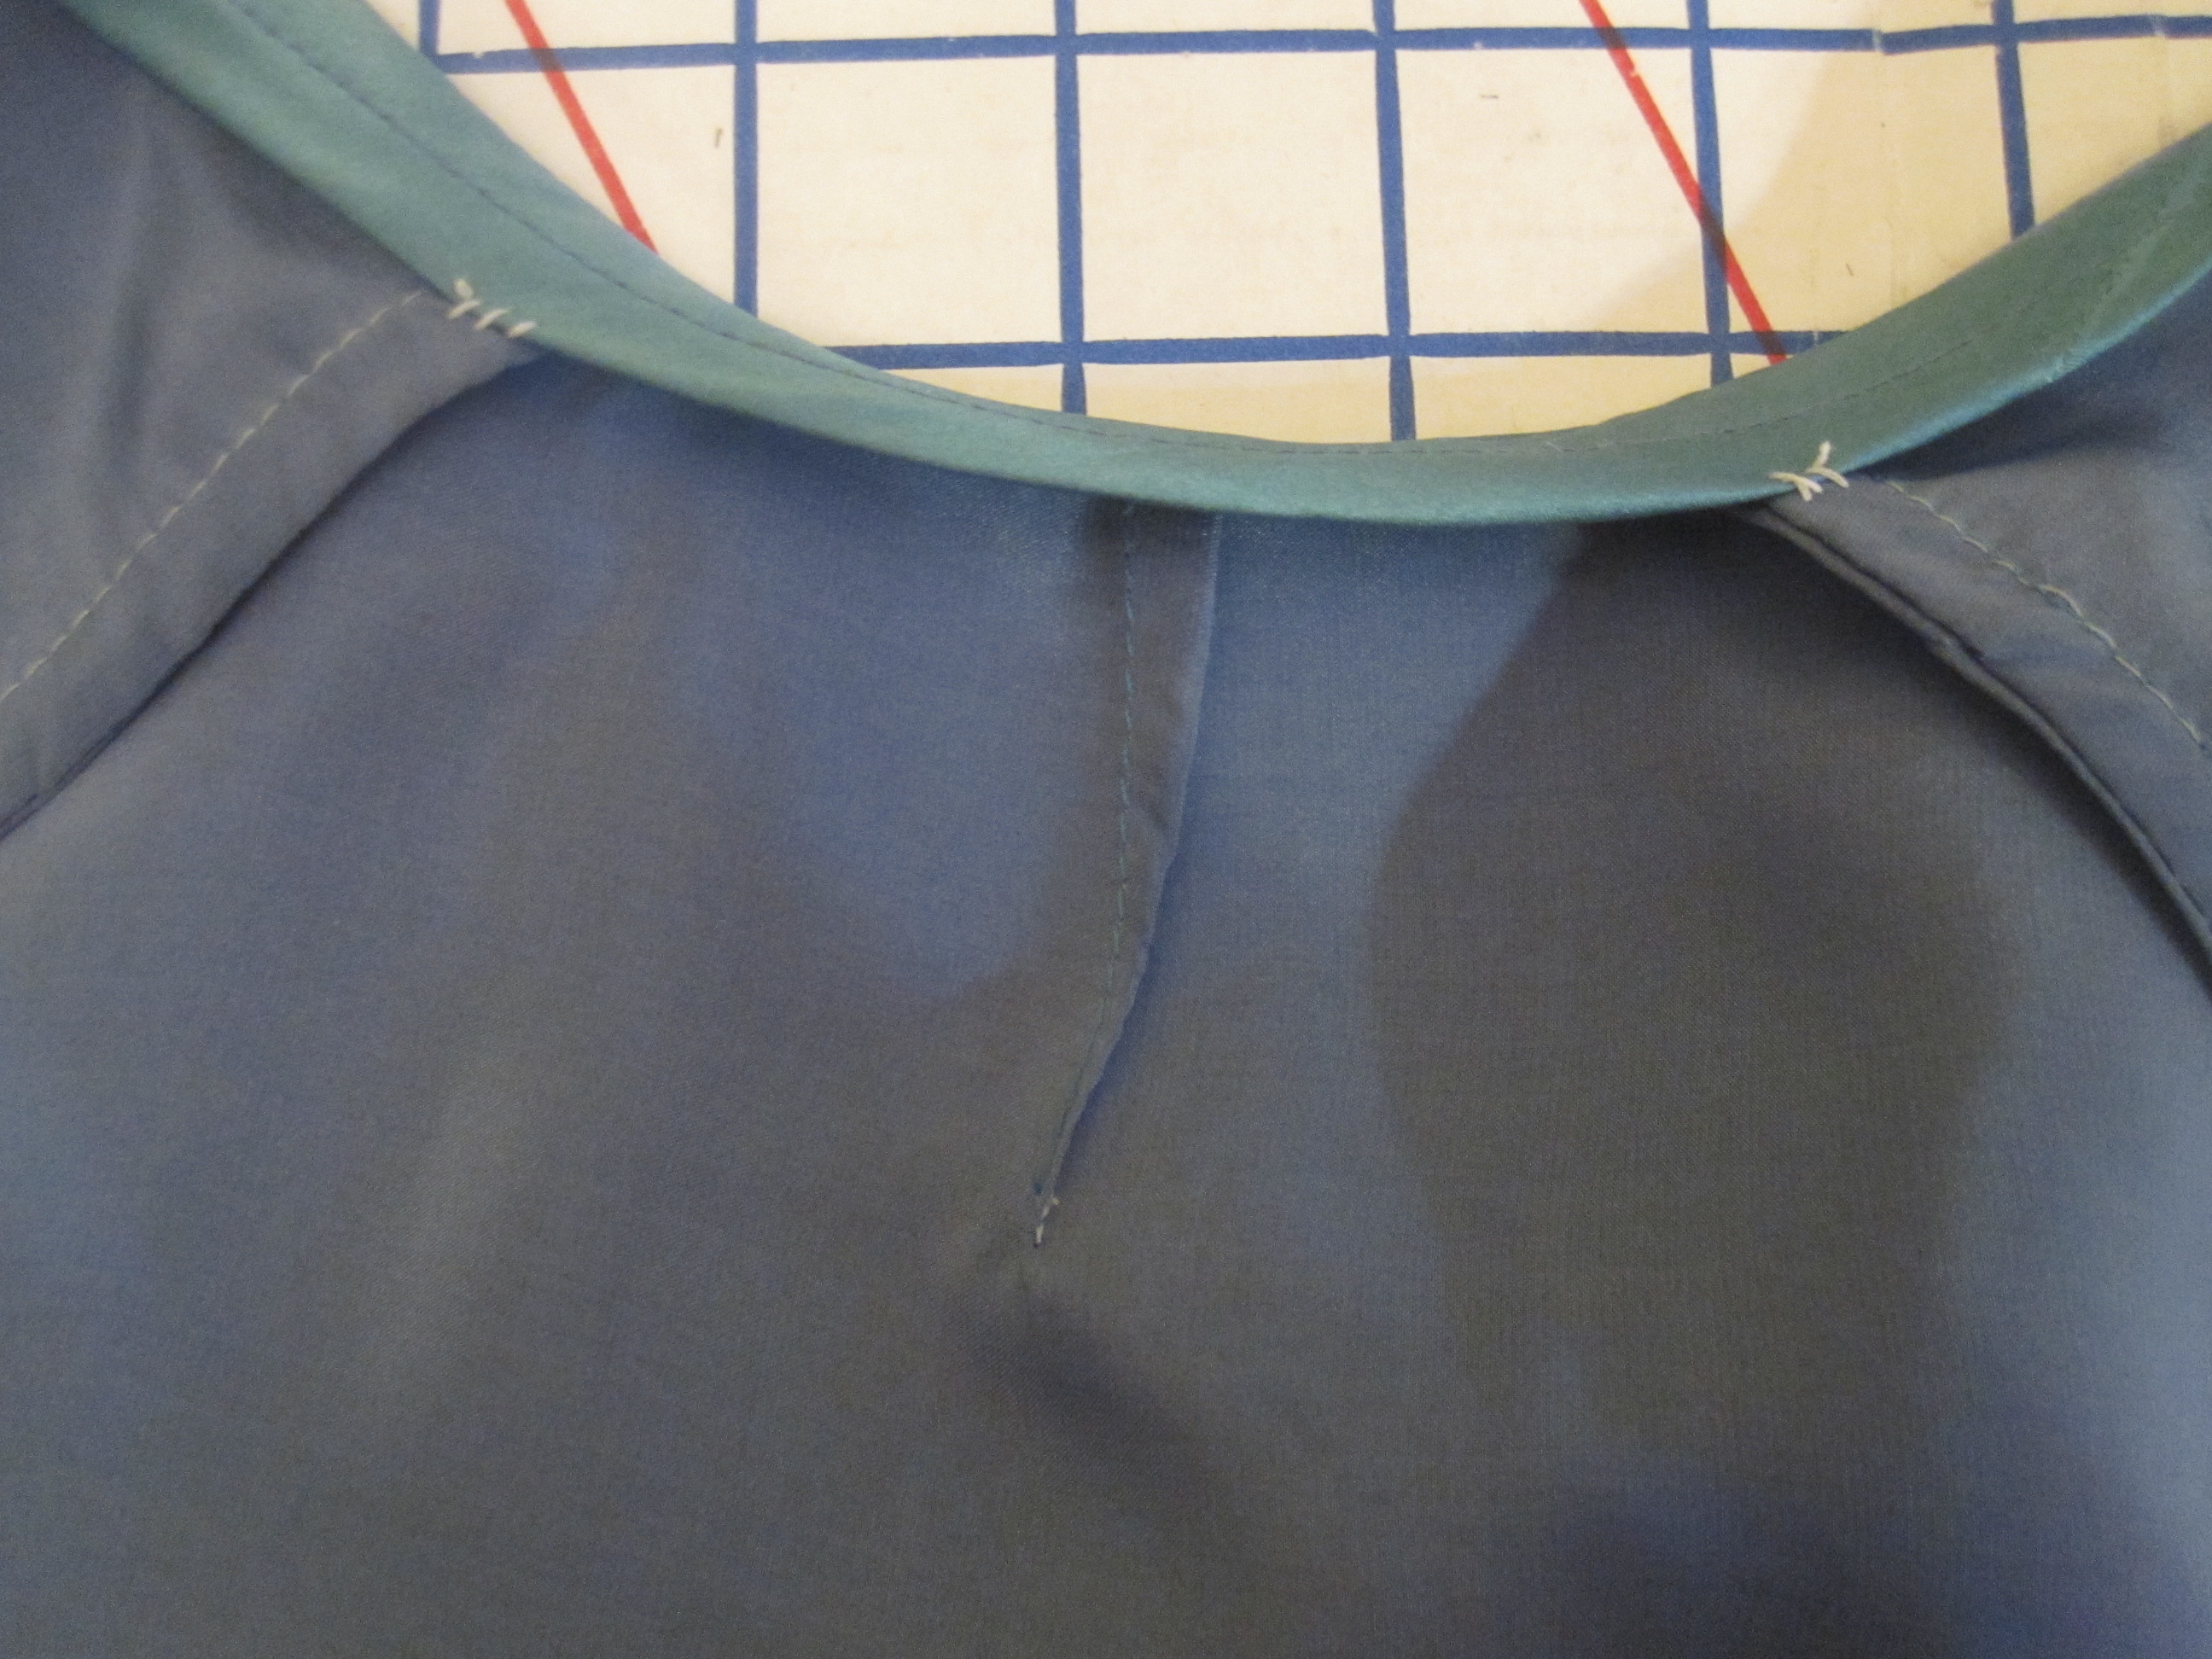
I had a little gaping at the back neck, which is not unusual for me.  I added a tiny dart, which took care of it.

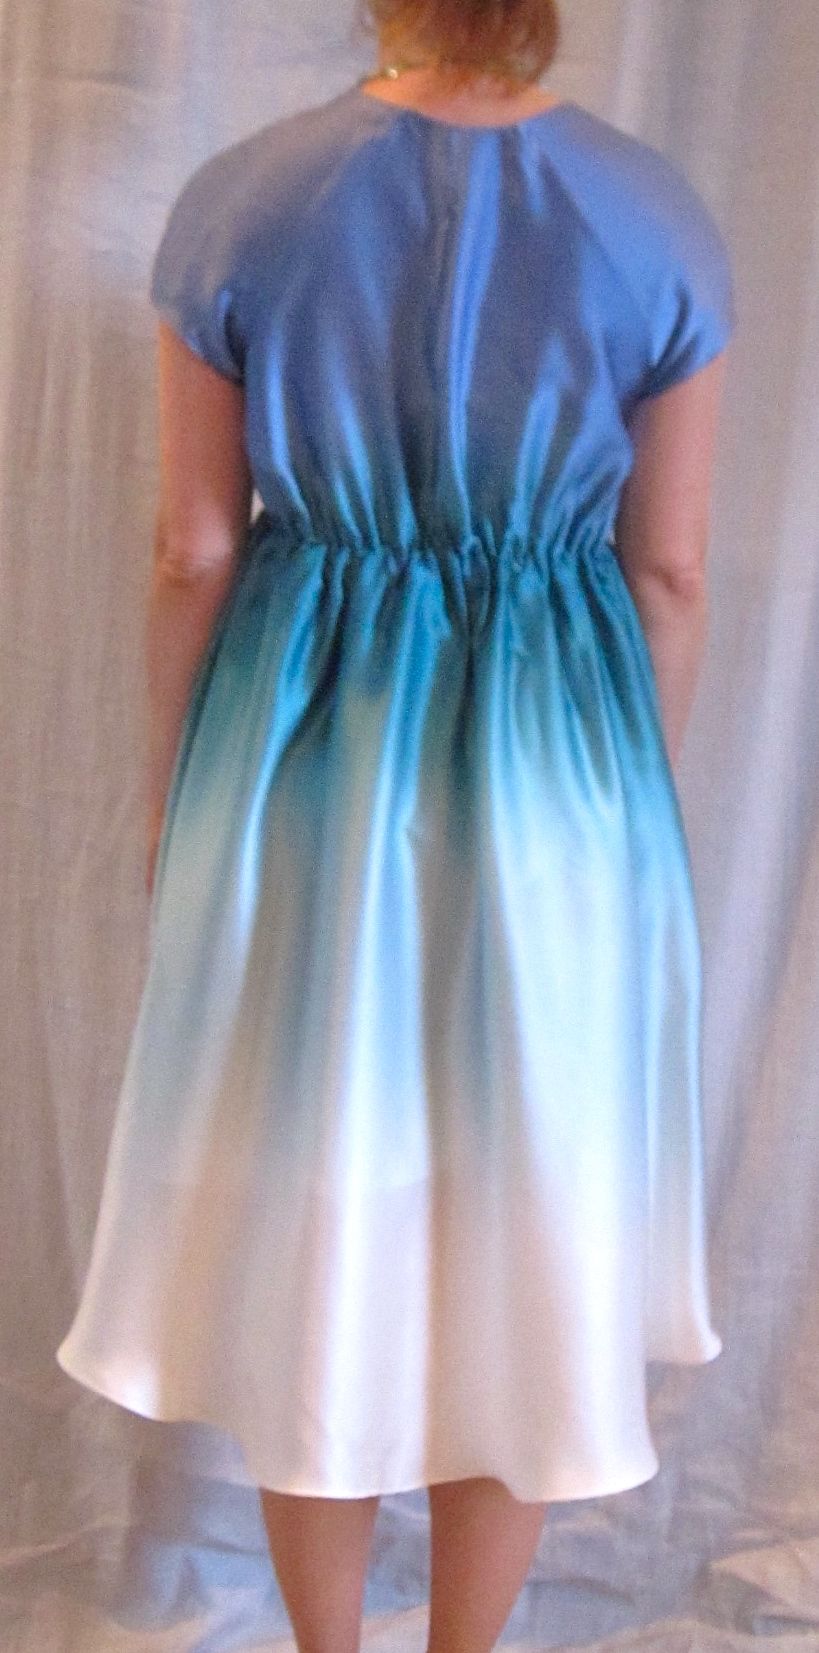
My main issue, though was the length of the bodice.  The side seams drooped a full two inches lower than the center front and back.  I sewed it to the skirt like that thinking that once the waist was elasticized there would be some sort of miracle transformation.

There was not.

So I put the dress on inside out and tied elastic around my waist and snugged it even with the lower edge of the center front and back of the bodice, then marked on the side seams where the elastic lay, which was two inches shorter.  Then I ripped the skirt off (poor silk!), reinforced the stitch line with strips of interfacing, trimmed the sides of the bodice at my markings, and sewed it back together with the shortened side seams.  Much, much improved.

The side seams of the front bodice are cut on the bias because of the grain direction, so I assumed the problem was my carelessness in letting the seam stretch out (though the back side seam is pretty close to straight grain).  But comparing the pattern piece to the finished dress, the side seam was as drafted.  I really don't know what happened.

Small Bust Adjustment

Part of the problem may have come in with my Small Bust Adjustment of shortening the front bodice crossover.  I probably could have shortened it half as much and not had gaping; this is *very* unusual for a Big 4 pattern.  Anyway, the front pulls up a little and it's hard to keep the shoulder seams exactly square on my shoulders.  (I did nothing to the length of the back bodice, though, and it had the same length problem there with a very high center back and the drooping side seams.)


Experimenting with the elastic in the "waist" casing, it looked best if it started and ended about 3 inches in from the side seam on the front, with the center front completely flat and unelasticized and the majority of the gathering in the back. 

Back UnbeltedFront Unbelted It still isn't great, so I went for the universal solution to a bad waist:  the sash.  Without the sash it is just bad.

However, the Bust Pleats to Nowhere I will not take credit for.  I don't know if they are angled wrong, or too close to the center front (and I overlapped the fronts about an extra 3/4" from the design) or what.  But they do not create flattering draping over the bust.  They just create a bubble of fabric above the waistline.

Speaking of which, the waistline is way high!  It is dangerously close to empire, and I swore off empire last year, no matter how much I am tempted, because it is very of a moment for 2011 and the expiration date approacheth.

I like the raglan sleeves, though they are a tad restrictive.  The downward slope of the shoulder is pretty severe.

Dyed to Match Bias Tape

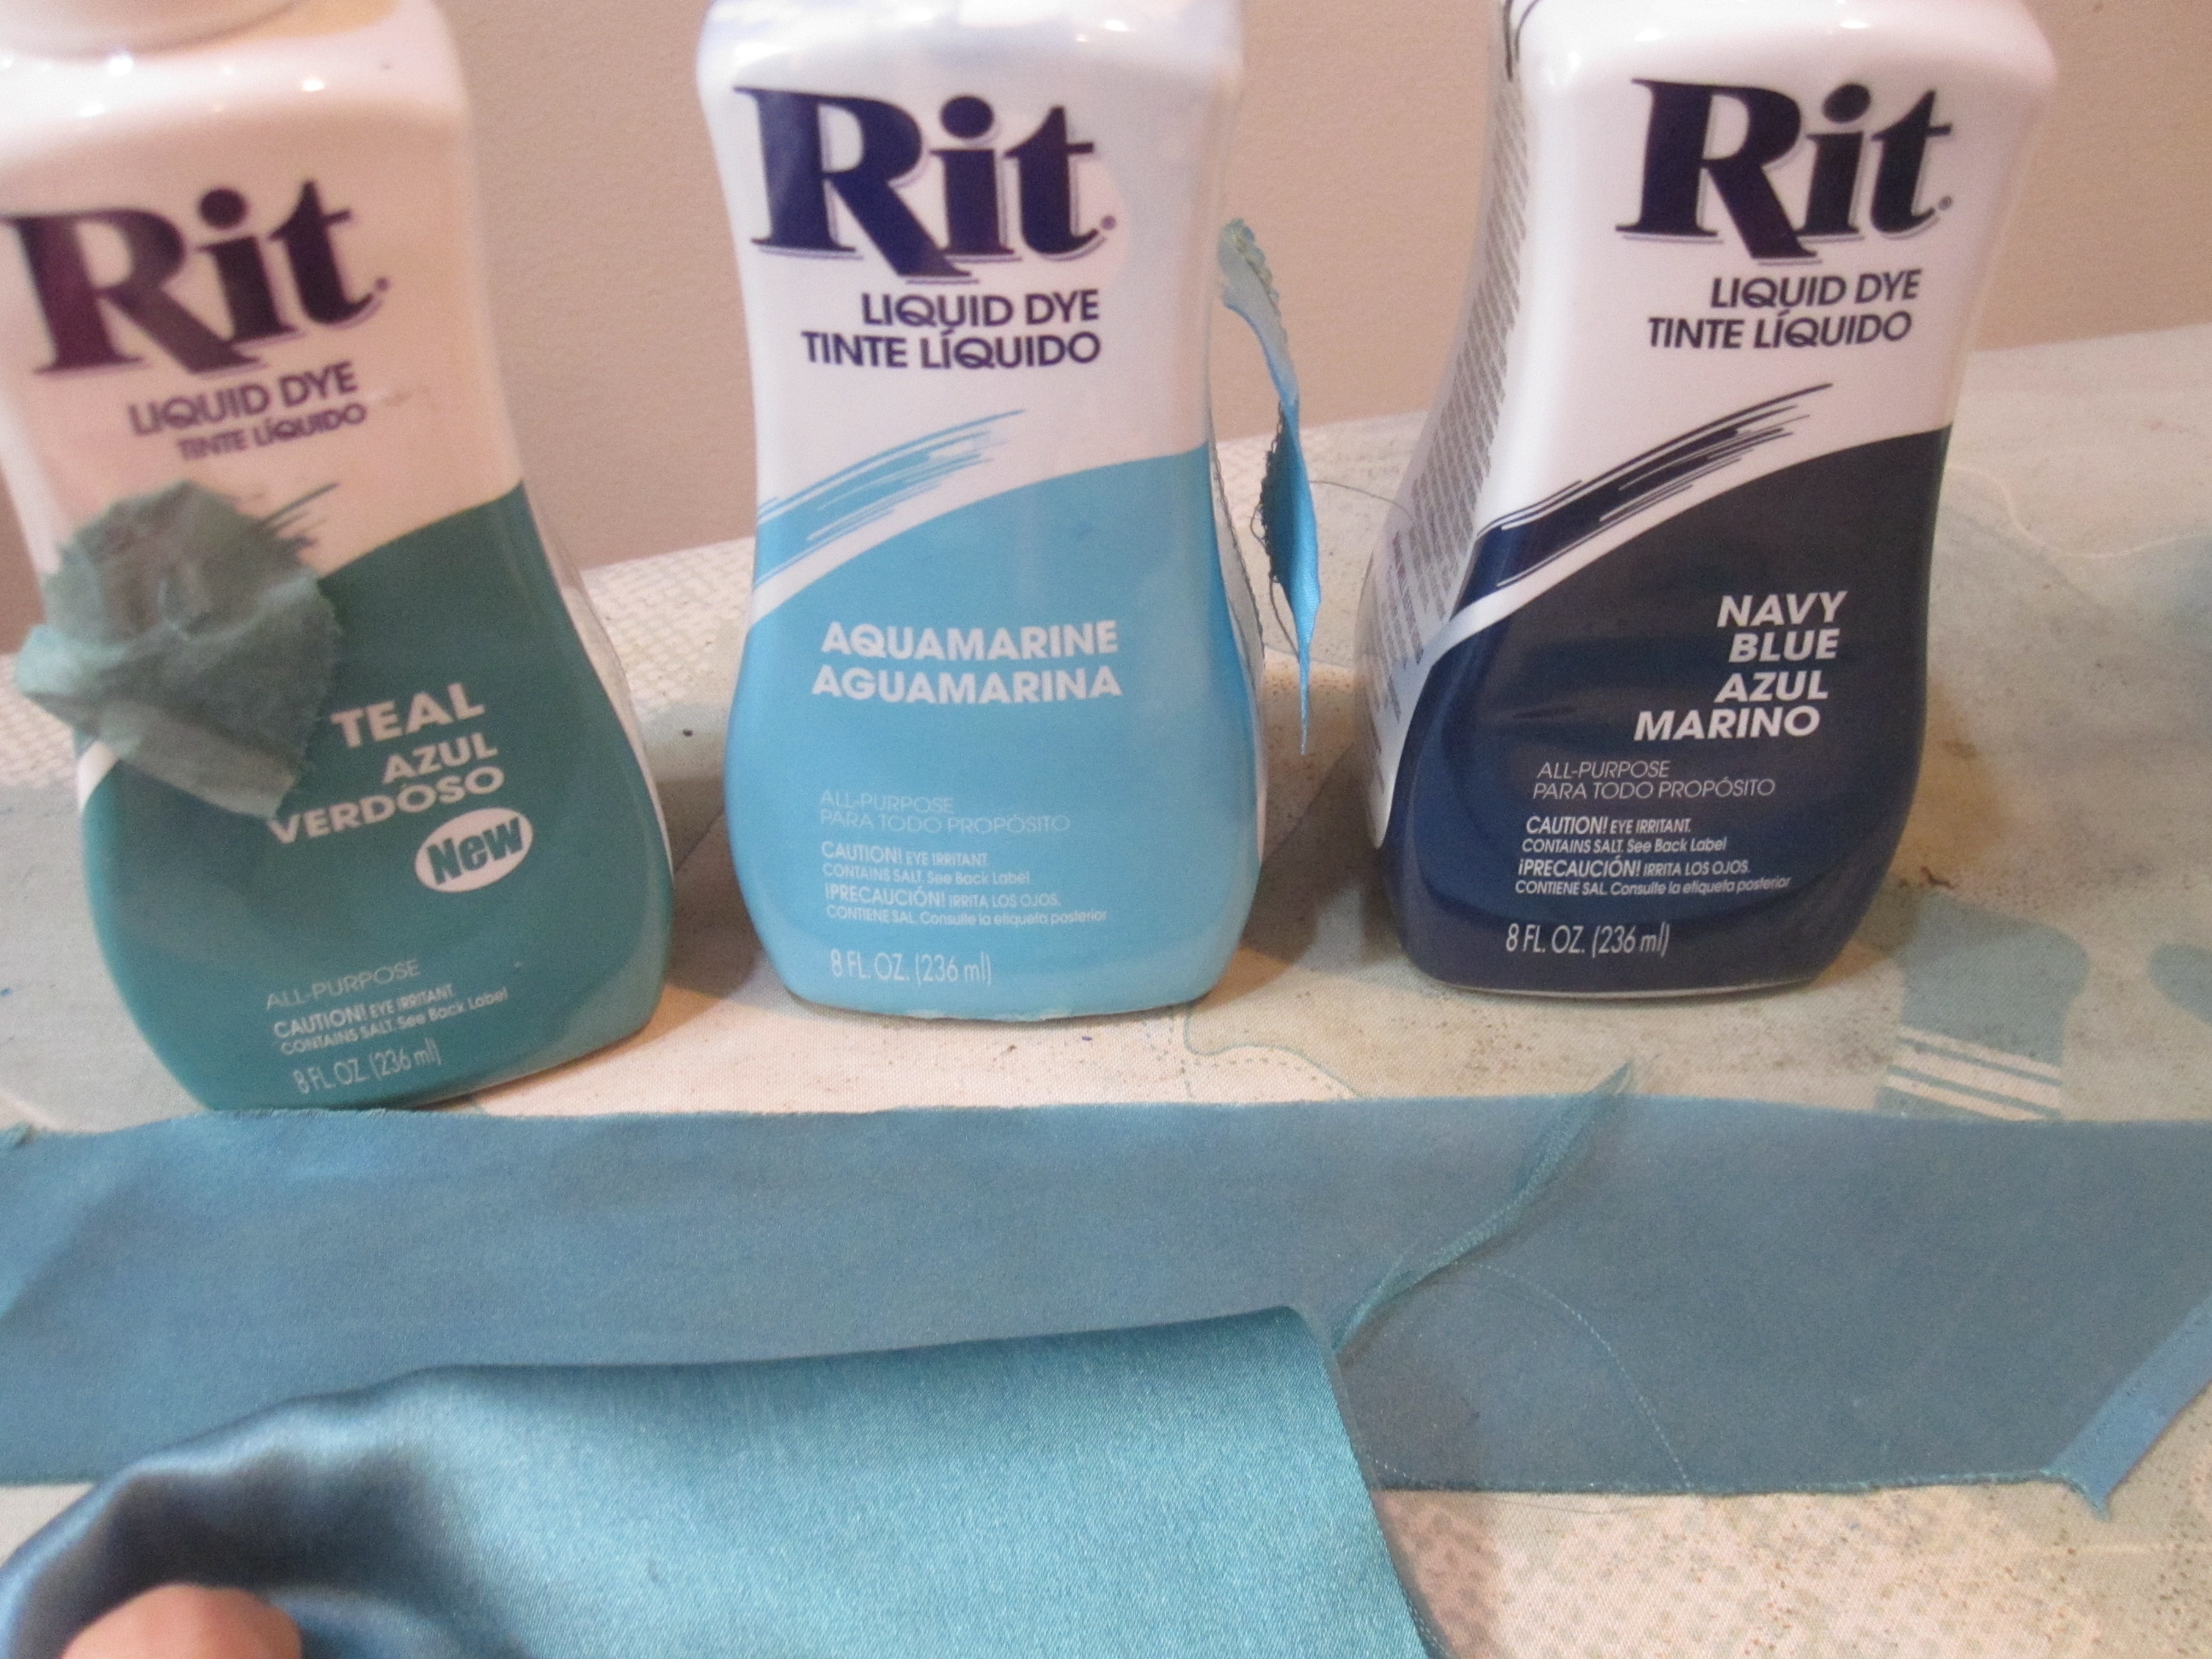
I finished the neckline with bias tape rather than a facing.  I used the leftover bit of white fabric from below where I cut the front skirt to make the bias tape and then dyed it using a mix of Teal (mostly), Aquamarine (a little), and Navy (just a few drops) liquid Rit dye.  I managed to get an almost perfect match for the turquoise in the fabric, much to my surprise.  In the photo at right, the dyed bias strip is above and the original fabric is below.  (Alas, an attempt to dye cotton in the same dye bath did not have good results.)


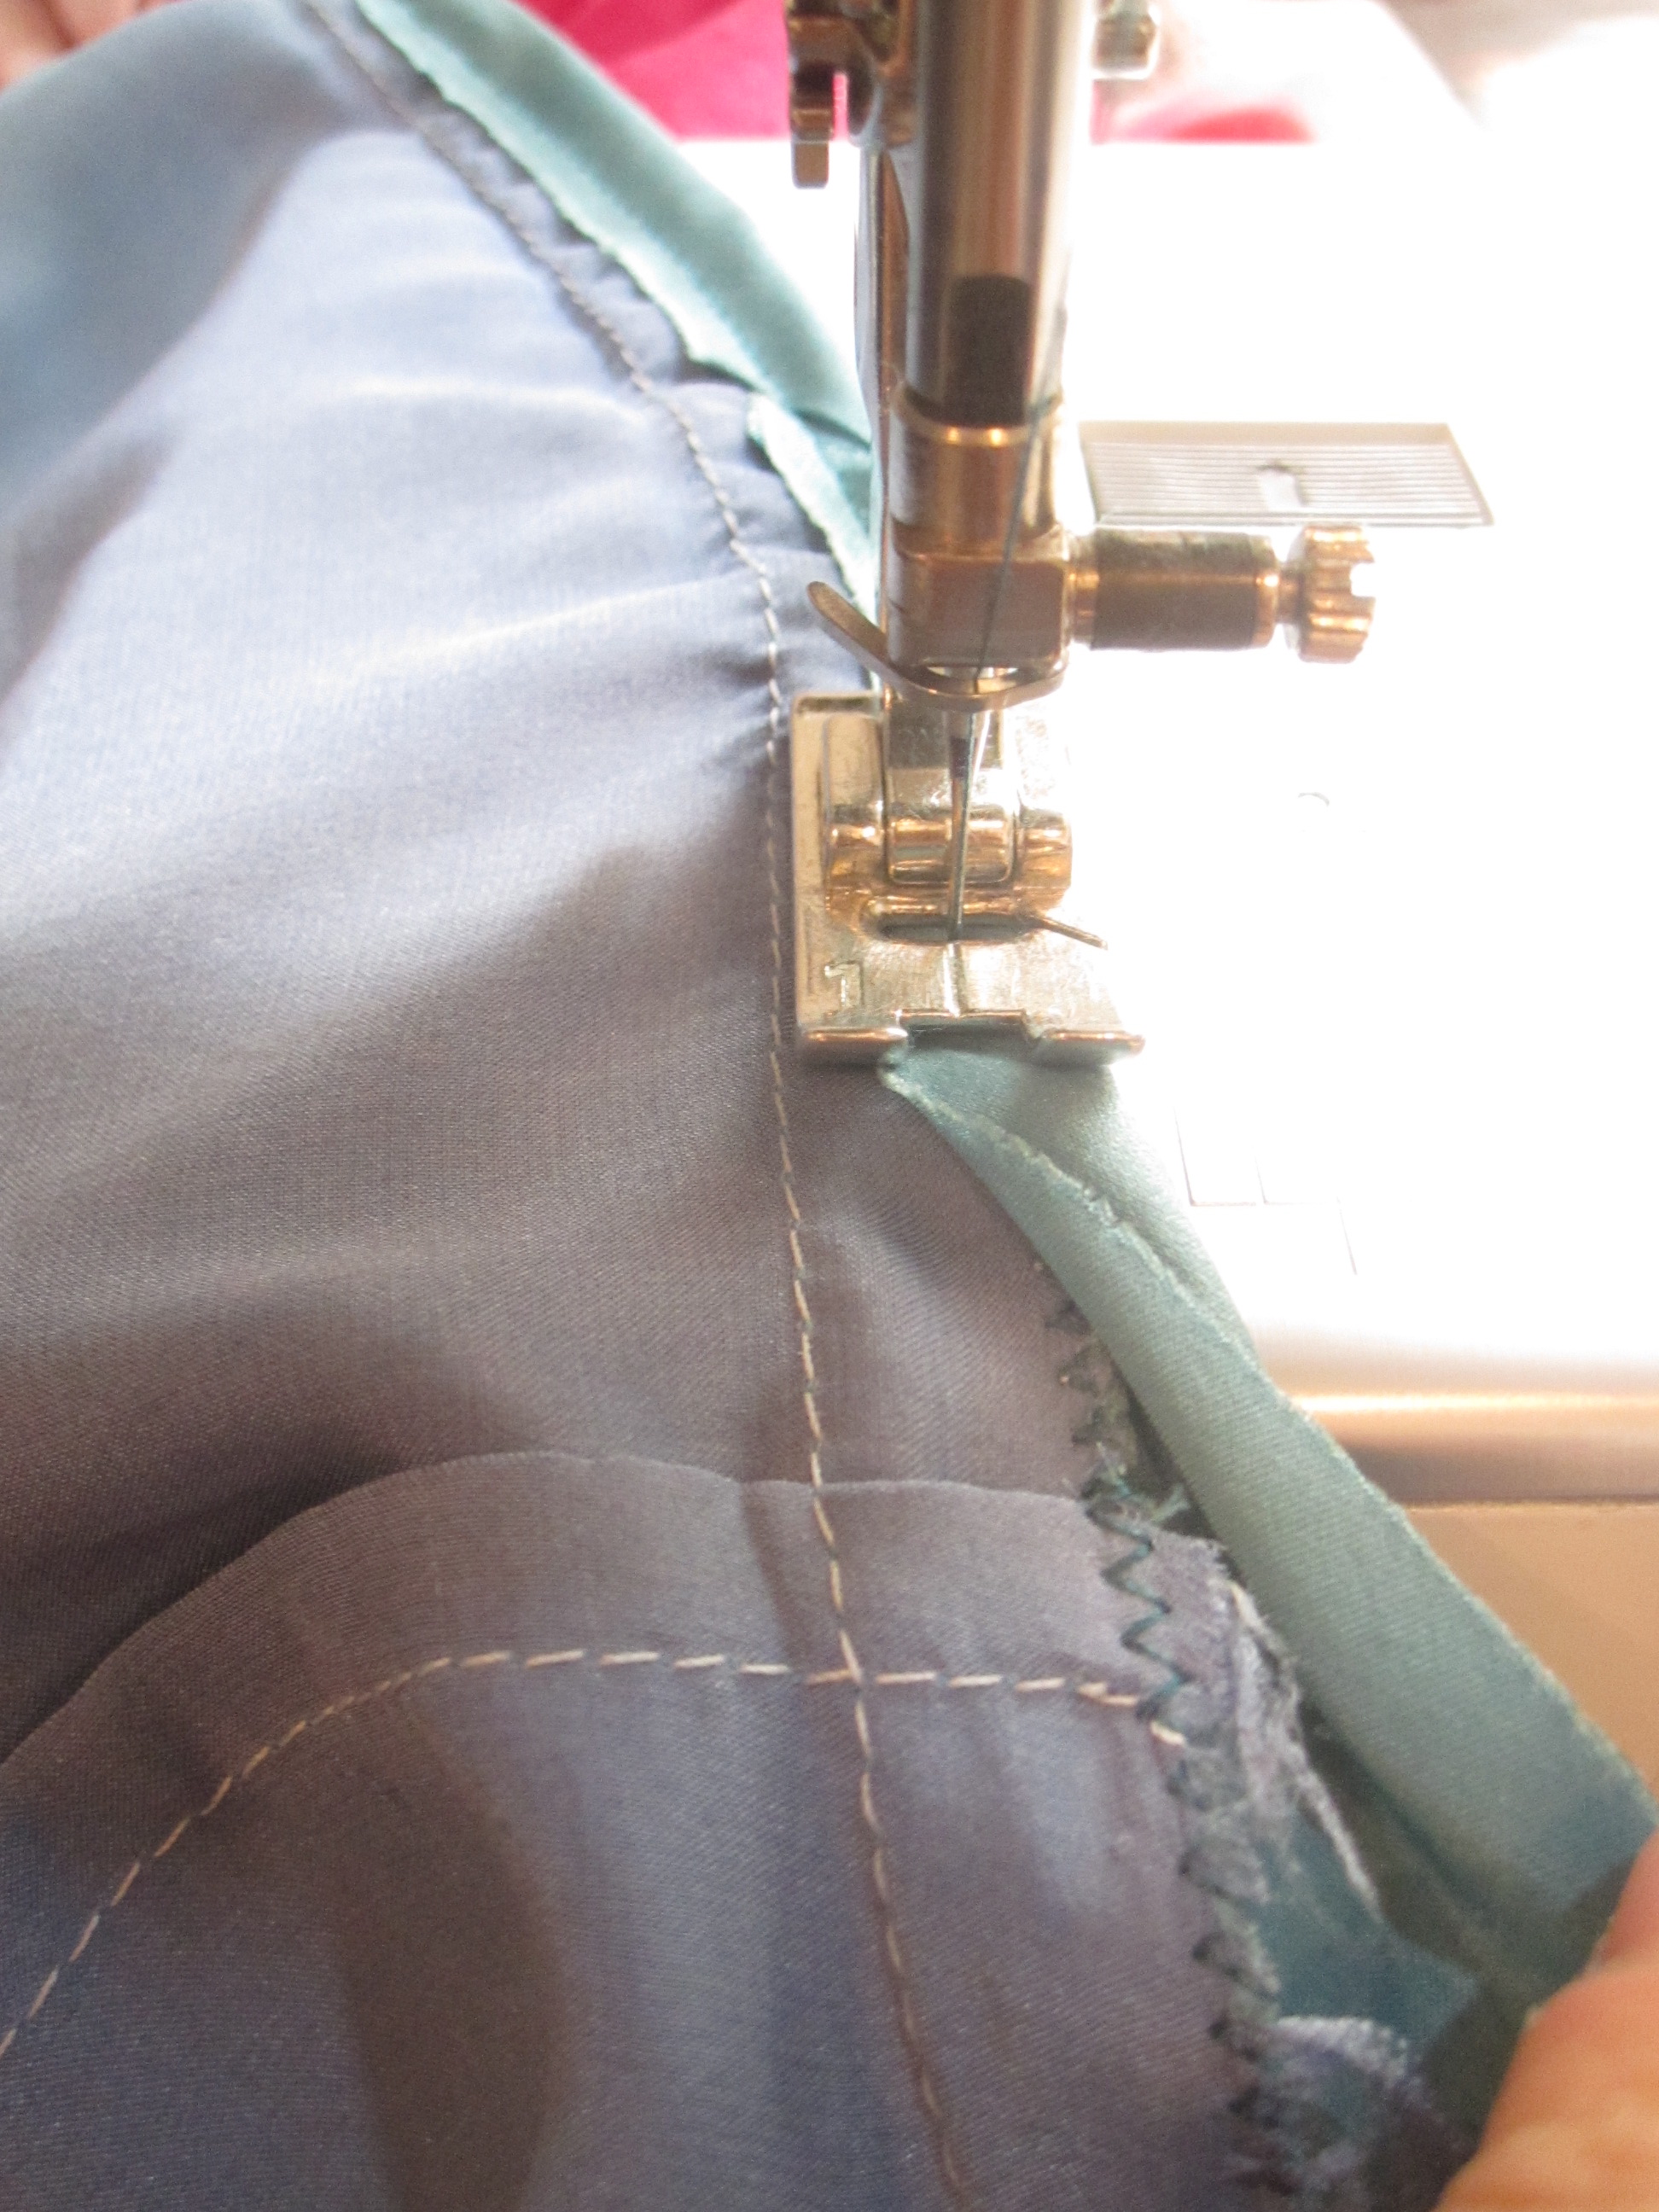
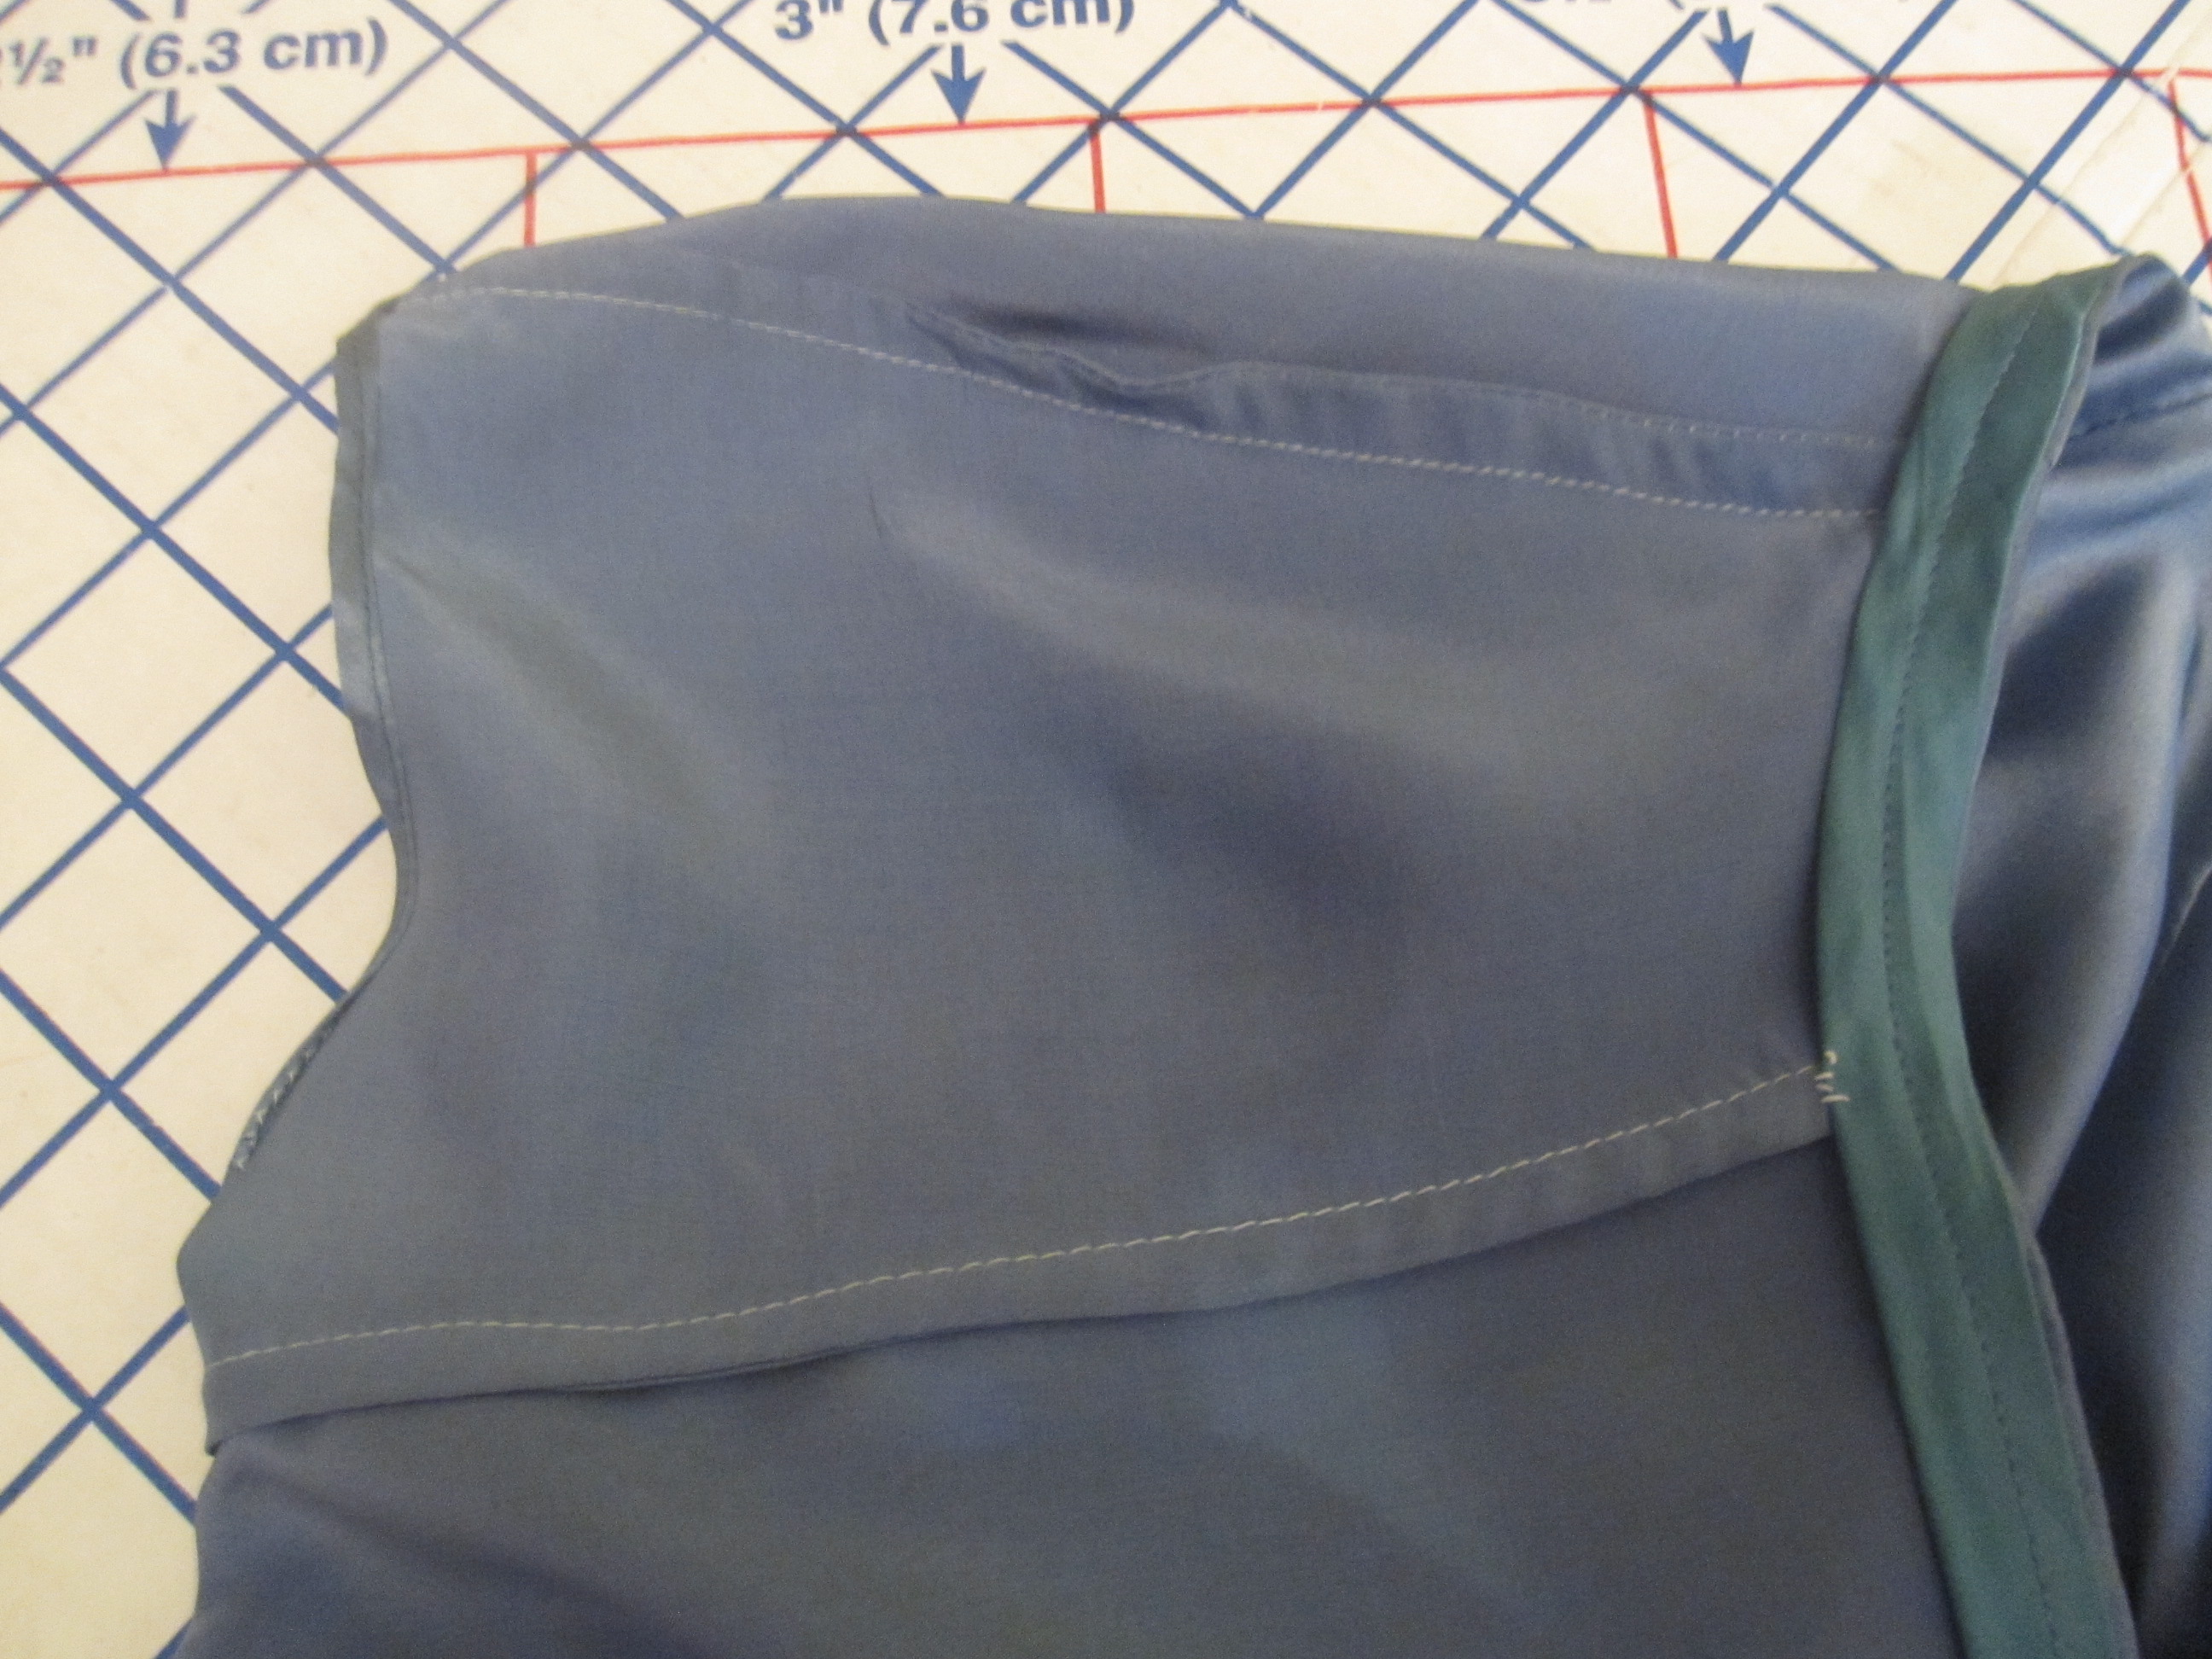
Stitch Bias Tape over SA

After sewing the bias tape to the right side of the neckline, I stitched the raw inside edge of the bias tape over the neckline seam allowance before pressing under.  It is kept in place by strategic hand stitches at the sleeve seams.

I cut the back skirt on the fold rather than with a CB seam, as did most everyone who made the pattern.  It required ignoring the grainline, but a seam would have interfered with the smooth ombre look of the skirt.

I lined the skirt only with silk/cotton Elegance from Martha Pullen.  This stuff is a dream for lining!  I drafted a straight across hem for the lining, rather than making it high-low as well.  It shines through a little, so maybe that was a mistake.  My pet peeve for patterns with "specialty" hemlines like this is when they do not come with a "regular" hemline marked as well.  It limits the versatility of the pattern.

French Seams

It's frustrating that this dress turned out kind of meh.  I put a lot of work into it; I sewed it while my serger was in the shop so it has gorgeous French seams for everything but the waist.  It's a luscious silk.  And it will have to be my birthday dress (tomorrow!) because I had only 3 weeks to sew for the Greek islands instead of a month and a half.

Front


When it is all dressed up with accessories, it passes for a cute dress.  But it definitely cannot stand on its own.

I like the idea of this pattern but I'm not sure I'll give it another try.  Definitely not the crossover bodice.  If the mood strikes I would try to draft a plain bodice with sleeves based on the spaghetti strap version.  I like the spaghetti strap version as is but seriously, bra.  Strapless bras are horrible.  I would recommend a stable but lightweight cotton as the best fabric; a good quality lawn would be perfect.  I think this could also work in a knit.

All photos are here and the pattern review is here.

===============

Trip sewing continues apace!  So far I have made:
-3 bikinis
-shorts
-yoga/hiking capris

-nightie

I have a knit dress done except for the hem, and a knit top about halfway done.  The last two pieces on my list are a little sweater and another knit top.  Though this is a long weekend, it will be full of birthday festivities so we'll see.

Wednesday, November 28, 2012

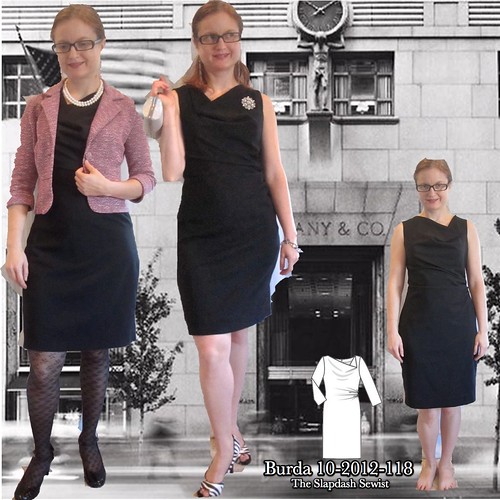
Burda 10-2012-118, Side Gather Cowl LBD

Burda 10-2012-118 Thumbnail

Burda 10-2012-118 (available for purchase from BurdaStyle at the link in sizes 34-42) is destined to become a Burda magazine classic.  It has already been made many times, including by AllisonC, Kristy of Lower Your Presser Foot, and Sigrid, to name a few.

Luckily, because so many people had tested it before me, I knew I could safely ignore the marked grain--which has the cowl on straight grain and the skirt on the bias--and place the skirt on straight grain.  This gives the cowl a little more drape and the skirt a firmer hand.  I really don't know why Burda designed it the other way.  BWOF, you are still a mystery to me!

Also, note an error in the instructions:  the pattern pieces are on sheet B, not sheet A.  The corresponding black-lined piece numbers on A are a pair of pants, which really confused me.
 
I traced my usual sizes:  34 at the shoulders and bust (and halle-freakin'-luja for a pattern that is already a 34 and doesn't have to be graded--they are getting rarer and rarer), a 36 at the waist, and between a 38 and a 40 at the hip.  I cut a 38 at the hip for years but lately have sometimes needed a 40.  However, for this size 39ish cut I had to shave off about 1/4" on the hips, ending at the saddlebag.  This is the only area in which I find Burda's sizing inconsistent, though it is only slightly inconsistent.

The fitting adjustments I made were a swayback adjustment and a broad back. I also added a back neckline dart for my narrow neck.  I did not change the bust fit--a cowl is a nice way to accommodate a variety of bust sizes.  The broad back adjustment adds a bit of puffiness over the shoulder blades, and I probably could have lived without it in this sleeveless stretch garment, but eh.  The sinking feeling of not being able to move my arms in a just-completed garment is much worse than some puffiness.

Drafting Front Lining

This stretch wool, from the Vera Wang $1.99 blowout on Fabric.com a couple years ago, is rather sheer.  I debated whether to plan to wear it with a slip or to line it.  For a dress this fitted, I feared that a slip would bunch underneath it and ruin the line so I decided to line.  Well, then my dilemma was that I needed a lining fabric with adequate stretch.  I have some stretch lining in a very light gray, which I used to the line the godet pencil skirt I previously made of this fabric, but I am really not happy with the quality.  I decided to go with a fairly opaque tricot from G Street's $2.97/yd table.

My first step in creating the lining was pleating out the gathered width.  I didn't want a bulky lining.

Next, as described in my review of Burda 7519, I folded over the front self-facing (very generous in this pattern, a really nice touch) and marked the bottom of it on the pattern.  In this case, it was below the armscye.  In cutting, I added seam allowance to the top of the front self-facing, and cut the front lining 1/4 inch above the marked line (for seam allowance).

Back Facing
Faced/Lined Back


To ensure that the flesh-tone tricot would not show, I cut a back facing of the wool, fused with lightweight interfacing, and stitched it on top of the back lining.  I should have been thinking about the width of the front self-facing so that the facing would look more seamless, but I like a generous facing and cut the back facing lower down the side seam than the front facing.

I interfaced the armscye of the front-self facing so I would get nice sharp lines.

Lining Lace

Taking a nod from Carolyn, I sewed stretch lace on the bottom of my lining.  Of course, I realized it would have been better to sew the black lace on the outside of the lining--the side the actually faces the public--rather than the side the faces me, just in case of show through.  But I like the way it looks when it's facing me!

I realized too late that the neckline was a touch too wide for my taste.  I solved this by taking 1/4" seam allowances at the inner shoulder rather than 1/2", though this made sewing the front to the back tricky there.

Front Sandwiching the Back

I used the same construction method as for Burda 7519, modified for the sleeveless style:
1.  Finish back neckline and armscyes with the facing/lining
2.  Sandwich back shoulder between front and front self-facing, stitch shoulder.
3.  For a sleeveless cowl, pivot at the seamline on the shoulder and continue all the way down the bottom of the armscye.
4.  Sew the lining and fashion fabric side seams, matching underarm seams.

Turn everything right side out and like magic, your dress is almost completely done!  All that's left is the zipper/CB seam and the hem.

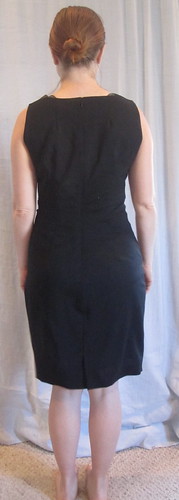
Back
Evening Look with Gold


The darts are very low in the back, going almost to the fullest part of the booty.  I tried shortening one of them, so I could compare them.  Wrinkles appeared on the high hip in the back on the shortened side.  I was neutral as to whether high-hip wrinkles were worse than slightly pointy darts.  I decided to go with the pattern as drafted and the incredibly long darts.  When I look at the curve I am working with here, I can forgive myself for a not-totally-perfect fit.  It's just a lot of curve.

I added a walking slit so I'd have plenty of movement in the dress.


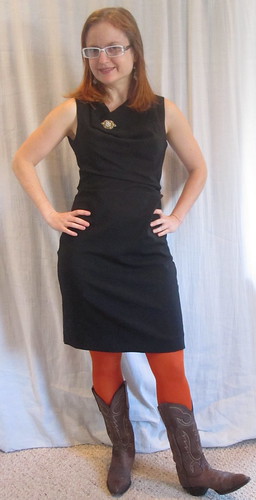
Burnt Orange and Boots


I was making this under the gun for an event and amazingly everything went pretty smoothly.

I came back from NYC and had literally 1 hour at home in which to do the hem (machine blind stitch) and little finishing bits.  Luckily, it got done in time.  The event's theme was "Texas" (as in the state and the University).  I didn't want to be too informal, as it was to celebrate a federal judge, but I didn't want to be out of the spirit of things.  A little black dress with burnt orange tights and cowboy boots seemed to strike just the right tone.


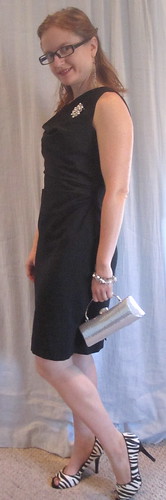
Evening Look with Silver
Day Look
The LBD contest on Pattern Review happened to coincide with my need for an LBD, so it was nice to have double motivation to make this for my event.   The rules require you to show the dress plain, with a day look, and with an evening look.  My looks aren't crazy different--but in my mind, the idea of a LBD is that it can go from day to evening with just a change of earrings and shoes.

I was hoping to get outdoor photos taken but the stars (or sun?) never aligned.  But there are a million photos.

I am very pleased with this dress.  The fit is excellent (at least under my not-too-stringent standards) and it definitely feels sophisticated and elegant.

It took me a while to get to like the cowl.  It's a shallow/narrow cowl and like the line drawing I can only get it to flop to one side, not to drape down the center as is standard for cowls.  Once I accepted that, I see it more as neckline origami than as a cowl.  However, it does limit necklace options.  It's better with a pin than a necklace.  In that sense, it may not fit the label for a classic Little Black Dress, where I think jewelry is supposed to be a big part of changing it from day to evening.  But the silhouette is definitely in the spirit and I will be glad to have this little number to pull out of the closet when needed.

All photos are here and the pattern review is here.

Thursday, November 21, 2013

Burda 05-2009-102, The Agony of Plaid Matching (aka Blazer for Tweed Ride)

Burda 05-2009-102 Thumbnail

Tweed Ride was a couple of weeks ago.  I wasn't sure I'd be able to attend so I hadn't put any thought into an outfit, but I ended up being free that day and I had one week to pull it together.  Eek!  I had just returned from vacation, before which I had engaged in an absolute orgy of sewing and was still kind of worn out.  So of course the logical thing to do was make a jacket.  A lined jacket.  In plaid.  In one week.  But last year I vowed that if I did it again this year I *would* finally make this wonderful plaid (a wool/poly blend, as it turns out) from The Carol Collection into a jacket.

I went through my BWOFs and decided I just loved Burda 05-2009-102.  Unfortunately, the smallest size it comes in is 36 and the pieces are complicated enough that I skipped grading to a 34 at the shoulders and bust as I would normally do.  Luckily, I was able to narrow the shoulders a bit on sewing and the fit in the upper part was pretty good.

Open Wedge in Back

Because the jacket was intended for a long bike ride, I wanted to make sure I had plenty of room for my broad back--reaching for the handlebars gets awfully old when your arms are restricted.  For armscye princess seams, you have to first pin the back and side back together at the stitch lines, mark your L, and then cut along the L and open out your wedge.
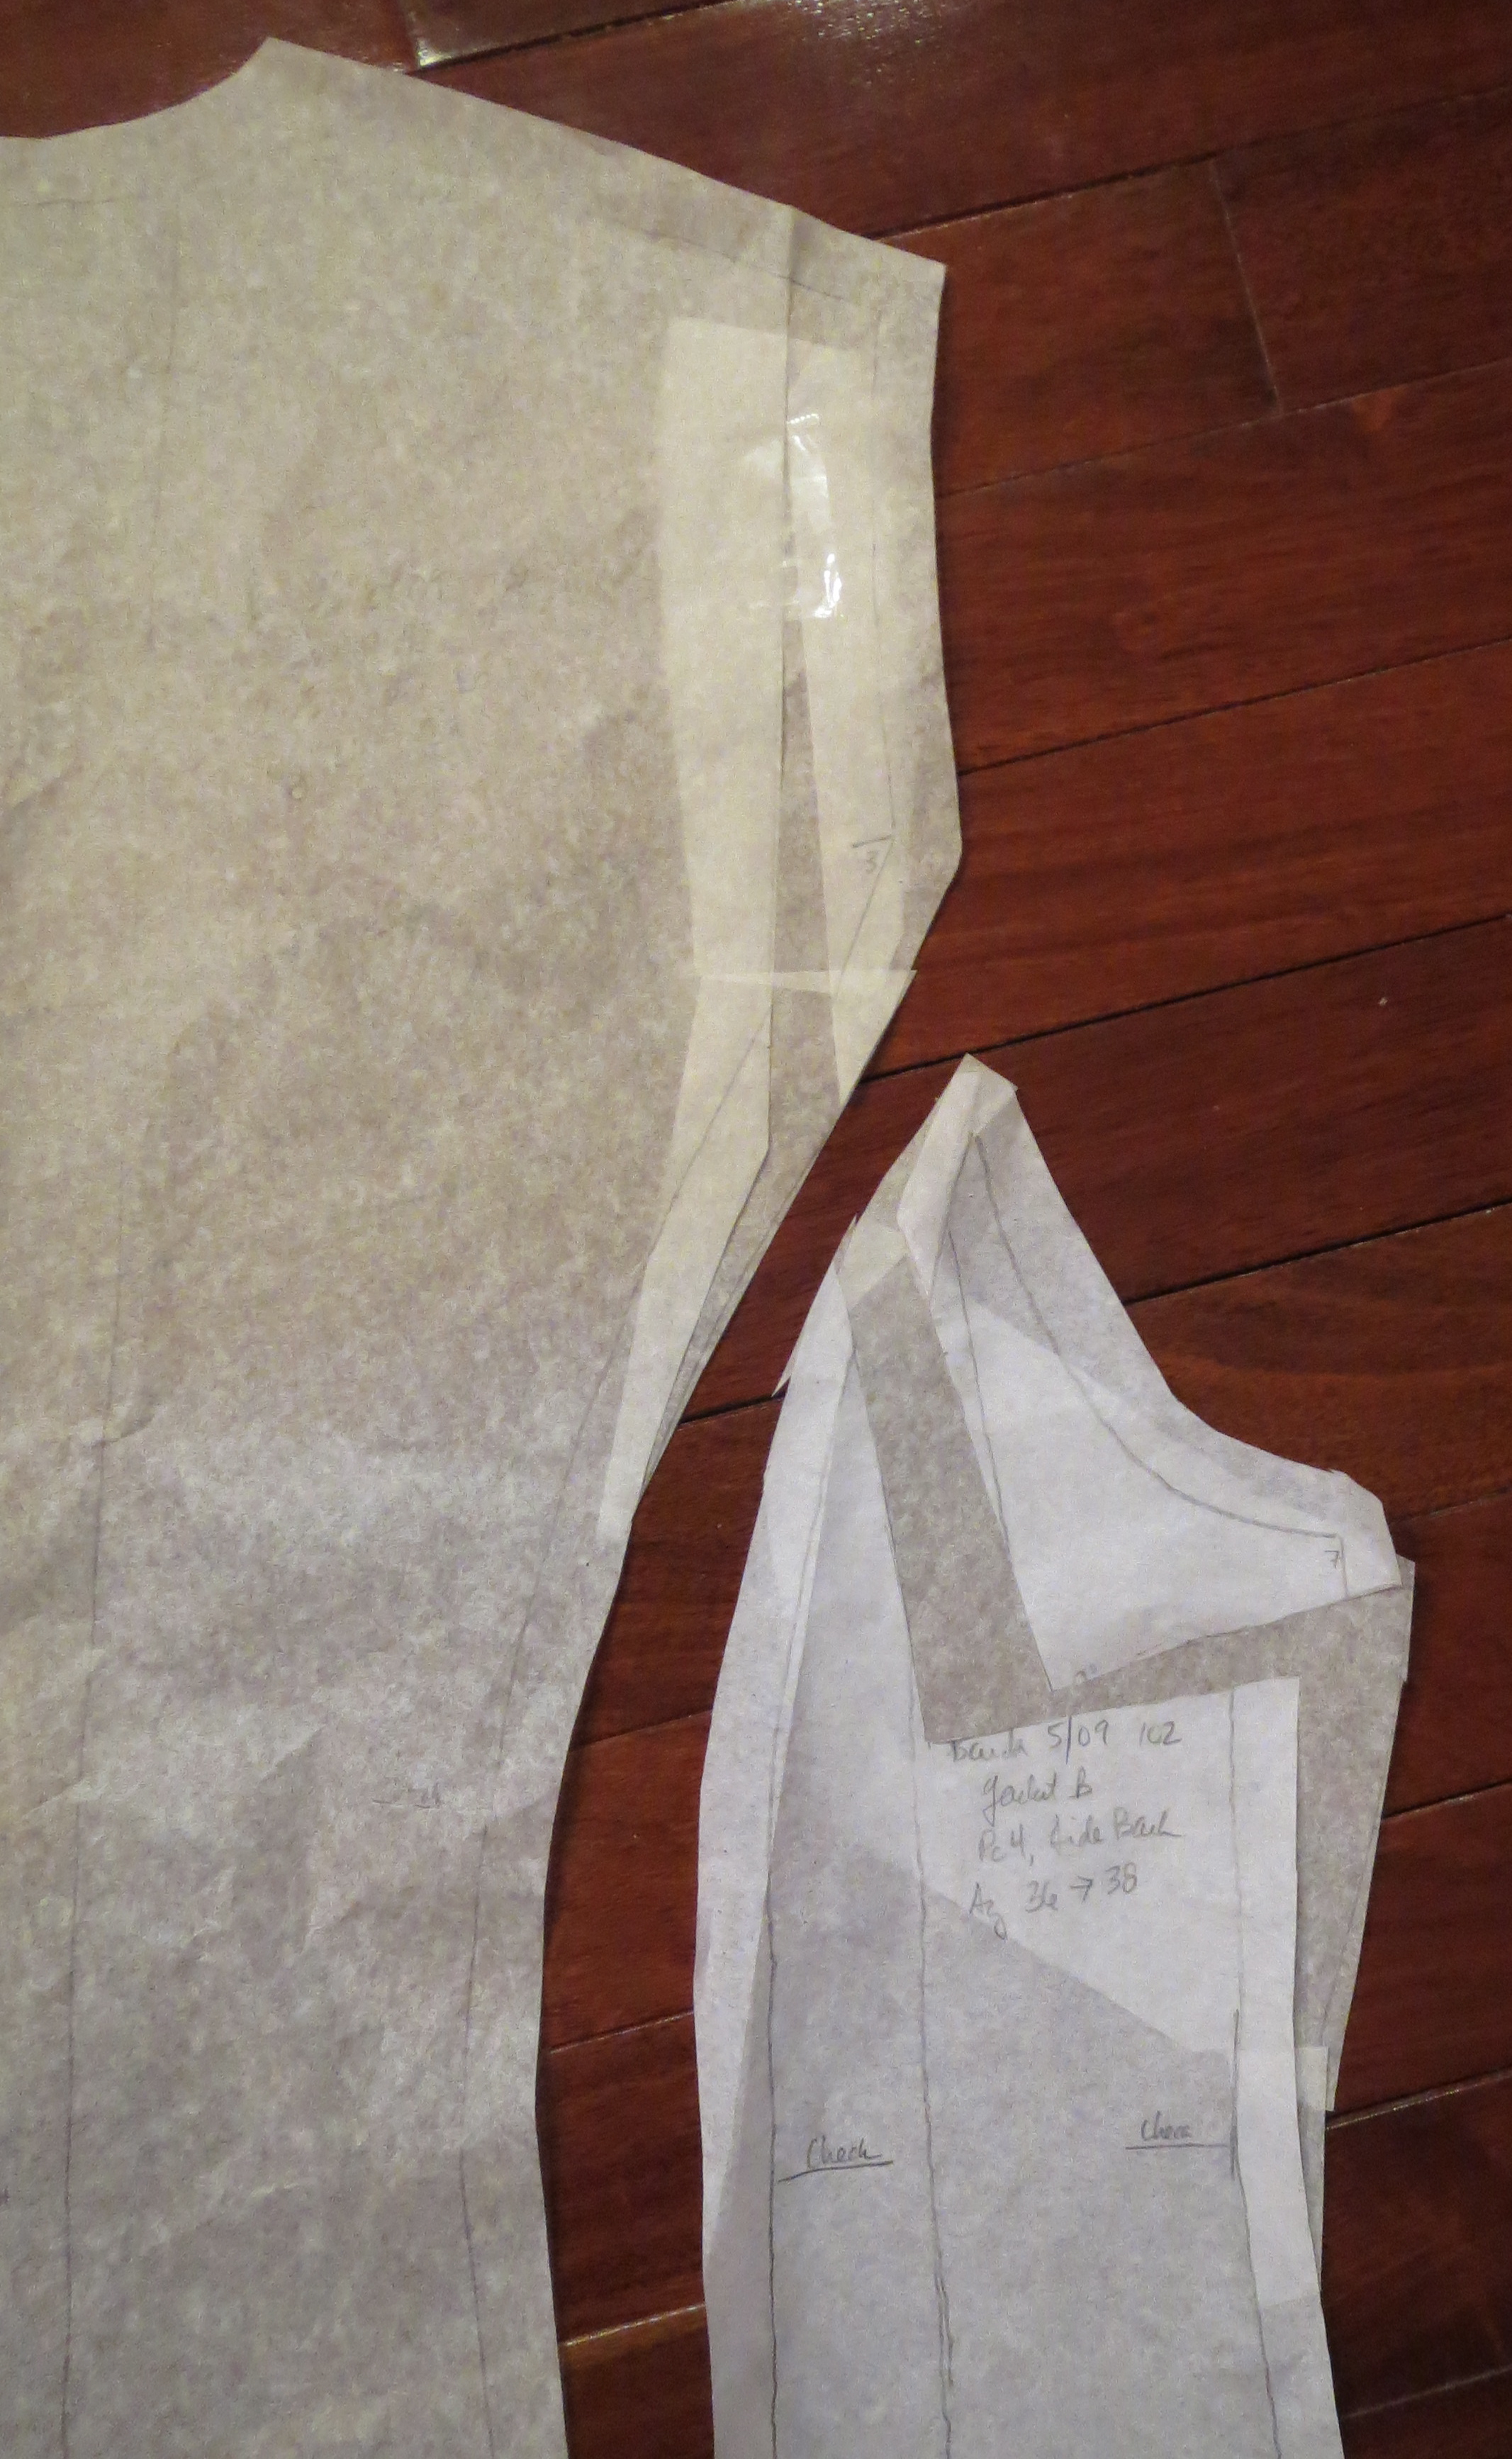
Completed Princess Broad Back Alteration


Put extra tissue underneath and tape it to your pattern pieces to the extent you can while the pieces are still pinned together so you preserve the same angle on both pieces, then separate them and fill in the extra area.


Fusing the Pieces


I fused all the body pieces onto lightweight, flexible interfacing (except the collar and lapel, for which I used a stiff interfacing).  I turned my cutting table aka kitchen table into a pressing table by putting an old wool blanket down, then covering the wool blanket with a white fitted sheet I keep for that purpose.  This protects the table and allows me to use lots of steam without worry.


Insert Welt into Front


When choosing the pattern, I figured that shaped front, single welt, and side with integrated pocket would be tricky.  It turns out, it was actually quite easy.  You start by sewing the welt into the front, and sewing the front pocket bag into the seam allowance.  Then you clip into the corner at the welt intersection (the photo shows the right side of one half and the wrong side of the other).
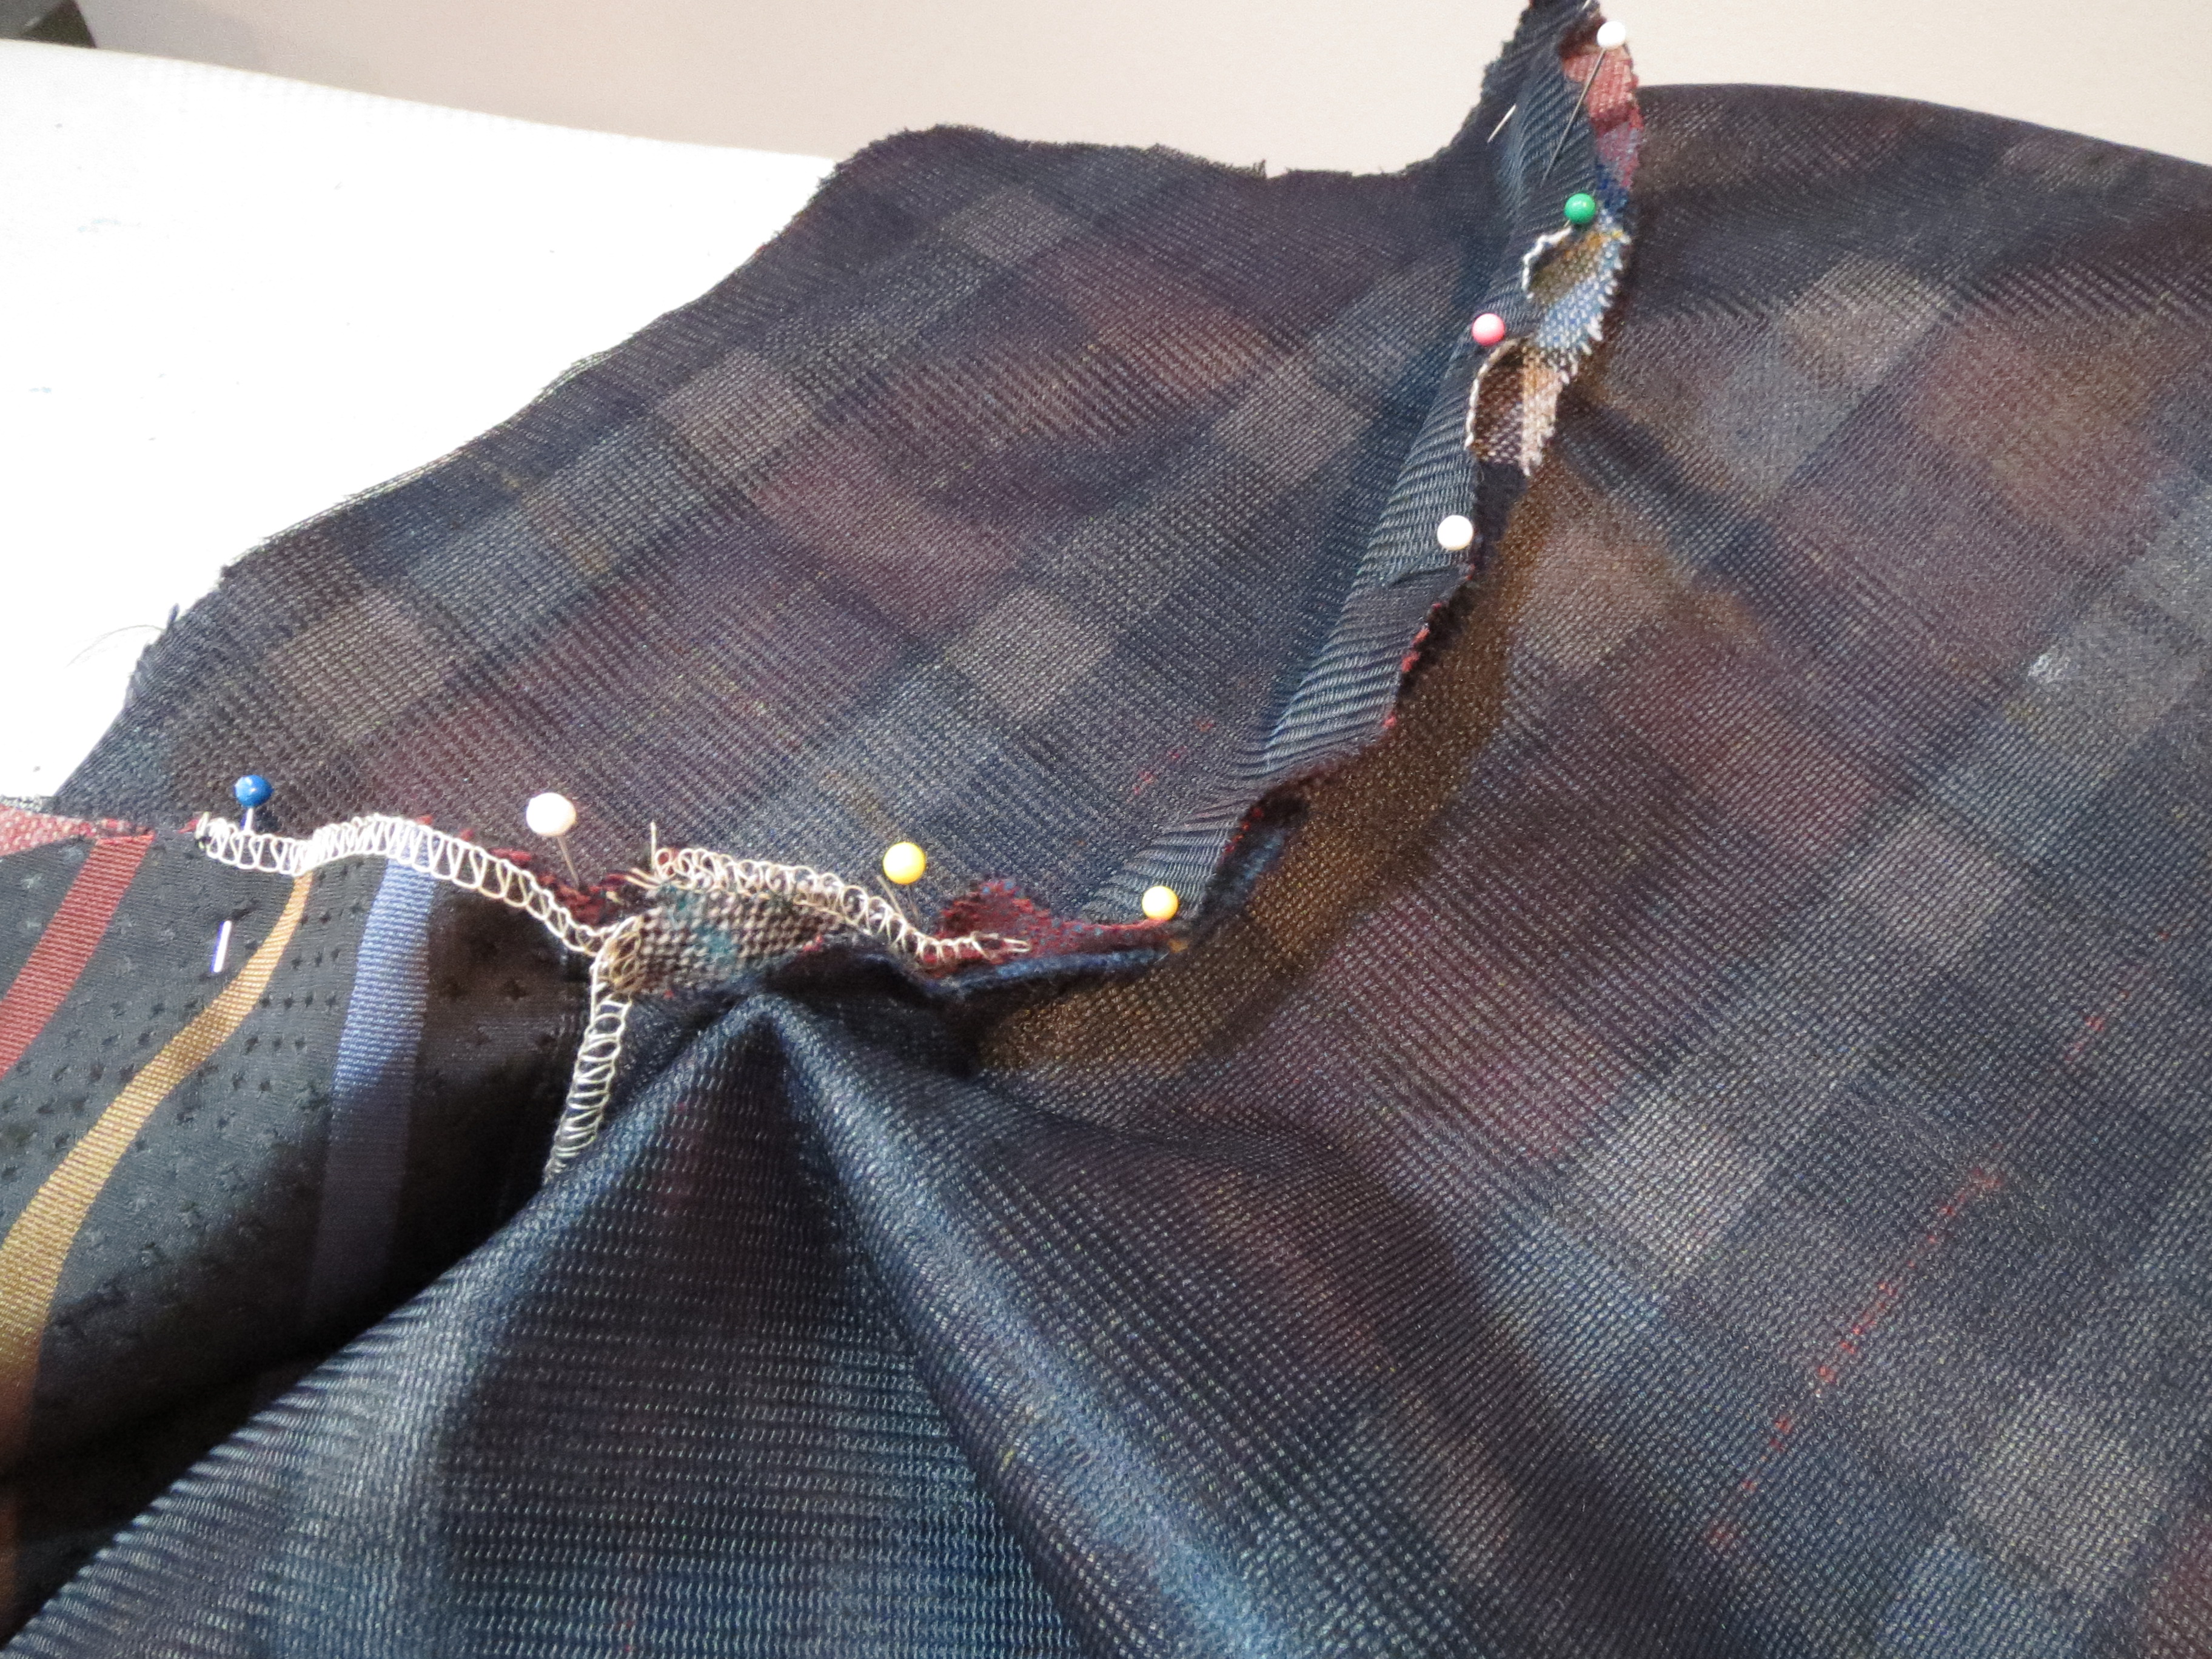
Clip Into Seam Allowance of Front at Corner

When sewing the side front to the front, open out that clip and stitch the angle as though it were straight--the pins show the "straight" line I sewed.

I was pretty amazed at how neatly it comes out.  My corner looks sharp and sits flat.  Once the front and side front were constructed I pressed them over a ham so they would look flat on a round body.  The pocket is caught into the side seam to keep it in place.

Sewing Facing to Body of Jacket-1


What turned out to be difficult in construction was sewing the facing/collar to the body of the jacket.  There is a dart hidden under the lapel to give it shape and Burda's instructions were classic BWTF.  They have you slit open the dart, and then "sew the dart and neck all at once."

I tried a LOT of different configurations before finally figuring it out.  It sounds duh to write it out, but the dart is sewn to itself, the neckline is sewn to the collar, and the lapel is sewn to the facing.  Nothing is tucked into anything else (I kept wanting to catch the lapel in the dart seam because it seemed the most logical way to put it together when all the pieces were in my hand).

You do, indeed, sew from  the bottom of the dart up over onto the *back* neck and back down the other dart.  Then you go back and complete the lapel/front neck seam separately.  If I make this again, I would try *not* cutting open the darts, sewing them as regular darts, and then sewing the neck all at once.  It seemed like they were trying to be cool and innovative rather than trying to find the best construction.
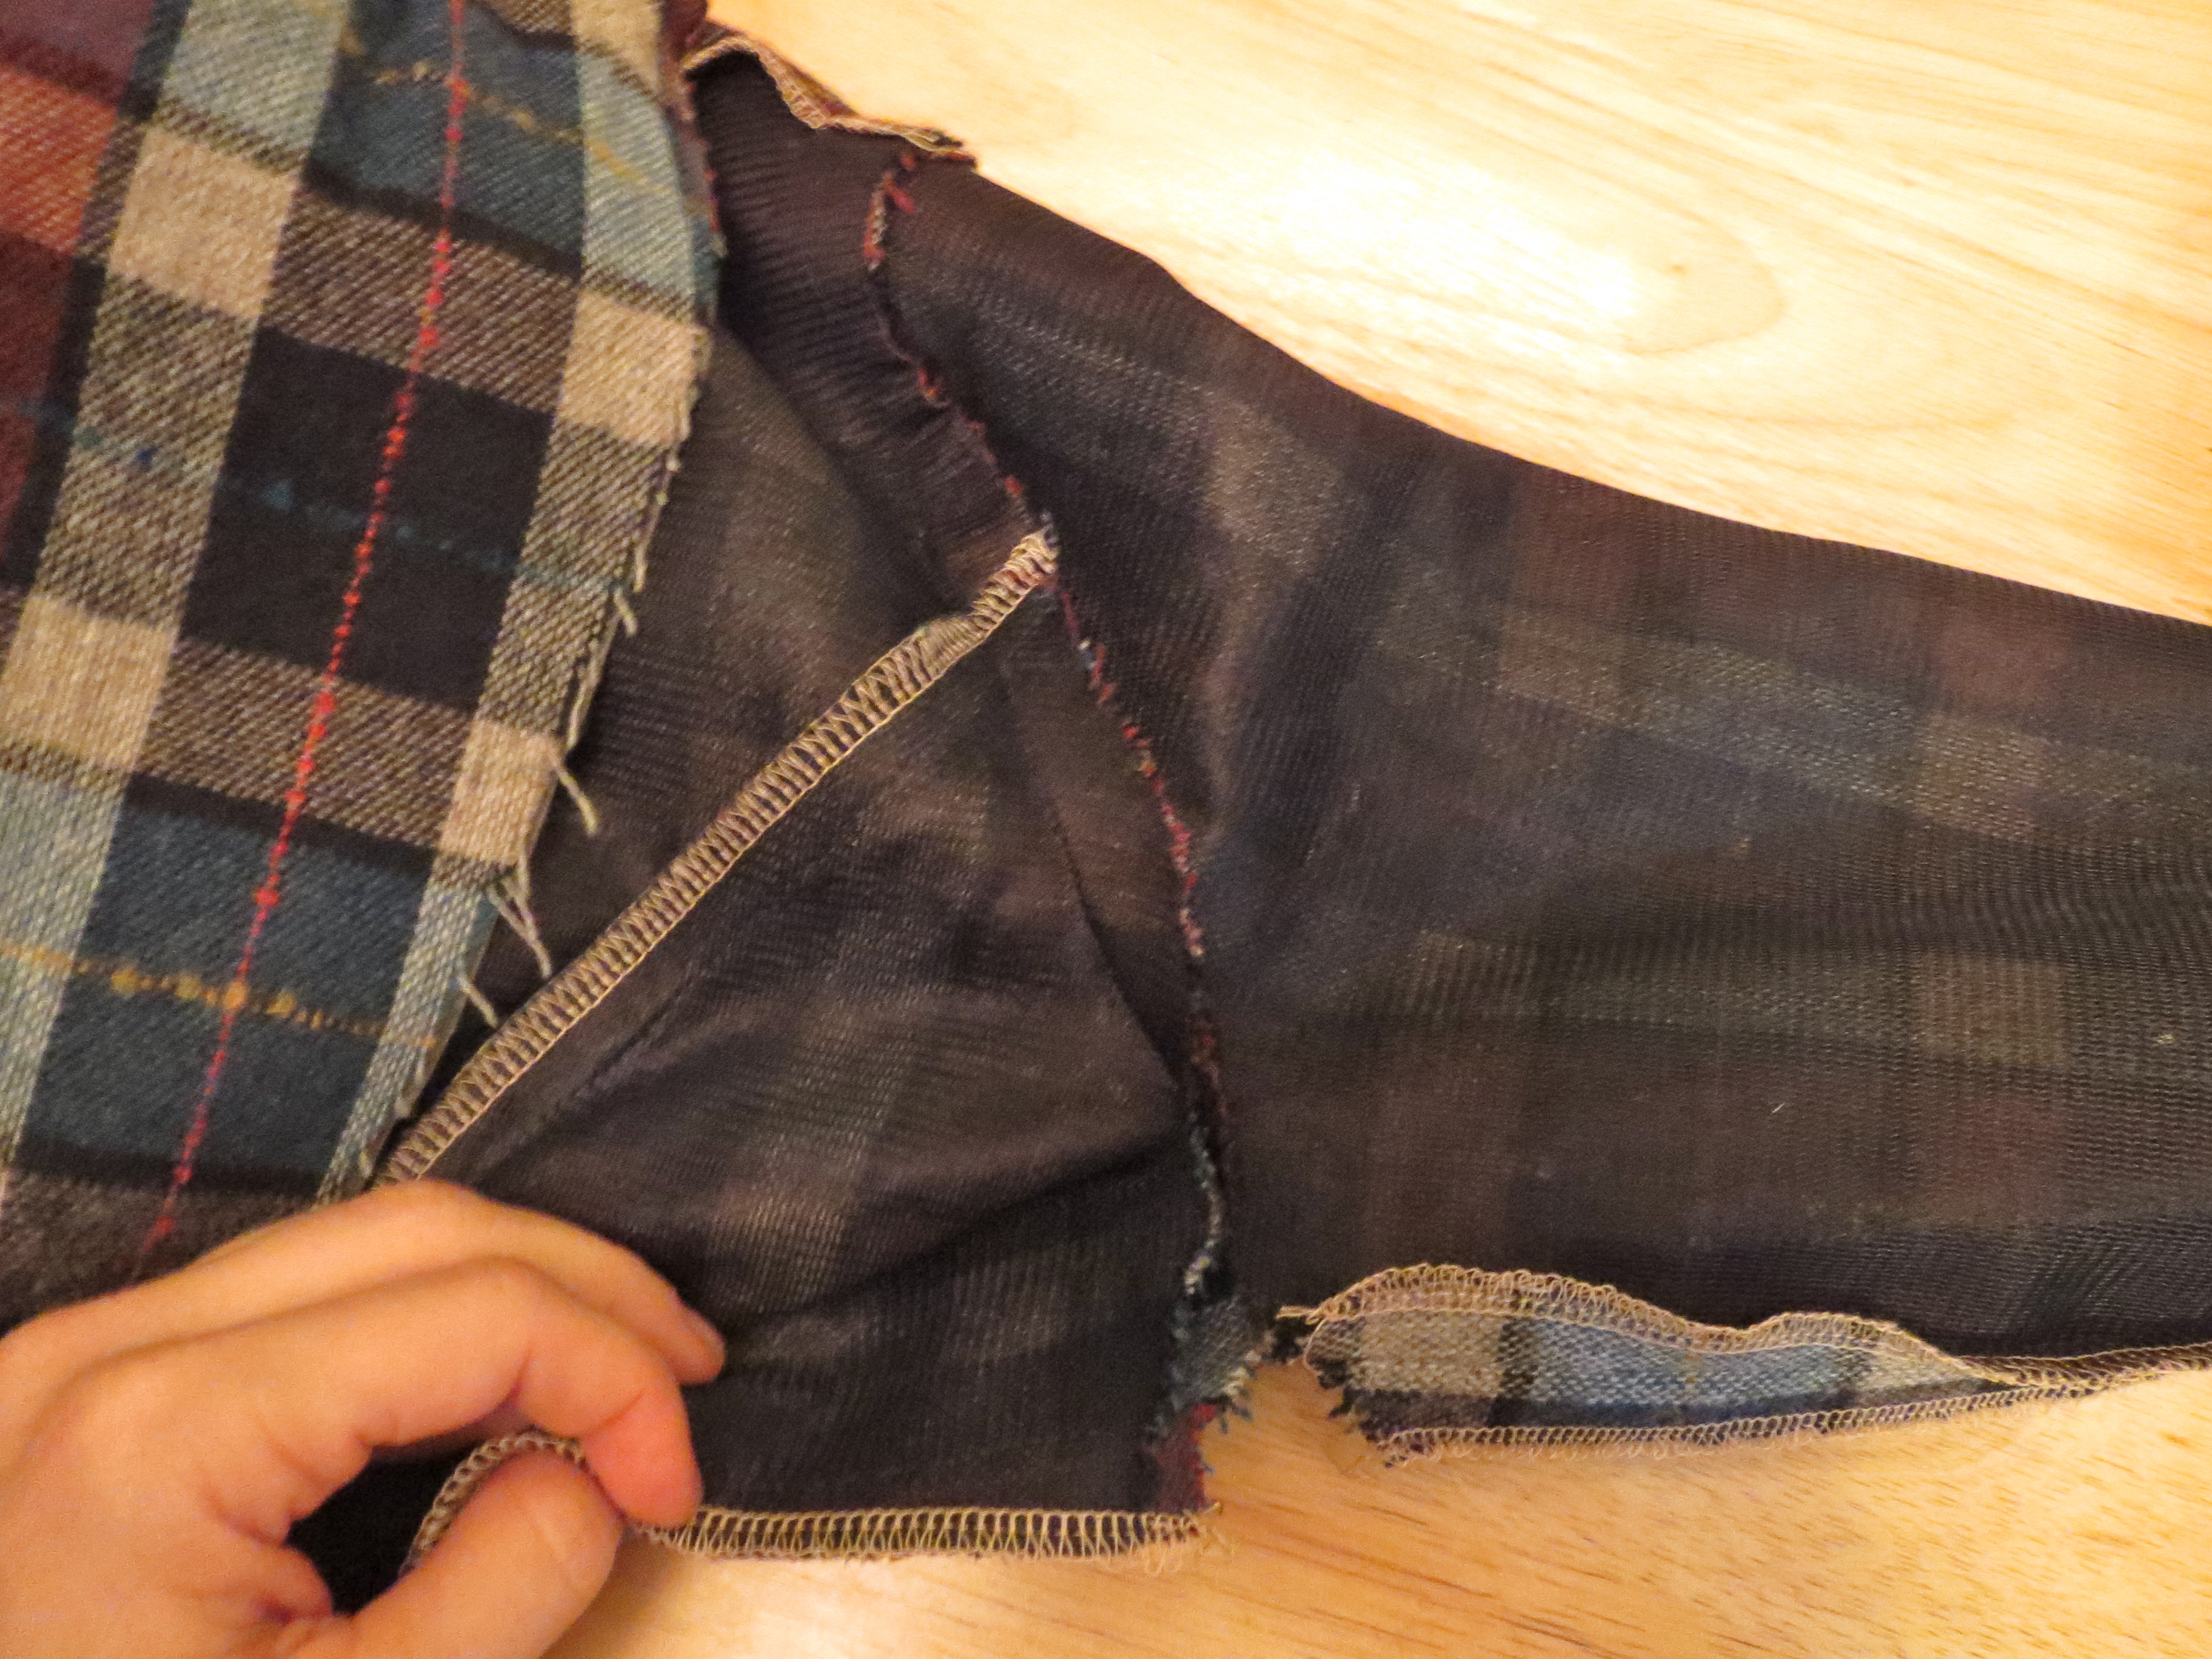
Stitch Sleeve and Side Seams

I tried a new way of setting in the sleeve based on a suggestion I saw on PR (unfortunately I can't give anyone credit, as it is impossible to find the post on the message board).  It's set in mostly in the flat, leaving the last couple inches open on either side.

Once the sleeve is set, sew the sleeve seam and the side seam and press them open.
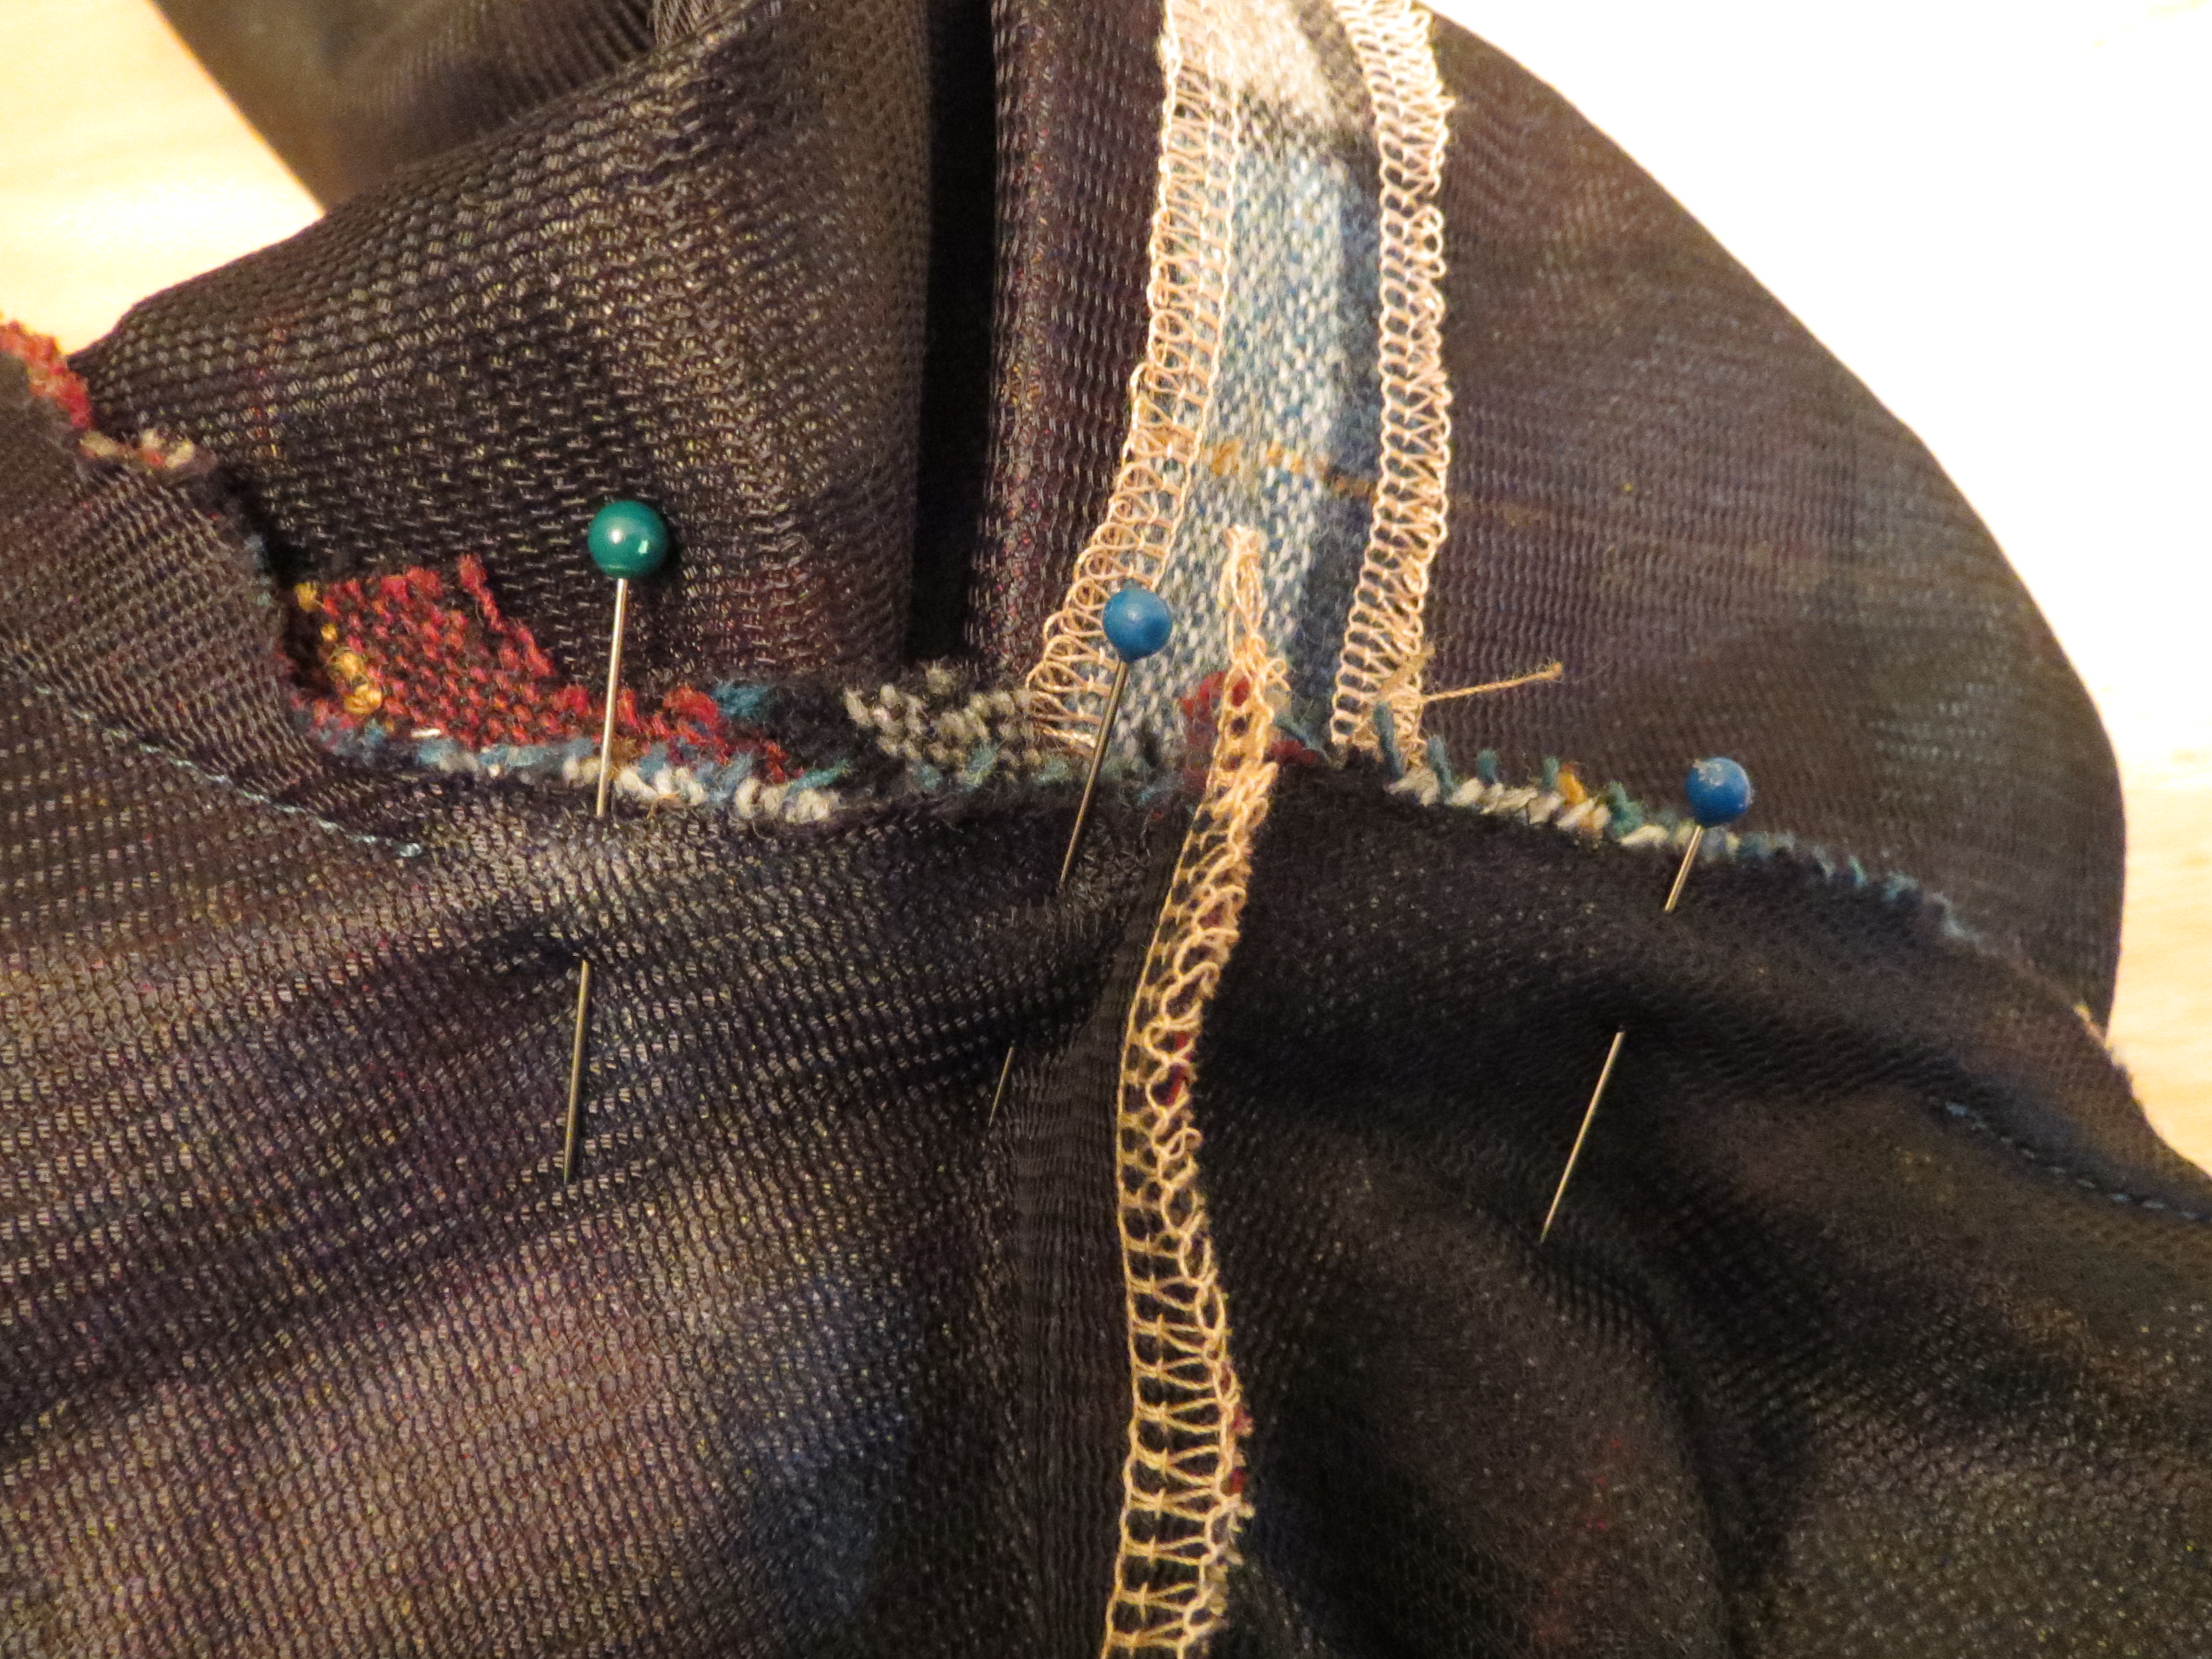
Complete Sleeve Seam


The last step is to sew the bottom little bit of the sleeve as though it was set in, matching the sleeve underseam with the side seam.

This way you get the easier setting in in-the-flat, but you have a normal seam distribution at the underarm.  With a true in-the-flat with the sleeve/side seam sewn as one, the underarm can be a little bulkier, which isn't a problem in most cases but in a jacket fabric it might feel too much like a wad of fabric under the arm.

Organza Sleeve Head

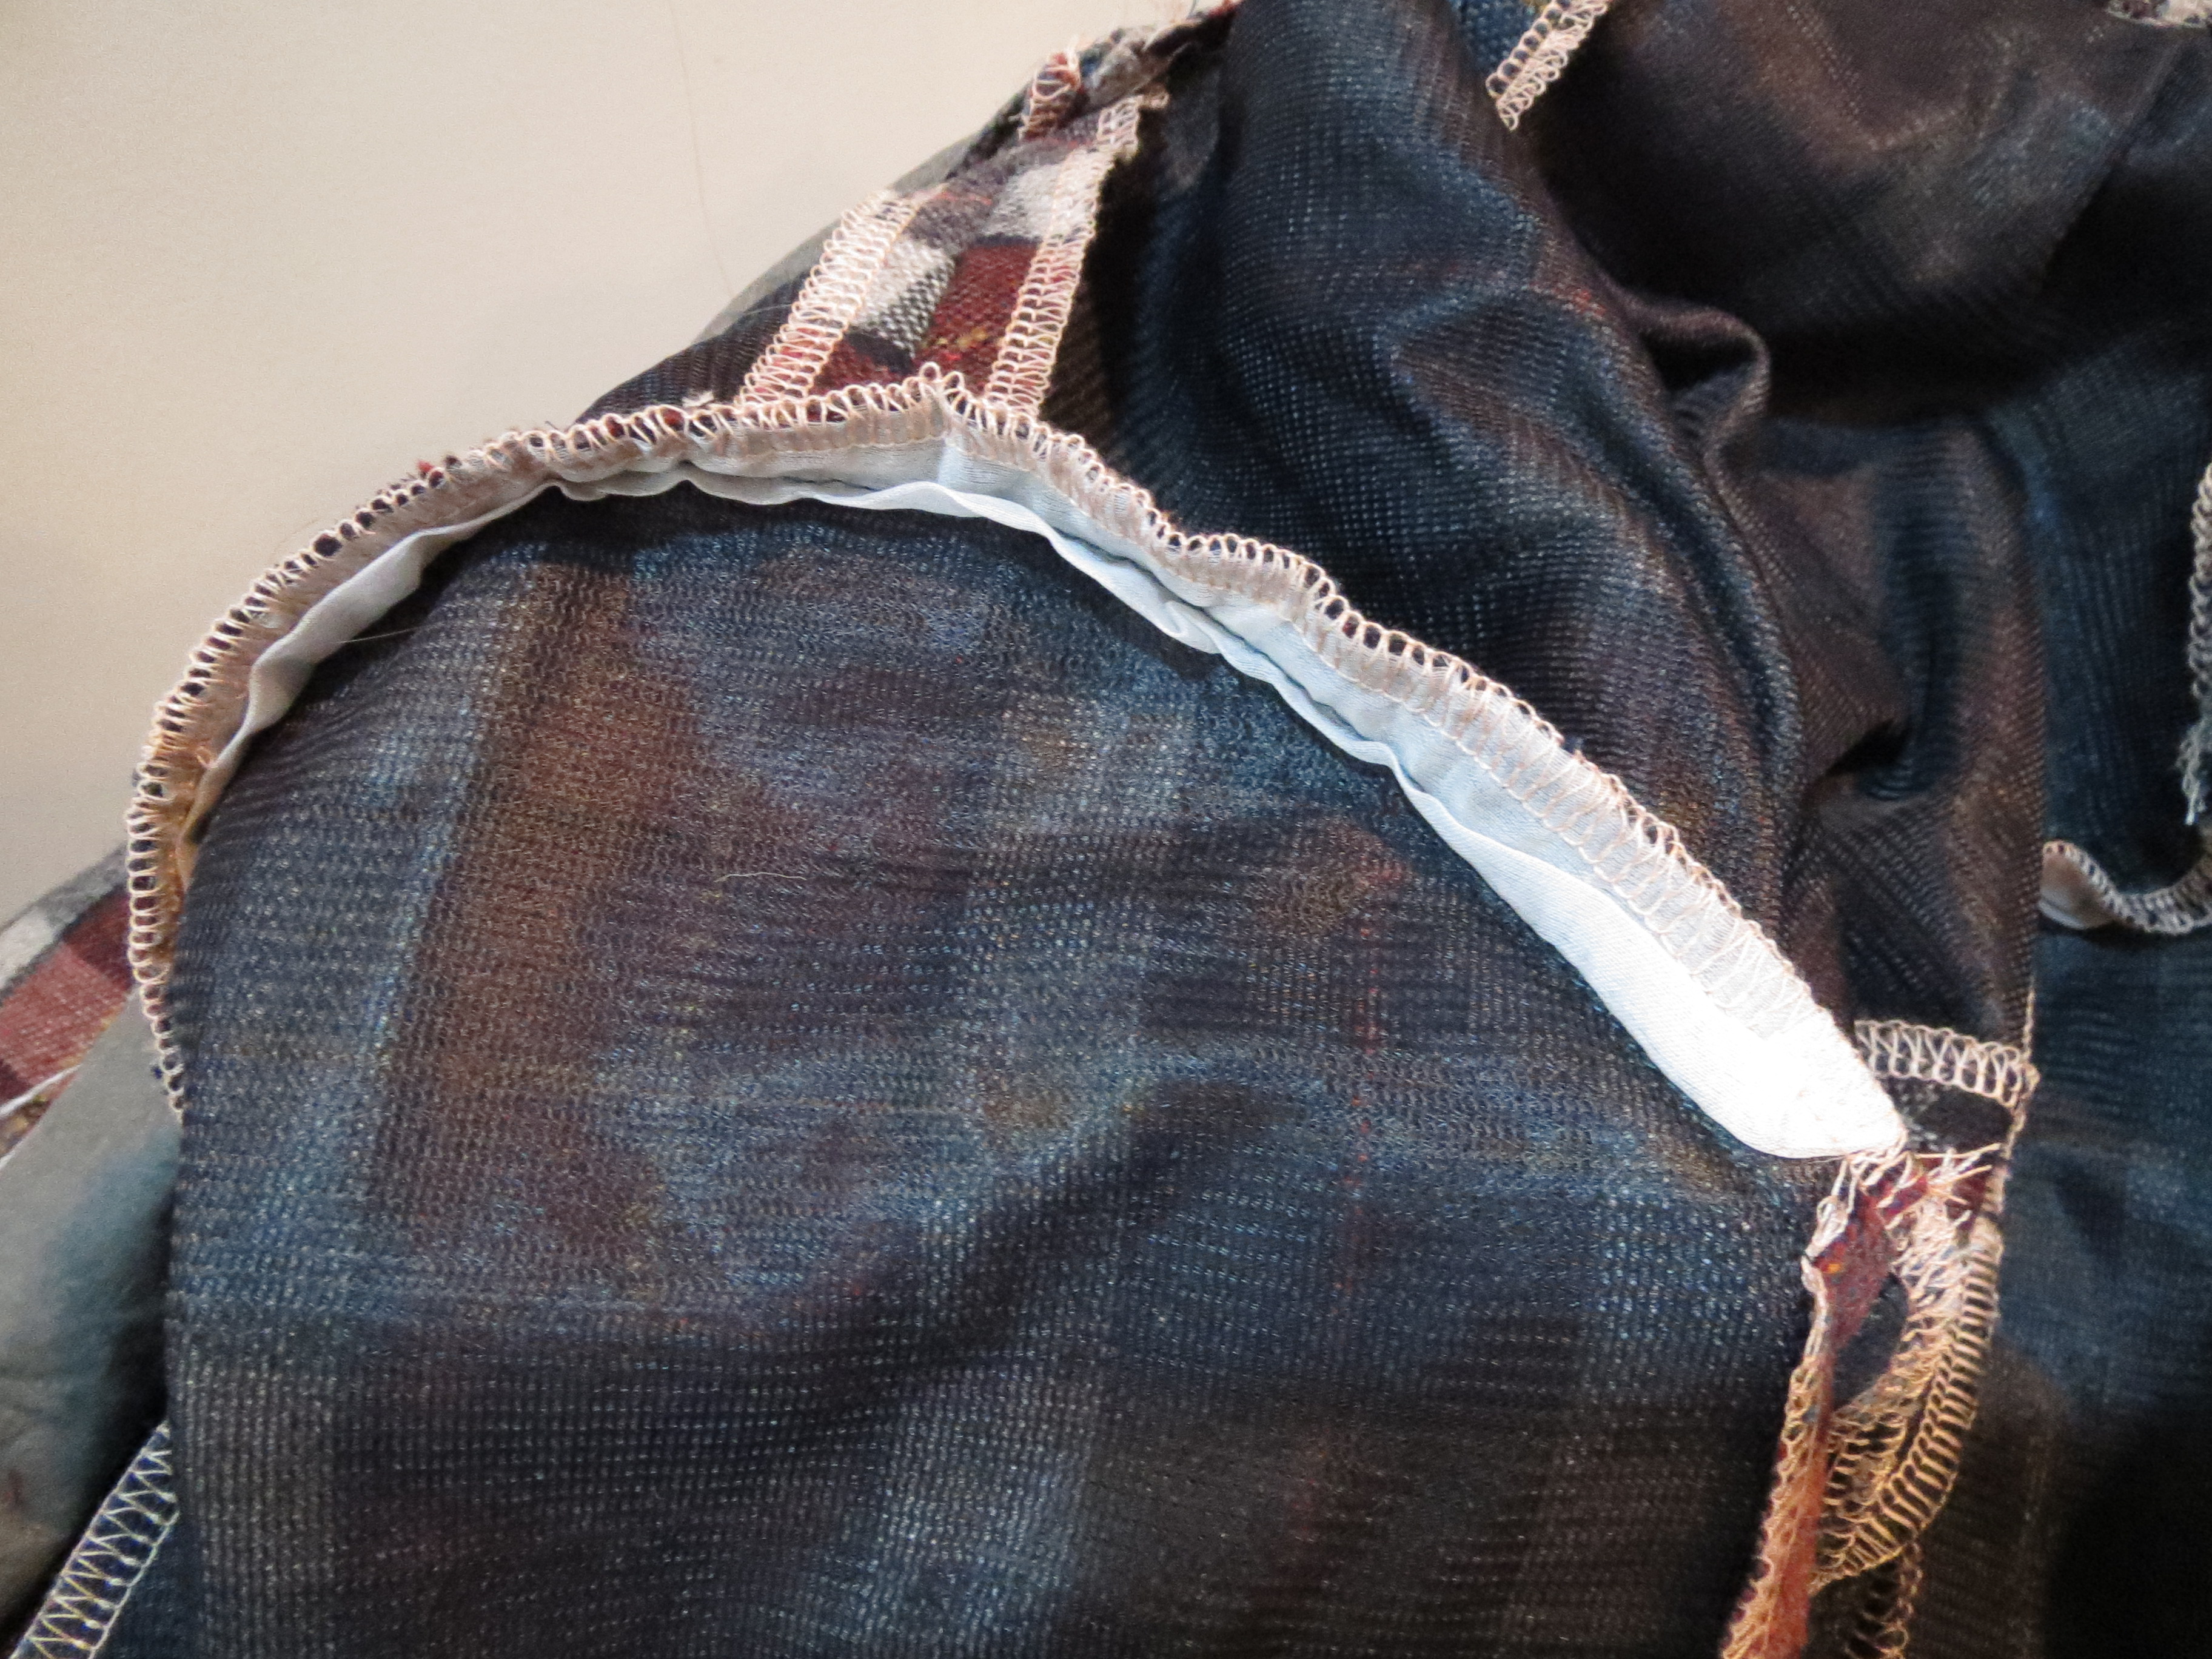
I put in a strip of silk organza as a sleeve head.  I'm not going to lie to you: it's not cut on the bias.  The earth did not stop spinning on its axis.

I stitched the organza juuuust inside the stiching line of the sleeve's seam allowance.


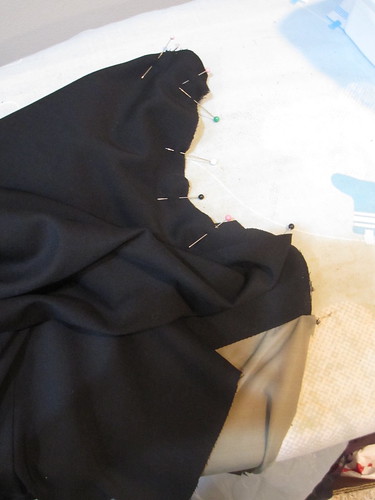
Taking in the Back Seams


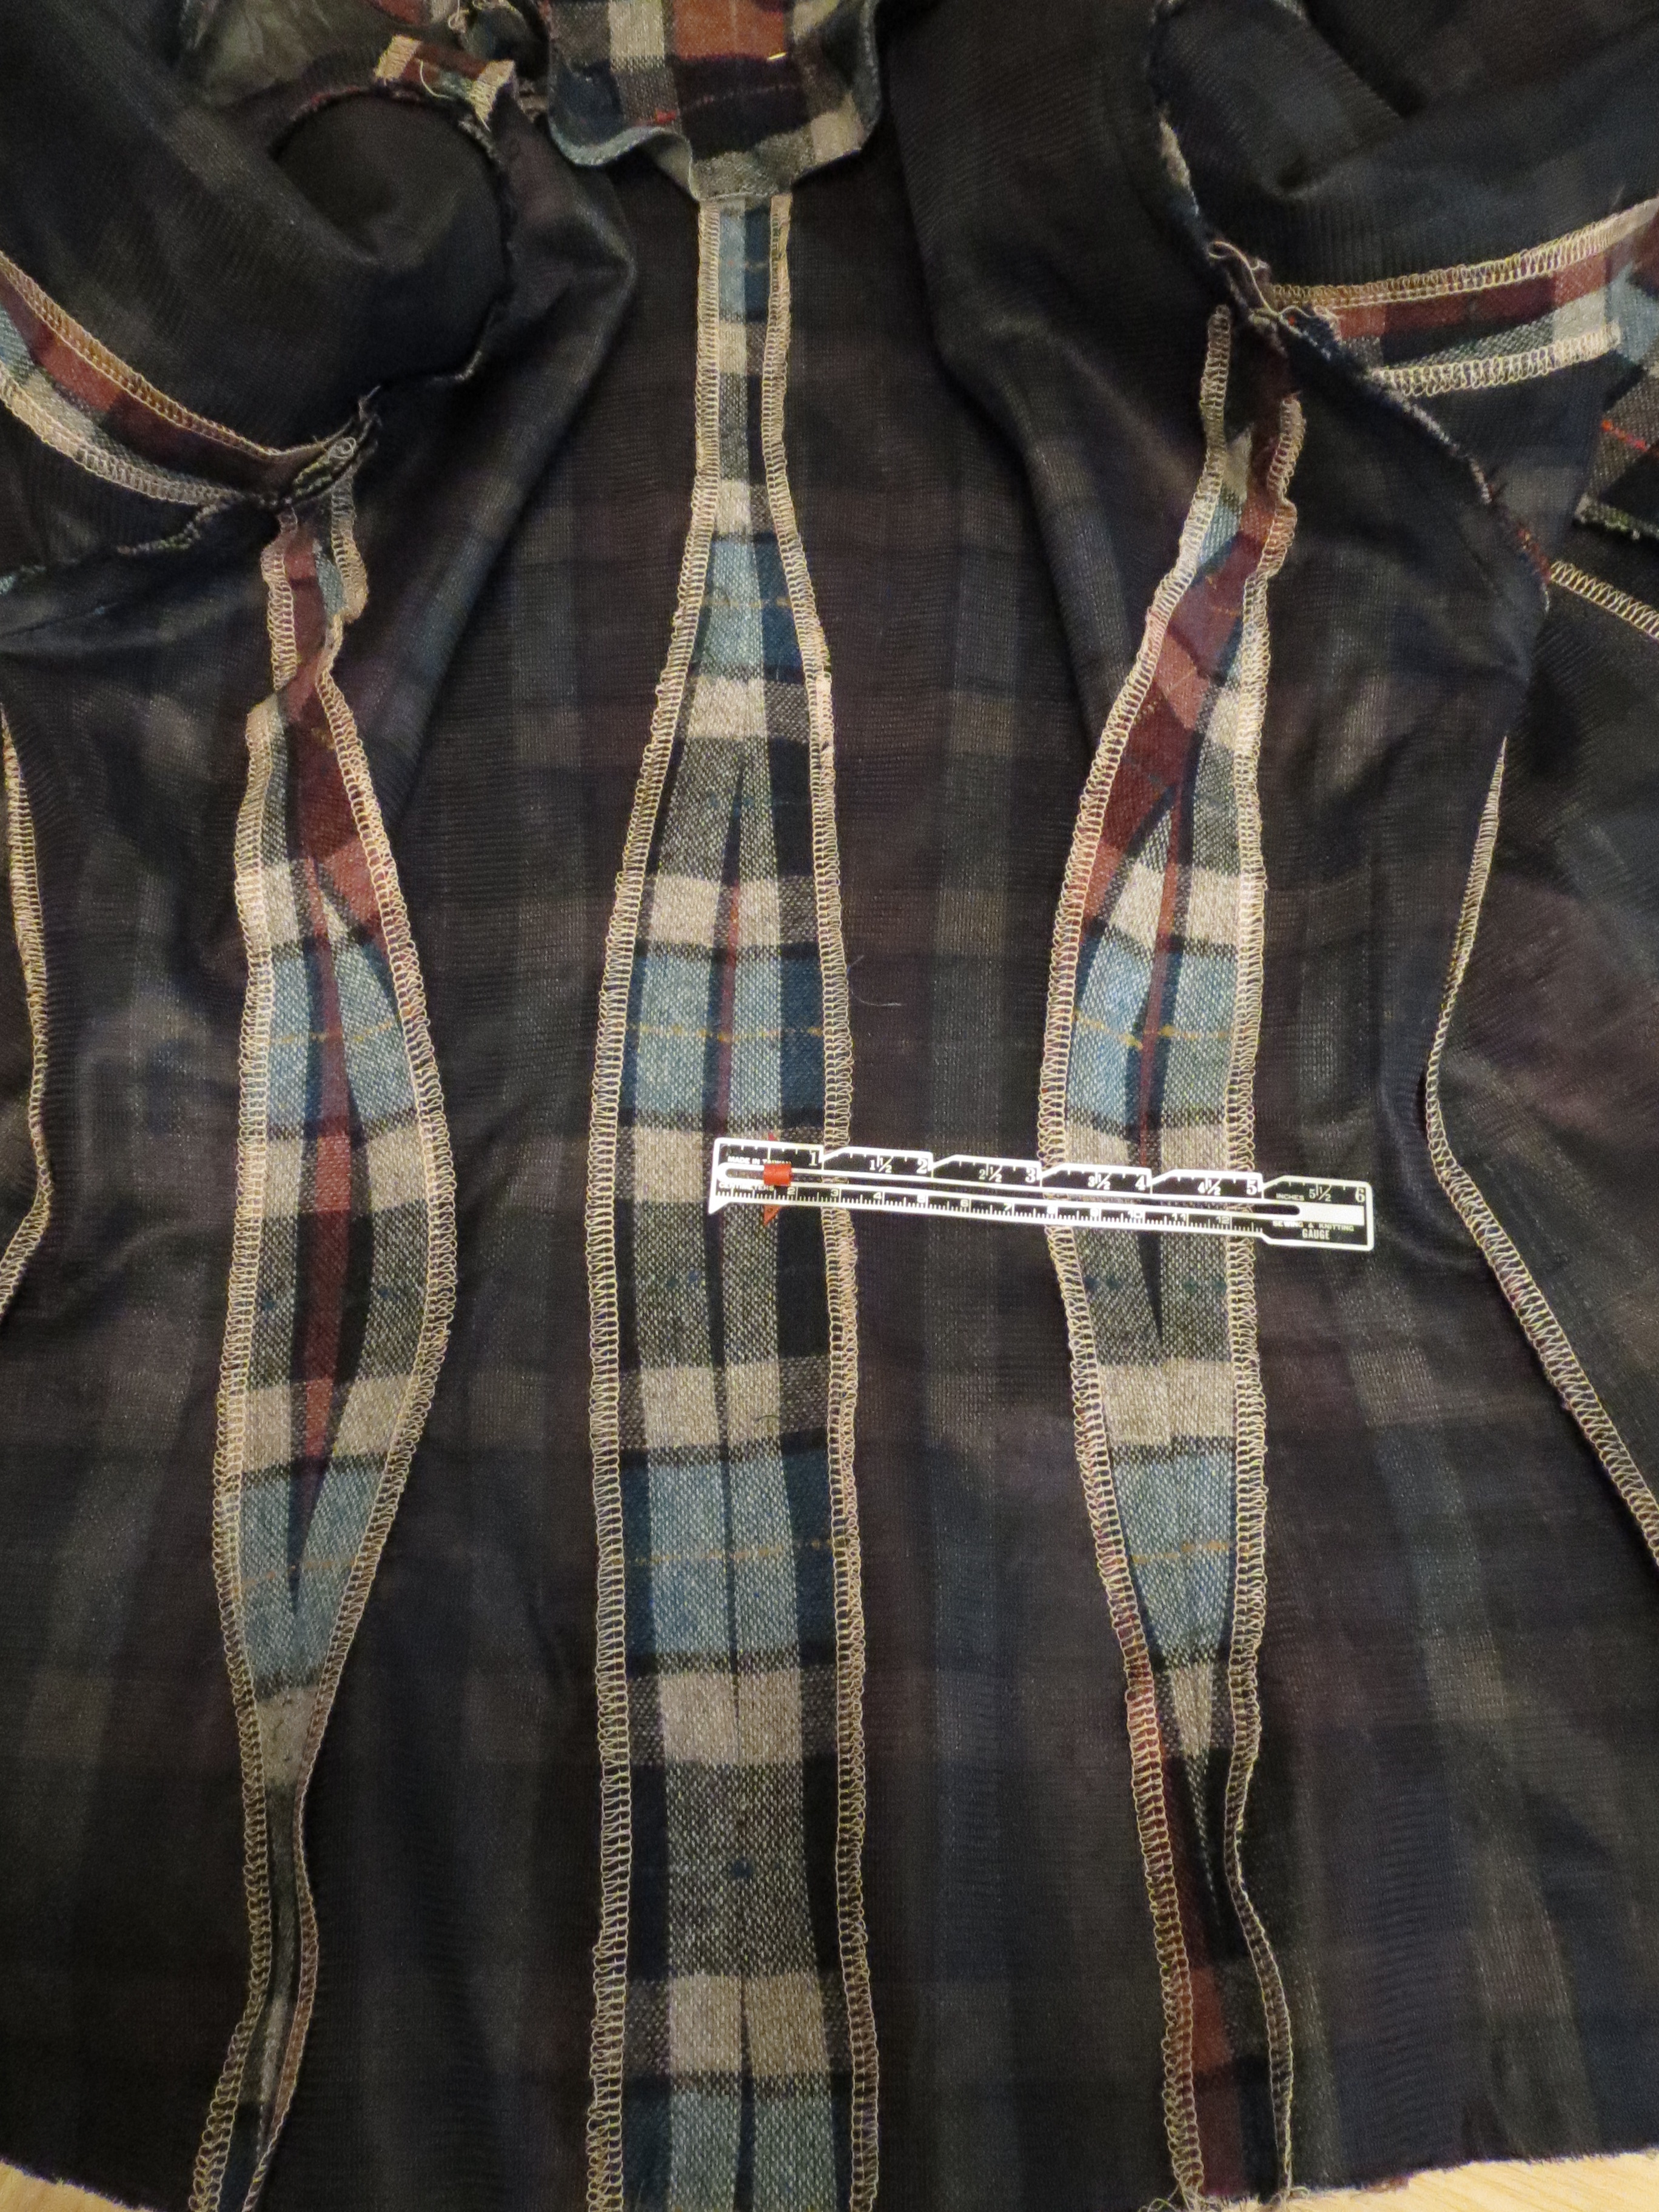
From the bust to the hem I had traced my usual 36 at the waist and 38 at the hip.  It was WTF huge.  Think 10 or more inches of ease at the waist.  I think Burda may have drafted this from a coat block, not a jacket block, with enough ease to wear a puffy snowsuit underneath.  Burda sizing *never* gives me trouble so this was pretty aggravating!

Because of the construction of the pocket, I could only adjust the side seam about 1/4". The rest I took out the side back and center back seam.  I took it in a total of 6 inches.  I had put so much care into the Broad Back Adjustment that I forgot to do a swayback adjustment (I was falling asleep after cutting out the jacket in the evening and started straight up when I realized this), which would have given me a little more shape at the CB seam but would not have solved the problem by a long shot.

Striped Silk Lining

It's lined in a striped tie silk from FFC.  Cidell and I bought tie silk bundles several years ago.  They may have come from an end user factory, because most of them are only about 30 inches wide with one selvage and one raw edge.

I folded this piece in half the long way rather than selvage-to-selvage, so my stripes match all the way down but the colors are off on the bottom.  I actually kind of like the effect. Brings me back to the old days of Tetris.

And now for the bad.  Part of the reason I chose this pattern is that Burda shows it in a Glen plaid and had marked "check" lines for plaid matching on the pieces.  Burda, you screwed me!!!!

 First of all, the front and back check lines did not match up to each other at the side seam.  In retrospect, this is probably mostly due to my Broad Back Adjustment, but I'm not sure that explains the full discrepancy.  I matched the lines and cut off the excess at the armscye.

Second, the check mark on the sleeve pieces had absolutely nothing to do with the check on the body pieces!!!!!!!!!  I was so mad.  I assumed they'd put the check a little above the waist on all the pieces, but the sleeve is offset from the body by almost an entire plaid motif (my plaid has a thread down the middle, alternating yellow and turquoise.  I used a yellow thread as my check.  The sleeves' turquoise thread roughly lines up with the yellow thread of the body). Because of that happy coincidence, the sleeves *almost* look like they match but they don't.
Single Layer Cutting
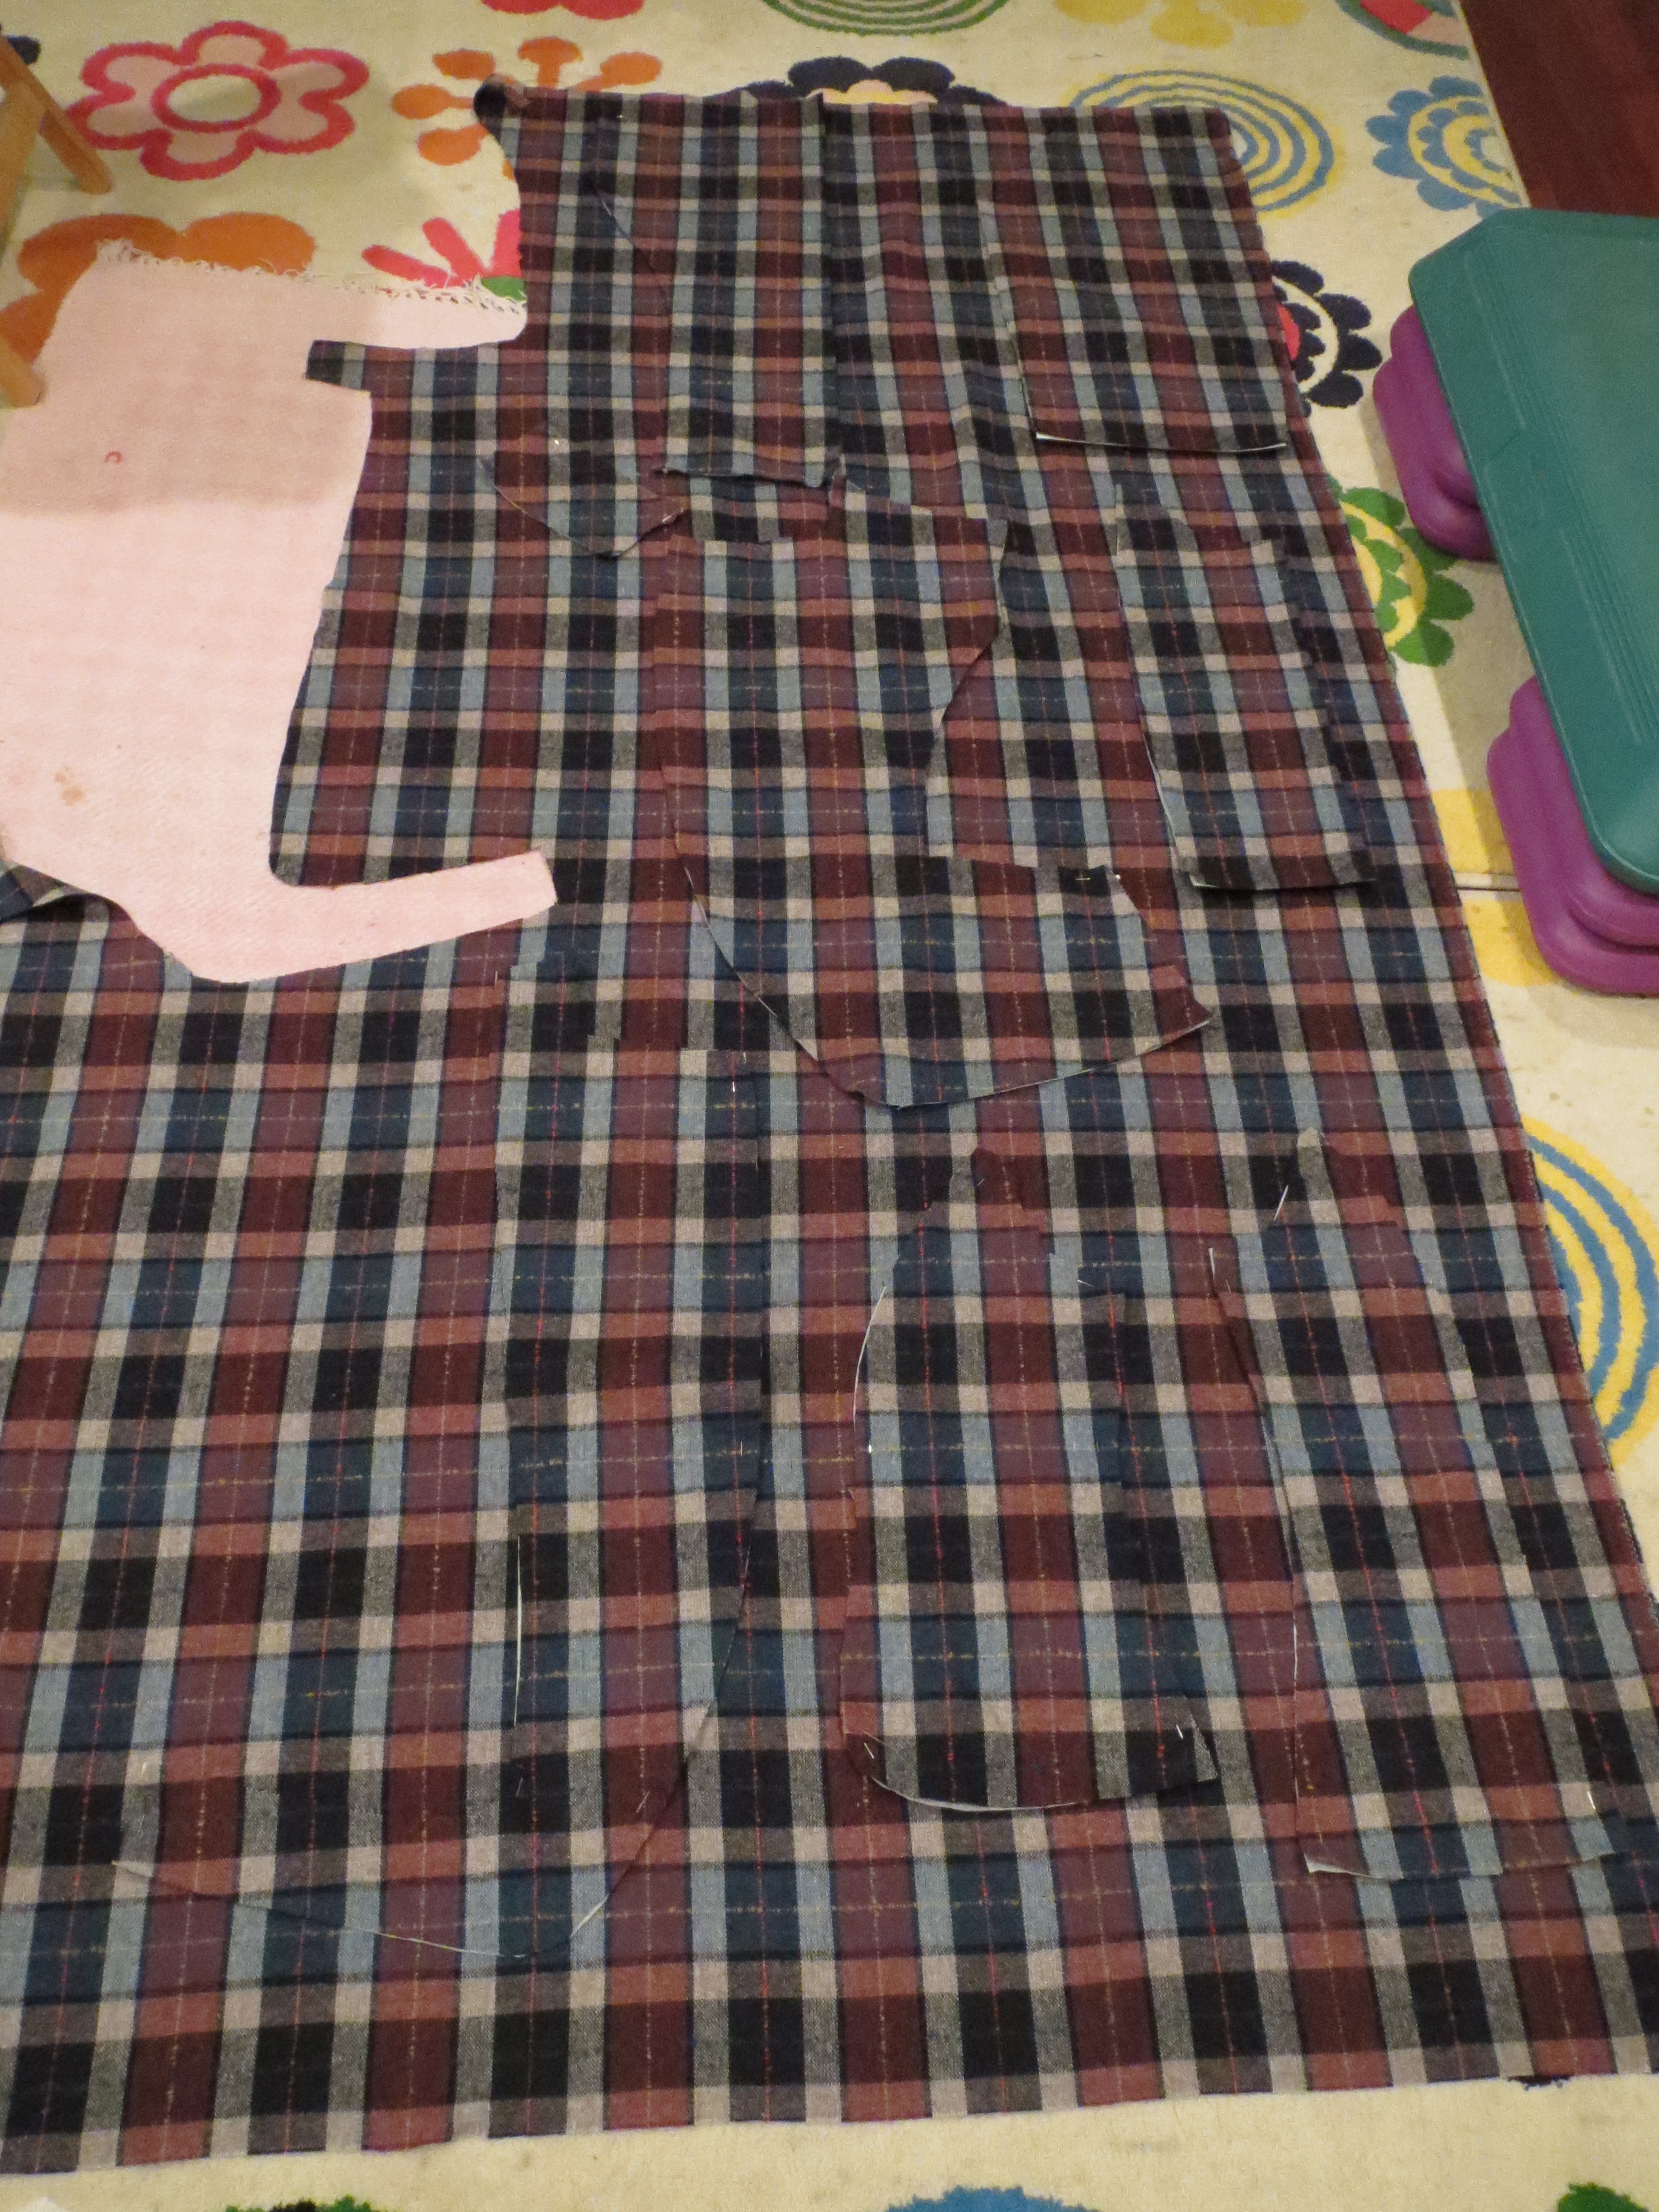
The lack of vertical matching is all on me (Burda doesn't give vertical check marks).  I had limited fabric and the cutting layout was a nail biter.  I cut it all one layer, then flipped the layer over to cut the other half (the photo shows the first layer flipped over onto the remaining fabric to cut out the second layer).  I had to crawl around on the floor because I needed to see my entire acreage at once.  Here's what I had left at the end--a whole two inches of length to spare.

When choosing to ignore vertical matching, I figured it would only not match vertically at the shoulders, which I could live with.  I was NOT thinking of the front/side front situation.  You don't have to tell me:  I know it looks awful.  I am trying to console myself that I probably didn't have enough fabric to get it right anyway (although they're so close to matching I probably did).  Ugh.
Buttons

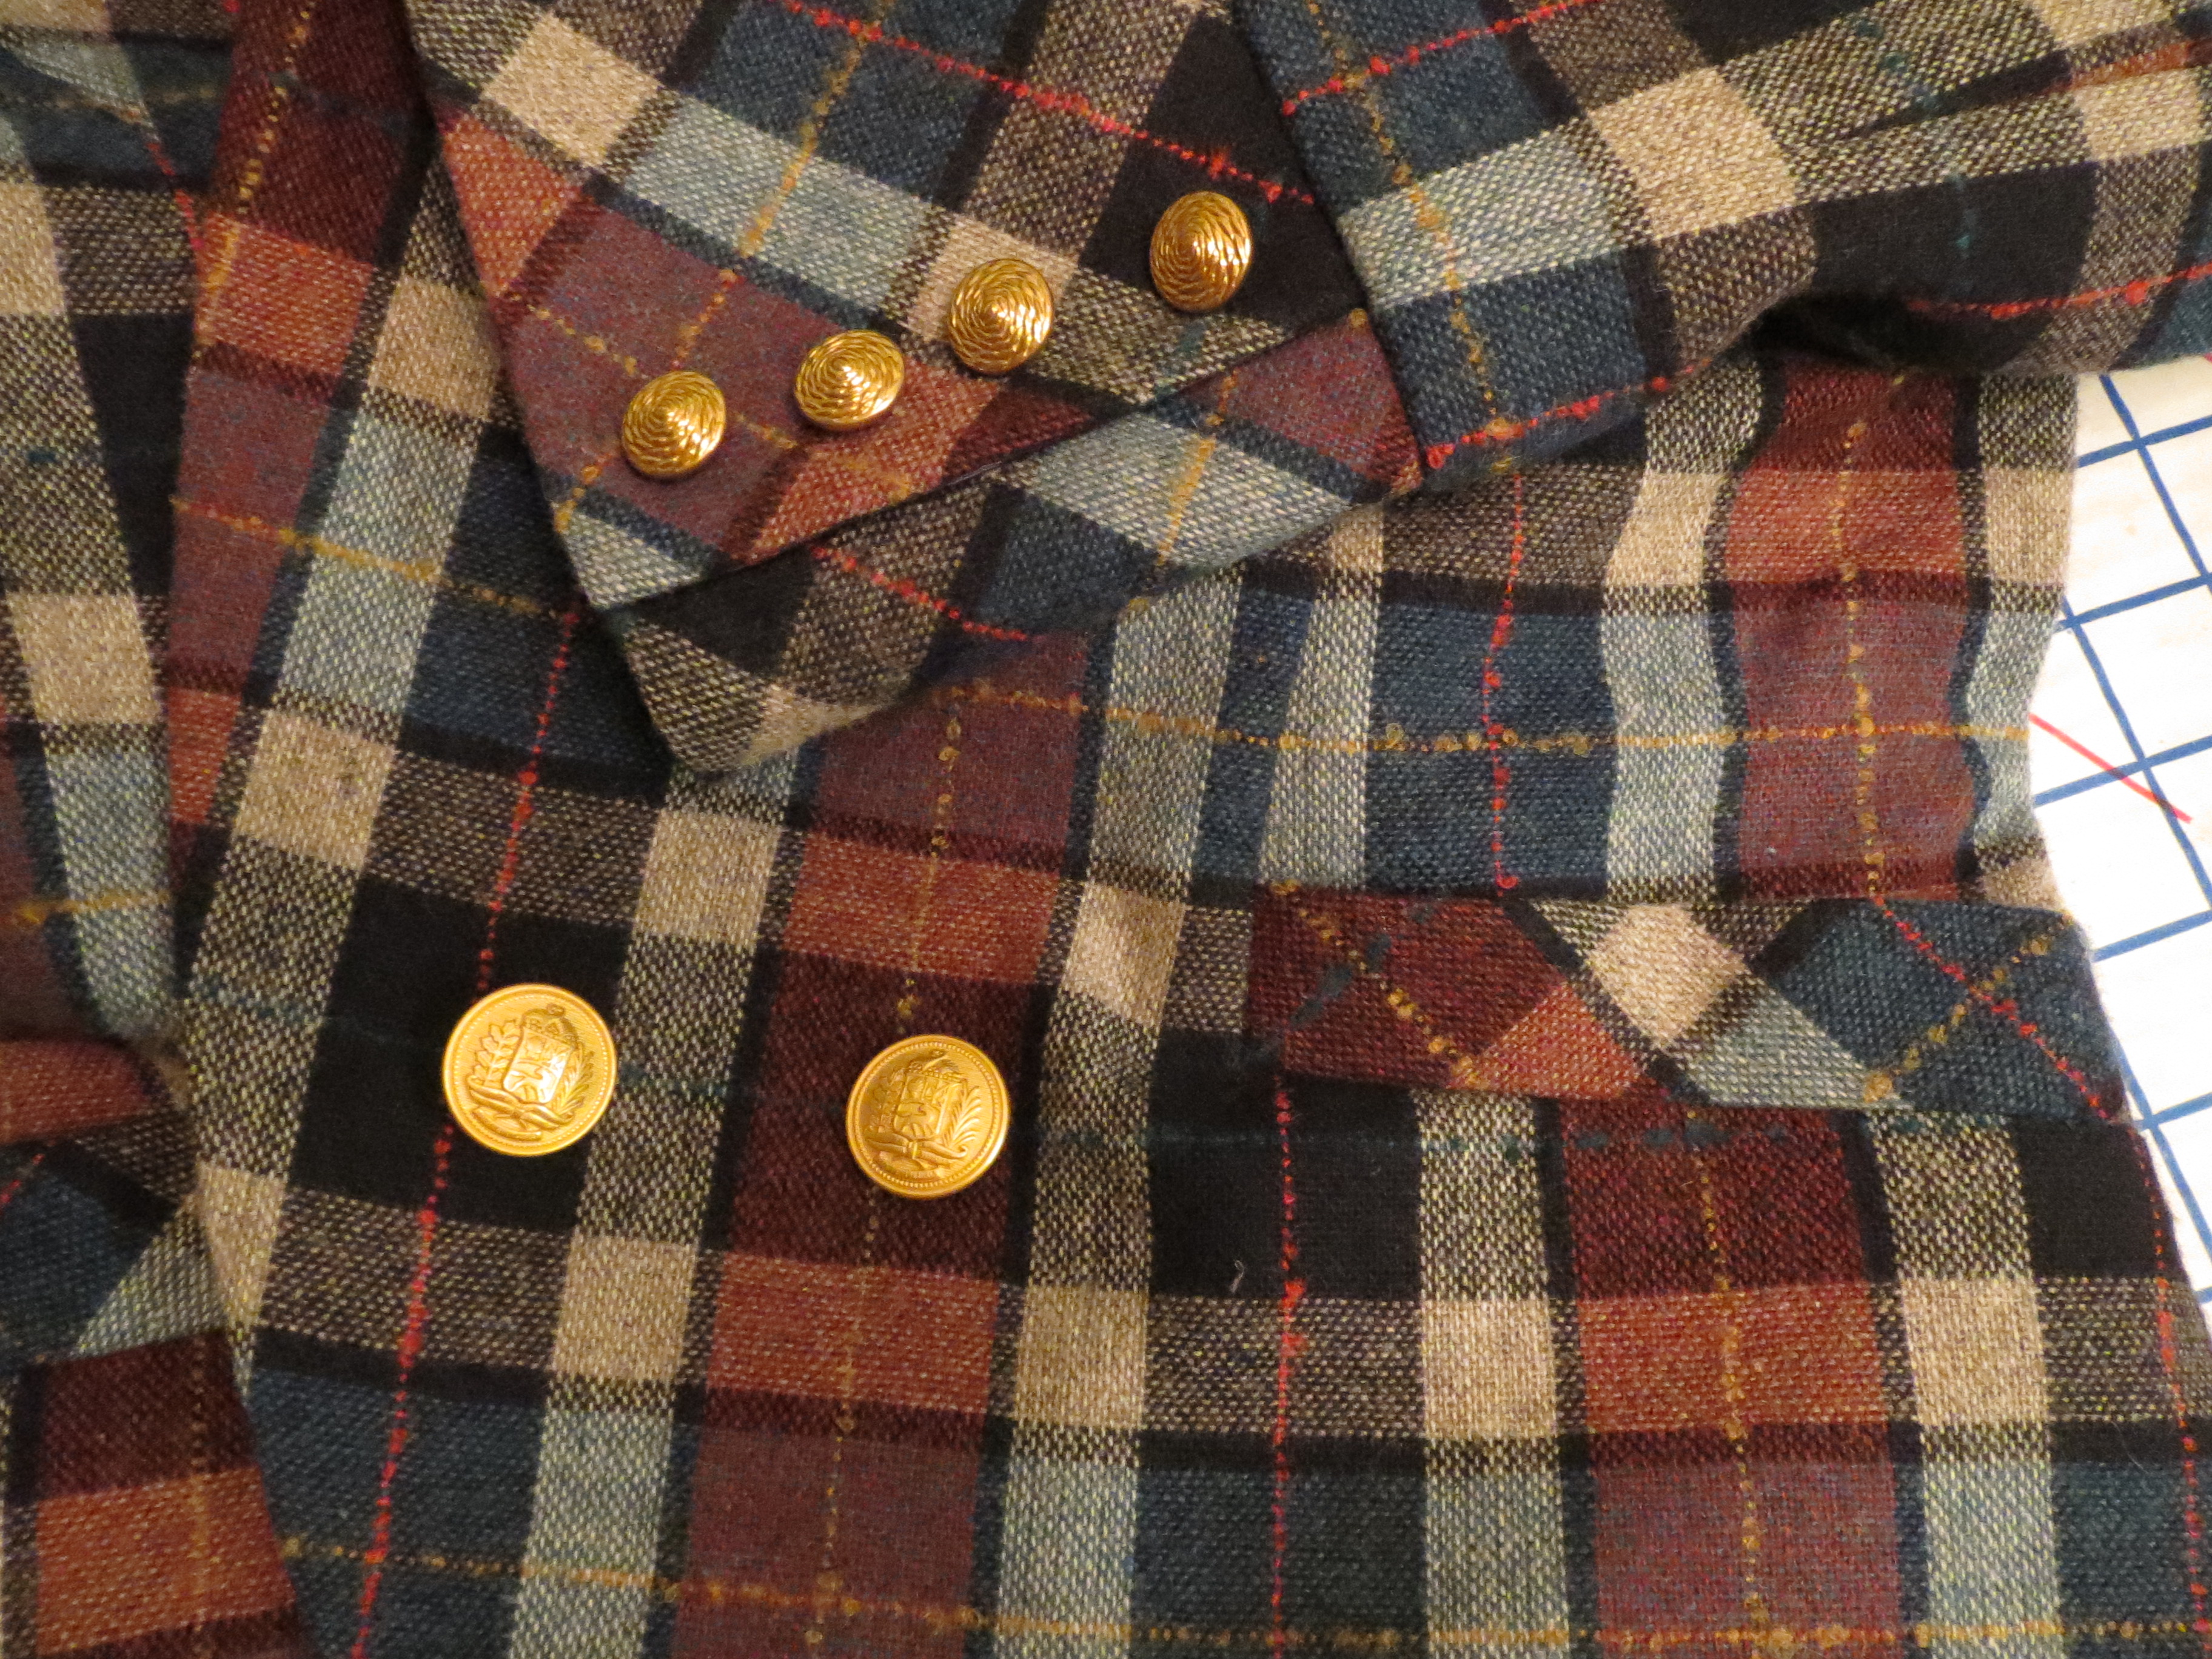
Because of my lack of fabric--I couldn't cut the sleeves full length--I used the cuff variation.  I cut the cuffs and the pocket welts on the bias as accents, and so I wouldn't have to match the plaids!

My buttons don't match but I'm ok with it.  I didn't want to use the larger buttons for the cuffs and I had these smaller gold buttons in stash (both types of buttons are from a Fabric Mart 4 pound bag several years ago).


Tweed Ride

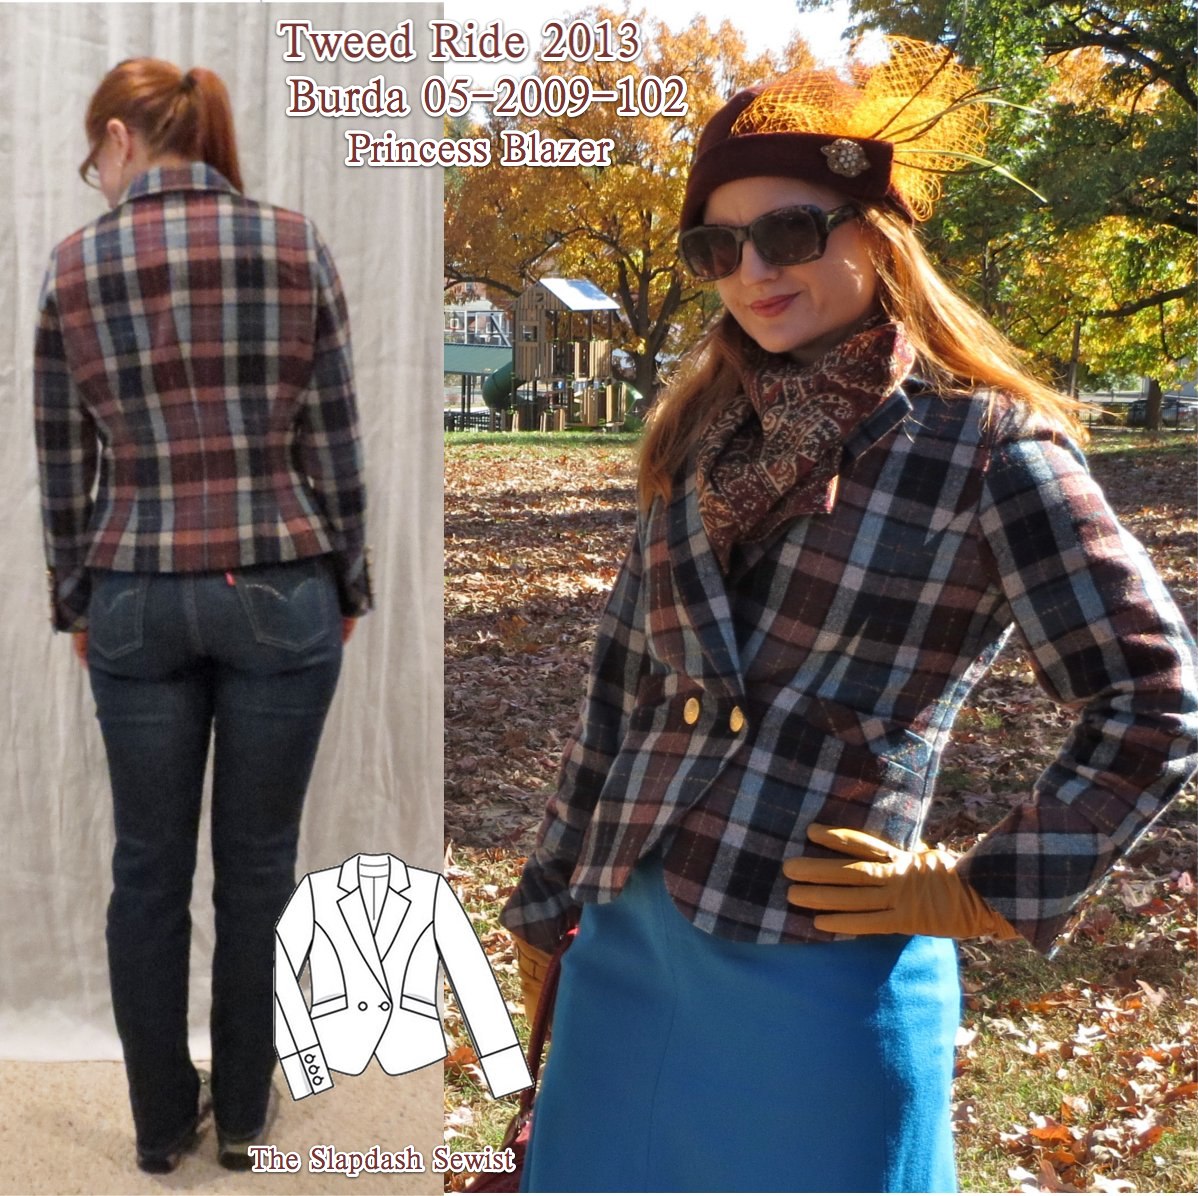
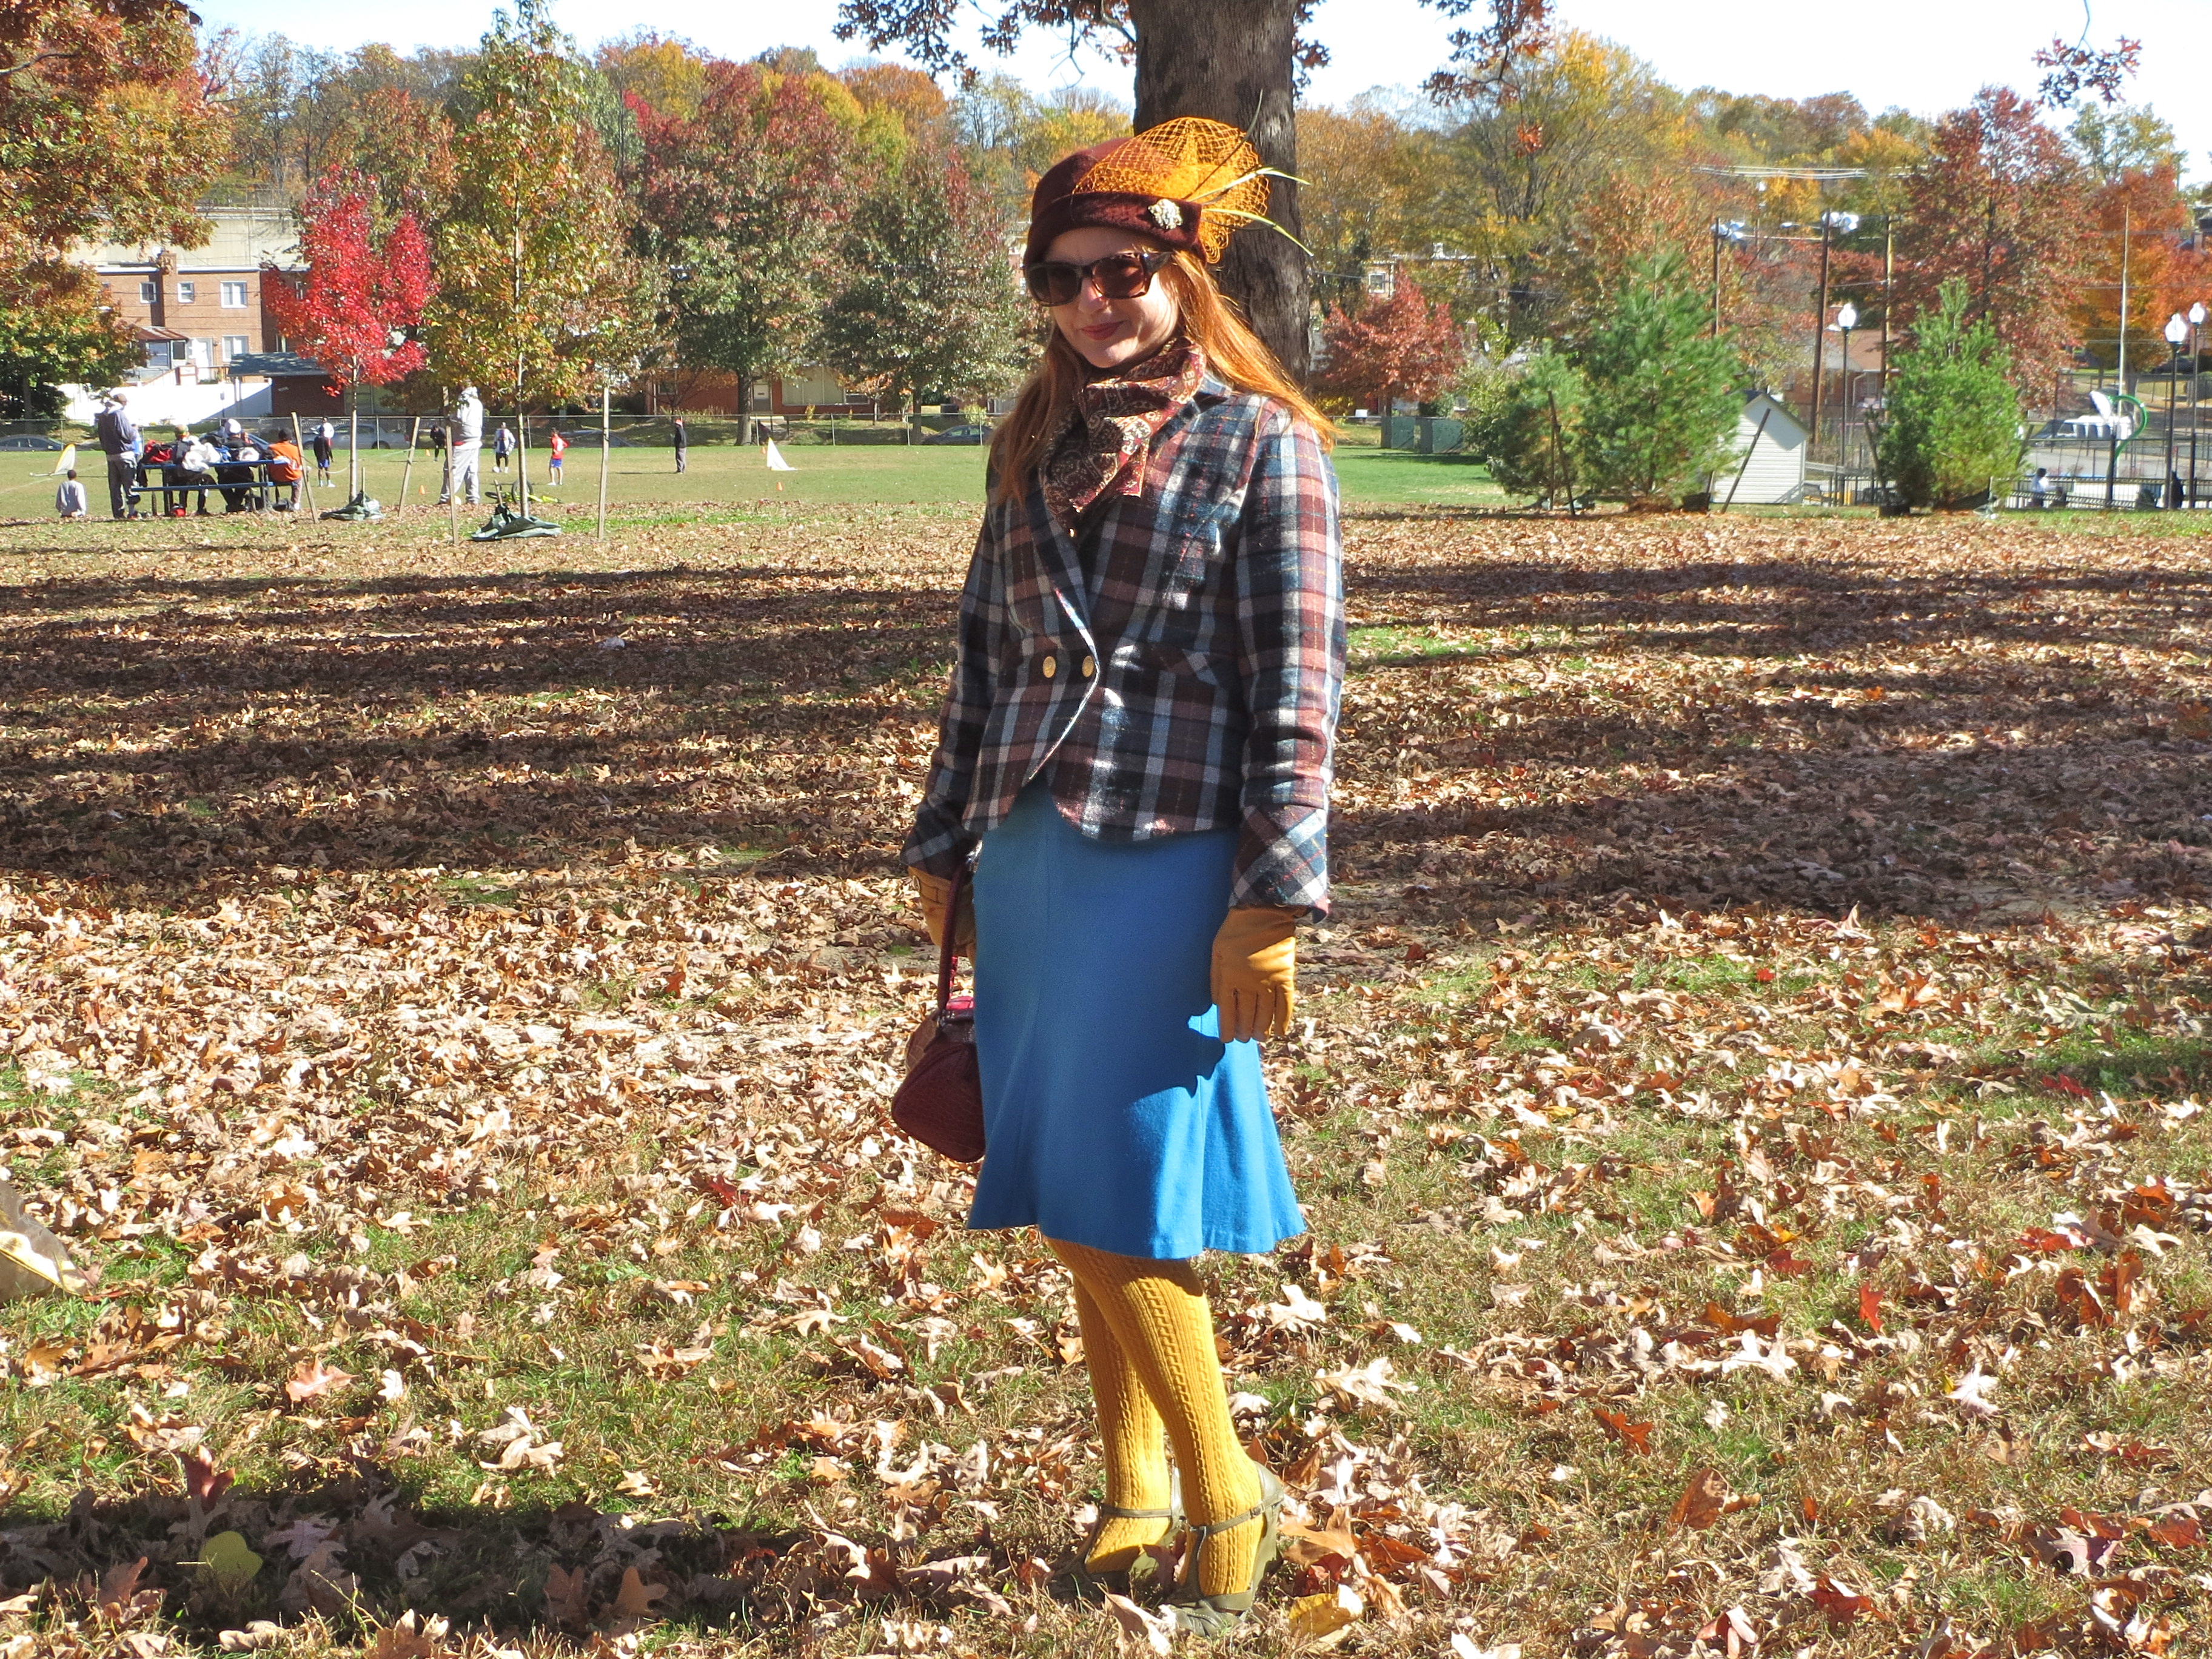
Here is the full Tweed Ride regalia (all my Tweed Ride photos are here).  The skirt is Simplicity 5914 I made several years ago and never wear because the waist is too loose--I didn't tape it and it just stretched way out.  The only fix would be to take the skirt apart and resew the seams and I have not yet made my peace with that annoyingness.  Since the low waist was going to be covered by the jacket--and the trumpet shape is good for biking--I figured it would be ok.  The hat will be reviewed soon!
Front


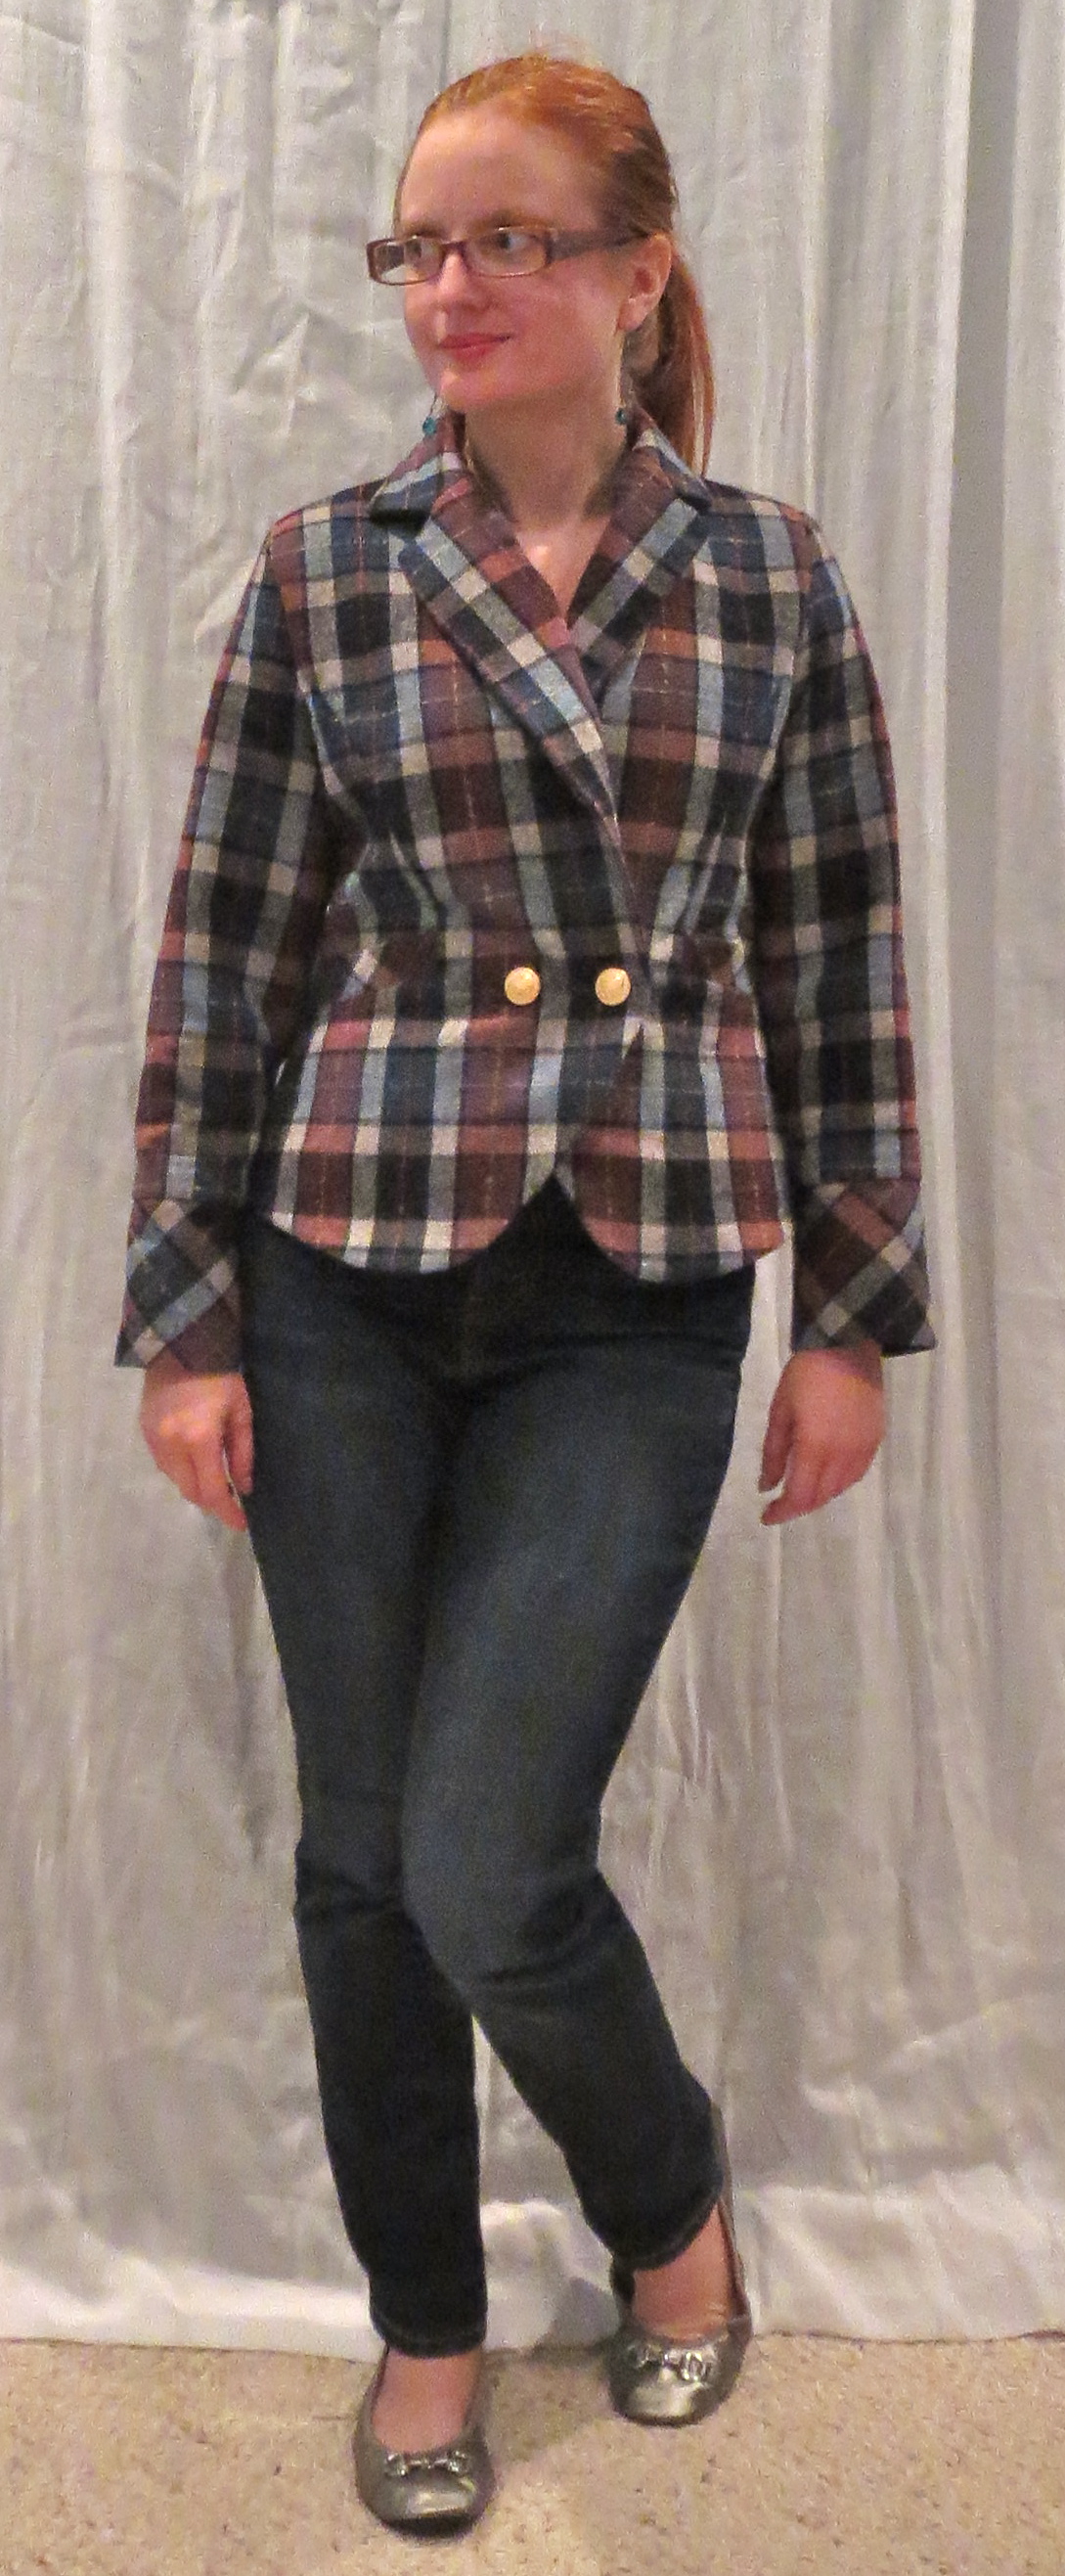
Although it looks costumey with the full on vintage thing going on, I think the blazer is wearable for every day (plaid matching issues aside.  UGH!).  It will be a challenge for me to find outfits to go with it because I wear so little solid color.  But how cute is it with jeans?  Too bad it's too cold for a light jacket already.  I just need one day where it doesn't get below 50 degrees at night...

I really like this pattern.  It's double-breasted without being 80s-evocative, the shaped hem in front is really nice but the higher back hemline prevents it from being dated (nothing says "I bought my suits for interviews in law school in 1999" like long jackets, not that this describes my sad suit collection, ahem).  The pocket situation is totally clever and well-drafted.  I don't know that I need two of these in my closet, but I am definitely hanging onto my tracing.  If this issue is in your archive, keep it in mind!

All photos are here and the pattern review is here.

Wednesday, March 2, 2011

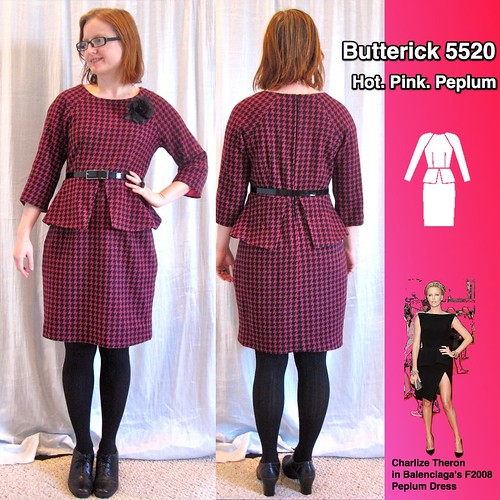
Butterick 5520, An 80s Revival in Hot Pink Peplum

B5520 Thumbnail

I think the first version of Butterick 5520 that I saw was Eugenia's, with the lace overlay on the sleeves. I liked the dress as a classic sheath with embellishment possibility, and when I saw that it had a peplum I was really into it.

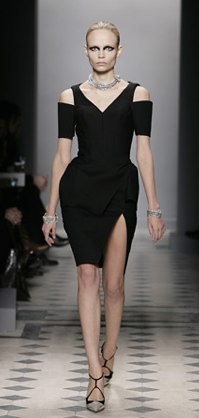
Balenciaga - F2008 I associate the gratuitous peplum like this (a peplum in a jacket is both design and functions to add length) with the 80s, but it is not entirely out of date. Balenciaga put this sleeveless number with asymmetric front slit on the runway for Fall 2008 (although since F2011 just walked the runway, it is still not exactly au courant). Charlize Theron totally worked it on the red carpet without the arm covering thingies. But I don't need the peplum to be in style. It is a great shape for a pear--in exaggerating the hip, it actually disguises it.

I bought the wool at H&M Fabrics in NYC in November. At $10/yard, it was expensive by my standards, but I just adored it. Although PR's stash contest was running the past two months and I generally try to sew up stash, I just *had* to get this piece done. I felt like I needed to get it done while the current 80s moment is on. But when it was done I was surprised at how un-outrageous it is. You put the words "peplum," "houndstooth," and "hot pink satin" in the same sentence and you expect to be a little over the top, but this is almost...tasteful. Which is nice, because it should be able to stay in my wardrobe for many years.

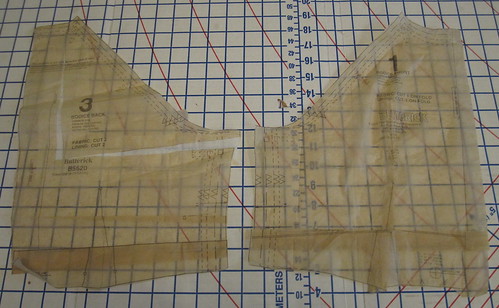
Broad Back Adjustment I started with Broad back adjustment and small bust adjustment. When it was completed I thought maybe I shouldn't have done the broad back adjustment because when my arms are at my sides the extra fabric sags a little there and the back is overall a touch baggy. But later I felt vindicated because even with the broad back adjustment I popped the stitches on the lining under the arm when wearing the dress and vigorously messing with something on the floor. So I will have to deal with the slightly saggy back in order to have full range of motion.

For the SBA I narrowed the dart.

I also shortened the bodice an inch. I have a high waist but a long torso so I generally don't mess with the length of the bodice. Here, I wanted the waistline to be slightly high as I didn't want the peplum to hit me too low on the thigh. If I made this again, I would probably shorten the waist only 1/2 inch, but I am happy with where the waist hits me on this project.

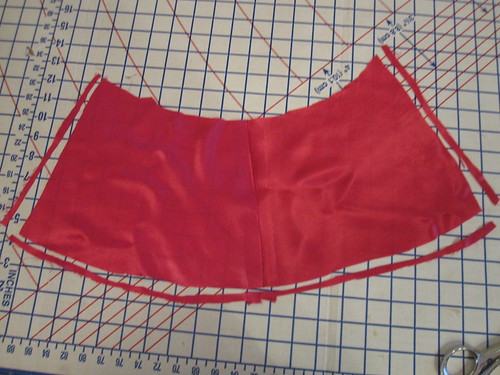
Trim Edges of Peplum Lining

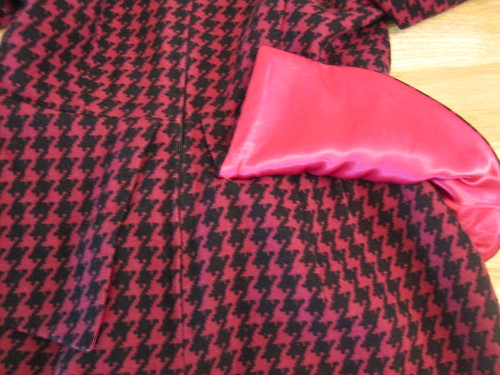
I lined the peplum in hot pink rayon satin, purchased from Fabric.com for $2.79/yd last September. While I love the contrast underside, I wanted to ensure that it would not show unless the peplum flipped up. The first step was to trim the side and lower edges of the peplum lining to make it slightly smaller than the fashion fabric. This creates a turn of cloth after they are sewn together.

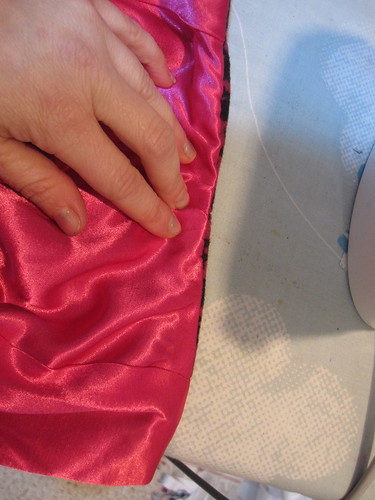
Press From Wrong Side

Anytime I am pressing a lining or facing, I always press from the underside. As I arrange the fabric for pressing, I make sure that I can see the tiniest edge of the outer fabric and then press. If you can see the tiniest edge of the outer fabric from the underside, you won't see any of the underside when the garment is on.

Peplum and Lining

Here you can see that the pink satin lining does not show at all when the peplum is laying flat, and you can also see the tiny edge of the fashion fabric that shows from the underside. This closeup shows a little better how you can see the edge of the fashion fabric rolling over the lining.

Hand Picked Zipper I use invisible zippers almost exclusively. I will only use a regular zipper if the fabric is thick and crosses a seam so that an invisible can't be invisible (or if it is invisible, won't slide past the hump). I used to be competent at regular zippers, but I now do them so infrequently--no more than two a year and probably less!--that I have completely lost my touch.

The last time I put in a regular non-invisible zipper (I think it was over a year ago on my houndstooth fail dress) I decided that the next time I had a regular zipper to do I would just hand pick it. So that's what I did here. I basted the center back together as for a machine insertion, pinned the zipper, and sewed it in with a prick stitch (tutorial on Somerset's blog). It didn't take too long, maybe 25 or 30 minutes. I would have spent that much time sweating it over the machine and it would have looked terrible. I can see doing a fancy beaded hand-picked zipper for a special project.
I'm still not entirely happy with the zipper as I feel that the "lips" open up a little over it. I actually did my first lapped zipper to see if it's better when making the skirt of the leftover fabric so stay tuned for that...

Another downside of regular zipper--you have to hand sew the lining to the zip. Again, didn't take very long, but man, an invisible zipper is so much easier in about 12 different ways.

I've gotta say, I just love stepping into this hot pink satin lining. I feel like a character in a movie, maybe Jessica Rabbit.

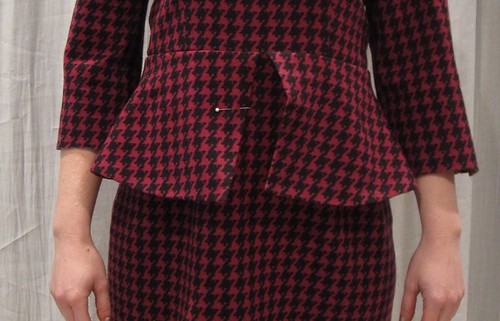
Original Peplum Look While the pattern is well drafted and all the parts fit together, for some reason the peplum just does not sit right for me. You can see that it sort of bulges out about halfway down. I had to take a hand tack on the front and back openings to get them to lay right. I don't know what that's about. In cutting, I spent a long time decided whether I wanted the peplums on the bias or the crossgrain for visual interest, but ultimately decided that houndstooth, peplum, and hot pink satin were enough visual interest and cut them per the marked grainline. So I don't think it's a grain issue (though the print is very slightly off grain and I cut with the print rather than the actual grain). I guess they need to be shortened at waistline at CF and CB for me? I don't know.

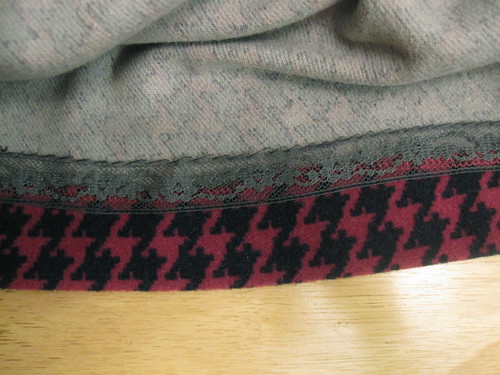
Hand Hem with Lace

The final finishing touch for this project was a hand hem with hem lace. Here I did not do a fancy stitch, although I have seen hand blind-stitching and it is exquisite. I just went with my default, the whip stitch.

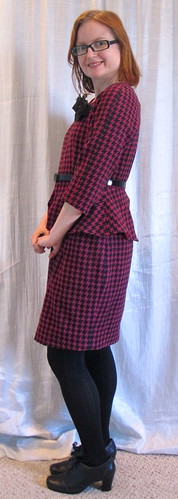
Side

This was a rather painstaking project, starting with cutting everything out in single layer. Even that was harder than it could be because the houndstooth on this fabric are printed on rather than woven in, and they are very faint on the wrong side of the fabric. So the first piece was easy to cut, but lining it up with the second piece was no fun. However, all the houndstooth match and are straight, although the back hem mysteriously does not run straight on the right side. I counted the houndstooths at the CB and right side seam and there are the same number. I traced the houndstooths across the right skirt and they run straight across from the CB seam to the side seam. I just can't figure it out. I'm pretty sure I am cursed in this arena. However, it is not nearly as horrible or noticeable as the last one.

But a nice wool dress deserves painstaking and I don't begrudge any of the effort involved. I have only worn it once and will try to wear it one more time before cold weather ends. Knowing I have this in my closet will make next year's onset of cold weather bearable (but only the onset, not the duration!).

All photos are here and the pattern review is here.