Tuesday, July 28, 2009

Going to Asia and Stashoholism Confessional

I am jetting off to Asia on Thursday! I am so excited. I will presenting a two-day course on the island of Langkawi in Malaysia. On the way I'll stop in Hong Kong for a bit of shopping with AllisonC!!!! I am so excited to meet her, as I love everything she makes. Then on to Langkawi.

On the way home I'll spend two days in Tokyo. Suggestions are welcome. I've wanted to go to Tokyo since I was a kid and I get so excited when I read my guidebook.

=======================

FFC 7-09

Ostensibly for the trip, I ordered some white stretch cotton twill from FFC, with the idea of making Simplicity 2728 for my trip. Unfortunately, it took a while to arrive and I didn't have time to make the jacket. I had ordered some of this twill last year and was *thrilled* with the quality. Alas, they have changed suppliers. It's still good quality but the last batch was almost completely opaque. This is much more translucent and a jacket (or anything) made out of it would have to be lined. I had envisioned a short sleeve unlined summer jacket and this fabric won't work for that.

The seersucker was because I needed to fill up my cart to get full value on shipping, LOL. I bought enough so that I was within pennies of the step up to the next shipping charge.

Wednesday, July 22, 2009

BWOF 02-2009-124, Lace Dress

Thumbnail

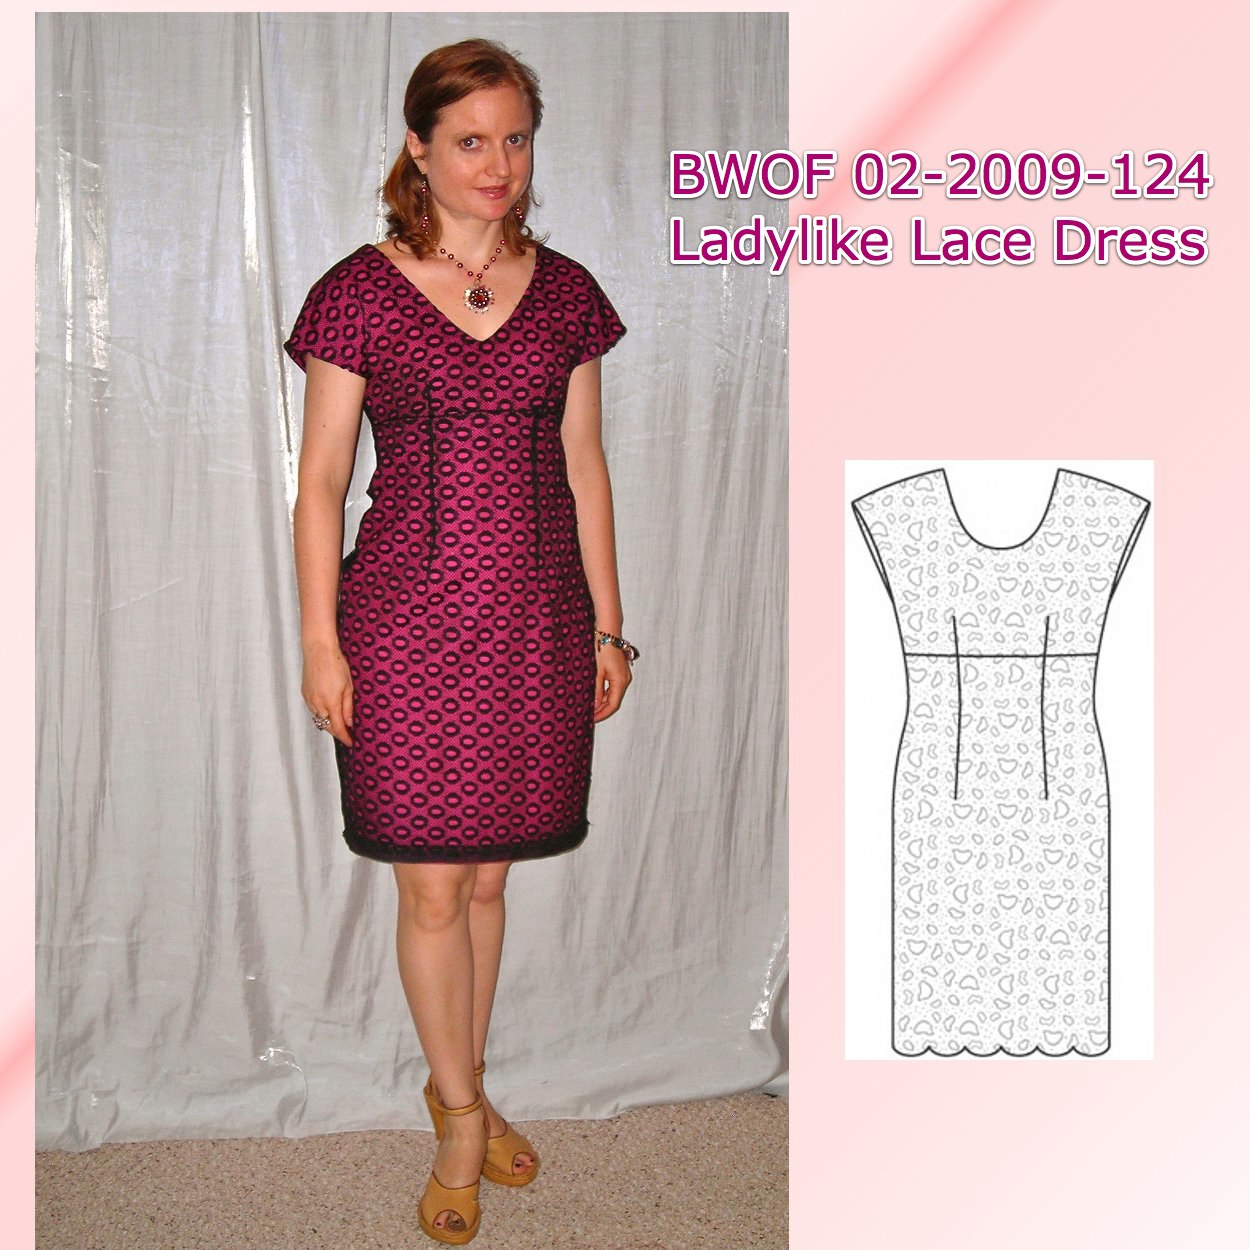
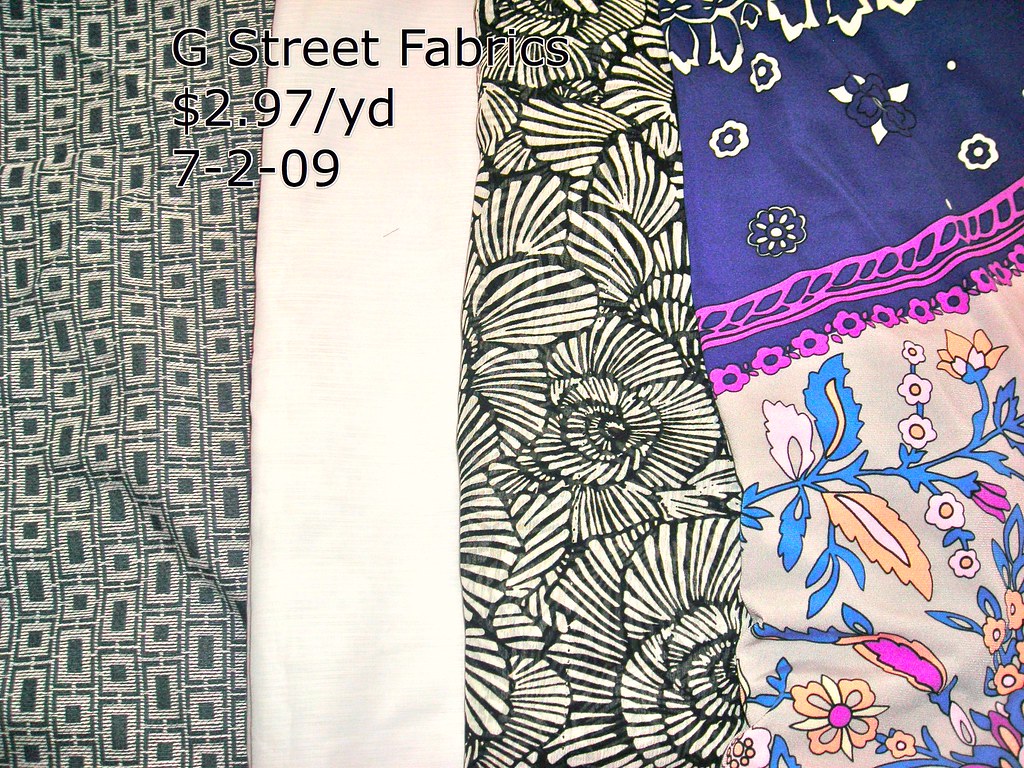
I love all things girly and ladylike so I was thrilled when lace came in style last year. I found this lace at Jomar in Philly when we had a mini-PR weekend last November. I don't remember exactly how much I paid for it, but somewhere in the neighborhood of $3/yd.

When I bought it, I was very influenced by Claudine's lace dress, which, as with everything she makes, is very classy and sophisticated. So I was thinking classy and sophisticated with a flesh-tone underlining. At some point, someone recommended I underline it with hot pink. I had to let go of the idea of myself as classy and sophisticated (which I'm really not) and embrace the true me, lover of hot pink. I think this turned out to be the right choice; I love hot pink, I think it really sets off the lace, *and* it makes the dress suitable for day. I wore it to work yesterday with a jacket and it did not seem outrageous.

The underlining is a polyester of some kind purchased as a lot from a vintage store several years ago for around $3/yd. This is a pretty fancy dress for under $20!

Now, I have something shocking to reveal. Prepare yourself for...

Muslin

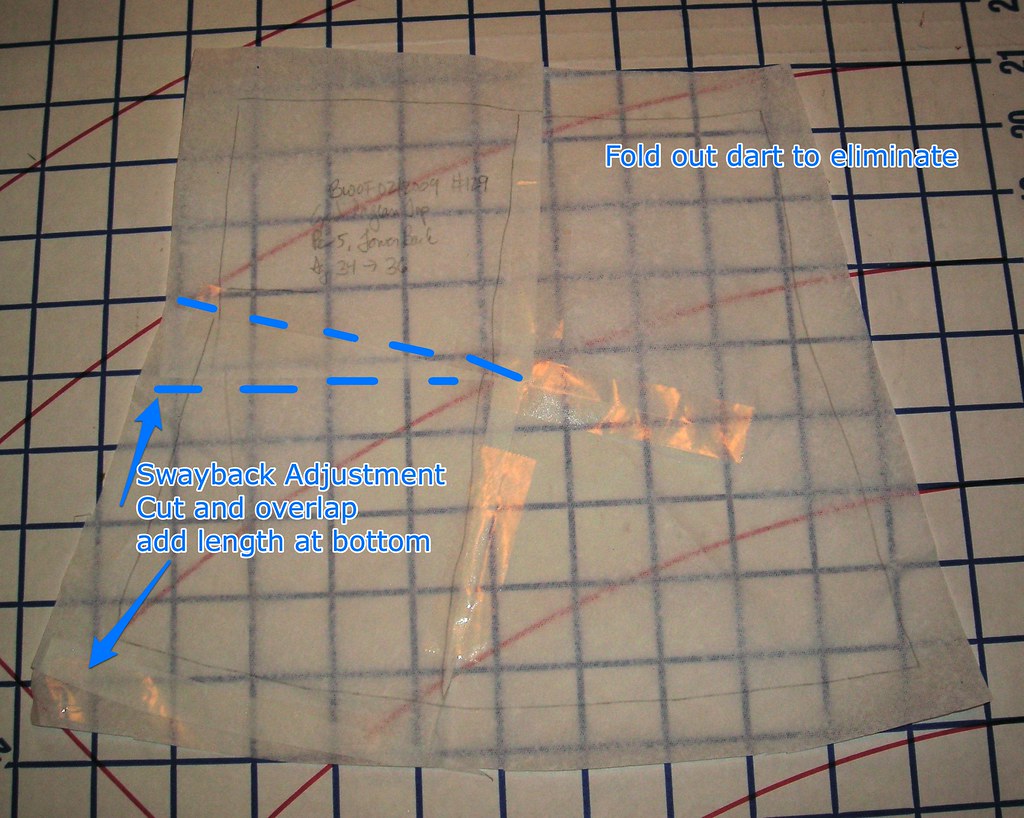
a muslin! The smallest size this 
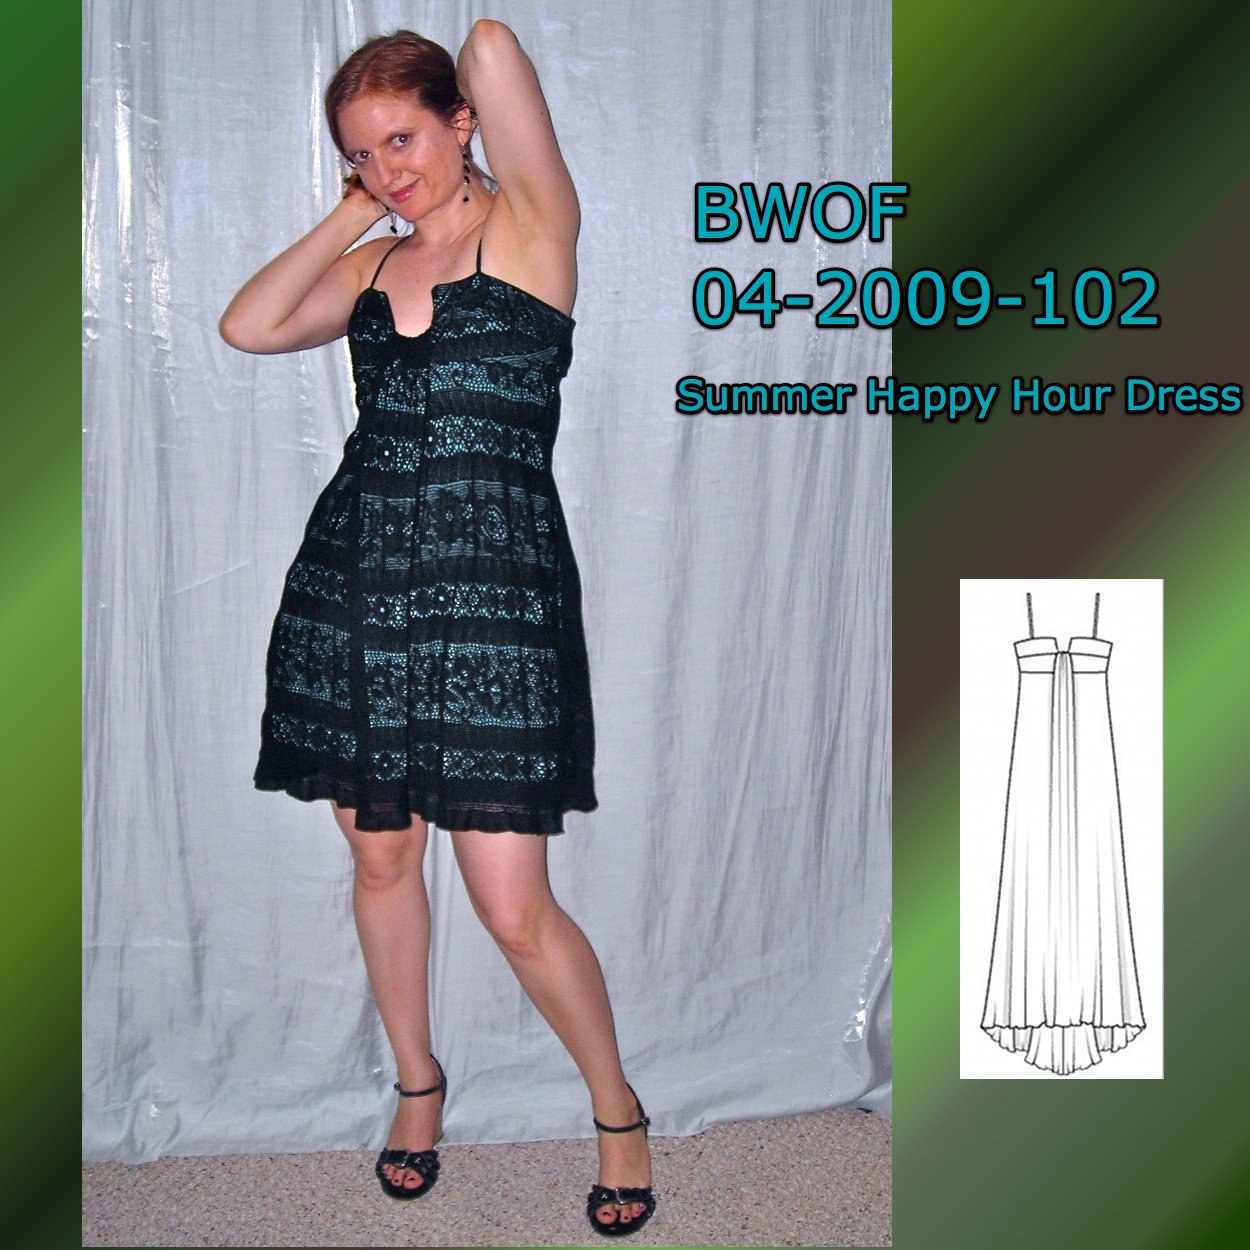
BWOF 02-2009-124 comes in is a 38, so I had to size down two sizes to a 34 at the bodice. I am confident sizing down one size, but two sizes is twice as difficult. Also, I was concerned about the length of the bodice. It's not empire nor is it at natural waist, and I thought that midlength might really emphasize my flat chest. I wanted to make sure I didn't need to shorten it to an empire line.

It turned out that the lines were fine, but I was glad I had muslined nonetheless because the neckline was icky high (with a flat chest I find it more flattering to have a lower neckline, otherwise there is a long flat expanse of fabric above the bust that is just not attractive), it was so wide it was falling off my shoulders, and I needed the world's largest swayback adjustment.

Bodice Front

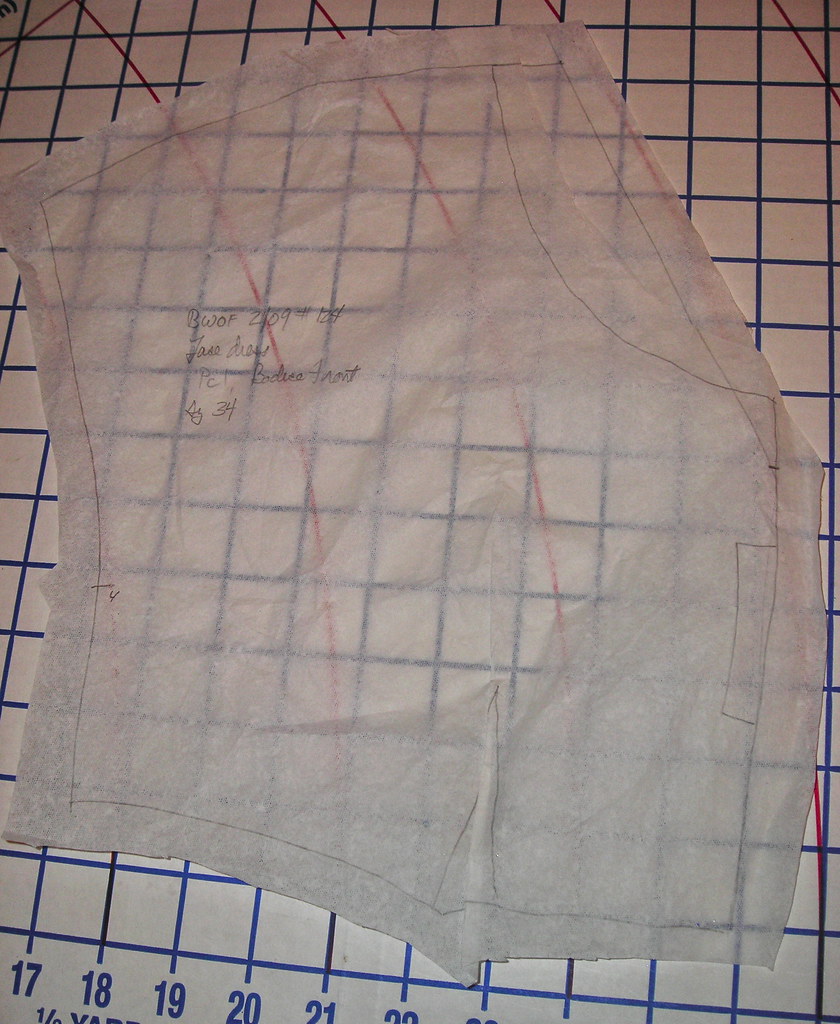
I had already narrowed the front bust dart for an SBA, and that was good. After the muslin, I made the front neckline into a V to match the back neckline and lowered it a couple inches (I think I ended up going even lower than shown on the altered pattern piece). However, I also needed to narrow the neckline opening to keep the dress from falling off my shoulders and ensure it covered my bra straps.

Bodice Back


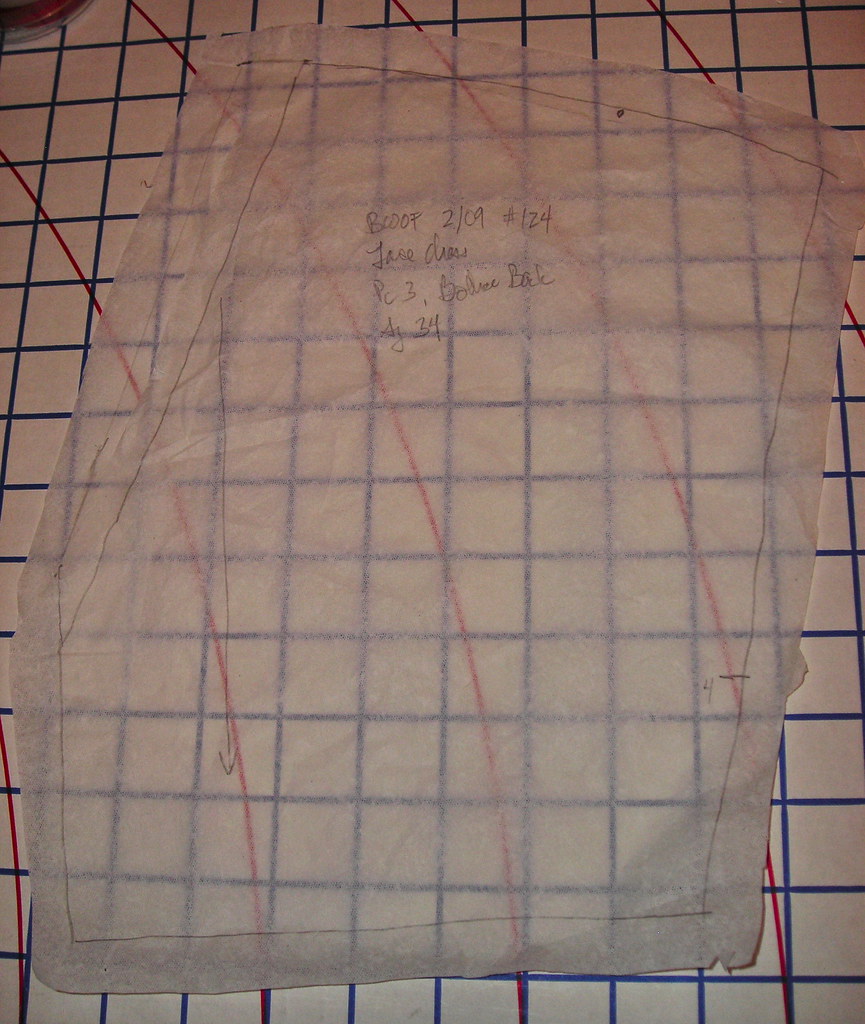
Next I tackled the back bodice. I again narrowed it at the shoulders. I also ended up raising the back neckline an inch because I was concerned it might creep below the bra band as drafted (I did not cut off the seam allowances at the neckline on the muslin, so it the back is 1/2" higher than the finished product would have been).


Swayback Adjustment


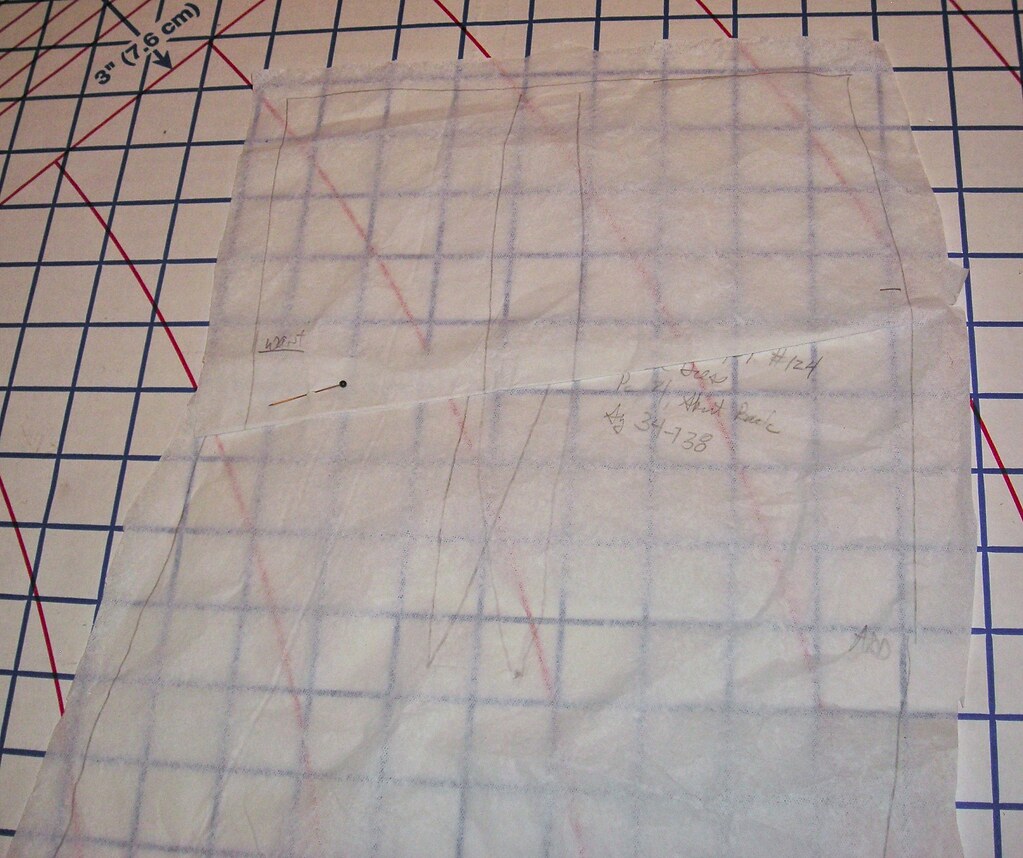
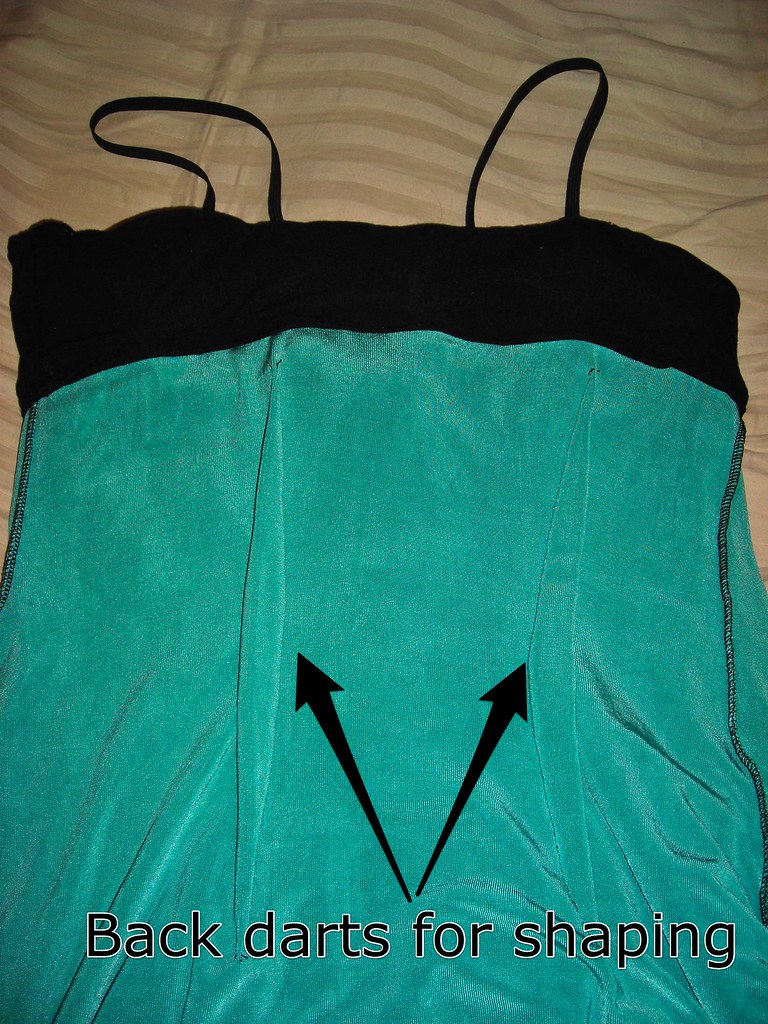
Finally, I took a giant swayback adjustment tuck (around two inches!!!!) in the skirt back. I also redrew the lower dart point and added length back into the skirt (not shown).


Once all this was done everything was pretty simple. Projects with only four pattern pieces go together quickly! I guess it had been a while since I had done a standard dress with bodice, skirt, and nothing else.

I assembled the underlining and the lace overlay completely separately. I did all the construction on the lace with the serger, including the darts, as the seams were all going to show. I like the way this looks in the end result, because it emphasizes the lines and the darts.

Neckline Finish
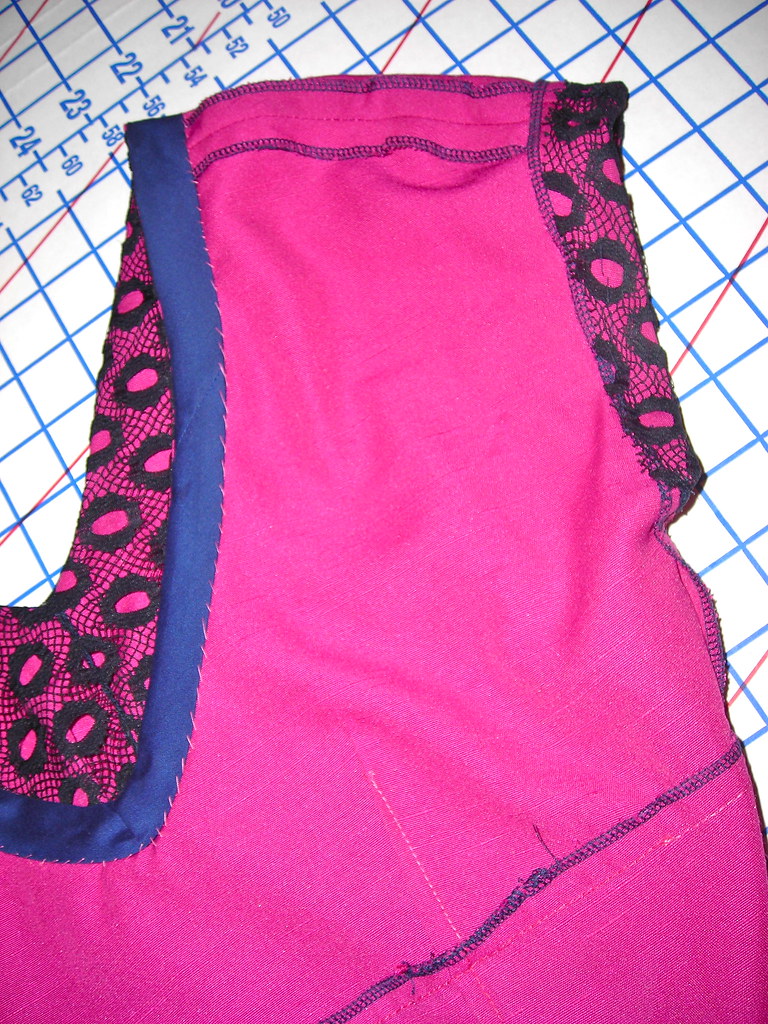
Once both were completed, I joined the two pieces at the neckline, stitching along one fold of some double fold bias tape. I turned the bias tape to the inside and stitched by hand only to the underlining.

You can also see how I did the sleeve hems in that photo--turned the lace to the inside and stitched to the underlining hem allowance.

Side


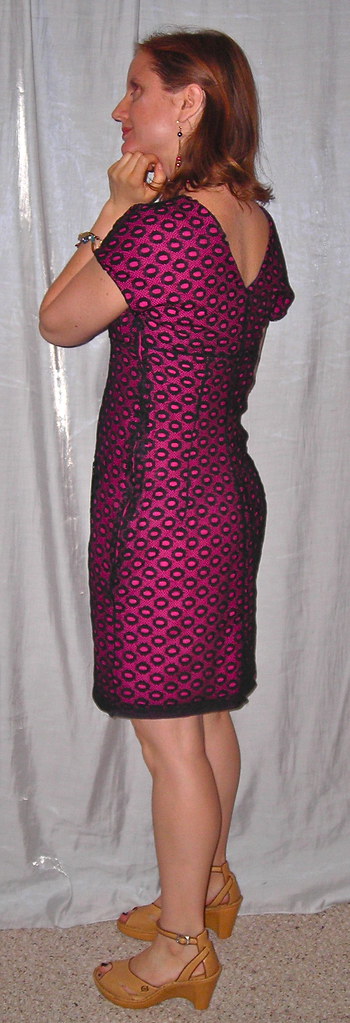
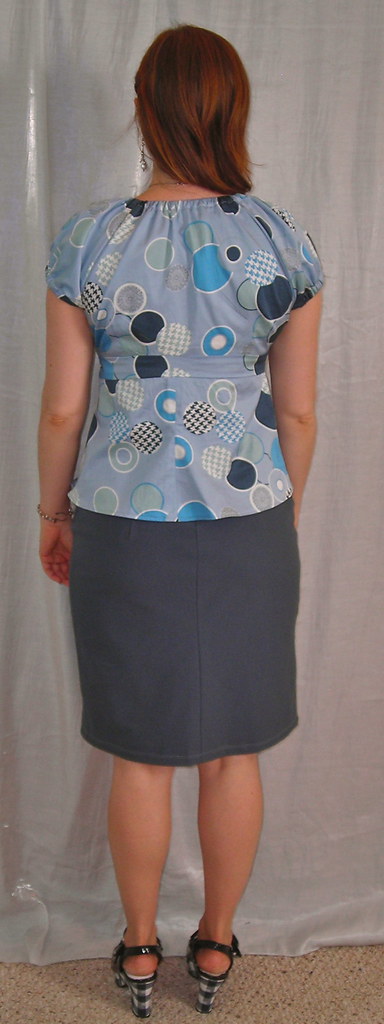
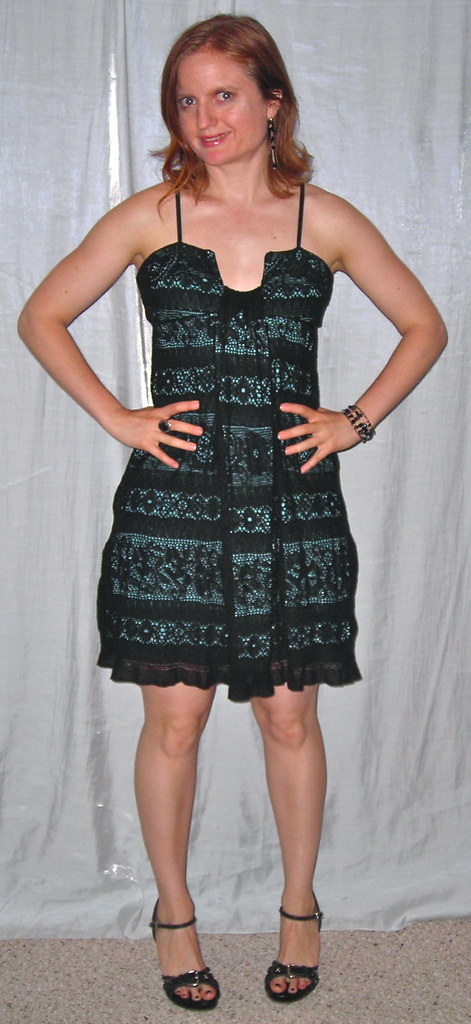
The only thing I'm not happy about with this dress is the zipper (though the side view shows how well the swayback adjustment worked!). I considered sewing the lace and underlining as one to the zipper, but decided this would be too complicated at the bottom of the zipper as I wouldn't have wanted the lace to be caught up in the seam all the way to the hem. So I put the zip only into the underlining, and then pressed under the seam allowance of the lace and sewed it down by hand. I think what I need to do is undo alllllll that hand sewing (ugh!) and trim off the seam allowances. The lace is not going to ravel, and while the zip is never going to appear seamless and perfect there, I think the double layer of lace is what is making it look so noticeable and bride-of-Frankenstein-y there. And then hand-sew it again, of course.

I wanted to use the finished selvage of the lace for the hem. Since I hadn't muslined the full length of the dress I had to make a guess at the exact length. I definitely did not want the dress to end up too long, and I ended up erring a tad shorter than I would have normally chosen. To me, it feels extremely short while I'm wearing it. But looking at the photos it does not look short at all; it is merely above the knee. It's so funny that above the knee feels so scandalous to me now, considering the short skirts I loved in my 20s.

All photos are here and the review is here.

Tuesday, July 21, 2009

Manicure Mardi and Q&As

I cut my hair recently (well, my stylist did) in the same short 'do I had last summer. My hair is not really naturally curly and must be coaxed into a reasonable facsimile thereof with lots of mousse and a diffuser. In the mornings I need to mist it with water to get it in the proper frame of mind and go from there and you would be surprised how hard it is to find a decent spray bottle! After the one I bought last year not only malfunctioned repeatedly but also rusted, spraying ick everywhere, I decided a trip to the beauty supply store was in order to get a stylist quality spray bottle.

I headed to the nearest Sally where I was lured in by the wall of nail polish and cosmetics. While I wear only lipstick (but unfailingly lipstick, as my lips are a rather unattractive shade of blue naturally) 99% of the time, I just looooove makeup. It's the little girl in me, I think. I remember how badly I wanted to wear makeup when I was younger. I was allowed to start in 7th grade. I might have managed to make it all the way that school year keeping up the routine, but it didn't last much longer.

Sally Girl Colors

Anyway, I picked out a few bottles but then got to the register and saw these tiny Sally Girl nail polishes for 99 cents each, Big Three Free (the talk of Big Three was very confusing to me at first, because I was like, "What do McCall's, Butterick, and Simplicity have to do with nail polish?"). I love tiny things and I really like tiny nail polishes because I never manage to use up a whole bottle. So I put everything back except "For Audrey" and picked out a bunch of the Sally Girls.

Sally Girl Surfs Up The matte colors--hot pink and turquoise--are great. The color goes on true to the bottle and gives almost full coverage in two coats. I have the hot pink on my toes and the turqouise on my fingernails, as demonstrated at right. I took a picture after I finished the manicure last Friday, but then it turned out it was blurry. So I did a crappy touch up and took another picture this morning. You can see the chips and pits of time. I didn't use a bottomcoat but I did put a topcoat on and it was two full days before it started showing tip wear and a small amount of chipping. My toes are farther away so I can't give an assessment except to say they look good from here. Both of these needed a shiny topcoat to make the colors pop. The turquoise pictured here, "Surfs Up" (the lack of apostrophe bothers me), is pretty much my favorite color in the world, so I'm pleased to find it in nail polish form.

Unfortunately, the glitter colors are pretty terrible. The darkest blue gave a nice color in three coats and dried fine, but the two lighter glitter colors just don't dry. After about 30 minutes, I was able to just wipe them off my nails (two coats) like that kiddie peel nail polish. Perhaps if I let them dry fully after one coat it would work, but who has time to wait around for that. I love the sheer hint of color and sparkle, but they appear to be useless for the purpose for which they are intended. I will report further if I have better luck in the future.

===========================

An Anonymous commenter asks:
Could you please share information about the paper you use to trace out the BWOF patterns? Also, is it available nationwide? Thanking you in advance.

First of all, there is no One True Paper for tracing BWOF. Don't feel like if you get The Wrong Paper your project will be ruined. It's just what you can find that's acceptable to you in price and quality. Cidell and I ordered a box of exam table paper as used at the doctor's office (I can't remember who our supplier was, but here are google's results). It comes in conveniently large rolls and the width is good. However, it is a somewhat large initial investment (I recall our box of 12 rolls was around $60 plus shipping). Before we ordered the exam paper, I bought tissue paper from CVS--Hallmark has some special 99 cent packs that are all white and larger than normal tissue paper. The packs are in a yellow/orange wrapping with no plastic and were stacked on the shelf below the hanging baggies of tissue paper. Other people like to use plastic sheeting, or non-woven interfacing-like tracing textile. Go to an office supply store and see what you can find in rolls; some art supply stores also have large rolls of paper thin enough to trace through.

Of my Pretty Parisian Blouse, BWOF 02-2009-129, Jenny asks
Are your sleeve hems gathered? They look much flatter than in the design drawing. I've been wanting to make this in white cotton/linen but just haven't gotten around to it

I should have mentioned this. So my shoulders are narrow across, but my shoulders around the armscye and my biceps are apparently gigantor in relation to the normal population! BWOF's armscye fits me well, but Simplicity and McCall are so tight I can barely get them on, much less wear them in any comfort. When it comes to biceps, even BWOF is too tight sometimes. I didn't think to add any width to the sleeve (and probably couldn't have, given my limited fabric) and needed longer elastic than recommended so it wouldn't be too tight across the arm, so the sleeves appear less gathered at the bottom than the line drawing and on others who have made the blouse. It's not the pattern, it's just all that strength training.

Sherrill cuts to the chase
But I love those shoes. What do they look like in the front?

This photo shows the front of the shoes, and this one the side view. I think the brand is Madden Girl but as with all my shoes it is no help because I bought them a year ago from Ross, so they are long out of stores. If it's any consolation, the straps across the foot are held to the shoe by elastic, and the elastic popped on one of the shoes the first time I wore them. I did a funky fix, but I'm afraid to actually wear the shoes now beyond carrying them with me and changing at the destination. They are surprisingly comfortable, though.

Wednesday, July 15, 2009

BWOF 02-2009-129, Pretty Parisian Blouse

So when I was in Paris last year I bought two fabrics. I made last year's birthday dress out of the blue circles fabric and had enough left in odd shapes for a project with lots of small pieces. When I saw BWOF 02-2009-129, it totally clicked, especially after Allison C made it and it turned out so cute.

Thumbnail

Following Allison's lead, I didn't use the BWOF directions for the gathered neckline and sleeve. BWOF wants you to neaten the raw edges of the fabric with a narrow zigzag and then use zigzag over shirring elastic to gather. Instead I added allowances for casings and used regular elastic.

Elastic Casing InsideI was kind of proud of my clever method here. The fronts are lined, so I first sewed the neck edge of the front and front facing and turned right sides outward.

Then I sewed the sleeve to the front, ending the stitching at the finished edge of the front, leaving the casing allowance overhanging.

Next I turned under the casing short edge seam allowance for a neat finish and turned under the long casing edge of the sleeves/back.

Finally, I threaded the elastic through and stitched it in place at the ditch at the front/sleeve seam. This creates a nice finish on all the edges and a clean, continuous look on the outside.

I did my usual SBA of narrowing the bodice front darts. Oddly, I could have used some sort of weird FBA on this one because I found the upper bodice a little bit too short. Had I muslined (as if!!!) I probably would have added about half an inch of length to the upper bodice front pieces so the midriff would sit securely under the girls instead of creeping up over them a bit.

Back AlterationsI didn't really understand the point of the darts in the lower back, so I folded them out. To compensate, I added a center back seam and took an extra large swayback adjustment, slashing and overlapping right below the waist and adding the length back in at the bottom. The fit in the back is good and I don't miss the darts at all.

I left off the bow; although I love it in the solid, it seemed too busy for my print fabric.

Back


I love the style of this blouse, and somehow find the shape of the back neck with the gathering very appealing. It's so simple, but something about the design is unusually nice.


I was so pleased to find a pattern for the rest of my lovely Paris fabric! I adore my birthday dress, but it is not an everyday piece. This blouse, on the other hand, allows me to be secretly Parisian on an otherwise ordinary day at work. Pass the macarons!

All photos are here and the review is here.

Thursday, July 9, 2009

A Week of Stunt Dressing

So I don't know whether it's cheesy or hilarious (or a little bit of both) but I enjoy dressing for holidays. Not in the obvious blinged out sweater kind of way, but with a little more subtlety. But only a little. Since I did a red, white, and blue wardrobe last year for Paris, I thought it would be fun to do a whole week of stunt dressing

July 4th, 2009

Oddly, nobody really noticed. One co-worker noticed my outfit on Wednesday (the red swiss dot blouse and navy eyelet skirt) and asked if I was dressed for the holiday but that's all. Huh.

You might notice a few new pieces in there. Obviously, I am way behind on reviews as usual, but most of them were made in a frenzy last week to keep up with my color theme.

One of the new pieces was a ribbon belt, shamelessly copied from Cidell's red version. I wanted a navy belt and had wanted to try the belt so I made it up in a flash and wore it that afternoon.

Supplies:
1 18 foot roll of 7/8" wide grosgrain ribbon (I used cheapie Offray)
2 18 foot rolls of 3/8" wide ribbon
Belt buckle to cover

Iron braidCut each roll of the narrow ribbon into three 2 yard sections. Pin three sections together on the ironing board and braid. I felt like I was part of an old-fashioned rope walk. The key is not to let the ends of the ribbon braid themselves in mirror image.

Don't twist the layers of the ribbon as you braid. It won't look great and you will be doubtful, but when you finish your braid, sew or pin the ends to keep it from coming undone and iron. The ironing really does wonders in getting the braid to look nice.

Three Layers for Belt Then prepare the belt portion. I used three layers of the 7/8" ribbon, sewing the two side ribbons underneath the top ribbon. Cidell used a more layered look on hers. It's important to use more than one layer just so you get the proper body and stiffness.

Next, sew the braid into each long edge of the belt.

Finally, cover your belt buckle. Mine does not look particularly good (sorry, I could not get a decent picture and I am working on blogging now rather than waiting until that magical day when I have perfect pictures), but it doesn't show from two feet away so eh. I used the 7/8" ribbon and just sewed it into place.

Thread your belt over the center bar of the buckle. I hand-sewed in place because I couldn't get close enough to the buckle with my sewing machine. Turn the raw edge of the free end under, stitch, and turn under again.

Voila! A super easy yet surprisingly attractive and RTW looking belt.

Tuesday, July 7, 2009

Manicure Mardi and Stashoholism Confessional

Wet'n'Wild Blazed
I never paint my nails, much to Cidell's despair. But I found myself in the CVS looking for a lighter color for my toenails (I usually wear dark) and ran across this Wet'n'Wild. So I will imitate Shannon's Lacquer Lundi and share "Blazed." I love the pinky-coral color, but alas, you get what you pay for when you spend 99 cents on a bottle of nail polish. The first time I used it I painted my nails outside. The good thing about this polish is that it dries very quickly. The bad thing is that if you're using it outside on a sunny, breezy day it dries midstroke. So the outdoor manicure was a disaster.

I tried again at home, and it was much better. It definitely required two coats, and I still didn't get opacity. Not being a manicure person, I didn't bother with base coat or topcoat, so it started chipping on the second day. Oddly, my left hand--painted with my more dextrous right hand and used less--chipped badly, while my right stayed intact with only tip wear. I wonder if my clumsier left hand applies polish more heavily?

I will try to resist the cheap nail polish in the future, but this was the only color in the CVS that appealed to me and I really like it. If I could find the same color in a good quality polish I would consider buying it.

========================

G Street Fabric
G Street Fabrics 7-2-09

I headed to the suburbs on Thursday to hit up Joann's Vogue and McCall and half-price notions sale, and of course had to visit G Street as well for 25% off zippers. I wanted to get a sheer-ish white woven for a quick top I wanted to make, and a white linen with black embroidery for a wearable muslin. I was hoping that I had some kind of willpower not to buy any fabric other than these planned purchases. Alas, I do not.

I found my white sheer, and got the navy rectangles (it looks black or gray in the photo, but the fabric on the left is actually navy) instead of the embroidered. But then I found the knit print that is perfect for a maxi dress (assuming there's enough of it) and the sheer black and white print as another wearable muslin. So much for willpower.

========================

When I posted instructions on how to add more holes to a belt, several people asked what to do about the excess. If it's a cheap belt (as most of mine are) without a real edge finish, I just chop it off with scissors. For a nicer belt where this would be obvious, I use a hair elastic as an additional belt-loop-holder-thingy to keep the excess in place. For a black belt, a black hair elastic is perfect. For the red/gold belt from the post, I use one of those clear hair elastics. These were popular several years ago and I still have a whole bunch of them. I'm not sure if they're still available in stores, but they are sold on the internet. It's completely unnoticeable on the belt, but keeps the long flap from waving around.

Monday, July 6, 2009

BWOF 04-2009-102, Summer Happy Hour Dress

BWOF 04-2009-102 Thumbnail

So as soon as it started getting warm all the girls of DC busted out their strappy sundresses. I was struck with jealousy and also amazement at the fact that I do not have a single strappy sundress in my closet. The closest I come is my goddess dress, which is not spaghetti straps. So I neeeeeeeded one.

When I found this fabric at G Street on the bargain table in April, I was thrilled. It's lace, it's tiered, it's stretch--perfect for a quick, easy wearing, fashionable summer happy hour dress. I snatched up enough for a dress and a super-easy elastic skirt (haven't made the skirt yet) and sewed it up within a few days.

When I got home I went through the BWOFs and decided on 04-2009-102. In the magazine, I thought the photo for the top version was a jersey (turns out it was a silk), but this pattern is in fact for wovens. Pfft. I treat that as a mere suggestion (not the other way, though; I would never attempt to turn a knit pattern into a woven one). Since the fit in the woven is intended to be very body conscious at the bodice, I didn't need to size down to use a knit. Well, I did have to size down because the smallest size was a 36, but I would have sized down to a 34 in the woven, too.

There is really not so much to say about this dress, other than it's easy but has a nice impact.

-In cutting the slinky underlining for the lower front piece, which has the drape/cascade/whatever you want to call it, I cut the underlining off along neckline to reduce the bulk.

-I used a heavy woven interfacing on the upper front bodice so the square neckline would stay square and stand up. It does those two things; however, it pulls/opens outward a little bit at the upper edges. I experiment with putting boning along the center front edges and it had no effect so I didn't end up adding any.

Line bodice-In addition to the colored slinky underlining (the leftovers from my mom's Knip Mode gather front tee), I lined the bodice to get a clean finish. As you can see, I tacked down the drape/cascade by sewing the lining over it. I should probably trim off the excess but I haven't bothered to do so yet.

-I used elastic for the straps, which was actually kind of dumb. I don't know what I was thinking. It's too stretchy and I think the elastic isn't strong enough to hold up the dress for too many wearings (what with the slinky and all the volume it is quite heavy). I keep meaning to pick up some flat lace to sew on top for some stability. The good thing about elastic is that it doesn't fall off my shoulders.

-Left out the zipper.

Add Back Darts-Even though part of the beauty of this dress is that it's shapeless and therefore you can eat as much as you want while wearing it, it was a little too sacky when completed. I added back darts to give it a tad more shape.

Front


I am very pleased with my summer happy hour dress. It's cute, fashionable, comfortable, easy to wear, and a little bit sexy. I am always conflicted about making clothes I can't wear to work, because the number of occasions to dress for that don't involve work are rather embarrassingly small sometimes when I have gotten lazy about my social life, but I've already made several opportunities to wear this one and I think it has served its purpose well.

All photos are here and the pattern review is here.