I've enjoyed everyone else's end-of-2008 wrap ups and plans for 2009, so I'll throw my entry into the mix. I am jealous of Cidell's slideshow; flickr's application isn't as fancy. The album for the above inferior slideshow is here.
By the numbers:
35 PR reviews in 2008 42 total garments reviewed (as I made duplicates of several patterns) 17 dresses--8 woven, 9 stretch 2 skirts 21 tops--10 blouses, 11 stretch 2 outerwear jackets/coats
14 unreviewed as yet, though I'm not sure this is a complete tally 9 dresses--5 woven, 4 stretch 3 skirts 1 blouse 1 hat
2 utter wadders: the green version of Vogue 8386 and my hideous attempt at BWOF 10/2007-115, which was absolutely grotesque and I didn't want to waste time taking photos to show how awful it was on me.
7 months of 2008 BWOF issues sewn from (January through June and October), in addition to some patterns from previous years
56 total garments (or thereabouts--I keep thinking of things I've forgotten and am sick of tallying): 26 dresses, 22 tops, 5 skirts, 2 jackets/coats, 1 hat 1 item sewn per week, as an approximate average (though my sewing is generally more like two items one weekend, none the next)
3.5 travel wardrobes (Vietnam, Paris I, Germany, and for Paris III I used one Germany dress and made a new skirt)
1 new skill (welt pockets) 2 improved skills (perfect invisible zippers and I no longer fear buttonholes) 1 new interest (remaking sweaters)
133 yards purchased (this is probably too conservative) 40-50 yards gifted (this is a total guess on the contents of the amazing Carol Collection, which I didn't measure) 94 yards sewn (approx)
The numbers are interesting! To me, at any rate. LOL I feel like I fall back on easy knits too often, but based on this I am exactly even on knits and wovens in tops and dresses. I make a new dress every other week! No wonder the dress section of my closet is completely full. I buy too much fabric, but I already knew this.
Best Blouse: BWOF 01/2008-108, the yoke front blouse. Not necessarily favorite, but definitely the best.
Favorite Knit Top: Knip Mode 04-2008-113. I hesitated to call this one the favorite because it has novelty on its side. My H&M knockoff top, which I've made in two colors so far, is less distinctive so can be worn more often and I really like it. But I get tons of compliments on this Knip Mode and feel great in it, so I think it will stand the test of time.
Favorite Woven Dress: New Look 6394, my maxi dress from my 21st birthday dress pattern. (I've excluded my yellow party dress, McCall 5382, from the calculation since it's of limited wearability.)
I tried to figure out which item would be Most Worn, but other than my corduroy jacket and my green coat, which I don't think really count, I favor all of my little sewing children pretty equally. It helps/hurts that I have a billion clothes and don't wear many things more than 4 or 5 times in a season!
=================================
Looking forward to 2009...
Well, I don't know if it's zen contentment or slothful complacence, but I'm pretty happy with where my sewing is now. I make a good mix of clothes, my techniques are adequate to my standards, I am satisfied with the complexity of the projects I undertake (I love the look of tailored garments, but it's just not in my personality to develop that skill-set *or* to wear the clothes), my speed/productivity is satisfactory, and I generally do a good job choosing fabrics and patterns that suit me (with a few obvious exceptions!). I blog about twice a week and that seems about right. I do well balancing sewing mania with a social life--as tempted as I've been, I've not canceled a social event to sew (though I could probably be accused of deliberately not booking my social calendar to its fullest possible extent so I can have more sewing time).
I will add my old chestnut resolution to the list, learn how to put in a fly front; that's the only skill I think I should have but don't. It would also be good to get a little more fluency in bias. And I will try to keep up with doing reviews better. Sure, learning to padstitch would be cool, but I am in no hurry and if I never get to it I won't feel like I robbed myself.
My real goal is to continue to wear something I've made every day, eventually with the plan of phasing almost all ready-to-wear out of my wardrobe, other than pants/jeans and sweaters. And should I ever actually tackle my perennial resolution, maybe even those will come out of the closet, but I'm not in any hurry there. To that end, I *still* need to make more winter work tops, despite my Two Weeks of Winter Work Tops project of last winter. So I must persevere with the sleeves of longness representing the season of coldness for which I have much hateness.
Thanks for spending the year with me! Here's looking forward to miles and miles on the sewing machine odometer (I really wish such a thing would be invented) in 2009!
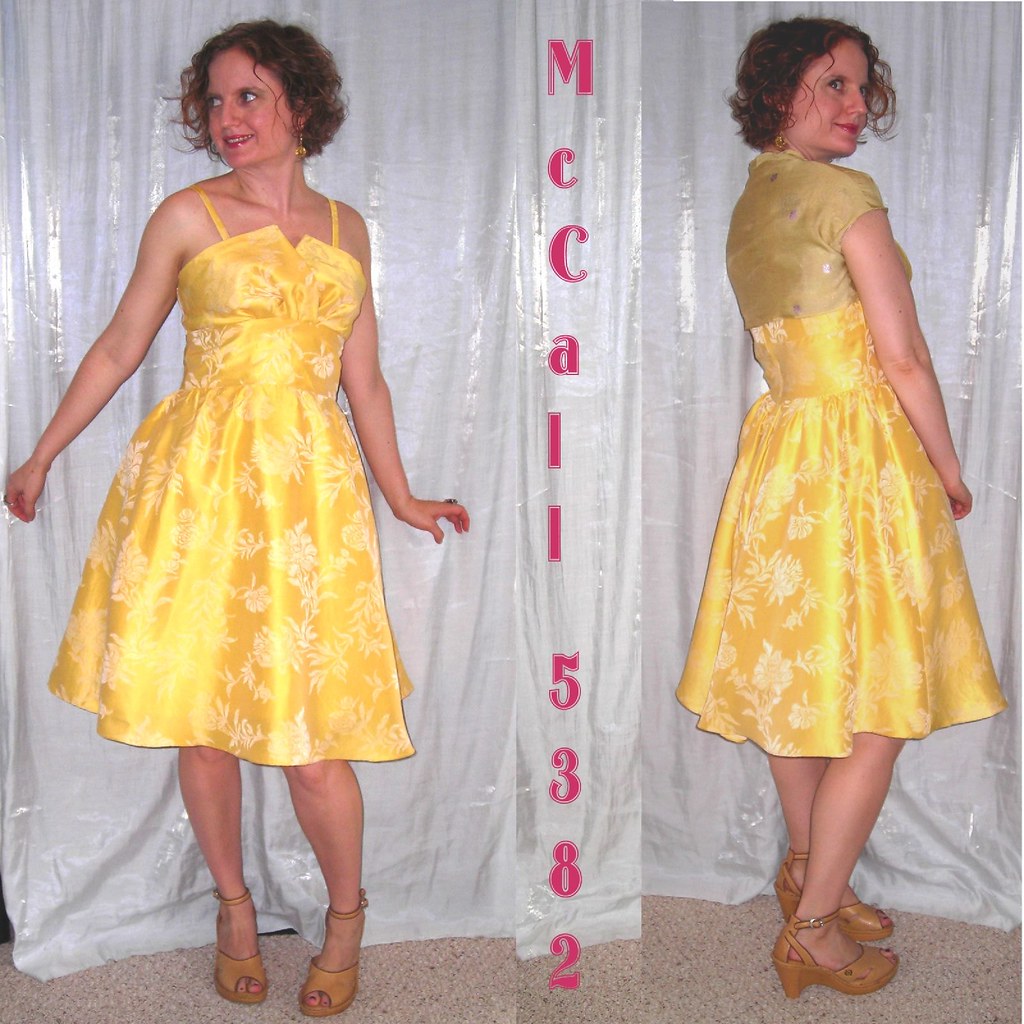
So for the most part my vintage inspirations are the 1920s and 1940s. I don't have the figure for the 50s so I mostly stay away. The exception is this little number, McCall 5382. It's not 100% vintage, but the styling with the full skirt and shaped bodice is just reminiscent enough to evoke the era without being costumey.
I bought the yellow silk brocade from Fabric Mart sometime last year (by which I mean 2007). My steal--I think it was $8/yd, or maybe $12--is long sold out, though there's a similar but higher-priced yellow brocade on the website now. The color was another departure for me, as I don't wear much yellow, though this dress definitely makes me want to add more of it! I didn't have a really specific idea of what I wanted; I envisioned maybe a keyhole shift.
I had several weddings to go to in the past year and I wanted a dress I could wear to more than one. When I found the pattern I absolutely fell in love with it as the consummate party dress, and decided I was ready to cut into the beautiful fabric (a victory for me, as it was in danger of becoming Too Good to Use). You may recall while I was sewing it I asked for advice on whether to do a contrast midriff or not. The people spoke, and for once I listened! I think I definitely made the right choice.
I also wasn't sure whether to make a matching shrug or use a scarf I received as a gift in Vietnam as the cover up. I didn't go with the voice of the people on that, but turned the scarf--which was not my style and not quite long enough to use as a wrap--into a shrug. I was really pleased with the solution, and it is neutral enough to wear with other outfits.
I was really pleased with this pattern. It went together easily and the look is just too adorable. The only real issue I have is that it doesn't recommend interfacing the bodice shell overlays! That's just silly. Maybe if you make it in taffeta you wouldn't need interfacing, but they also recommend cotton(!-ew, in my opinion, for this fancy dress) and that would unquestionably need interfacing. I used a stiff interfacing on the inner halves of the shells, but I really should have interfaced both the outer and lining. I ended up having to tack them to the straps to keep them from drooping down. I wore this with a crinoline, also not a recommendation, which enhances the 50s feel.
I felt great wearing this at two weddings this Fall; not like a spinster at all, which was the goal. And it was definitely an original. One of the weddings was in Chicago and when I came downstairs to the hotel ballroom I was afraid I hadn't got the memo that we were supposed to wear black! I think there were only three of us not in black--one woman in dark purple, another in white(!!!!!--I am NOT referring to the bride), and me. I felt like I was sticking out a little, but everyone assured me it was only in a good way. At the wedding here in DC most of the female attendees were in lovely bright colors and I felt like we were fancy butterflies.
I should have gotten it together to review this in time for people to consider it for a New Year's Eve dress. Sorry about that! But this will be review #100 (cumulative total since joining PR, not for the year) and I think it's an appropriately celebratory garment.
So I *thought* that having to confess all my fabric purchases on here would slow down my fabric buying this year. Not so much. According to my rough tally on PR, I'm currently over 150 yards bought for the year, with 75 yards sewn. Now, I don't increase the yards sewn until I do the review and there are at least 15 yards, if not more, worth of finished projects waiting for reviews, but that's still nowhere near parity. I think the first step is admitting I am powerless against my addiction?
Anyway, I had the car last weekend, it was Fashion Sewing Club at G Street and Joann was having a big sale (but when aren't they?).
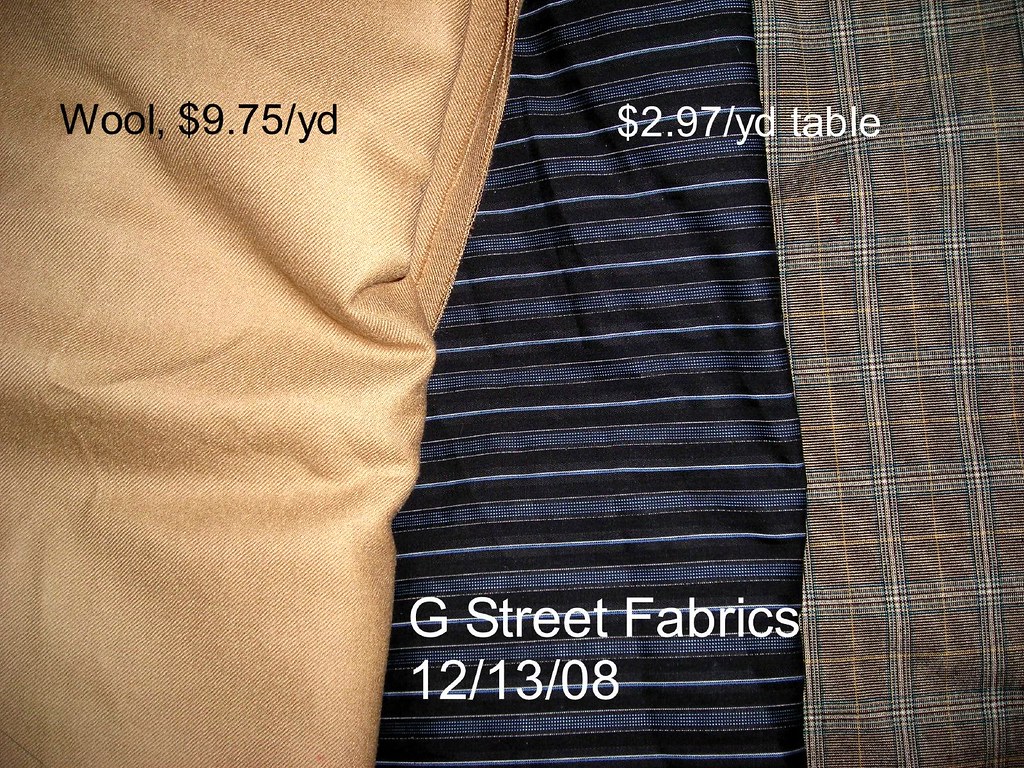
My G Street haul:
The only thing I really intended to buy from the fabric stores was some camel colored wool to make the BurdaStyle Kasia skirt and something to make my nephew a king dress up robe out of. G Street was also having a sale, so I scored the perfect camel colored wool for under $10/yd, and of course could not resist browsing the $2.97/yd table. The striped fabric is a really nice shirting and I'm thinking I've finally found the right fabric for that BWOF pleated sleeve blouse, 12-2007-117. The plaid is a stretch rayon and it was just too nice to leave behind. No idea what I'll do with it. I already have a couple of plaid dresses, but one more can't hurt?
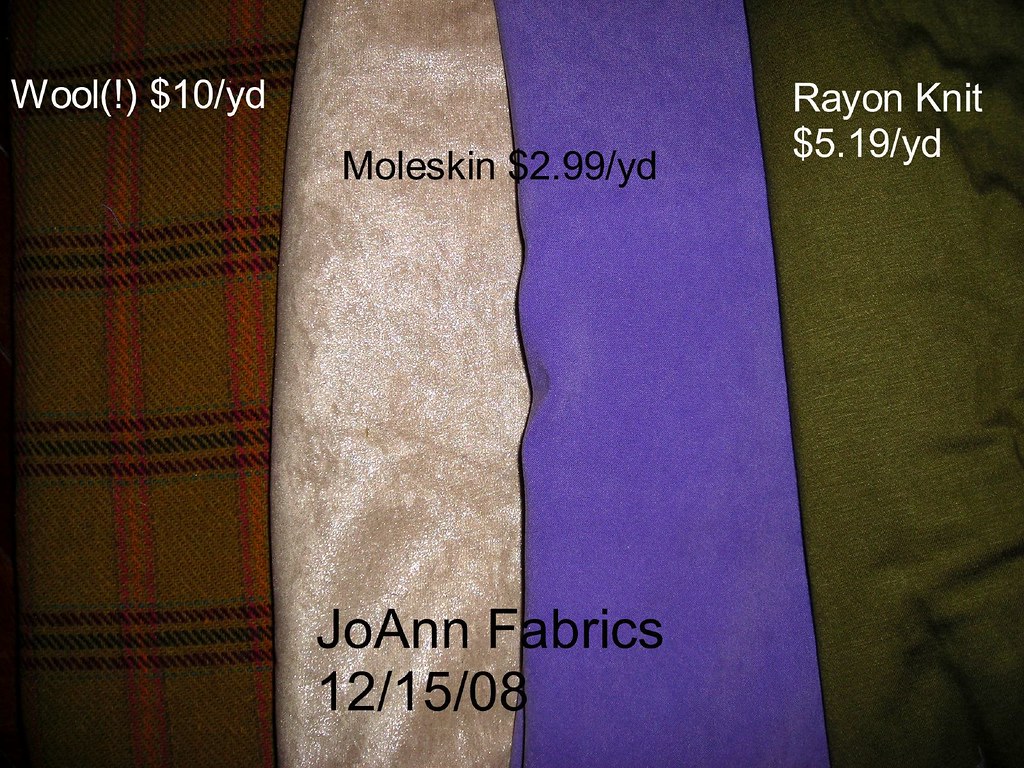
Then I went to Joann. Now, normally this is zero problem for me. Their fabric is pure fug. There is not a natural fiber, fashionable color, stretch *anything*, or trendy print to be found in the entire store. I go in for patterns on sale and notions and don't even look at the fabric. I hadn't found anything great for my nephew's king robe on the $2.97 table, so I scanned the aisles in Joann, thinking I'd use crushed stretch velvet. For some reason, this time it appeared they have stepped up their game, in however minute an increment.
First, I found some wools. Wool! Like actual wool, not wool from the rare endangered Acryliquous ickious beast. Insane! I fell in love with the olive plaid on the left (the lighting is not good in the pic), which can be worn with orange, red, pink, or teal. On sale, it was $10/yd. Although it's wool it's not great quality--rather a loose weave--and I hemmed and hawed, but finally decided that I should support Joann's decision to carry any fashionable, natural fabrics for the sake of my sisters who have no choice but Joann. I'm altruistic, what can I say.
Then I found some rayon knits. Knits! In rayon! At Joann! I loved this olive color (I'm in rather an olive mood lately, witness yesterday's Disastrous Velvet Skirt).
The best thing I could find for the king robe was some purple moleskin. I'll trim it with some bits of fur left from my crazy Down With Love project/purple faux fur swing coat of a couple years ago. And while I was looking at the purple I was totally taken with the subtly metallic winter white. I have no idea but it just drew me. Several months ago one of the women in Fashion Sewing Club wore in a jacket she'd made of Vogue 1052, an Issey Miyake design. It is baggy and unappealing on the envelope but it looked really great in person and I've been thinking about it for a while. I don't know, though; that envelope view is totally not interesting to me. I think the FSC sewist narrowed the ruffles and fitted it more. Anyway, maybe a lightweight jacket? It would also be great as a fitted skirt because it has a little stretch.
Aaaand then when I came home I ordered more solid rayon jerseys from FFC, along with one yard of ITY print for a casual winter top and some silk/cotton. I don't have to count those until they arrive, though.
I had a hankering for velvet at PR Weekend 2007 and, in his magician-pulling-a-rabbit-out-of-a-hat manner Kashi had the perfect color and texture for me.
So, an eternal mom refrain (or at least from my mom--maybe we were particularly destructive children) is, "Why can't I have nice things?" I don't need kids to destroy my things for me, I do a good job of it all by myself! It started with storage. I folded up the velvet not very carefully and put it on the shelf, where it got jostled around quite a bit over the past year and ended up looking more wadded than folded. A couple months ago I finally took pity on it and opened it up, pressed it from the wrong side, and folded it more neatly. It already had a few marks and shiny spots on it from bad storage.
Then came the sewing and the pressing. I really didn't/don't know anything about velvet, but apparently it does not take to the iron. LOL I'm sure this is common knowledge to everyone else. So this poor skirt has iron soleplate marks, marks that show the seam allowance, and random bad marks all over it. It was pretty much trashed before it was even done.
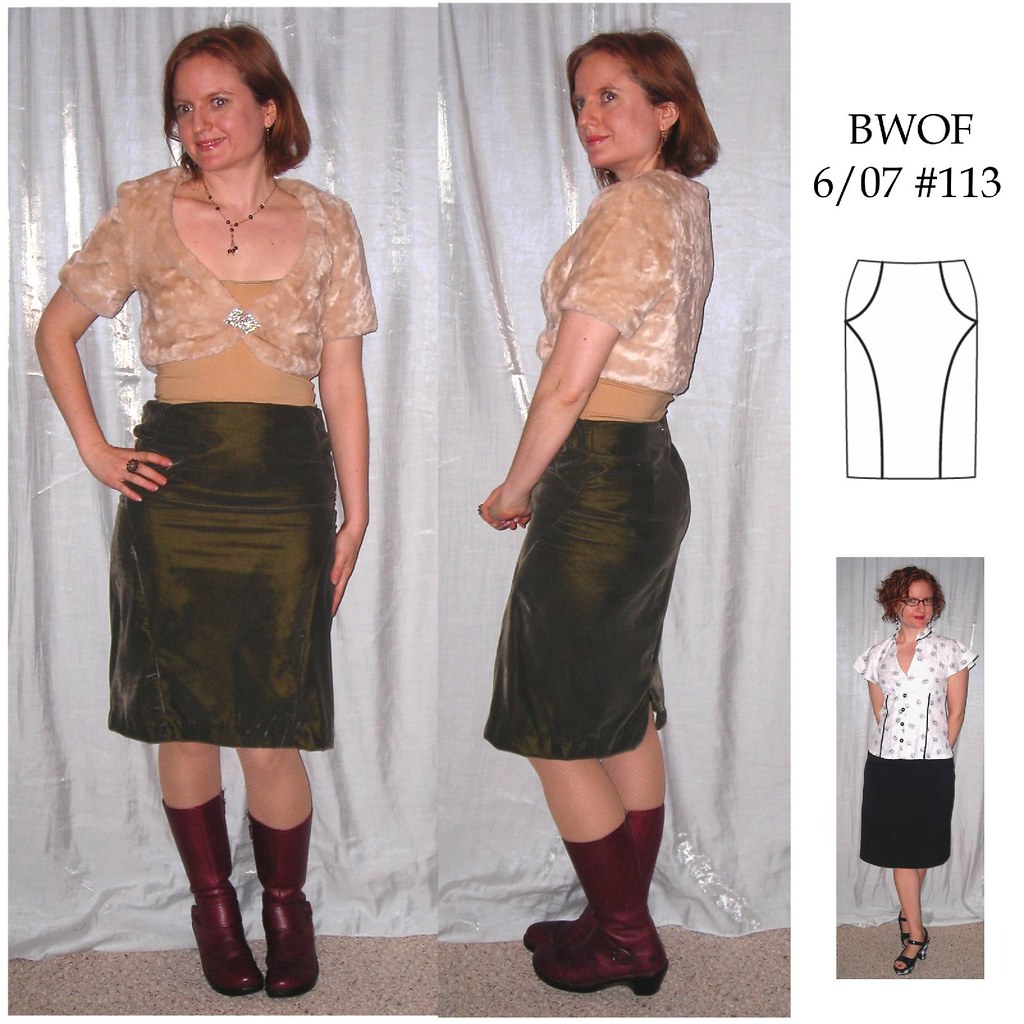
Then there was the pattern. I LOVED this skirt, BWOF 6/07 #113. This was one of the first BWOFs I traced off, from one of the issues Cidell loaned me before I got all subscribed and hooked on it. It's the perfect kind of skirt pattern--the seaming is interesting but the overall finished shape is plain and very wearable. In skirts, I like to see some unusual detail but a fairly traditional shape. Karen made it a while back and I was pleased to see that it looked just as good in person as on the line drawing.
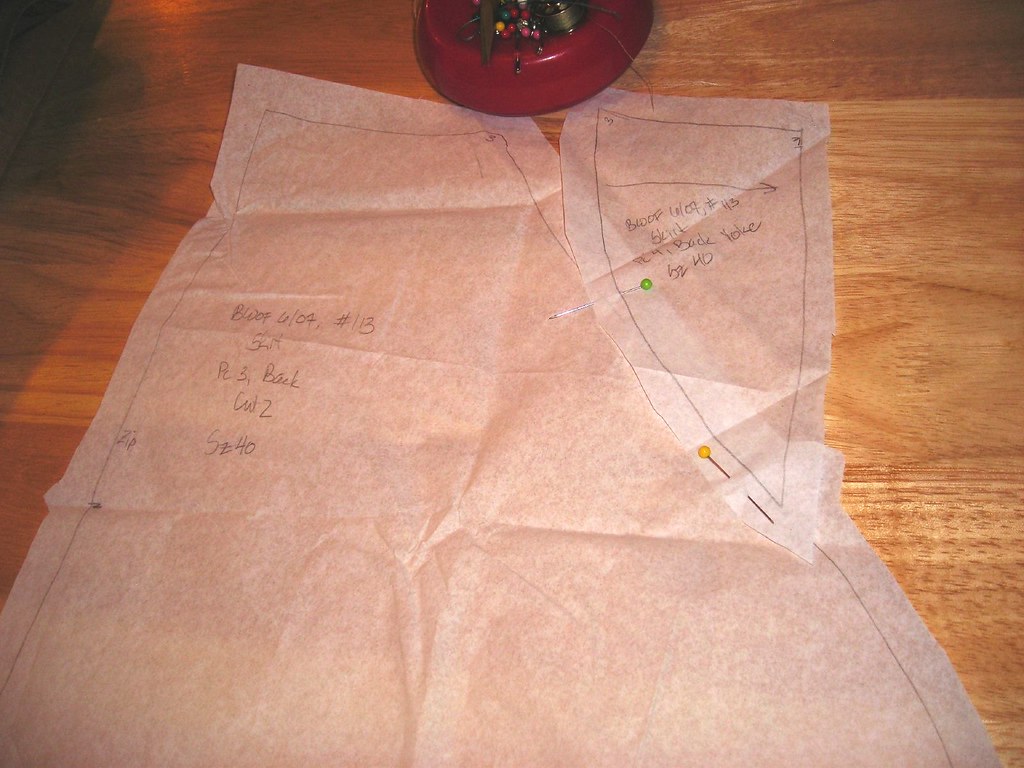
I had actually already made it over the summer in navy but because it's a dark color absolutely none of the details show up in photos, and this was just my wearable muslin for the green velvet anyway. I couldn't find a line drawing for the back view, but the back has the same side yoke situation as the front. My observation on the wearable muslin was that the back yoke created unnecessary pouchiness above/at the bum so for this version I combined the two back pattern pieces, converting the seam into a dart.
Now, part of the issue is that I traced the wrong size. I traced a 40, and I should have traced a 38 at least, and probably a 36 at the waist transitioning to a 38 at the hip. This is supposed to be a snug-fitting skirt. I really don't know how to size down something with unusual pattern pieces and I returned the magazine to Cidell long ago. Anyway, I put it together and while the back view with darts looks fine the hip was a whole other issue. The side seam was completely sticking out like Mickey Mouse ears and I kept having to take it in and flatten the curve until eventually it was so tight it couldn't possibly stick out any more (I think this pattern pretty much requires fabric with stretch).
Another velvet-specific issue is topstitching. To take advantage of the seams in this pattern you really need to topstitch. I topstitched the front yoke seams and it looked horrible--I think it needs a walking foot or differential feed or something--but picking it out would have been worse because of how velvet gets marked up when you put a seam into it. But I didn't dare topstitch the lower front curved seam, so it's kind of lost (other than the iron marks, which clearly delineate the seam allowance underneath).
Then there's the waist. I figured I should line this, so I drafted a facing and cut that out of velvet, and then lined it from there. This created SO MUCH bulk at the waist, which was already a bit baggy. I thought I looked ok in person on my way to the holiday party I wore this to on Saturday, but in the pics I can see it makes me look thick in the middle. I am annoyed with myself about this velvet. It's a gorgeous color and this skirt is just a complete failure. I don't have enough of it left (plus it's trashed from the way I stored it) to do anything more except maybe some trim.
The only good thing about this project is the side view, which you can see in the composite above, but I can hardly walk around crabwise the whole time I'm wearing it! I wore it to a holiday party on Saturday just to wear it, but I'm not sure it will leave the closet ever again.
This was the project that got me to make the Knip Mode Gather Front Top just to clear my palate by making something easy, cute, flattering, and wearable (and that top turned out to be all of the above), so I guess that's the silver lining.
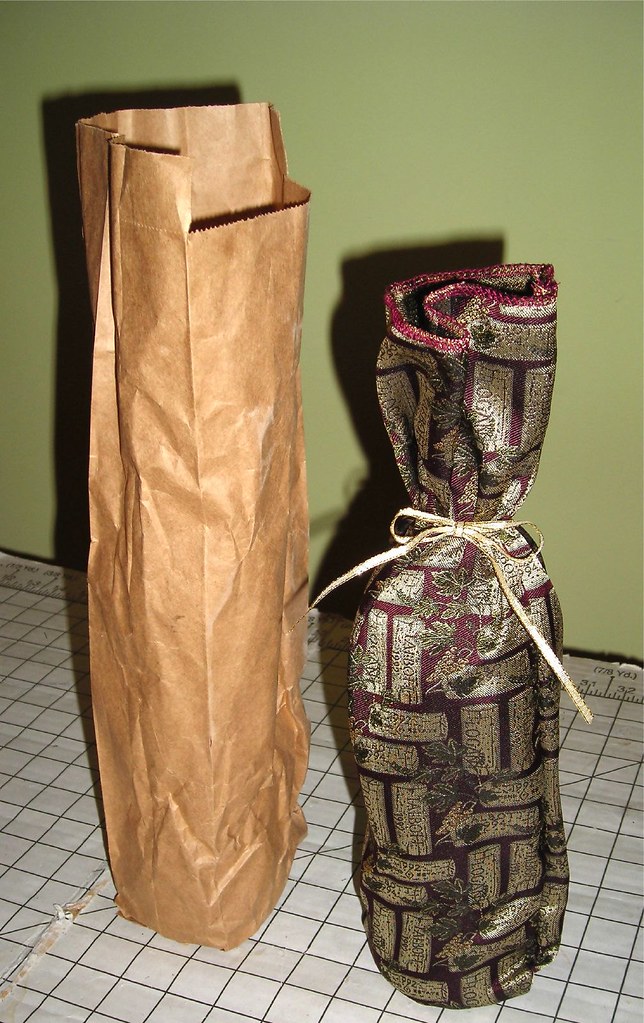
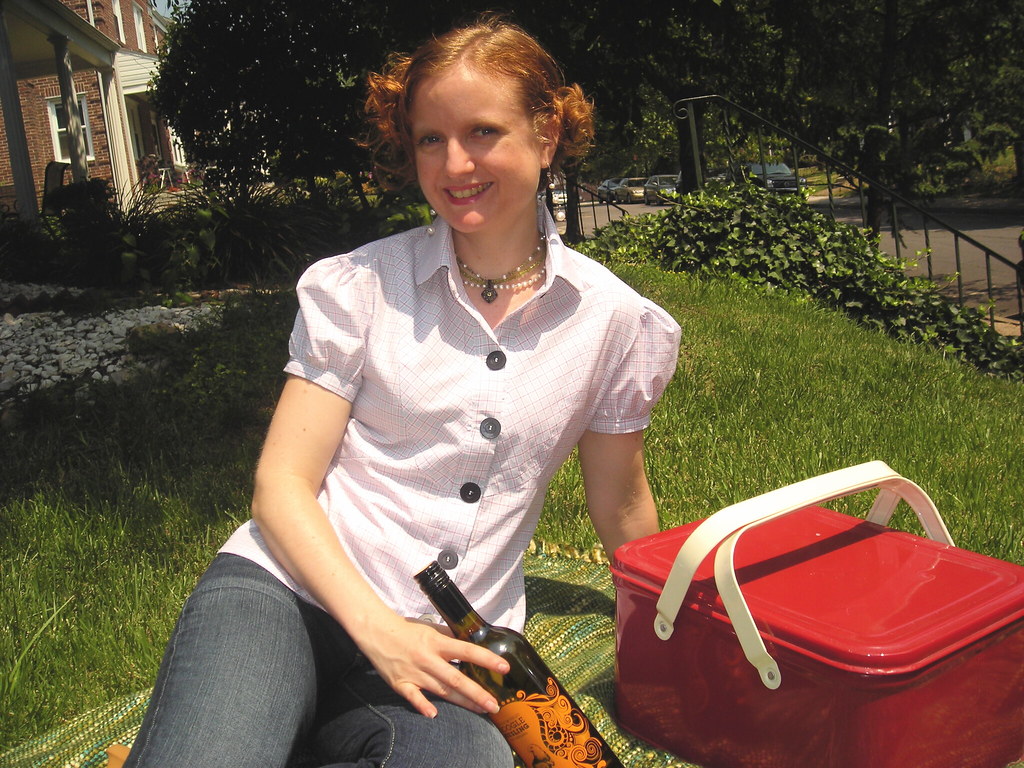
When Cidell and I ordered our tie silk from Fabric Mart, most of the silks were quite lovely but we got one real dog, a wine cork print. Cidell was going to use it for muslins, but when I realized it would be perfect for making wine gift bags she handed it off to me. On Saturday I had a holiday party to go to. I don't have a car and take the metro everywhere. When I'm bringing a host(ess) gift of a bottle of wine I don't want to just carry a bottle of wine around the city for all to see so I can either carry a big purse or put it in a bag of some sort. I didn't want to wear a giant handbag with my festive outfit (I wore a completely disastrous velvet skirt I will shamefacedly reveal later in the week), so it was time to bust out the tie silk and make a quickie wine bag. Last year I posted a tutorial for a wine gift bag with a pocket. This is the completely simple, no-frills wine gift bag.
Start by cutting a piece of fabric 12 inches wide and 16 inches long. This will make a gift bag for a standard size bottle of wine. If you get a larger bottle or one with an unusual shape, you'll need to adjust your starting size to accommodate.
Next, sew down the long (16 inch) side with a 1/4 inch seam allowance (run the edge of your foot along the edge of the fabric); pivot at the bottom and sew the bottom edge with a 1/4" seam allowance as well. Finish your edges with a serger or zigzag if your fabric will ravel. Then finish the top. I had hoped to use the selvage here as the finished top edge but it wasn't a sturdy selvage. Since I have a serger I just serged along the top edge before sewing the side seam. If you don't have a serger and can't use the finished selvage as the top, you can zigzag along the top and turn under in a narrow hem.
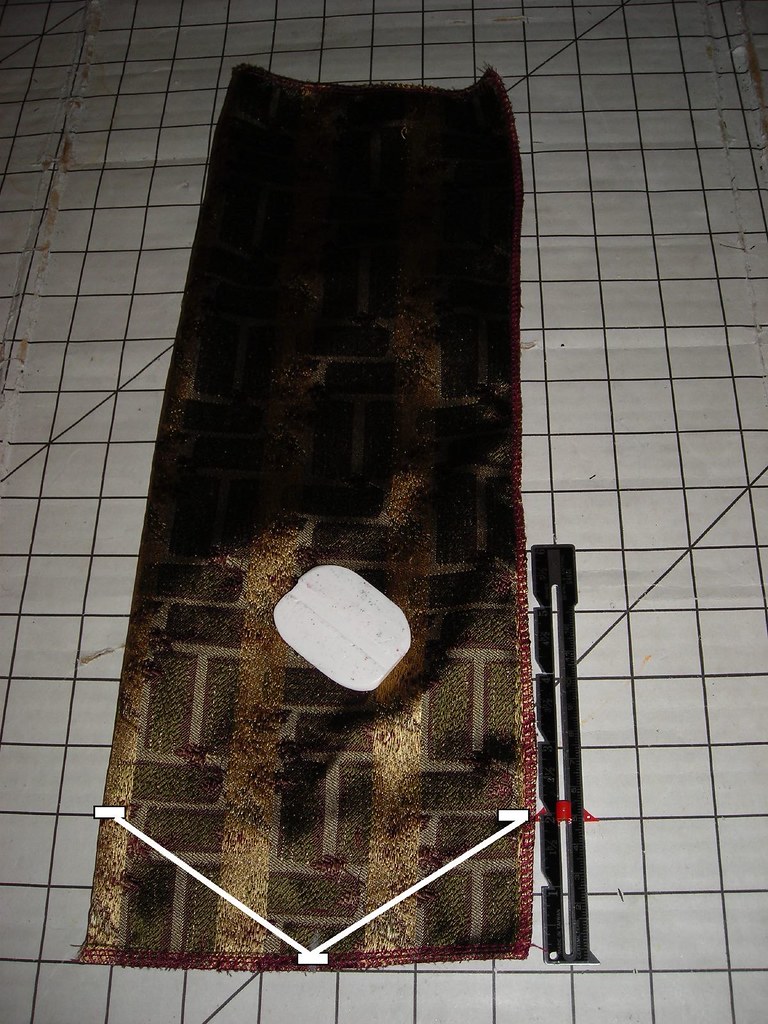
Now you're going to mark the gussets. You can easily skip this part, but I think it makes the bag look a little nicer. Mark the center of the bottom, and two inches up from the bottom on each side. You will sew between these markings, as indicated by the white lines in the photograph. This gives the bottom of the bag a more rounded shape so no corners are sticking out when the bottle is inserted and standing up. You can trim off the gusset corners, but I didn't.
The last thing to do is sew on a ribbon for tying it closed. First you need to mark your ribbon placement. Slip the bottle inside the bag and mark the spot where the neck and shoulders of the bottle meet--where the bottle starts to slope out. If you have cut a 12x16 rectangle and have a standard bottle, this will be 5 inches from the top. Cut a ribbon long enough to tie in an attractive bow--here I cut 18 inch lengths. Slide your bag over your sewing machine's free arm and tack the ribbon at the marked spot using a short stitch length and a narrow zigzag.
And you're done! You can check out all the photos here. Now which guest would you rather be?
In an effort to clear out my review backlog, here's a project I did over the summer and took pictures of and everything. I've just been too lazy to write about it.
I loved the look of this one when it came out in the magazine and when everyone started making it I loved it even more. For my version I busted out some silk dupioni I had bargained for at Chic Fabrics in NYC when I was there for Mermaid Parade.
The only challenge was limited fabric, as I'd only bought 1 yard but it was 60 wide. I had to cut it out on the crossgrain instead of grain to get it to fit (I notice no grain issues from this), I pieced the shoulder yoke with a CB seam, and I did the under-collar with that same olive/bronze dupioni I've been using for everything lately. The smallest size this comes in is a 38 so I had to size it down two sizes; it's only a semi-fitted style so the fit is fine. The gorgeous 1" shell buttons were a gift from Carolyn when Cidell and I stopped by on our way home from PR Weekend 2007.
Although this blouse looked great on everyone else I really feel very meh about it on me. There's something wrong with the length of it, and the blousiness at the waist is not something I normally do (though I've been experimenting with it lately) so it doesn't match my usual silhouette and I am not good with change. There were no technical issues and I can't quite put my finger on it, but I just was not pleased with this. Hopefully in the Spring when I can wear it again I'll like it better.
There's not much more to see, but all photos are here and the review is here.
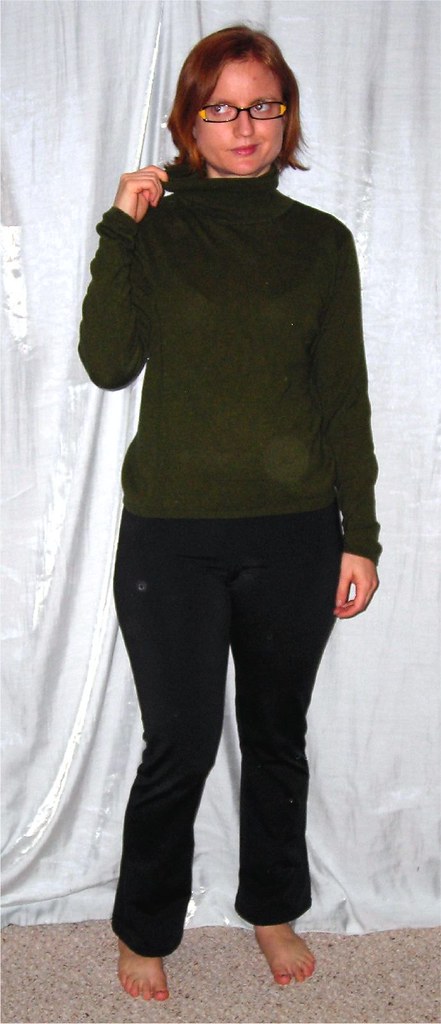
More sweaters! When I ran across this one I *loved* the color and the silk/cashmere fiber content. It was only slightly too large for me so I couldn't dramatically remake it into anything else, but the boxy shape was not flattering and it had the inevitable turtleneck.
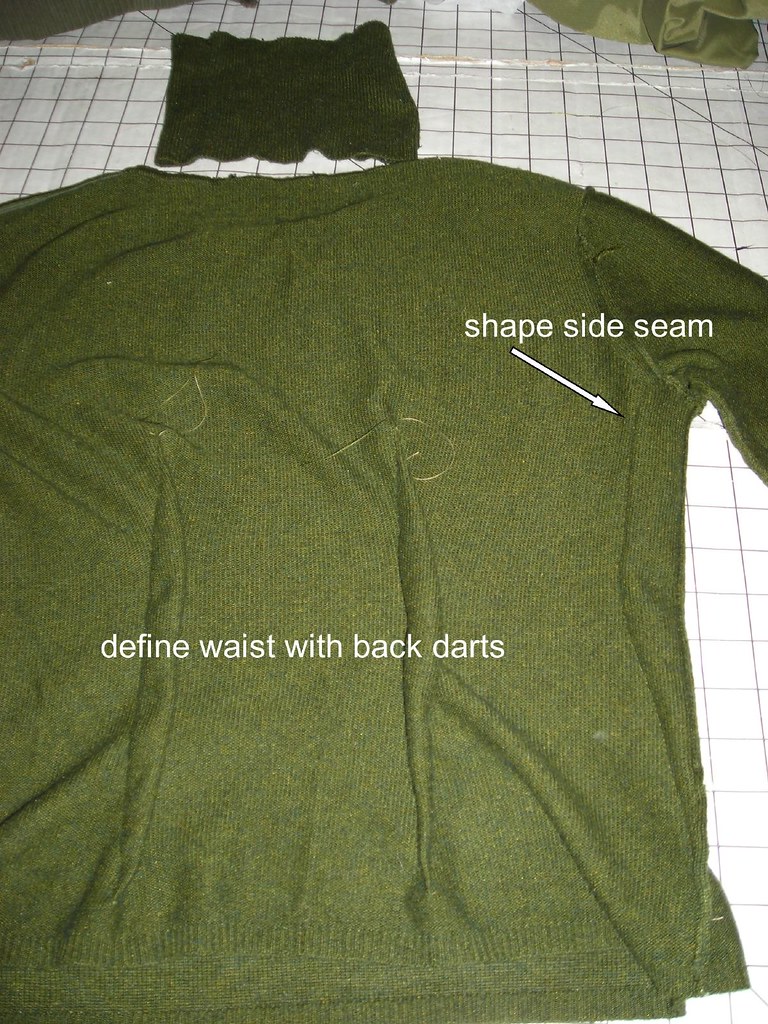
I wanted to do something to embellish it a little and make it more interesting without detracting from the gorgeous color and making it too fussy to wear often. I started by cutting off the turtleneck. Luckily, because of the way it had been manufactured I cut along the line between the finished neck and the ribbing and didn't have to do any finishing to it at all. Then I fitted it by taking in the side seams and adding darts in the back--because of my round belly/swayback shape back darts are generally the best way to define my waist.
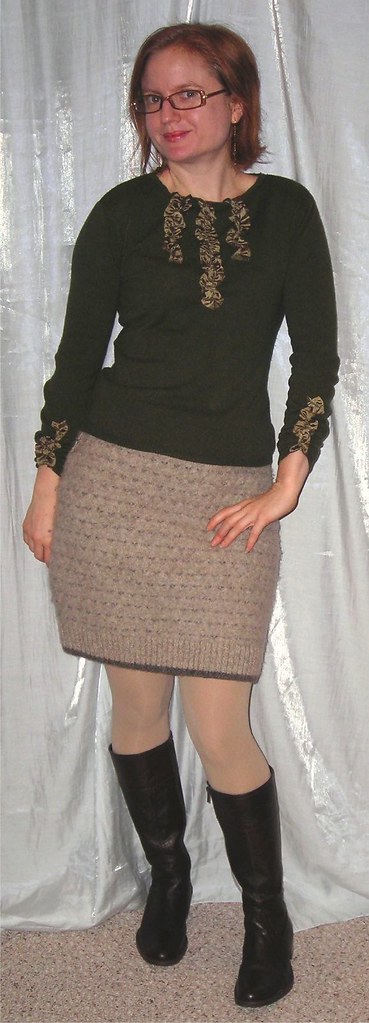
Now it was time to embellish! My first plan was to do a bib with ruffles at the side, something along the lines of this, but then I decided that was a little too fussy and decided to go with straight ruffles. The fabric is an olive/bronze silk dupioni from stash (same fabric used for the underside of the cuffs and collar on my Butterick 4985 blouse).
This was very easy to do! First I put on the sweater and marked where I wanted the ruffles to start and end. The middle ruffle ends right about the lower center front edge of my bra, and I arranged the side ruffles so as *not* to end at the, ahem, bust apex.
Next, I cut strips of fabric 2 1/2 inches wide and about two and a half times as long as the final ruffle length, serged the edges, and turned under in a narrow hem.
I put single rows of gathering stitches in the centers of the ruffles, pinned the bottom in place, and gathered. I used the selvage for the bottom edges of the ruffles, and folded the top edges over the neck. I sewed these down with a narrow straight stitch. The hardest part is making sure that the edges of your ruffle haven't curled into your stitch line. Lots of pins are needed!
Now it was time to deal with the sleeves. I've been having a thing about sleeves the past several months. I just cannot have plain boring sleeves. I don't know why they're bothering me so much! These sleeves were too long so I couldn't leave them as is. I wasn't inspired by the thought of just shortening them. Finally I hit on the idea of echoing the front ruffles at the sleeves.
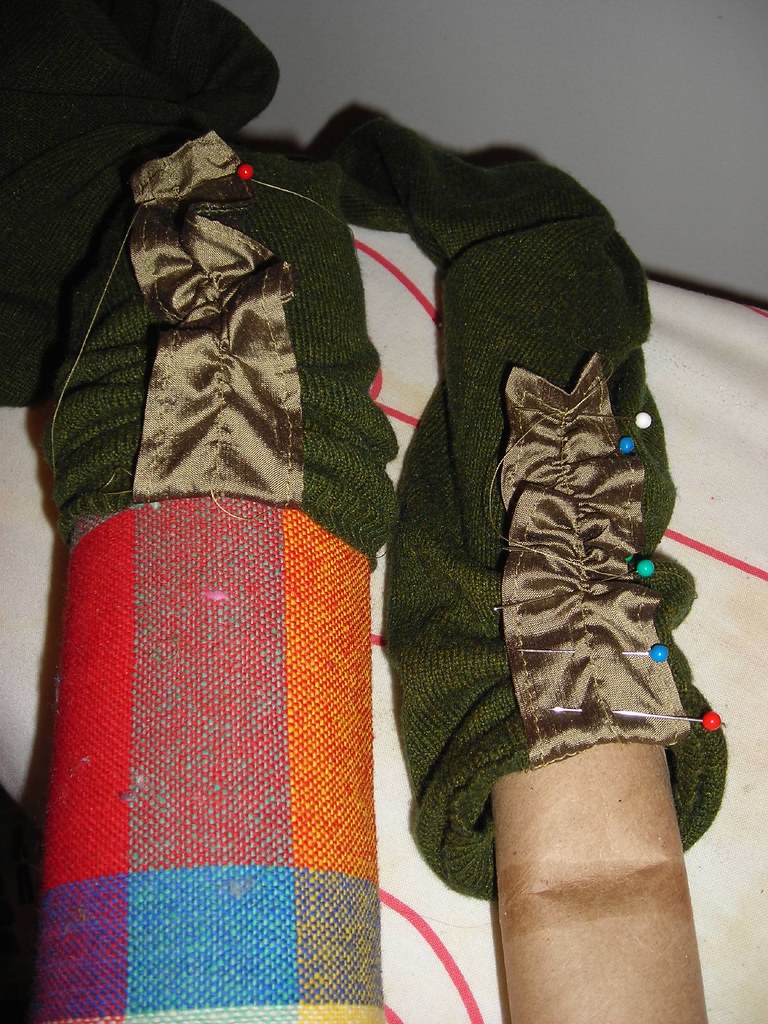
I marked the ruffle placement and pinned in place. I found my seam roll pressing ham invaluable for this task, but for those who don't a paper towel tube will work splendidly. I tried to gather the sleeve simultaneously with sewing on the ruffle by just bunching up the fabric but this worked only moderately well. I should have gathered the sleeve first, then sewed on the ruffle. I ended up going in and stabilizing the sleeve gathers by hand-sewing them to pieces of grosgrain ribbon.
I love my new top! I debated whether pairing it with the skirt for sweater-on-sweater was too incestuous, but decided I liked them together and this is what I wore on Tuesday.
Oh, and I have to clarify my review number! I am only hoping to get to 100 reviews as a cumulative total since I posted my first review in May 2006, not 100 for the year. That would be impressive! But I am not that impressive. I'll only end up with somewhere in the neighborhood of 35 reviews for the year, assuming I finish out my goal. Much more modest!
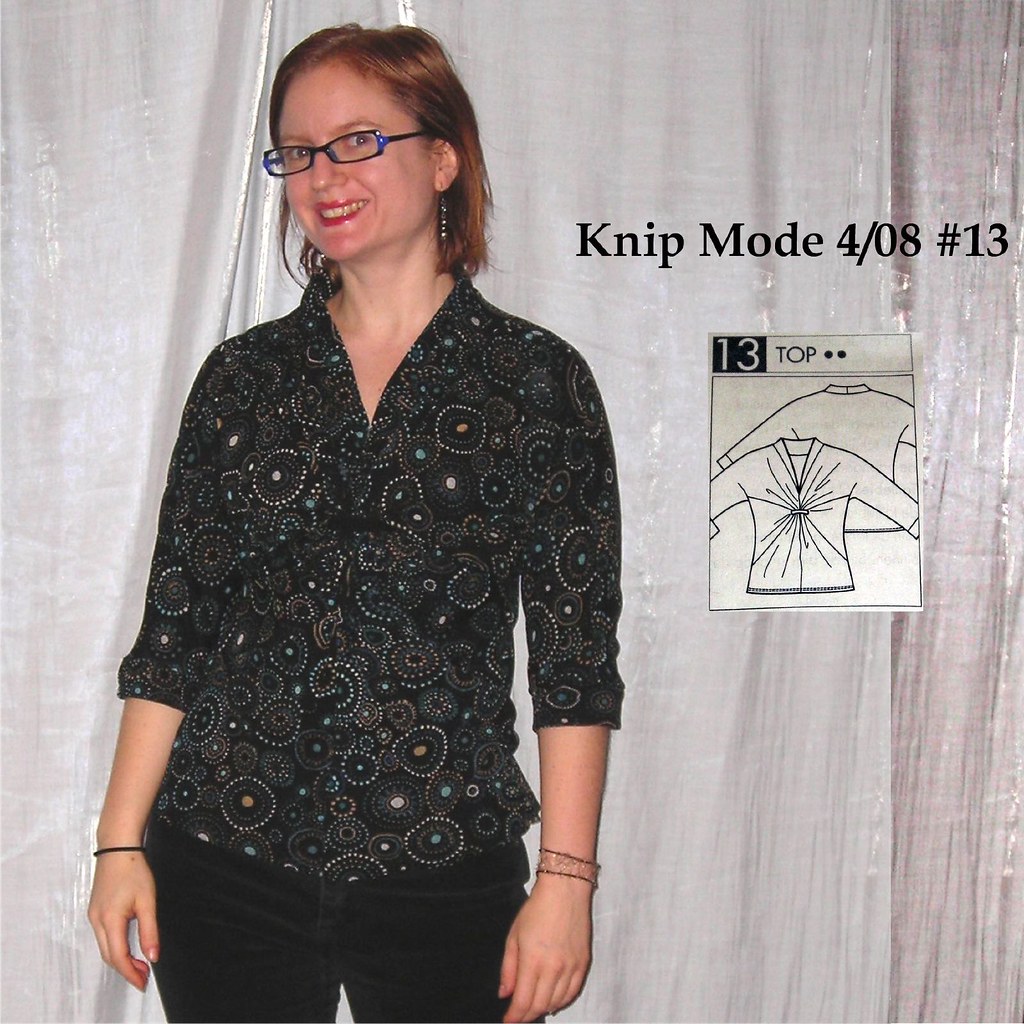
Among the Knip Mode issues Cidell loaned me was April 2008, home of the twist top that Melissa has been making. So exciting! I've wanted that pattern since the first version Melissa did, and she keeps making more. After a frustrating skirt experience over the weekend I needed a slam dunk to clear my palate and decided it was time to pull this out.
Knip Mode was an experience for me. Patrones is no problem because I speak enough Spanish that I can read the directions nearly as quickly and completely as I read English. I also speak French, and German and English are related enough to get the gist of German. But Dutch shares very little with English and I can't get a word out of it (except luckily the color words are close enough that you know which pieces to trace out!); even the names of the pattern pieces are a mystery. I relied heavily on the explanation Melissa gave for putting it together, particularly the magazine photo on which she had drawn lines to show how the pattern pieces fit together. She is right, the line drawing for this was the pits!
I traced and sewed it in under three hours and indeed got my slam dunk. This was despite challenging fabric--it's a mesh knit underlined with a black cotton/rayon (?) knit. I bought the mesh knit a couple years ago knowing it would be awful to work with, but I really loved the print. It's impossible to keep it flat and on grain (this was my second project with it) but luckily it's lightweight enough that these issues don't show up as distortions. Unfortunately, the photos do not show the details at all because my fabric is both dark and in a busy print, so you'll mostly just have to trust me on how great this pattern is. But you can see that the shape is interesting and flattering, but still a very relaxed fit to accommodate that extra layer of insulation the body wants to accumulate during the winter.
I'll definitely be making more of these, probably at least one of them a dress as Melissa did. All the photos are here, and the review is here. My goal was to get to 100 pattern reviews this year. I have a backlog of at least 8 garments to review and I'm only four away from 100, it's just a matter of finding time!
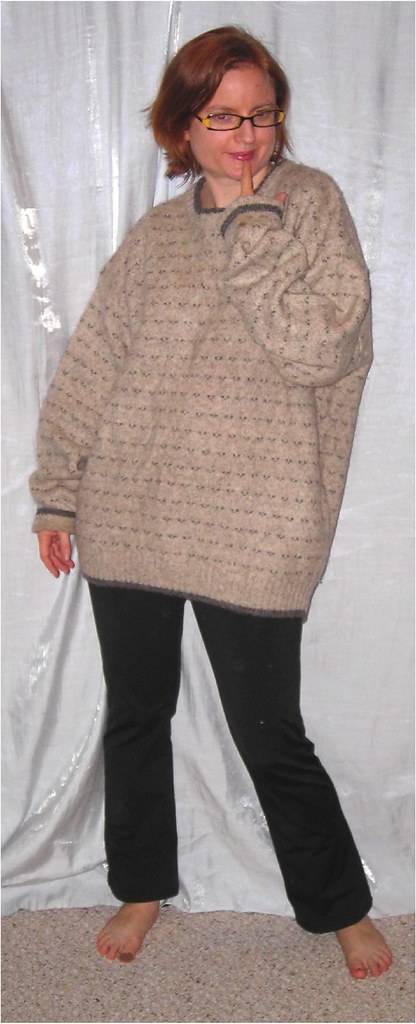
So when I had my sweater buying orgy at the thrift store last month my main criteria were (1) 100% wool and (2) not ugly. I didn't stick to them entirely, but this sweater fit both the requirements. The quality of the wool was high and I loved the subtle tweed print. When I got home it went into a hot washer and the dryer to felt. When it came out it had shrunk by about 1/3 and was a nice thick fabric. The Second Time Cool book referenced in this post had recommended turning a sweater into a skirt by turning it upside down and using the lower ribbing as the waist. I liked the look of the lower ribbing way too much to hide it at the waist so I used it as the hem.
The skirt was so easy that I didn't think to take any pictures in process. I cut off the sleeves and neckline and then cut across the shoulders under the neckline so it was straight. Most of the side seams are just the original, and at the armscye slit I shaped the seams to fit my hips, as seen here. I further shaped the waist by making darts in the back, as seen at left. Because the felted wool is so thick you absolutely must cut them open and press them down. Luckily, felted wool will not ravel so there's no danger of your skirt falling apart.
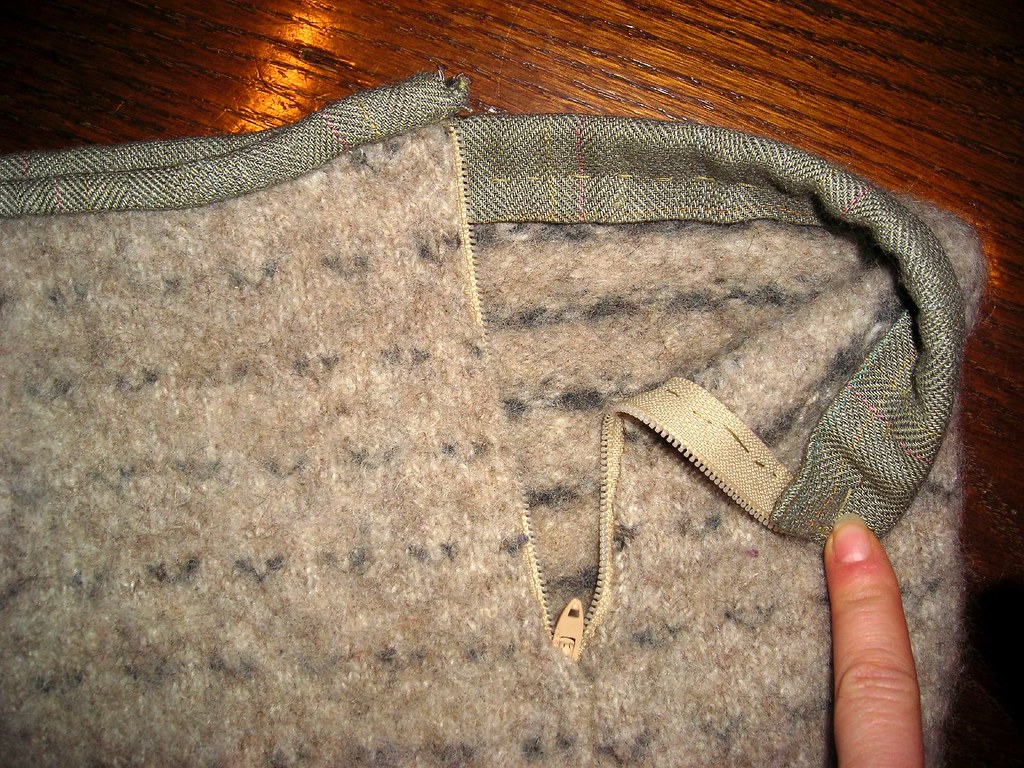
I had to do something to stabilize the waist so I found a coordinating fabric in my stash, cut a strip 5 inches wide, folded in half wrong side together, and serged it on to the waist. I pressed the seam as flat as I could upward, then folded the strip down over the seam allowance and hand-stitched in place. The thick felted wool doesn't show the stitching so it was really easy. The waist is way more bulky than I would like but I'm not sure what a better solution is (except to use the ribbing, which doesn't felt the way the rest of it does). I could use a wide jersey waistband, but that would just transfer the sweater bulk line to my hip, which wouldn't do me any good either. I hand-stitched the zipper in, butting the raw edges of the former armscye seam together. Again, no need to finish felted wool! It would have been too bulky to turn the edges under.
And voila! This was an incredibly easy project that could be done by someone without a sewing machine and the skirt is both warm and cute. My cost was probably around $5 for the sweater and the zipper.
I have been so procrastinate-y about posting actual completed garments here and on PR! Geez! So here is an outfit hot off the sewing machine. I started the skirt several weeks ago but just finished it last night, and I made the blouse mostly over the weekend and did a tweak to the fit last night and I'm wearing the outfit today for the first time. They don't get fresher than that.
The blouse is Butterick 4985, which I previously made for Spring/Summer with the flutter sleeves. I had made a bunch of fitting notes on the pattern pieces so for this version I added two inches(!!!!) across the back and scooped out from the front armscye so that it wouldn't be tight across the back. These went well toward solving the back tightness issue.
Cidell suggests that I shorten the shoulder seams on blouses as well, which I didn't do here but will try in the future. I should have added neck darts, I think, to counteract the two inches of width (I also added these to the collar so it would fit the new neckline). It doesn't matter with this style, but if it were a traditional collared blouse where the ends of the collar are supposed to meet it might be too obviously gapey around the neck.
This is my issue with fitting blouses, though. You can't just change one thing, you have to go through this whole litany of changes and I find that boring and frustrating. I am not a perfectionist, as you know. I'm all about volume. I love having a huge closet full of fabulous clothes. I'm not saying it's a good thing, but things don't generally get worn more than five or six times in a season. It's just not worth it to me to spend hours of not only time but concentration and frustration and the maddening pursuit of an impossible target to get it perfect.
I also added a fair amount of width at the hem. This made me look like a marshmallow. I love my white goddess dress, but apparently off-white just does not work on me. Especially not shiny off-white that emphasizes my pear shape. I don't think that the white and blue floral version of this makes me look so large around the middle, so I think it's the shine. That's a bit of comfort because then I don't feel like I "wasted" the fabric by choosing the wrong pattern. Shiny off-white is going to magnify my middle no matter what. I took it in at the front/side front seam and it is improved. In the pictures it doesn't look bad at all so I'll average how I look live in the mirror with how I look in the picture and decide that I look ok.
When I made it the first time I was taken by the idea of doing an in-seam buttonhole at the empire line, but didn't think of it in time. This time I did it. I sewed the bust/lower blouse seam on the right hand piece from the edges in 5/8 inch for the seam allowance, left it open for about 3/4 inch, and then continued on. Inside I serged the top and bottom together as far as the unsewn opening, clipped the fabric, serged the top and bottom pieces separately, and pressed open. I trimmed the seam allowance between the front and facing very small at the buttonhole, and made a buttonhole in the facing (which is one piece). I should have left a longer opening so I could have the button further in, and not have the seam allowance in the way. Next time. I'm really pleased with this detail
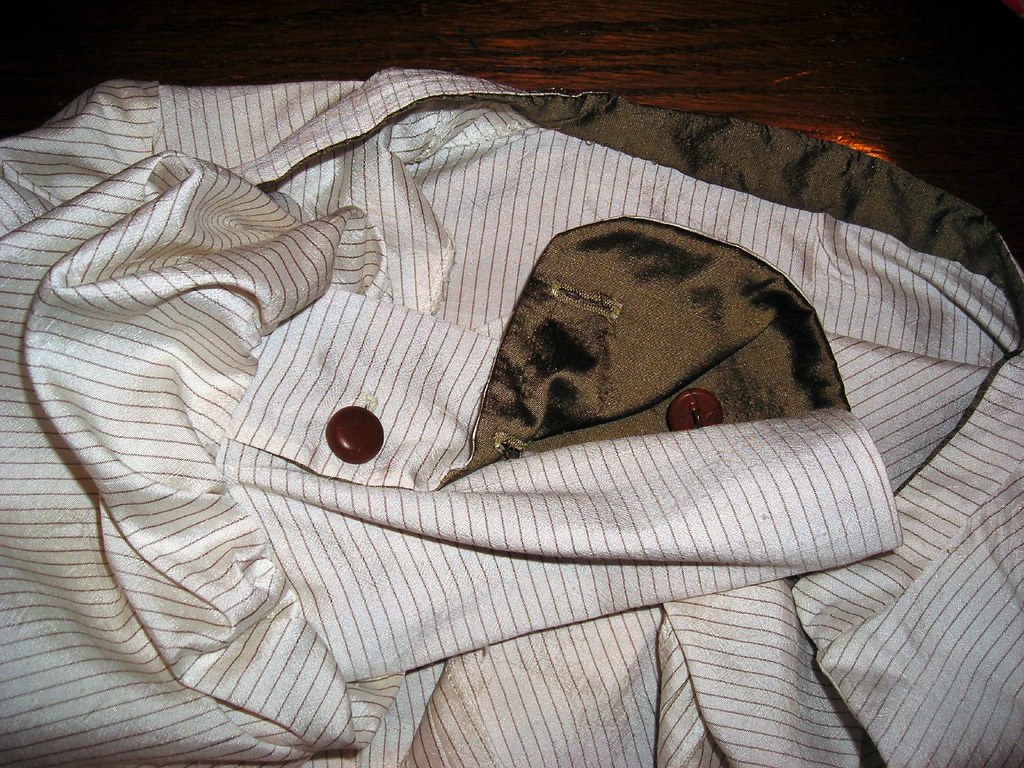
I also cut the inside collar and cuffs from a contrast fabric, mostly just because I didn't have enough of the pinstripe silk. The silk was purchased from Paron at PR Weekend 2007, I took only a little over a year to get to it, which isn't so bad considering how old some of the other things in my stash are! I have imminent plans for the green velvet from Kashi from the same trip, so I'm on a roll. If I actually make the navy wool skirt I will have used up all the fabric from that trip (the maroon jersey turned into a horrible, horrible wadder that I should eventually review)! That would be amazing. The navy wool skirt may have just moved up a few notches. For the collar and cuffs I used an olivey/bronzey silk dupioni from stash that had previously been tapped as the inside collar for BWOF 06-2008-105, yet another months-old unreviewed project.
The skirt is from another thrift store sweater. More details on that later.
All the photos of both iterations of Butterick 4985 are here. The review is here, and I'll update it soon (I hope). I think I will enter the Endless Combinations contest with this, the other blouse I have almost done, the skirt I made for Germany, and the yet-to-be-made green velvet skirt and whatever else I can get done by the end of December so that gives me an incentive to actually do reviews!
Cidell and I had discussed the flyer for Joann's Black Friday sale and she mentioned she wanted to get the big 120 spool thread holder they had on sale for $14.99. I recently acquired a spool holder for serger thread (and planned to get another with my next coupon) because the cones are just too big to keep in plastic bins like I keep my regular thread, but was ambivalent about a spool holder for regular thread. And incidentally, to put to rest any fears that I am not thinking about sewing day *and* night, I dreamt about serger thread the other night. I had read in one of the serger books that you should switch out spools between your loopers and your needles because the loopers use a lot more thread and that way you won't run out of thread on two cones and have plenty left on the other two. So in my dream I was serging a lot, apparently, and was coming to the end of the spools on my loopers. I was so annoyed with myself that I hadn't switched out the cones, and what was left on the looper cones was more like rags tied end to end than thread and it kept clogging up my serger. Bizarre.
Anyway, I got to Joann and the more I thought about it the more I wanted to thread holder. My thread situation had been having all the spools in a plastic box, but they were pretty much outgrowing the box and I never knew quite what I had. It would be nice to know what colors I have and not have to root through dozens of spools to find the best match. I couldn't find the holders and was a little disappointed, so I asked an employee and she showed me where they were. Yay! I was also able to use my coupon on another serger thread holder *and* the 20% off purchase coupon, so I did well. I didn't get any fabric, only a few notions and the thread holders. Luckily, the Joann near me has only horrible fabric. People show projects made of cute knits that they allegedly purchased at a Joann; ours has no knits at all.
I had just sorted my Fabric Mart buttons--and let me say if you are OCD, and I mean this in the clinical diagnosis sense, not the colloquial sense, I do not recommend you get these bulk buttons because it's very hard to determine in which category to place some of the buttons. In this grouping there were a ton that were similar but not quite the same (and not even interesting to boot!). Unlike that obsessive, dull task, sorting my thread by color was fun! And the result is so pretty!
I thought I'd have more red, I had no idea I had only one spool of one color of orange, I need to stop buying black thread and start buying white thread, and obviously teal/aqua/turquoise is my favorite color because that is the only complete row!
=============================
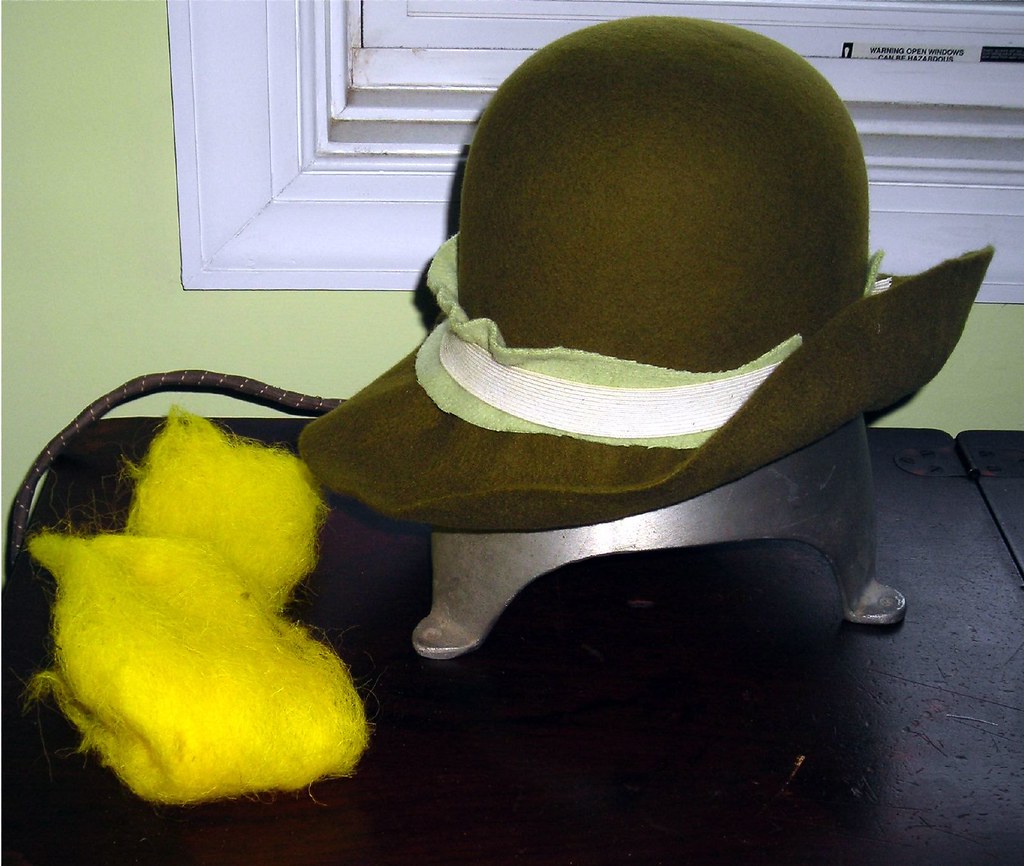
On the way home from Thanksgiving at the parents of a friend, I convinced my neighbor/dear friend, with whom I'd ridden to said Thanksgiving, to stop off at my office so I could pick up my heavy hat block and bring it home. Yay! I decided to start with one of my least favorite of the hoods, which was sort of a taupe-y green in a boring way (the lower most one in this photo). I really didn't like the color much but I thought if I could add a little yellow to it I'd like it better (observe that I have a whole category for yellow-green thread). What could I use? Turmeric! Turmeric dyes everything yellow, even plastic containers, so surely it would add some color to wool. Sure enough, it worked great. I threw in some roving too, to see what would happen. It makes an awesome bright yellow!
I put some water on the stove to simmer, added a bunch of turmeric, and tossed in the hood. That was it. Let it simmer for about ten minutes, rinsed it out and pressed out some water, and popped on the hat block. In From the Neck Up I'd read that you should hold the hat in place on the block with a band of elastic so I sewed the ends of some elastic together and stretched it on. In the morning the hat was still very wet, so I turned on the internal heating element for a little while and the hat dried pretty quickly after that. Unfortunately, the ribs of the elastic left markings on the hat, so I sprayed it with water, protected the hat felt with a piece of heavy wool, and stretched the elastic over that. It looked good this morning.
In home millinery, I have learned from the book, one generally cuts off the brim and blocks the crown and brim separately. I don't have any brim blocks and am kind of just playing around at this point, so I'm going to see what I can do about molding it as one piece. It's very fun.
=============================
Thursday was Thanksgiving, of course, and on Saturday I made hundreds and hundreds of cookies with my girlfriends. We have an annual cookie baking day and we are out of control. We make nine kinds of cookies, and huge double and triple batches of each: snickerdoodles, rollo cookies, chocolate crackles, peanut butter whirls, sugar cookies, gingersnaps, chocolate chip, lemon bars, and coconut balls. It takes about 8 hours and is completely exhausting but very fun. Sunday night I made myself Thanksgiving dinner to have for lunches this week. Other than the Tofurkey roast, it's quite traditional: mushroom gravy (the secret to a good vegetarian gravy is lots and lots of red wine), mashed potatoes, sweet potatoes (this year I roasted them with parsnips and onion), cranberry sauce (cranberries, a grated apple, an orange, oj concentrate, and a little honey), and apple-cranberry pie (from Cooks Illustrated with the vodka crust).
In between times I managed to do some sewing. I'm pretty much done with Butterick 4985 in the silk pinstripe. I'm just trying to figure out how *not* to look like a marshmallow in it. And I have a good start on BWOF 10-2008-118 in a silk print, though I ran into a pickle while cutting and found I had miscalculated in my mock layout and did not, in fact, have enough fabric (I came up with a solution). "All" I have left is buttonholes and buttons, hem, and some hand sewing on the cuffs. This should take me a good three hours to finish because it always does when I'm "almost" done with a blouse.