Monday, July 2, 2012

Overdressed: The Shockingly High Cost of Cheap Fashion


I finished Overdressed (link goes to Goodreads; the cover photo above is linked to Amazon) over the weekend.  The author explores various angles of our addiction to cheap clothes:  the poor quality of clothing, the enormous waste generated by throwaway items and the (lack of) secondary market for used clothing, the loss of American (and most first world) textile jobs and production capacity, and the pressure on third-world garment-makers to keep worker wages as low as possible.  It was a good complement to Deluxe:  How Luxury Lost its Luster (and actually cites Deluxe).  

By the end of the book, the author is a convert to "slow clothing" over fast fashion:  fewer good quality pieces produced by well-paid workers in the U.S.  She even learns to sew.  She thinks if we could all just realize how poorly made fast fashion is, we'd all see the light on good-quality, more expensive clothing (which can end up with a *lower* cost per wear than fast fashion).

But I think she misses the major point to fast fashion.  She admits that she is not a fashionista herself; she's not a trend chaser and doesn't enjoy shopping.  She also lives in Brooklyn, New York, where there are thousands of options that aren't Target, Old Navy, Wal Mart, and other retail behemoths.  

So she can be forgiven for not realizing the essential problem:  Fast fashion isn't about clothing or fashion.  Fast fashion is about shopping.  That sounds like a tautology, but hear me out.

 The thing is, for a large majority of people in this country, there is nothing to do but go shopping. Literally.

I am very fortunate to live in DC and I can go for a bike ride, visit a museum, run, hike, or just walk around--NOT to stores, though I sometimes feel like I am "wasting" my time if I don't have a destination, i.e., a store, i.e., something to buy--very easily and without a car (well, the hiking part requires a car). However I moved from places where (a) you had to have a car to get anywhere, so you had to have a destination, and (b) the only anywhere to go was a mall or shopping center. Even with all DC's rich resources, it took me years to break the habit of going shopping most weekends. It is our primary leisure activity, other than watching TV.

Convincing people to buy fewer but better clothes has almost nothing to do with money. It has to do with entertainment.  


Sculpture from Artomatic 2012
Where my parents live, there are virtually no sidewalks and no bike lanes.  So when teenagers who can't yet drive want to meet up with their friends, it needs to be a central location and they must be driven there by parents.  And the only central location is the mall.  So you beg your parents to take you to the mall, where you spend hours shopping.  Now, as a teen I didn't have enough money to actually buy anything on most visits.  But it creates this idea that the place you go for fun is the mall.

Then when you can actually drive, it doesn't occur to you to go to museums (which are an hour's drive away and have high admission charges).  And there is no hiking within a reasonable drive because it is suburbia as far as the eye can see.   No, when you get your license it's so exciting because now you can drive yourself to the mall.  What started out as a central destination convenient for parents to drop you and teens to meet up, becomes the destination.  The only one.


At some point you get out of school and have more money but fewer people to hang out with all the time.  So you start going shopping by yourself.  Sure, you try to arrange to do it with friends when you can, but if you can't find anyone to go with you, what are you going to do, not shop?  What else is there to do?  It's considered weird to go to a movie by yourself, or to eat in a restaurant by yourself.  But if you need to get out of the house by yourself, it's not weird to go shopping alone.

That's when the buying really starts.  Because if you're shopping by yourself, it's not socializing disguised as shopping.  It's just shopping.  And if you don't buy something while you're out shopping, then what's the point?  It's like it never happened at all. 

Sculpture Detail
To feel like something happened in your life, you need to have a bag and a receipt and something to cut the tags off of.  It feels like you were being productive.


I am not pretending I am above it all here!  I love clothes.  And I am definitely still in the "productivity" mind set.  I prefer to sew a new item every week.  That is not any different than buying a new item every week, though my items are generally better quality than what you'd find at Forever 21 and their ilk.  

When I put a lot of work into one project, like my Seersucker Social dress, it drives me crazy to be working on it week after week.  I could have made so many other things!  Never mind whether I need them or not and whether they fit in my closet.  The slow pace of acquisition kills me with those projects.  And we all know how much fabric I buy (but I've not bought any for over three months now, which is very exciting).


I don't know what it would take to get people to go for a bike ride or to picnic in a park for fun and a way to get out of the house instead of going shopping, but it would require a huge, huge, HUGE cultural shift, infrastructure changes to offer entertainment alternatives to the mall, and a reconfiguring of the idea of "productive" away from having something tangible to show for your weekend.

In my current job we have a staff meeting every Monday.  The staff is pretty small so at the end of the meeting if we have a little time we all go around the table and give a little synopsis of our weekend.  When I started I was joking with some of the longer term staff members that I was going to have to start planning more exciting weekends so I'd have something interesting to recount.  

It was kind of a joke but kind of not.  If everyone had to give a report on their weekend every Monday morning, would we want to be able to say more than "I went shopping and got a great deal!"?  Or is that really enough?

There is a discussion of this book on Pattern Review.

Friday, June 29, 2012

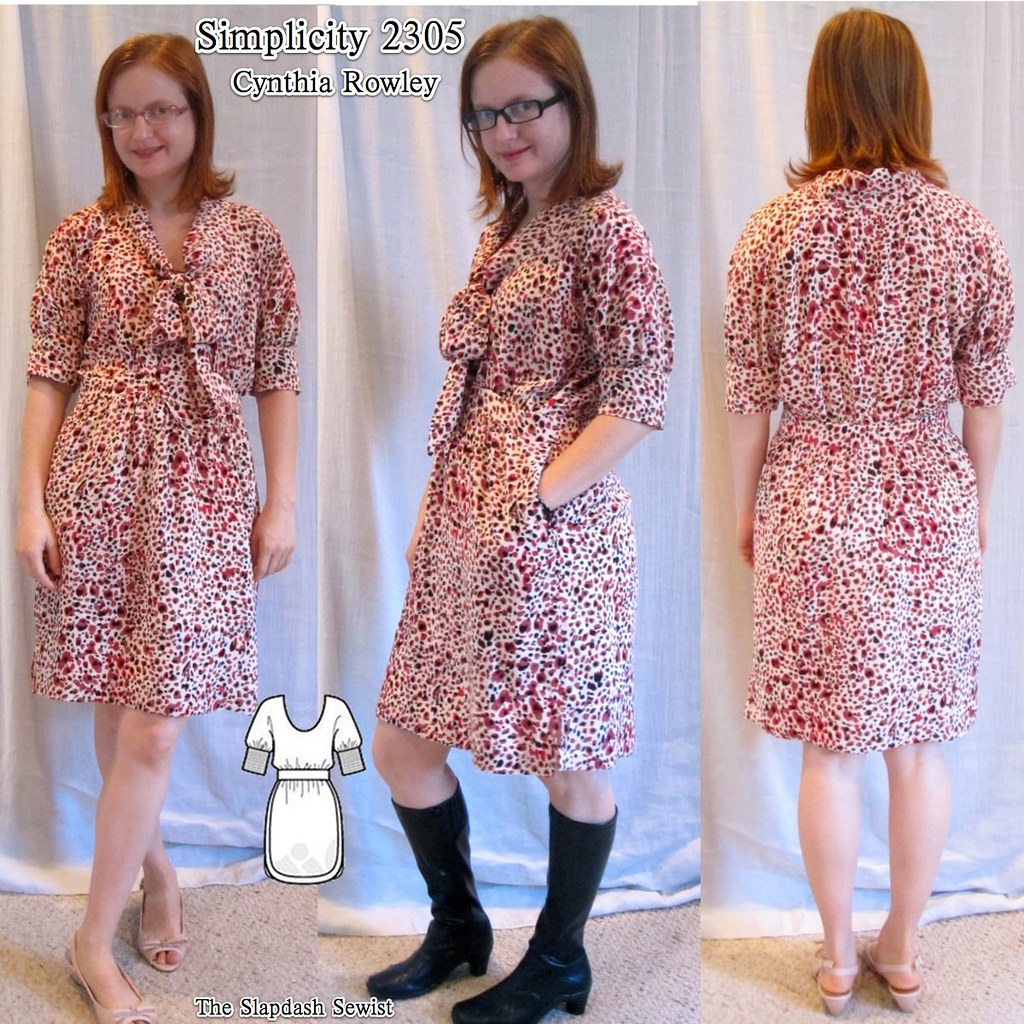
Simplicity 2305, Tie Neck Dress


S2305 Thumbnail


Dolce & Gabbana


When I got this rayon print in a free bundle from Fabric Mart, I immediately knew it wanted to be a tie neck dress.  I was very much influenced by this Dolce & Gabbana ($2,495).   My project is more in the style of the inspiration than a literal copy, but I liked the smaller scale animal print and the voluminous bow.

Simplicity 2305 fit the bill for the shape I was looking for.  I feel like Cynthia Rowley is a bit of a one trick pony--half of her dresses are sacks and the other half are sacks interrupted by a midriff, like this one and the ruffle collar dress, Simplicity 2497.  It's an on-trend pony, though, so one trick is probably good enough (not to strain the metaphor too far).

While I like S2497 enough to make it twice--in purple silk and in swiss dot--I'm not sure this one is going to enter the repertoire.

First, a batwing/dolman sleeve in a voluminous gathered bodice is not kind to a flat chest.  They're under there somewhere, but you'd really have to get up close and personal with me to find them.

Second, the sleeve cuff needs redrafting, and I don't know if it's worth it.  The cuff is just an unshaped rectangle that is stitched in place and doubled over (I did my wrong-side-first and topstitched the right side in place).  I was concerned about length so after stitching the wrong side I pinned the right side in place.  Well, something about the length of the sleeve (a couple inches below the elbow) and the length of the dress (my hem was 3 inches from the cut lower edge) was a little too Big Love for my taste.  So I shortened the cuff by 2 1/2 inches. 

You really want a little blouson effect from the sleeve, but as mentioned, the cuff is just a rectangle.  I made sure it would fit my bicep comfortably, which it does, but that meant it was very loose closer to the elbow--right where it needs to fit to ensure blouson rather than just falling down below the elbow.  I took it in an inch at the bottom of the cuff, tapering to nothing where it attaches to the sleeve.  It's an imperfect solution, but good enough for this project.


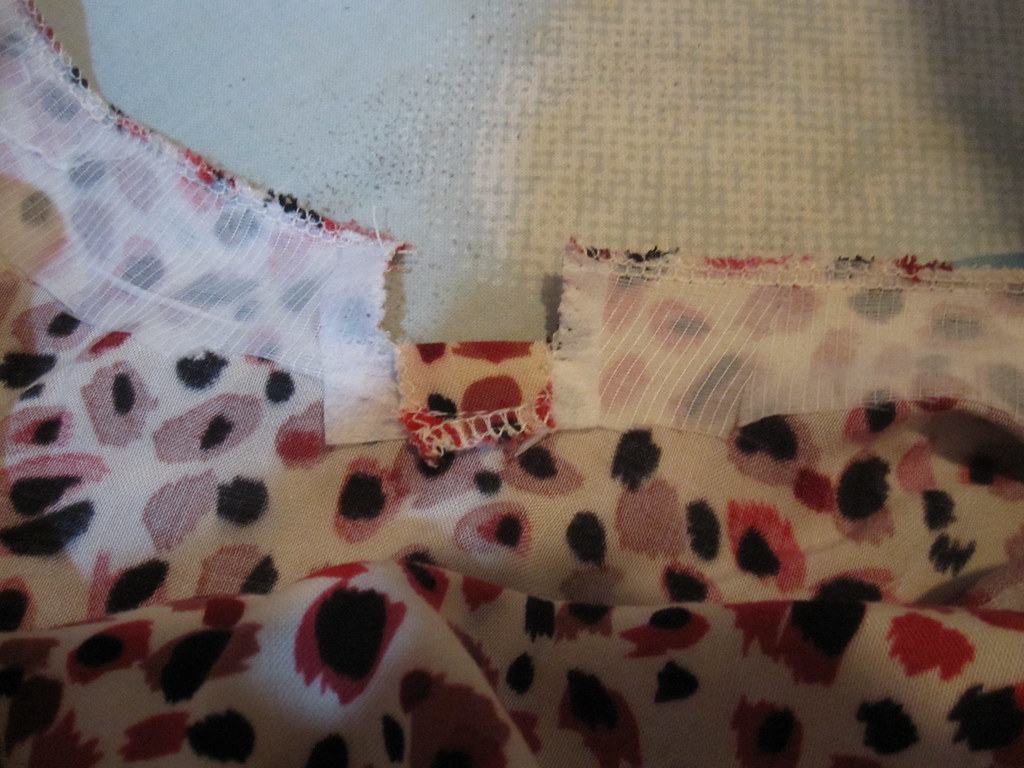
Front Neck Notch


The other big change I made to this was to make a tie neckline, rather than just the faced scoop as drafted.

I raised the neckline about 1 inch in cutting and it is still really low, so beware.  Cynthia Rowley necklines are lower than Burda's, in my experience.

Tie at Notch


I interfaced around the neckline to stabilize this floppy rayon fabric.  Then I clipped into the seam allowance about 1/2 inch on either side of center front.

I stitched the tie in place on the inside then folded over to the outside and topstitched in place, using the method described here, then finished the tie ends by sewing right sides together from the end to within a couple inches of the dress neckline, turned right side out and pressed, and then closed the gap with hand stitching.

Most patterns I've made with ties want you to cut the tie on the bias.  Not only does this create huge waste, but it also means that once you wash the item the tie is forever twisted and yucky looking at the neckline.  I cut this tie on the cross-grain.  It does not hug the back neck the way a bias-cut tie would, but that doesn't bother me.

Bow Loop Attachment
My biggest issue with tie neck items has been the heaviness of the tie.  A knot is just so heavy that it lolls around and pulls the front neckline too low.  To avoid that here, I made a loop of fabric and pulled the ties through it to create the look of a bow without actually tying a knot.  I stitched the loop to the dress slightly below the neckline (after experimentation).  I am really happy with this solution; the bow looks neat and does not loll around and weigh down the already low front neckline.


For some reason, I felt compelled to have pockets on this dress.  I was going to do the side-zip-with-pockets magical but annoying thing, but then remembered that I don't like a side zip with a fuller skirt.  The zipper acts as a sort of boning that causes the skirt to stick out more on one side than the other and it's just not attractive.  However, I had already cut the dress with the back on the fold.

What to do?  I decided to insert a center back zip anyway.  I had enough volume in this dress that I could take a little bit of it from CB for a zipper seam allowance without affecting fit or look.  I had enough fabric to recut the midriff with a seam allowance, so I needed to create an opening for the zipper in the bodice and skirt.

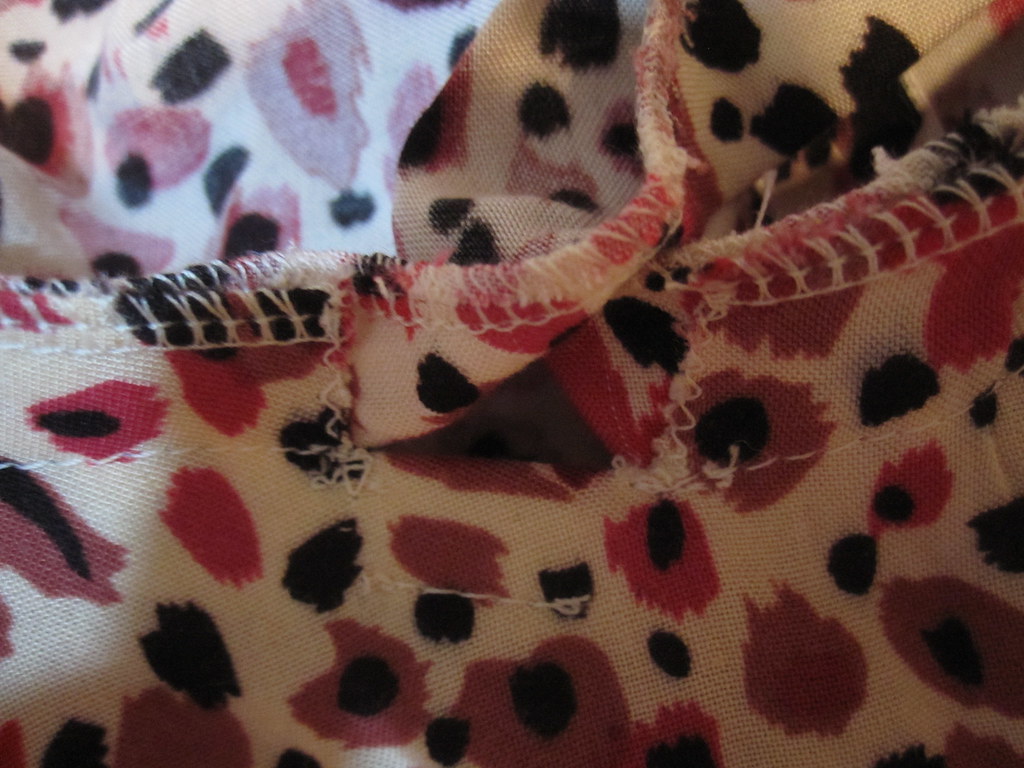
Insert Slit Zipper

I started by interfacing the spot where the zipper would be inserted.  I then marked a line down center back for the opening.

The next step was to stitch darts, about 1 1/2 inches long, at the top and bottom of the markings.

Then I cut along my marked lines and into the darts for about 1/2 inch, pressing open at the darts.

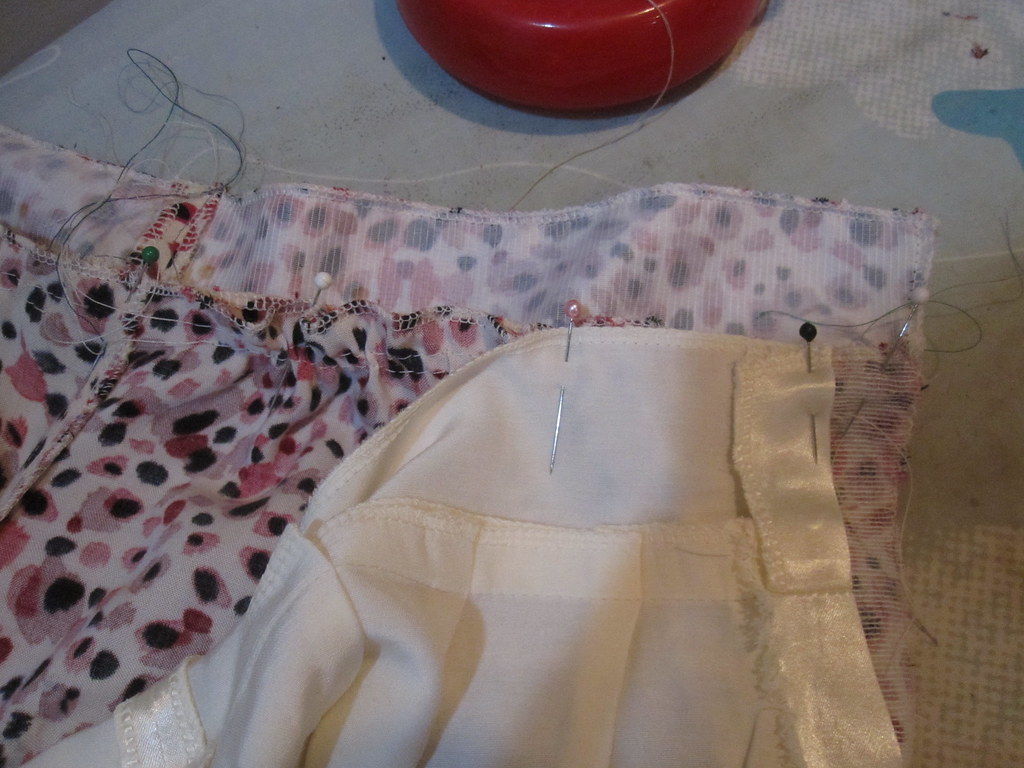
Fold in Lining at Midriff for Zipper
The next step was to stitch the midriff to the front and back.  I did not line the bodice of this dress but did line the midriff and skirt.  I turned the midriff lining in at the center back so it would not get caught in the zipper (here's the finished effect).

Next, insert the zipper as usual.  Place the top zipper stops in the area of the dart that has been slit (so there is no gap where skin shows through above the zipper).  Sew the zipper to within 1/2 inch of the lower dart (mark the bottom of the zipper), then go in and extend the dart to the end of the zipper stitching.

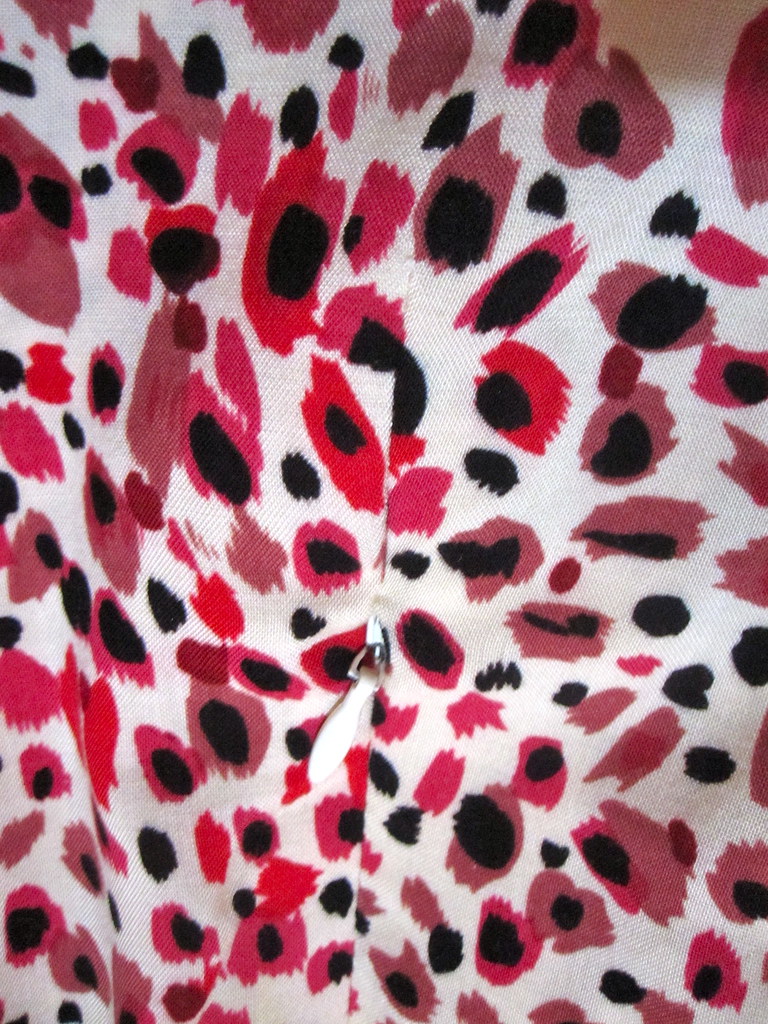
Finished Zipper from Outside, Closed


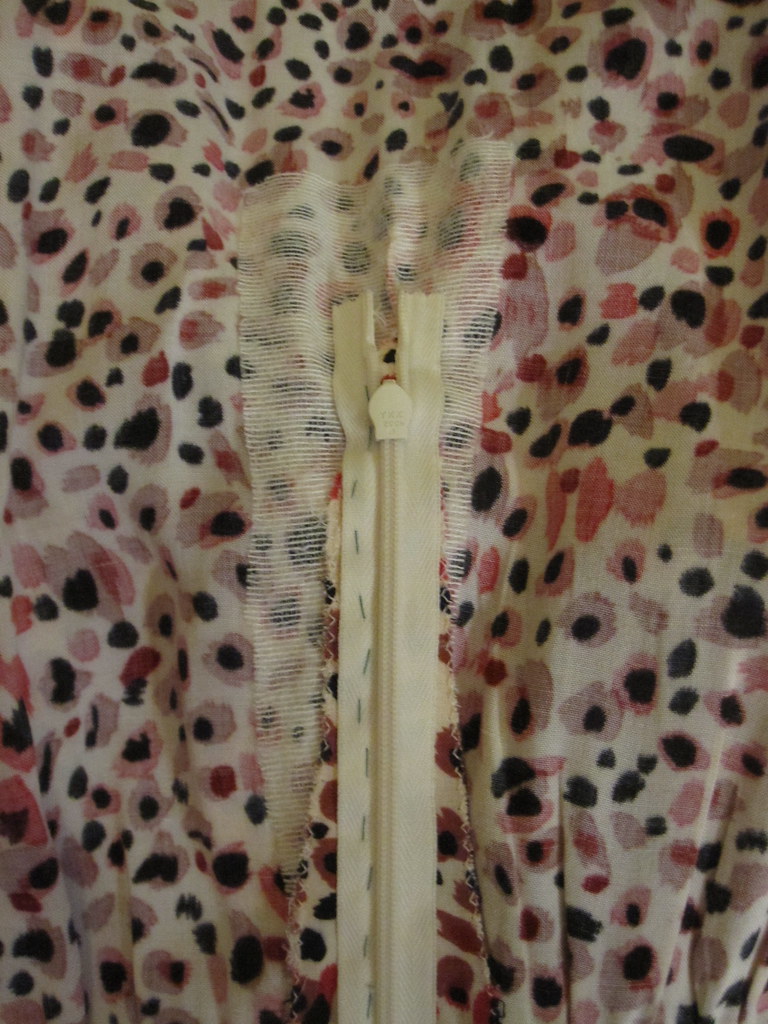
Finished Zipper-InsideI was a little nervous about this, as I just sort of made it up as I went along, but I think it worked out very well.  The zipper does not look incongruous and sits just as nicely as a zipper inserted in an actual seam.

Here you can see how it looks on the inside and on the outside.  You sort of have to hunt for the zipper tab in the photo on the right, but it shows how the little dart looks just fine above it.


Side Vents
One of the features on the pattern is the side vents on the skirt.  There is an option of a shaped hem or a straight hem.  The shaped hem seemed a little too trendy for me to pile on top of the bow and the print, so I went with the straight hem.  I did keep the idea of vents and made small ones in the side seams.  To keep the lining from showing through, I topstitched it to the fashion fabric at the vents (with a big bar tack at the top of the vent to keep the seam from popping).  I was concerned about sewing lining to fashion fabric at the hem--I never seem to get this right and everything always hangs all wonky.  However, I somehow got good placement and this actually turned out really great.  The lining attachment gives the skirt weight it would otherwise lack.


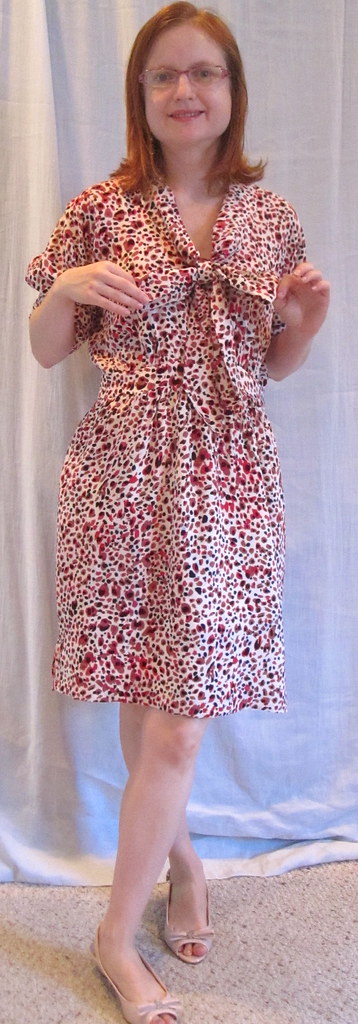
Displaying Bow

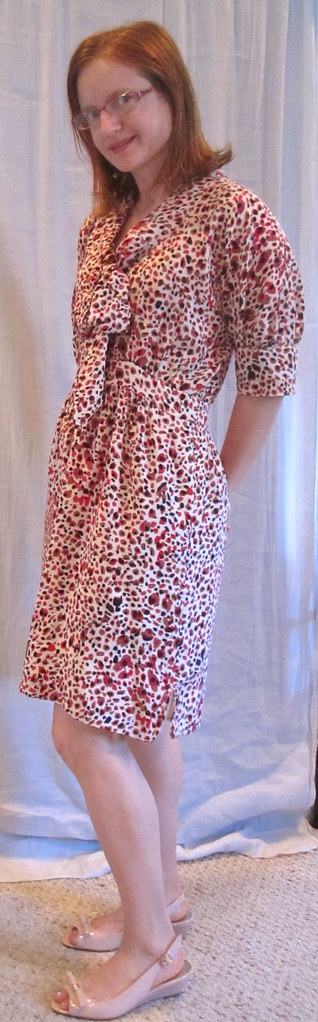
Side

While I don't know that I'll be making this pattern again, I am really happy with the way this dress turned out.  It can be worn in Fall with boots and Spring and early summer with sandals (a little too warm for very hot summer days).

Adding the tie neck turned out to be super easy.  I am about 3 years late on this trend, which I keep saying can't possibly last any longer but then it does.  So I don't know if I'll do more tie necks or not but I should be able to wear this dress for a while.


All photos are here and the pattern review is here.

Thursday, June 21, 2012

Burda 05-2011-108, Panel Princess Dress: The Real Deal

Burda 05-2011-108 Thumbnail


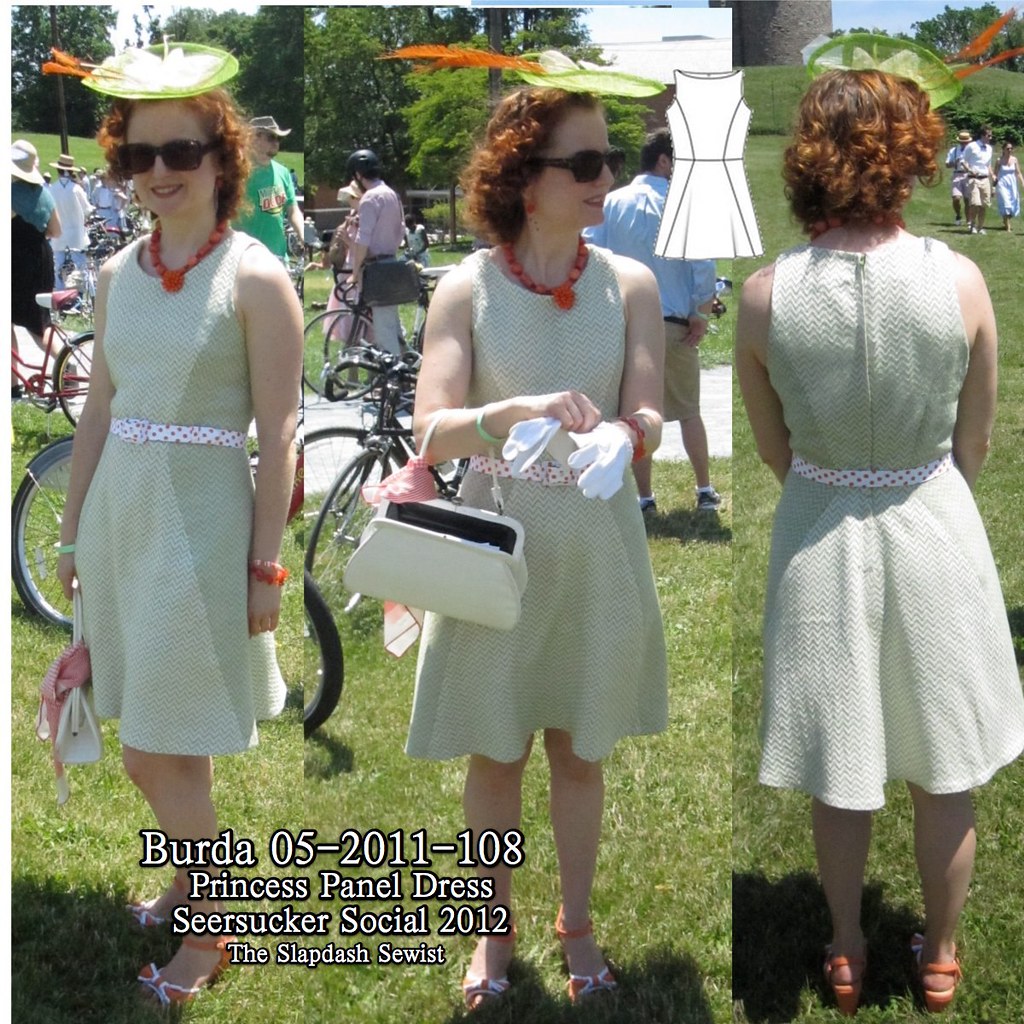
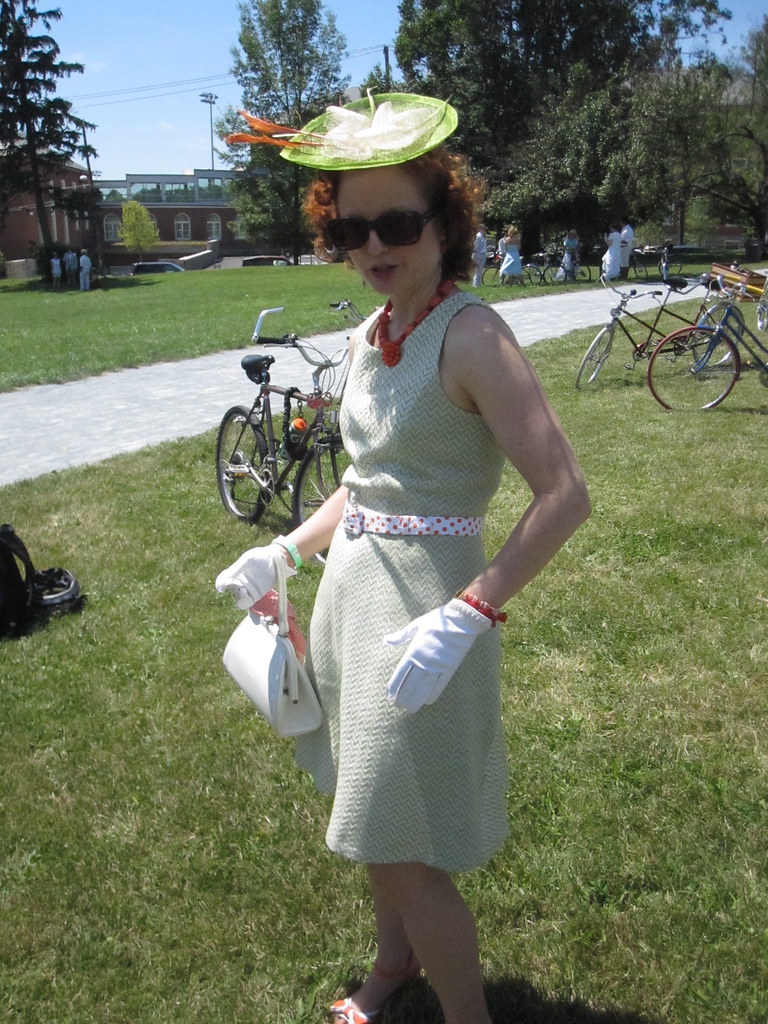
I got this vintage home dec fabric from DeBois Textile in Baltimore for $3.50/yd in April 2011.  When I got the next Burda magazine and saw Burda 05-2011-108 (available for purchase from BurdaStyle at the link--I am not affiliated or compensated, just trying to be helpful) I immediately knew this fabric would be this dress and I would wear it to Seersucker Social.  Unfortunately, I was out of town for last year's Social so the fabric had to wait another year to be made up.  But when it rolled around to May it was on!

I mentioned what a nightmare this was to cut in the muslin post.  It was hard to see the zigzags through my tissue, and then really hard to keep the pattern pieces straight.  I ended up pinning the grainline to the fabric along a single zag and then pinning the rest of the piece in place.  It wasn't helped by the fact that I didn't have *quite* enough fabric so the jigsaw of the layout was extremely tedious.  I had to cut one of the skirt side pieces slightly off grain.

The real downside of zigzags like this is that, unlike with regular stripes and plaids, once you've cut a piece one time you can't just flip it over on the fabric to cut the other piece.  The zigzags are just impossible to trace/keep track of underneath the fabric.  So I had to do the set up for each piece twice.  I spent about 2 1/2 hours on cutting.  So not fun.

Lining/Zipper

Because of the thickness of my fabric I couldn't use an invisible zip, so I decided to go for a lapped zipper to add to the vintage feel.  I rewatched What Would Nancy Drew Wear's video tutorial and then found this awesome PDF from sewing.org on putting in a lapped zip (clicking on the link auto-launches the PDF download--their website is not very well-organized and I can't figure out how to give them the traffic).  I referred to it about 4000 times while putting in the zipper, and it came out perfectly. 

The only thing that nobody addressed was how to handle the lining at the neckline to finish it properly at the zipper.  So I just had to sort of make it up.


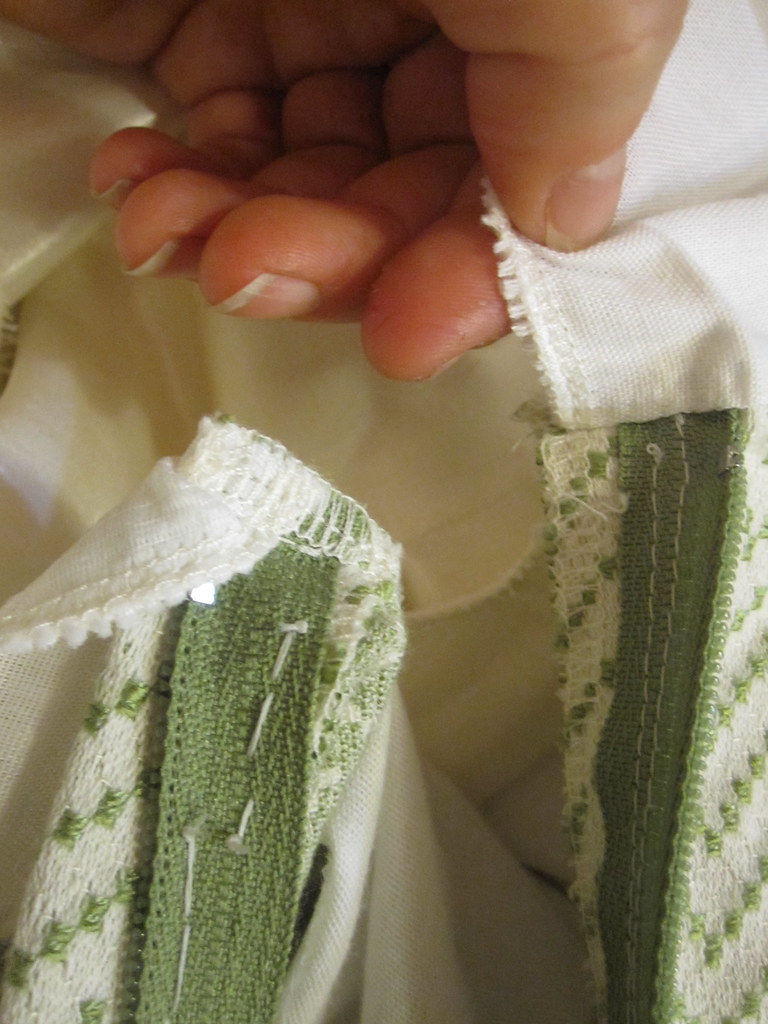
Lining Finish at Zipper


On the overlap side (the left in the photo above), I folded the lining around the overlap.  You can see I could have used some extra width on my lining.

On the underlap side, I just placed the lining and fashion fabric right sides together as normal.

You can see on the right that this finish worked adequately.


Hand Stitch Lining to Zip


To finish the lining, I hand-stitched it to the zipper. There was a lot of hand-stitching in this project!


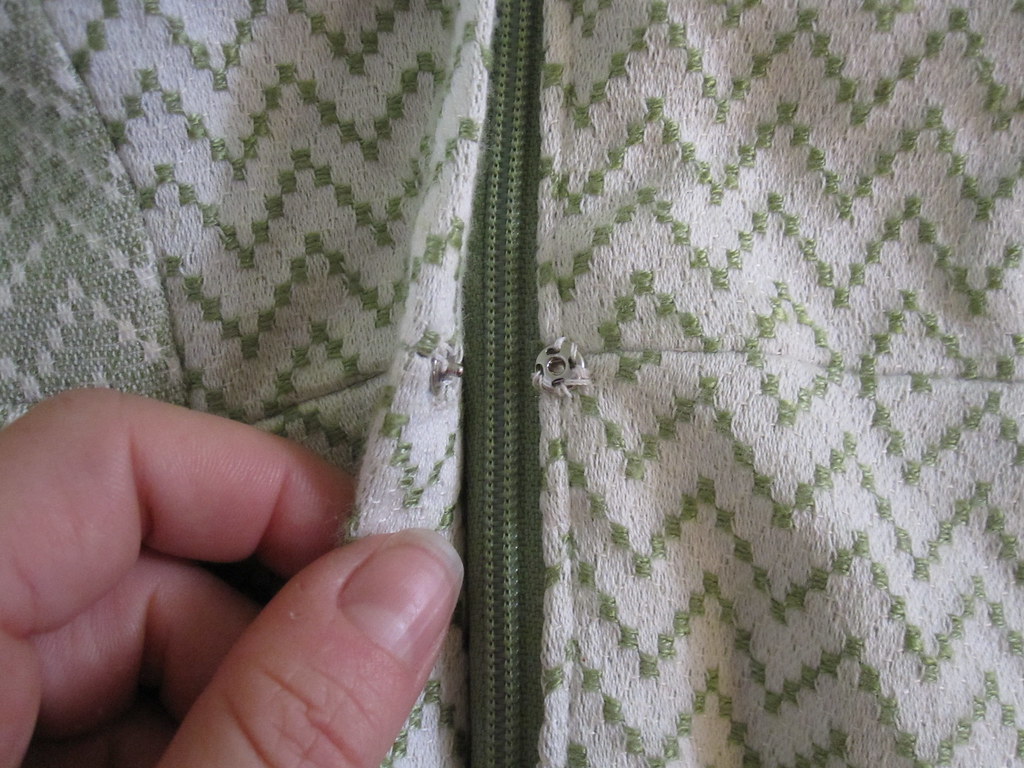
Snap at Waist Seam


Because of the thickness of my fabric, the overlap stuck out a little at the waist seam, rather than sitting flat. I sewed in a little snap to keep it in place (though I wore a belt with the dress and am likely to do so every time I wear it, which obviated the need for the snap).


Back Closeup

I hand-picked the visible/overlap side of the zipper. I am an expert at installing invisible zippers, if I do say so myself, but the last time I tried to install a regular zipper by machine was just so gross that I vowed never to do it again. From henceforth, any regular zippers would be installed by hand. The hand stitches pretty much disappear into this thick, loosely woven fabric.


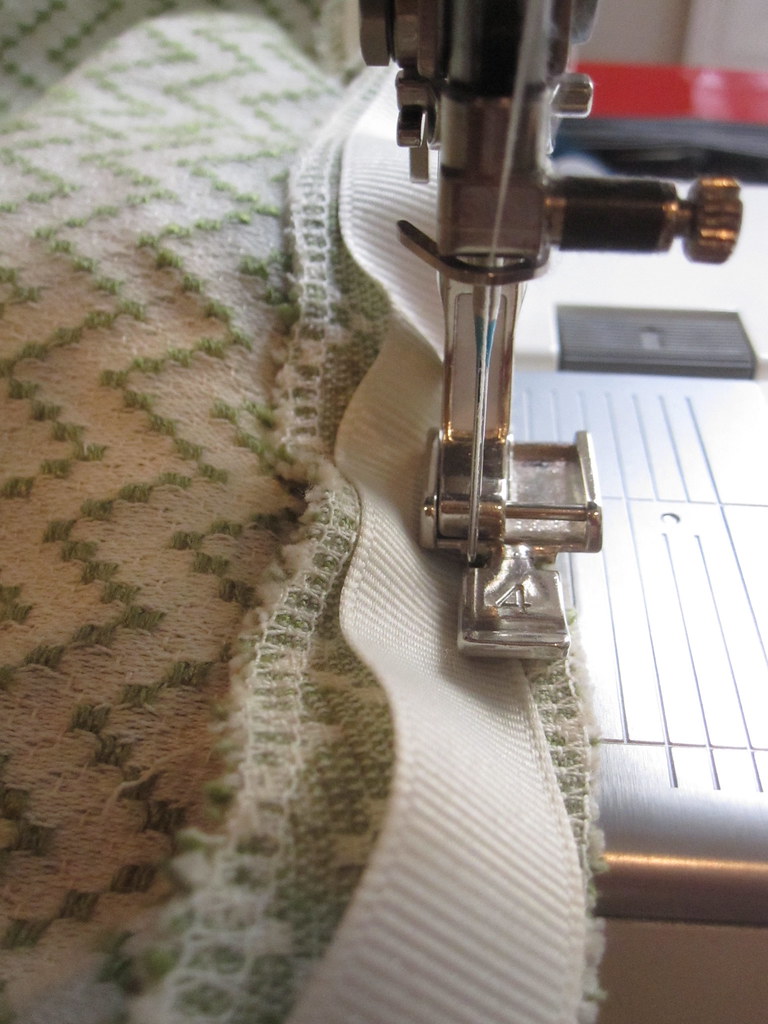
Stitch Ribbon to SA for Waist Stay
Because the fabric is not very firm, I decided to put in a waist stay.  I'm not sure it needed a stay so much as just a stabilizer at the waist seam.


I used Tasia/Sewaholic's instructions for a waist stay. As you can see at left, I stitched a ribbon to the seam allowance.  I had sewn the dress in front, side, and back panels so I could fit it more easily, so there are spots where the ribbon isn't sewn because the waist seam isn't continuous.


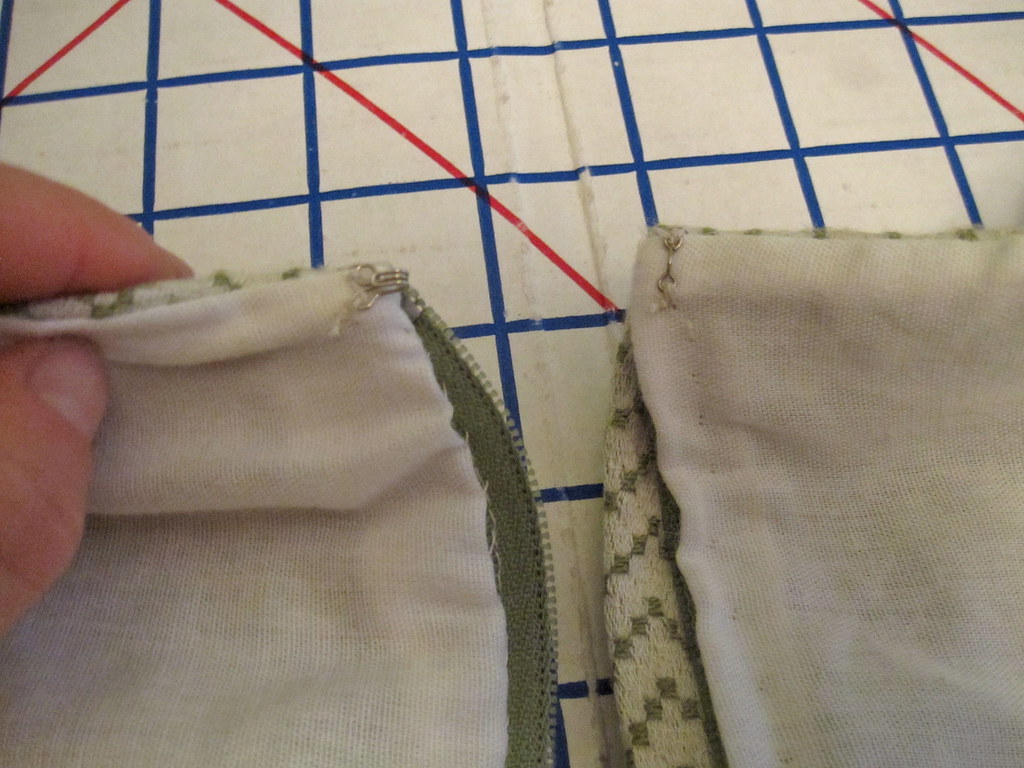
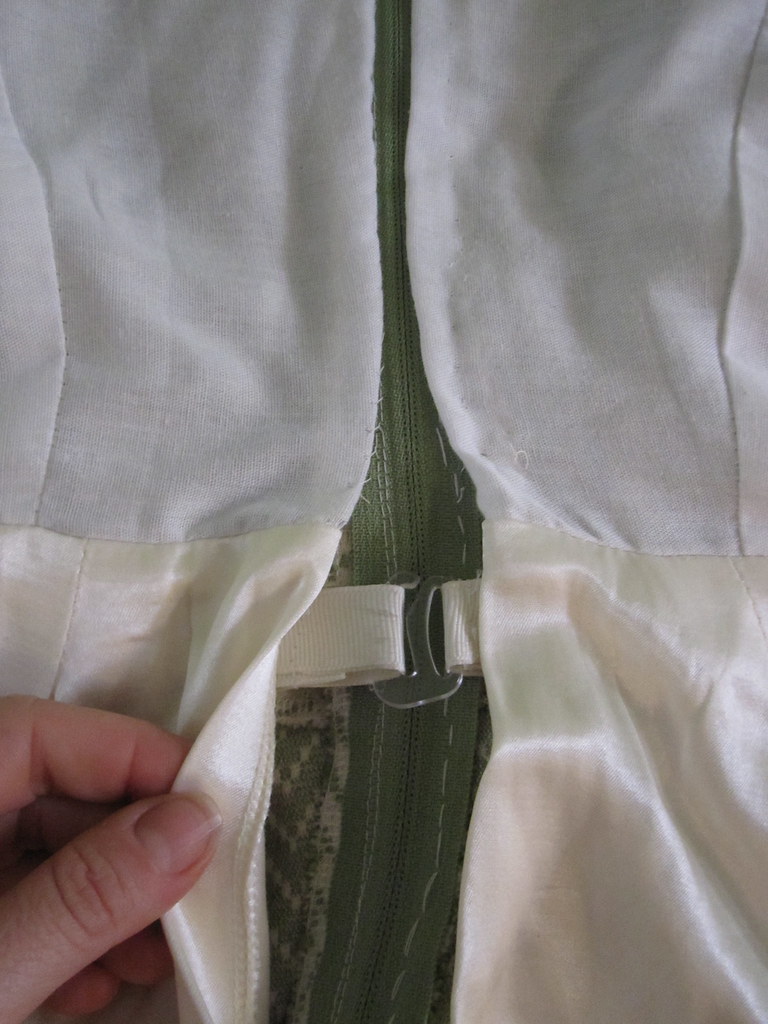
Waist Stay


I stitched the lining to the zipper only to right above the waist seam to leave an opening for the waist stay hook.  I had to cannibalize the hook from a bathing suit.  Must remember to replace that next time I'm at the fabric store.

Interface Hem


Because of fabric limitations, I shortened the dress about two inches in cutting. Even though this is a petite pattern, it is drafted quite long and I ended cutting off another two inches before hemming.


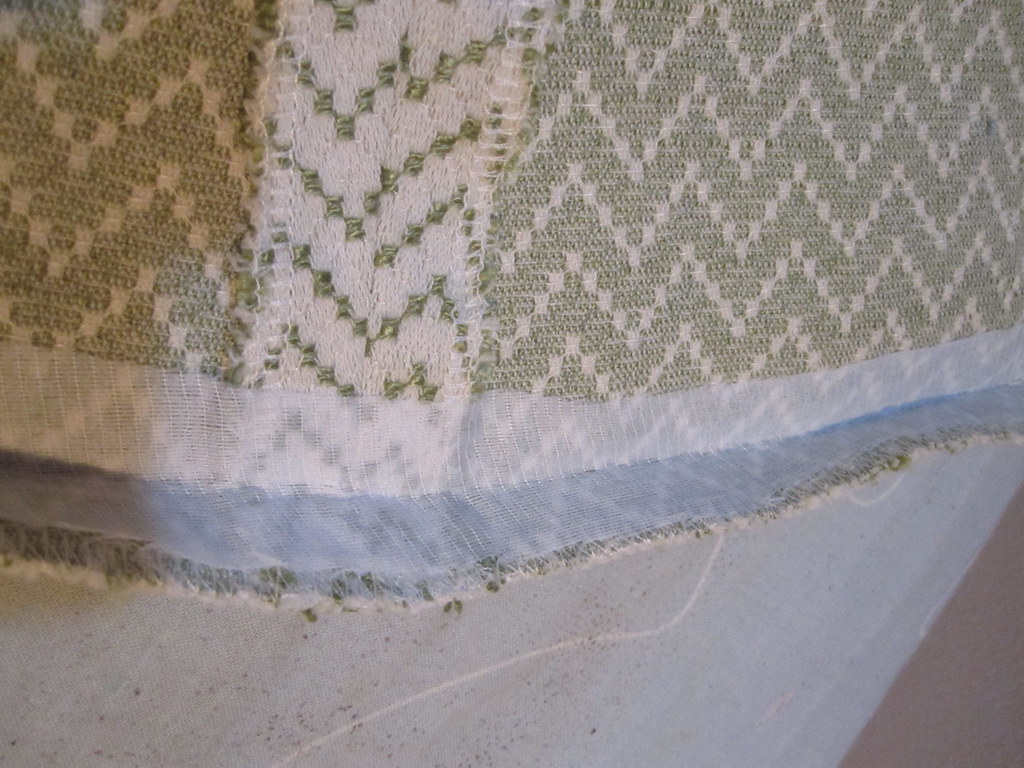
In marking my hem, I found that it was collapsing, especially at center back.  So I fused a strip of medium-weight interfacing along the fold line.


Hem Lace


I bought a bag of vintage hem lace from the thrift store a while back. The owner wore a LOT of maroon, apparently, which is a color I wear almost not at all. But there were a few other colors, including this green. I was about an inch short, but figured the gap wouldn't be too terrible.

I used a machine blind hem to stitch the hem in place.  Again, it pretty much disappears into this fabric, which is the advantage of a loosely woven textile.


Burda 05-2011-108
Amusing Outtake


Here you have your choice of me trying to look cute and me apparently doing the robot. Cidell is good at finding the best/worst outtakes.

I am a big fan of this pattern.  The only thing I would do differently is take out a tiny bit more length from the back bodice for a swayback.  I did a small swayback, but it is a hair too long.  I can definitely see making it again.  It is a great A line alternative to a traditional sheath.  It could be made in a fancy fabric for eveningwear, suiting fabric for work, or a printed cotton for play and look appropriate in all three contexts.

All photos are here and the pattern review is here.  You can read about the muslin fitting process here and how I lined the bodice here.

Wednesday, June 20, 2012

Alternative Finish for Sleeveless Lined Bodice


A while back I published my all-machine clean-finish bodice lining tutorial. I have used this method on every sleeveless dress and top I've made for the past several years, but when it came to my Seersucker Social dress, it wasn't going to work.

The all-machine method requires three open seams:  two side seams and a front or back.  Burda 05-2011-108 is drafted with a side panel rather than a side seam.  While you could theoretically leave the side front or side back seam unsewn, there would just be too much fabric to pull through the strap tunnels (especially the home dec fabric I was using).  The method generally prescribed by the Big 4 is nonsense.  Here is the alternative to the all-machine finish.

Interface Neckline and Armscye of LIning

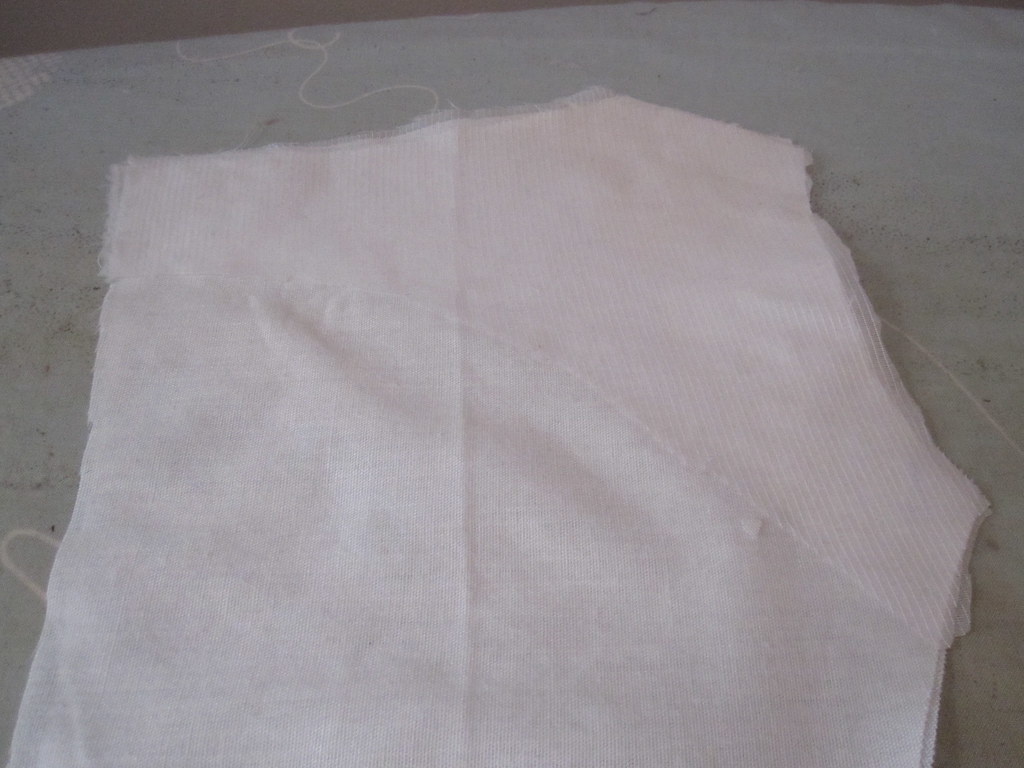
I lined the bodice of this dress with an Ikea Knoppa sheet, a lightweight cotton-poly batiste (and only $1.99 for the sheet!). Because my fabric was lightweight, I fused strips of interfacing to the neckline and armscye (a little hard to see because it's white-on-white).

 As with the all-machine method, trim a scant 1/8 inch from the edges of the neckline and armscye on the lining to make it slightly smaller than the fashion fabric.
Leave Unstitched 2 inches from Shoulder


Sew the side seams on the bodice and lining, or, in this case, side panel seams.  This will also work for a pattern with no center back seam (I think--I am terrible with the 3D mind, but as far as I can work out it should be fine).

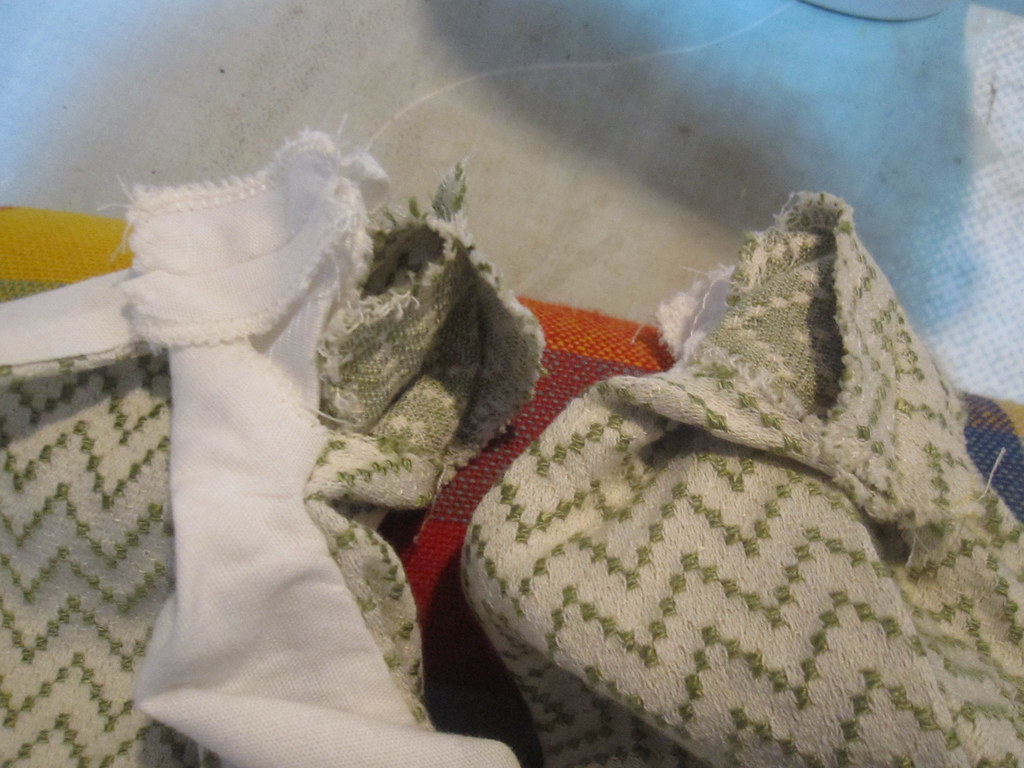
Once your lining and fashion fabric are assembled, sew the lining to the fashion fabric, right sides together, along the armscye and neckline.  Leave unsewn for two inches from the shoulder seam.

Turn the lining right side out.  You can see here the unsewn neckline and armscye edges leading to the shoulder seam.  I found it useful to finish the edges of the shoulder seams at this point.

Stitch Shoulder and Lining Seams


Next, sew the shoulder seams.  Treating the lining and fashion fabric, separately, place them right sides together.  Stitch and press.  This is why you need the extra two inches leading up to the shoulder seams, so you have room to maneuver the shoulders right sides together.


Shoulder Opening

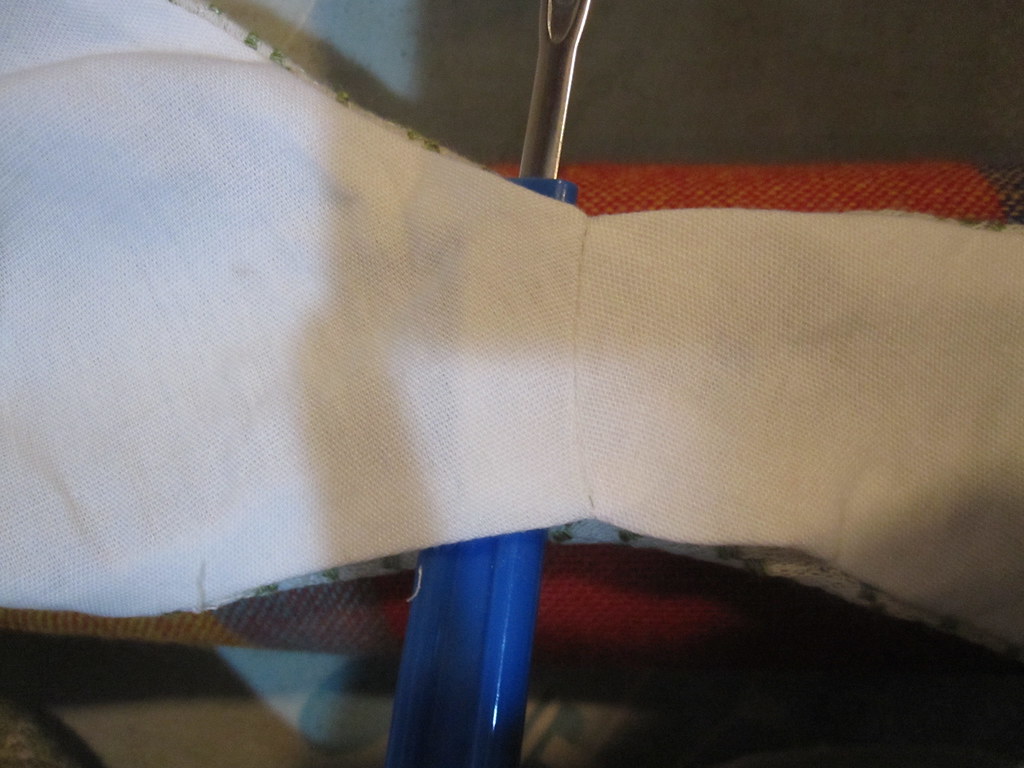
Turn the shoulder seams to the inside and press the seams allowances of the lining and fashion fabric in place.  You can see how close it is to done here.

The seam ripper illustrates the part of the seam that is open.  This is that two inches (minus shoulder seam allowance) that you left open at the top of the shoulder.


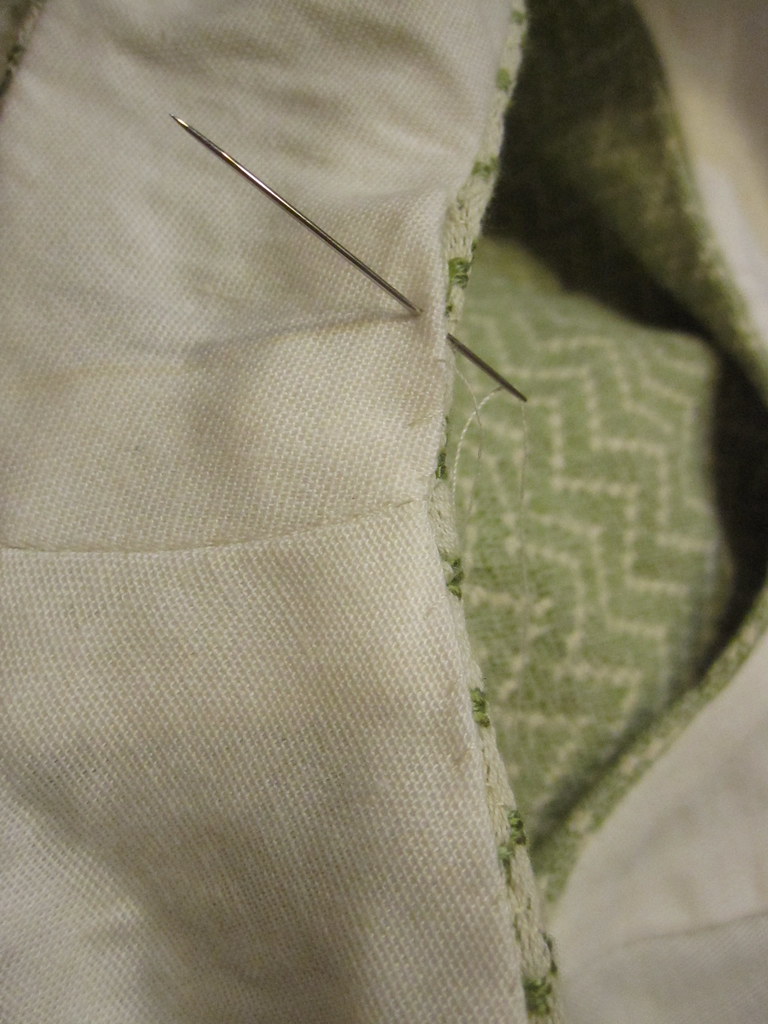
Finish Shoulders by Hand


Now all you have left is a little bit of easy hand stitching. I use a small whipstitch.

With the lining trimmed slightly smaller than the fashion fabric, it automatically turns under more and is easily hidden.  Both my fabrics pressed so well I didn't even need to pin.

I timed it, and the hand-sewing of these little bits of the shoulder took less than 10 minutes. 

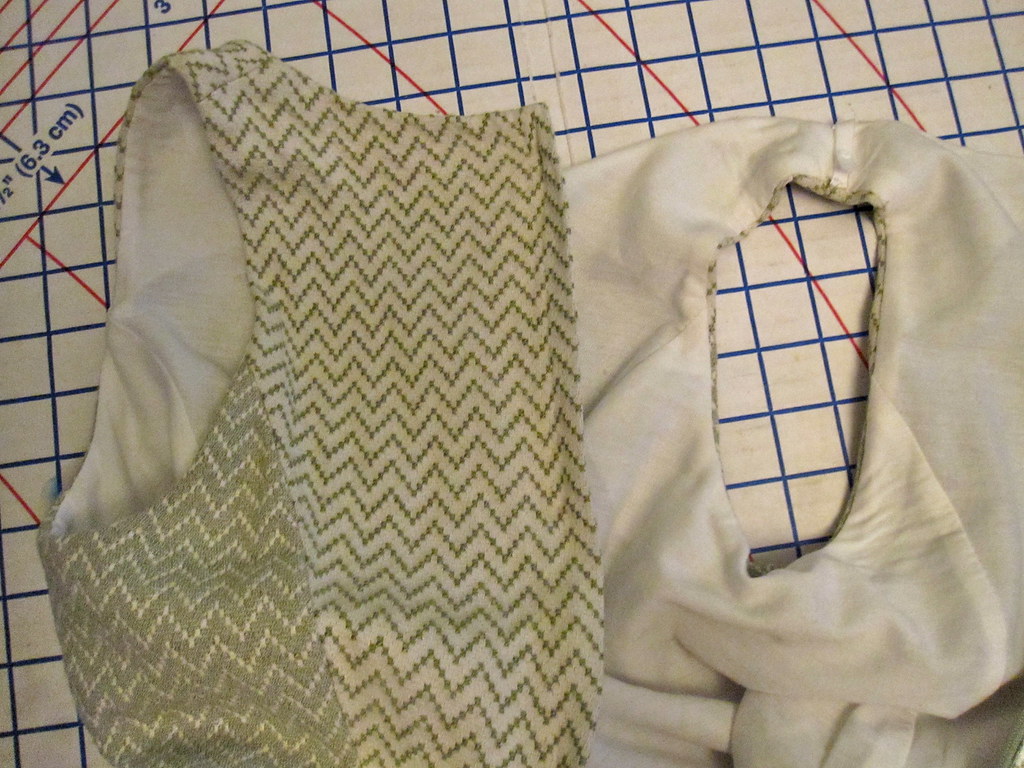
Completed Armscye Lining

And here is your completed finish (the shoulder seam is obscured by my bra strap keeper, sorry about that).  *Almost* as quick and easy as the all-machine finish, and does not involve any crazy steps or visible hand-stitching.

Tuesday, June 19, 2012

Burda 05-2011-108, Panel Princess Dress: The Muslins

Burda 05-2011-108 Thumbnail

I spent a lot of time on this dress, Burda 05-2011-108 (available for purchase from BurdaStyle at the link--I am not affiliated or compensated, just trying to be helpful), so I have a lot to say!  I realized it will make waaaaaay too long of a post to say it all at once, so bear with me.

Widen Shoulder Straps/Narrow Neckline v.1

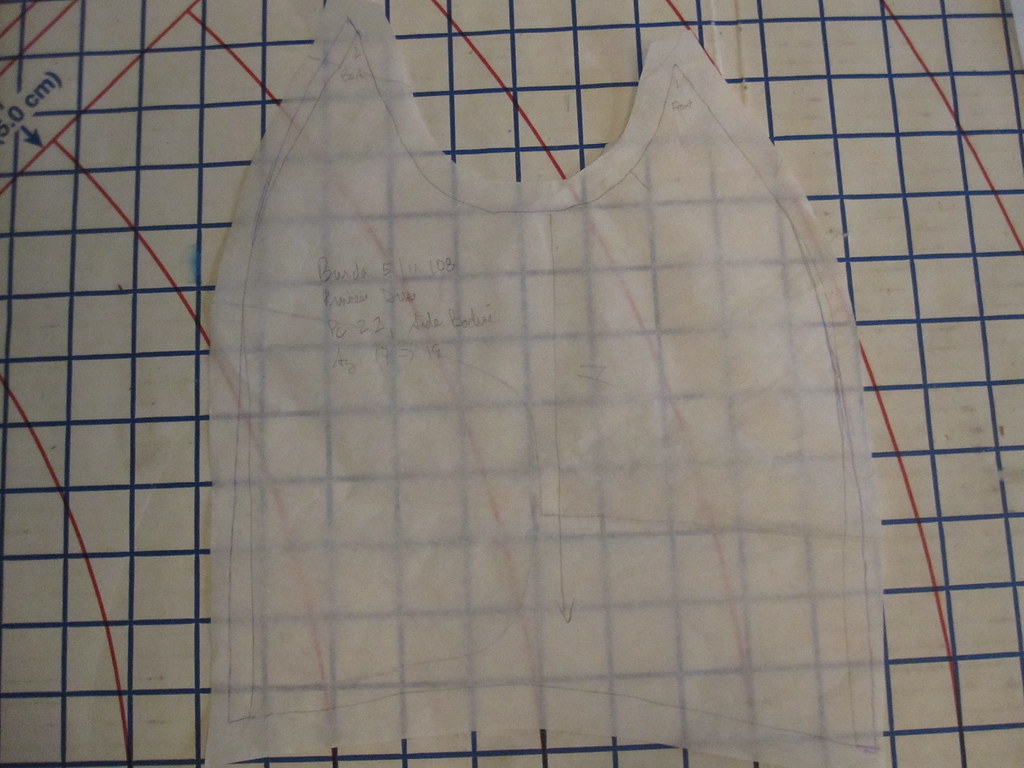
I made not one, but two bodice muslins.  However, before I even started the muslins I narrowed the neckline and widened the shoulder strap, as you can see at left.

As drafted that shoulder is so narrow that it wouldn't cover a bra strap, not to mention would be a nightmare to line.


Small Bust Adjustment


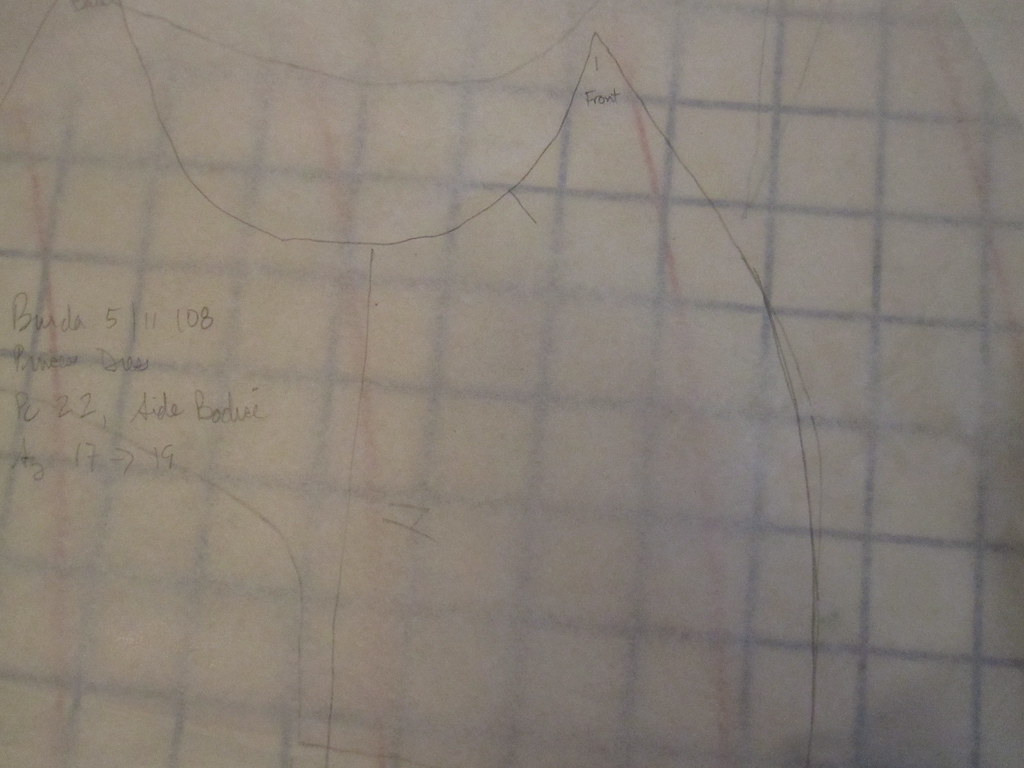
I also made a small bust adjustment by flattening the curve on the side panel piece. I found it very helpful in working with this side panel piece (no side seam) to mark the front and the back of it. I wrote on the pattern piece, and also added a notch at the back so that I would have no trouble on the cut pieces.


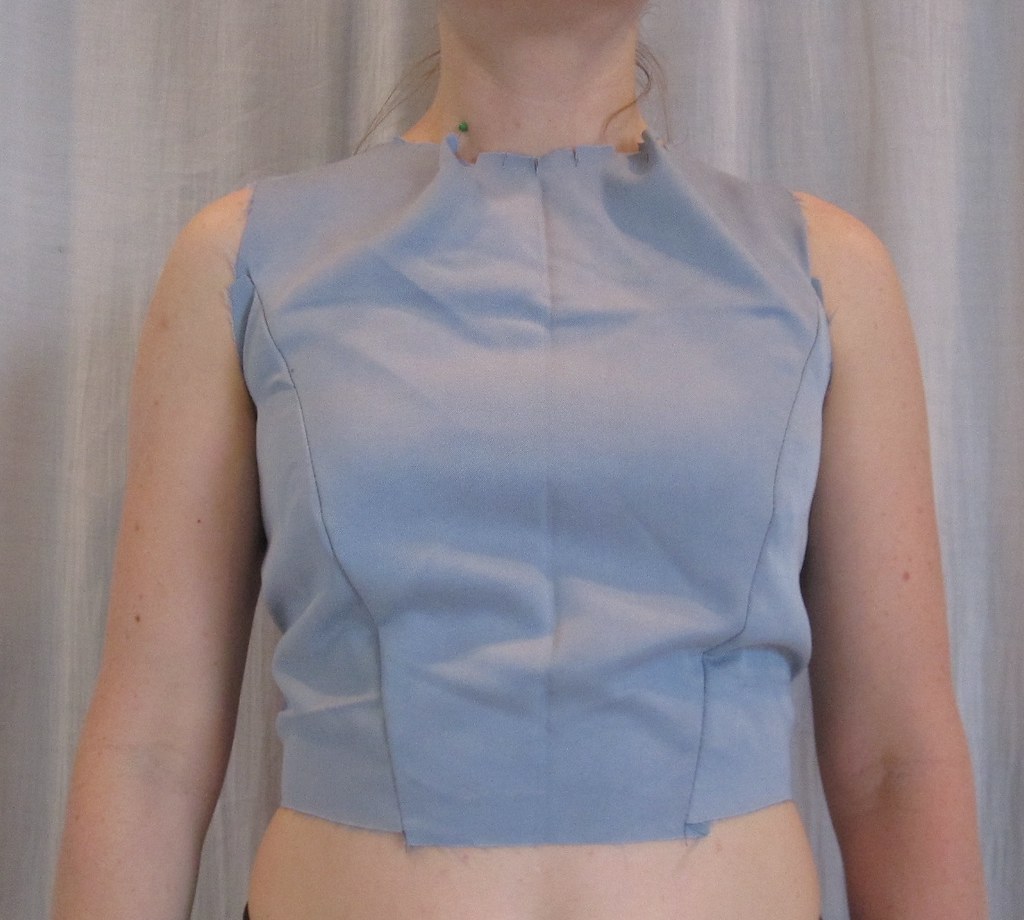
Muslin 1 Front
I knew to expect the neckline to be too wide, both from the photos in the magazine and from the reviews on Pattern Review. I'm not really sure why Burda does this. I made a dress several years ago (never got around to reviewing it) that had the same problem. Looking back at the magazine photo I could see that's how the dress was drafted? I honestly don't know if it's a drafting error or a design feature. I'm not sure in what universe a gaping neckline is a design feature, but I think it's clear that none of us live in Burda's universe.
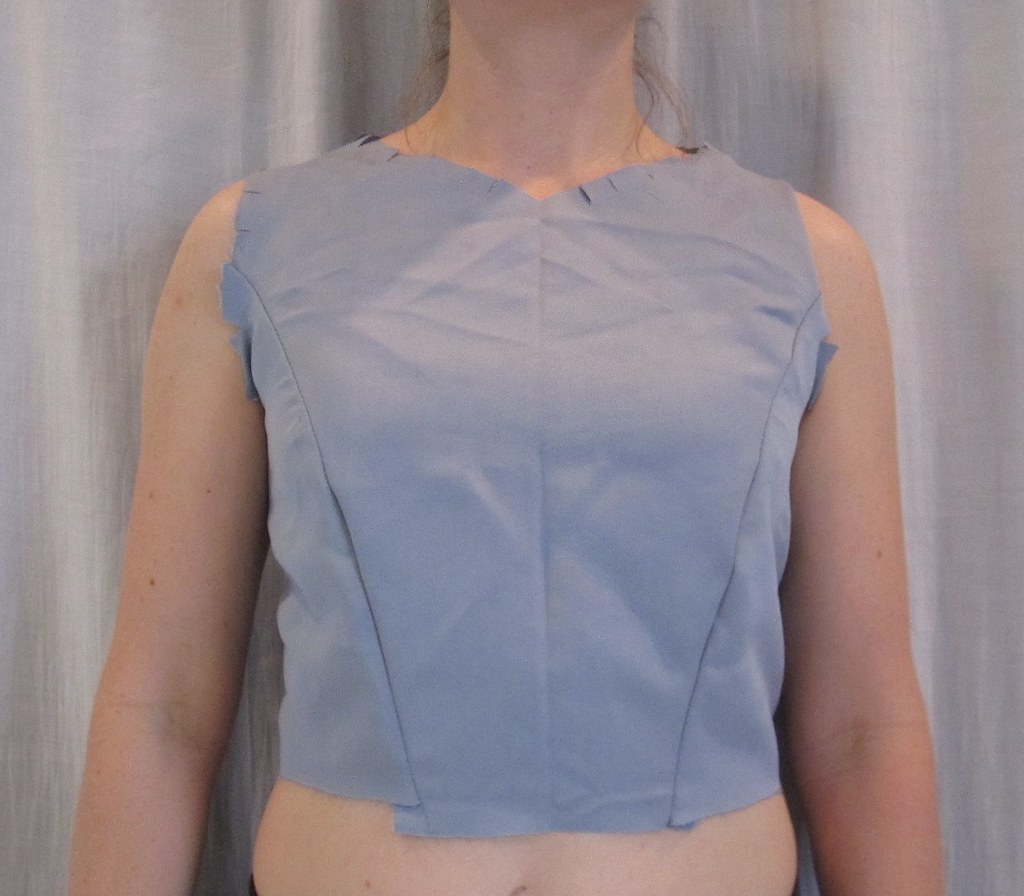
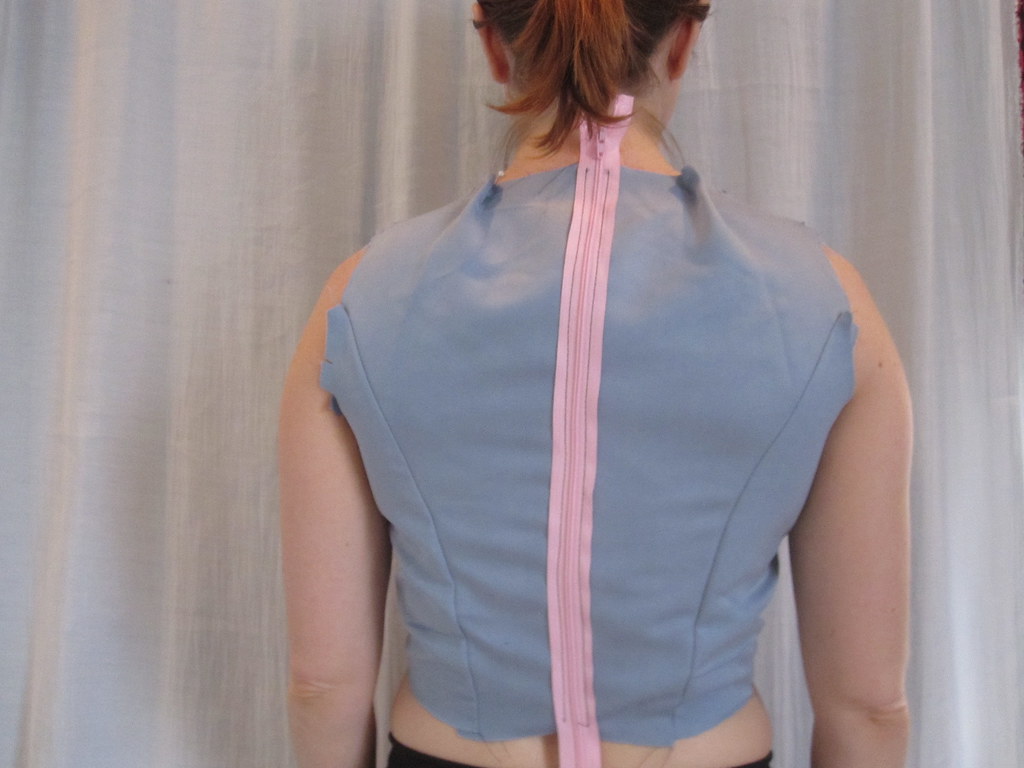
Muslin 1 Back


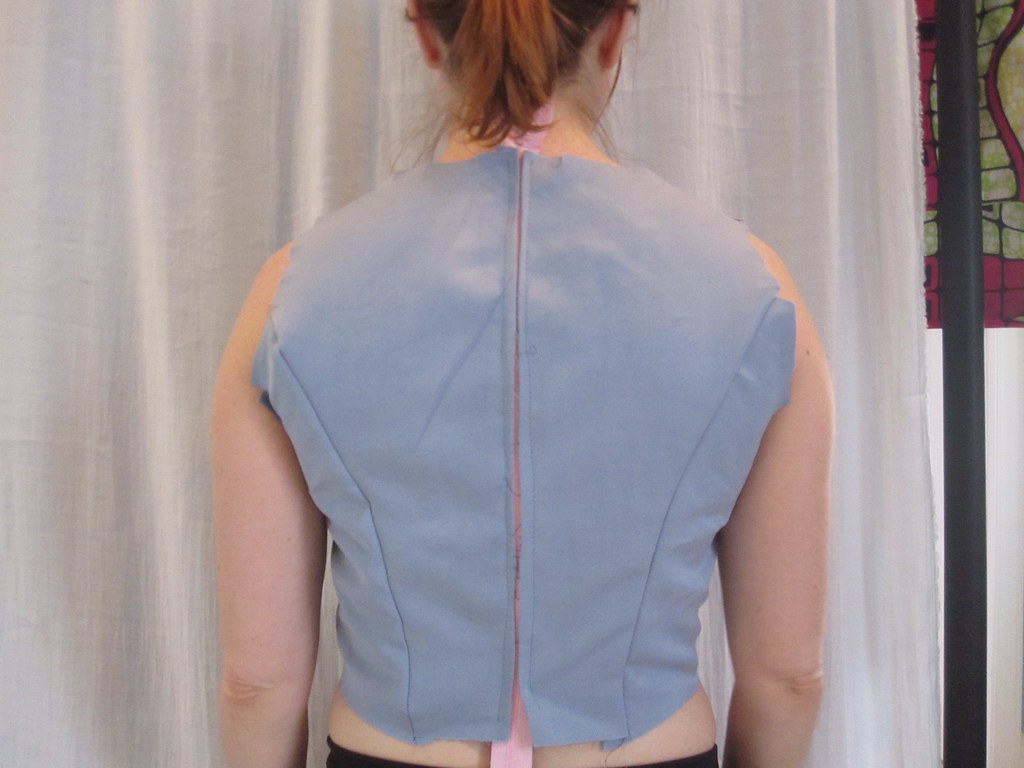
I also found I needed just a touch more room in the upper back.  It's not totally evident in the photo, but it was pretty tight across the latissimus with some impeded movement.  A Broad Back Adjustment is normal for me so I expected it.

The back neckline was just as gapey as the front.


Widen Shoulder Straps/Narrow Neckline v.2


Here you can see where I have redrawn the shoulder straps closer into the neckline--I simply moved the shoulder straps inward.


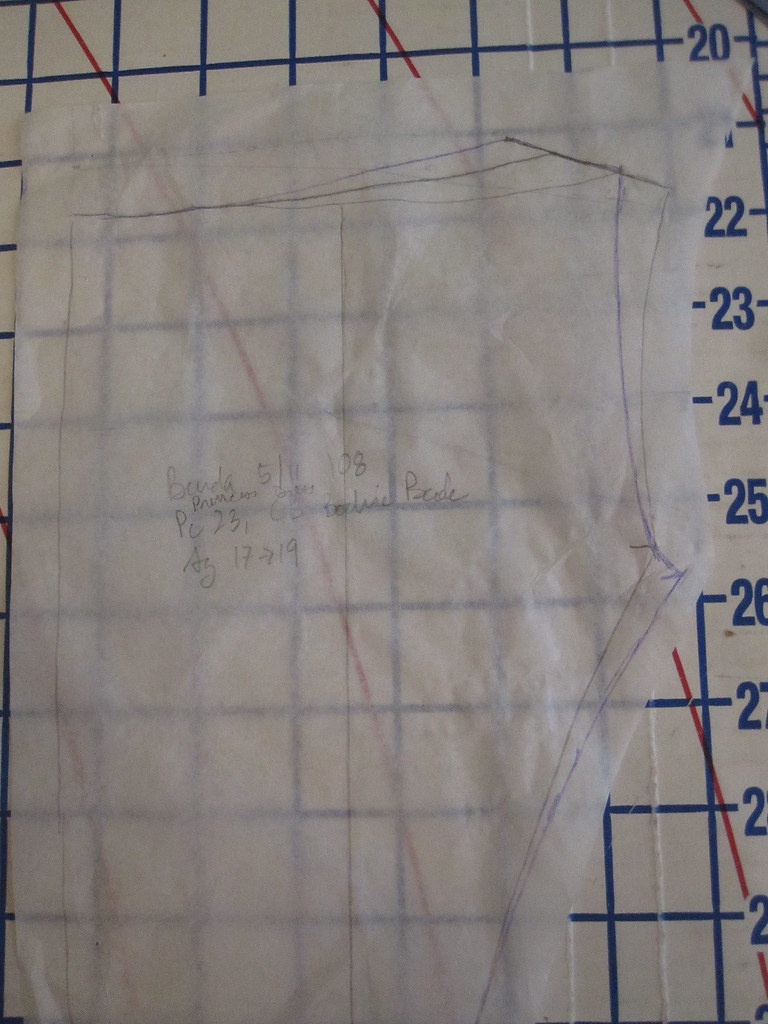
You can also see my Broad Back Adjustment on the upper back piece, extending from the armscye.


Broad Back Adjustment and Add to Side Seams


  Here you can see my Broad Back Adjustment on the side piece. I added a little width to the side panel at the top of the back seam.

I also added to the side seams on both the bodice and skirt, but in fitting the actual dress ended up taking that width out.  My muslin fabric was more tightly woven than the fashion fabric, and adding the skirt may have made a difference in fit.


Muslin 2 Front


Here is Muslin 2, much improved!  I found the front neckline still a little bit gapey, which is not evident in the photo because I am standing up unnaturally straight.

Muslin 2 Back


Lower Neckline


The back is much more comfortable with the added room.  The pull lines you could see a little bit of in the first muslin are gone.

The back neckline looks good, too.  No more gaping.  (Why, Burda, why?)


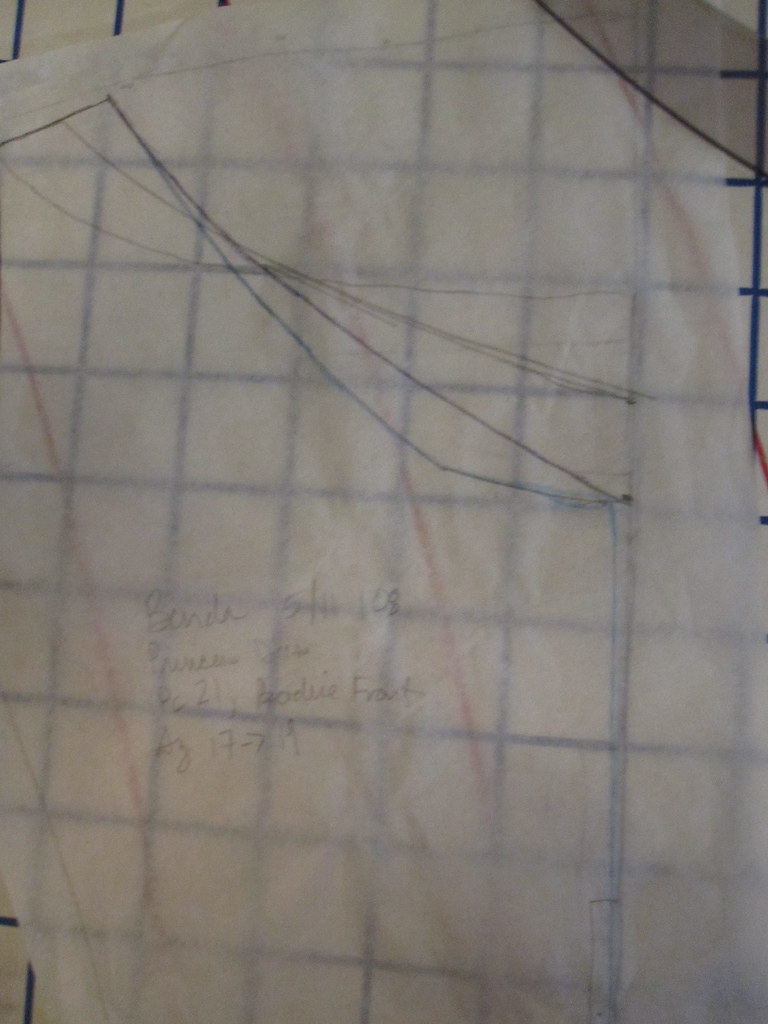
In addition to narrowing the front neckline just a little bit more (you can see the three lines in the photo at left--I ended up narrowing the neckline by over 1 inch).

I also lowered the neckline. A high neckline is just not flattering on my short, flat-chested self. The neckline is lowered two inches from its original draft.

Now it was time to undertake the truly arduous process of cutting the fabric.  What's worse than stripes?  Zigzag stripes.  Worse than plaid, even.


All photos are here.  You can read about how I lined the bodice here and construction details of the real dress here.  The pattern review is here.