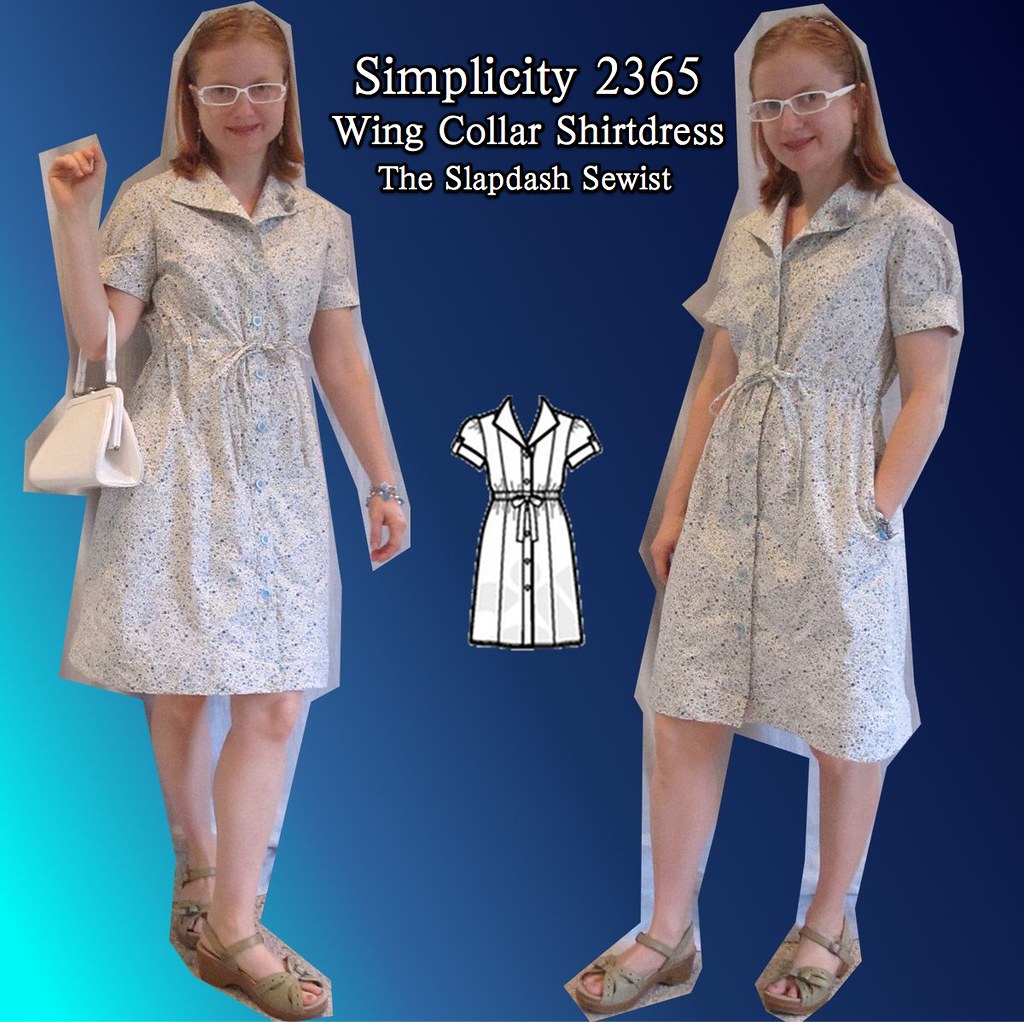
I bought this pattern, Simplicity 2365, sometime last year, I think. Shirtdresses have been popular the past few years, but I find dresses tricky to fit without a waist seam (see, e.g., Burda 10-2011-123). However, this one works as one piece because it is not fully fitted, while the empire drawstring gives it some shaping so it's not a sack.
I also really like the collar. Incidentally, what do you call this kind of collar? Google-searching indicated wing collar or revers, but for all Google's knowledge I haven't found it to be overly smart about fashion technicalities.
The pattern includes another variation, a more traditional tunic with pintucking, which has been very popular.
To get a dress I added two inches to the tunic length (view C), but it was way too short. I didn't have much choice on this project because of limited fabric, but next time I would add 5-6 inches for ample length and hem allowance.


I started with broad back and small bust adjustments. LOVE a princess seam, man. So easy for bust adjustments. With the amount of ease in the dress, I'm not sure my SBA really made a difference but it makes me feel better.
The collar and placket are a single pattern piece--with a seam at center back--which is really nice design touch. Without a seam at the neck, the collar sits really nicely. I love that there is no bulk from the placket/collar intersection, which is the bane of my existence on standard blouses.

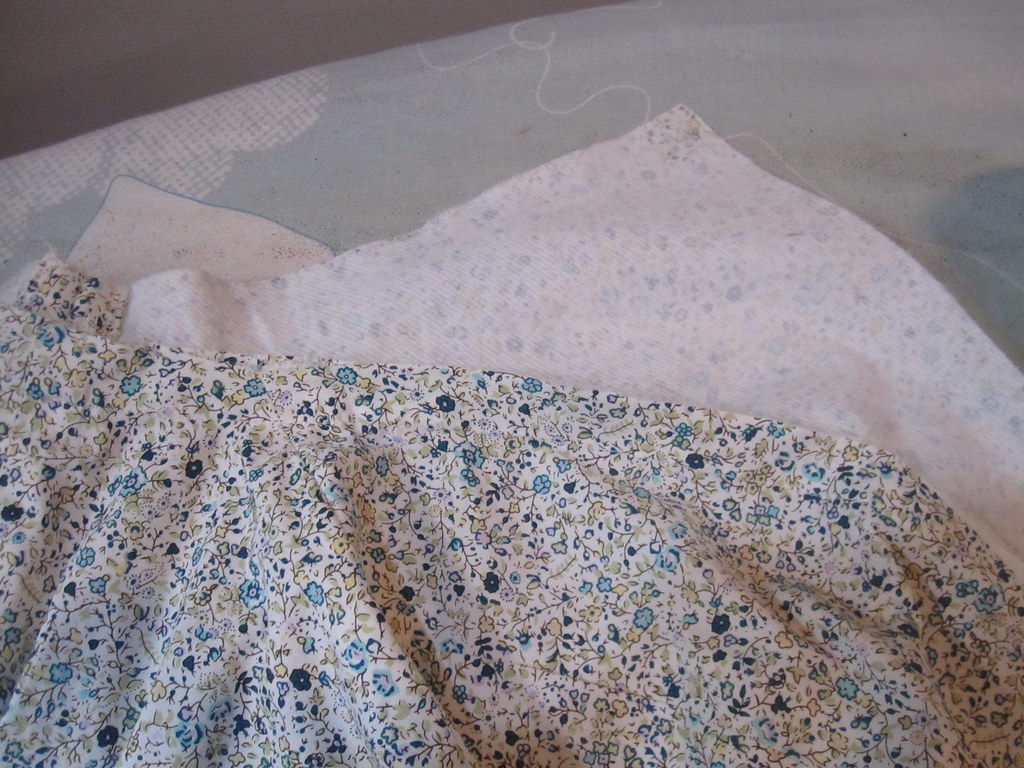
As per my usual procedure, to make things easier and allow for a machine finish I applied the collar/placket facing to the wrong side of the fabric first.

Next, I sewed the "outside" collar/placket to the facing (not really outside because the "inside" or facing collar/placket is folded out for the collar) along the outer edge of the facing.

Turn under the seam allowance of the outer collar/placket and pin in place.

Finally, I topstitched the turned under the seam allowance of the outer collar/placket close to the edge. Very easy, nice clean finish, no tedious hand-sewing or nerve-wracking topstitching from the top and hoping you've caught the folded seam allowance on the underside (as per the pattern instructions). With this print, the topstitching is fairly invisible.
I used some vintage buttons, which is always fun. I bought them at a Goodwill trunk show in 2009 for $1.99. They were made in Japan and originally cost 29 cents, but I have no idea what that means for the age. As it turns out, the buttons are pretty much decorative--with the drawstring untied I can just slip the dress over my head. I wouldn't have opened the buttonholes if I'd known that (and won't if I make this again). I realized after sewing the buttons on that they are very dusty inside, LOL. I never thought about it, but I suppose they have been sitting around for several decades and were bound to be a bit dusty! I hope the color doesn't look too different after they come out of the wash.

Since I was making a dress and not a top, I thought I would move the casing for the tie down about 1 1/2 inches, as I felt the marked height would have been too empire on a dress. However, when I got the dress try-onable I pinned a piece of elastic in place to test various heights and I ended up pretty much at the marked line.
The casing is applied along the inside at the marked placement line, not at a seam which is my preference. This was a little nerve-wracking for me because a straight line gives me the vapors. I think it is a little low in the back. Rather than use packaged bias tape, I just tore off a cross-grain strip of batiste--the bias function is not needed. Where the tie emerges next to the placket you sew a buttonhole.
I made my tie with two fabric pieces connected by about 3 inches of elastic in the center so I wouldn't have to yank the casing straight to put it on and take it off.

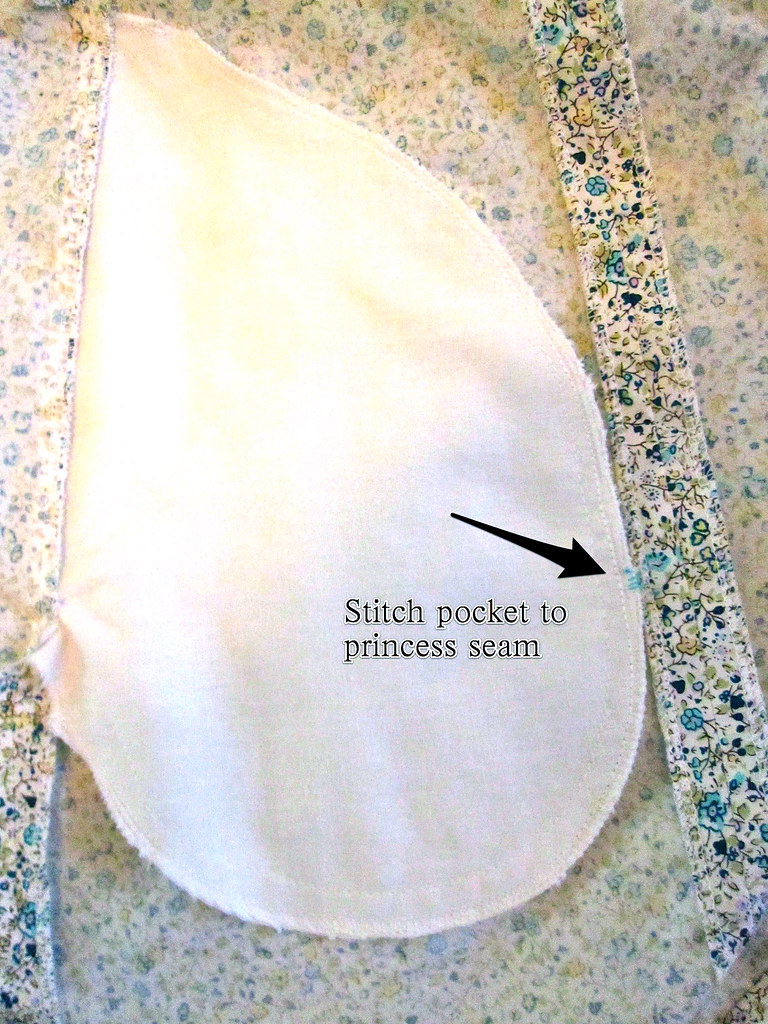
Also because it was a dress, it really seemed to need pockets. I did a little reorganizing recently and *finally* got around to putting up a cork board to holds frequently used patterns/elements in plastic sleeves, including a couple different pockets. I didn't have enough fabric to cut self pockets so I used cotton batiste. I should have thought to face the pocket pieces attached to the back with small scraps of the fashion fabric because the white fabric shows if the pocket pulls open. I solved this by tacking the pocket to the front princess seam to keep the pocket pulled toward the front. It works pretty well.
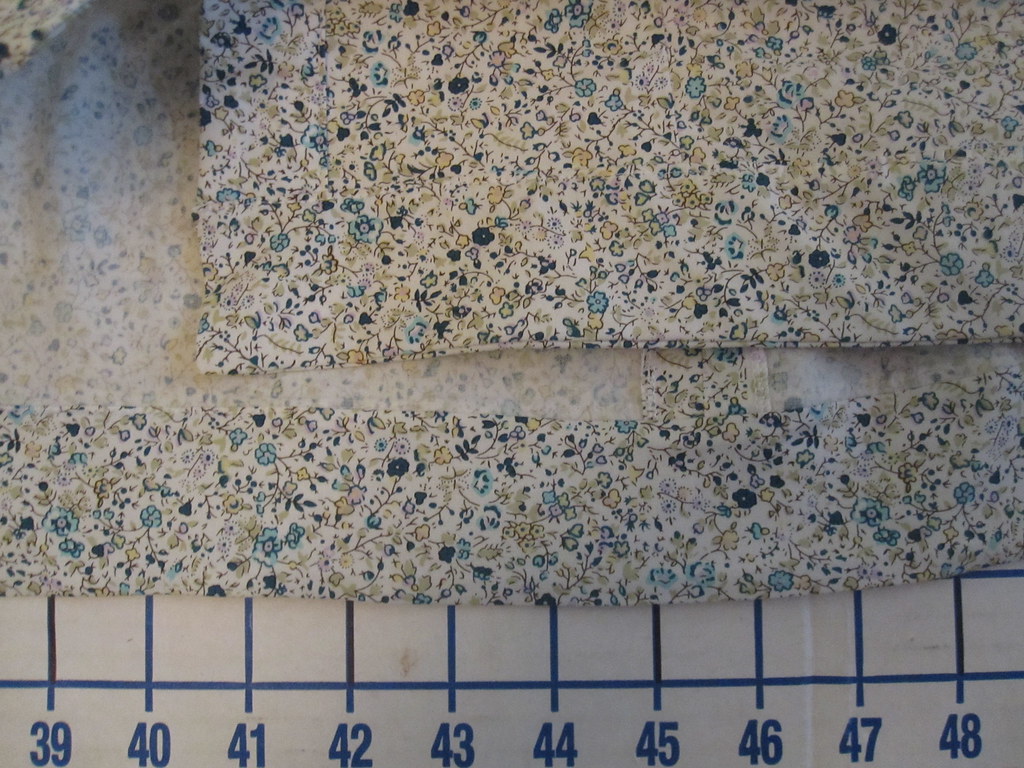
When the dress got try-on-able I realized it would be way, way short. I cut 3 inch wide strips of fabric from my scraps--and they were definitely scraps, as you can see by the pile of what I had left after cutting my hem strips!--and pieced them together. I debated possibly making a ruffle, but in the end decided to do a simple faced hem band, using the same inside-to-wrong-side-first method described above for the placket/collar.

In the end, I actually could have done a 1 1/2 inch hem band instead of 2 1/2 inches, as the dress could be slightly shorter, but eh. I am sort of prudish about hemlines for work. I'm comfortable with right at the top of the knee; any higher and I think about it all day, wondering if I've gone too short.
For instance, I don't wear my Burda 02-2009-124 lace dress very often because I feel that it is a whisper too short--only about 3/4 of an inch, best seen in this photo, but enough to make me worry that I am lacking propriety. (BTW, I did go back and fix the zipper, trimming the lace to the edge of the finished zipper edge and hand-stitching it in place so there is only one layer of lace there.)

I used the faux hem band gathered sleeve variation described here (hand-stitching to the gathered seam instead of stitching in the ditch). I am really happy with the way it looks on this dress. It is a nice complement to the feminine style and so much more interesting than a plain sleeve! Though in Simplicity's defense, there is a drafted short sleeve with a cuff and tab detail that is more fun than a plain sleeve.


I bought this fabric nearly four years ago from Chic Fabrics in New York ($5/yd). The print is in my colors and I couldn't leave it there, but it took a while for these little Liberty-style florals to come into fashion.
I had considered various projects through the years but nothing really grabbed me until now. I think I aged it just the right amount. `-)
This pattern turned out just as well as I'd hoped. I really love the collar and it is a great place to showcase this brooch from my mom. I can definitely see making it again with long sleeves as a winter blouse.
All photos are here and the pattern review is here.


.jpg)


32 comments:
That is a super-cute! Well done.
It looks great! I like that sort of collar as well. I think it frames the face nicely.
Love it! I need to pull that one out and make it. Thanks for the inspiration!
I have some cotton with small flowers on it that I am considering making into Burda's Style's new shirt waist dress in the June issue.
So your dress is timely! I do like your dress and the ditsy little print seems to work. Hmmm, I think I am becoming emboldened here!
Good idea tacking the pocket down. Always so annoying when they flap around.
This is super cute on you! It also looks like a comfy and simple dress that I would enjoy wearing - must try it soon :o)
It looks great! I love the sleeves and the collar. It looks like it will be the perfect dress to wear the rest of spring and into summer.
It looks great on you and I want to know that collar is called as well.
It looks like a great dress for the heat and humidity of a Washington summer.
I just got an email from Hot Patterns and that DVF top you kocked off? They have a new pattern out doing their own knockoff of it.
Really cute dress! The fabric looks eerily familiar, like I might have the same print in my stash. Is that even possible?
Adorable! I made one similar for my teen last spring. Before I put in the waistband, it seriously looked like one of my mom's old house dresses. That print is sweet!
Thanks for the details on the sleeves in this and the earlier post, very helpful. And the final dress is very cute! Great shoes too. I also wanted to let you know that I nominated you for a Liebster Award over on my blog. I don't know if you "do" awards or not, and it's totally fine if you don't, but I thought you might like to know that I linked to you and that I love your blog. :-)
Oh! My husband has used the word "revers" to describe certain collars and when I saw the title of your post I immediately thought "revers" although I'm not sure why. I'll ask if he knows more - he's had a lot of custom suits and shirts over the years and has a better knowledge of tailor-speak than me.
Very cute btw - I bet you'll reach for it on really hot humid days.
This looks like the perfect cute, cool dress for summer! :-)
An absolutely stunning little cool summer dress.
Now I want a new summer dress! I love the print, even thought I am usually drawn to giant flowers.
Adorable! And perfect for summer!
What a nice shirtdress! I love shirtdresses for summer.I have a top with the same type of collar which I love. The drawstring waist is perfect to add shaping.
Super cute dress. You've done an amazing job.
So cute. I love the sleeve cuff detail.
The collar is awesome! And while I was dubious about the sleeve on your previous post, you've won me over in the final garment--I really like how the fullness is just at the bottom--it really strikes a balance of being interesting without being too sweet from loads of overgathering in the sleeve head and all the way around the band like you often see in patterns.
I have the same issue as you with no waist seam dresses being kind of irritating to deal with. Do you have any patterns in your arsenal that are in this kind of shirtdress sort of style with waist seams?
That is an adorable dress! How did I miss this pattern? The color is very cool, and it has just the right amount of sweetness mixed with sass!
Great dress, as usual! Thanks for the tip about the elastic in the center of the drawstring - that's absolutely brilliant, I'll have to remember it when I get around to making the McCall's shirtdress-with-drawstring I've had in the queue for forever.
Love this style on you. Very cute for the figure. I can't believe how tame the fabric is. Kinda shocking! ha ha
very sweet dress!
That's a lovely dress for the warmer weather. I think your sleeve modifications look great.
Off topic - Hot Patterns has a new pattern, Riviera Blouse, that reminds me of that DVF blouse you were trying to make.
So pretty and summery-I like your sleeves
Cute dress. I just looked up the style of collar in Metric Pattern Cutting for Women's Wear by Winifred Aldrich and surprise, surprise it's called a Wing Collar!
Not a wing collar. A wing collar is mounted on a collar stand or band. I think this is merely a variation on a shawl collar -- I reference Kathleen
Fasanella at Fashion-Incubator on Oct. 13 of 2008. I've several favorite blouse patterns that use this feature. One (a long-out-of-print McCall's) is shaped by a fish-eye dart at the shoulder seam, to curve the collar and roll it down gracefully around the neck. One (a still-in-print New Look 6598) mounts the upper collar over a two-piece undercollar to achieve this effect. Pattern Review starts off with two "would not recommend" and two "would highly recommend" reviews. First time I made it was an epic fail. After that, I read the instructions ... duh. Now it is a go-to for me, so much so that I bought several copies in case my original goes missing. It makes a marvelous dress. I will SO copy the drawstring waist detail for the next time I make it.
What a perfect match of pattern and fabric. I love the tiny floral print and the sleeves turned out fantastic.
This dress is so cute, and it looks SO COMFORTABLE. I have a vintage pattern for a shirt dress that I'm aching to make, but have yet to find the time. I also have a similarly patterned fabric in green and purple that is slated for a blouse with a similar collar. Your dress is inspiring to the power of three!! (now look who has the vapours) Also, I appreciate the sleeve tutorial. I like the way it makes the sleeve hem wing out a little.
I really love this one. I'm a sucker for small florals and the style is so cute. Hmmm...I might have to steal your idea for keeping frequently used pattern element templates in a convenient spot. That would work better than digging around in pattern envelopes.
Post a Comment