Friday, November 9, 2012

Stashoholism Confessional: 7 Month Itch Edition

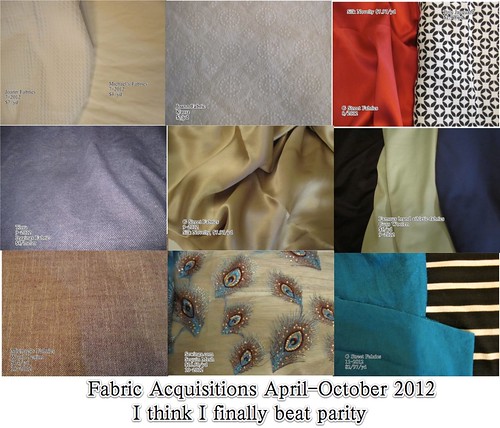
Fabric Acquisitions April-October 2012

So, you may recall that I decided to go on a Fabric Fast for Lent this year, which I promptly broke the first week due to the seductive powers of Fabric Mart.

I stayed faithful through the remainder of Lent, and threw in another week to atone for my sins.  Then I kept going.  I didn't buy any fabric until July, at which point I bought fabric for my white A line skirt.  I feel that I have somewhat learned my lesson in fabric buying, because I first bought online from Michael's Fabrics, which had a cotton/linen blend for an incredible $4.99/yd.  I know this was in July because I lost my wallet on 4th of July and I still didn't have a replacement credit card, so I had to get the boyfriend to order it for me.  When it arrived, dangit!, it was winter white, not white.  It also didn't come through the pre-wash very well and it's quite thick/heavy, like a denim weight.

I mostly stuck with in-person buying after that.  I kept my buying sparse, trying to purchase only for wardrobe holes.  For instance, the red silk is to replace this one, whose sleeves I just never loved.  The taupe silk is for a silk half-slip.  The black and white geometric is for (another) A line skirt--I got rid of my black and white plaid skirt several years ago and occasionally miss having a b&w skirt.

The gorgeous wool denim from Michael's fabrics on the lower left will be a sheath dress.  I realized I would really like more non-print sheath dresses for work.  So easy to wear and accessorize and yet instantly professional.
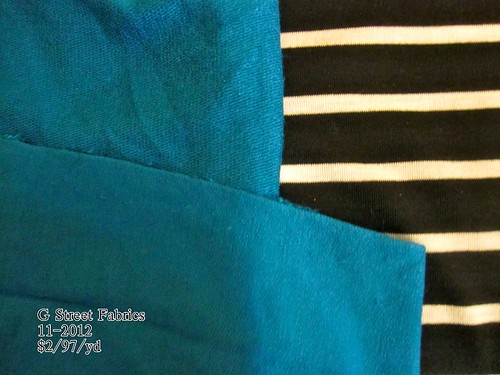
G Street 11-2012

The two knits on the right are for long-sleeve tees.  I have pasted the larger picture above to ask if the turquoise on the left is French terry?  People talk about French terry but I honestly have no idea what it is.  This is a very stretchy knit, fairly heavy weight.  One side is smooth like a jersey knit, the other side almost looks like a sweater knit.  Unfortunately, it didn't wash too well--it has parched desert "crack" marks all over it, the way you sometimes see on rayon knits (though it doesn't feel or burn like rayon).  They are worse on the sweaterknit looking side, so I will be using the smooth side as the outside.

I will admit there is a folly in there. I fell in love with that peacock feather sequined mesh at sewings.com and had to have it.  I have no real idea for it other than a simple skirt.  But I loved it so much online, and I love it just as much in person.

I think for the first time ever I am below parity in my fabric buying, counting the number of pieces of fabric purchased for 2012 against the number of garments sewn (which is not a 1:1 yardage correlation, but is an easy rough calculation).

How better to celebrate than to blow that streak in a fantastical fabric buying spree?  Nikki organized a trip to FabricMart earlier this year, but it was on a Wednesday and I just couldn't take the day off.  Cidell and I are taking our own field trip on Monday since we have the Veteran's Day holiday.  I am so excited.  I just can't even tell you.  Comment here or on her post if you want to meet up with us!

And then next week I will be in NYC for work.  I haven't quite figured out when I'll go fabric shopping, but there will be Garment District visiting.  I will be free for dinner on Thursday night (November 15) if anyone would like to keep me company.

And then I will go back to being parsimonious and puritanical in my buying, and sew like hell to make more room!

Wednesday, November 7, 2012

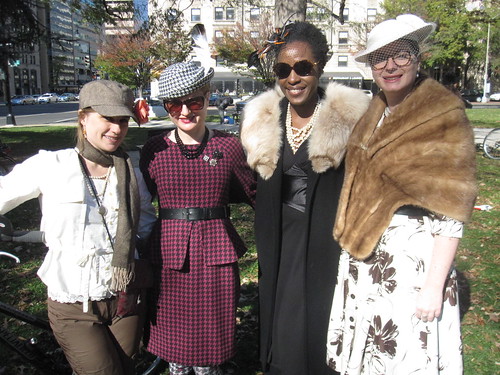
Tweed Ride 2012: Triple Houndstooth

The Girls


Riding on R St


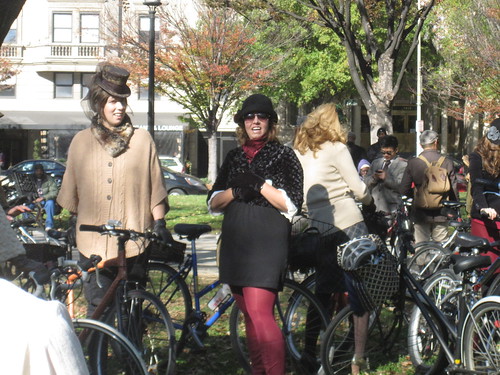
Sunday was the Tweed Ride, and of course we were on it!  Nothing is more fun than dressing up retro and riding around town.  Here is the crowd riding about a block from my house.  I admit that we peeled off here--we had to get ready for the party.

Crowd


 We started off in Franklin Square in downtown DC.  Everyone was in their finest and there was a lot of inspiration to be had.

 I have never been into the tiny top hat for women, until I saw this woman's hat.  Love it!  I think the scale is just perfect--not so small as to be entirely twee, but not so full-sized so that it loses its sauciness.


Cidell and Liz License Plates


Cidell and Liz got custom Maryland license plates for their bikes. I was pretty jealous and think I might need a DC one. I just can't decide what to put on it! Any ideas?


The Look


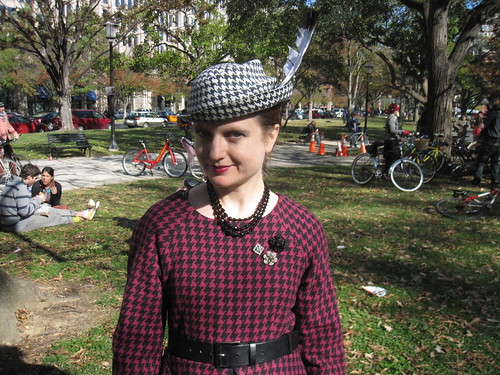
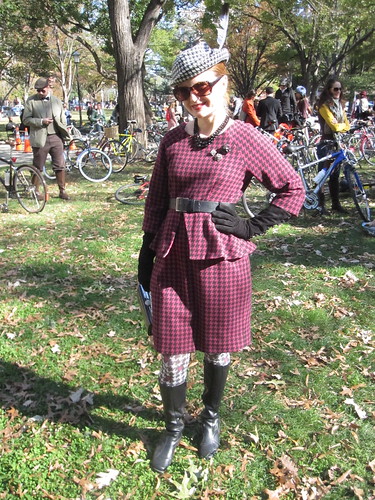
I had a lot of fun putting together my look.  I spent the 10 days before the ride working on two different hats, and couldn't decide which way to go.  In the end, I figured that the chance for triple houndstooth (hat, dress, and tights) does not arise very often and must be seized upon.


The dress is Butterick 5520, out of a nice thick wool that kept me warm despite the chilly day..


Front Closeup


I am quite proud of my hat.  Judging by the prices for hand-blocked felt hats on Etsy (though they don't seem to have many sales) I feel that I have now *almost* justified the hundreds of dollars I have spent on millinery supplies and a class over the years.


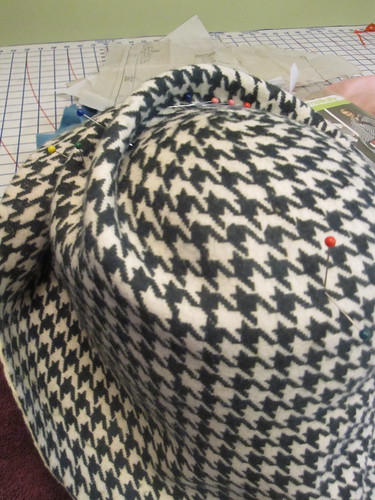
Molding on Headform


I bought a vintage wooden head form on Etsy last year and spent many hours sanding it down to my freakishly small head size.

After looking at tutorials on blogs and YouTube (tutorials and inspiration photos are on my Hats Pinterest board), I wet and steamed the felt hood.  I started out with the idea of doing a pillbox hot, and used my metal form for that (the linked photo gives you more of an idea of what the hood started out looking like, I didn't think to take a flat photo).  But it just didn't look right.

So I wetted and steamed it again and started over.  The hood was very thick and a little difficult to shape, so I kept it fairly simple.

The Look


All my Tweed Ride photos are here and the sewing/hatmaking relevant photos are here.

As I mentioned, I was working on another hat simultaneously.  I decided it was too great not to get *some* exposure, so I did a costume change before the party.  It also involved a new blouse and revitalized skirt, so stay tuned...

Wednesday, October 31, 2012

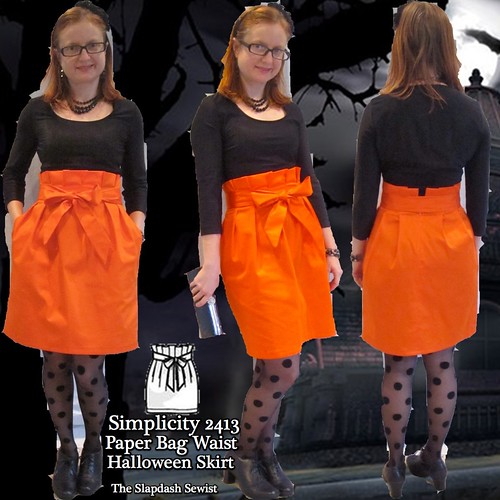
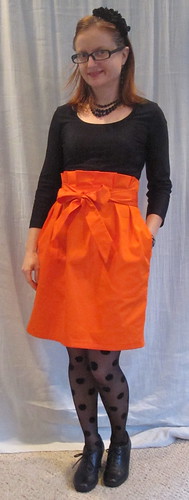
Happy Halloween! Simplicity 2413, Paper Bag Waist Skirt

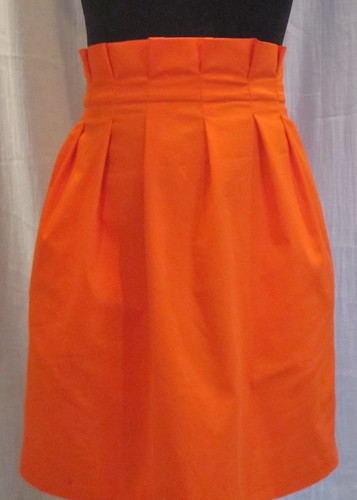
S2413 Paper Bag Skirt Thumbnail

My work was closed due to Hurricane Sandy so I had some unexpected sewing time.  A bonus, unplanned item seemed the way to go.  I sort of fondled my stash for a bit and ran across this crazy fluorescent neon safety orange sateen.  I purchased it from Fabric Mart a couple years ago for $1/yd to be the trim for my Butterick 5315 piped shirtdress but I ended up using tie silk for that project instead.  I was wavering whether to put it into the giveaway pile or make it into a Halloween skirt.  Halloween won.  I love Halloween, but there is just nowhere for a grown adult to dress up in a costume and go someplace non-horrible.  It makes me sad that I've had to give it up.  This lets me celebrate a little.

I went digging through my skirt patterns and found Simplicity 2413.  I made the pleated skirt last year in silk organza, and had made a mental note at the time to try the paper bag skirt.  A bright orange skirt shaped like a pumpkin--what could go wrong?

Stitch Edge Above Zipper

Both the front and back are meant to be cut on the fold; however, I always prefer a center back zip.  The pattern has good instructions for doing a side seam pocket with a side zip, if you prefer to make it as drafted.  I sewed the side seams and then the zip before making the waist pleats, for easy fitting.

Paper Bag Overhang

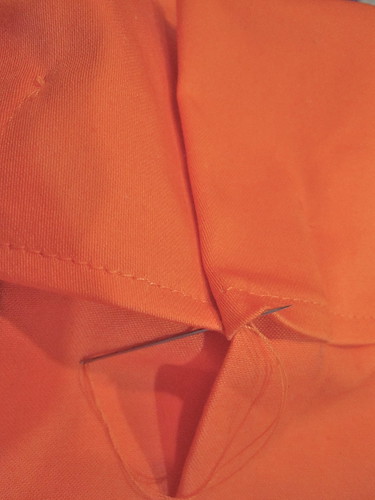
As drafted, the zip is supposed to go up to the facing self-fold line.  However, my zipper wasn't long enough for that, and I kind of liked the idea of having the paper bag portion of the waist open above the zipper, so I put the zipper stop at the waistline, letting the entire self-facing and above-waist paper bag overhang.

To get a nice finish I folded the facing right sides together and stitched above the zipper.  When turned right side out, it has a clean finish.  To keep the upper edges of the zipper in place I took a few hand stitches, catching the zipper tape.


Wrinkling at skirt waist

I turned under the upper edge of the self-facing so it would look nicer on the inside, but this created a wrinkled mess on the outside at the waist.  This has to be worn with a belt or the sash.


I cut an 8 at the waist, transitioning to a 12 at the hip.  I ended up taking the back pleats slightly larger than marked so it was probably more like a 6 or slightly smaller, so I think this runs a bit large.

Tack Pleat


To keep the pleats facing the right direction, the instructions want you to topstitch all the way around the waist.  I wasn't keen on adding another element to the already unsightly waist, so I hand-tacked the pleats to the facing.

Side


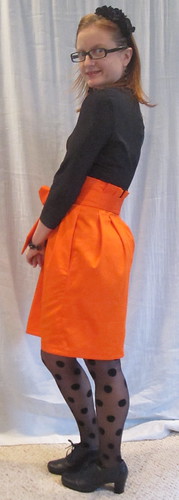
The instructions have you press the front pleats toward the sides (radiating out from the center) and continue the back pleats in the same direction, toward CB.  Well, as you can see that looks pretty terrible.  After seeing these photos I changed the back pleats to be pressed toward the sides as well and I think it is an improvement.

The skirt can be made with or without a hem band.  Without a band it is very short:  16 inches.  In cutting, I lengthened it by 6 inches.  I cut off two inches in hemming, so next time I'll add 4 inches.


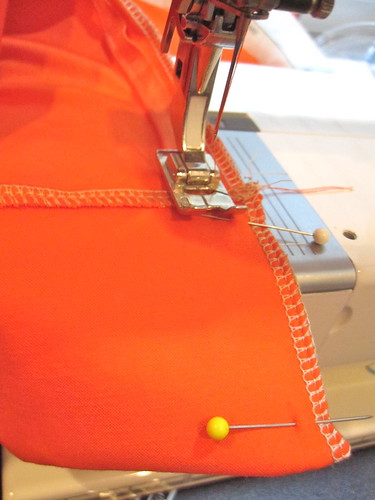
Machine Blind Hem

Because I was lengthening it, it is not as pegged as drafted.  I went down to the drafted hem width at my 6 inches, but since it ended up being shorter than that I lost some of the pegged shape.  That was fine with me, however.  I wanted more leg room for walking and I can even ride a bike in this skirt, as the sateen has some stretch.

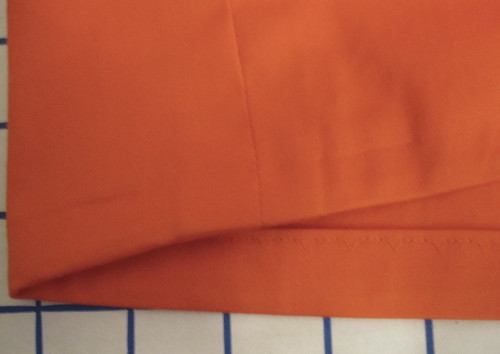
I hemmed it with a machine blind stitch, using about a 1 1/4 inch hem allowance.

Front
Front, One Pocket


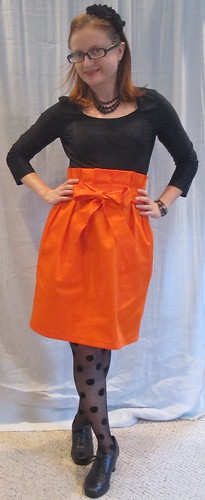
This skirt ended up so much cuter than I expected!  The pockets are a little iffy, especially in this robust fabric, but the overall shape and the paper bag detail are surprisingly flattering and also fun to wear.  I'm even wondering if this could be more than a once a year novelty skirt (styled with gray instead of black).  I'll keep this pattern in mind for the future.

All photos are here and the pattern review is here.

How are you celebrating Halloween?

Tuesday, October 30, 2012

Travel Togs for Portugal: A Line Skirt and Waterfall Cardi

Thank you all for the lovely comments on my photos from Portugal!  It really is a wonderful place to visit.  I highly recommend it.

Since making my biking/travel wardrobe for The Netherlands, I've pretty much been set on travel clothes.  For that trip, I made 6 tops out of solid-colored wicking fabric and added 3 print skirts to my already broad repertoire.  Throw in a dress or two and you've got two weeks worth of outfits that you might not even get sick of.  However, for Portugal the weather was likely to be a little cooler than my sleeveless tops and summer skirts would work for, and plus I always need an excuse to do some sewing!

I made four new items and in writing about them I realized that all of them are TNTs, or at least based on a TNT.  Am I getting boring?  I hope not.  I think it's that with 275 pattern reviews (plus all the patterns sewn before I discovered PR and those I haven't gotten around to reviewing), I've got a lot of bases covered.  I'm also getting better at adapting patterns I already know that go together nicely and fit well rather than having to start over each time.

====================

Bronze Skirt Front

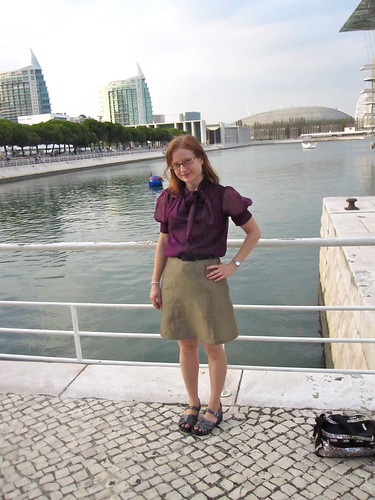
The skirts I made for The Netherlands are mostly cotton, which sometimes doesn't interact well with tights, so I wanted a more tights-oriented skirt.  I turned to--what else--TNT A line skirt Simplicity 2211.  This is a recent addition to my lexicon, as I only made it for the first time over the summer.  I've now made it 4 times, and this certainly isn't the last.

I used a bronze silk dupioni I bought in NYC several years ago.  It was intended for another project but I kept using bits of it here and there and finally there wasn't enough for the original plan.  Also, I am (as ever) working on Too Good to Use.  Sometimes having a plan for something makes it TGTU.  If I really cared about the planned project, it would have been made sometime in the last four years.  It wasn't.  Better to make it into something I will wear than continue to "save" the fabric indefinitely.

The challenge with this was choosing the right side and then keeping all the piece straight.  I tore little pieces of tissue paper, marked them with CF, SF, SB, and CB and then pinned them on the wrong side of the respective pieces.

Faux Hong Kong Finish
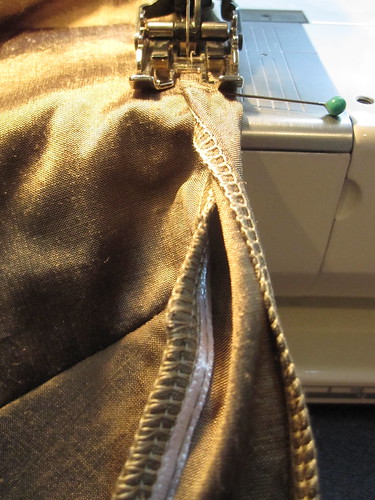
To add body to the dupioni, I underlined in silk organza using the faux Hong Kong finish technique, as described here.  You cut the underlining 1.5 inches wider than the fashion fabric, line up the cut vertical edges and sew right sides together (so the underlining is kind of bulging over the fashion fabric), then turn it right-side out, letting the underlining roll over to cover the seam allowances.  It creates such a high-end looking finish!

Hand Hem


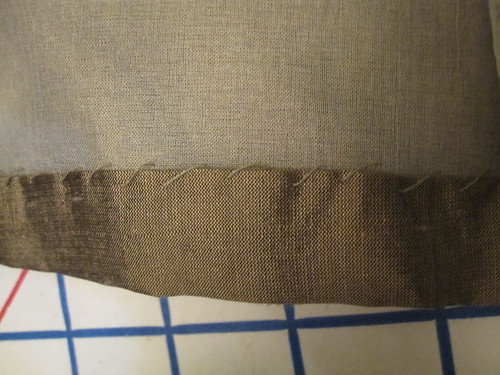
To complete the high-end look, I put in a hand hem.  I don't usually do hems by hand.  The machine blind stitch is truly nicer than anything I've ever achieved by hand.  But here I was able to sew the hem allowance only to the underlining, for a completely invisible hem.

Stitching Waist Binding


The waist is bound with a straight-grain strip of fabric.  I sewed it first to the wrong side, stitching a ribbon in place as I sewed on the binding to ensure the waist would remain stable.  Then I folded it over to the right side and topstitched, using my walking foot to ensure even feed.  I left a tab overlapping the zipper opening, and sewed in a snap for closing.  I find snaps more secure than hooks-and-eyes.

Bronze Skirt Side


This still isn't a great skirt for sitting in; the dupioni wrinkles like crazy despite the underlining.  So I think I only wore it twice, on the days we didn't take any train rides.  It is gorgeous, though, and I felt very luxe in this 100% silk outfit.  The blouse is McCall 5708 made out of Vera Wang silk from that Fabric.com $1.99/yd blowout a couple years ago.  The photos were taken near the Oceanario (aquarium) in Lisbon.

All photos for S2211 are here.


====================

Blue Wool Cardi Front

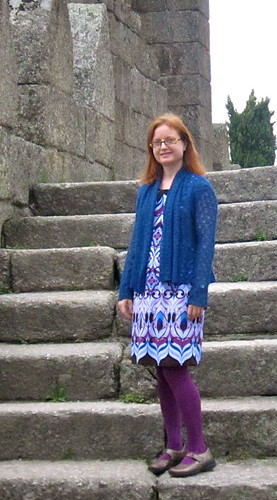
I made use of my waterfall cardigan t-shirt variation pattern right away for this gorgeous wool sweaterknit I bought in New York last Fall.  It was $10/yd and I only bought one yard, thinking I'd make a pullover sweater (aka long-sleeve t-shirt).  To get the waterfall cardigan out of it, I had to cut the sleeves on the crossgrain.  Before doing so I tested the fabric and it appeared to have stretch.


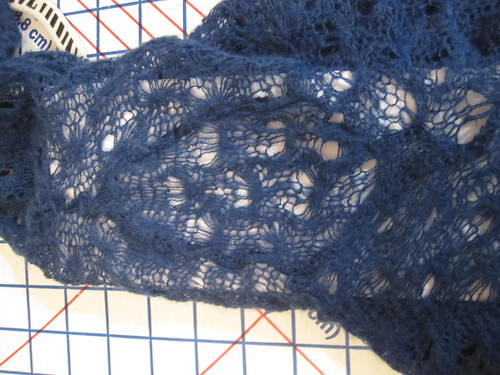
Well, clearly my stretch test was not sufficiently rigorous because I could barely pull the sweater on, the sleeves were so tight.  Dang it!  Stupid, stupid mistake.  I contemplated it and then found scraps large enough to add gussets under each arm.  I carefully cut away the serged seams as narrowly as possible, and then added diamond-shaped patches (you can see them in the photo if you look carefully).

Underarm Gusset


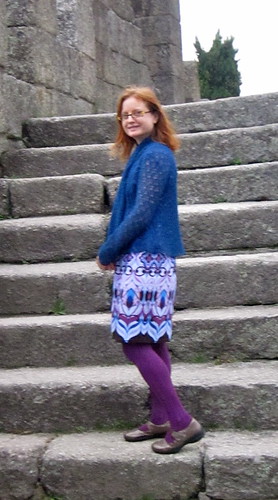
I should have made the gussets extend longer on the arms, all the way to the elbow, but the sweater is wearable now.  It is surprisingly warm, even with the lacy pattern.  I am wearing it here with Butterick 5382 in the fabric gifted to me by Marji.

Blue Wool Cardi Side


Please excuse my appearance.  It looks like I forgot to put on lipstick that day.  Also, I look a little bit like I'm upset but I was actually having a lot of fun!  These photos were taken in the Castelo in Guimaraes.  It's an 11th century (? as I recall) ruin that has been rebuilt enough to be safe to scramble around in.  It is free to enter and you can climb up and down the walls and staircases.

While we were there some students were having some sort of initiation ceremony, it looked like.  Students in Portugal wear capes or robes, so three girls flowed by in their long robes, climbed a staircase, and called something out from the top of the walls.  The initiates down below, wearing street clothes and straw hats, had to shout something in response, dance a jig, do pushups, and generally carry on.  It was so fun--I felt like I was at Hogwarts!

All photos for the waterfall cardi are here.

=================

All is well with me through Hurricane Sandy.  We got a lot of rain and wind, but I have power and my roof didn't leak.  Those of you still dealing with it, take care and my fingers are crossed you get off as easy as I did.


Thursday, October 25, 2012

Back from Portugal!

Guimaraes Logo with Buttons

Back from vacation, back to real life.  Le sigh.  I have been back for more than a week but you know how it is to readjust (and the inevitable cold from flying).  Portugal was beautiful and easy to get around.  The people were all lovely and kindly spoke English.  I speak passable tourist-level French and Spanish and figured Portuguese wouldn't be too much of a stretch but, boy, was I wrong!  The spelling and grammar are similar, so I could read things well enough to get the gist, but the pronunciation is so different that I couldn't understand a word.

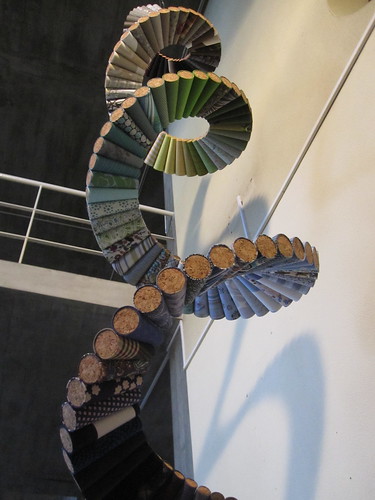
Textile decoration in Teleferico Station
We visited Lisbon, Porto, and Guimaraes, a small city about an hour from Porto.  Guimaraes was named European City of Culture for 2012, so it was a great year to visit.  A lot of money had been poured into it and has a lot of interesting history.  The button sculpture at the top is the Guimaraes 2012 logo, a G turned on its side so looks a bit like a heart.

Palacio Nacional, Sintra
I managed to encounter some interesting textile and fashion related stuff along the way.  The fabric sculpture at leftwas in the Teleferico station in Guimaraes (the sky gondola that takes you to the top of Mt. Penha).  The fabrics are arranged in the color of a rainbow, and there was also a flag garland.  Unexpected little piece of art!

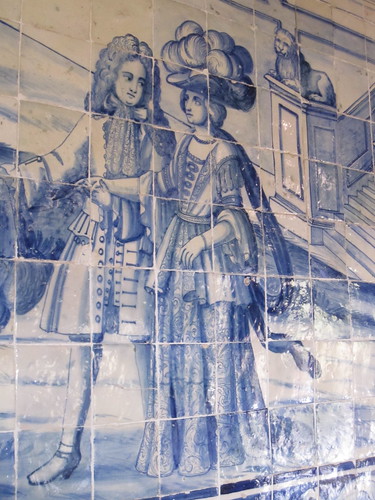
On the right is an azulejo, blue-painted tile, from the Palacio Nacional in Sintra.  I loved the woman's hat!

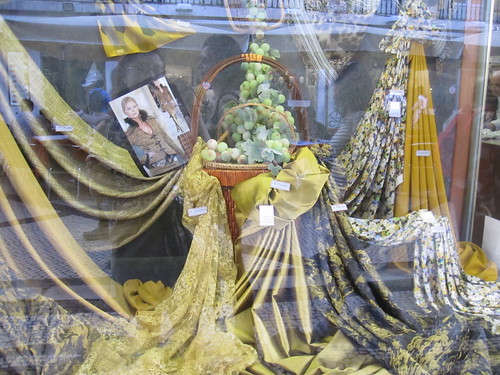
Fabric Store, Rua Augusta, Lisbon


I was amazed to encounter a fabric store on the main tourist drag of Rua Augusta in Lisbon.  The window displays were gorgeous, with tonal fabrics draped artistically and inspiration photos showing how the fabrics can be used.  I have to confess, though, that I didn't even go in the store.  The fabrics seemed to start around 40 Euro/meter, and while I'm sure I could have found something gorgeous I just don't have a need for a luxurious and luxuriously expensive souvenir fabric.

MUDE (Design Museum) Lisbon


In Lisbon the Museu do Design e da Moda (museum of design and fashion) is free to visit.  It's in an old bank building, and the permanent exhibit downstairs is really cool.  It's a chronological look at design and fashion over the past 100 years, with about 8 different "stations" as you walk in a circle through time.

There wasn't a whole lot of fashion--a lot more home and industrial design--but I really liked this coat from Dries van Noten.


The textile-related photos from my trip are here.  You can see all the photos from my trip here, and view them as a slide show here.  There are a few new wardrobe elements in them which I will write about soon!