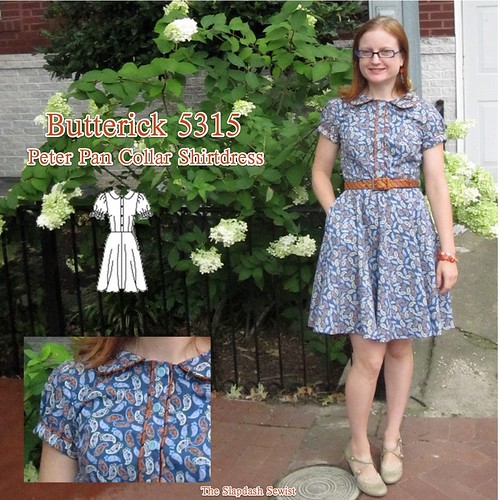
Butterick 5315 has been on my list for quite a while. I bought this fabric from G Street's special cottons table in March 2010 for $5.88/yd. I know I paired it with this orange tie silk at the time (the tie silk is from a bundle I split with Cidell in 2008), but I can't remember if I chose the pattern then or shortly after. At any rate, I've been planning to make this for two years, if not a little longer. In fact, I waited long enough that the pattern is now out of print. Sometimes it's obvious why a pattern went out of print, but this is actually (relatively) well-drafted with nice details that aren't too trendy. I don't know why they took this one off the market.
This is a standing-on-the-shoulders-of-giants project--I used a TON of techniques that I never would have worked out on my own:
-Front placket method from Silhouette patterns as pointed out by Dana of Lean Mean Sewing Machine.
-KBenco's Burrito method for yokes
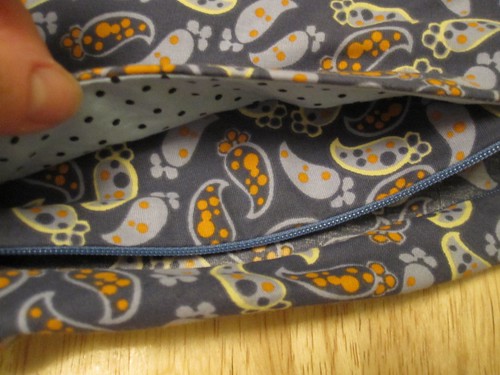
-Side zipper with pocket technique from Simplicity 2497 (shown at right). If you have access to Simplicity sales, I think it's worth picking up this pattern solely for those instructions.
So my vision was piping. I wanted to pipe the collar, the placket, the back yoke, and sleeve bands. Some of this required redrafting, in addition to my usual Broad Back (remember to add width to both the back bodice *and* the yoke), Small Bust, and Swayback adjustments.
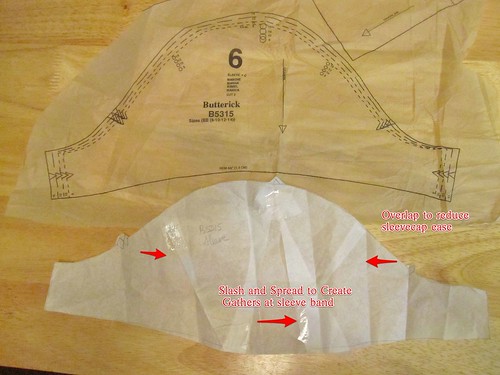
I took the provided cap sleeve and slashed it up the center, spreading to add volume to gather up at the hem. I also overlapped at the front and back sleevecap to reduce the ease. I know we all complain about this all the time, but they really do put a LOT of ease into a sleevecap in the Big 4.
This is drafted with a cut on placket. Since I wanted to pipe the placket I had to add a separate placket. The Silhouette method is to create a placket that encases a placket extension on the bodice, rather than being entirely separate. In the end, I'm not sure this was the right choice as I have difficulty buttoning the top button because of all the bulk in the buttonhole, but it worked out fine.
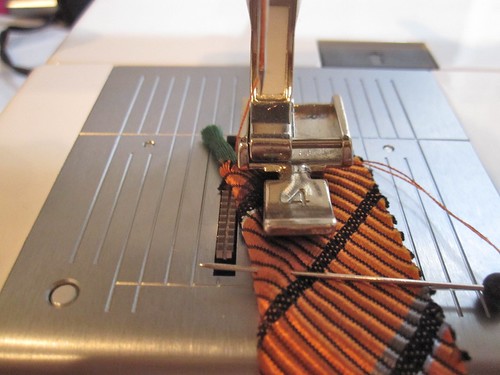
To make the piping I bias-cut my tie silk 1 5/8 inch wide, so that when folded over the cording it would be 5/8 wide, the width of my seam allowances. I used the continuous bias strip method to sew and cut it. For cording, I just used whatever rattail braid I had in stash. I used my zipper foot to stitch the braid into the bias.
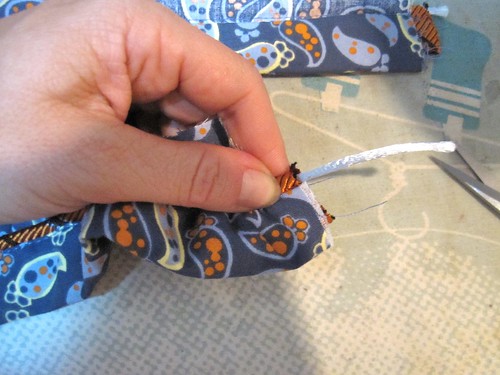
The issue with piping, other than just being a general pain in the @ss, is the bulk at the seam allowances. The trick here is that once you have cut your piping to size for your seam, you pull the cording out and cut an inch or so off. That way the piping is flat in the seam allowance.
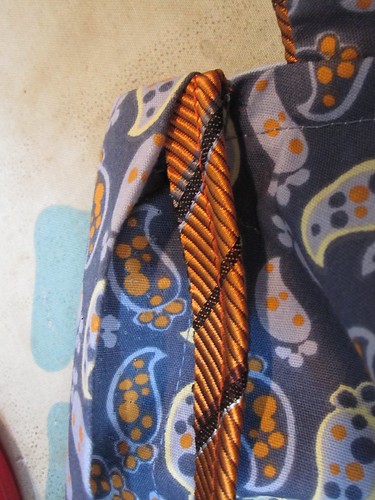
The biggest challenge with the placket was finishing the top edge. The collar on this dress is a standless Peter Pan shape that does not extend all the way to the edge of the neckline. Instead, the last inch and a half of the neckline is finished with the placket.
I first applied the placket to the inside of the bodice, right side of placket to wrong side of fabric.
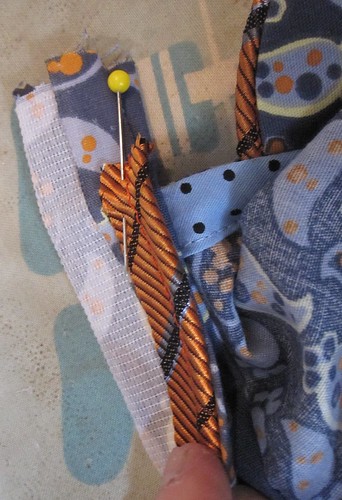
Next, fold the placket the long way down the center, right sides together. Fold the outer edge of the placket's seam allowance over this. Then place the piping on top of the folded-out seam allowance. Pin this whole mess together above the neckline, which has been finished with bias tape before attaching the placket.
Stitch right above the finished neckline edge, catching all layers of the placket.
Trim very close to the stitching. If you are me you will also zigzag, because I have a weird fanaticism and phobia about raw edges.
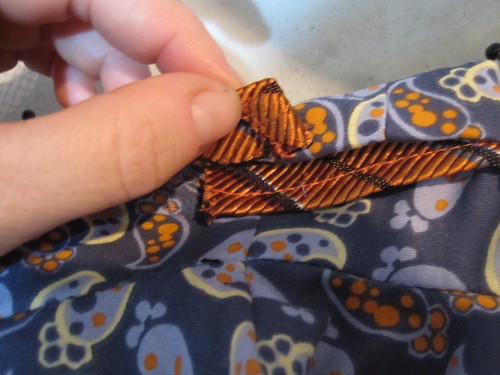
Now fold the placket over to the front, encasing that upper seam. Pin in place, positioning the piping.

Topstitch the placket close to the edge and piping.
I used essentially the same method for the sleeve. I originally cut the sleeve band with two inches of ease above my bicep measurement but when I finished it, I was just afraid that it was too tight--the tie silk for my piping fabric is quite thick and added a lot of bulk. So I had to rip it off and add another inch to the sleeve band. In the end, I think it was more the nature of cap sleeves and a slightly restricted back (despite my broad back adjustment!) but I would have been so annoyed with myself had I left the sleeve band as is and felt uncomfortable in the dress.
For the sleeve band, I stitched it first to the inside of the sleeve, then folded it over to the front and topstitched with the piping in place. To reduce bulk, at the underarm seam I cut the piping so that it would overlap by about 1 inch. I also trimmed the piping's seam allowance. I fray-checked the cut edges of the piping. I placed the lower layer of piping straight and then folded over the upper layer of piping 3/8 inch or so and then placed that on top. This was much less bulk than trying to stitch the piping right sides together and having a seam allowance there.
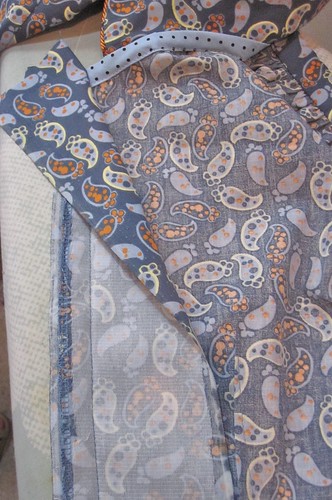
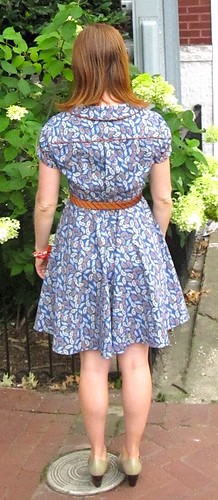
Because of limited fabric, I had to shorten the skirt. I wish I'd had just one more inch--I feel that the length makes this more Sally Draper than Betty Draper when combined with the Peter Pan collar. To preserve as much length as possible, I did a machine rolled hem. I find it easier to do this by the panel, rather than try to roll the hem over the seam allowances, so I opened out the seams for a couple inches above the hem.
There is a trick to using a machine rolled hem foot, and I'm not entirely sure what it is, LOL. I have worked out my own method.
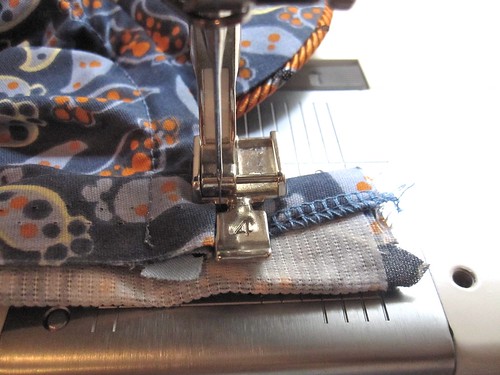
The first thing is to zigzag the edges of the fabric. I find this necessary to get the foot to grab onto the edge of the fabric. Serging would be too wide and bulky here, so it's good ol' zigzag for me.
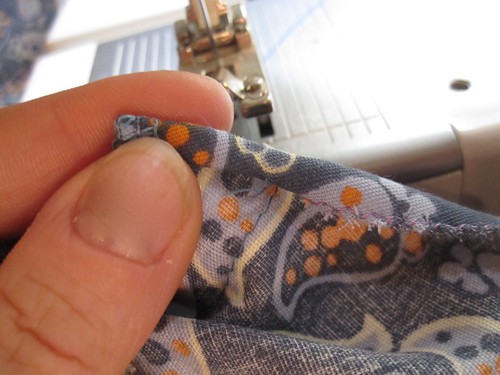
My method is to start by manually rolling the beginning of the hem in a double roll, about as wide as the foot will roll the hem. Place this manual roll under the foot and put in about 4 or 5 stitches.
This is the hardest part because my machine's feed dogs just don't play well with the rolled hem foot. It is very hard to get the fabric to run through the machine rather than just bunching and making infinite stitches in the same place. I find I have to be very proactive in pulling the fabric through the machine, even when past the beginning the stage. I don't know if that's common or normal.
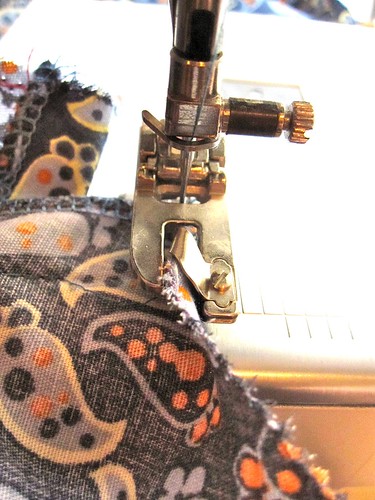
After you have secured your manual roll with a few stitches, with the needle down in the fabric, lift the foot. Then pull the fabric up into the foot, working it into the roll. Lower the foot and then continue stitching. Your manual roll and whatever bobble may occur at the beginning of the machine roll should be hidden in the seam allowance.

As I said in my last post (which has information on making a covered belt), I am now totally into the matching belt situation. I ordered from Sunni of A Fashionable Stitch and was very happy with her selection, prices, and especially her quick shipping. This is definitely not her fault, but the covered buckles being manufactured nowadays are much flimsier than the vintage one I used. It still seems ok, though. I put in brass eyelets because I felt they would match the orange better, without thinking about the fact that the hook on the belt is silver. Ugh! I painted it with gold nail polish and that seemed to work well enough.

 July was Pattern Review's Pattern Stash Contest. I chose this pattern because, as mentioned, I've been planning it forever. I kept putting it off because I knew it would be a lot of work with a lot of fussy details and I was definitely not wrong.
 I worked on this dress for three weeks, although I had very little sewing time over that period. The pattern adjustments and drafting the additional pieces alone took about 2 hours, then the cutting layout took forever because of limited fabric, and then sewing with piping just takes extra time and effort.
I put at least 12 hours into this dress (most projects take me closer to 8 hours). (I managed to get another dress made over the weekend, but won't be able to get it in on time to count for the contest.)
But, the dress is really cute and I'm sure eventually I'll forget how much work it was! I dragooned a photographer into taking outdoor shots because I am fancy.
All photos are here and the pattern review is here.
=======================
Thank you for all your support on the last post! I promise it was not my intention to post a rant and then disappear for a week, but I had family in town last week and then lost all of my photos for the past 3 years when my Mac's hard drive was replaced. Yes, I had backed up with Time Machine. But for some reason the one thing Time Machine didn't copy was my iPhoto library. It was pretty devastating. Luckily, I have a lot of things on flickr.
Anyway, I am aware of the irony that I am wearing a bit of a heel in these photos! I really appreciated Ripple Dandelion's comment that it is important for at least some of us to model healthy footwear. Our eyes are very trained to see only super high heels as attractive, because that's all we see in magazines and red carpets. By wearing healthy shoes in our photos, I do feel that we can offer a small counter-message. The heels in these photos are low and supportive, I promise! And there will be many more Danskos to come. Heh.


.jpg)


.jpg)


46 comments:
This is a real cute dress on you. Perfect for your figure!!(we have the same shape lol). Also I love the shoes!!
Super cute! The contrasting prints are perfect for each other and all your hard work paid off!
Super cute dress and I love the shoes.
LOVE the use of the tie as piping and belt. My dad just gave me a giant bag of his silk ties (some are from when he was in high school- he never throws anything away). I am definitely filing this away.
What lovely details in the dress. Love the piping and the belt in the same fabric. Great dress and looks good too!
Hmmm. "Dragooned." I'd never heard it used like this -- I'd only ever heard "shanghai" in that context. Thanks for stretching my brain! I like the colors of the dress and the piping together -- that was also unexpected. The shorter skirt is fine for high summer, not too young at all for you. Agree that, come cooler weather, you'll need to cover your knees; but more for warmth than for age-appropriateness.
Thank you for such an exhaustive post on the making of an adorable shirtdress. I love your work, and wish I could pop over to your place with questions from time to time.
I like the heel height in this pic:-)
You can see all of the work you put in this dress because it's beautiful!
What a cute dress! I see why you would like a little more length but I don't think it's too short. I had to go back to the first picture to see what you were talking about because it didn't stand out to me.
The minute you decide on piping, self made piping at that, you know you are in for a long sewing job! But this dress is so cute, I think it must have been worth it.
Everything about this dress is perfect. The belt is also fantastic. I think the length of the skirt you ended up with is just right. Thanks for the tips for piping and the link to the Silhouette pattern site.
This dress looks very Marc Jacobs!! You look great in it!!
Very pretty little dress! Looks comfy too!
Gorgeous, I love this dress and especially love the belt. I've yet to tackle many of those techniques so thank you for all the links. Sorry to hear about the pictures. That's devastating! You'll just have to take lots more.
Very cute and glad to see this made up, I have this pattern in my stash and keep meaning to sew it. Like the color combo on you.
Cute dress! And thanks for the tips on piping. :-)
Such a cute dress - you look adorable!
Hey, I like those shoes, too! Thanks for the validation on my comment--I'm just happy I was able to express my thought on that in an understandable way. I am in a bit of a shoe flux myself. Long ago I realized Dansko was not the answer for me--when I wore them, I was always falling off my shoes. Then I had a multi-year jag of Naot, which I do think is a great shoe but didn't solve my bunion-related problems. More recently I've gotten into the minimalist shoe idea (happy feet have resulted) and my forefoot has gotten significantly wider from wearing this type of footwear most of the time. Now Naot feels too narrow, so I am exploring wide width flats and low heels. At the moment the very best shoes for me are dancing shoes. They are available in widths, lots of heel heights and the sole is relatively thin and flexible (i.e., more minimal). It's no easy thing to combine a wish for foot comfort and health with a love of wearing dresses, to be sure.
Thanks for the tip of painting the buckle tab with nail polish to match bronze eyelets! The nickel ones are just so...silvery. Not always the right look.
All the extra work on details paid off, your dress is beautiful. Thanks for all the tips for the piping.
This is so great! The piping is perfect and the dress itself is utterly charming. It is so you!
Cute dress!
RE your hard drive crash.
Your iPhoto library may not be lost. You may have a file permissions problem that an Apple guru can fix.
Did you make an appt for the Apple Genius bar?
You do such a thorough review. Great dress.
I really enjoyed reading this post, mostly for the construction details (zipper in side pocket! silk piping! a magic rolled hem foot!) And the dress is really nice to look at as well. I can't believe you did all of this in one weekend.
I love the dress and the details. I also enjoy when you talk about the time it takes to sew. It helps keep my own personal expectations in check. I didn't comment on the shoe post but appreciated your point of view. Comfort is huge with feet - I am a chronic plantar fasciitis girl thanks to genetics.
Love the dress and belt.
Lots of work, but worth it. Looks great on you.
What a great idea to use tie silk for the piping. Incredibly cute dress!
Beautiful end product!
I love the new life of tie!
I just adore the piping detail--wonderful contrast with the base fabric. You are so creative!
That is a very pretty dress and it suits you perfectly. Nice work!
Awesome job with the piping! You make it look easy. I avoid it like the plague. When using piping, you take your normal sewing time and multiply by two.
A tip for your rolled hem- start it by hand and run a needle with a short length of thread through and knot to hold in place. Feed this through the hemmer before you start to sew. When you go to start the machine stitches, pull the thread gently. This = mimimal distortion for the hem and you don't have to worry about stitching a finger.
This is hella cute. All of your hard work paid off!
That is a super cute dress! I absolutely love the contrasting prints, and the belt in the tie silk is awesome. I was especially interested in how you do the machine rolled hem, I can never get this to work for me! I should give it another go I suppose... And my heart dropped when you mentioned about your photos, that is awful.
KID,MD used the words I was looking for....utterly charming! And the belt made to match the piping is the icing on the cake. I think you are incredabley talented and creative and so happy that you share in such detail with us. Thank you.
Reading your reviews is like taking a sewing class, you've packed so much information in this one I had to go back and look at the dress again. It is fabulous, the piping and belt are great finishing touches.
Great use of silk ties.
I am impressed.
The dress is beautiful -- I love all of the details -- and it suits you perfectly! And I so feel your pain about losing the photos. Something similar happened to me a few years ago, and I still feel a stab of pain every time I think of it. Courage!
Karen in Paris
The details on this dress are impeccable. Your colour combinations look so sharp without fighting with the design lines of the dress. I love it.
I like the point about wearing non harmful shoes, and I am also rather chuffed that you use, and kindly mention, the yoke trick :)
Your dress is super -- and not too short. Between that hemline and the nudish color of your sensible (lol) shoes, your legs look at least a mile long! And thanks so much for all the sewing info you always so graciously share.
I love this! Beautiful craftsmanship and LOVE the shoes too!
I adore your dress ! and your shoes ! totally your style ! thanks for sharing all the steps...
Wow, I just discovered your blog, and I am so impressed with your sewing! I just started sewing garments and have a lot to learn, and I love how detailed your posts are. Thanks for all the great info, and congrats on this very cute dress! : )
P.S. - I'm also a carless walker and totally hear you on the shoe thing. Rock on.
I'm so sorry for all the photos you lost! How tragic!
As for the Peter Pan collar dress. ADORABLE! I don't know if you watch Project Runway, but Kenley was wearing a dress similar in the last episode, but yours is MUCH cuter!
The dress is lovely.The piping fabric is just perfect with the dress print.
Nice details and choice of fabric. Darling dress!
This dress is one of my favorites of your creations. Really! It is fresh, cute, and perfectly funky with the fabric/ silk tie piping. It's also great to hear the reminder that it takes so long to create a great garment.
Post a Comment