Tuesday, March 8, 2011

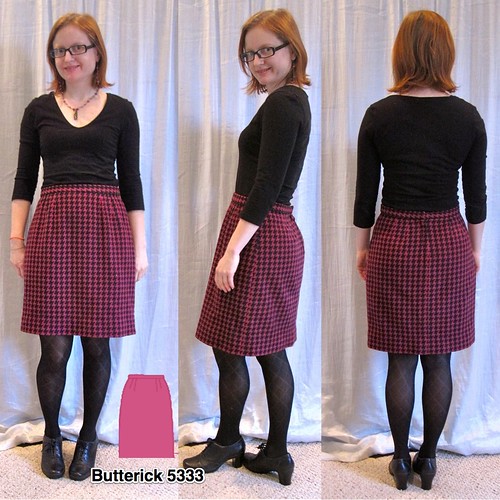
Butterick 5333, Experimenting with Straight Skirts

B5333 Thumbnail

When I bought my $20/yard-most-expensive-ever-piece-of-fabric alleged Versace boucle from Golden D'Or in Dallas over the holidays, I knew this was one pattern I'd want to muslin before cutting into it. I want the skirt to be a wardrobe staple for years to come and if it turned out not-quite-right I would be very disappointed. I want something straight and fitted but not pencil, because a pencil skirt can be a little confining to walk and sit in. I also want a separate waistband that sits at natural waist. A waistband looks nicer when items are tucked (in my opinion), and natural waist is rarely "in style" but is not faddish like a high or low waist and can weather the waistline storms over the years.

For the straight skirt being such a classic, I found few patterns that fit my vision. A couple of the Butterick wardrobe patterns have skirts with two darts in front and back, which I thought might be helpful for my large belly and derriere. I chose Butterick 5333, the Mrs. Obama wardrobe as I call it, as it was clearly riffing off her famous black and white dress from the campaign.

When I had enough of the black and pink houndstooth wool left to test out the pattern I was so pleased. I have fabric I can use for muslin, of course, but for the boucle I think I'm going to get the best results if I test the pattern in fabric of a similar weight. Darts in a thick wool are going to behave differently than darts in a thin fabric.

Based on the finished measurements, I cut a straight size 12 and the fit is excellent. This was a pleasant surprise. Not the size 12 part, the fitting part.
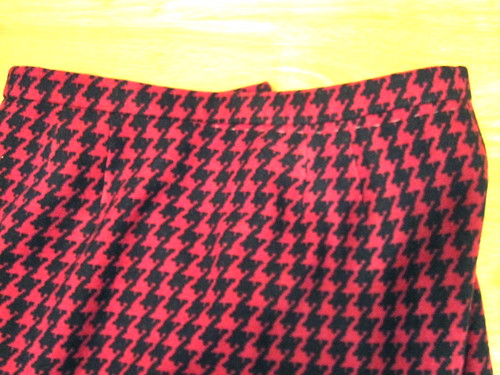
Crooked Print at Waistline As I mentioned when reviewing the dress of the this fabric, the print is not quite on grain. In the comments, some suggested that I sew with grain instead of print. However, this is a judgment call, in my opinion, and I am more comfortable with a slightly off drape than with a crooked print. I feel that a crooked print would be much more noticeable and make me more self-conscious.

And speaking of crooked print, this is what happened when I put together the waistline. UGH!!!!! You can see where I thread-traced the line of the print. Although this skirt is wearable, it is definitely a wearable muslin for me. It's a bit of a unitasker skirt because it can only be worn with black (other ideas welcome). Life is too short to wear black, in my opinion. I wore it with this black tee and a black jacket to have a "friendly" meeting with opposing counsel (which turned out to be not so friendly!), so it is good for "less than a suit" work stuff, but not something I'll wear often. So I was loath to go to the trouble of fixing the ugliness of the print. But after letting it sit for a day I acknowledged that I would *never* wear it with the horrible print effect at the waistband and picked it out. The waistband itself was also crooked so I had to recut, but I didn't have enough fabric to recut on grain so I did it on cross-grain and had to add side seams, which adds bulk at the waistband. But it's still better than crooked.
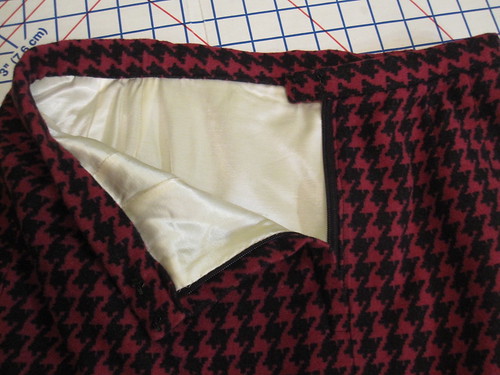
Lapped Zipper!!!! My big excitement for this skirt was my first successful lapped zipper!!!! Yes, it deserves four exclamation points. For the dress, I inserted a centered hand-picked zipper, but felt that the centered zip wasn't perfect because the lips open up a little and the zipper can be seen. So for the skirt, I decided to try my hand at a lapped zipper.

I think I have tried one once before and it was something of which we shall not speak. So I searched the web for help and found this video tutorial from What Would Nancy Drew Wear. Note: clicking on the video launches YouTube in a separate window and then the video begins to play on *both* the blog and YouTube (at least it did for me). Turn one of them off or they will be playing a second or two off from each other and impossible to understand! The video holds your hand all the way through the process. I mimicked Lisette's moves exactly. I think I made the lap a little too large but as a technical matter, it is perfect. I was on a high for the rest of the day. And the next day I realized...a fly zip is just a variant of the lapped zip. (Right?) OMG, could I actually handle a fly zip?
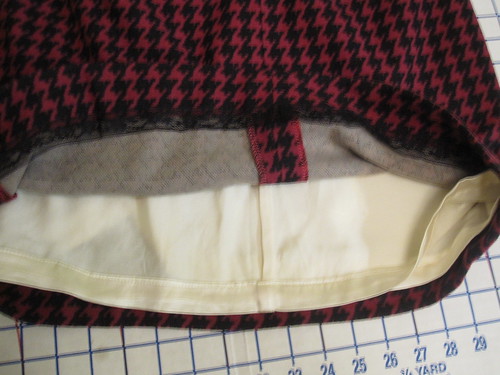
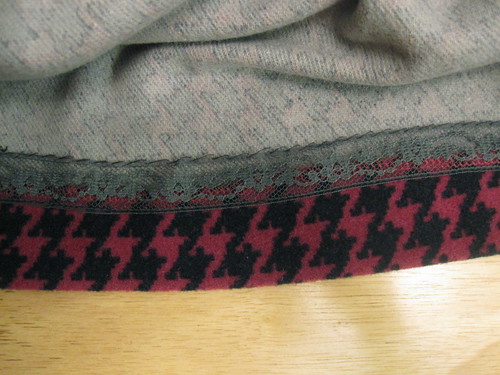
Hem Lace and Lining French Seams There's not much more to say about this project. It's a skirt, for heaven's sake. I used hem lace again, though I used a machine blind stitch rather than hand hem. Sorry the pic is low quality. I lined this one in off-white rayon instead of pink because I bought a ton of the off-white and not as much of the pink and wanted to save the pink for projects I'm more excited about.

Unfortunately, this pattern is not The One. The overall fit is great and the back lies smoothly over my posterior. But the front is puffy. Yuck. I thought the double darts (for a total of four in front) would help with fit, but that is too much dartage for my front. I need a flat front or only two small darts, I think. I have a waist, but it is almost all in the back and my front is much more rectangle/apple shaped. I haven't decided if I will try to tweak this pattern or search for another. The bigger issue will be deciding what fabric to sacrifice for the next muslin!

All photos are here and the pattern review is here.

=======================

Thank you for all the nice comments on my pink cashmere sweater refashion! Several people asked about the neckline. I took a photo and added a discussion of how I finished it to the post.

=======================

Confidential to Our Heroine: I would love to comment on your posts, but I do not want to give Disqus all my personal information. I tried using my yahoo ID to sign in, but I have to share everything associated with that ID with Disqus, no opting out. Any chance of a less intrusive comment manager?

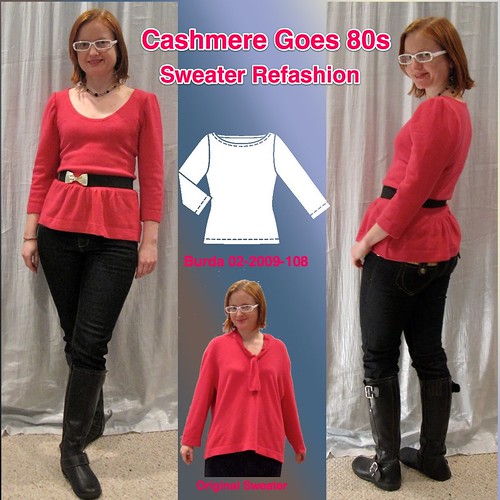
Sweater Refashion: Cashmere Goes 80s

Pink Cashmere Refashion

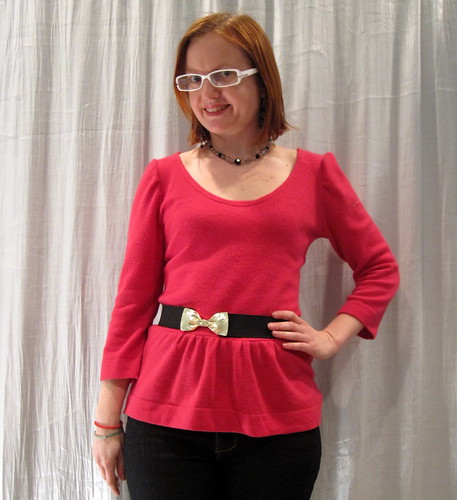
While we're on the subject of hot pink peplums, it seemed a good time to share this sweater refashion I did at the end of last year. When I was shopping the thrift store for suitable sweaters a couple years ago, I ran across this one. 98% cashmere and hot pink, how could I resist? At first, I planned to keep the neck tie thingy as a neck tie thingy, but move it so that the tie was to the side rather than center. The vaguely sailor-esque thing didn't do anything for me. Then I hit on the idea of using the tie as a waistband and the whole thing came together.

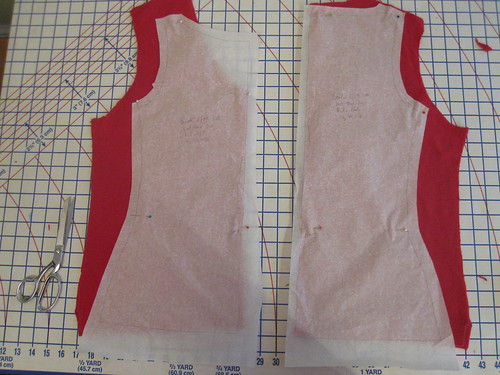
Pattern Layout To shape the bodice, I used the popular boatneck top Burda 02-2009-108. I actually refashioned the sweater before making my ruffle shoulder top of the pattern. I had to cut the front with a scooped neck due to the original design of the blouse, so I widened the shoulders about 3/4 of an inch to ensure the blouse didn't fall off.

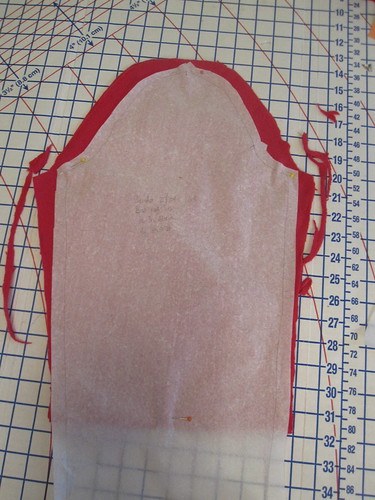
Sleeves


I also kept the original sleevecap, as I wanted an exaggerated 80s puffed sleeve. It didn't turn out as puffy as I'd hope, but I think it still looks deliberate rather than just poorly eased and installed.


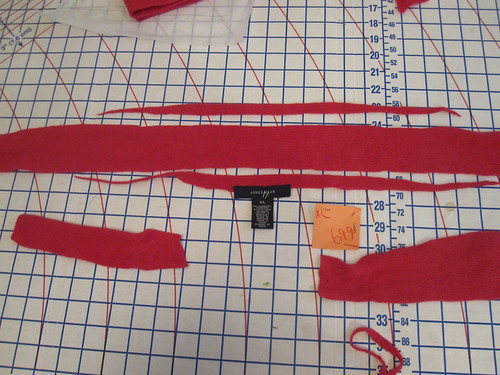
Neck Tie Becomes Waistband As mentioned, I turned the tie neck into a waistband. The tie was a different weave from the rest of the sweater, ribbed and a little thicker and more stable. Unfortunately, it wasn't woven as a straight piece but had a "bulge" in the middle. I cut it as straight as I could along the "ribs" but it also had a slight curve so that wasn't 100% possible. I gathered the peplums into the lower edge of the waistband.


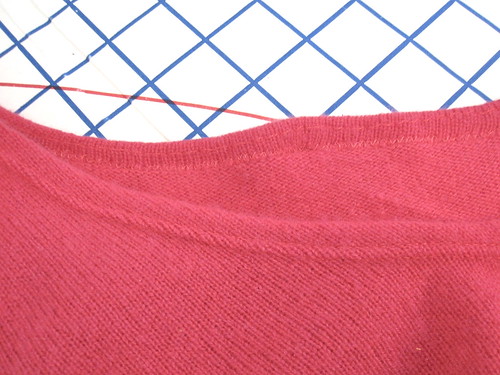
Neckline Finish Several people asked how I handled the neckline without stretching it. In this case, when I cut off the tie I was careful to cut as small as possible along the stitch line. The neckline next to the tie had been reinforced in manufacturing, and so I just needed to treat it carefully to prevent stretching. To finish the neckline, I used a twin needle and was careful while sewing to position the raw edge of the neckline (down along the feed dogs) so the "zig" would be on the neckline and the "zag" would be just off it. I tried to manipulate the photo so you could see the stitching on the outside and inside; click to enlarge.

If your neckline is not finished in manufacturing, it can still be finished nicely! First, finish the edge. I recommend a zigzag over a serged finish unless you are very confident in the differential feed of your serger. If you use the serger, put it on the most gatheringest differential feed setting. Once the finish is done, you must steam steam steam to get the neckline back into shape. The beauty of working with wool is that it should steam back into a reasonable facsimile of a neckline. Once it's back in shape you can fuse it with a strip of tricot interfacing cut on the bias to keep it in shape. Then sew with a twin needle as I showed above.

Note that I don't have a coverstitch machine, so I can't say how coverstitch would perform versus twin needle.

Belt
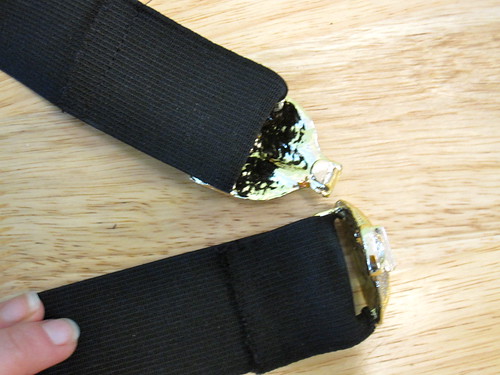
It definitely needs a belt. The 80s styling finally got me to add a length of elastic to this belt buckle purchased from Exquisite Fabrics in Georgetown in October 2009 for $5 (the packaging makes me think it was actually from the 80s). I don't know what took me so long to make this considering it took under 5 minutes to thread the elastic through the bars on the belt and stitch it in place. I've worn it a ton since then, it is too fun!


Closeup

I bought five or six sweaters to refashion in late 2009 or early 2010 and realized as 2010 was drawing to a close that I hadn't done any refashions yet that winter. When I bought the thrift store sweaters, I went for 100% wool (or cashmere in this case) only. However, I wasn't really thinking about my taste. Most of the sweaters are a thick wool and I don't see myself wearing something that bulky no matter how cute the refashion. So I think I will be doing a re-donate for most of them. However, this thinner texture is perfect for me, not to mention I love the color! The refashion isn't perfect (the waistband area is truly ugly), but with a belt to hide the imperfections it's a great go-to sweater.

All photos are here.

Wednesday, March 2, 2011

Butterick 5520, An 80s Revival in Hot Pink Peplum

B5520 Thumbnail

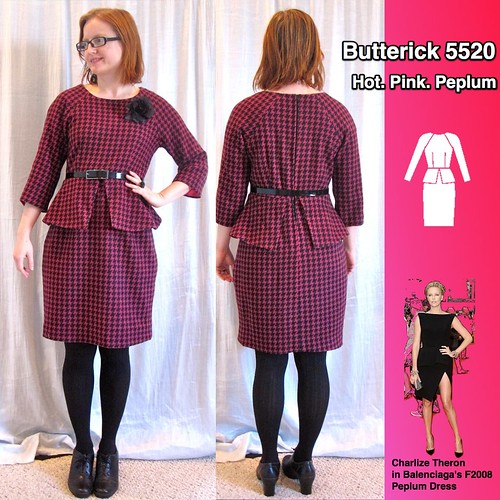
I think the first version of Butterick 5520 that I saw was Eugenia's, with the lace overlay on the sleeves. I liked the dress as a classic sheath with embellishment possibility, and when I saw that it had a peplum I was really into it.

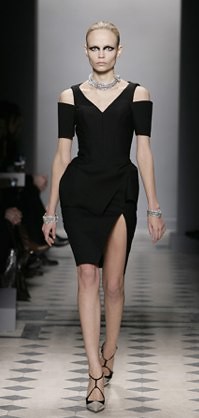
Balenciaga - F2008 I associate the gratuitous peplum like this (a peplum in a jacket is both design and functions to add length) with the 80s, but it is not entirely out of date. Balenciaga put this sleeveless number with asymmetric front slit on the runway for Fall 2008 (although since F2011 just walked the runway, it is still not exactly au courant). Charlize Theron totally worked it on the red carpet without the arm covering thingies. But I don't need the peplum to be in style. It is a great shape for a pear--in exaggerating the hip, it actually disguises it.

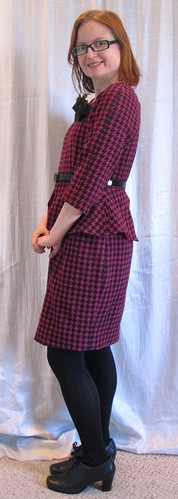
I bought the wool at H&M Fabrics in NYC in November. At $10/yard, it was expensive by my standards, but I just adored it. Although PR's stash contest was running the past two months and I generally try to sew up stash, I just *had* to get this piece done. I felt like I needed to get it done while the current 80s moment is on. But when it was done I was surprised at how un-outrageous it is. You put the words "peplum," "houndstooth," and "hot pink satin" in the same sentence and you expect to be a little over the top, but this is almost...tasteful. Which is nice, because it should be able to stay in my wardrobe for many years.

Broad Back Adjustment I started with Broad back adjustment and small bust adjustment. When it was completed I thought maybe I shouldn't have done the broad back adjustment because when my arms are at my sides the extra fabric sags a little there and the back is overall a touch baggy. But later I felt vindicated because even with the broad back adjustment I popped the stitches on the lining under the arm when wearing the dress and vigorously messing with something on the floor. So I will have to deal with the slightly saggy back in order to have full range of motion.

For the SBA I narrowed the dart.

I also shortened the bodice an inch. I have a high waist but a long torso so I generally don't mess with the length of the bodice. Here, I wanted the waistline to be slightly high as I didn't want the peplum to hit me too low on the thigh. If I made this again, I would probably shorten the waist only 1/2 inch, but I am happy with where the waist hits me on this project.

Trim Edges of Peplum Lining

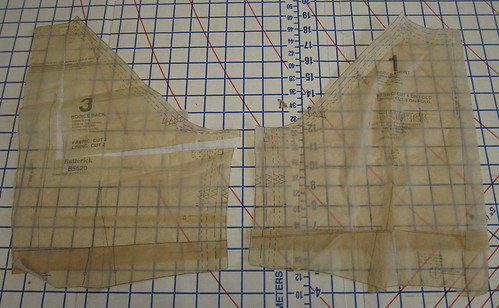
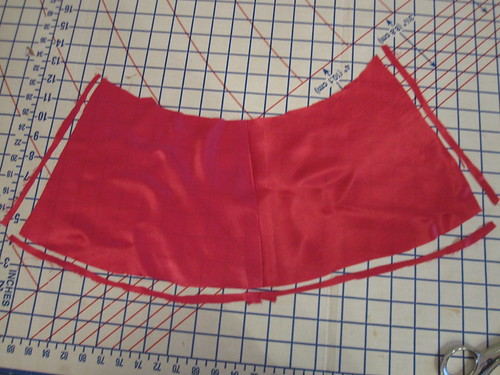
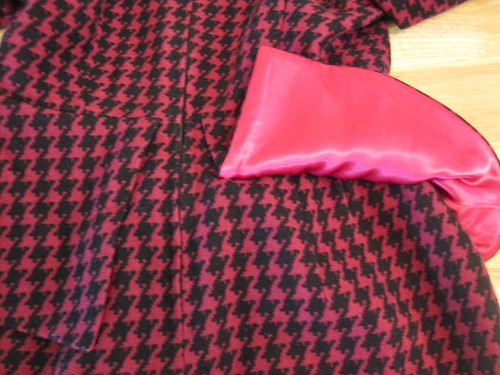
I lined the peplum in hot pink rayon satin, purchased from Fabric.com for $2.79/yd last September. While I love the contrast underside, I wanted to ensure that it would not show unless the peplum flipped up. The first step was to trim the side and lower edges of the peplum lining to make it slightly smaller than the fashion fabric. This creates a turn of cloth after they are sewn together.

Press From Wrong Side

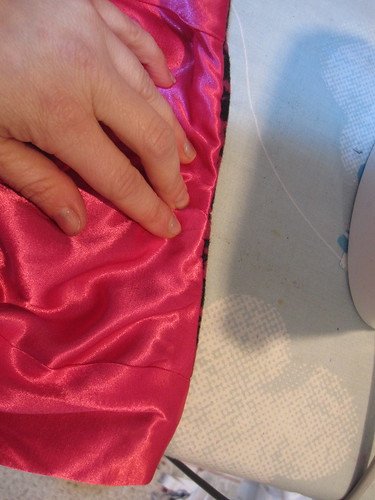
Anytime I am pressing a lining or facing, I always press from the underside. As I arrange the fabric for pressing, I make sure that I can see the tiniest edge of the outer fabric and then press. If you can see the tiniest edge of the outer fabric from the underside, you won't see any of the underside when the garment is on.

Peplum and Lining

Here you can see that the pink satin lining does not show at all when the peplum is laying flat, and you can also see the tiny edge of the fashion fabric that shows from the underside. This closeup shows a little better how you can see the edge of the fashion fabric rolling over the lining.

Hand Picked Zipper I use invisible zippers almost exclusively. I will only use a regular zipper if the fabric is thick and crosses a seam so that an invisible can't be invisible (or if it is invisible, won't slide past the hump). I used to be competent at regular zippers, but I now do them so infrequently--no more than two a year and probably less!--that I have completely lost my touch.

The last time I put in a regular non-invisible zipper (I think it was over a year ago on my houndstooth fail dress) I decided that the next time I had a regular zipper to do I would just hand pick it. So that's what I did here. I basted the center back together as for a machine insertion, pinned the zipper, and sewed it in with a prick stitch (tutorial on Somerset's blog). It didn't take too long, maybe 25 or 30 minutes. I would have spent that much time sweating it over the machine and it would have looked terrible. I can see doing a fancy beaded hand-picked zipper for a special project.

I'm still not entirely happy with the zipper as I feel that the "lips" open up a little over it. I actually did my first lapped zipper to see if it's better when making the skirt of the leftover fabric so stay tuned for that...

Another downside of regular zipper--you have to hand sew the lining to the zip. Again, didn't take very long, but man, an invisible zipper is so much easier in about 12 different ways.

I've gotta say, I just love stepping into this hot pink satin lining. I feel like a character in a movie, maybe Jessica Rabbit.

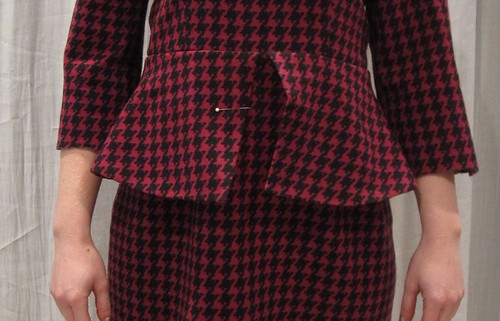
Original Peplum Look While the pattern is well drafted and all the parts fit together, for some reason the peplum just does not sit right for me. You can see that it sort of bulges out about halfway down. I had to take a hand tack on the front and back openings to get them to lay right. I don't know what that's about. In cutting, I spent a long time decided whether I wanted the peplums on the bias or the crossgrain for visual interest, but ultimately decided that houndstooth, peplum, and hot pink satin were enough visual interest and cut them per the marked grainline. So I don't think it's a grain issue (though the print is very slightly off grain and I cut with the print rather than the actual grain). I guess they need to be shortened at waistline at CF and CB for me? I don't know.

Hand Hem with Lace

The final finishing touch for this project was a hand hem with hem lace. Here I did not do a fancy stitch, although I have seen hand blind-stitching and it is exquisite. I just went with my default, the whip stitch.

Side

This was a rather painstaking project, starting with cutting everything out in single layer. Even that was harder than it could be because the houndstooth on this fabric are printed on rather than woven in, and they are very faint on the wrong side of the fabric. So the first piece was easy to cut, but lining it up with the second piece was no fun. However, all the houndstooth match and are straight, although the back hem mysteriously does not run straight on the right side. I counted the houndstooths at the CB and right side seam and there are the same number. I traced the houndstooths across the right skirt and they run straight across from the CB seam to the side seam. I just can't figure it out. I'm pretty sure I am cursed in this arena. However, it is not nearly as horrible or noticeable as the last one.

But a nice wool dress deserves painstaking and I don't begrudge any of the effort involved. I have only worn it once and will try to wear it one more time before cold weather ends. Knowing I have this in my closet will make next year's onset of cold weather bearable (but only the onset, not the duration!).

All photos are here and the pattern review is here.

Wednesday, February 23, 2011

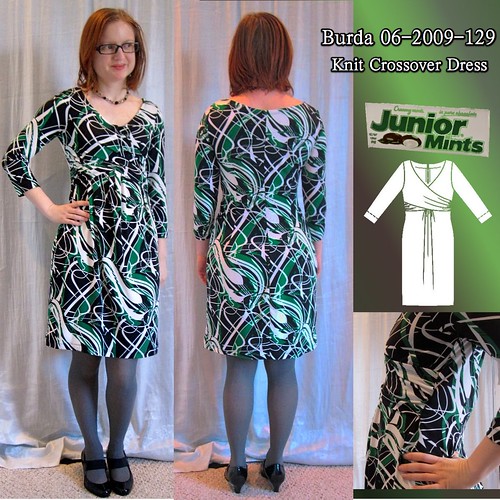
Burda 06-2009-129, Knit Crossover Dress

Burda 06-2009-129 Thumbnail

I bought this knit print from Jomar in October 2009, over a year ago, so it seemed a good candidate for the stash contest. To me, these colors say Fall/Winter so Burda 06-2009-129 with its long sleeves seemed perfect. I also wanted a pattern that would break up the print a little because when the fabric was laid out for cutting it became very clear that the print looks like, um, sperm (look at the white thing in the middle of the motif). With them swimming downhill and multiple pattern pieces (at least in front) I think this effect is mitigated, thank goodness! So I will call this the Junior Mint dress rather than the alternative.

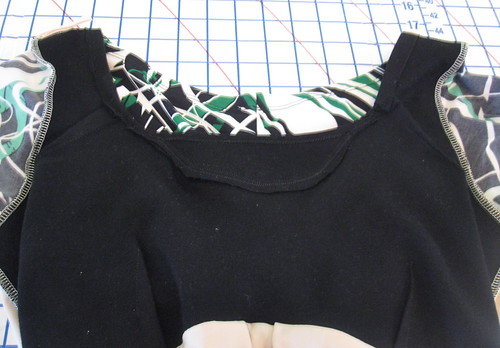
Back Lining View The white parts of the print are rather sheer, so I determined about halfway through construction that the dress needed to be lined. It is a rather standard thin poly knit, so the lining was a good idea anyway for a dress to be worn in cooler weather. To keep the lining from shifting around too much, it is sewn to the dress as one at the back neckline and the armscyes and then caught into the back darts. It made sewing more difficult than necessary, but it behaves very well. The sleeves are unlined.

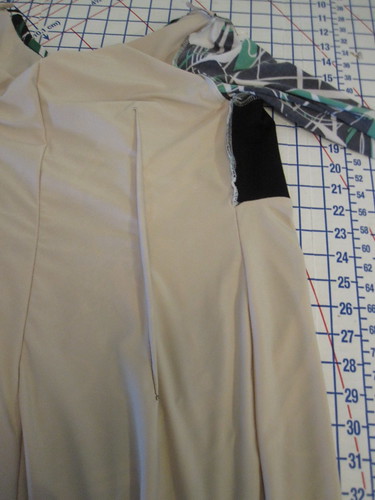
Front Lining View The front is partially lined as drafted, as there is an underlayer below the front crossover. After I completed this I realized it's actually very similar in style to the Kate Middleton/Issa Dress (the original, not mine) and would make an easy substitute for such a project, although it is a faux front crossover, which is caught in the side seam, rather than ties (could easily be converted). To jigger the lining in, I sewed the front to the back with both linings as one at the side seams above the waist, and treated the lining and fashion fabric layers separately below the front waistline seam. Rather than gather the front lining at the waistline as for the fashion fabric, I pleated it to reduce bulk.


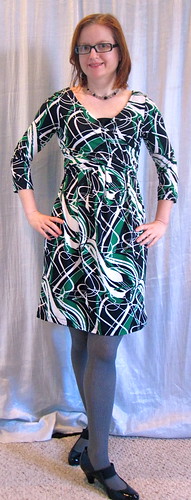
Neckline Darts The front underlayer is the only thing I don't like about this dress. It is drafted as a low V neck that is not intended to show under the crossover. However, I liked the idea of it as a faux camisole so I cut it with a higher scoop neck out of black double knit purchased from Kashi at Metro Textiles in NYC in November 2009. It is very odd for Burda, but this is so hugely gapey. You can see where I cut out a scoop at the top and replaced it with a narrower scoop, but this hardly made a dent in how gapey it is. The neckline is several inches wider than I am. I then added neckline darts, which took care of the problem. If I were to make this again, I would take about 3.5 inches out of the neckline width.

The back neckline is also quite wide, which I have no opinion on as a style but I should have sewn clear elastic into it. Not sure if I'll go back and do that as the poly knit doesn't take kindly to seam ripping as the stich line leaves a series of visible holes. The neckline is wide so I sewed in a pair of bra strap keepers (I'm going to have to go back to NYC soon to get some more of these from Steinlauf and Stoller).

Front


Although the drafting is not quite what it ought to be in the front underlayer and the slightly too wide or low back neckline, for the most part I really like this dress. It is a very flattering style for me and fairly easy to construct. I am quite pleased with how well the swayback adjustment came out--no puddling at all! I am also pleased to have moved this fabric off the stash shelf. I have now completed all 7 fabrics from that trip to Jomar (well, I still have a bit of this left, enough to make a top I think)! I feel such a sense of accomplishment when I complete large lots like that.

All photos are here and the pattern review is here.

Sunday, February 20, 2011

Who Doesn't Love Vintage Patterns?

Please pardon my shameless self promotion! I have been inspired to declutter lately. I haven't quite been ready to face the craft room because didn't I just do that? Oh wait, it was two years ago. Apparently, one must clean the sewing room occasionally after it has been organized. Who knew.

Anyway, I had a large box of vintage patterns I bought several years ago along with the box from my mom. I went through and chose the ones that I wanted and listed the rest on eBay in large lots. All the lots start at 99 cents and I will be shipping media mail--slow but cheap. I've got women's, men's, kids', 1960s, 1970s, 1980s...the whole gamut. If you are so inclined, please check out the listings. I have it set for US bidders only, but if you are outside the US and interested in a particular lot let me know and I'll revise the rules for that listing.

OK, commercial over!