Showing posts sorted by date for query broad back. Sort by relevance Show all posts

Wednesday, December 10, 2014

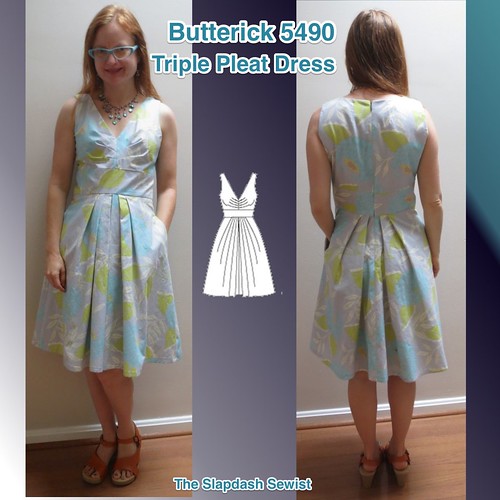
Butterick 5490, Triple Pleated Bodice Dress

Butterick 5490 Thumbnail

Sorry for my long disappearance!  I didn't mean to leave with no warning.  We had a series of deaths in the family, then went on vacation to get away from things, then the holiday season began...  Also, and this is so silly, but I *still* can't figure out how to get good pictures in my new place.  I tried a new location that might work.  I have been sewing a fair amount--especially right before my trip!--and hope to blog more regularly, at least once the holidays are over.  Thank  you to all who checked in on me; I really appreciate hearing from my sewing friends even when I appear to have dropped off the face of the earth!  I miss everyone.

And due to my long absence, I am way off schedule for the seasons.  I made this during the pattern contest, which was in July.  It's not getting much wear now!


Butterick 5490 has been on my list for a while now.  If you remember the Banana Republic Mad Men collection from a couple of years ago, the Betty Dress was quite similar in terms of the triple pleat in the bodice and the full, center pleated skirt (there's a front view here).

I knew those triple pleats would pose a small bust problem even more than usual, as all the reviewers observed that the pattern would not be flattering to a small bust as drafted.

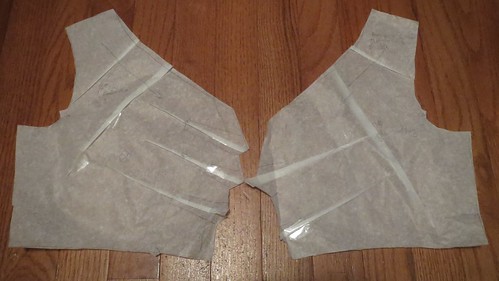
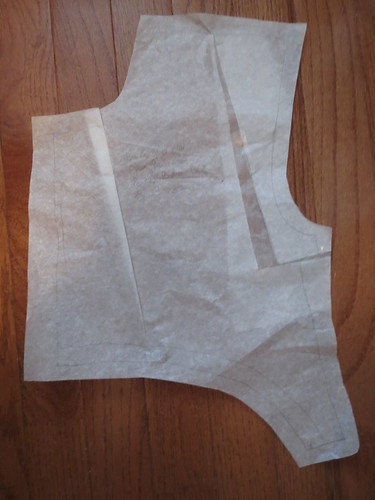
Small Bust Adjustment Bodice and Lining

I folded out width from each of the pleats, as well as shortening the neckline between the bust and the shoulder.  The pattern has a separate front bodice lining piece, a luxe touch I appreciate in these designer patterns (this one is a Suzi Chin/Maggy Boutique), and so the lining needed to be separately altered.  The triple-pleat fashion-fabric bodice is on the left, and the double-darted lining is on the right.

Having worn the dress for a day, I realized I need to scoop some width out from the front armscye as it is digging into my arm.  This is likely to do with my forward shoulders/bad posture.

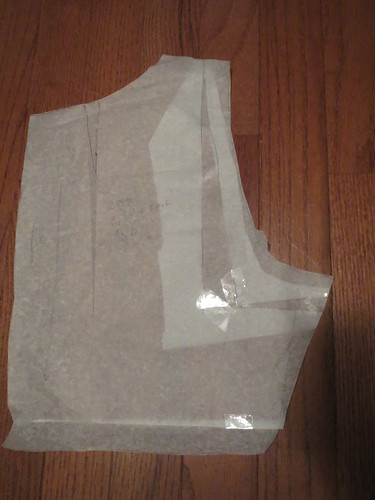
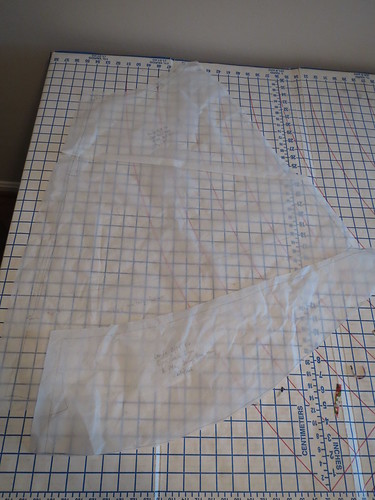
Broad Back Adjustment

On the back, I did my usual broad back and swayback adjustments as well as my fairly standard addition of a dart in the back neckline to prevent gaping from my forward head/bad posture.

This fabric was $1.99/yd from Fabric Mart, the special when I made the order.  I love the huge print and the colors, especially the little touches of orange.  I'm pretty sure it's a quilting cotton, though a good quality one.  As such, it is only 45" wide and I couldn't cut the front skirt the full width it was intended.  I cut the skirt as wide as I possibly could, but lost a pleat and about 10 inches of width.  The skirt is still plenty wide!


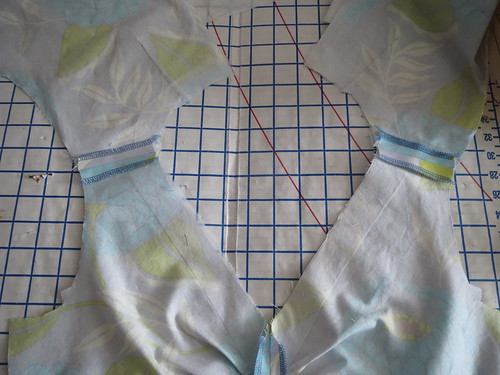
Interface Neckline of Fashion Fabric

Having learned my lesson on past projects that ended up with stretched out necks, I interfaced the fashion fabric and the lining at the neckline and armscyes.  The neckline feels firm and like it will stay in shape.

To make my quilting cotton a bit firmer I also interfaced the entire midriff.  This turned out to be a good decision.  Although I have totally adequate ease in the midriff (nearly 2 inches), the midriff has arrows radiating from the side seam toward the center.  When I lift up the neckline the arrows disappear, so I think they are due to the weight of the skirt on the midriff rather than the fit (good thing I didn't cut the front skirt in two pieces at the full width and make it even heavier!).  I imagine it would look even worse without the interfacing.  I'm not sure how to solve this problem in the future, except for just using lighter weight fabric so the skirt is not so heavy.

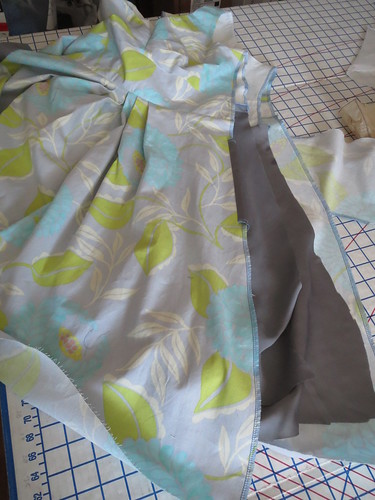
Assembled Front and Back Separately

Because I'm a little out of practice in sewing the Big 4, I wasn't sure how this would fit.  To give myself maximum possible adjustability, I assembled the front and back as separate units (the front and back bodice need to be separate anyway to do an all-machine clean-finish lining) so I could adjust along the side seam on the bodice, midriff, and skirt as needed.  As it happens, apparently the sizing hasn't changed at Butterick, because it was perfect with the seam allowances as drafted (I cut an 8 at the shoulders/bust and a generous 10 at the waist).


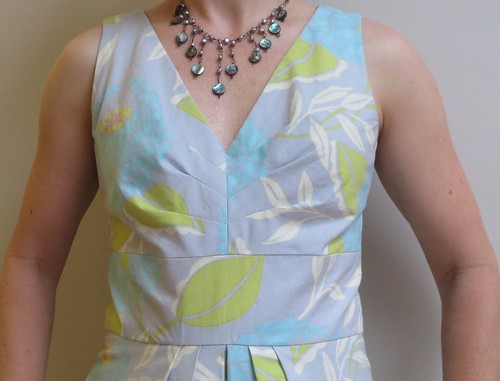
Front Bodice Closeup


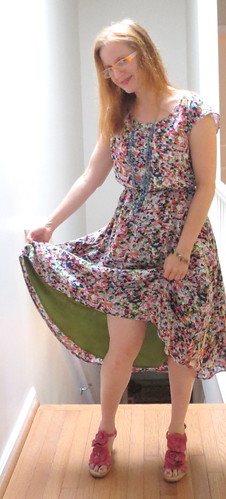
The final bodice fit is very good.  The bust fits well (though it definitely has ease) and is flattering.  I should have taken a tiny bit more length out of the front neckline, which sits away from the body a little bit.  The neckline is also surprisingly low, lower than conveyed on the model I think.  I might raise it up 1/2 inch next time.

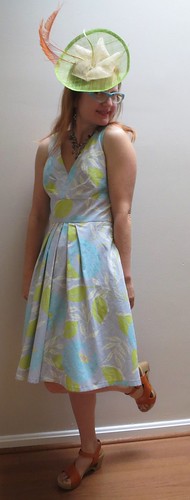
With Hat


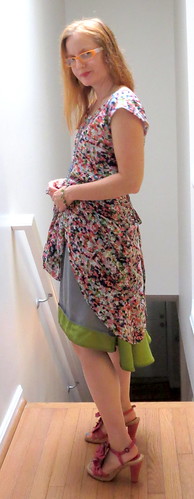
All in all, a fun sundress for our cool summer!  I had a little fun with pulling out one of my hats for a vintage style look.  With the width of the shoulder this would be easy enough to pop sleeves on for a Fall/Winter look, though I'd probably go with a less voluminous skirt rather than the wide pleated sundress look.

All photos are here and the pattern review is here.

Thursday, August 14, 2014

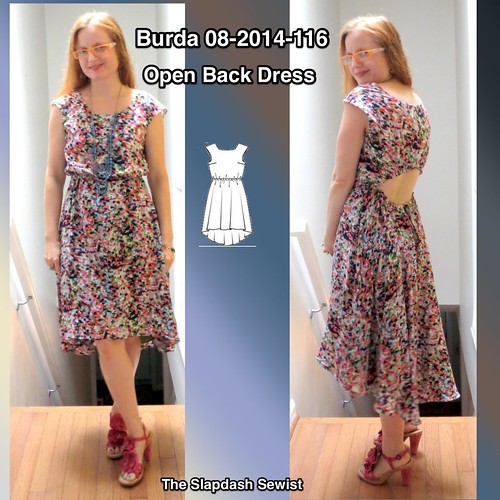
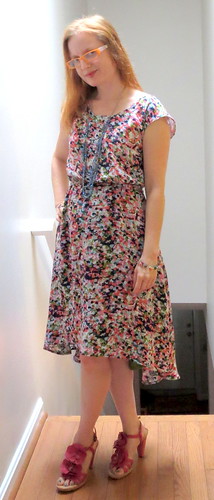
Burda 08-2014-116, Open-Back High-Low Dress

Burda_08-2014-116_Thumbnail

I have been enjoying the cutout trend and so when I saw Burda 08-2014-116 I instantly fell in love and had to make it.

I just happened to have a trip to New York planned, so finding the perfect fabric for it was on my list.  This lightweight rayon was exactly what I was looking for--I love all the colors in the print, I like that it's a dot and not a floral (I love floral, but have a LOT of it), and it has the perfect floaty factor.

Back Alterations-BBA and Neckline
For the back bodice, I did a Broad Back Adjustment and also took a HUGE tuck out of the back neckline, which was really, really wide.

The bust dart on the front bodice is actually pretty small as drafted so I did not do any alteration for SBA.  I think if you are larger than an A cup, you'll want to do a FBA even if you don't normally need to.  The front neckline is a wee bit wide; I wish I had taken a little bit of width out of it at the pattern alteration stage.

The pattern is drafted as a boatneck, which is difficult for me to wear given that I am short.  I lowered the front neckline 2 1/2 inches (!) from where it was drafted, and it is still reasonably high.  So keep that in mind if you are at all chokey from high necks as I am.

Shorten Skirt


For once, I didn't need to do a swayback adjustment to the pattern because the cutout is basically at the swayback.

The skirt was too long as drafted, so I folded out 1 1/2 inches on each piece before cutting.

The pattern as drafted is lined in the bodice, but not in the skirt.  This fabric was too sheer not to line the skirt.  I'm *not* into the trend of having a short lining under a long sheer skirt (the 20somethings in DC are ALL OVER this look--like 50% of them on a Saturday night will be wearing this), so I thought a contrast lining was the way to go.  I immediately thought of the gorgeous green silk/cotton I got during Martha Pullen's epic silk/cotton sale, but didn't want to waste the vast expanse of it needed to fully line the skirt.  After agonizing over it way too much, I finally realized that duh, I could use cheap ordinary lining for most of the skirt and then add the silk/cotton at the bottom where it would show.

Lining Contrast Hem Extension

I lined up the center front and back skirt patterns and marked where the center front hit the center back.  I later realized that the back skirt dips down below the front skirt at the waist, but luckily I gave myself a good 2 1/2 inch cushion and only the decorative lining shows.  I then drew in the line for the decorative lining, making it about 2 1/2" wide in the front.

Contrast Lining

Lining Extension


It all worked according to plan.  I got my pretty contrast lining without "wasting" an acreage of lovely fabric.


Because there is no front or back center seam I couldn't do my usual all-machine clean finish.  I would normally use this method in that instance, but I was intrigued in reading Burda's instructions for finishing; yes, the Wooden Spoon Method.


I have seen the Wooden Spoon illustration many times.  I imagine that every month someone walks into Dagmar Bily's office and is like, "Disaster!  There is too much white space on the instruction sheet!"  and she pulls her best Miranda Priestly and is like, "Have you used the Wooden Spoon yet?  Seriously, do I have to think of everything myself?"  and they're like, "Of course!  The Wooden Spoon!  The Wooden Spoon will save us!"  Seriously, I think it's in every issue.  But the illustration has always made zero sense to me.  Until now.

The Wooden Spoon Method:

As with my normal clean finish technique, I started by trimming 1/8" inch off the neckline and armscye edges of the lining.

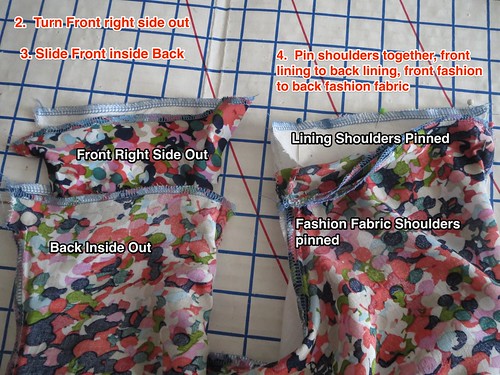
Front Right Side Out, Back Inside Out

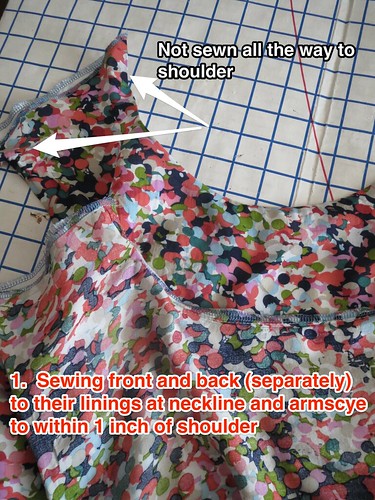
Sew the bodice pieces together with their respective linings along the neckline and armscyes to within about an inch of the shoulder.  Finish/trim the seam allowances (I do it in one with the serger).  Finish the unsewn shoulder edges by serging, zigzagging, or your choice.

Turn the front bodice right side out.  (I actually turned both bodices right side out and did the required pressing, since I figured it would be easier to do with the pieces separate than together.  Then I turned the back bodice inside out again.)

Front Pulled Inside Back


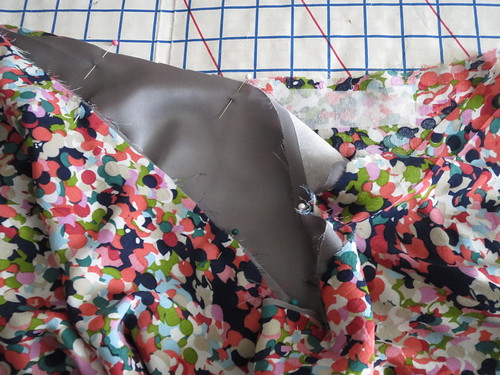
Slide the front bodice inside the back bodice/lining, with the fashion fabric right sides together and the lining right sides together.  Match up the shoulders of the fashion and lining fabrics, and then pin.  You now have four shoulder seams to sew: fashion fabric right, lining right, fashion fabric left, and lining left.

Sew the shoulder seams.

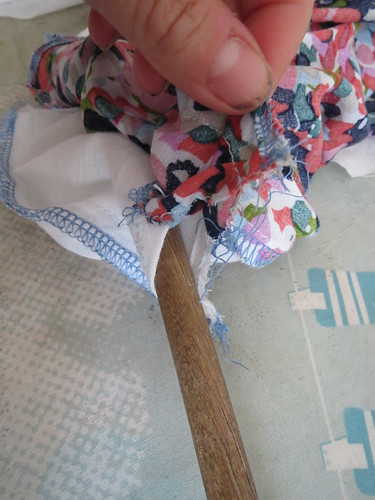
Insert Wooden Spoon

Now for the famous Wooden Spoon:  Pull the front, which is inside the back, further through the back more toward the outside so the shoulder seams are no longer at the edge.  Slide the wooden spoon into the holes where you did not sew all the way up to the shoulder at the armscye and neckline.

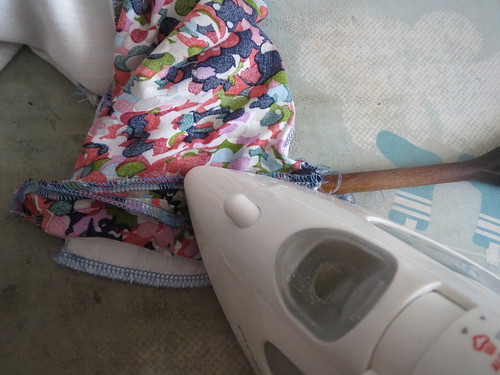
The Infamous Wooden Spoon

Position the shoulder seam over the wooden spoon, and use it as a "ham" to press open the seam.  Frankly, I was pretty disappointed in the wooden spoon, which did not really make it easy to press open the seam.  I should have grabbed my wooden spoon that has a flat handle, but now that I live in a two story house such frivolous trips back and forth to the kitchen are more carefully considered.

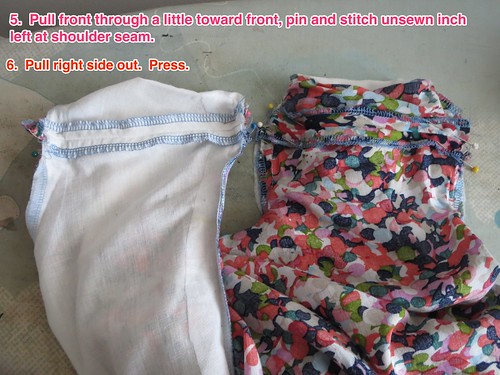
Pull Front Through To Complete Seam

Once your shoulder seams are pressed, keep the front pulled through, match up shoulder seams of the fashion fabric and lining (which are right sides together), and pin the little hole you left through which the wooden spoon was threaded.  Again, you have four shoulder edges to do. Sew. 

Pull the front out the bottom to turn right side out.

I have to say, I am impressed with this method.  My alternate method requires a few inches of hand sewing, but this method is all machine.  Well done, Burda and your Wooden Spoon.

Interface Drawstring Opening

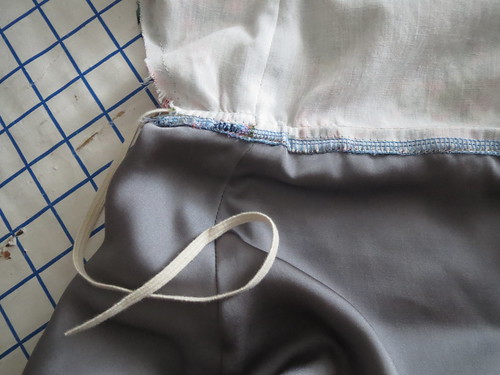
I sewed the side seams of the fashion fabric and lining of the skirt separately so they would hang free, and then basted them together at the waistline to be treated as one.  I interfaced both pieces where the buttonholes for the drawstring would go, and then did the buttonholes through both layers as one.


Stitch Skirt to Bodice at Front


The dress is pretty straightforward to put together.  Once the bodice is completely lined, the bodice and lining are treated as one at the waist.  I basted the two layers together to avoid shifting.  Sew the bodice to the skirt up to where the back skirt dips into its hole.

Thread Elastic in Front Casing


Use the seam allowance to make a casing and thread elastic in.  Burda has a misprint in the instructions, which tell you to "sew the ends together."  Unless you have a 17" waist and are looking for a figure 8 in the back, you want to sew the ends into each end of the casing.  The join of the skirt/bodice/casing is a little ugly, but it gets covered up by your finishing--I used bias tape as described below.

Turn Under Bias Tape for Casing

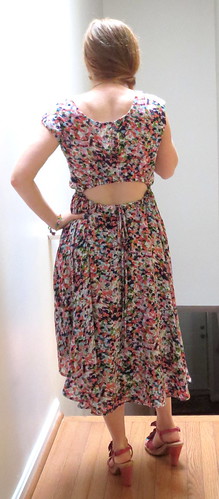
Burda has you make a facing for the back cutout.  I really don't know why you'd use a big unwieldy fabric-hoggy facing instead of bias tape.  I used self bias tape, stitching it right sides together all the way around the hole then turning it to the inside to form a casing.  Make your ties and join them with elastic in the middle, then thread through the casing.

Front


Love this dress!  It was also pretty simple--it might be a fun 3rd or 4th project for a dedicated beginner.  I may someday straighten out the hem, but the high-low thing is still going on and my other iteration, last year's birthday dress, was totally disappointing due to the poorly drafted pattern.

Back

The cutout is just perfect, and I like the cut of the bodice with the wider shoulders.  I'm considering drafting the cutout right out of it for a simple summer dress pattern--I feel like I'm seeing a lot of the simple dress with elastic waist (like this and this) this year and this one has well-balanced building blocks.

All photos are here and the pattern review is here.  I'm still working on a photo location.  Standing at the top of the stairs has more even lighting from the skylight--directly overhead instead of over one shoulder--than standing along the side wall, but then you get the gaping maw of the downstairs look, which is a little weird.  Also, I'm afraid of accidentally getting too close to the stairs and falling backward down them.


Thursday, July 17, 2014

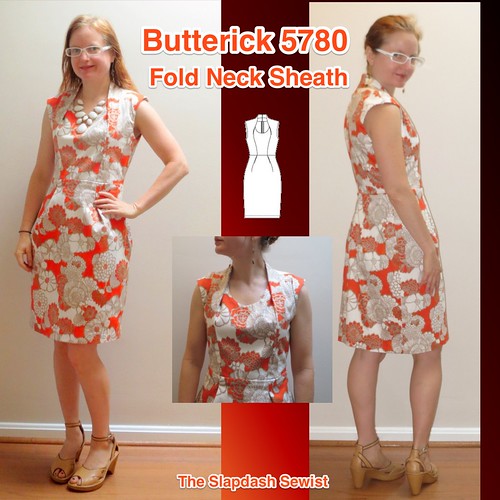
Butterick 5780, Fold Neck Dress

B5780 Thumbnail

I sewed!  Pattern Review is having its stash contest this month.  I am not a contender, but it did help me focus in deciding what to make now that I can finally sew.  I decided on Butterick 5780, a pattern that surprisingly has not taken the blogosphere by storm.  It's a flattering, interesting sheath dress with nice design lines.  It's a copy of the Reiss Taruca Sculptured Dress, which was $340 according to this blog post.  I think the issue with the pattern that has held it back is its suggested fabric:  ponte.

Let's talk about ponte. I think I have fallen out of love.  One the one hand, it is a miracle fabric.  A knit with all the easy-to-sew, easy-to-fit, easy-to-wear qualities we love, but that skims over all the lumps and bumps and is universally flattering.  What's not to love?

One word: pilling.  For the love of all that is holy, the pilling.  While I've found a few gems of quality ponte, almost everything I make out of it is garbage after the second wear.  Ugh!  What a waste.

The other issue is that ponte is a rather thick fabric.  This dress is necessarily constructed with a side front bodice stay/lining, and the pattern (and original dress) call for it to be fully lined.  With the fold in the side front piece and all the seam intersections, every review on PR complains about the bulk.

I never had any intention of making this dress in ponte--it begs to be more structured--so I used a very stretchy cotton twill I got from Fabric Mart last July for $7.99/yd (they called it sateen, but I would call it twill).

Given the Ease of Doom characteristic of all Big 4 patterns (yes, even Vogue), I figured it wouldn't be a big deal to make it in a very stretchy woven rather than a ponte, especially as several reviewers mentioned that it ran large.  They also mentioned, as I found to my chagrin, that there are no finished garment measurements anywhere--not on the envelope or the tissue.  Seriously, Butterick.
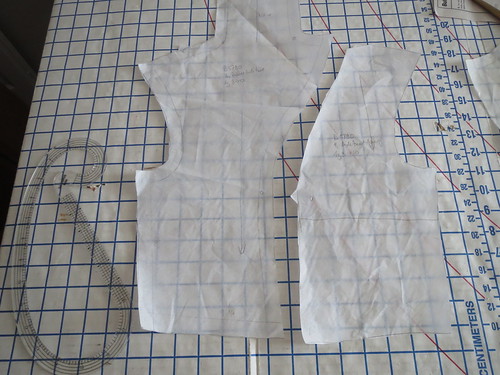
Bodice Side Front and Full Stay/Lining

Luckily, my awesome brother and sister-in-law gave me an Etsy gift certificate for the holidays, which I used to buy 5/8" SA Curve rulers.  I traced off the pieces, and used the rulers to mark the 5/8" seam allowances and was able to get my own finished pattern measurements.  Which, as expected, were pretty close to right for a woven.  I added to the waist--but ended up taking all that and more off when the actual dress was constructed.

The other thing reviewers complained about was the grody half-lining for the bodice.  As drafted, the bodice lining only goes to about halfway down, right at boob level.  The reviewers said you could see the line of the bottom of the facing/lining.  Again I say:  Seriously, Butterick.  The center front bodice and back bodice were easy--just use the same piece for the fashion fabric and lining.  The side front stay/lining just required lining up the armscye with the side front bodice, and completing the stay/lining from the boobs down.

I did a slight SBA by shaving a little bit off the curve of the center front bodice at the bust.  The fit on the bust is not enormous, and the fold does a little bit of subtle bust-building for a flattering finished result.
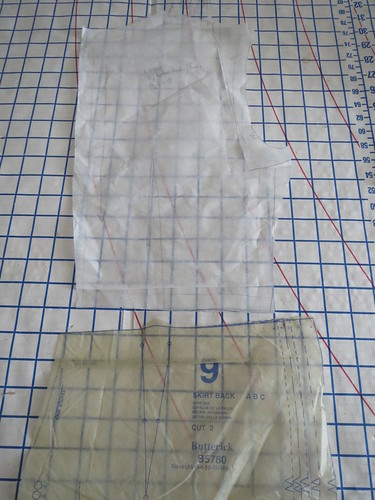
Swayback and Broad Back

I also did a broad back adjustment on the bodice back, and split the swayback adjustment between the bodice and skirt.  In addition to folding out length for the swayback, I also made the flat back seam into a curve over my swayback.

The instructions for construction are good but not great.  There's a little bit of origami involved and there are some things that aren't covered, like which direction the strap flaps are to be sewn on the underside of the side front (I did one right and one wrong--and I still can't tell you what's right.  I think you fold the strap toward the center--here's a look inside the fold).

You start by sewing the center front and its lining together at the neckline to finish it.  I raised the neckline by 1/2", I don't really know why.  It's neither too high nor too low at the raised level, but I'll probably cut it as drafted next time.  As I sewed it, I realized that unless your fabric needs lining, only the side front stay/lining is necessary.  You can finish the center front neck and bodice back armscye with bias tape.  Oh well, it looks nice on the inside.

Next, you pin the bodice side front to the bodice center front at the princess seam.  Easy enough.
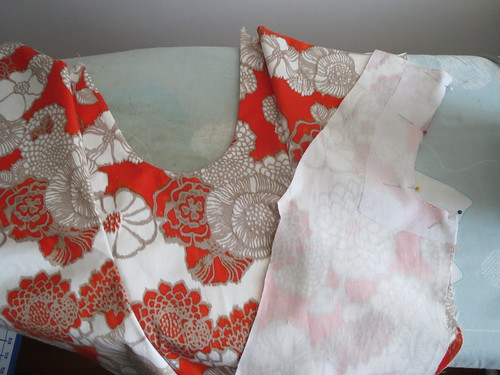
Bodice Side Front Stay/Lining

Now it's time to attach the bodice to the side front stay/lining.  Start by pinning the side fronts together at the armscye to get a clean finish on the armscye.
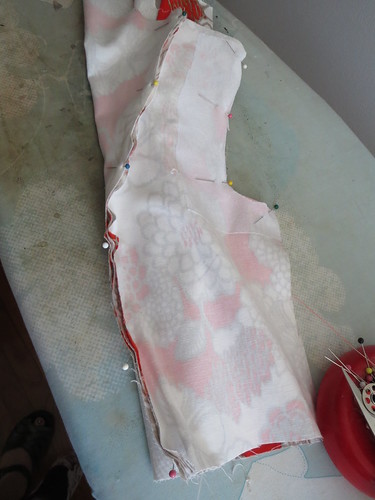


Burrito Fold for Bodice Side Front

Then you burrito roll the side front and the center front together, and encase them in the stay pinned over the already-sewn princess seam.  You can only do one side at a time, obviously, but once you do one side the other side is not any more complicated (you don't have to do any finagling with the already sewn side).

This is the part where the reviewers seemed to have trouble.  I actually had more difficulty puzzling out how to attach the front to the back.  It's not difficult and I've done plenty of projects with the same design of having a back "collar" extend from the front to the CB neck (including a self-drafted one), but somehow this one took me a minute to find all the match points.  Maybe because it had been so long since I'd sewn.  It was only a few months, but I felt so rusty on this project!
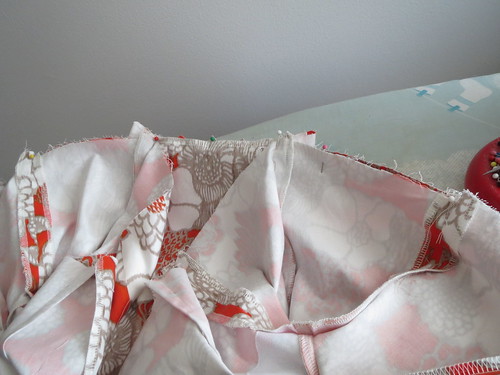
Pin Skirt to Bodice, Not Catching Lining

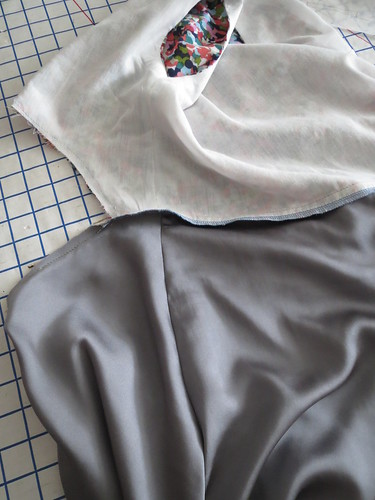
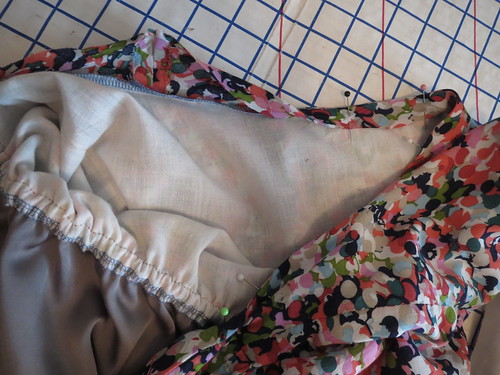
Because the bodice center front and lining were sewn as one to the bodice side front, the lining could not hang entirely free at the waist (with fashion skirt sewn to fashion bodice and skirt lining sewn to bodice lining).  I prefer to have the lining separate from the fashion fabric to avoid weird bunching and twisting, so I sewed the skirt and lining to the bodice separately everywhere except at the bodice center front.
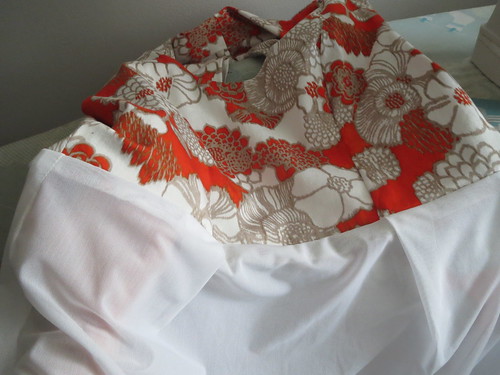
Lining Hangs Free at Waist to CF


You can see my hand in there illustrating that the lining is hanging free past the bodice center front.

I never know what to line stretch wovens with.  Here I used a stretch mesh purchased as swimwear lining, which is fine for this dress.  It didn't need much opacity added to the fabric, and I don't anticipate wearing tights with it.  If anyone has suggestions for a good stretch woven lining, I am all ears!
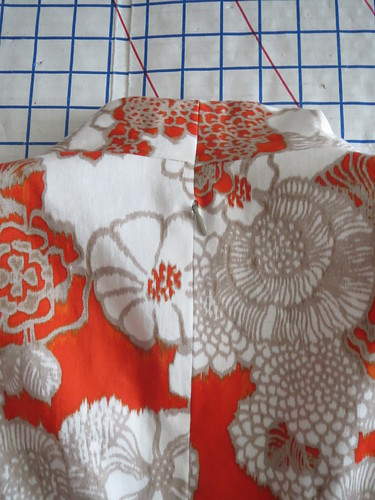
Zipper Starts Below Back Collar

As drafted, the entire center back seam is open and the zipper installed.  I don't have great success getting super-square corners at the top of a zipper, and I really didn't want a weird zipper at the top of the collar.  So I sewed the collar and one inch below closed, and then installed the zipper below that.

Burrito to Machine Stitch Lining to Zipper

Because of that, it was a little tricky machine-sewing the lining to the zipper tape (using this method). The first time I tried to pin the lining to the zip I ended up with a water weenie that couldn't be unfolded.  Good thing I tried before actually sewing it!

I realized I was going to have to burrito it again, folding the entire dress to the inside and wrapping the lining around.  It worked!  And sewing the second side was no harder than the first.
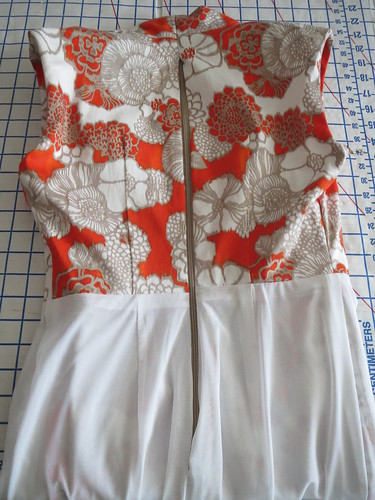
Zipper Inside


I ended up with a nice clean finish on the inside, no hand sewing involved.


Double Fold Hem


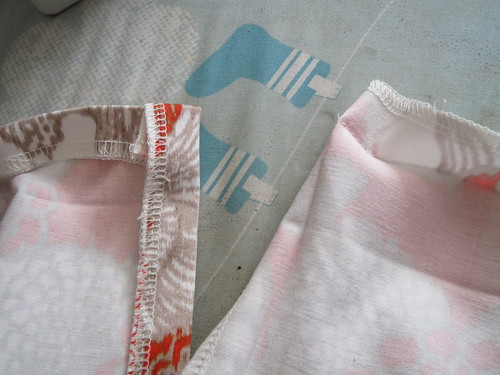
I did a double-fold machine blind hem.  At the back slit, turned the slit allowance toward the right side and then accidentally stitched along the first fold, rather than the second.  Fortuitously, this resulted in a nicer looking hem than if I had sewn the second fold, as I intended.  I will have to remember that for the future.
Front


Along with the new sewing room (which is totally makeshift at this point, just barely unpacked enough to sew) I have to figure out a new photo location!  I thought the spot at the top of the stairs would be good because there's a skylight, but the skylight is over the stairs, not the landing, and the lighting is uneven--a little too artsy shadowy.  The photo from the thumbnail was taken without flash and you can see that all the light is coming from the (viewer's) right.  With post-production, though, maybe that's ok.  Using the fill flash (this photo) results in harsh colors and a flat photo.  I'll figure it out!


And to make this post even longer and whinier, I lost all of my photos.  Again.  My hard drive died and my iPhoto library had never backed up in Time Machine.  Again.  (Everything else was backed up.)  Tears were shed, and unblogged projects were lost (having learned from bitter experience, I usually don't delete from my camera until the photos have been uploaded to flickr, but wading through thousands of pictures will take many, many hours I don't have).  And because Apple cannot currently generate codes for iPhoto credit in the App store (really?), I am having to learn new software.  It's only $14.99, but on principle I absolutely will not buy iPhoto myself.  (I'm told the issue is that in the old version I have the iPhoto library won't back up if iPhoto is open.  Which it always is.  So I need the new version.)  Blogging will continue to be slow!


And then there's the photographic challenge of shared space: the self-timer photobomber!
Front Closeup-Full


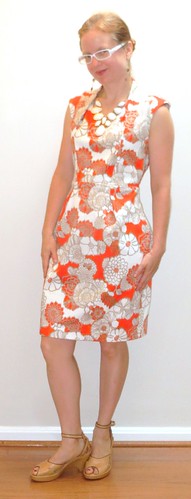
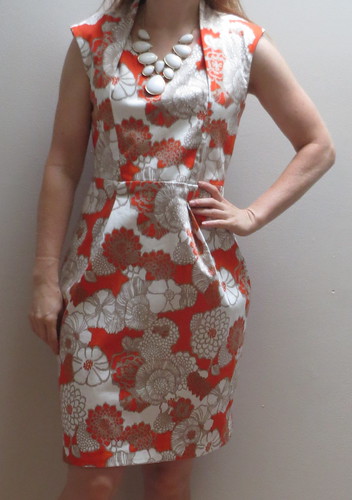
Meanwhile, however, whining aside, I am thrilled with this dress!  It is super flattering, fits well, and was untraumatic to sew.  An excellent entree back into the field.


It's well-drafted, and the fit alterations are almost there.  I should have rounded out the center back skirt seam as I have a teensy bit of shark fin at the CB hem, and the shoulders are a smidge too tall.

The pleats on the skirt feel like they stick out weird when I look down at them, and maybe they do, but it's a weird I can live with (I prefer it to a tummy pooch).

I will definitely be making this again for winter with sleeves, though I will trim the armscye to a shorter/normal length, as a dropped sleeve isn't flattering to me.

All photos are here and the pattern review is here.

Thursday, February 13, 2014

Burda 03-2012-104, Cowl Drape and Corset Drop Waist Dress

Burda 03-2012-104 Thumbnail


This rayon/mohair suiting fabric was a Fabric Mart Crazy Price $2.99/yd item that I got in September of last year.   I wasn't sure if it would be too shiny (the description was slightly alarming) but it turns out to be a very lovely rich navy with a hint of sheen, though because of the high rayon content it wrinkles fairly heavily when sitting on it.  All in all a pretty good buy (not that I ever need more fabric).

In deciding what to make with it, I was heavily influenced by this Antonio Berardi ($2065).  I love the cowl, the wide corset-style midriff, and the slightly drop waist.  I remembered that Burda 03-2012-104 had very similar lines and just had to make it.  Spoiler alert:  Mine does not capture the magic of the inspiration dress.

Extend Shoulder Length

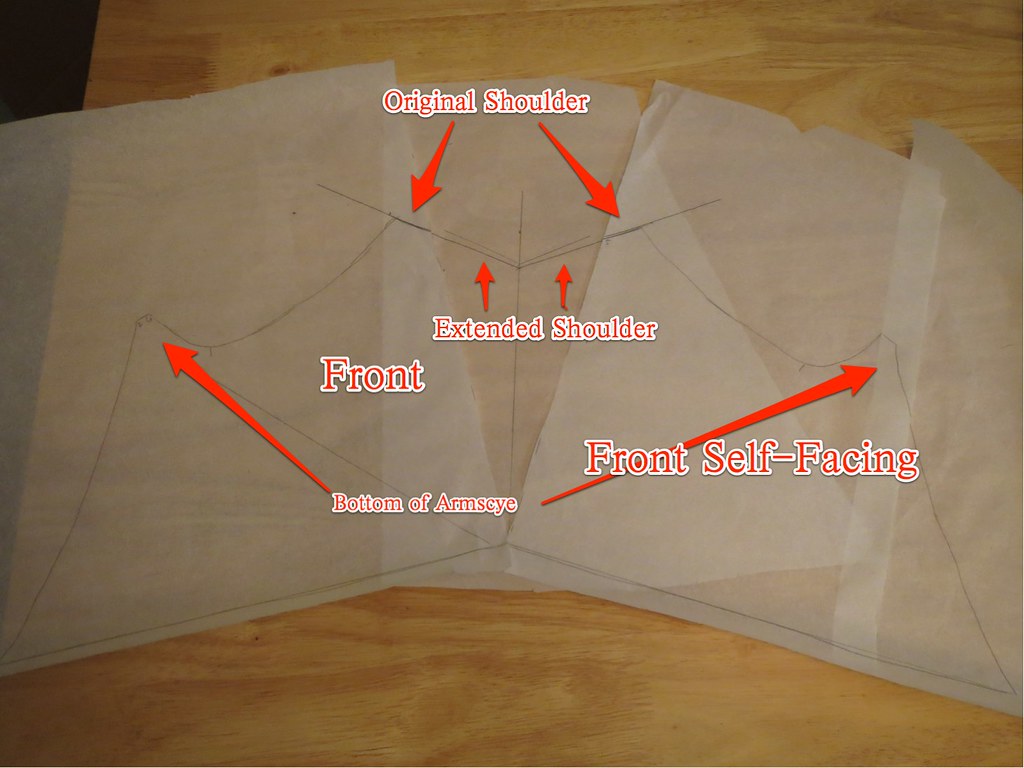
The major issue with the Burda was the narrow, cut-in shoulder.  I wanted full shoulder coverage with a sleeve so I needed to extend the shoulder.  The upper cowl portion of the front is cut with a full self-facing, so it wasn't as simple as just making the shoulder longer (what I would normally do).

My method added some volume to the cowl, but based on the magazine photo it didn't look like this would make the cowl too low.

I started by making a line between the front and the front self facing long the fold line, dividing the front from the self-facing at the shoulder.  Then I split along the line and spread the pattern by the length I wanted to add to the shoulder.  I continued the angle of the shoulder line from the pattern as drafted.  The now angled center front (at the bottom of the marked-up photo) is straightened and filled in with tissue.

Completed Upper Bodice Pattern


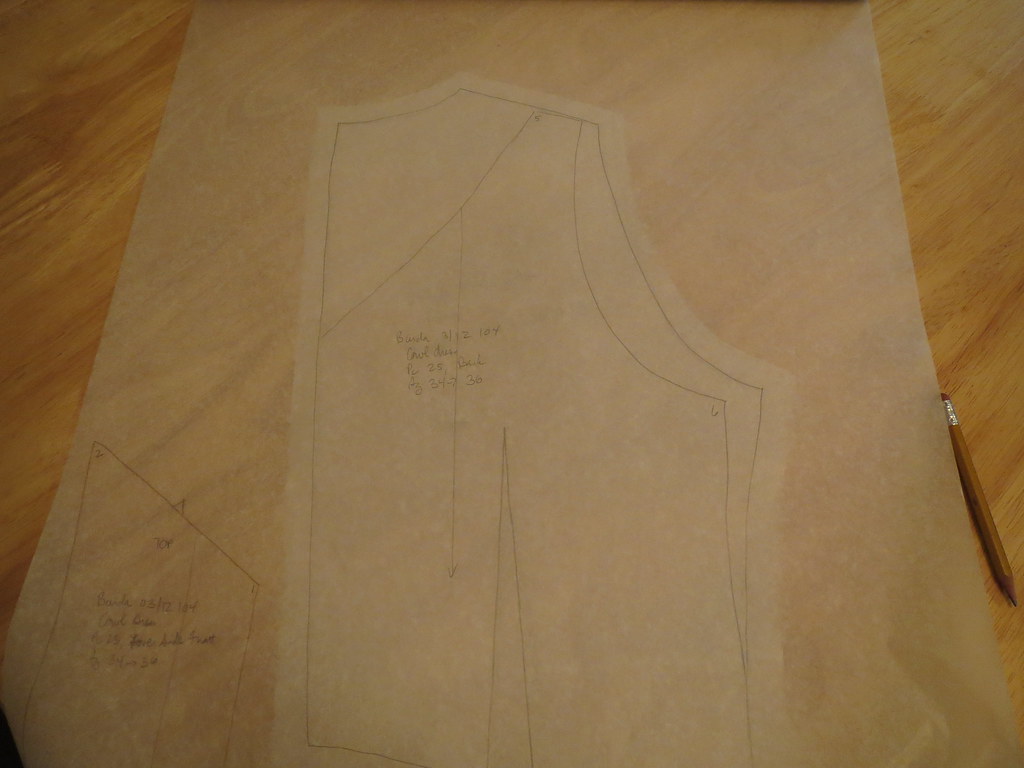
Because the front cowl is cut on the bias, I made a complete pattern piece that could be cut single layer, integrating my alteration to the shoulder length and added volume.

Use TNT Woven Top to Alter Back


The back was much easier to alter.  I do love having a TNT woven top.  I didn't have to do a broad back or calculate the shoulder length or anything.  I just popped my TNT under my traced pattern piece and trued it up.  Everything fits as it should in the back.

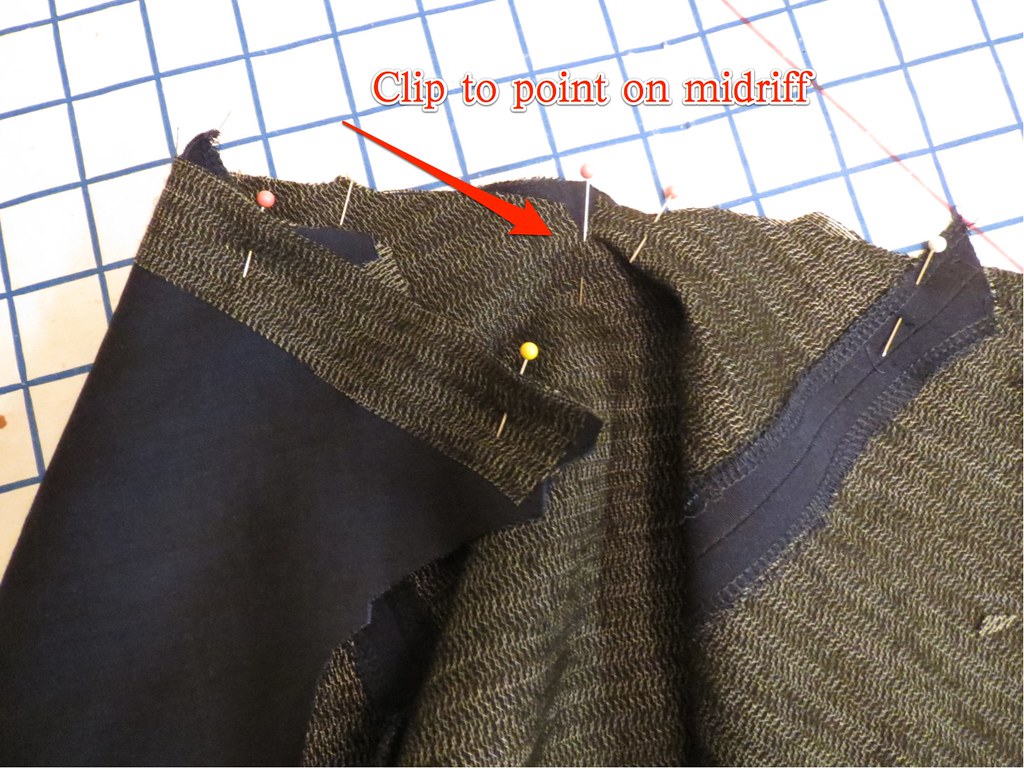
Clip to Point on Midriff


Construction was pretty straightforward.  I interfaced the front and back midriff sections because the fabric is somewhat lightweight and quite wrinkle-prone.  I wanted the corset lines to look corset-y, not collapsed and saggy.  To get the point at the front waist, I clipped all the way to the stitch line on the midriff.


Topstitching


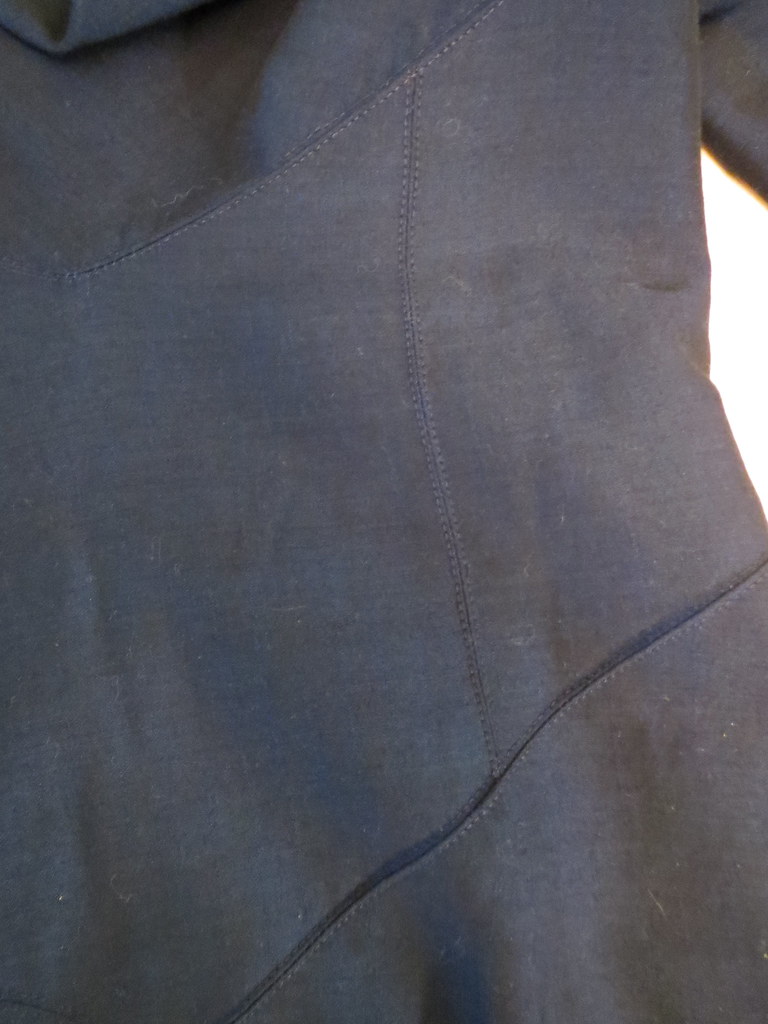
To emphasize the corset lines, I used a twin needle to topstitch along the princess seams and the joining seams with the upper bodice and the skirt.  With the dark fabric, this very subtle detail shows pretty much not at all, but I didn't want to do a contrast thread for this work dress.


Silver Lining


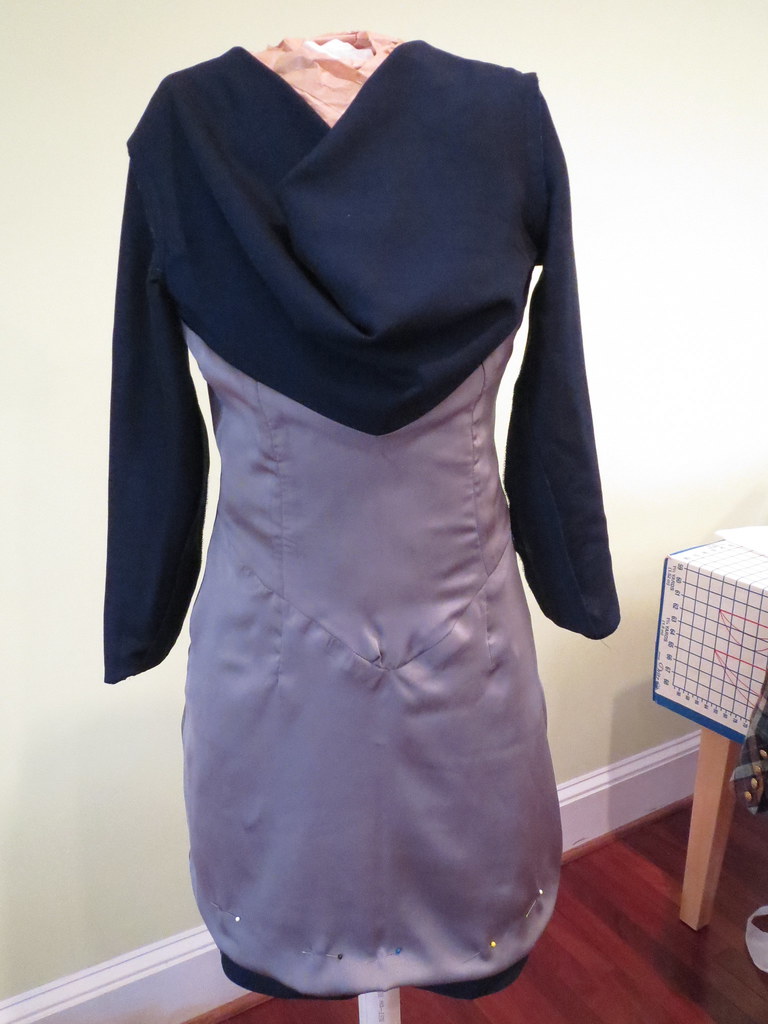
It's lined with a silvery gray poly purchased on our Pilgrimage to Fabric Mart ($1.99/yd).  The back neckline has a facing that I stitched to the lining along the lower edge of the facing before attaching at the neck, as the hand is too different between the fashion fabric and the lining to line to the edge.

I may not love the dress, but at last it has a silver lining!  (I bought 10 yards of the lining, so get used to this joke.)

Unbelted

I know that I cannot wear a drop waist.  I am too short and too pear shaped for a drop waist.  Why did I think this would be different?  This is not a great dress on me.  I like the individual features of it, but the shape is not my best.

I was too influenced by the inspiration dress, and then after I finished this dress and went to look at the inspiration again, I realized that it doesn't really have a dropped waist, just a shaped one.

Front


Adding an obi helps, although then I started second-guessing myself thinking that I looked like an extra in Star Trek from a planet of peaceful peoples who put on elaborate military drills with dummy weapons as their cultural entertainment.  I don't know.  I'll keep wearing it like this but it will never be a favorite.  It does serve its purpose when I need to dress up, as it works well with a jacket.


Looking back through my woven top inspiration board, I also found this Vivienne Westwood Red Label Draped crepe top ($355) with similar lines, so maybe I can rescue the pattern by making a top from it?  Although I'm not sure if this violates my No More Empire Waist rule.

All photos are here and the pattern review is here.