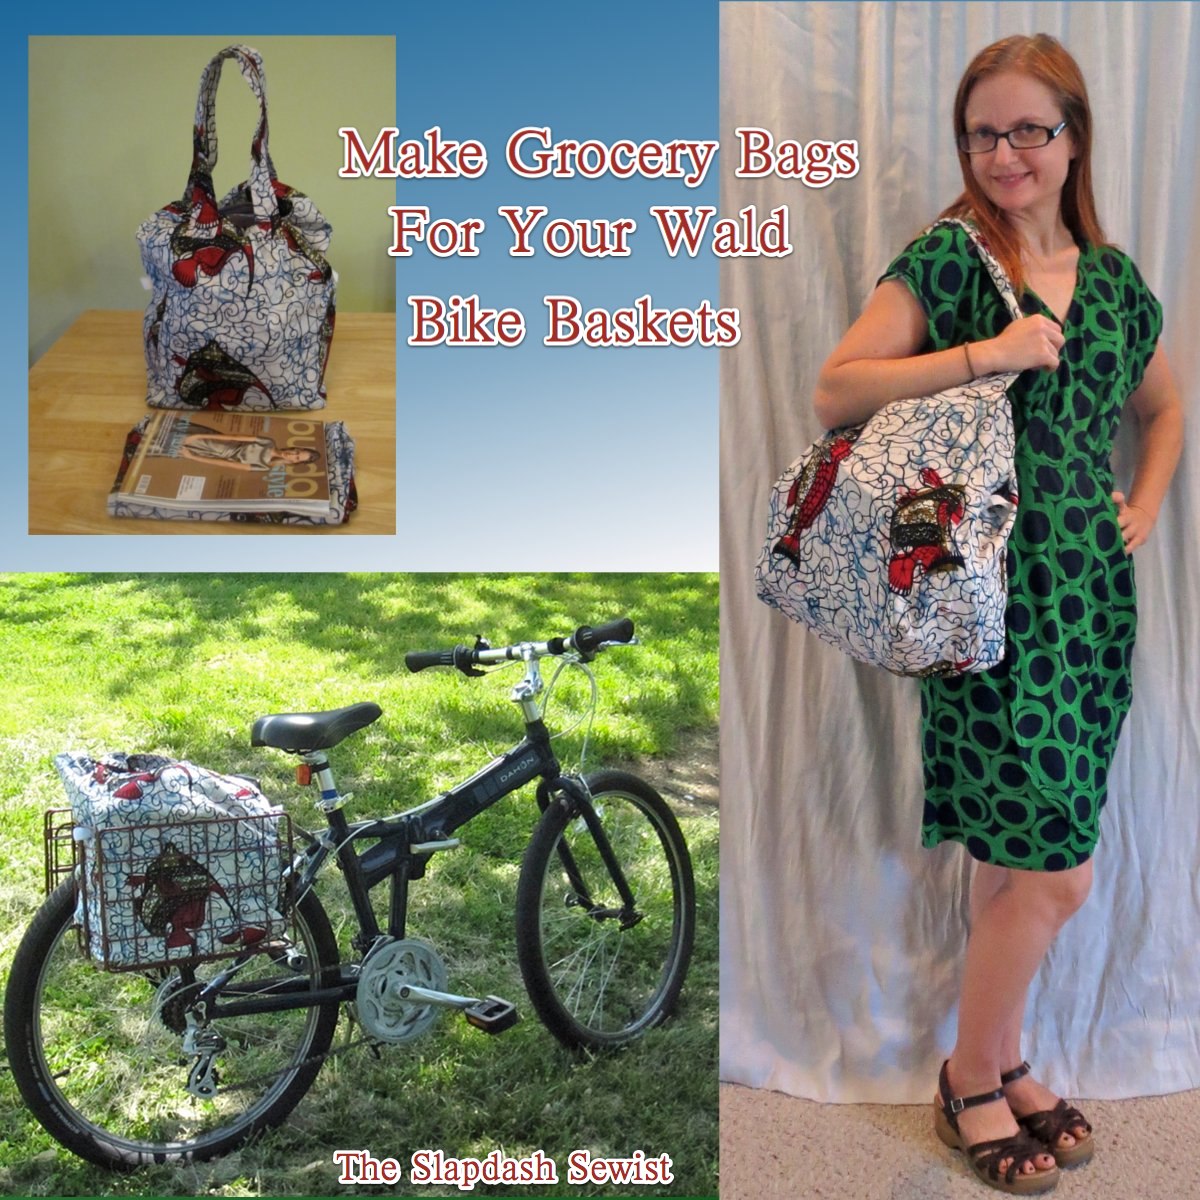
Given my focus on the bikeability of my skirts and dresses, it probably won't surprise you that I sew for my bike as well. I am a commuter-, shopper-, and pleasure-biker, so weight is not an issue for me. I'm not fast anyway, what's a couple extra pounds? So for cargo, I looooooove my Wald baskets.* They collapse when not in use and are easy to fold out when I'm doing a big grocery shop.
*Please note that I have no financial or other connection with any of the products or sources listed in this post. I really do like the baskets that much as a plain ol' satisfied customer.
Baskets are more stable than panniers and a bajillion times easier to use. I found detaching and reattaching panniers a real pain, they are enormous to carry into the grocery store (or heaven forbid a restaurant or bar where you don't want to leave your stuff sitting outside), and I had a pannier pop off my bike in Logan Circle once. With the baskets, there's no detaching and reattaching, and carrying a custom tote bag into the grocery store is much more civilized. Also, believe it or not, I think my grocery bags hold more than a pannier because they are tall. A tall pannier hangs down too low, but the bags' added height is above rack level.
Pro tip: on the advice of my bike shop, I skipped the included hardware and attached my baskets to my rack with hose clamps, which are available at Home Depot or any hardware store. They are a real pain to put on (you have the squeeze the tongue thingy into place with one hand and turn the screwdriver with the other until the tongue thingy is caught and you can tighten it), but that basket is not coming off. After about a year I had one hose clamp fail--the metal broke. Each basket is attached with 3 hose clamps so it did not fall off. When I noticed some rattling, I replaced the hose clamp without incident. So I do recommend an occasional inspection to make sure your hose clamps have not failed.
Of course, a naked basket is no good. I just had to make custom-fit liners for my baskets!
You will need:
Sturdy Fabric
Fusible fleece or other stiffener for the bottom
A drawstring (I used rattail braid; you need a little less than 1 1/2 yards)
A cord stop (Joann sells these in the notions aisle; mine are from Quest Outfitters)
Velcro (mine is 1 inch wide)
The liners are made from four pattern pieces (if rectangles rise to the level of pattern pieces): a front/back, sides, bottom, and straps. The measurements given below include a 1/2" seam allowance.
For each basket liner, cut 2 of each of the following pieces:
Front/Back: 17.5" tall x 13.5" wide
Side: 17.5" tall x 8.5" wide
Bottom: 13.5" x 8.5"
Handle: 4.5"wide x 26"* long
*The length of the handles is based on the perfect comfort carrying height for me. I'm 5'1", so in the highly likely event you're taller than me you might want slightly longer handles; I would recommend adding 1/2" for every inch you are over 5'1", on the theory that half your height is in your torso (where handle length matters) and half is in your legs (where it doesn't).
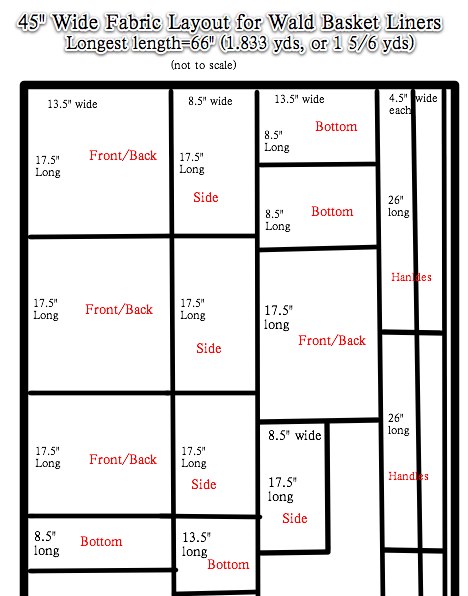
I made two liners--one for each basket (I think most people only have one basket, but since my bike is my car I have two)--from a 45" wide wax print a friend brought me back from Liberia, so I took the trouble to figure out the most fabric-efficient pattern layout, shown below. Most quilting fabric is 45" wide, so if you want to use one of those cute prints this may come in handy.
Most cottons can be ripped on both grain and crossgrain. Make a snip with the scissors and rip away. I ripped all my pieces rather than cutting them. So much faster, easier, and more precise.
A word of warning, though, that when the bags are full they are easy to catch and rip on the baskets. You want a fabric with some body and sturdiness so don't use a lightweight quilting cotton, or if you do you'll need to double it up.
The first thing to do is sturdy up the bottom. This isn't totally necessary, but I find it extremely helpful when loading groceries because it shows you the exact footprint of your basket. This is particularly important when the checker is loading your bags because they instinctively cram them as full as possible and then the bags are too wide to fit in the baskets and you have to mush your groceries around to get them into the right shape.
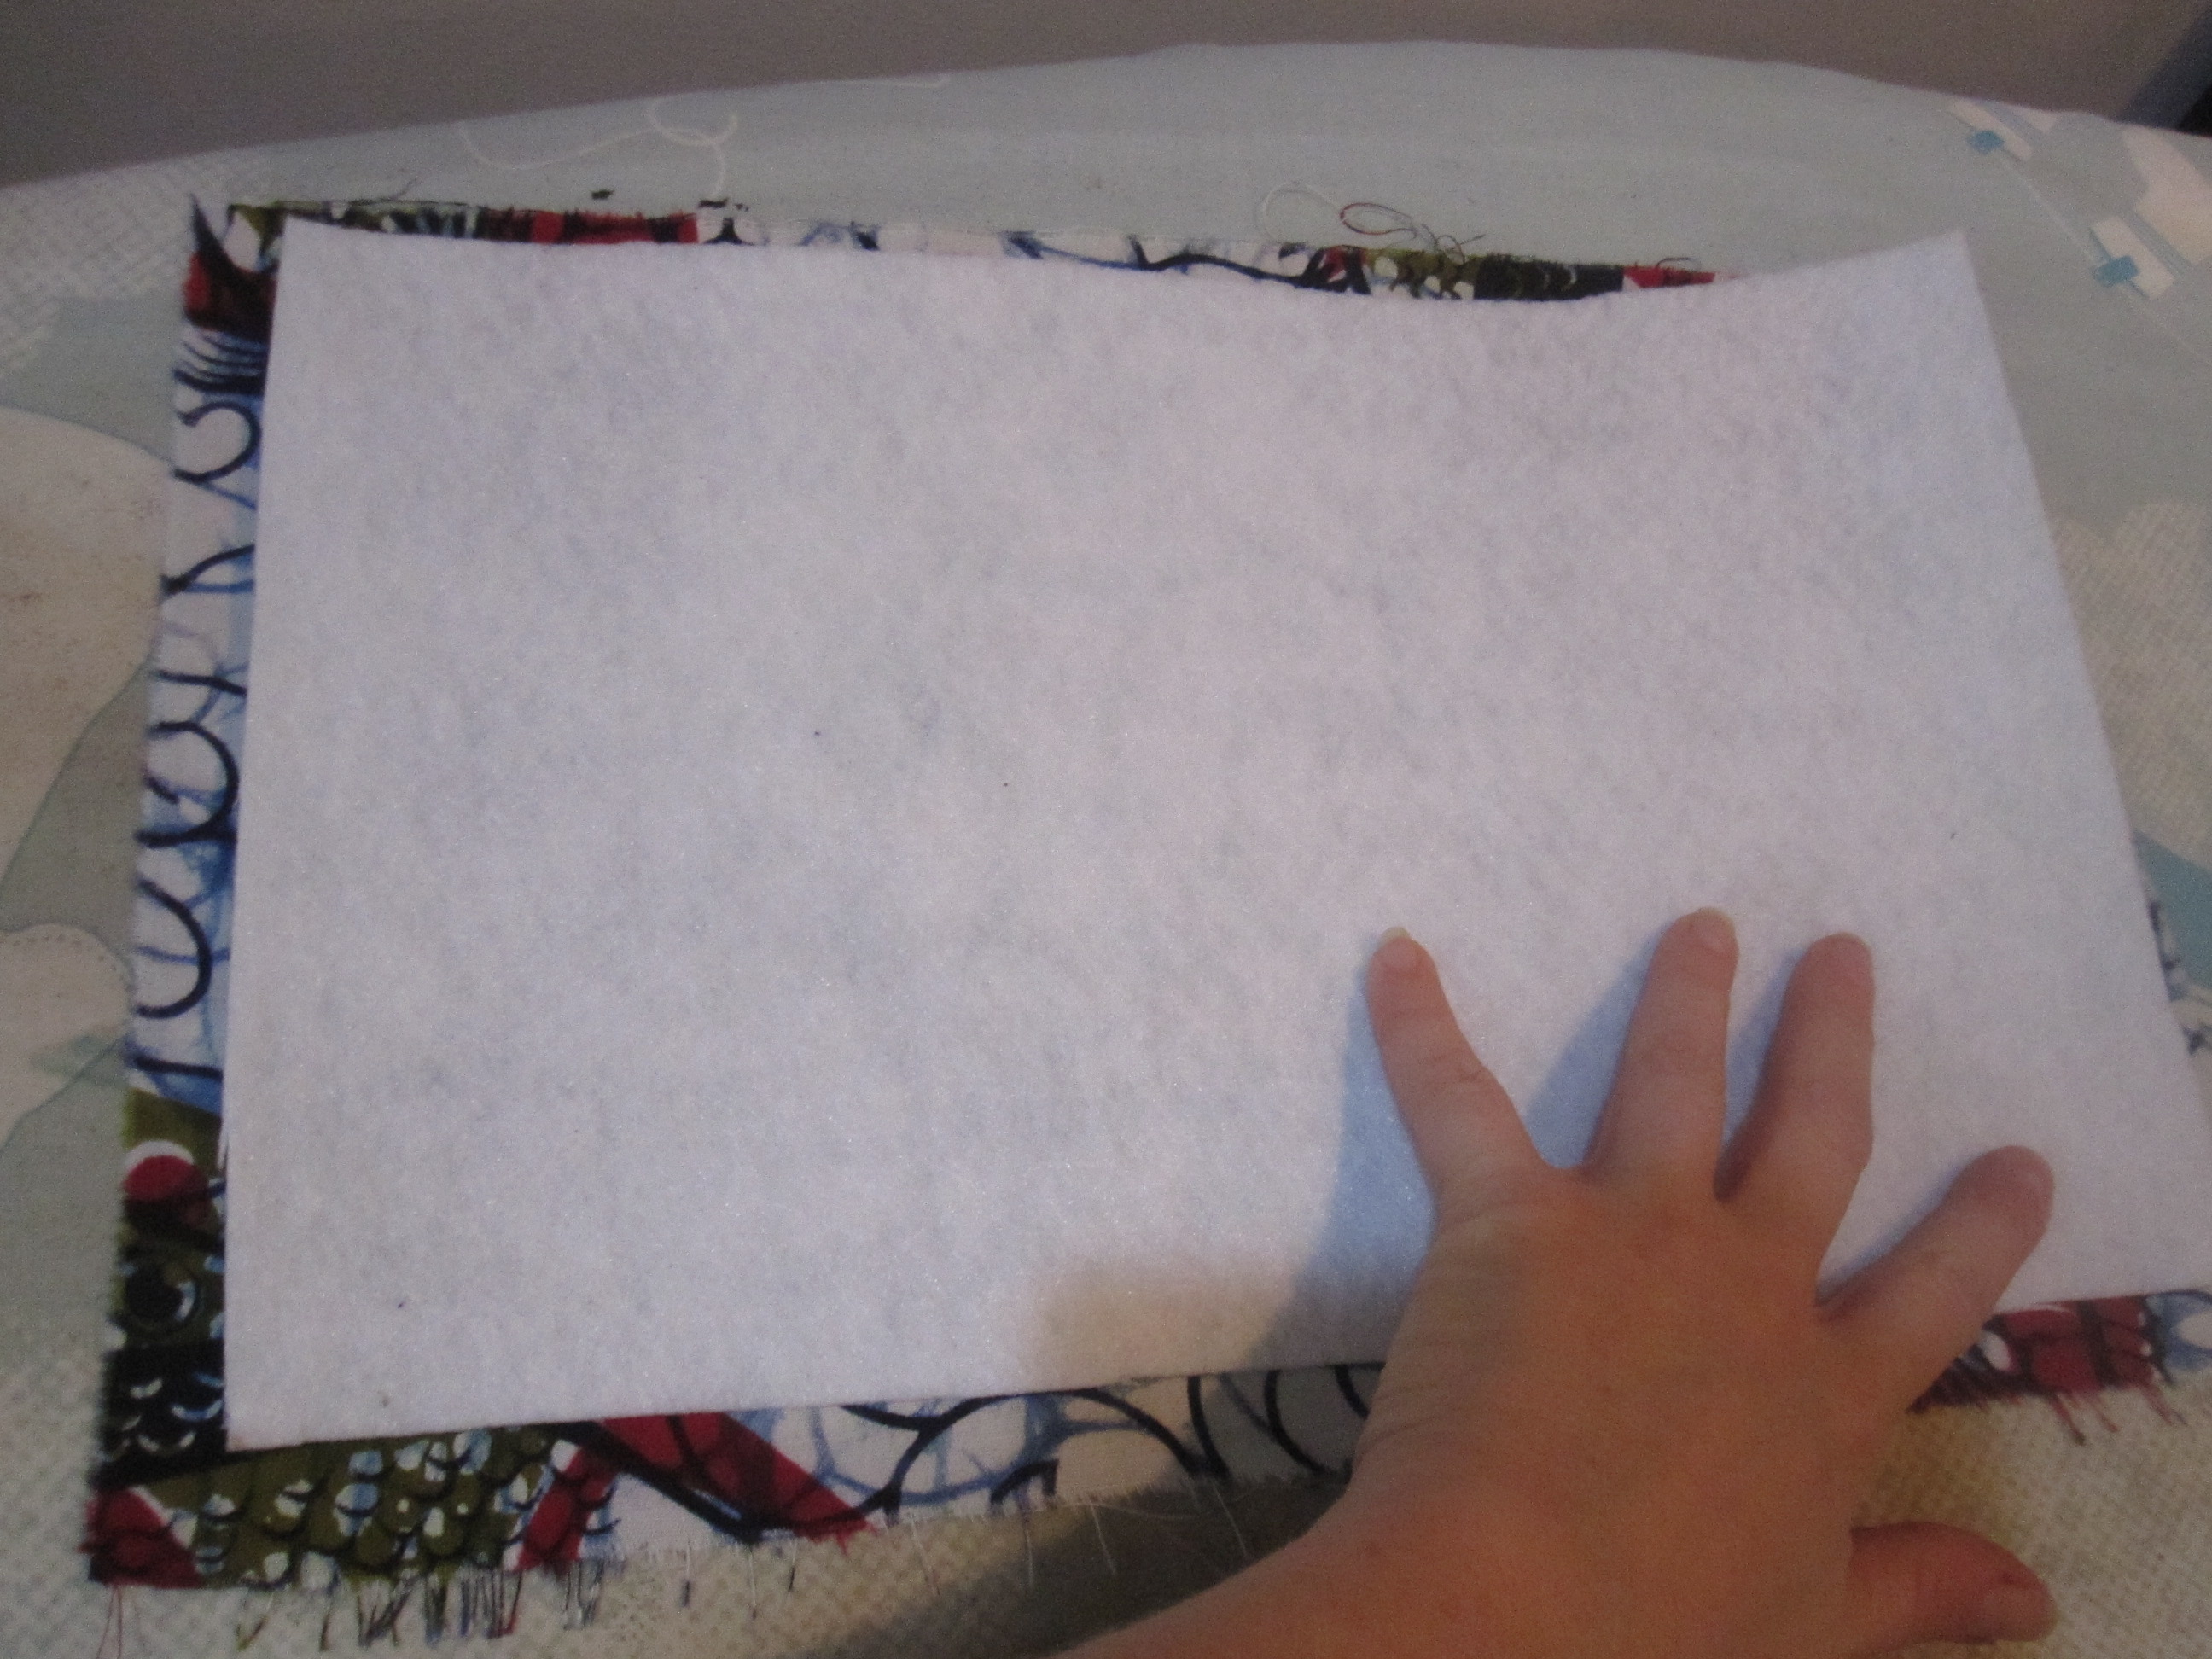
Cut your fusible fleece 12" x 7" (taking the 1/2" seam allowance off all four sides of the bottom piece measurements plus a little more so it's easier to sew). You can draw right on your fusible fleece with a pencil, so just mark your rectangle and then cut along the lines.
Lay one bottom piece, wrong side up, on a flat surface. Center the fusible fleece on top of it. Lay the other bottom piece on top of the fusible fleece, right side up. You've now sandwiched your fleece and the right side of your fabric is showing on either side. Pin through the sandwich a few inches in from each corner and in the center. Now take it to the machine and anchor it with a big X from corner to corner through all three layers (bottom, fleece, bottom). Take out the pins.
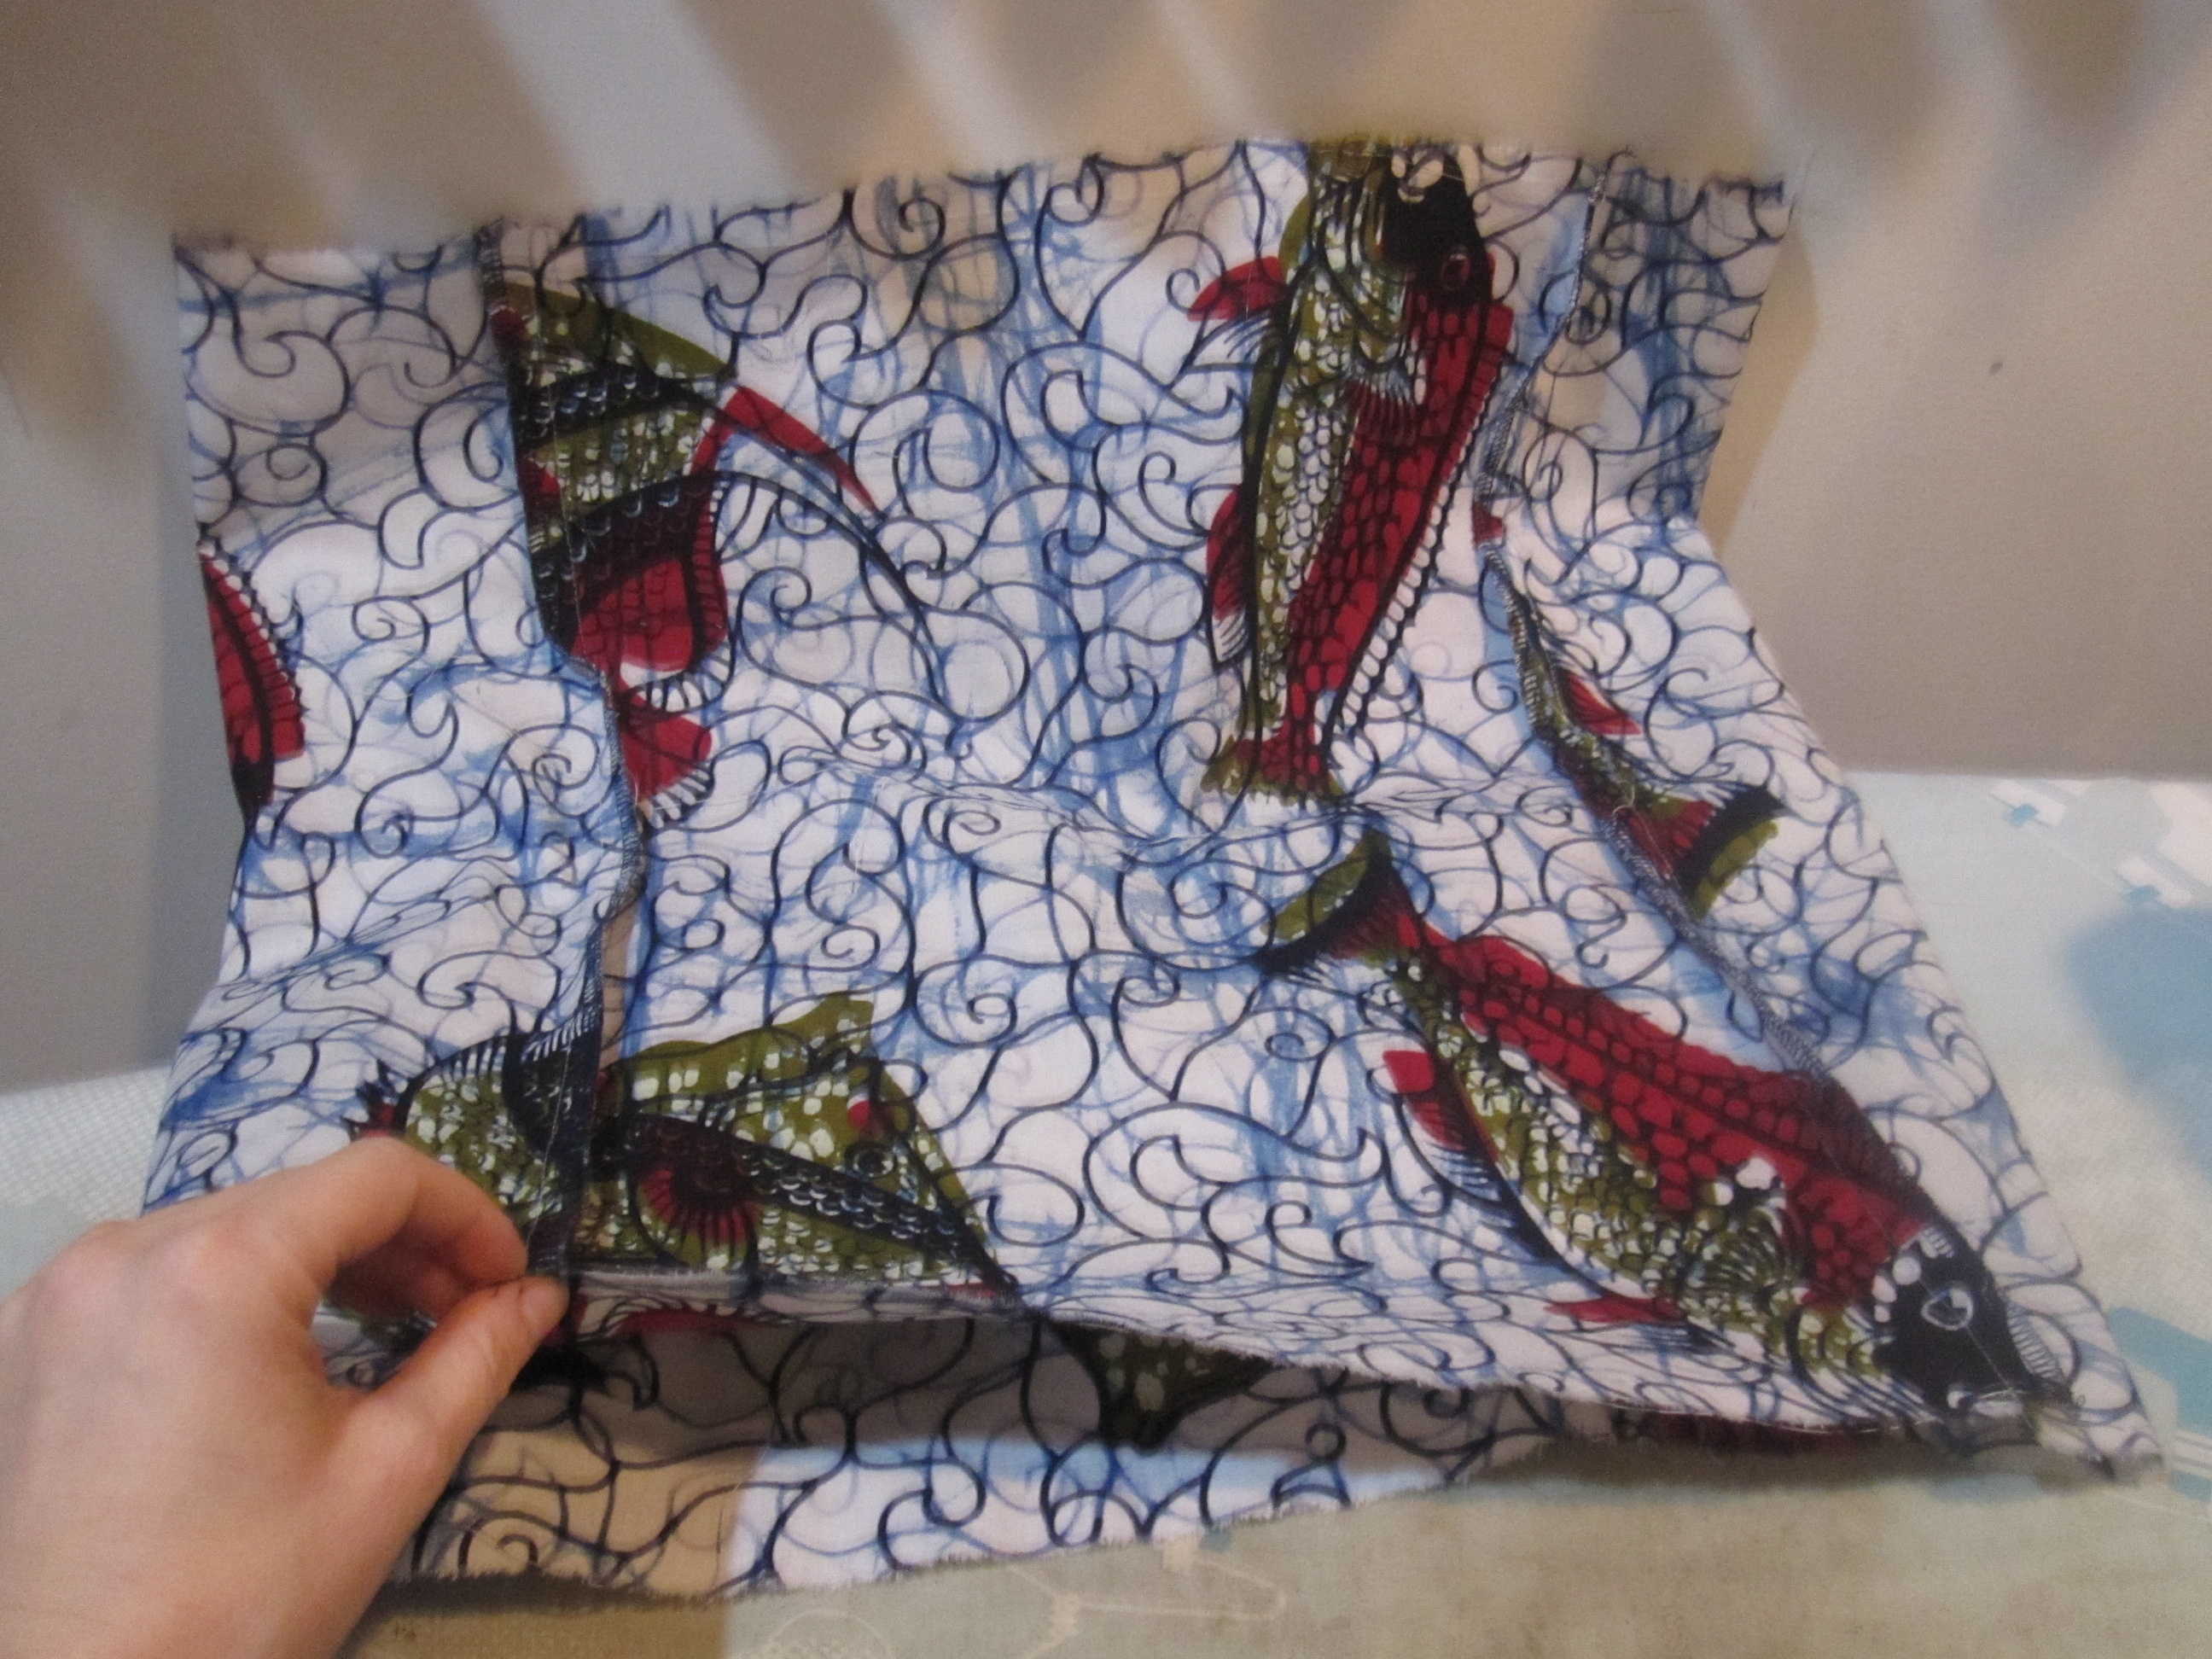
The next step is the sew the front/back and sides together. Take one front/back piece and lay it right side up on a flat surface. Place one side piece right sides together along the long (17.5") side, matching this to the front/back's long side. Pin. Now pin the other side piece in place the same way, right sides together. Pin the other front/back to one of the sides, and complete your tube by pinning the remaining front/back side to the remaining free side. Sew all these seams. I finished mine with my serger, but you can use a zigzag stitch if you don't have a serger. Press the seam allowances toward the sides. You now have sort of a box with no top or bottom, as seen at left.
Now comes the only even remotely tricky part, I promise. You're going to pin the bottom in place. Match the corners of the bottom with the seams of your front/back/sides box, right sides together. The seam allowances of your "box" will be on the outside. The bottom has two right sides so it doesn't matter which one you put inside and which outside.
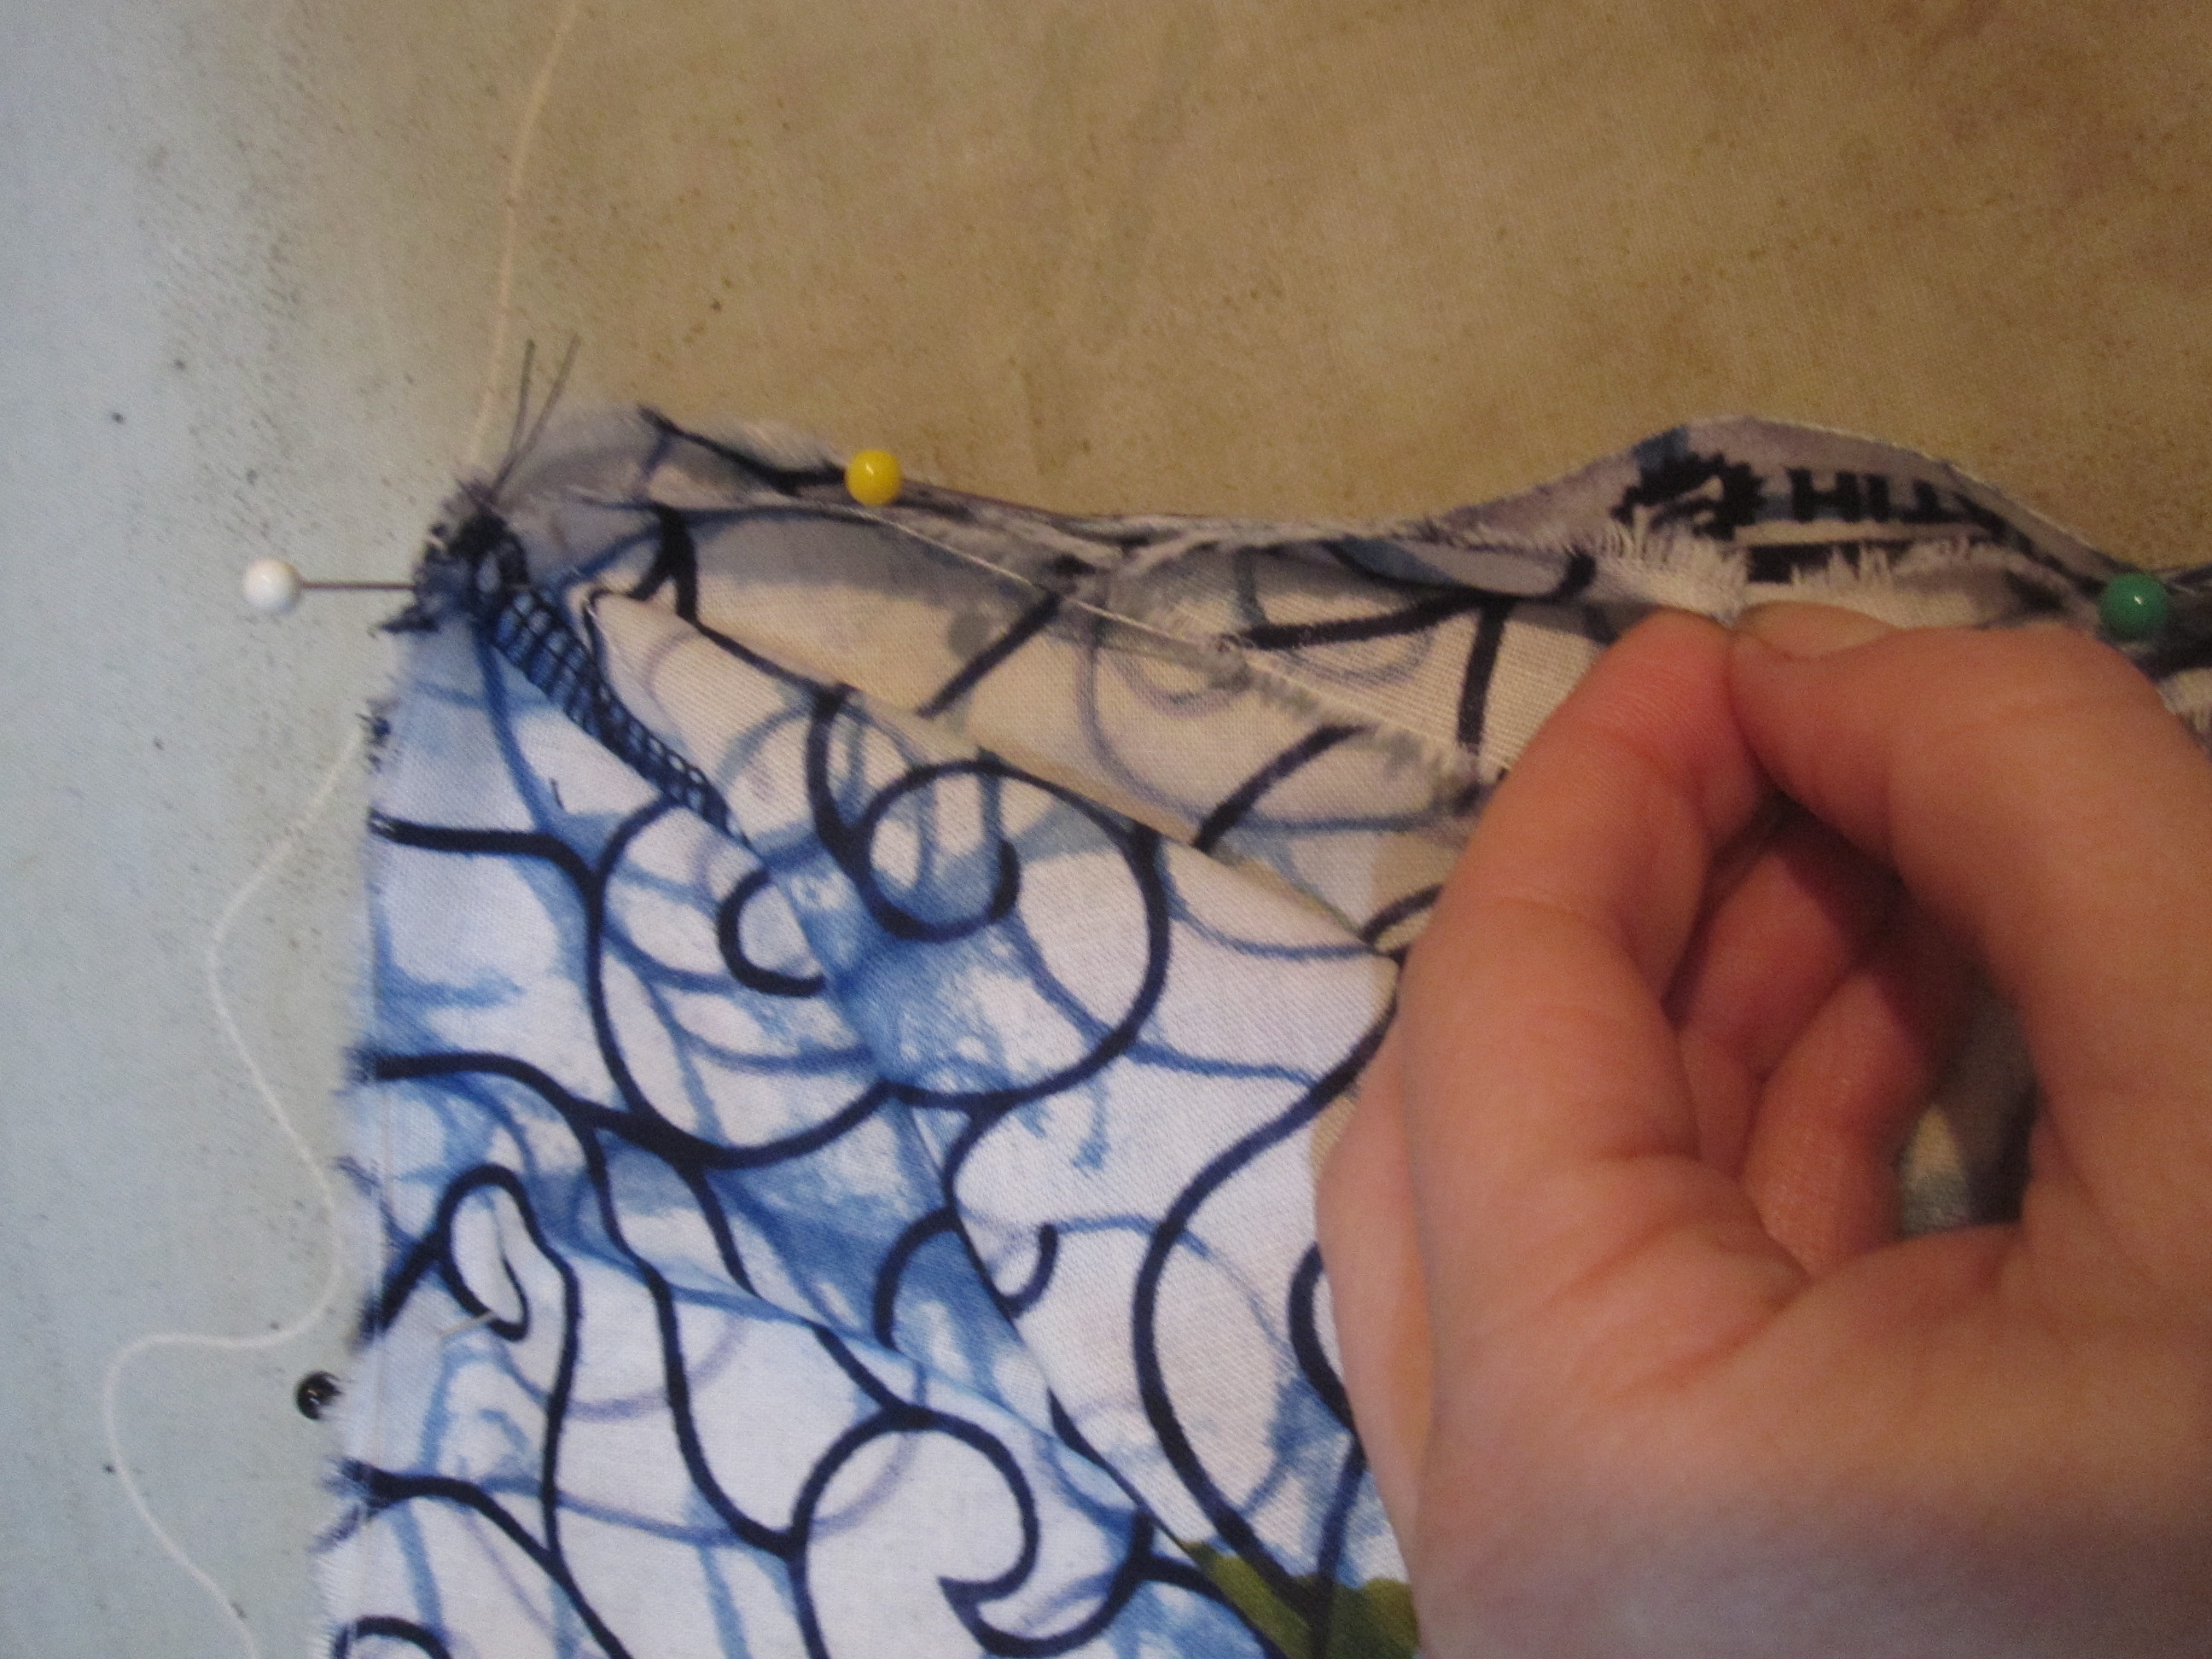
Pin the long edges together with the box on top and the bottom on bottom and pin diagonally into the corners. Make sure you have caught both layers of the bottom! The back/front/sides box won't match the square corners of the bottom exactly and will pull in toward the center a little. Just make sure you have the long edges lined up other than in the corners and it will work out.
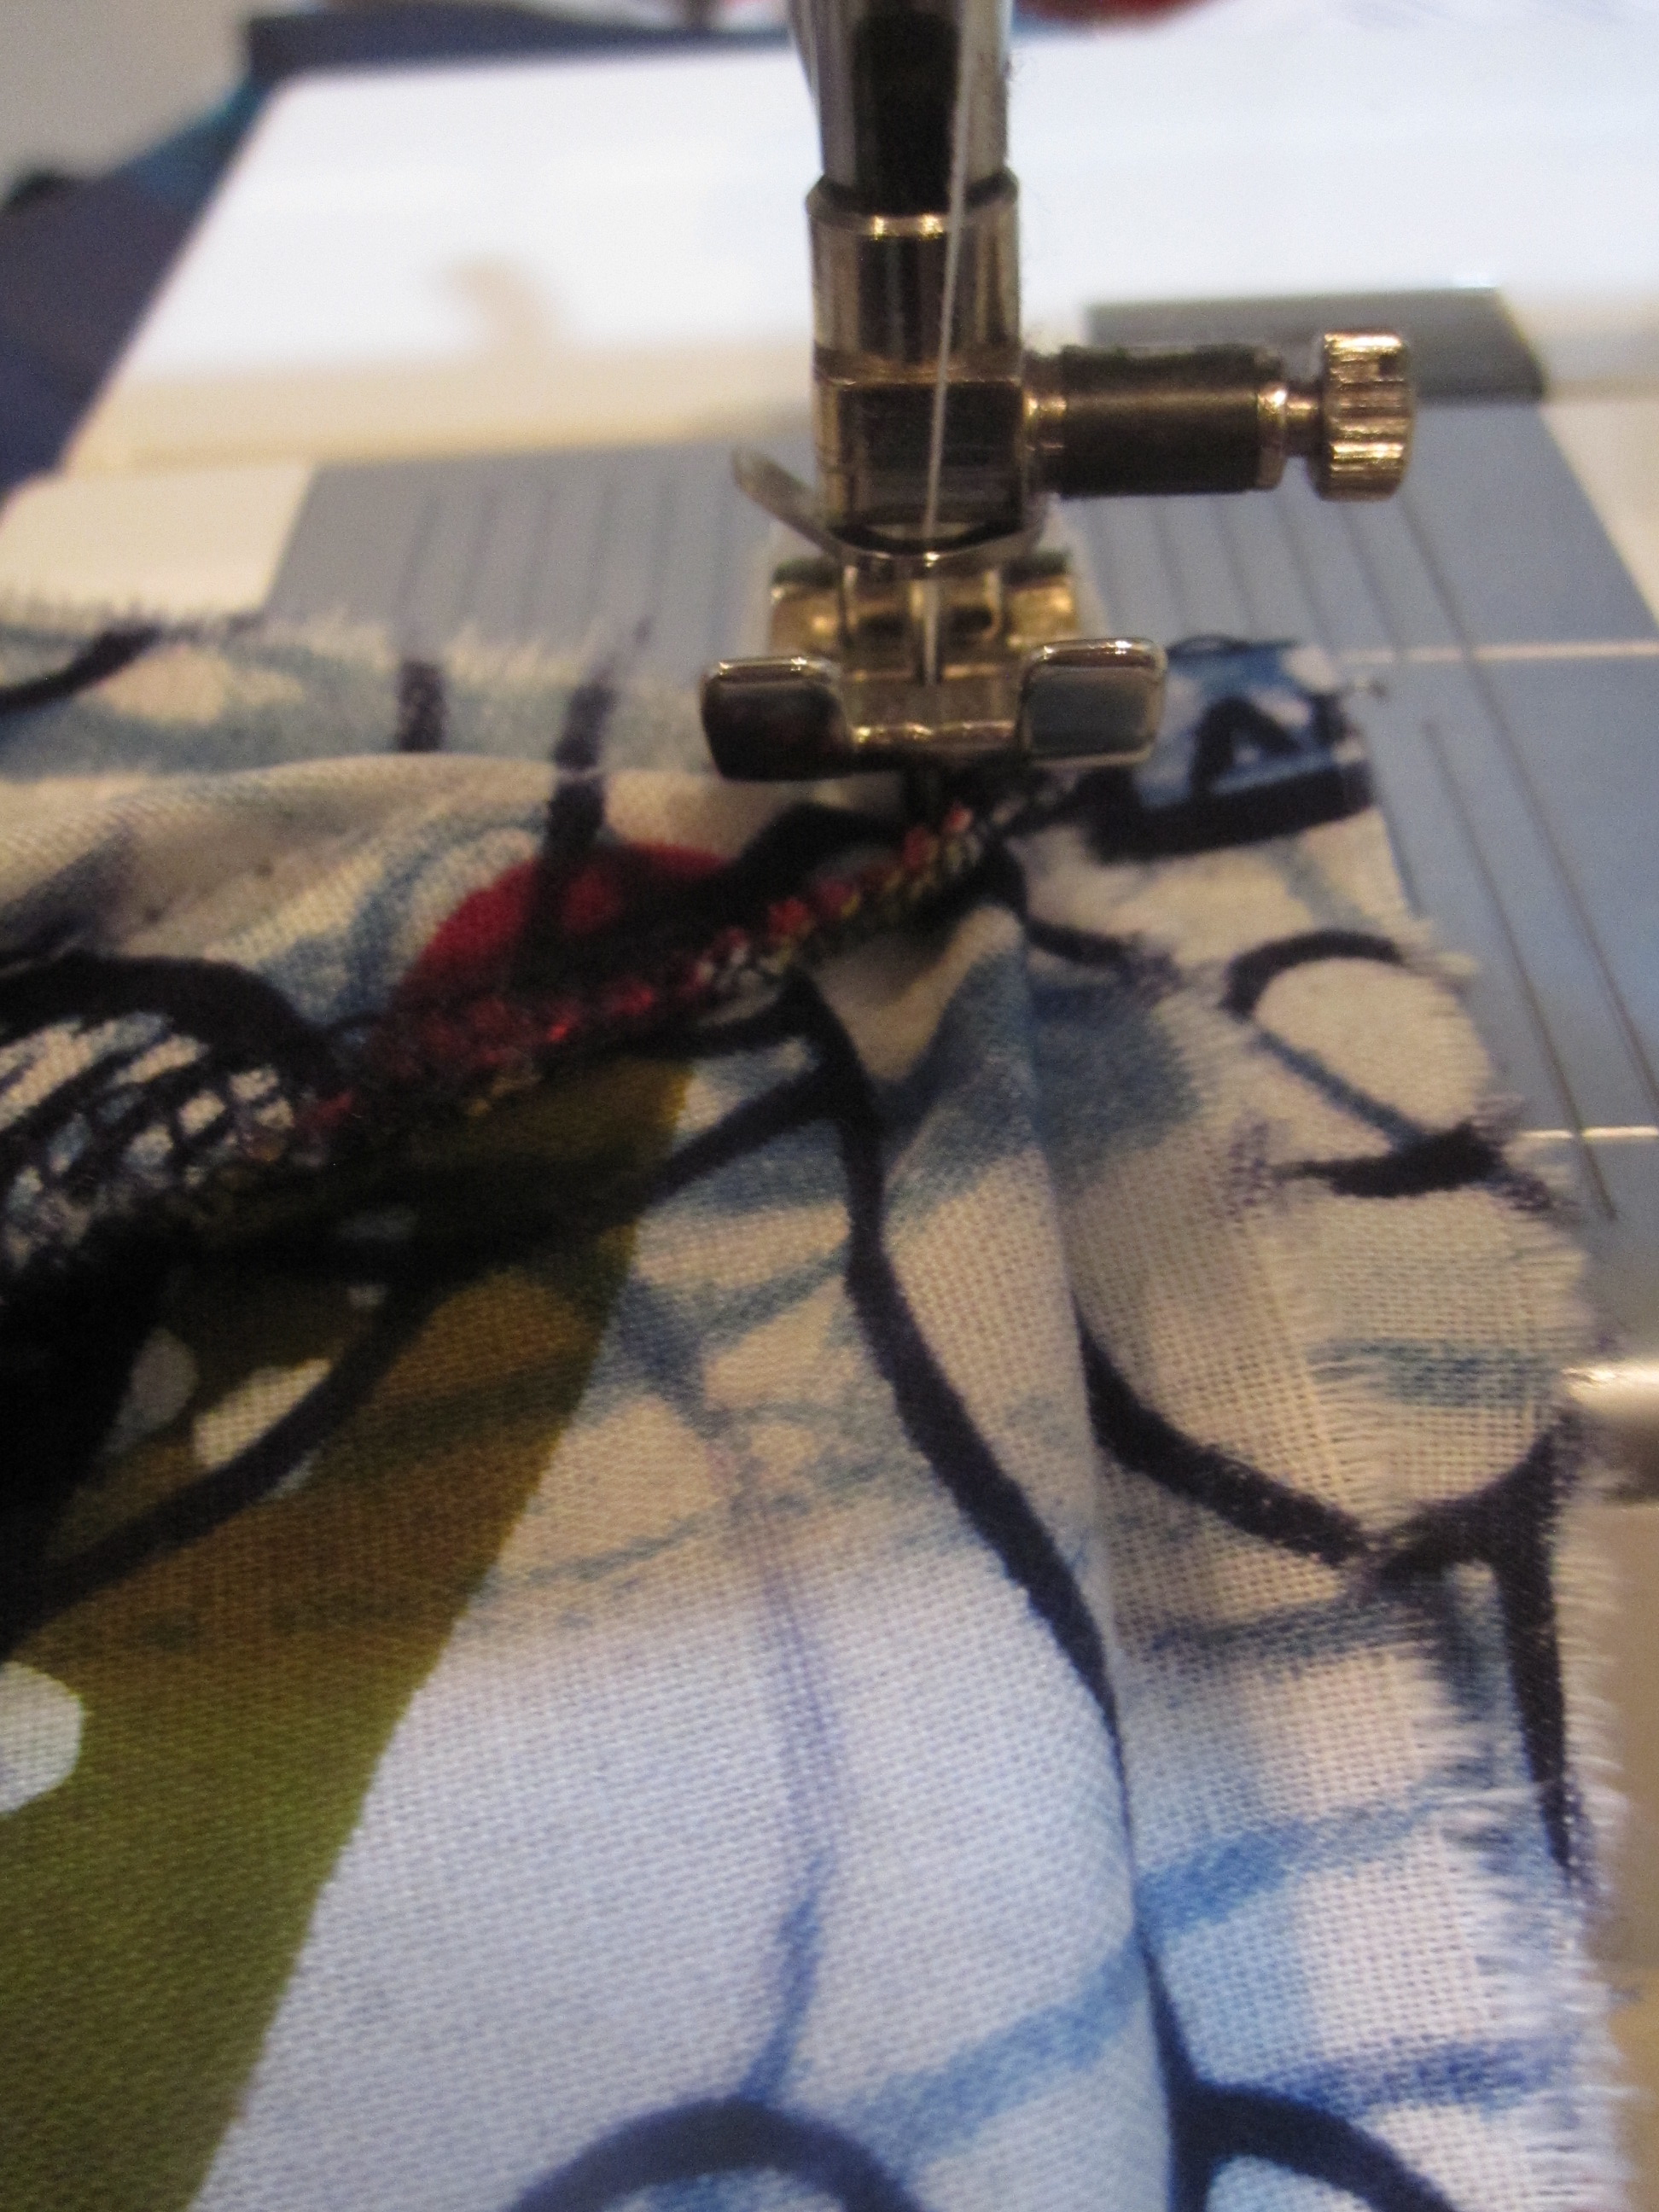
Start sewing in the middle of one of the edges, rather than at a corner to make it easier. When you get to the corner don't sew all the way to the end--stop at your 1/2" seam allowance. Make sure the needle is down into the fabric, then lift the foot and rotate your bag 90 degrees. Scooch your fabric (particularly the seam allowances of the front/back/sides), which will want to fold up, behind the needle. Put the foot back down and sew the next side.
When sewing the corner make sure you are catching the front/back/sides fabric box fabric with enough seam allowance to do a zigzag to finish the edges (remember, the front/back/sides box will cut in a little diagonally across the corners).
The bottom is stiff from the fusible fleece, so for one of the sides you'll have to cram it into the free arm. Your corners may not be beautiful, but they will probably look ok on the outside. Finish the seam allowances and turn your bag right side out.
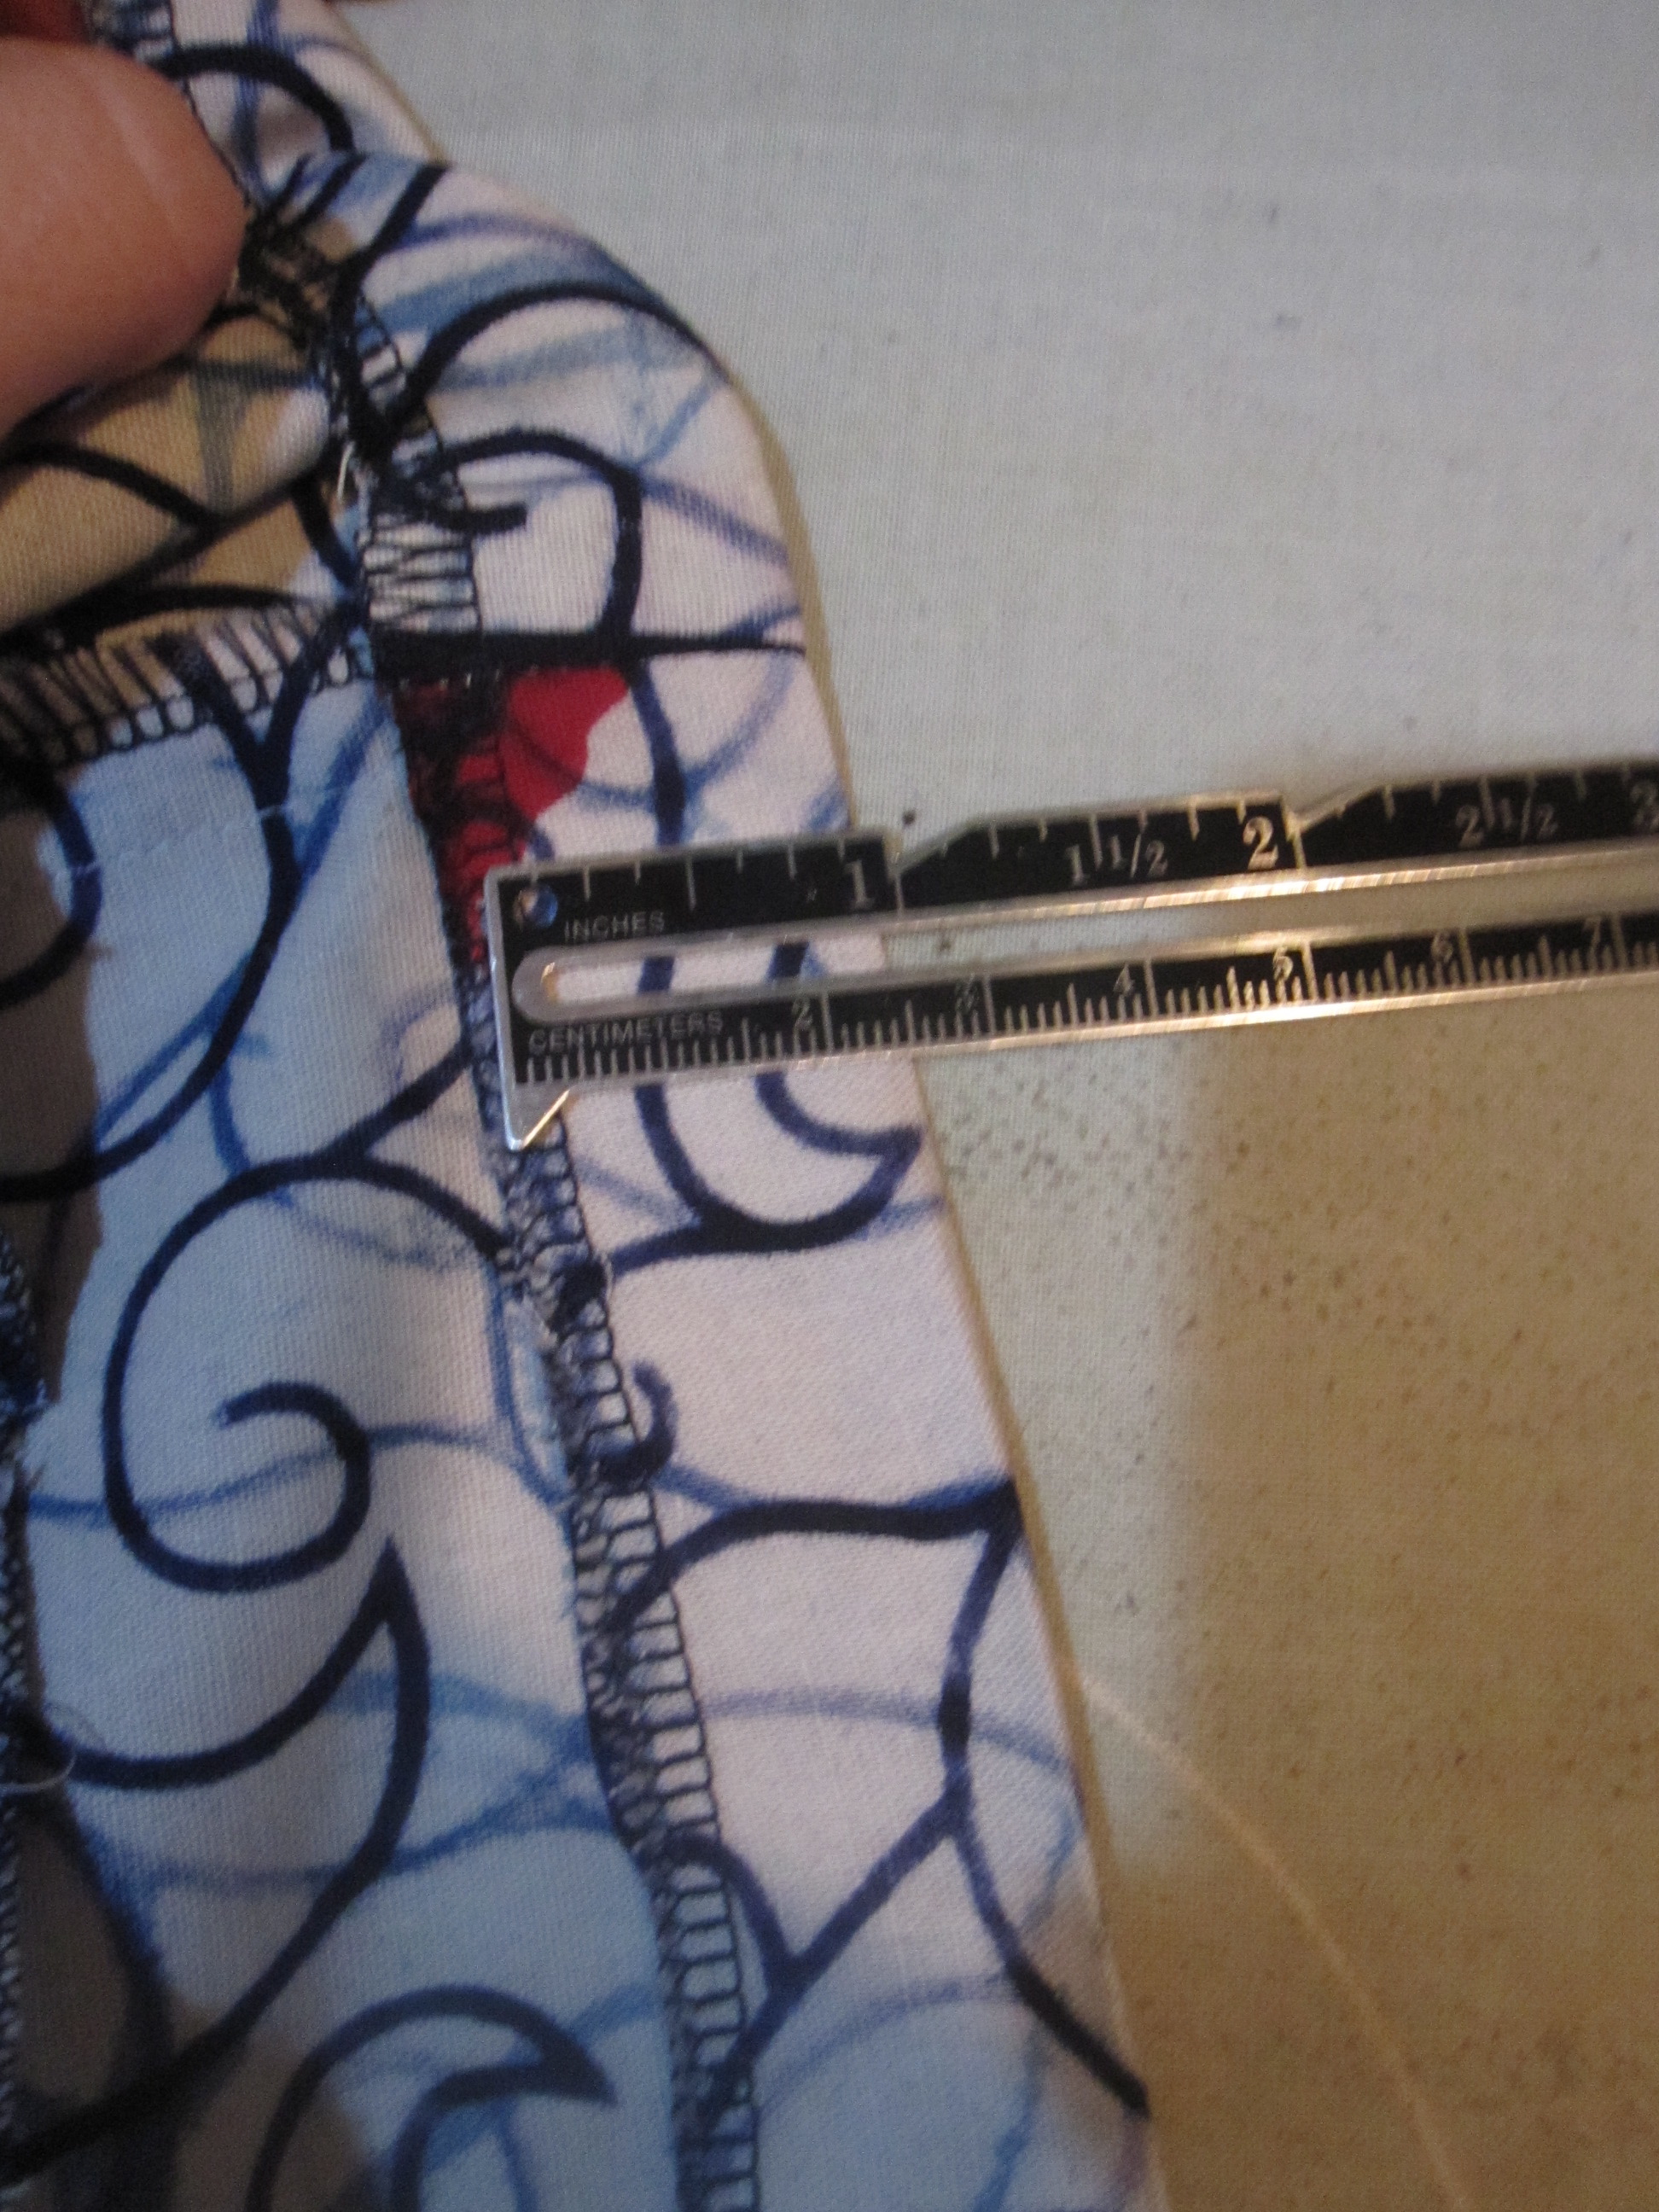
Now we'll sew the casing for the drawstring. Finish the top edge of your bag. Again, I used the serger but you can use a zigzag. Measure 1" from the upper edge and fold this down and press. To make it look nicer, I next folded under about 1/4" from the top edge, so that when I sew down the drawstring casing I will have a folded edge rather than raw edge showing.
Before we sew down the casing we need to make buttonholes for the drawstring.
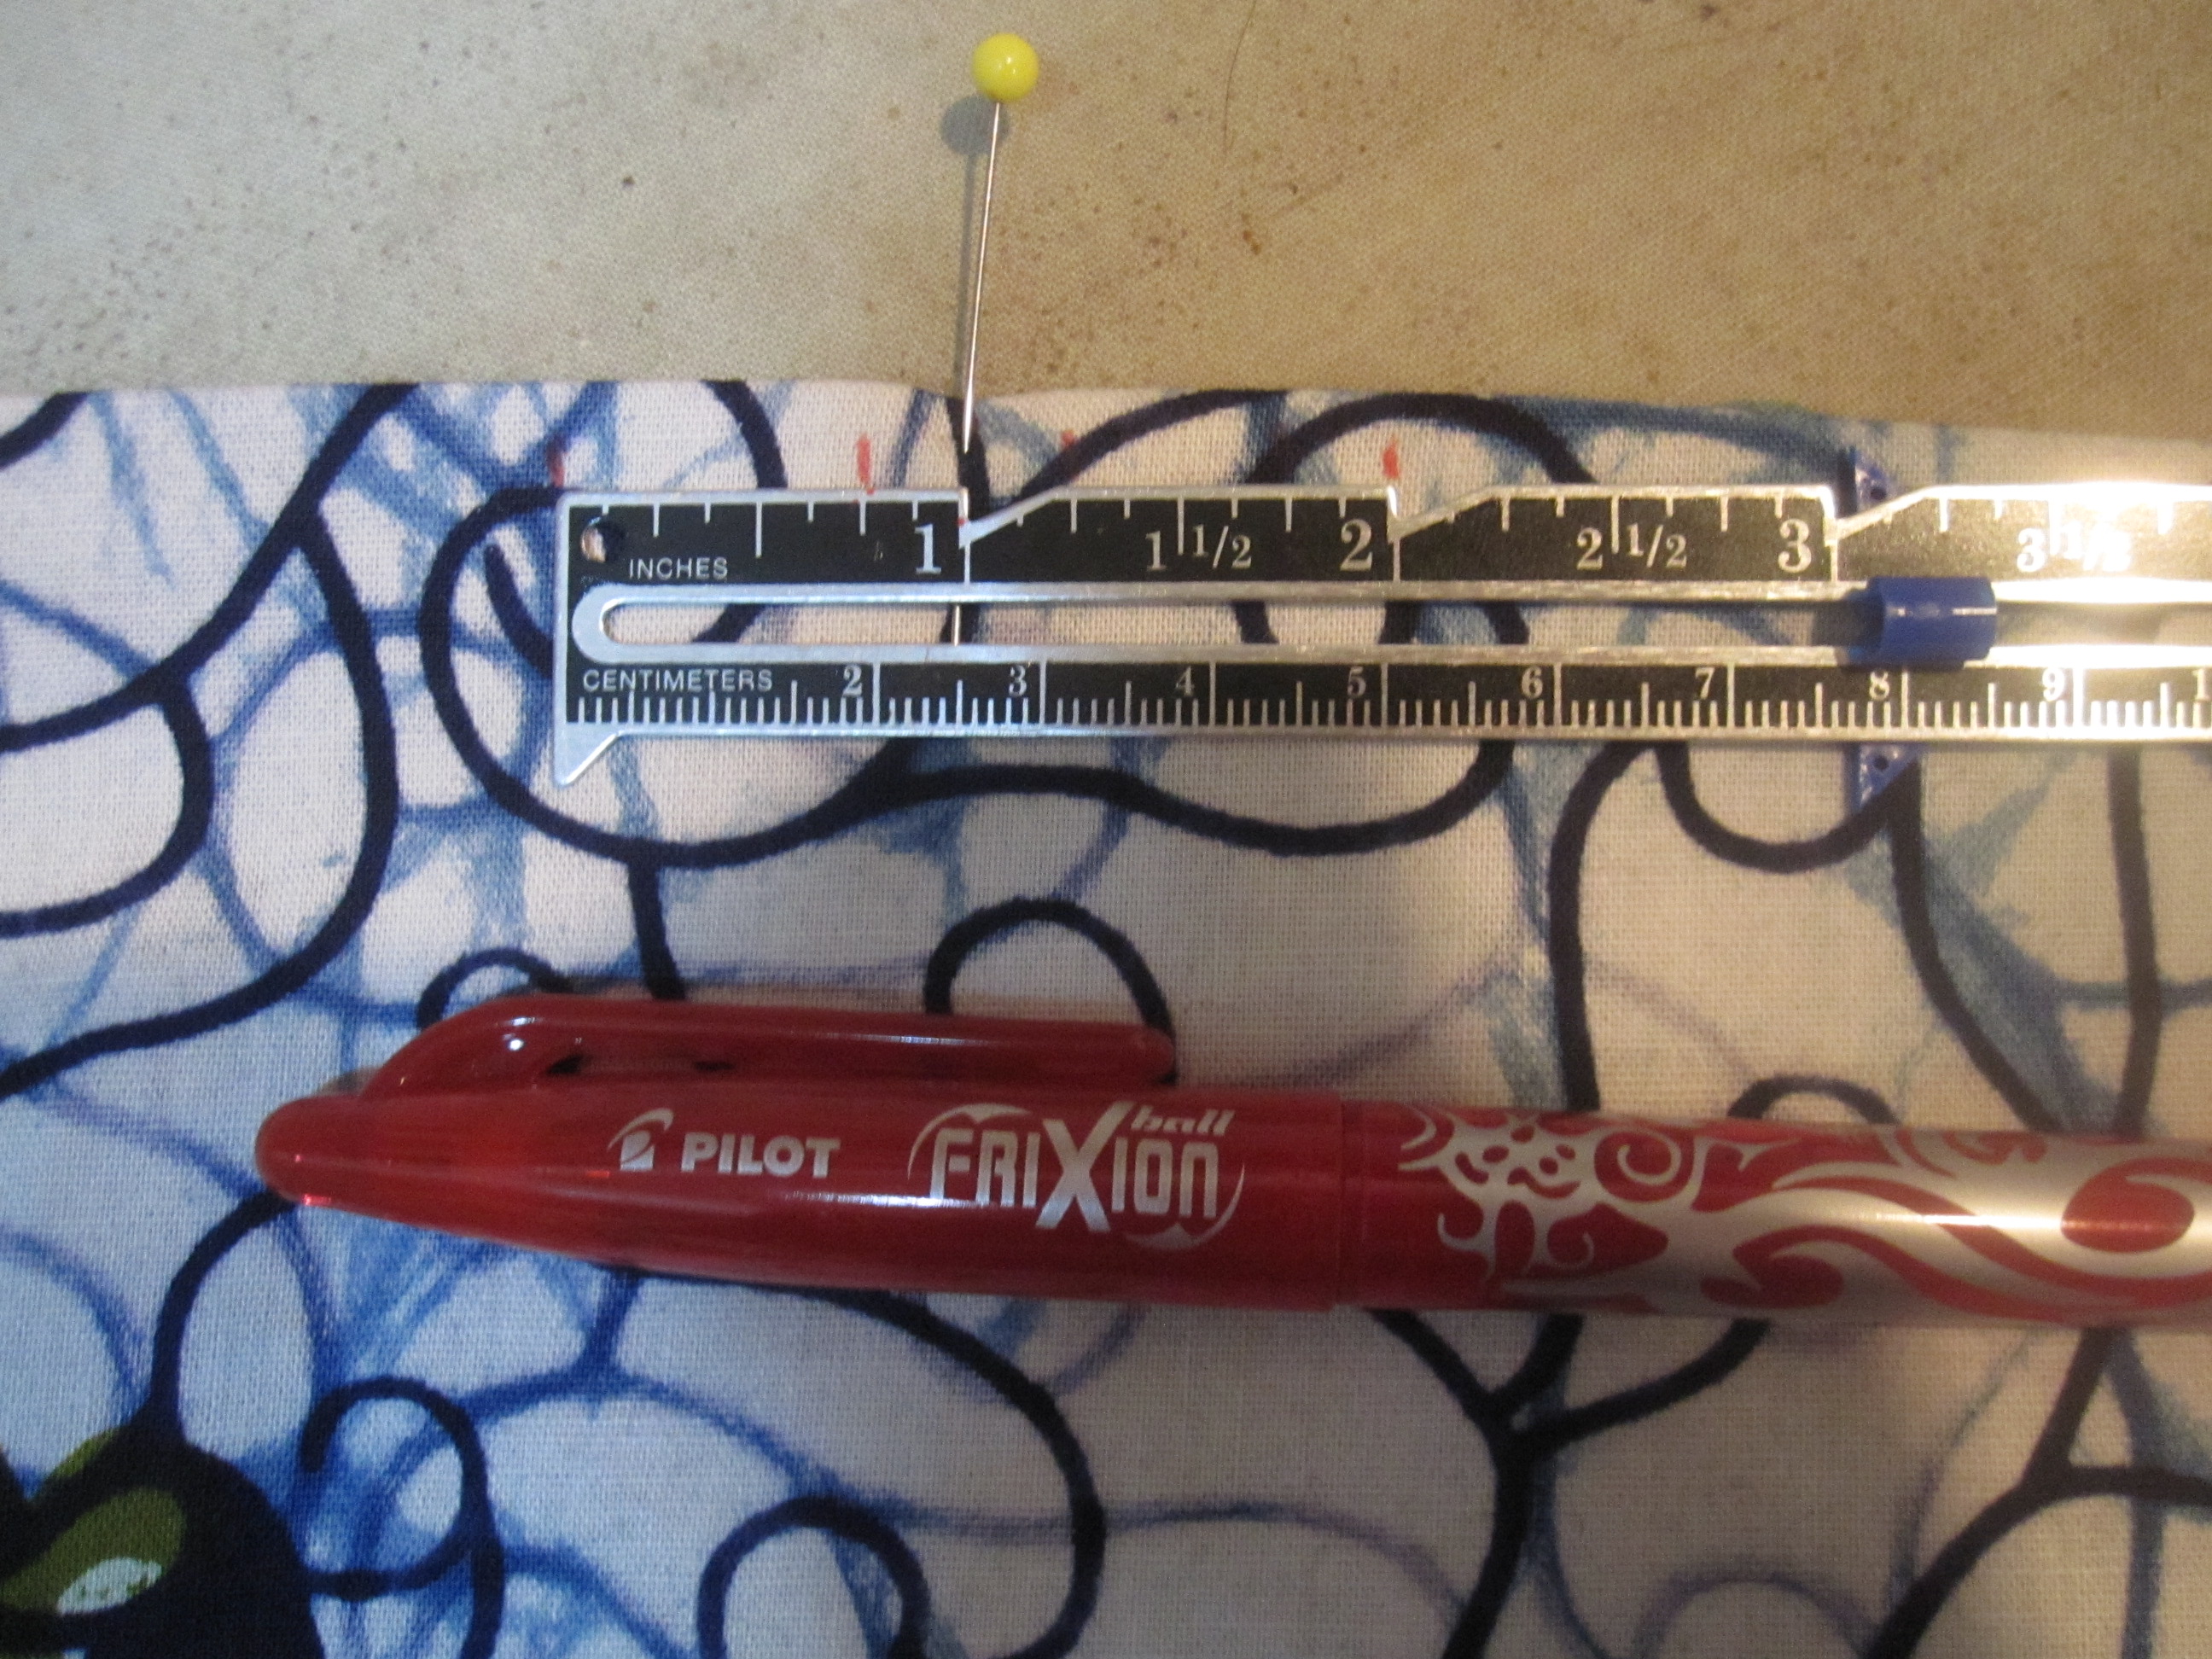
Keeping your fabric folded down 1" the way you pressed it, find the center of one of your front/back pieces. Here it is marked by the pin. Measure and mark 1/4" on both sides of the center, and then again 3/4" from your first marking. You want these markings to be 3/8" from the upper folded edge. Unfold the raw edge back up.
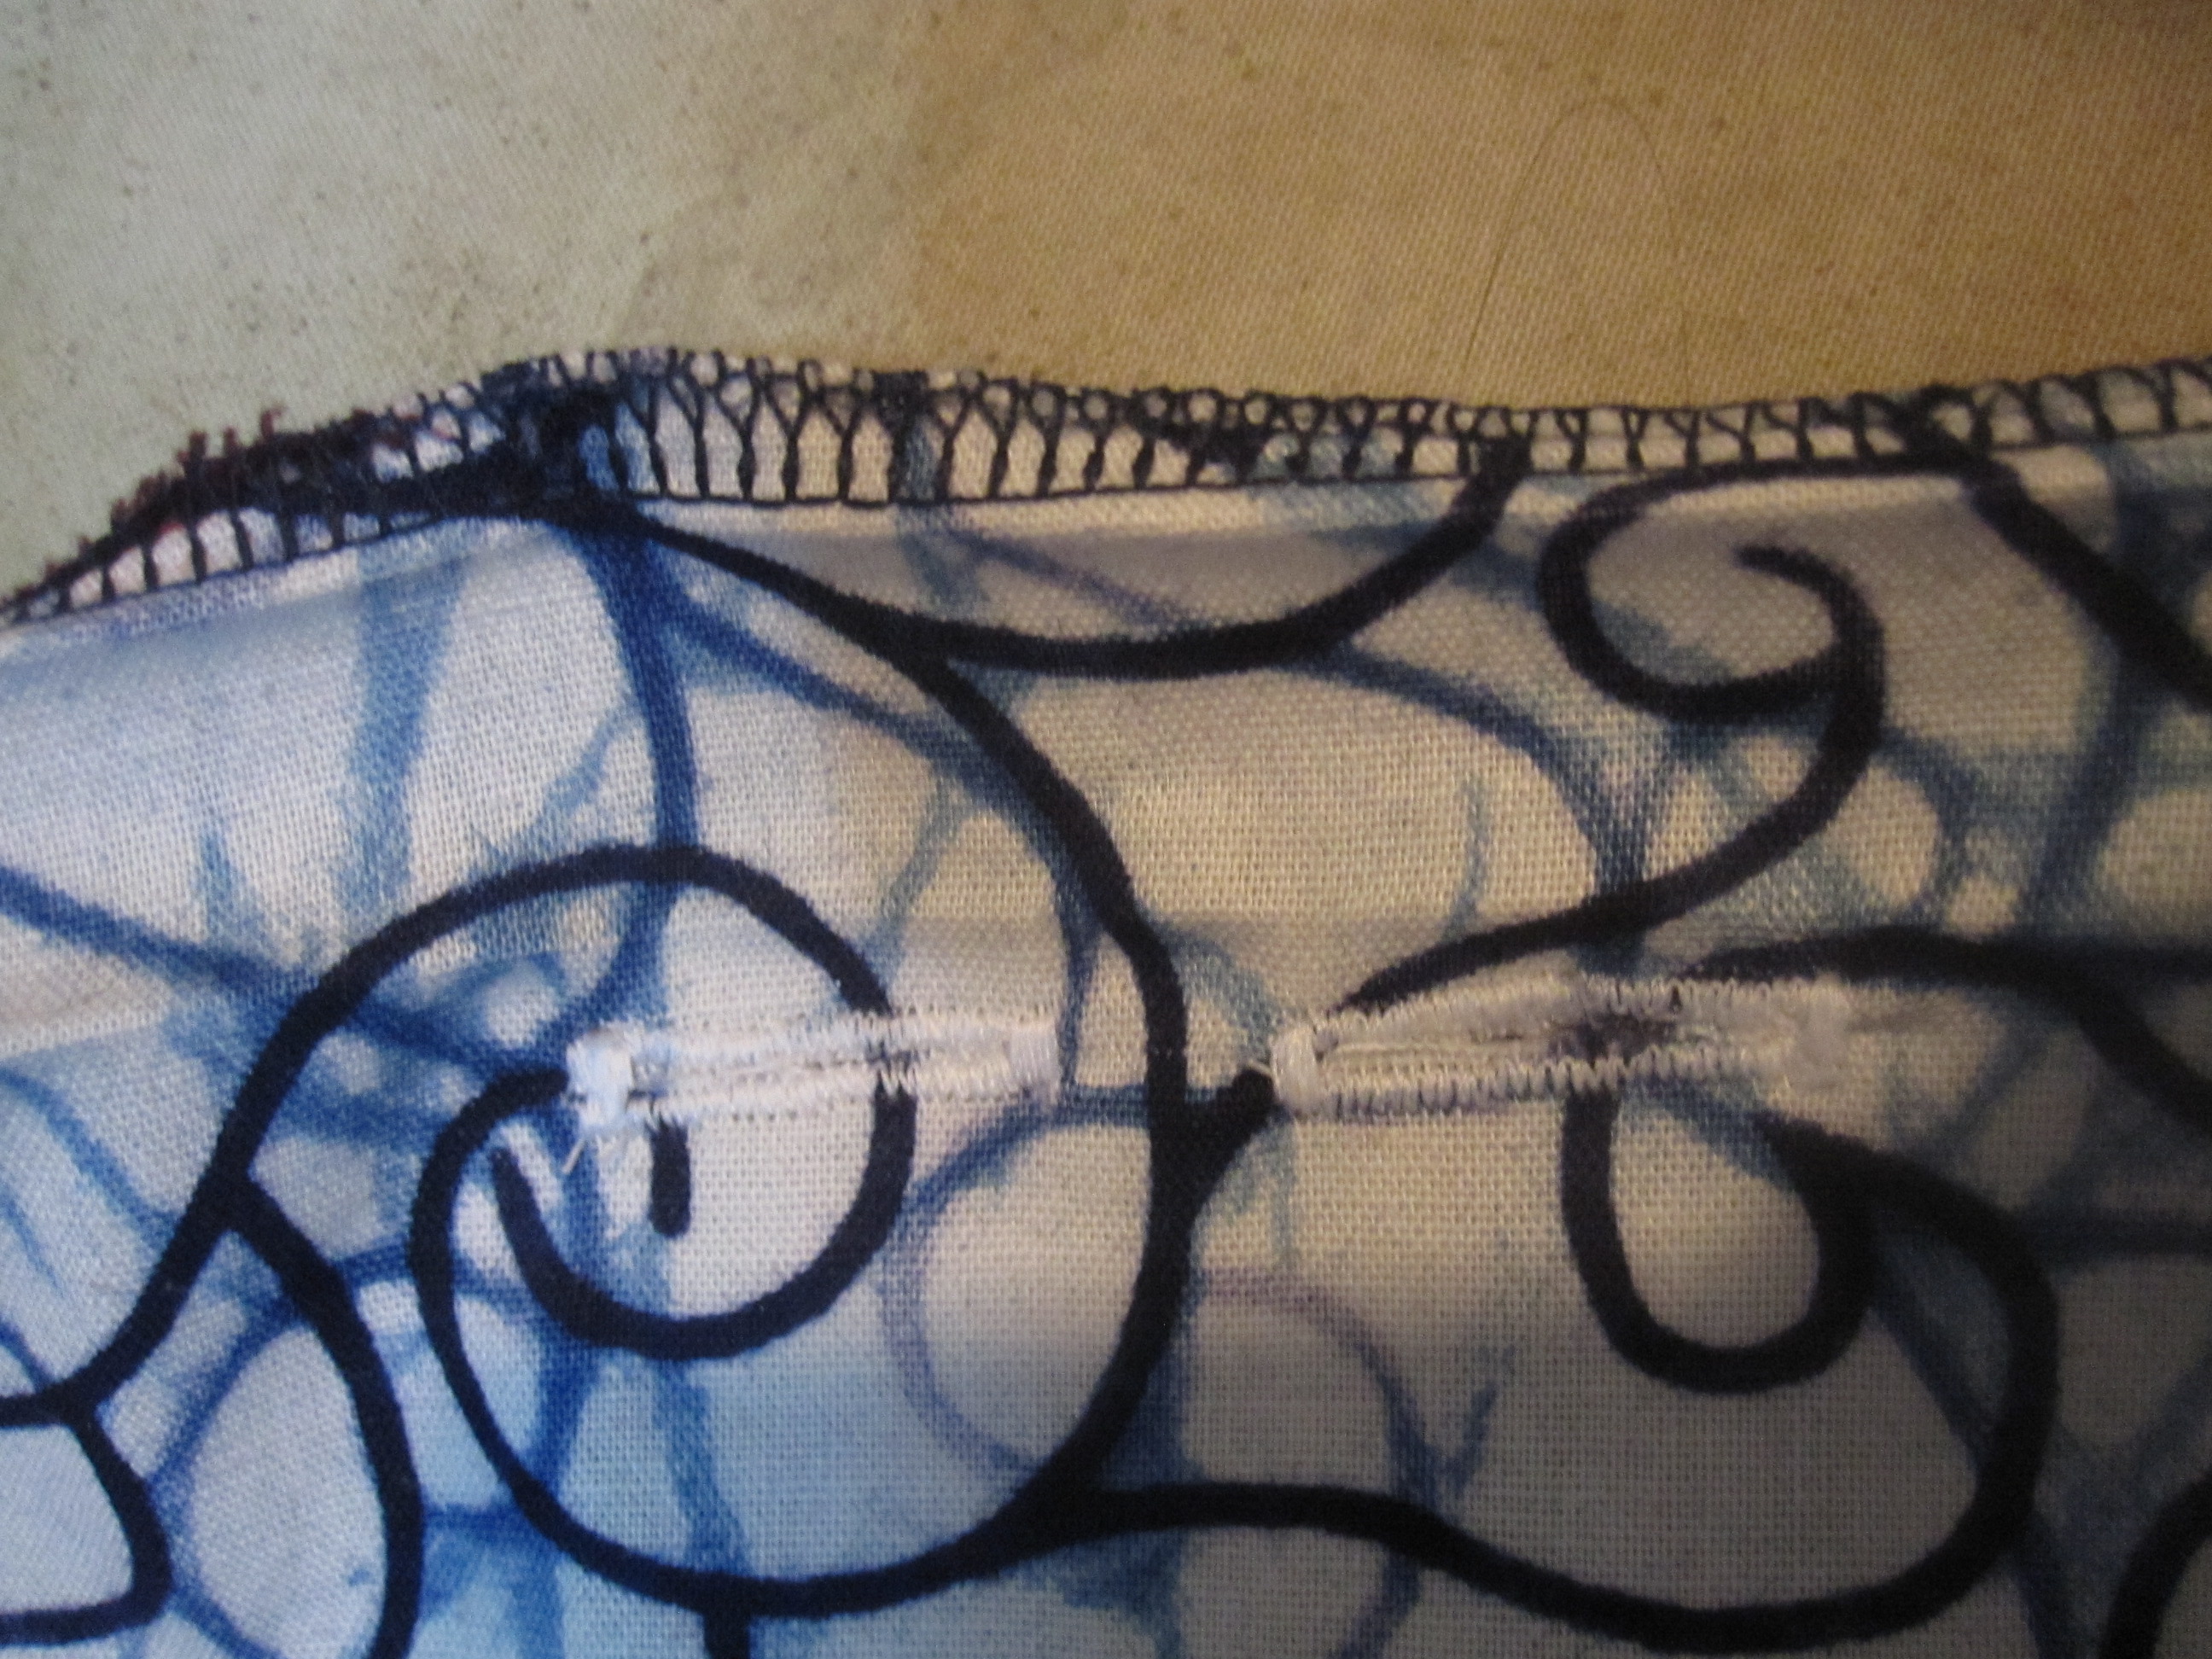
Cut small rectangles of interfacing and place them on the wrong side (I cut one fairly long strip and pinned it in place, far enough from my buttonhole markings not to interfere with my sewing. Because I used a Frixion pen, fusing the interfacing in place would have erased my markings). Make the buttonholes only on one layer of fabric, the layer below the fold, between your markings and cut them open.
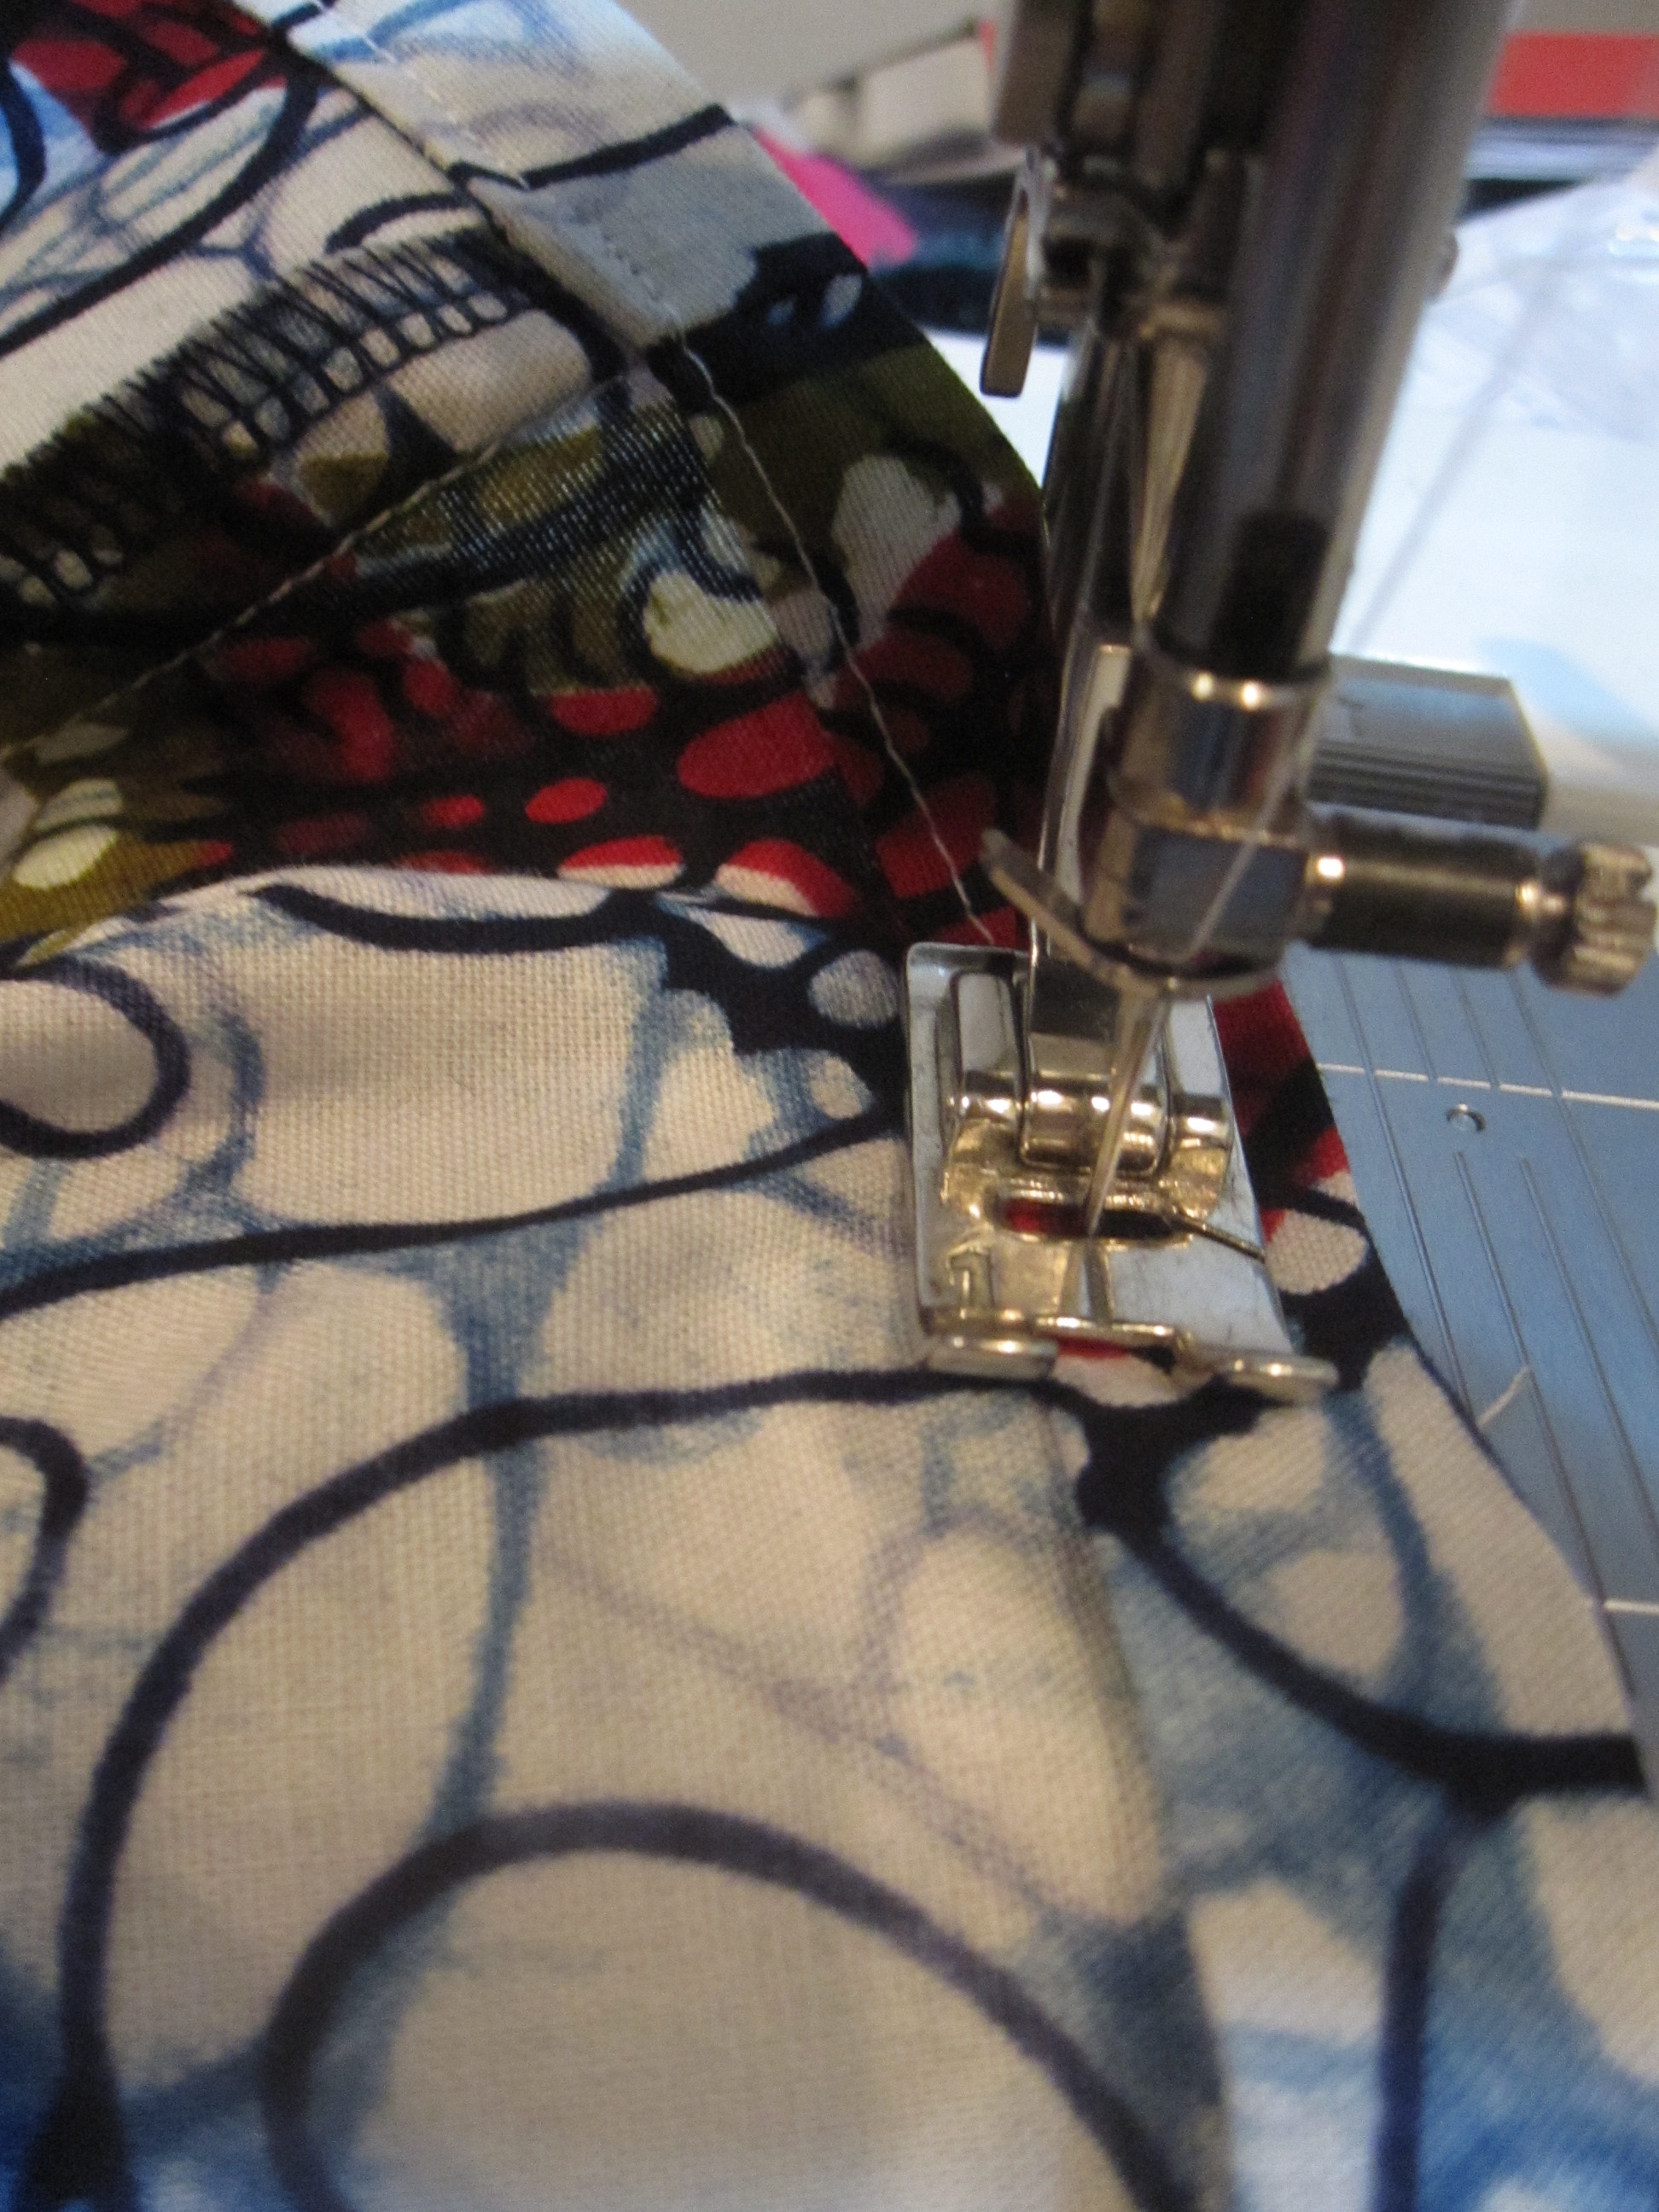
Now we're ready to stitch down that casing. Fold down your 1 inch again, and sew close to the raw edge or fold all the way around the top of your bag. Make sure that your buttonholes are above your casing stitch line.
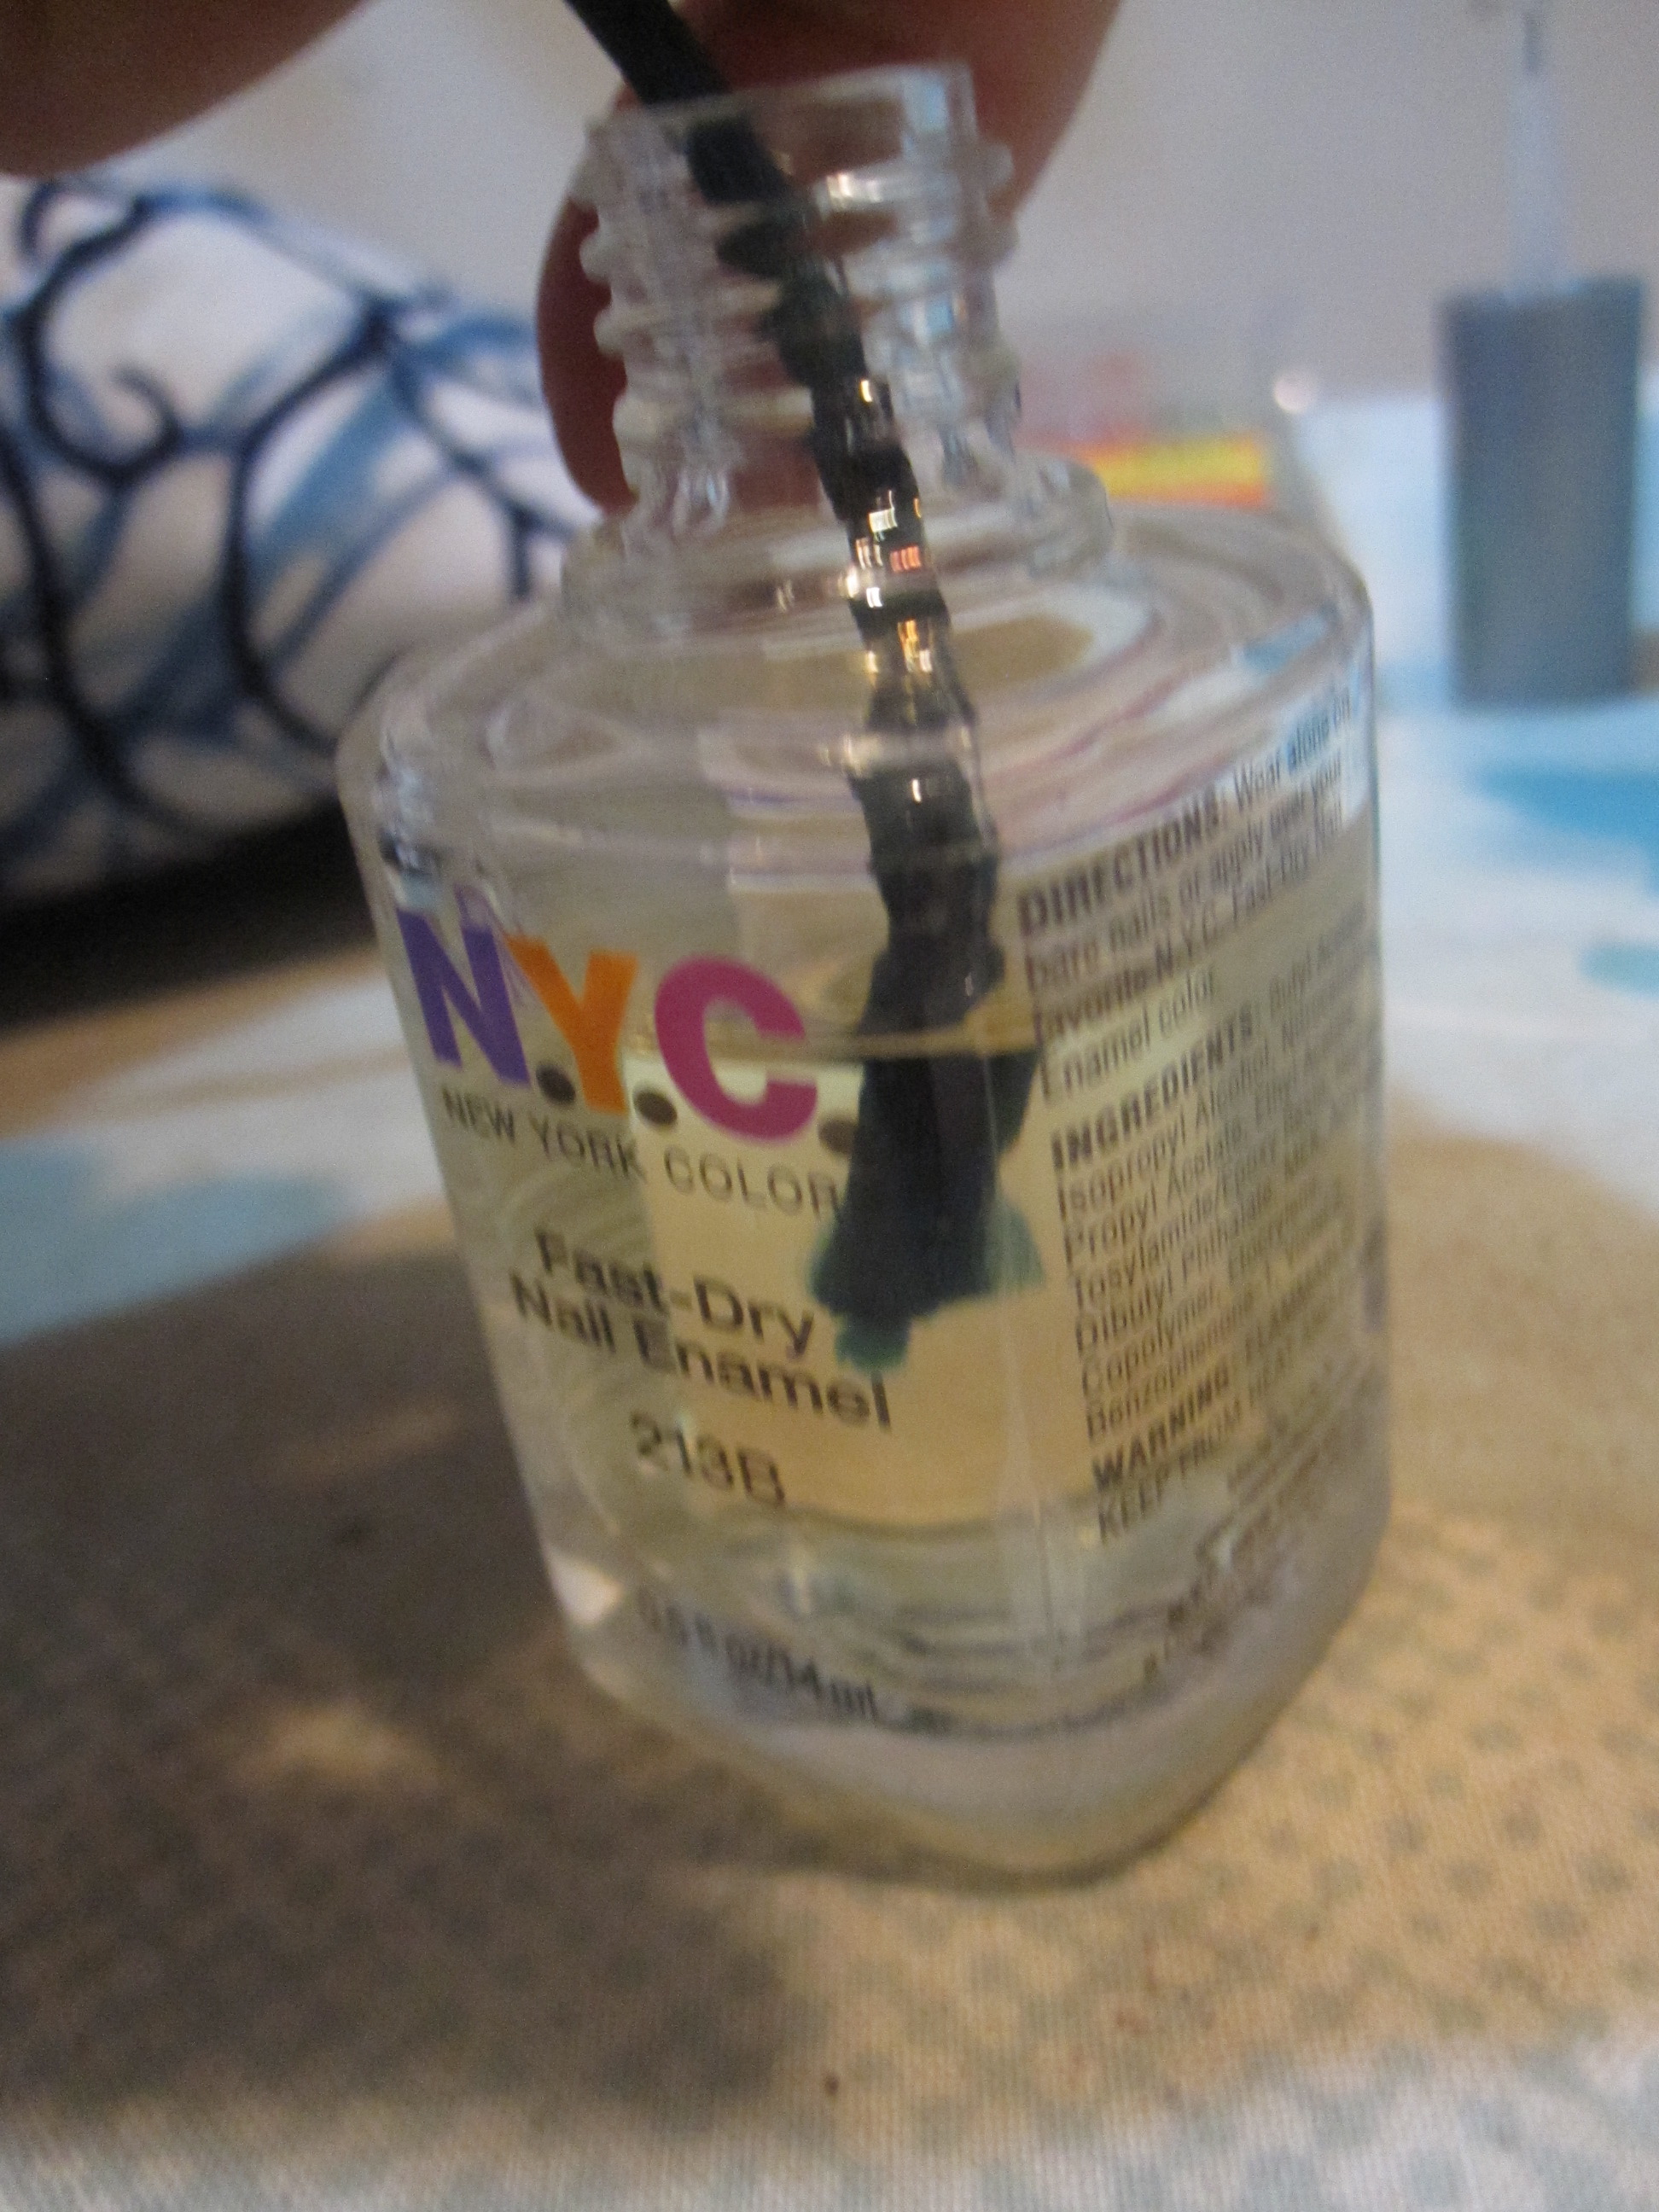
Cut your drawstring to about 50 inches. You want it to be as long as your opening plus another 14 inches or so. I used rattail braid (available from Joann). To keep it from fraying, I dip the cut end in nail polish and let it dry.
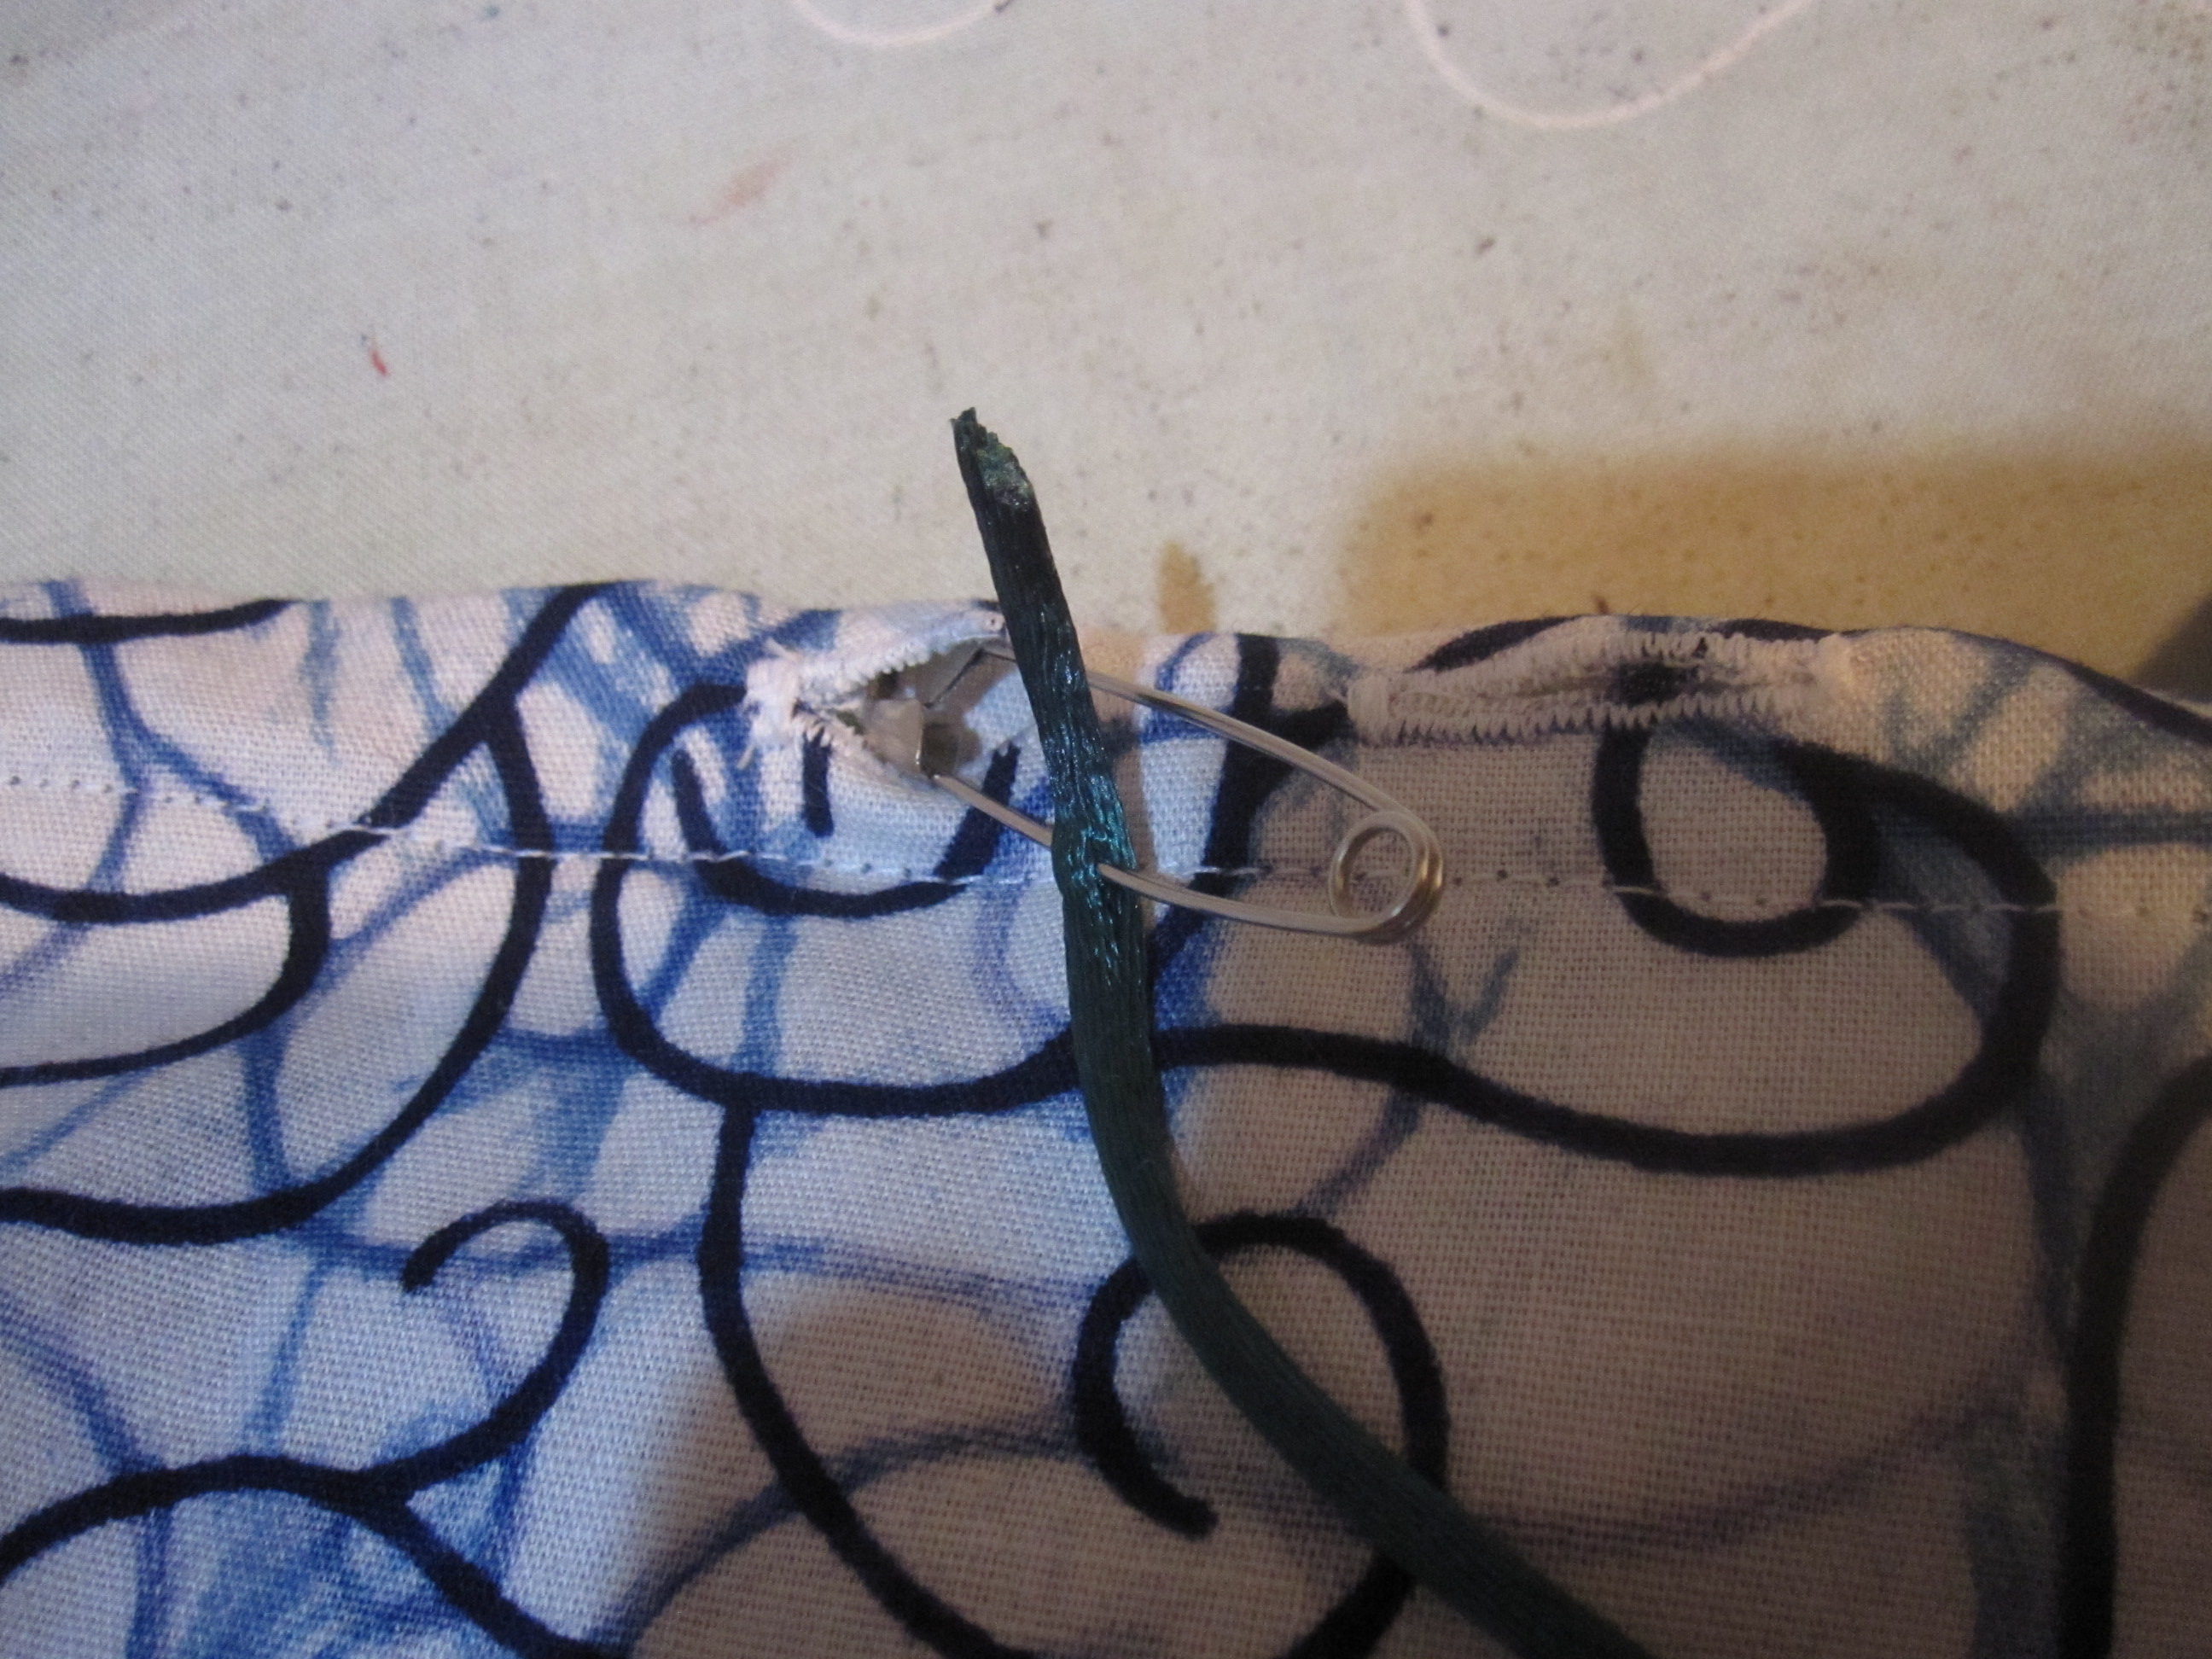
Once it's dry stick in a safety pin near one of the ends and thread it through your casing, in one buttonhole and out the other.
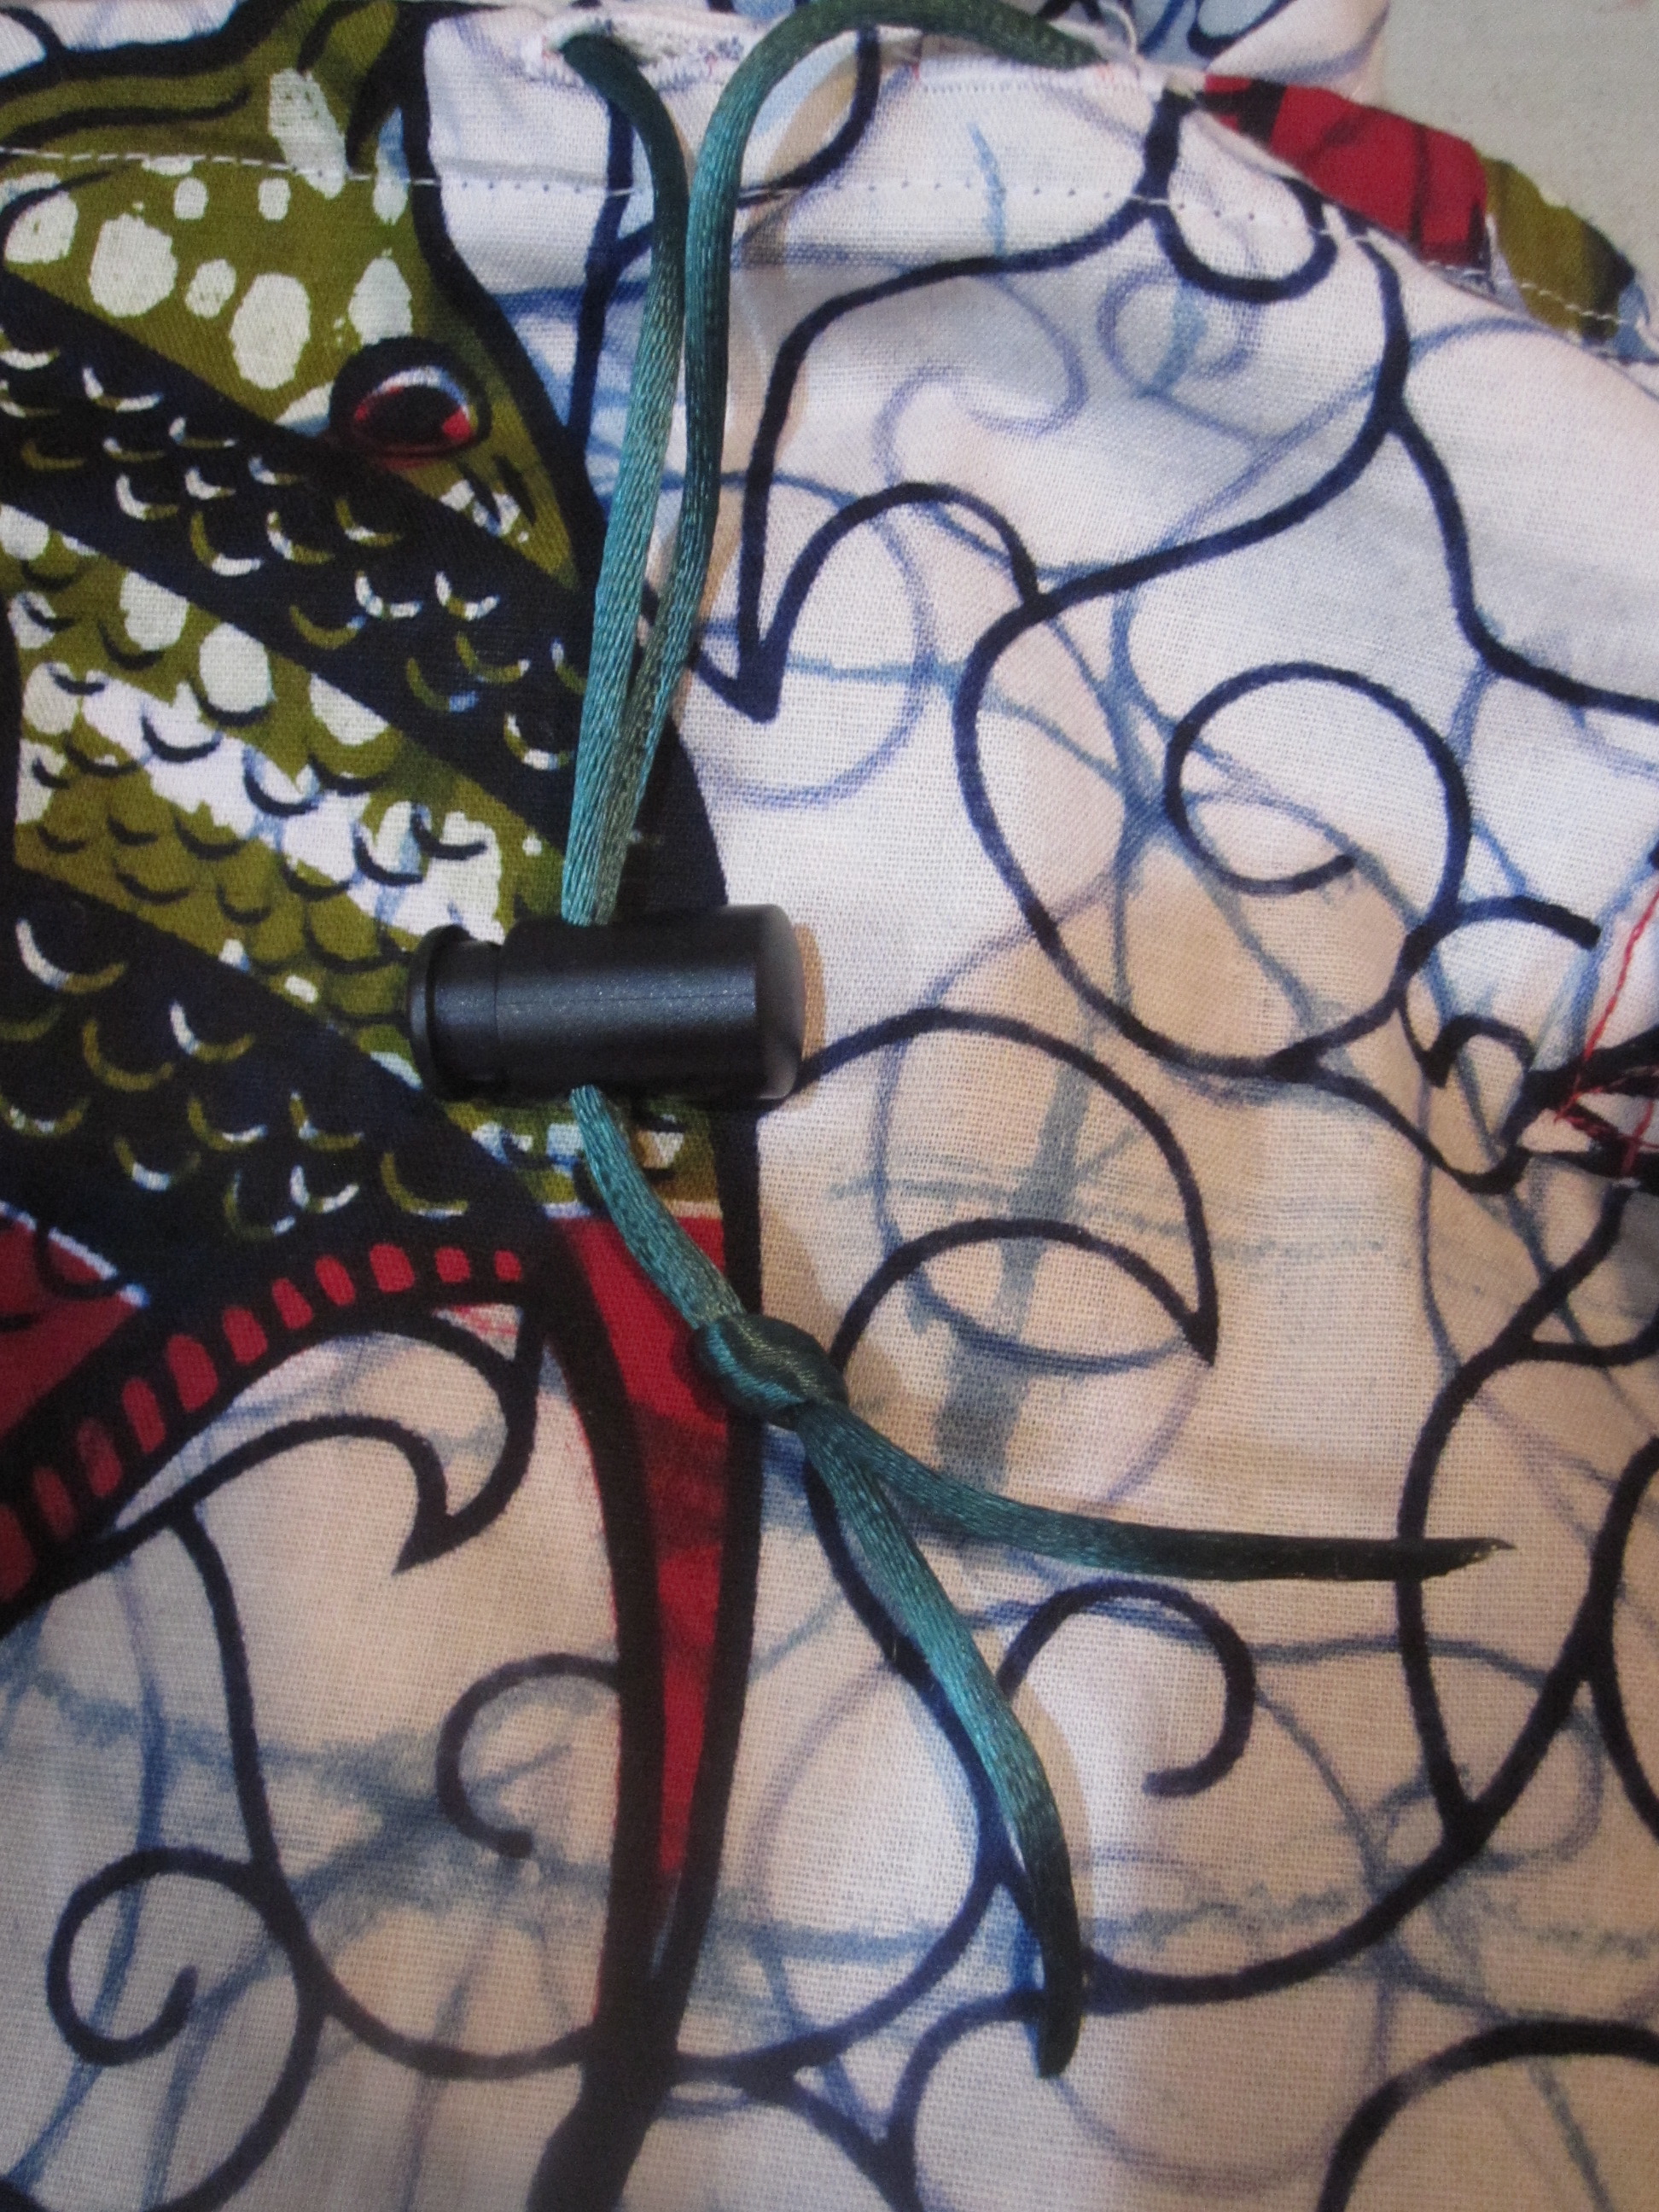
After you've threaded your drawstring through the casing, put your cord stop on and knot the ends to keep from accidentally pulling off the cord stop.
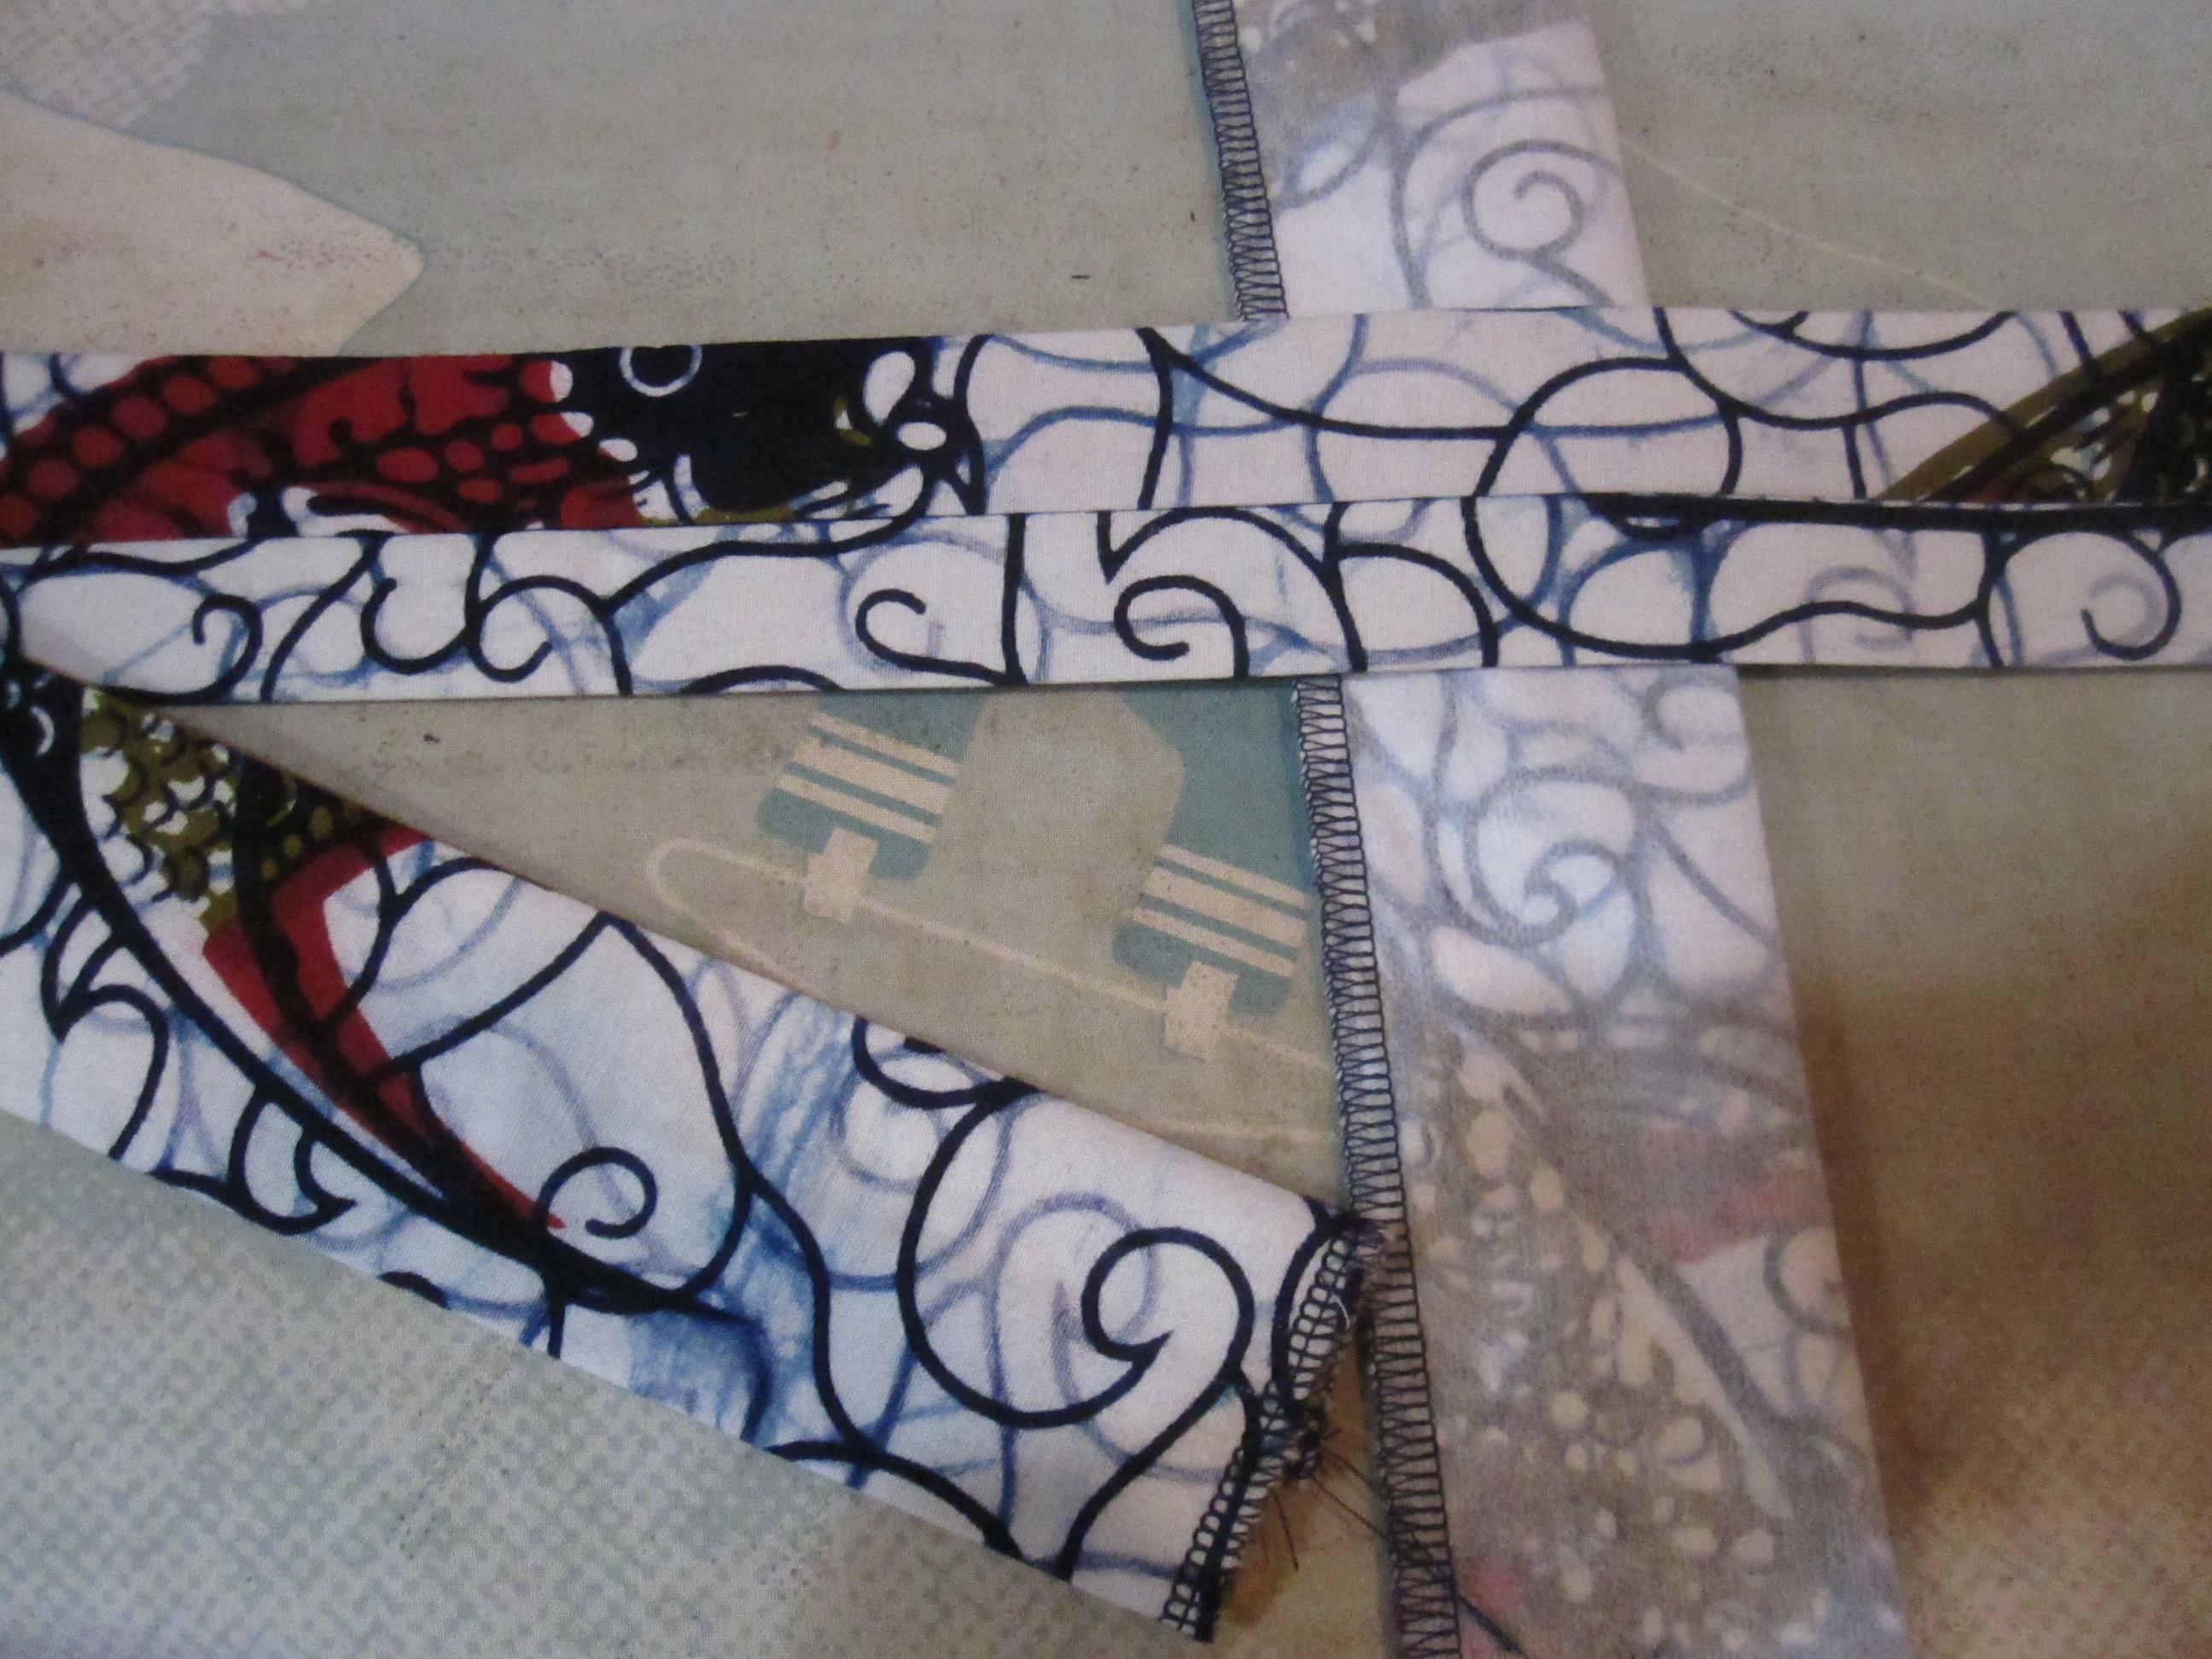
Next are the handles. I interfaced the handles for sturdiness, but it's not strictly necessary.
Fold your strips in half lengthwise (so they will be 2.75" wide and 26" long) and sew the long edge. Turn them right side out using a large safety pin (as shown in this video). Roll them so that the seam allowance is in the middle, rather than on one of the sides (this is purely aesthetic, you can put the seam allowance wherever you want) and press flat.
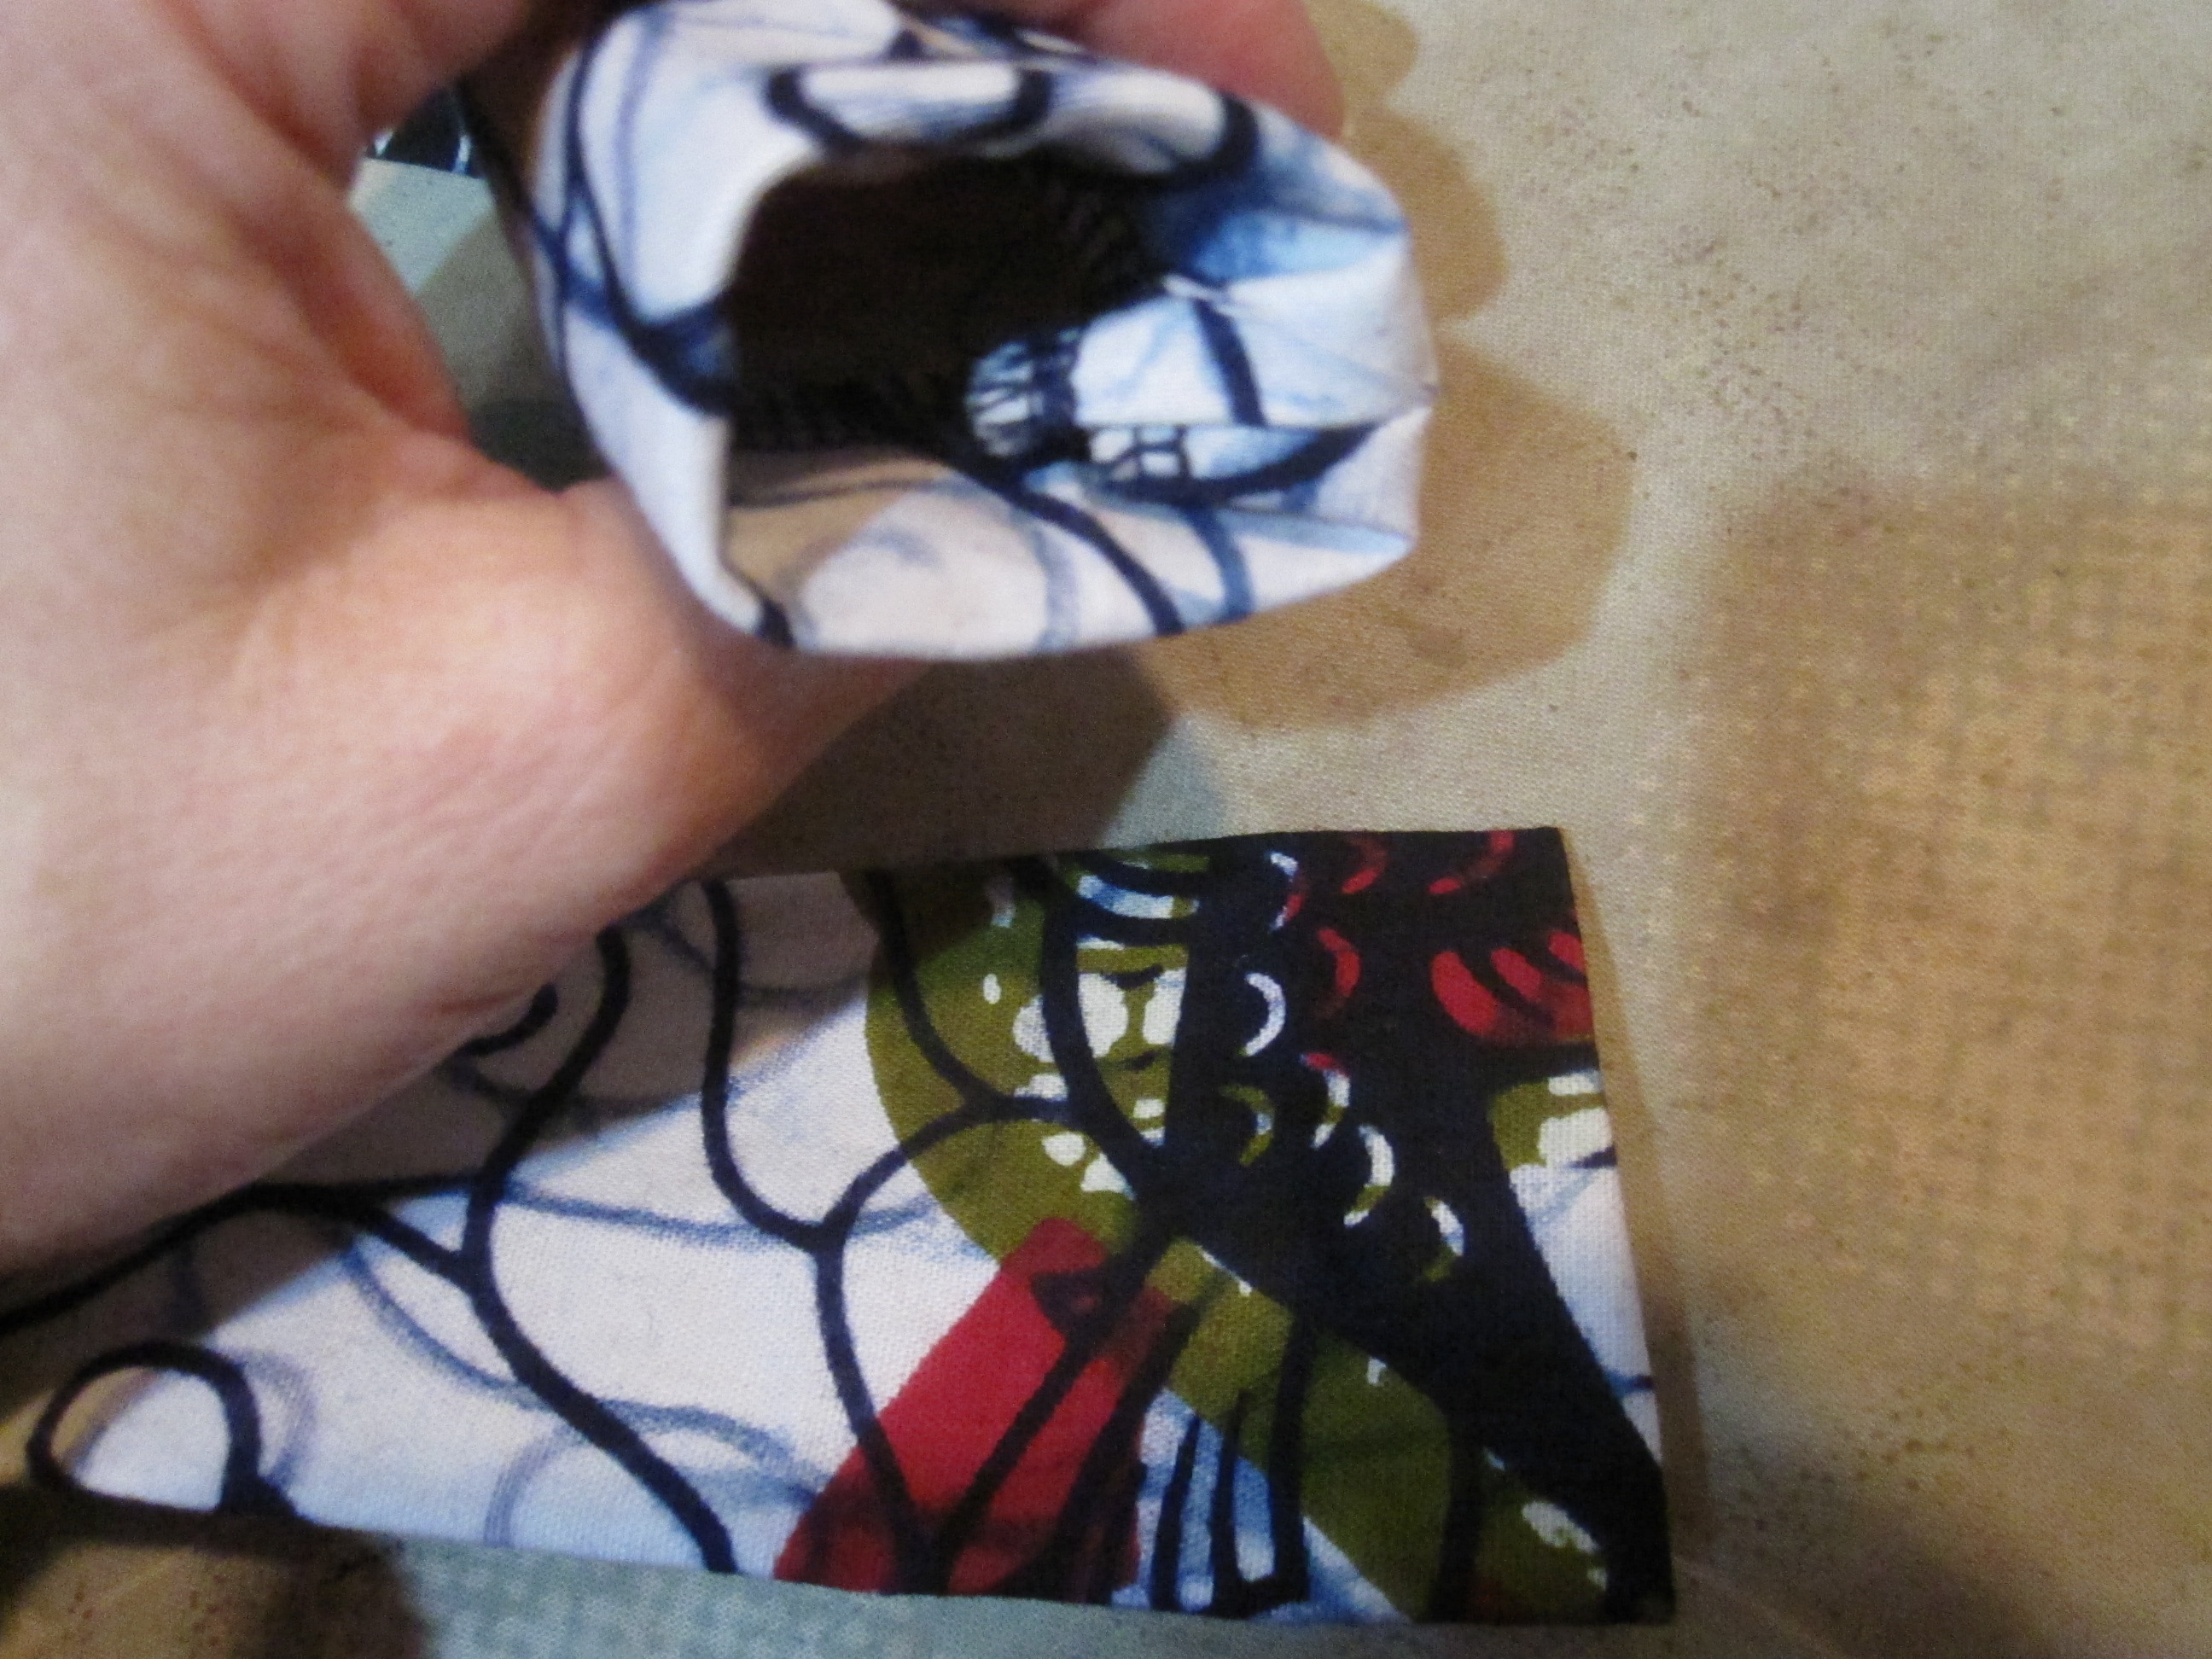
Now you're going to turn those raw edges to the inside. Just fold 1/2" to the inside all the way around and press. If you find this too hard, zigzag the raw edges together and just fold them toward the side with the seam allowance. Topstitch all the way around the handles, catching those turned under ends.
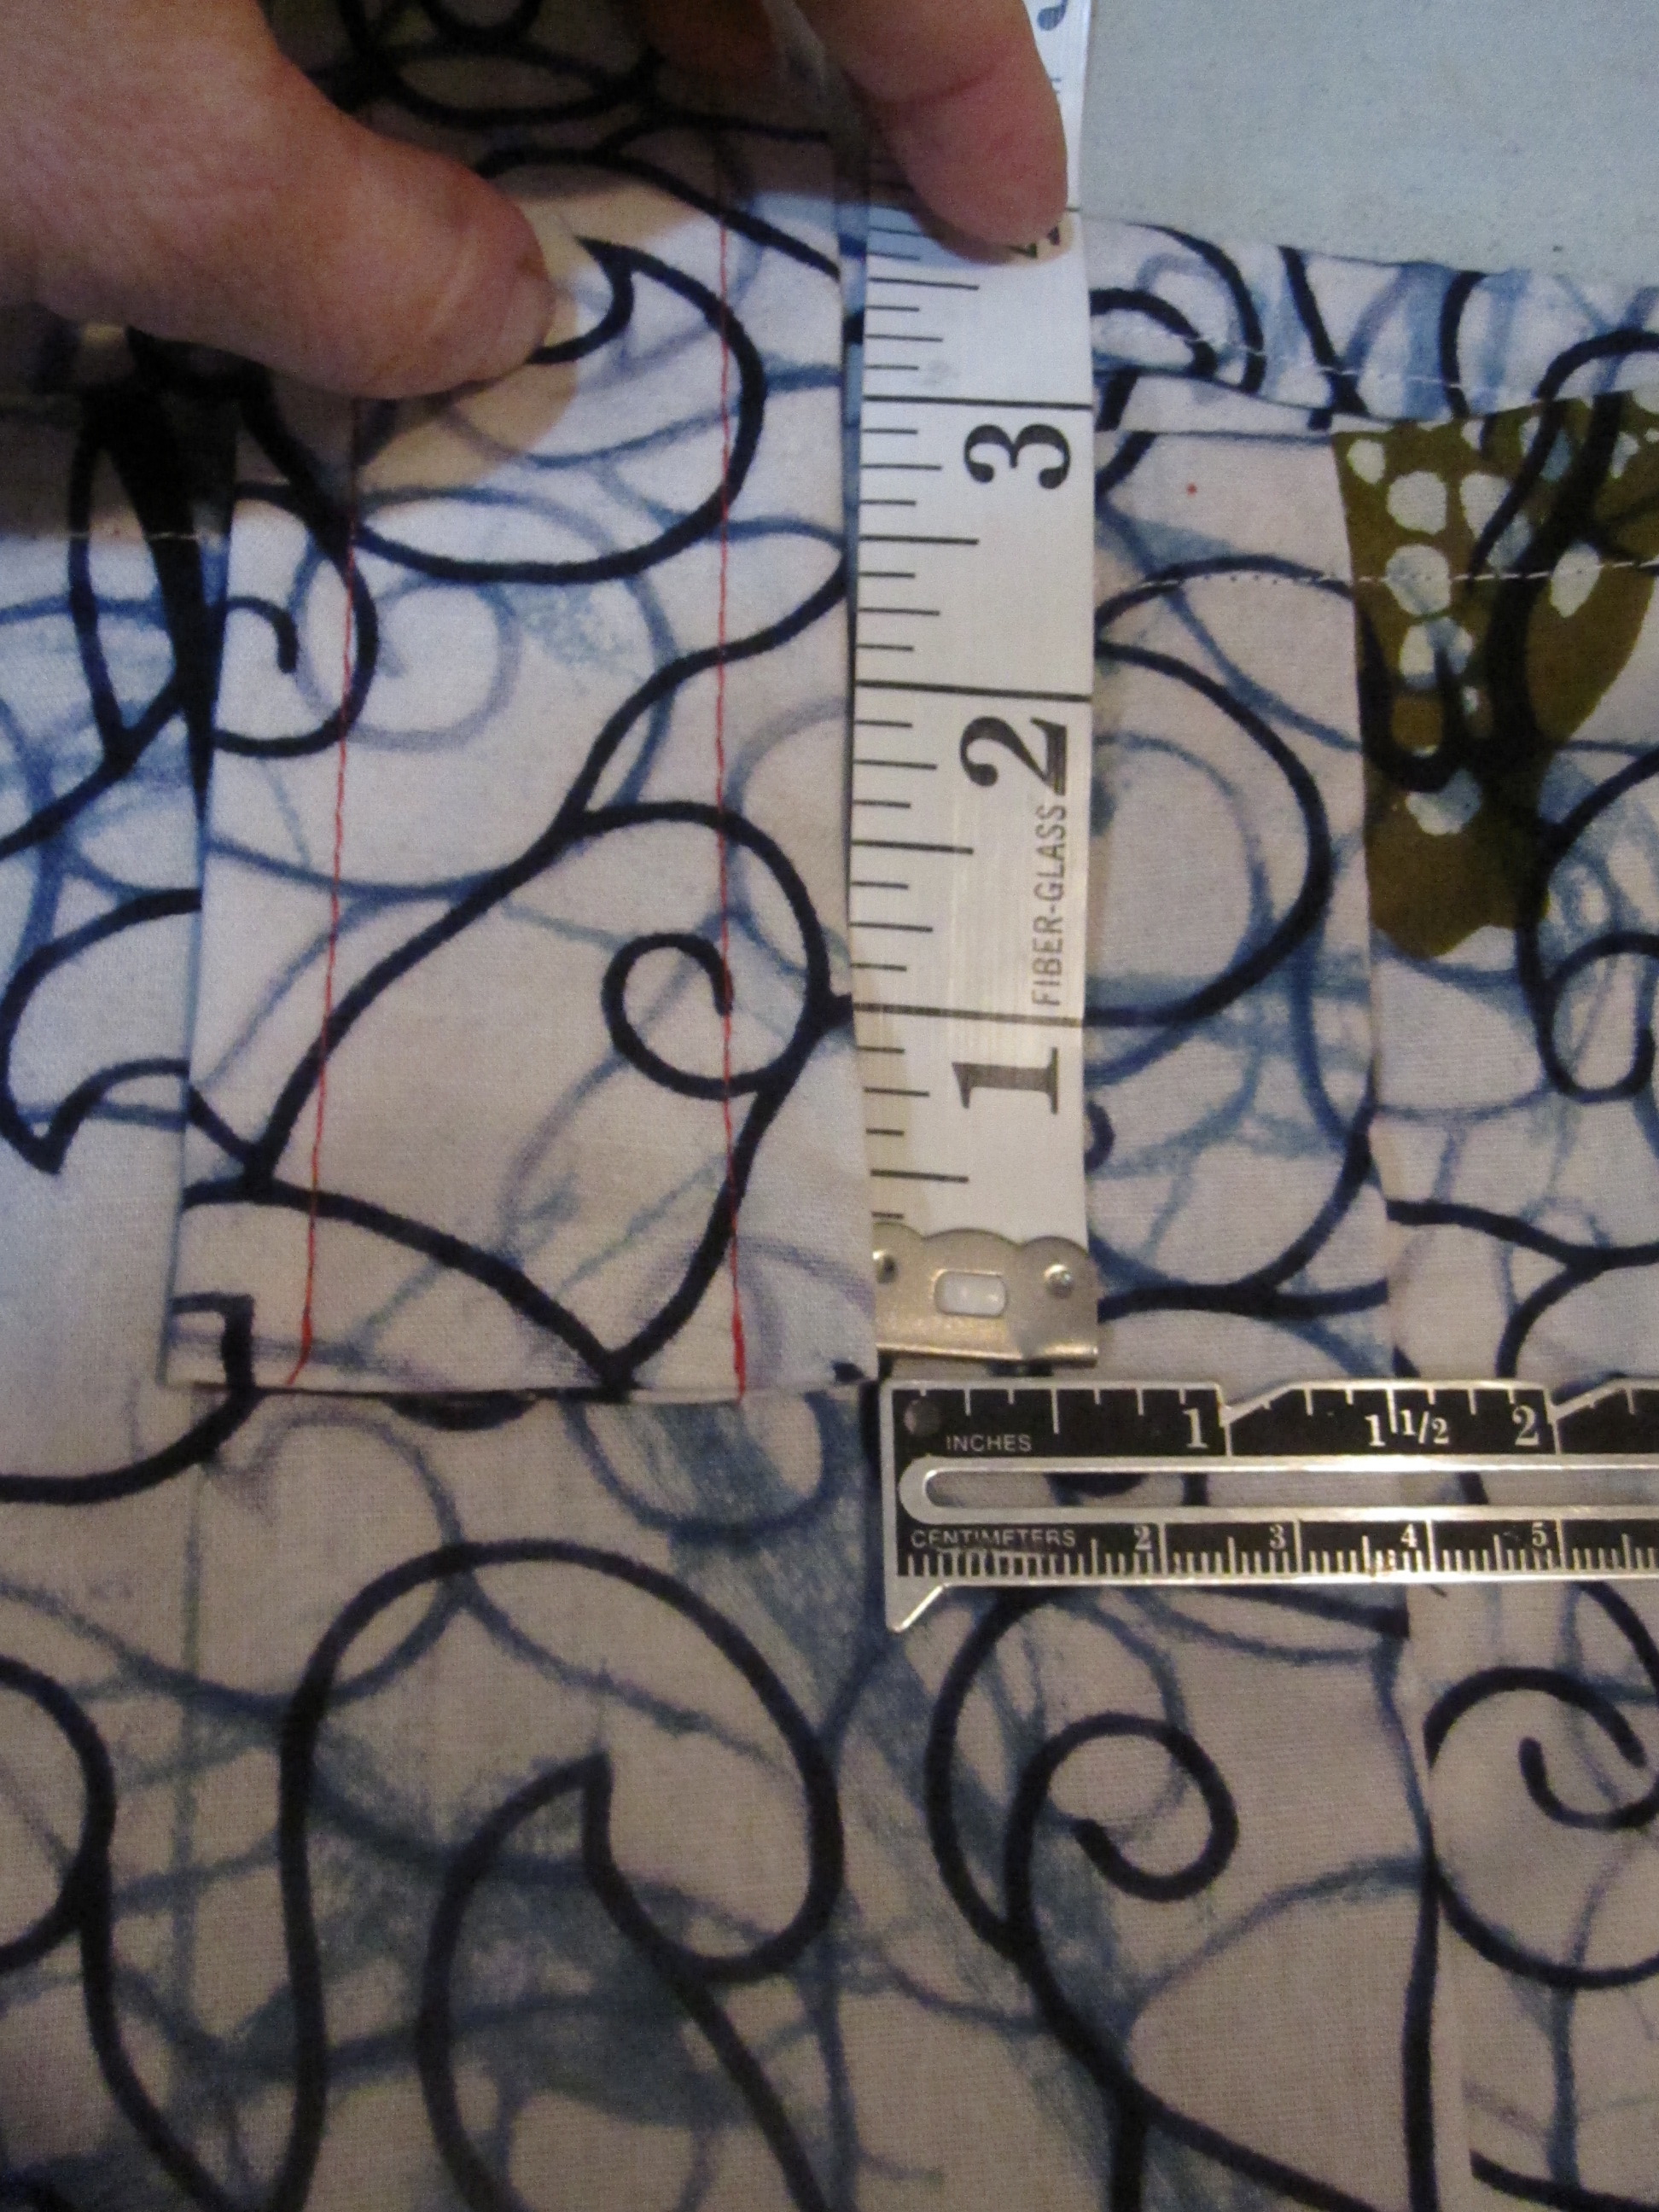
Now it's time to sew your handles in place. One handle will be sewn to each front/back piece. Measure down 3" from the top of the bag (the top being the fold for your drawstring casing) and 1 1/2 inches in from the side seam and mark this spot. That is where the lower outside corner of your handle will go. Mark this spot on the right and left sides of both the front and back.
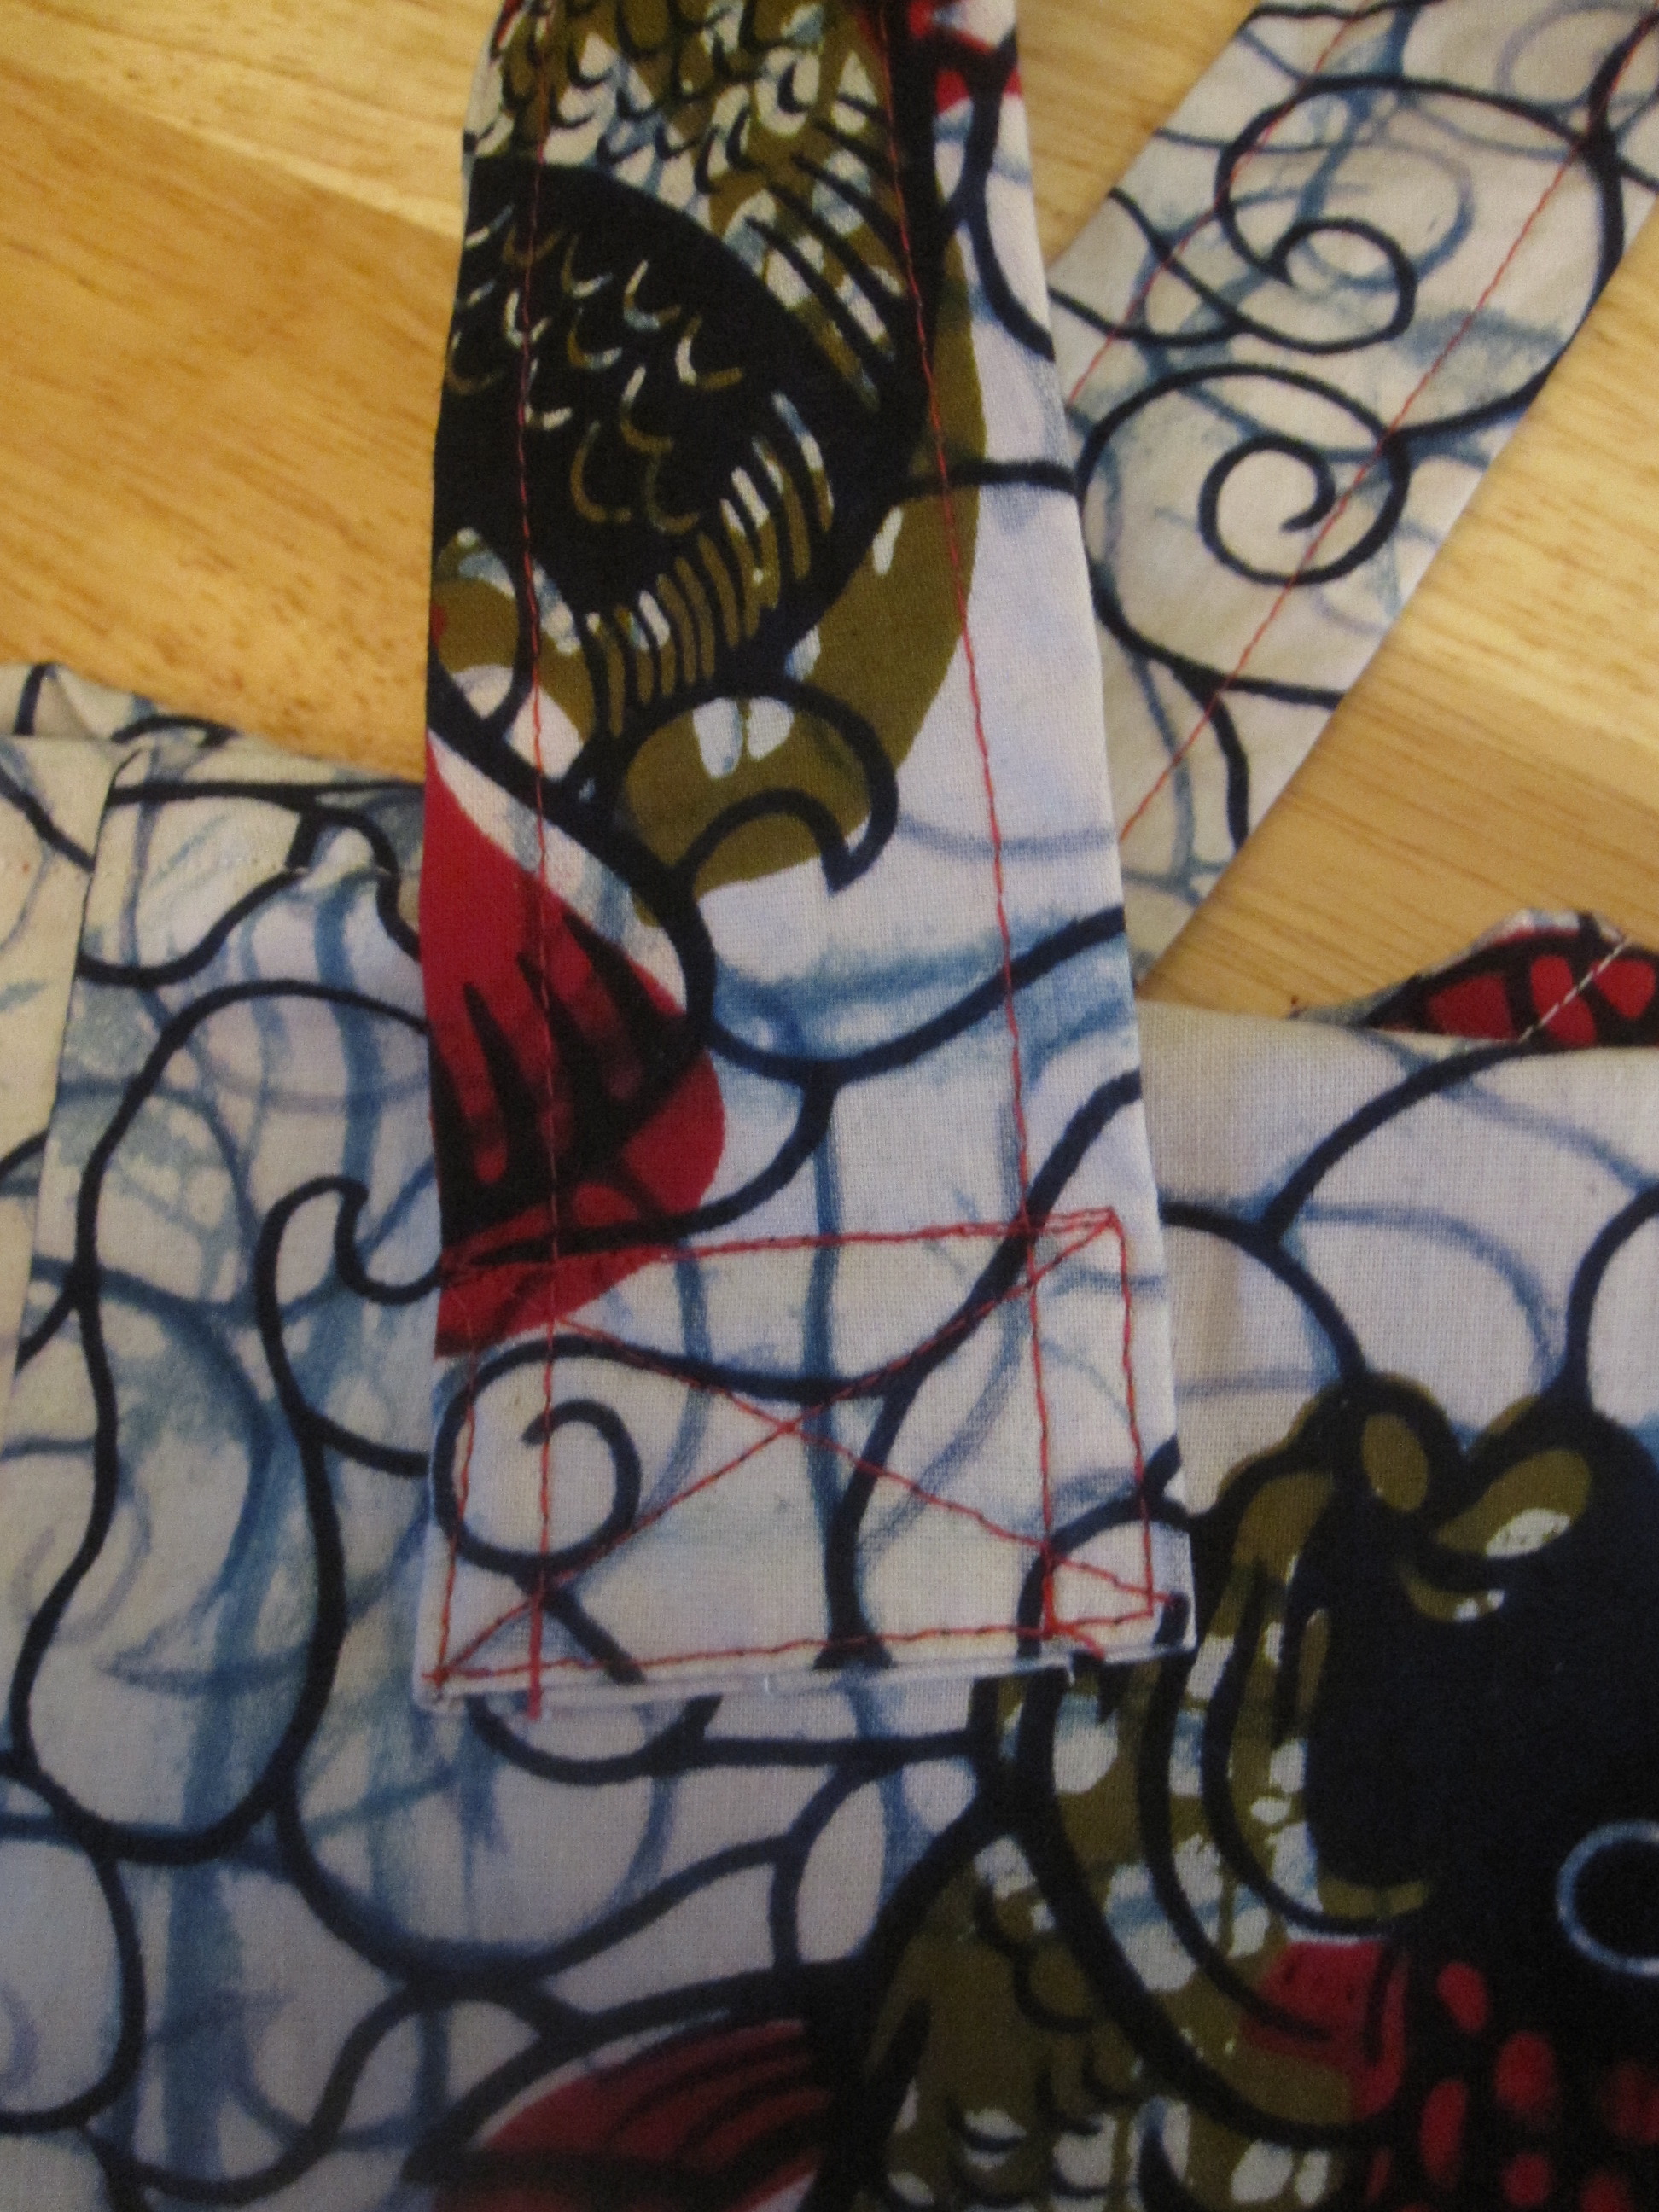
Pin your handles in place, aligning the lower outside corner to your marking, having the seam allowance of the handle toward the bag. Pin the other end of your handle in place on the same front/back piece (the handles do not go over the top of the bag's opening). Pay attention to make sure you haven't twisted the handle when pinning it before sewing! Sew in place using an X with a box around it for maximum sturdiness.
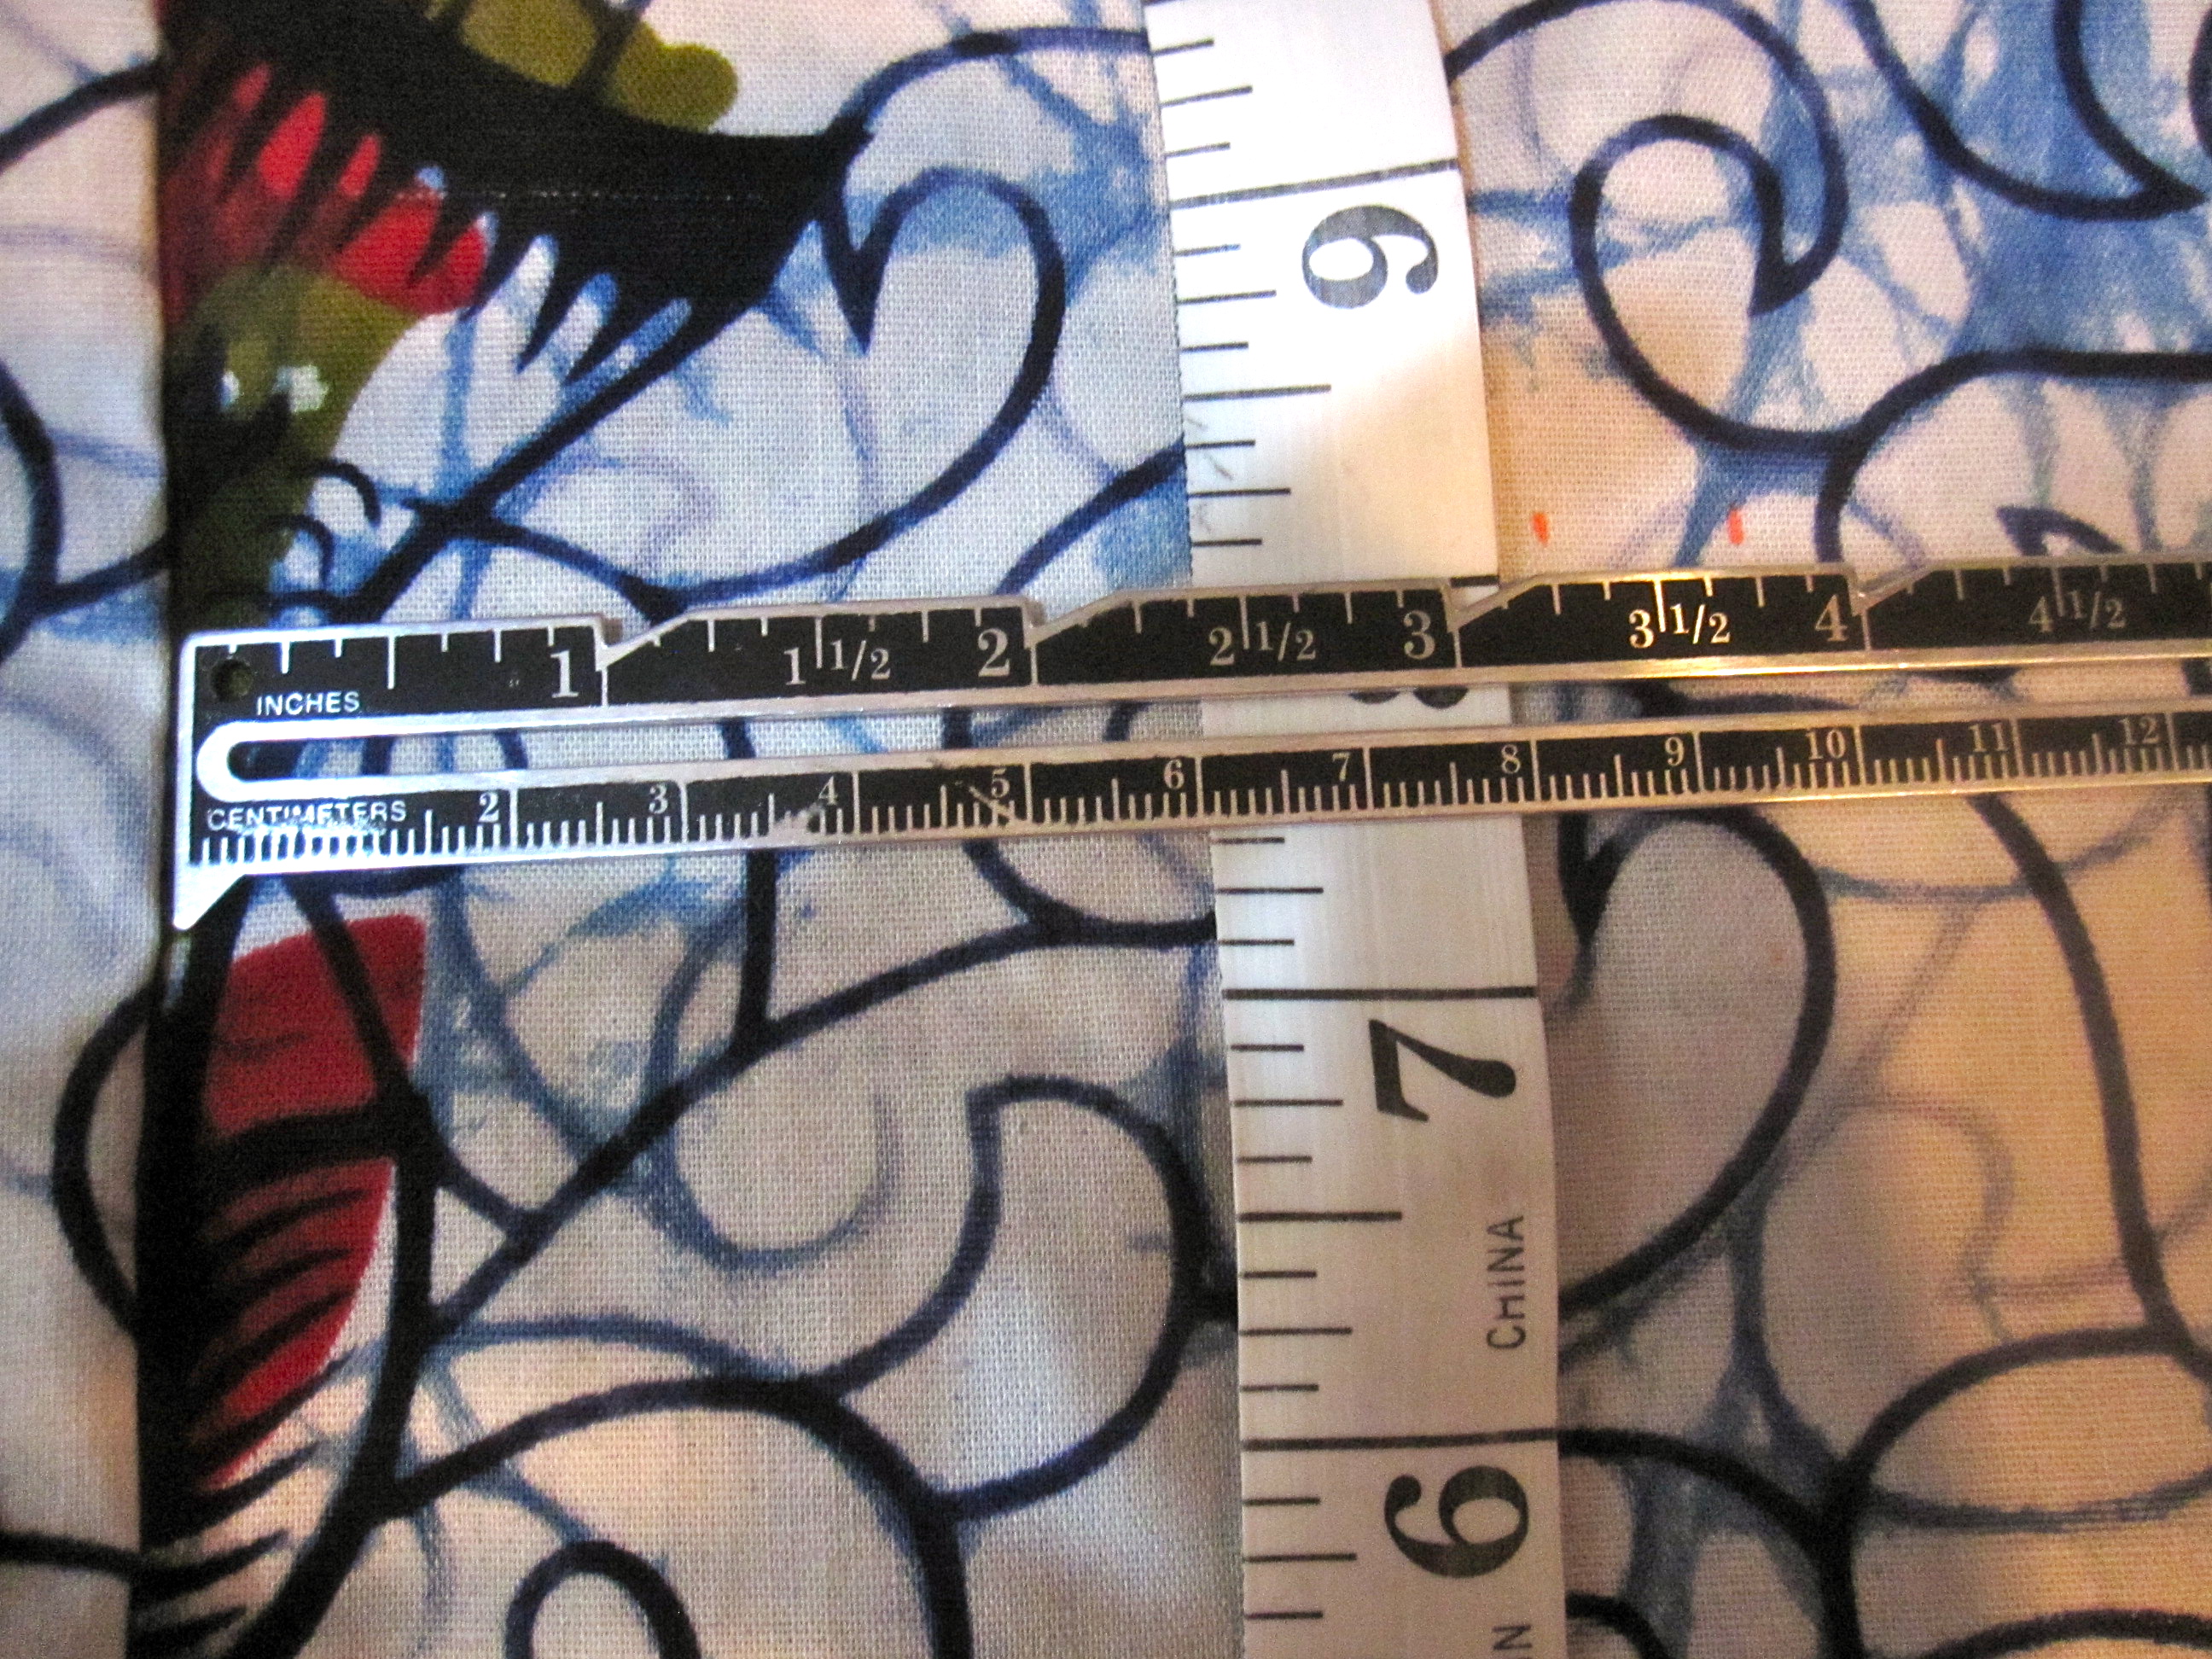
The final step is velcro strips on the side to attach to the baskets. On each side piece and measure down 8" from the top. Measuring from a seam, make marks at 3 1/4" and 3 3/4". Mark this spot. Cut two sets of velcro strips 2 inches long each.
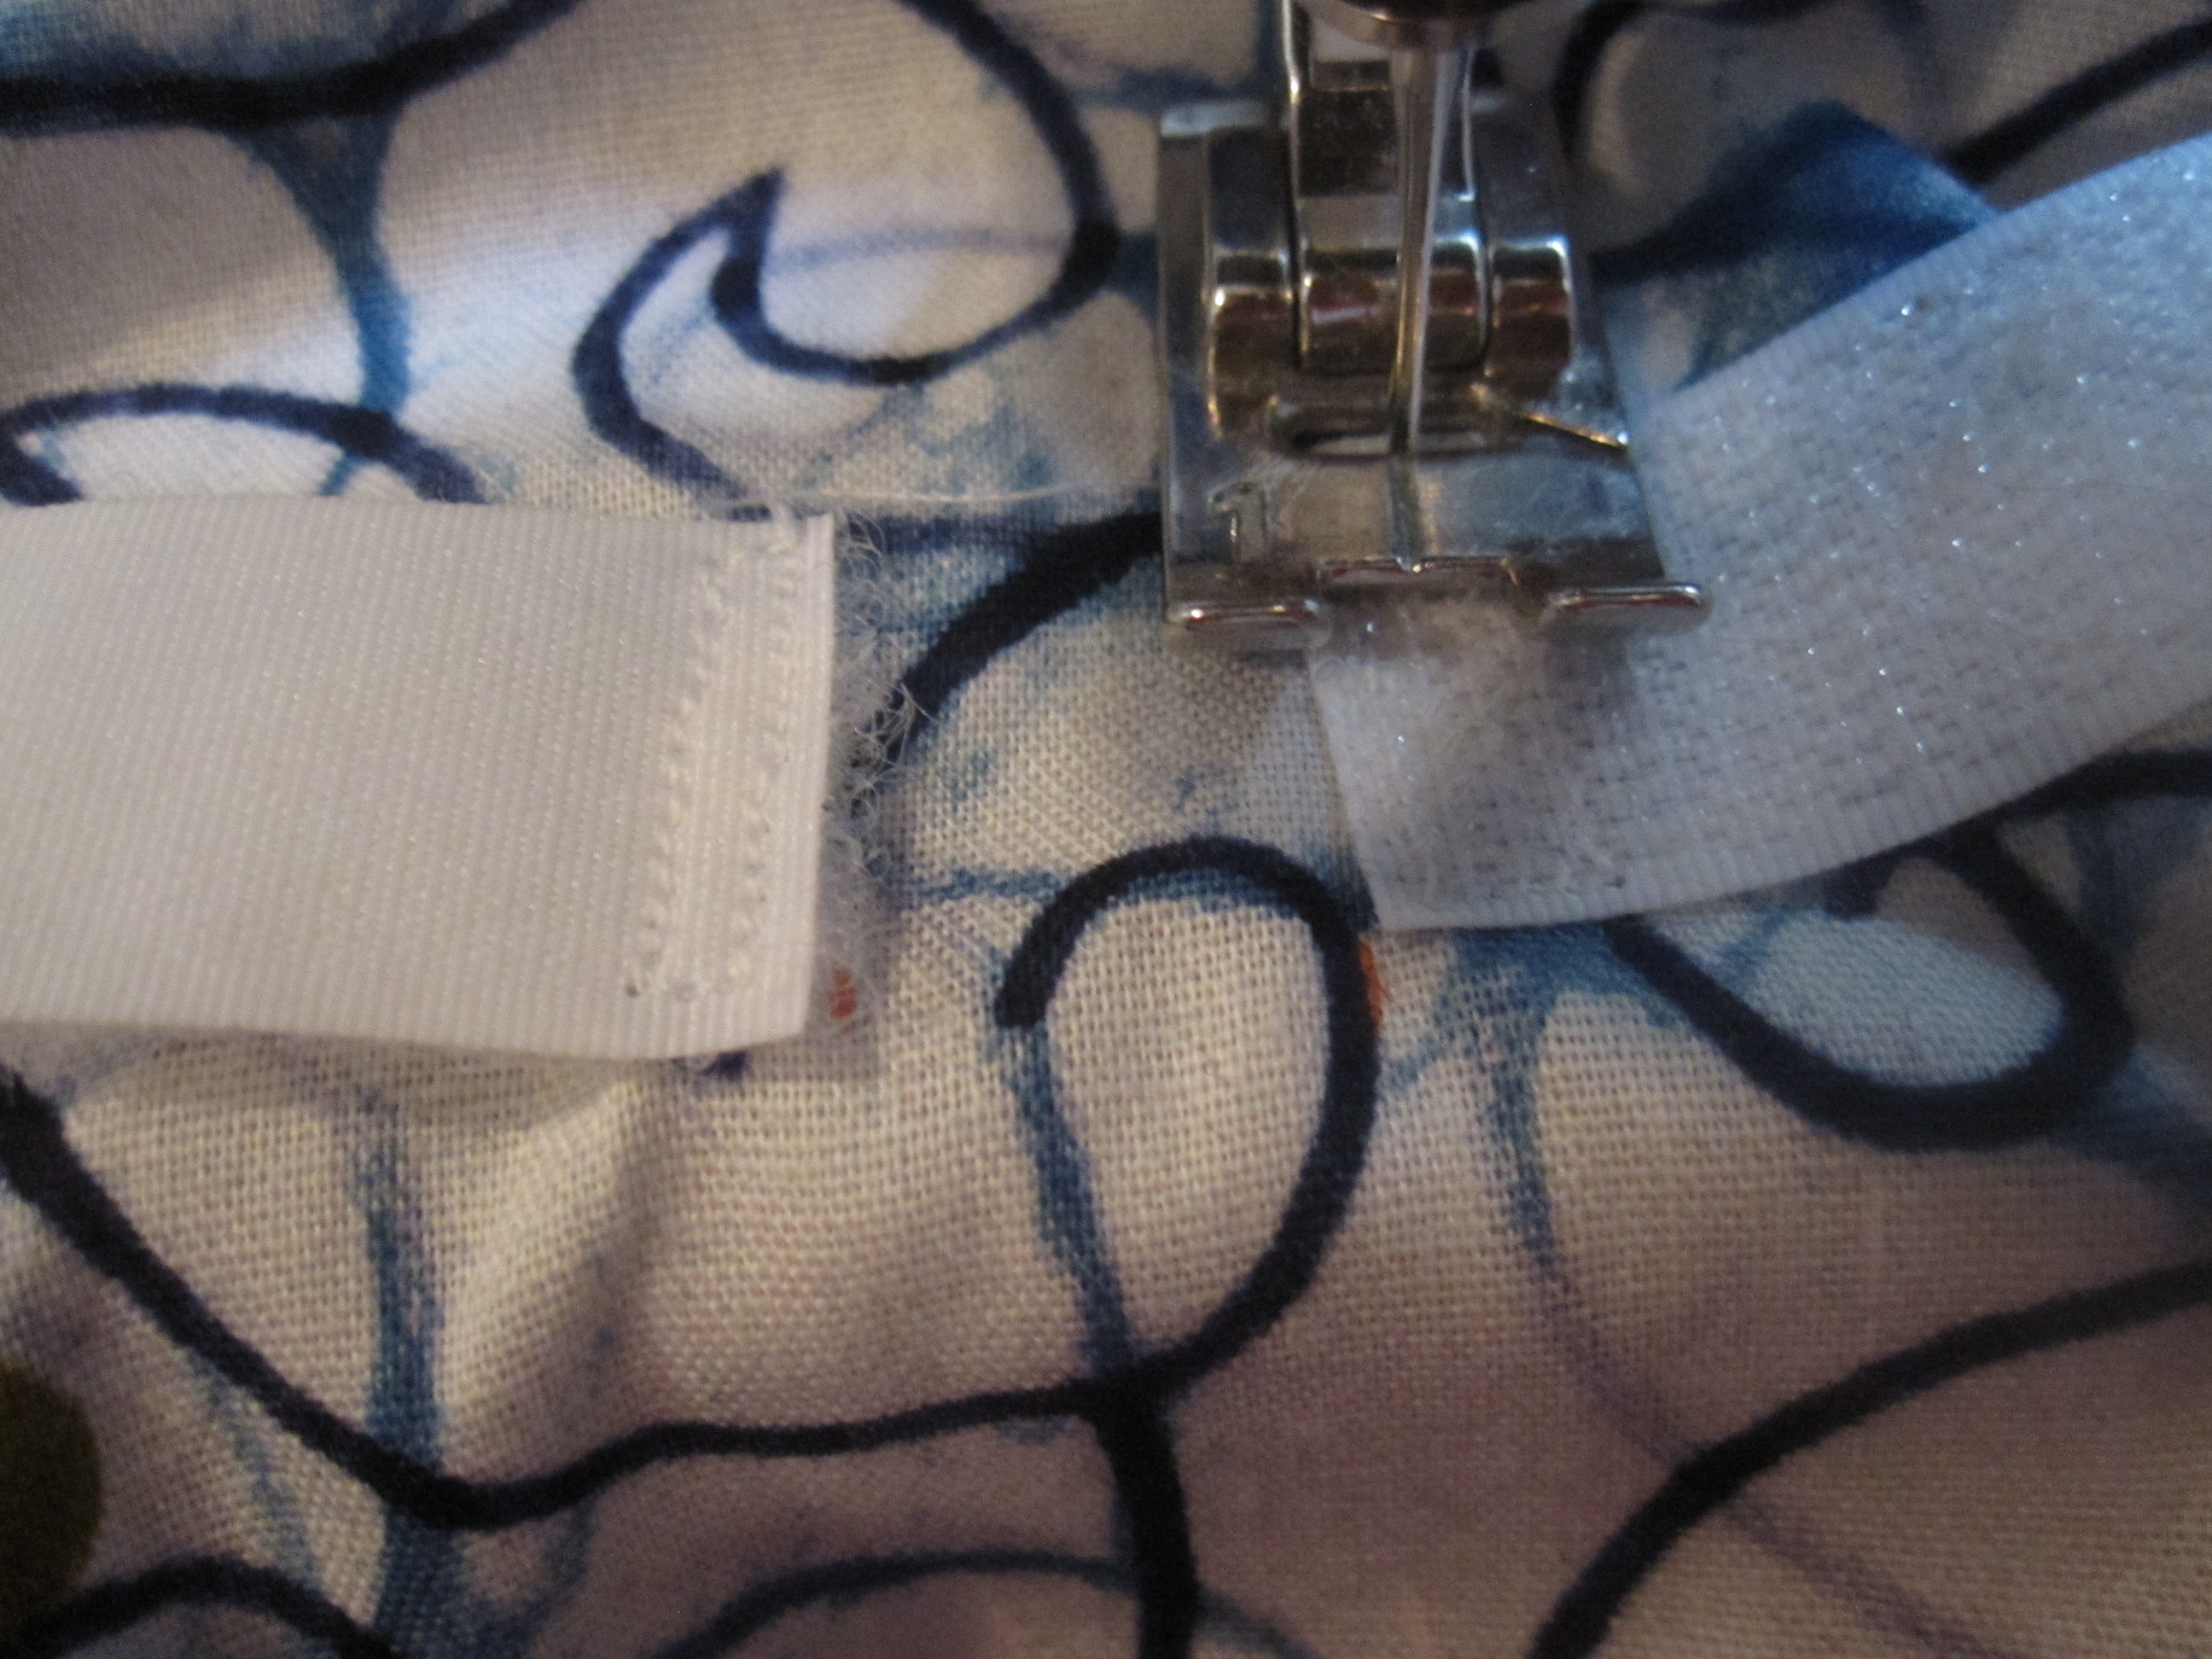
Spacing them a bit apart from the center, sew with one side up and one side down (otherwise they won't be correctly oriented to attach). Use a small stitch length and sew at least two rows of straight stitching. I did the rough side up and the smooth side down because when they are joined together the rough side is to the inside. However, it's probably better to do smooth side up and rough side down so that when they're open (i.e., when you're carrying them through the grocery store) the rough side is against the bag.
I really don't know if the velcro is necessary or just superstition on my part. However, my bags have never fallen out of my baskets no matter how full they've been--and if you ride DC's streets, you know that is NOT from lack of jouncing from pothole to pothole--and I always velcro them in place (and never use bungee cord) so I'll stick with my superstition.
Done! Making two of these took me about 2 1/2 hours--although that included documentation time. They are not a hard project and a beginner should be able to make them in 3 or 4 sewing sessions of a couple hours each.
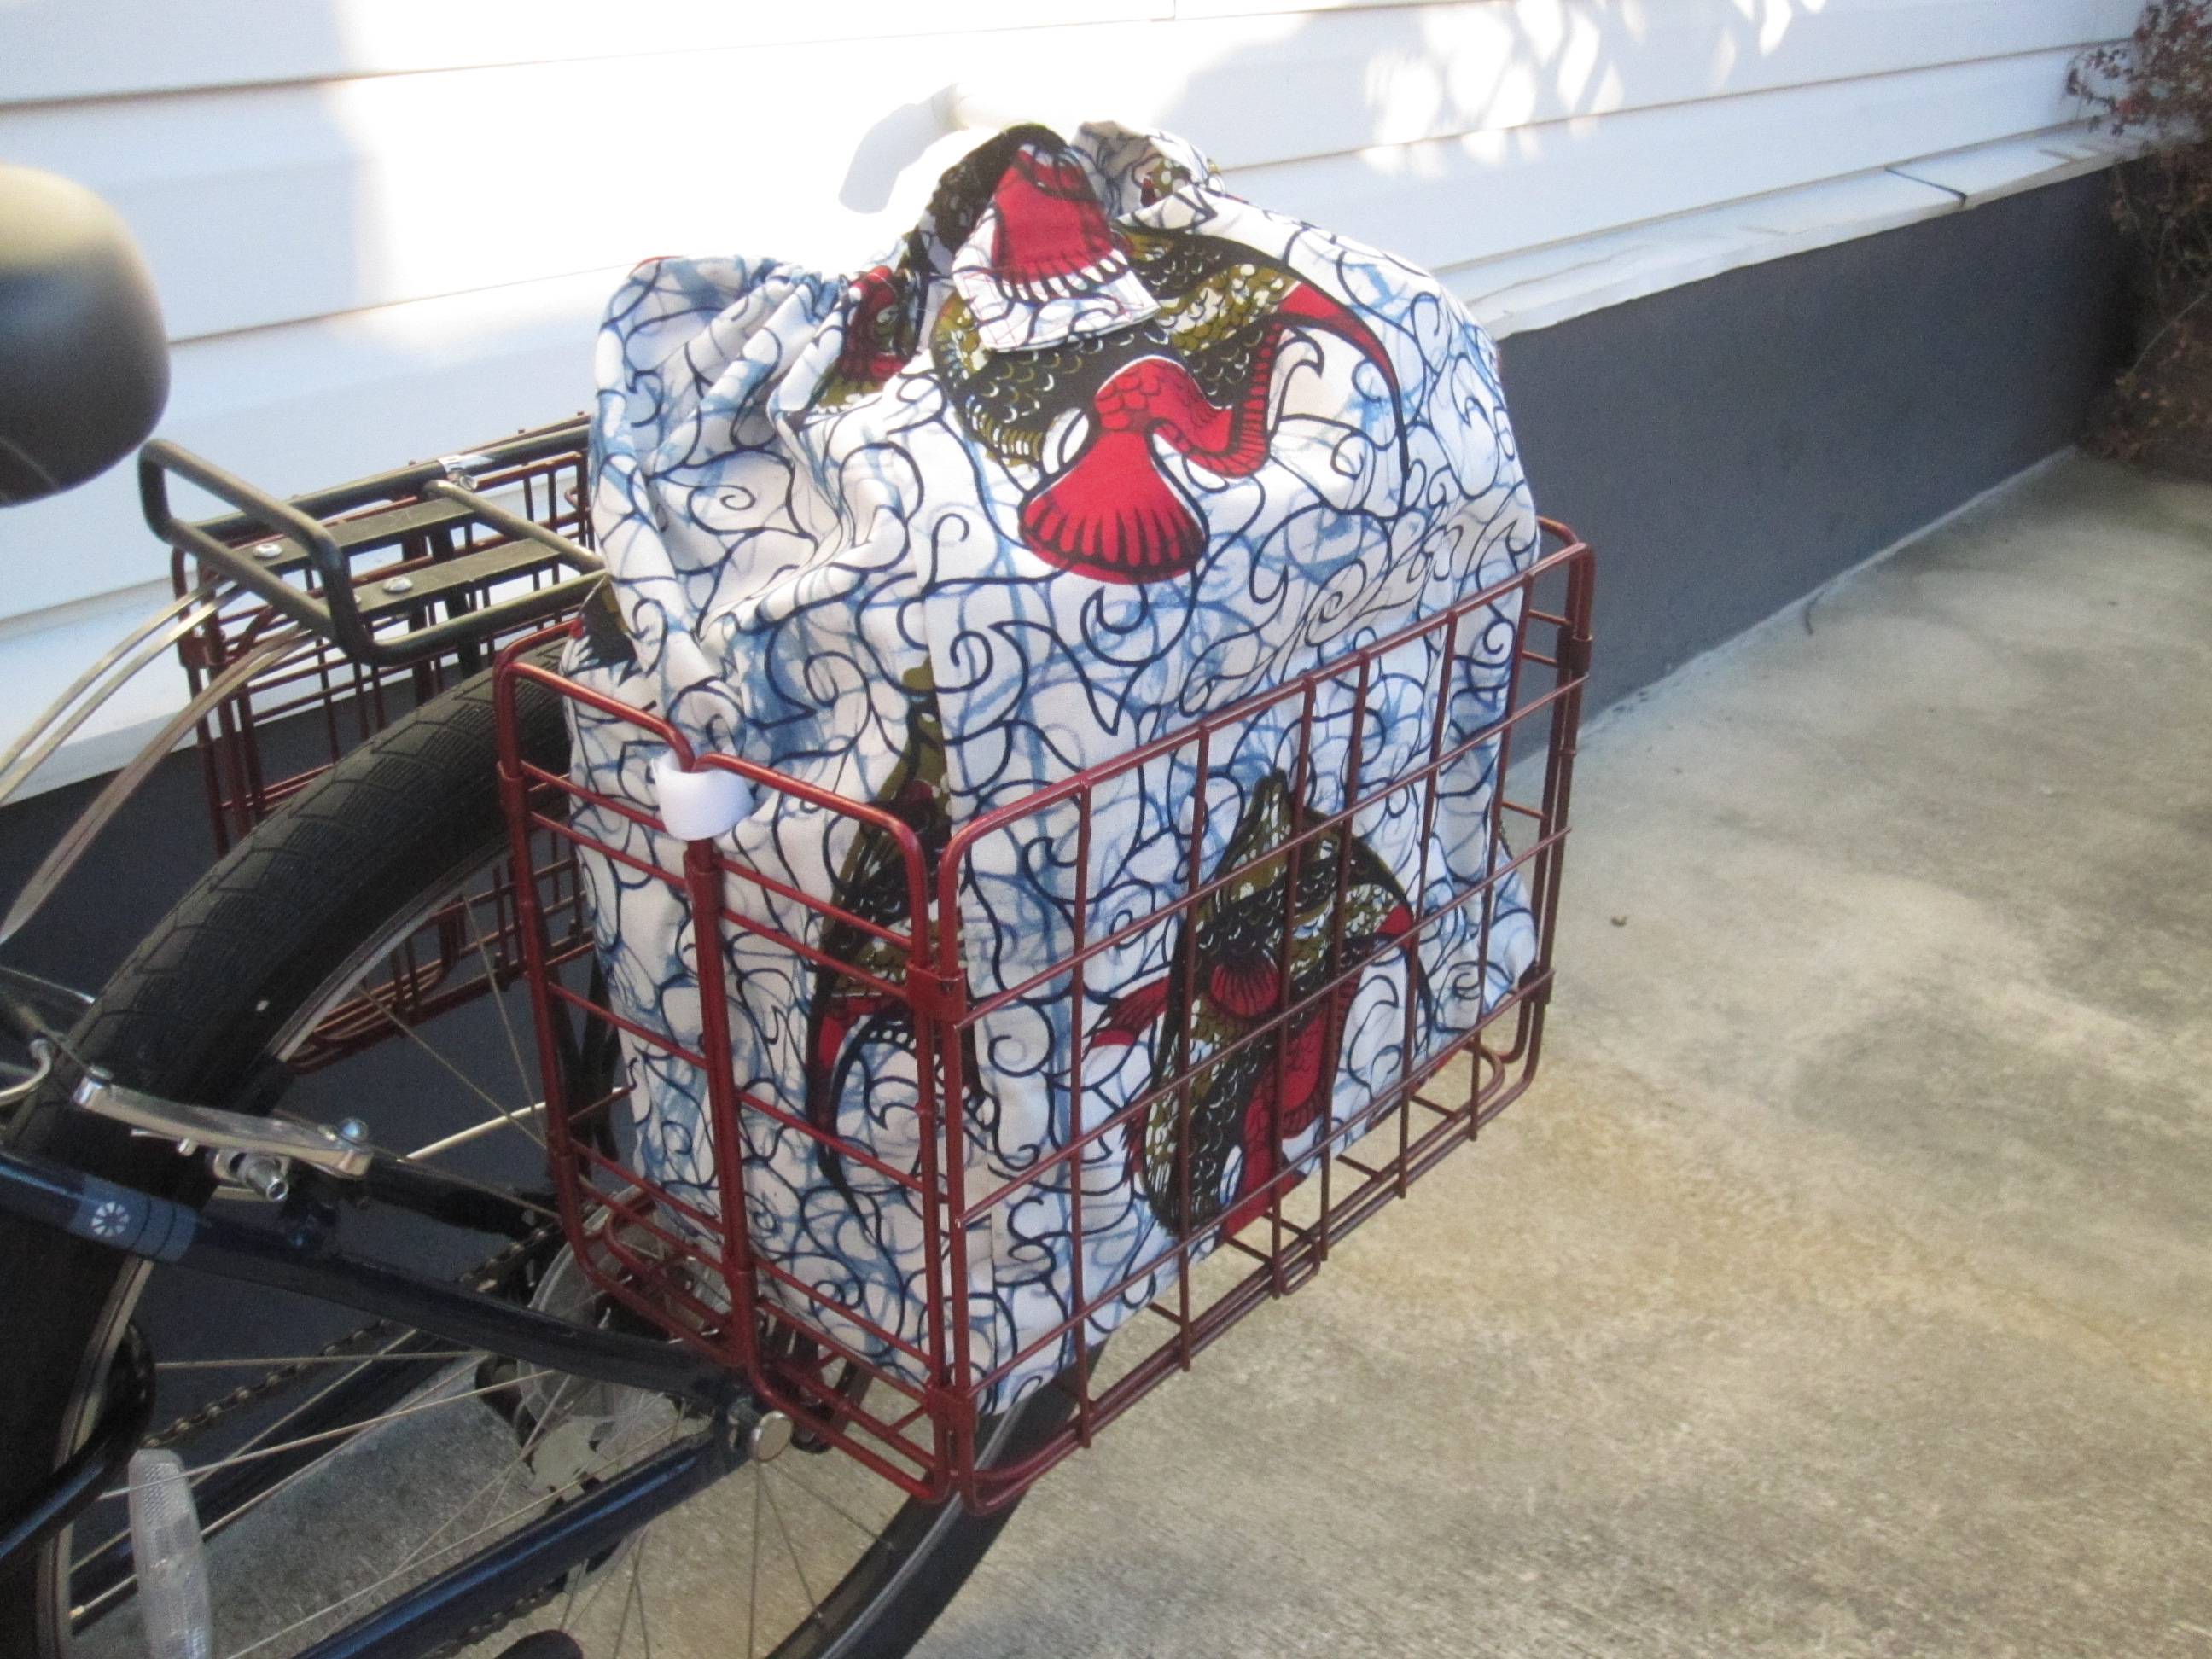
To use your bag, place it into the basket. Pull the drawstring tight to close the top of the bag and snug the cord stop, then tuck the long loose ends of the drawstring into the little opening of the bag. Tuck the handles into the little opening left at the top of the bag as well. This is to keep the drawstring and handles from spilling over the side of the basket and getting caught in your spokes, which would be Very Bad. Loop the velcro through the mesh of the basket and fasten it. Ride off into the sunset (or off to the Potomac, where the shot of my bike "in the wild" was taken).
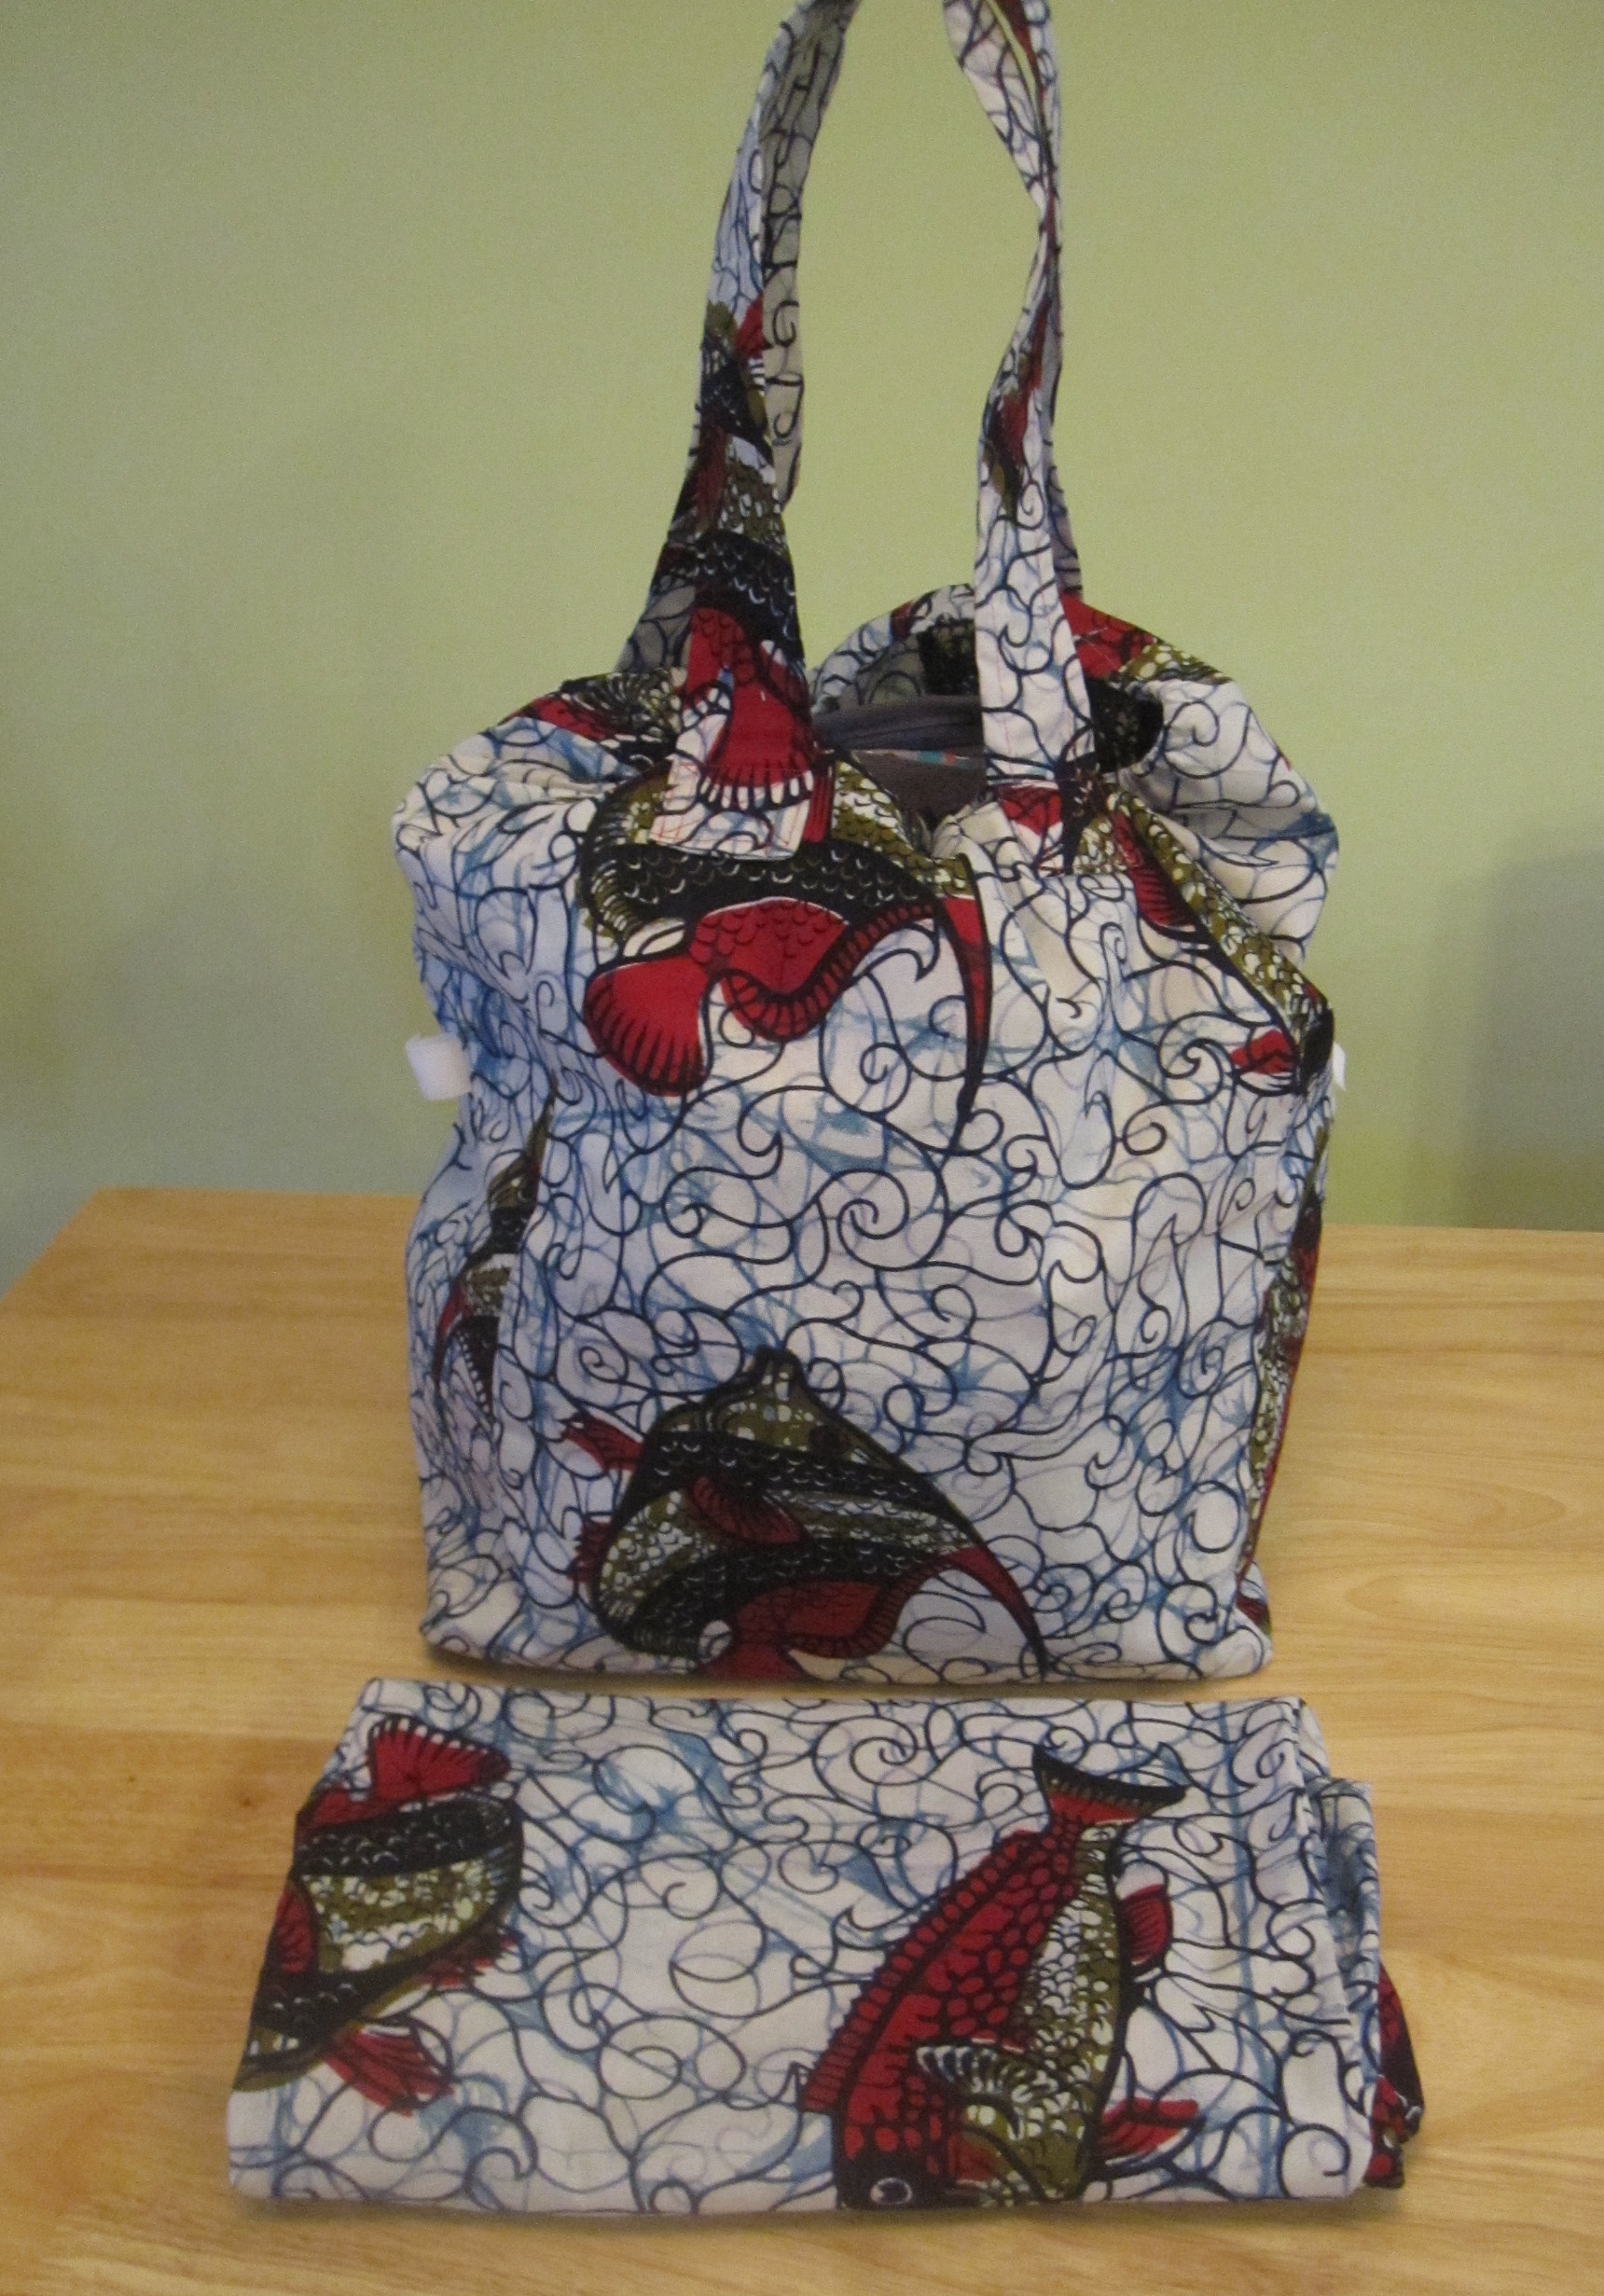
My bags are plain fabric. If I need something in them protected from rain, I wrap it in a plastic bag. I like the fabric bags because they are light, fold down quite small, and most importantly can easily be washed and dried when groceries go awry.
However, you could use waterproof fabric for a more precipitation-friendly bag. This blog is all about oilcloth. Rose City Textiles/Fabricline has reasonably priced waterproof fabric for bags.
I made these forever ago and kept waiting to post this until I got more glamorous photos of me and my bike but I think we'll just go with what we have!
All photos are here.

.jpg)


.jpg)


11 comments:
Very nice tutorial. I don't bike, but I made grocery bags out of an old lightweight tent. It's a pretty turquoise color. If you would like to make rain resistant bags I would be happy to send you some tent fabric. :)
becky at mckeent dot com
Good idea on the hose clamps. We found out with the offspring's bike the attachment hardware doesn't work. I have grocery bags sized to a tall brown paper grocery bag made of rugged nylon that fit in my baskets. No drawstrings but they were made long before we had the bikes. Just have to be careful not to load them up too tall.
Theresa in Tucson
I've had to bike/bus/walk to work this fall while Blake is student teaching just out of town, and having baskets would have made my life a lot easier (and my back much less sweaty—gross). I especially like the velcro you attachment you aded to these. Great fabric too!
I love your bags - almost as much as you clip-thingy-command of technical terms ;-)
Thanks for this tutorial. Your bags are way cooler looking than my panniers. I especially like the African fabric. You've inspired me to make one for my front wire basket in similar fabric.
RE panniers flying off. I would like to amend that to CHEAP panniers tend to fly off. The more expensive ones, geared towards long distance touring, have stronger attachment systems, a secondary fail-safe mechanism and internal stiffeners. The stiffeners prevent the panniers from attaining resonant frequency (and flying off at peak amplitude).
My husband and I have 3 pairs of Madden Mountaineering panniers, purchased at their factory store in Boulder, CO. Even at the factory store seconds price, they cost more than the average bike sold in America (at a discount store).
We've been happily touring, commuting and shopping with our Madden panniers for 20 years and counting.
Adventure cycling, the people who brought us cross-country bicycle routes, sell only equipment guaranteed to survive a cross-country bike tour. Check out their selection of quality panniers, including ones make in California by Jandd. However, people who live in rainy areas (hello PNW!) prefer the French-made Ortlieb waterproof ones.
http://www.adventurecycling.org/cyclosource-store/equipment/panniers/?P:Show=ALL
Madden used to supply backpacks for Outward Bound, but ceased operation after the owner sold the factory to travel around the world. When he got back, he repurchased the factory from the people who ran it into the ground in his absence. Now they make the Sherpani line of high quality (but expensive) bags.
I love your baskets (and the liner, of course!) I have a detachable basket that will fly off if there's a bump in the road which isn't fun, and I need a different solution. I must look into the availability of your baskets in Germany!
Thanks for the shout out for RCT fabrics. The most amazing fabric store in Portland.
I bought all of the fabrics AND hardware needed for out airplane cockpit cover and also the luggage compartment here. -- great selection of performance knits too. If you are ever in Portland, I would be happy to call in sick to show off this wonderful store.
I love this idea! It's so great that you can bike so much. I really want to, but there's a 600 foot hill that gets steep at the end coming home, and it doubles my commute time, so I often end up just driving to the train. These bags look just perfect!
You are very resourceful! What a cute bag. Almost makes me want to dig out my bike!
Great tutorial! I just use a Trader Joe's canvas bag that doesn't really fit into my bike basket and often ends up on my shoulder instead (with about 50 lbs of groceries in it which make me ride all wobbly). This is a much better idea. :)
Post a Comment