
I should have made clear in my last post that I had actually already drafted and sewn the final pattern when I posted about my muslin, before there was a consensus (and confirmation, as seen below) that there *are* seams in the front. But, alas, I was still in the dark and drafted the front as one piece.
Both Nancy K and Loti asked about draping. I don't know how to drape and though it would be an awesome skill to have, I just don't have enough free time to learn. :( I have only a few hours a week to sew and I would miss general workaday sewing too much to devote that time for months (or longer) to learning how to drape just to do a few projects a year. Also, flat pattern works better with my non-3D mind. I would never be able to unpin a draped project from a dress form and figure out what the heck I did!
After my first couple of muslins, I decided to try to be a little scientific. Plus, making full sized patterns was getting really old! So I played some paper dolls. I drew a little front bodice and then traced it several times. I slashed and spread it in different ways to see how that affected things.

The interesting thing to me was how similar--not how different--the patterns ended up looking, even though they were slashed in different places. I decided to go with #2 for my final pattern, as it seemed like the most volume for the least side seam distortion.
I had learned from Muslin 2.1 that all the effort I had put into fitting the waist of my master pattern while still leaving it pull-on-able had been pretty much wasted. I needed the extra width along the waistline to make room for the faux wrappy thing. So in addition to slashing and spreading, I flattened the waistline curve in the front piece and reduced it a bit (but not fully flattened) on the back. I also lowered the seam for the hip band, as I originally had it too high.

I believe the Grandie is fully lined, but for a silk summer top I thought a lining would make it too hot. Not to mention, it would look best self-lined and I didn't have enough fabric. I used a really lovely quality silk crepe from The Carol Collection. I wasn't crazy about this fabric until I prewashed it (by hand in the sink) and then it revealed itself to be quite spectacular.
Rather than separate neckline and armscye finishes, I decided that an all-in-one facing was needed to ensure the top kept its shape.
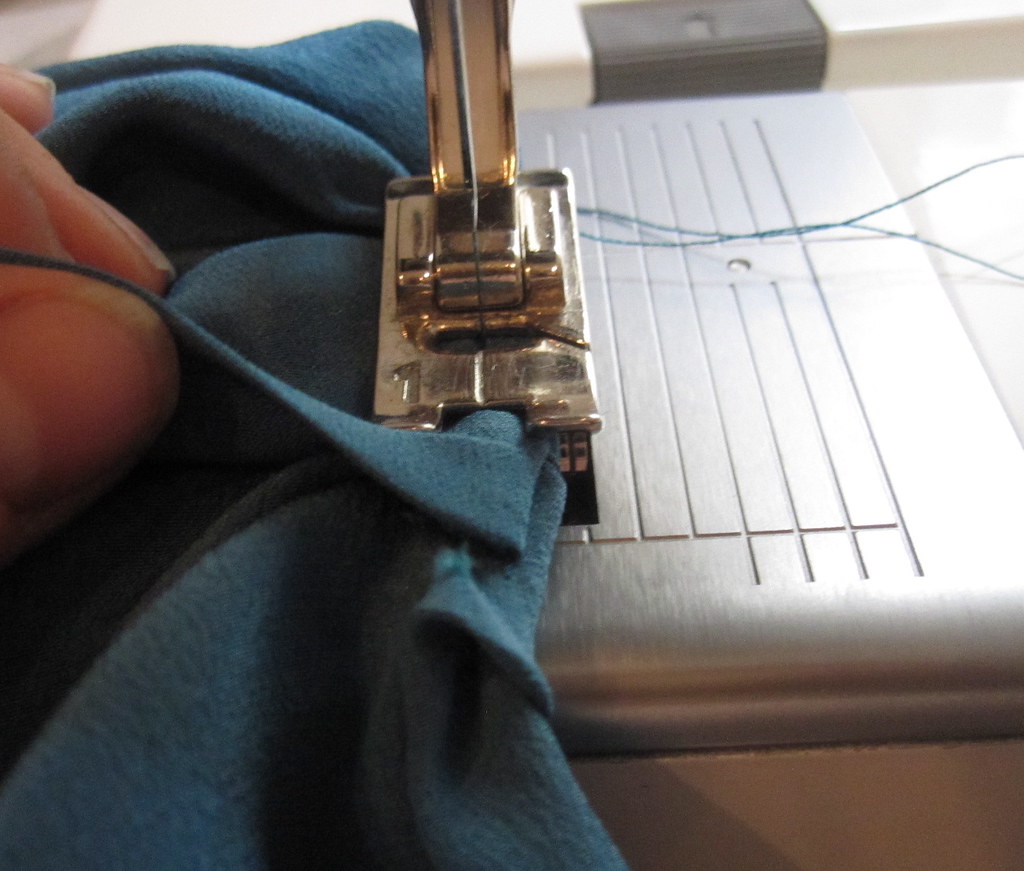
To nicely finish the edges of the facing, I used Sunny Gal's interfacing trick. Sew the lower edge of the interfacing and fabric, right sides together--so that the interfacing "glue" side is up. Trim, if you didn't use a serger. Then turn the interfacing up to the wrong side of the facing and fuse the interfacing in place. The lower edge is neatly turned up without extra bulk. It's a bit tricky to get a nice smooth edge over curves because you can't press it in place until you're ready to fuse, but a little bobble here and there is still nicer than a sergerd or zigzagged edge.
Although I have read several tutorials on sewing an all-in-one facing by machine without a CB seam (something like the burrito method for yokes), I really didn't want to add figuring that process out to this already frustrating project, so I kept the CB seam in my top and used my all-machine clean-finish technique.

The hip band is also self-lined. To keep the hem stable and add a little weight I interfaced the lower edge of the facing piece. I didn't want the look of topstitching in this project so rather than do my usual method of sewing the facing to the wrong side, sewing the fashion fabric to the hem of the facing, and then topstitching the upper edge of the fashion fabric in place, I did this the traditional way and hand-stitched the band facing to the upper seam allowance.
I generally like to use French seams on silk, but with all the layers it would have been bulky in places. So I did regular seams at the shoulders and the side seams of the band--seams that are hidden inside facings. The only French seams are the side seams of the upper bodice. When including a tie in a French seam, remember that it must be included in the first pass!
You want the tie to end up on the outside. On the first "wrong side to wrong side" pass, the right side of the fabric is on the outside. So the tie goes on the outside too. When the top is turned inside out and the "right side to right side" pass is made, the end of the tie gets sandwiched into the seam and the tie ends up on the outside. (It always takes me great mental effort to figure these things out.)
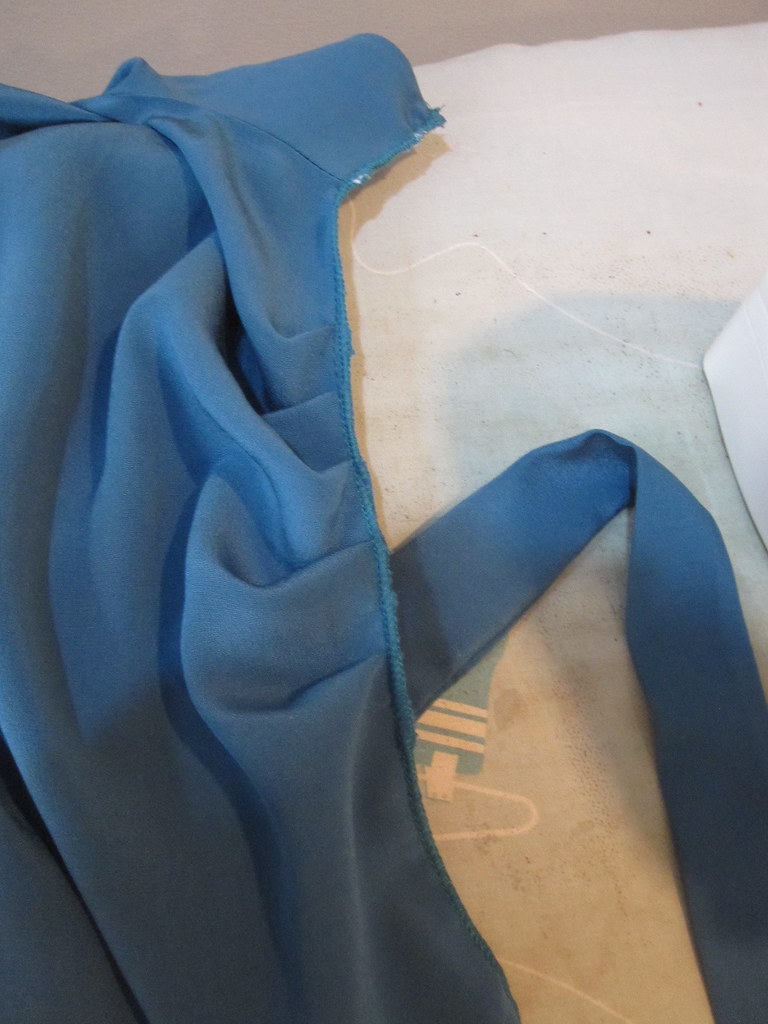
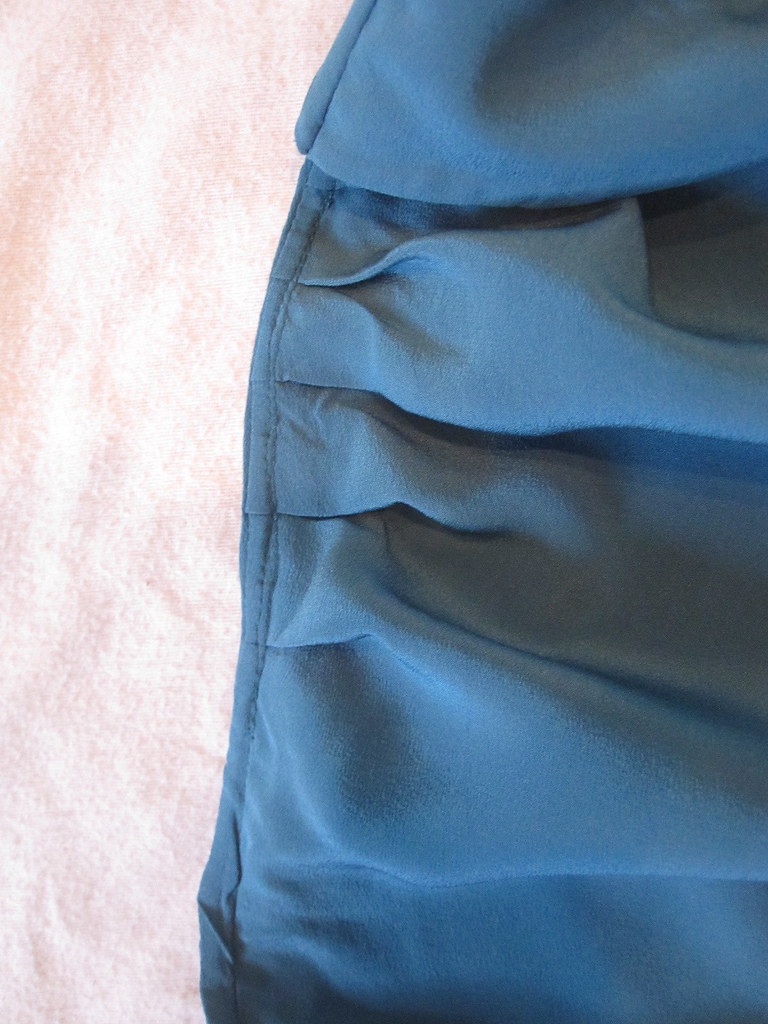
The most difficult part on the final product was figuring out where to place the pleats and front tie. I'm not sure I chose correctly, but it cannot be undone now without destroying the fabric so c'est la vie!
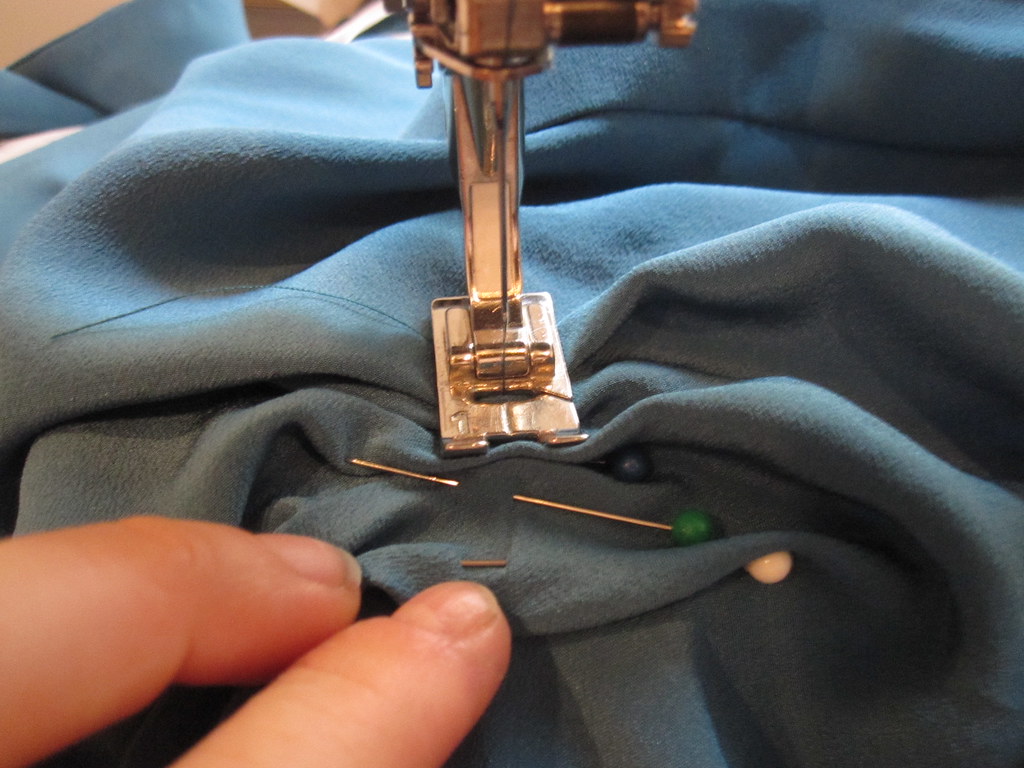
I tried on the top and pinned the pleats in place. Then I machine stitched vertically over the pleats.
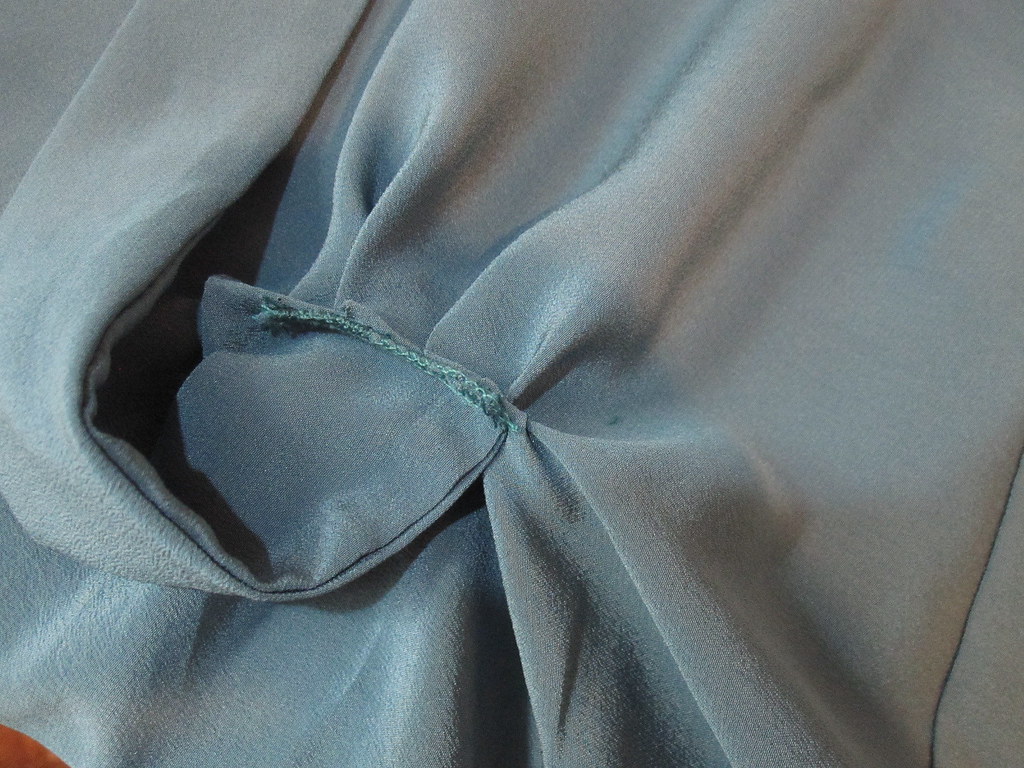
Next, I took the tie and stitched it, with the end flush to the pleats, so the finished end of the tie was reaching toward the side on which it would be tied (sorry for my bad technical writing).
Once it was stitched in place, I flipped the tie over to the other side and stitched again, enclosing that raw edge. When the tie is pulled over to be tied, the seam is hidden.

Alas, I did not crack the Grandie code. I was hoping this would be a pattern I could use again with sleeves for Fall/Winter but I am not crazy about the final result. Rather than cascading and draping, I just have a big bulge of fabric over the left side of my bust.
Sunny Optimist geniusly found this photo online where the seller had tied the top the "wrong" way, clearly exposing the seams. Well, that would have been helpful! With this information it would be a lot simpler to draft a closer approximation; I'm not sure I have the stomach to go back to this project.


However, although it wasn't fully successful, it was still a highly educational project. I learned a *lot* about pattern manipulation, and I can imagine all sorts of other patterns that can be drafted using this method. And plus, the paper dolls are so much fun and no risk/cost in materials (I use scrap paper).
All photos are here and the pattern review is here.


.jpg)


39 comments:
It looks cute to me. Sorry it wasn't exactly what you had in mind, though. BTW, I LOVE that tapered black skirt on your figure. It's really very flattering.
Even though this top didn't turn out exactly as you planned, you did hit the nail on the head when you said that you learned a lot about pattern manipulation. Those things will help you in the future when you're working on your next garment. I've had some epic fails, things I wouldn't even wear, and I think I'm a better sewist for that.
I like the color and I think it looks nice with the skirt. Maybe not exactly what you wanted, but I do think that with sewing you can learn a lot more from a fail than a success. Which is the fun part - learning new things, increasing skills, and then using them later to make something awesome.
Ooooh, I really like this top. Good job :)
Looks fab!
How annoying to see the photo where the seam is exposed AFTER you've done all that work! It's really not that far off. I wonder if this is one of those projects where the object needs a little time in the "magic closet" while you forget some of the frustrations in creating it?
I think it looks fantastic, too! That's a great color on you. Let's talk about your shoes, though - what are those? Me want.
Your top looks great. In face, your whole outfit looks great! And thanks for the links to the different techniques you use. I'm sure I'll be referencing them in the future.
It turned out lovely! Even if the shape is a bit different from the inspiration, the color and drape are fabulous and it looks great on you.
Even if it wasn't a complete success, it stills look good. Super cute outfit! Love the shoes!
You look lovely and I enjoy reading about your thinking process - I get all spacey trying to visualize things in 3-D. Well done - and I love the skirt and shoes.
You got yourself a lovely top! But I love this investigative/detective approach to creating garments and look forward to your next project.... I always feel like I've learnt from your posts.
I think this looks beautiful on you even if it's not exactly what you hoped it would be. The color and cut are really quite flattering on you!
I like it, Trena!
Great tip about the interfacing! It turned out so cute!
OK, I am completely confused by the new photo. The garment - in addition to be tied the wrong way - also appears to be a mirror image (like an evil twin?!). The pleat is on the left shoulder, whereas yours and the first (original) photo have a pleat on the right shoulder. I clicked to enlarge the new photo on its site, and the label is not backward, so something is sinister (or dextro, ha).
I applaud your drafting and redrafting and mini mockups. Your dogged persistence is to be admired!
totally impressive!
June--I meant to mention that my version of the blouse is the mirror image to have it tie on the right side. In the photo of the DVF in my composite, I reversed the photo so that it would be the same as mine for comparison purposes. The actual top ties on the left.
I have a lot of trouble figuring out how to draft these drapey pieced tops. I am impressed that you even tried and came up with a wearable top. Even if all you learned was to use reduced size patterns for playing around you picked up a new technique for the future. It may not have turned out the way you wanted but you learned a lot in the process.
It might not have been the top you were picturing in your head, but the finished top looks really good on you.
Although it's not an exact copy, it looks pretty darn good. I hope you get to wear this a lot!
You know what? The top is great and you're learnt lots so really, you've gained more for the experience.
And... you will wear this top quiet a bit this season too:-)
To be honest, I like yours better. The original looks a bit messy with all those fabric folds, whereas yours is clean and just drapey enough. That's a fab skirt, by the way.
Only a few hours a week to sew? You sure get a lot done!
Wonderful knockoff of the DVF Grandie top! Your pattern manipulation proved to be a success, even though you are not completely satisfied with it. Your drafting skills are impressive.
I nominate DVF for a Nobel Prize in garment pattern making.
I learn a lot from every pattern I make, even if it turns out crappy. (And your blouse is definitely not crappy!) It's been very interesting comparing your process with mine.
It's a great color and it sits really beautifully on you even if it's not what you hoped for. I'd shelve it for a while and give it another go. I think you can figure it out. These drapey kinds of styles work really well on you.
I think the blouse looks great. Job well done.
I am wondering if you couldn't get the DVF effect by using silk jersey? Your version looks great, but I am wondering if the pleats would fall correctly with jersey. I regularly snoop at the DVF stocked boutique in my neighborhood and most of her fabric is silk jersey.
Wow, beautiful! The middle design almost looks like the center of that beautiful brown snakeskin dress you did. Cindy C.
Seriously cute shoes.
The top may not be a duplicate of teh DVF, but it sure is cute and a great color for you.
I like your version over the inspiration. You seem to have fit it better to your figure and left out aspects that make me scratch my head with the DVF top.
Great job! I love it. It's very flattering on too.
Very impressive to figure out how to come up with a similar pattern. I really like the top and it must feel so good being made out of silk.
This looks awesome, and kudos for making it appear so similar without adding seams!
I didn't see this until today but it reminded me of your top.
http://www.hotpatterns.com/hp-1137-riviera-summer-breeze-sleeveless-tops/
@Dawn, I also came here to alert Trena to that HP 1137! But I guess I'm a week later than you, how funny.
Trena, have you seen the Hotpatterns Summer Breeze pattern? It's your DVF (if you want to revisit it!)
http://www.hotpatterns.com/hp-1137-riviera-summer-breeze-sleeveless-tops/
Post a Comment