Monday, April 30, 2012

DVF Grandie: The Big Reveal

Grandie Top Thumbnail

I should have made clear in my last post that I had actually already drafted and sewn the final pattern when I posted about my muslin, before there was a consensus (and confirmation, as seen below) that there *are* seams in the front.  But, alas, I was still in the dark and drafted the front as one piece.

Both Nancy K and Loti asked about draping.  I don't know how to drape and though it would be an awesome skill to have, I just don't have enough free time to learn.  :(  I have only a few hours a week to sew and I would miss general workaday sewing too much to devote that time for months (or longer) to learning how to drape just to do a few projects a year.  Also, flat pattern works better with my non-3D mind.  I would never be able to unpin a draped project from a dress form and figure out what the heck I did!

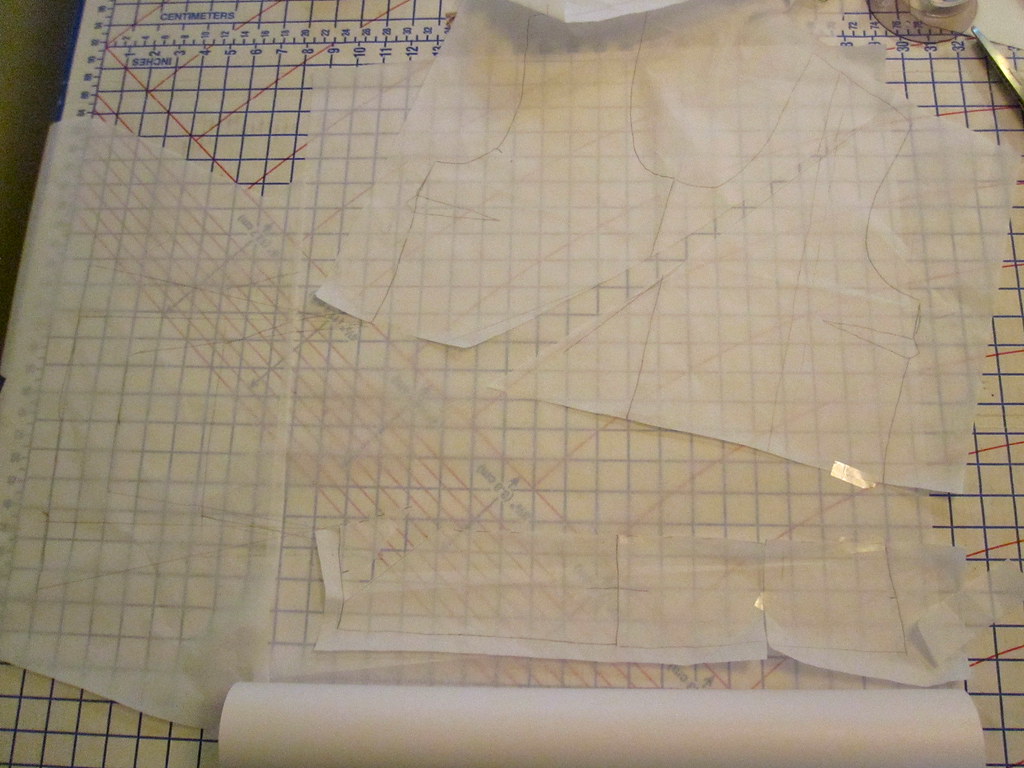
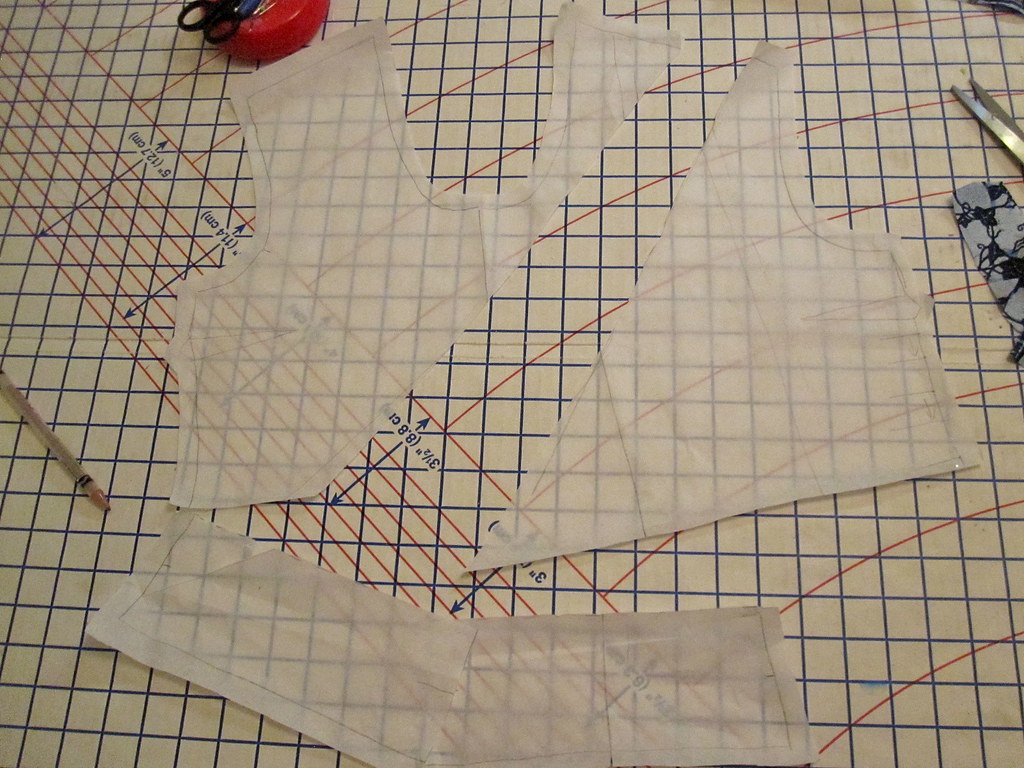
After my first couple of muslins, I decided to try to be a little scientific.  Plus, making full sized patterns was getting really old!  So I played some paper dolls.  I drew a little front bodice and then traced it several times.  I slashed and spread it in different ways to see how that affected things.

Drafting Options


The interesting thing to me was how similar--not how different--the patterns ended up looking, even though they were slashed in different places.  I decided to go with #2 for my final pattern, as it seemed like the most volume for the least side seam distortion.

I had learned from Muslin 2.1 that all the effort I had put into fitting the waist of my master pattern while still leaving it pull-on-able had been pretty much wasted.  I needed the extra width along the waistline to make room for the faux wrappy thing.  So in addition to slashing and spreading, I flattened the waistline curve in the front piece and reduced it a bit (but not fully flattened) on the back.  I also lowered the seam for the hip band, as I originally had it too high.
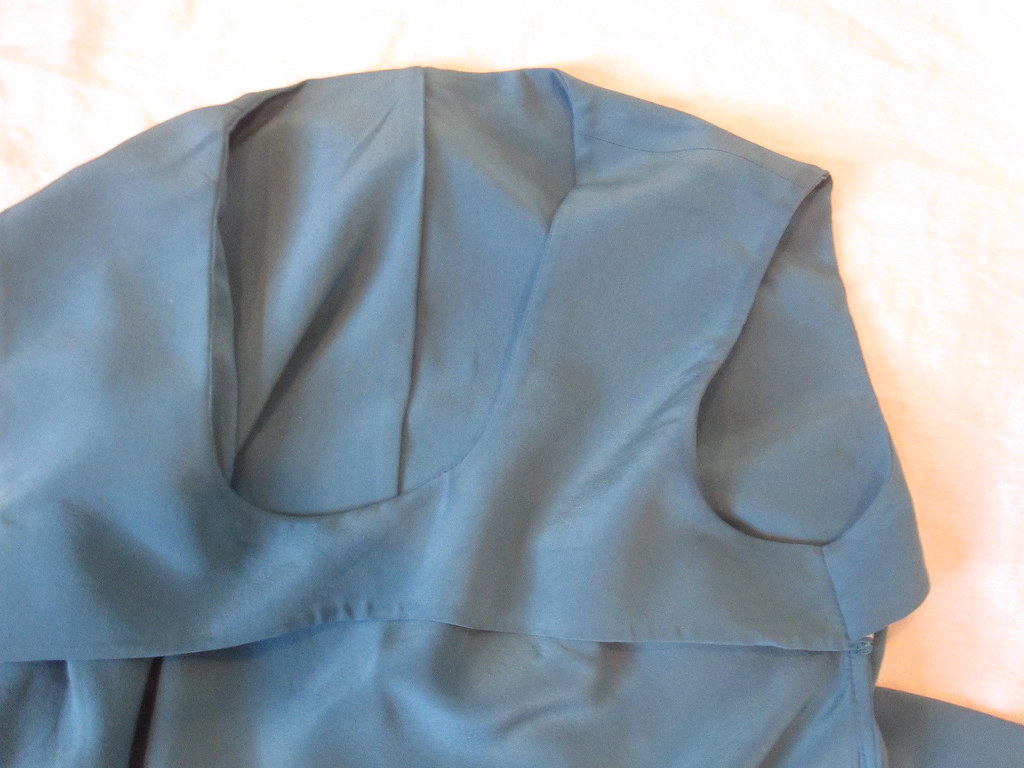
One Piece Facing
I believe the Grandie is fully lined, but for a silk summer top I thought a lining would make it too hot.  Not to mention, it would look best self-lined and I didn't have enough fabric.  I used a really lovely quality silk crepe from The Carol Collection.  I wasn't crazy about this fabric until I prewashed it (by hand in the sink) and then it revealed itself to be quite spectacular.

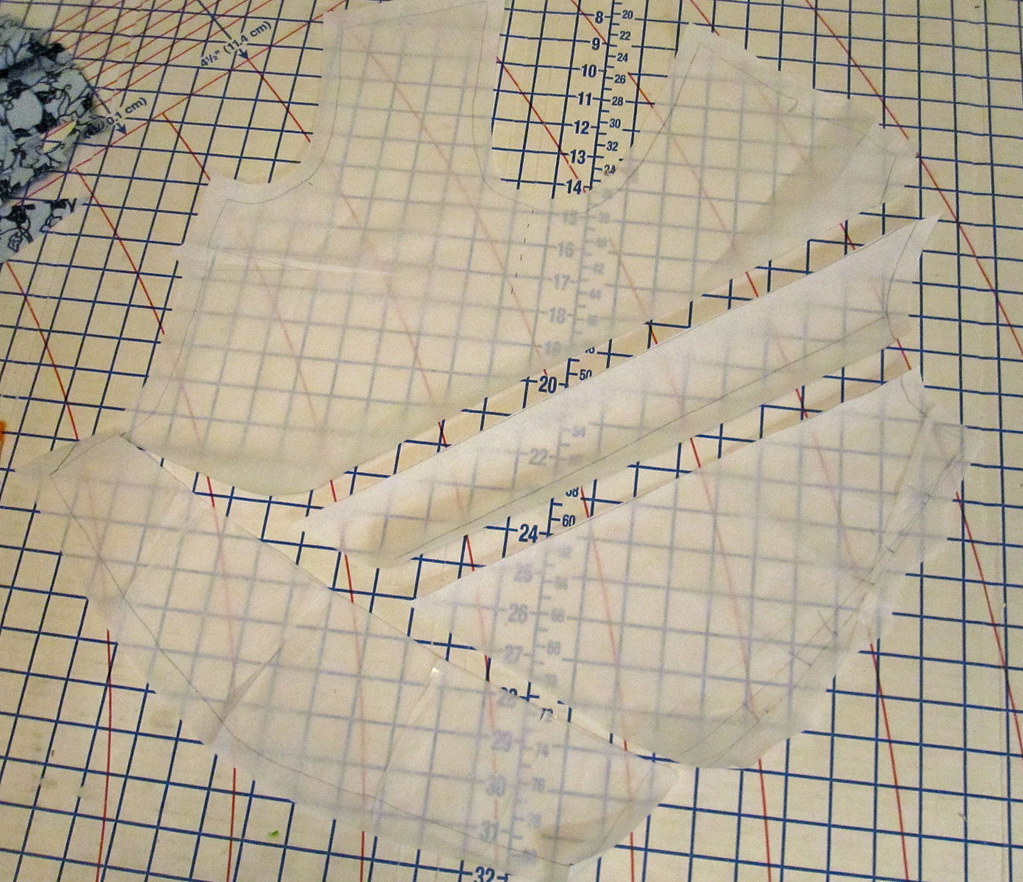
Rather than separate neckline and armscye finishes, I decided that an all-in-one facing was needed to ensure the top kept its shape.

To nicely finish the edges of the facing, I used Sunny Gal's interfacing trick.  Sew the lower edge of the interfacing and fabric, right sides together--so that the interfacing "glue" side is up.  Trim, if you didn't use a serger.  Then turn the interfacing up to the wrong side of the facing and fuse the interfacing in place.  The lower edge is neatly turned up without extra bulk.  It's a bit tricky to get a nice smooth edge over curves because you can't press it in place until you're ready to fuse, but a little bobble here and there is still nicer than a sergerd or zigzagged edge.

Although I have read several tutorials on sewing an all-in-one facing by machine without a CB seam (something like the burrito method for yokes), I really didn't want to add figuring that process out to this already frustrating project, so I kept the CB seam in my top and used my all-machine clean-finish technique

Interface Hem Band Facing

The hip band is also self-lined.  To keep the hem stable and add a little weight I interfaced the lower edge of the facing piece.  I didn't want the look of topstitching in this project so rather than do my usual method of sewing the facing to the wrong side, sewing the fashion fabric to the hem of the facing, and then topstitching the upper edge of the fashion fabric in place, I did this the traditional way and hand-stitched the band facing to the upper seam allowance.
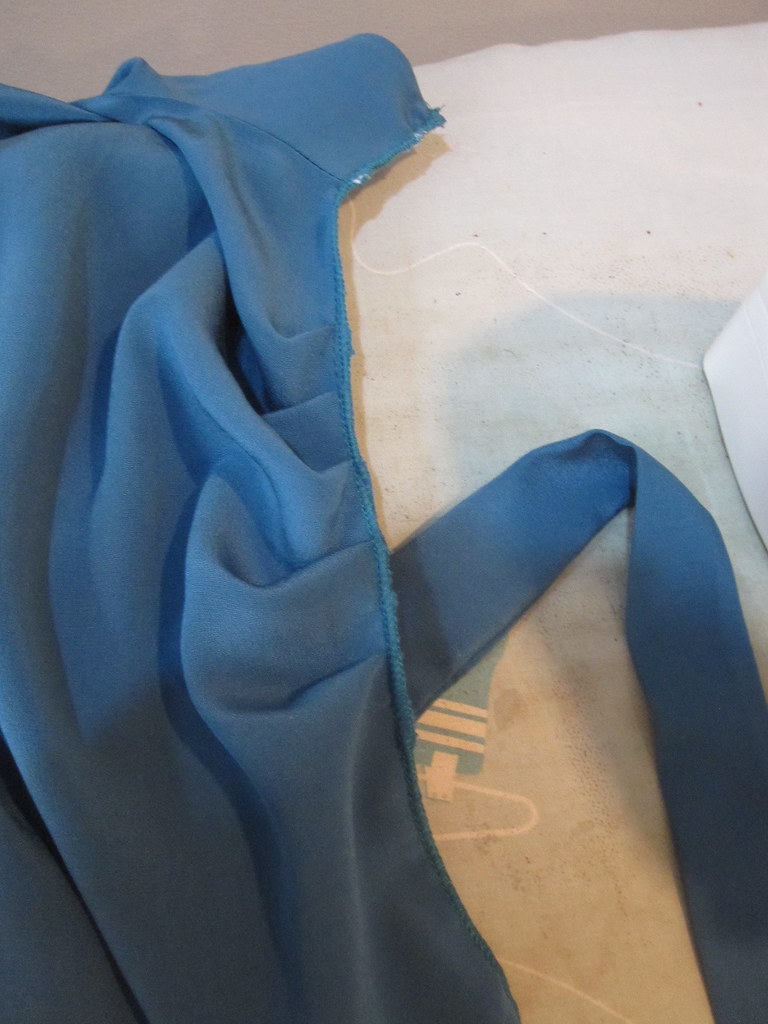
Side Tie First Pass

I generally like to use French seams on silk, but with all the layers it would have been bulky in places.  So I did regular seams at the shoulders and the side seams of the band--seams that are hidden inside facings.  The only French seams are the side seams of the upper bodice.  When including a tie in a French seam, remember that it must be included in the first pass!
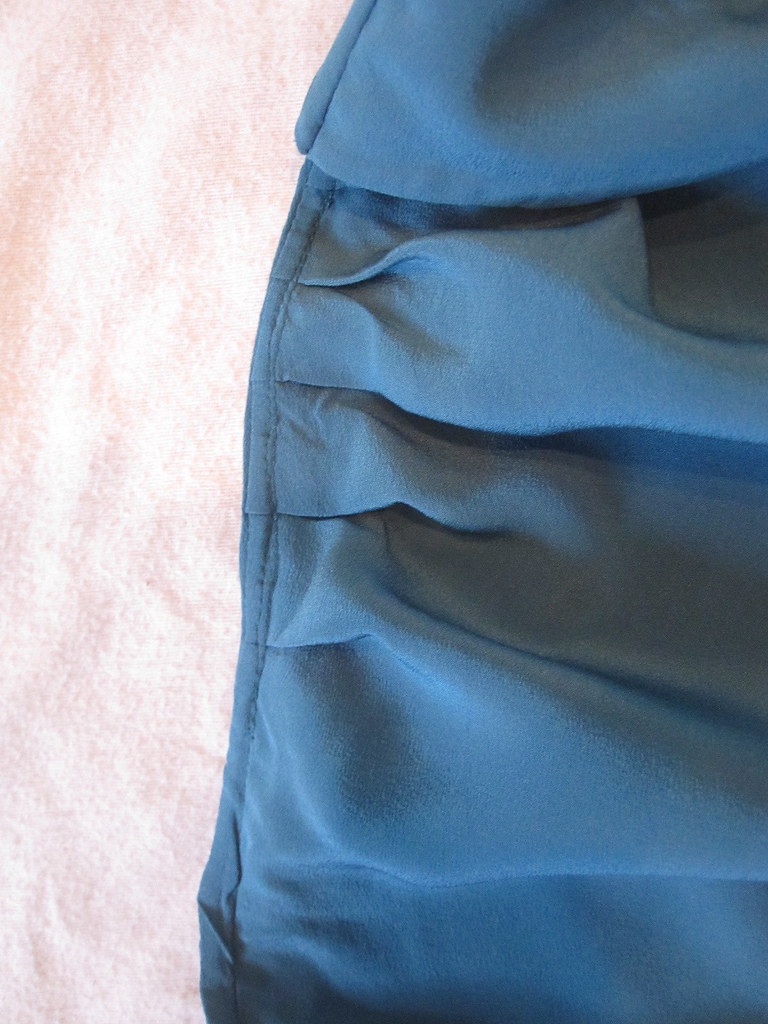

French Seam with Pleats
You want the tie to end up on the outside.  On the first "wrong side to wrong side" pass,  the right side of the fabric is on the outside.  So the tie goes on the outside too.  When the top is turned inside out and the "right side to right side" pass is made, the end of the tie gets sandwiched into the seam and the tie ends up on the outside.  (It always takes me great mental effort to figure these things out.)

The most difficult part on the final product was figuring out where to place the pleats and front tie.  I'm not sure I chose correctly, but it cannot be undone now without destroying the fabric so c'est la vie!
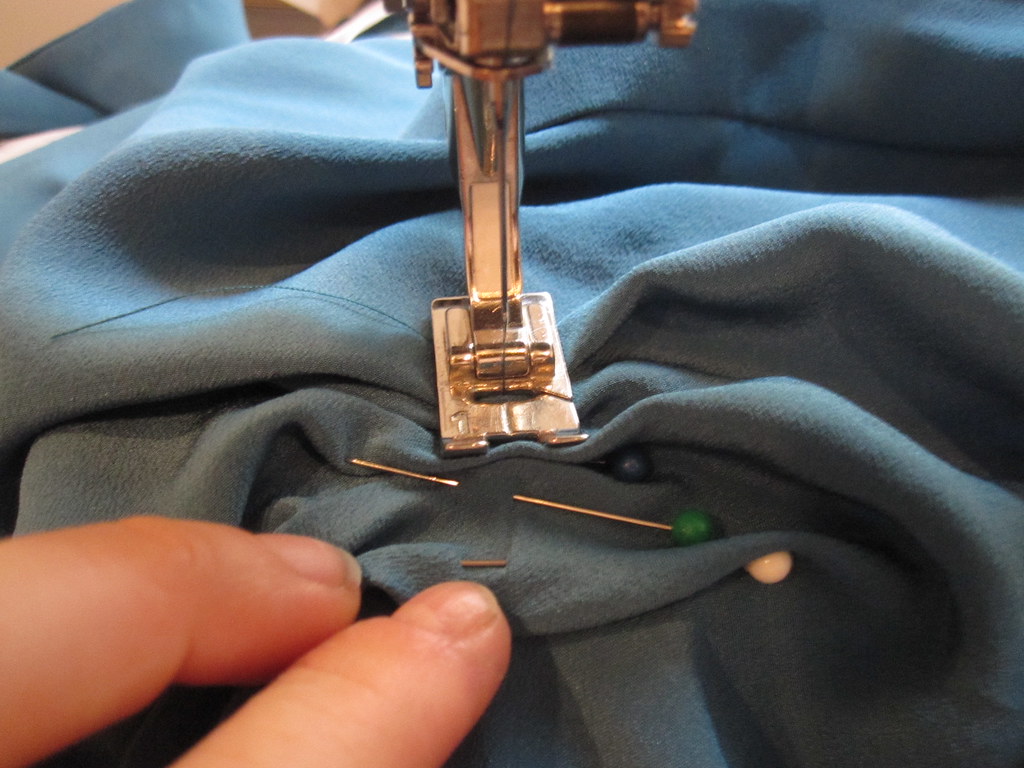
Stitching Front Pleats

I tried on the top and pinned the pleats in place.  Then I machine stitched vertically over the pleats.
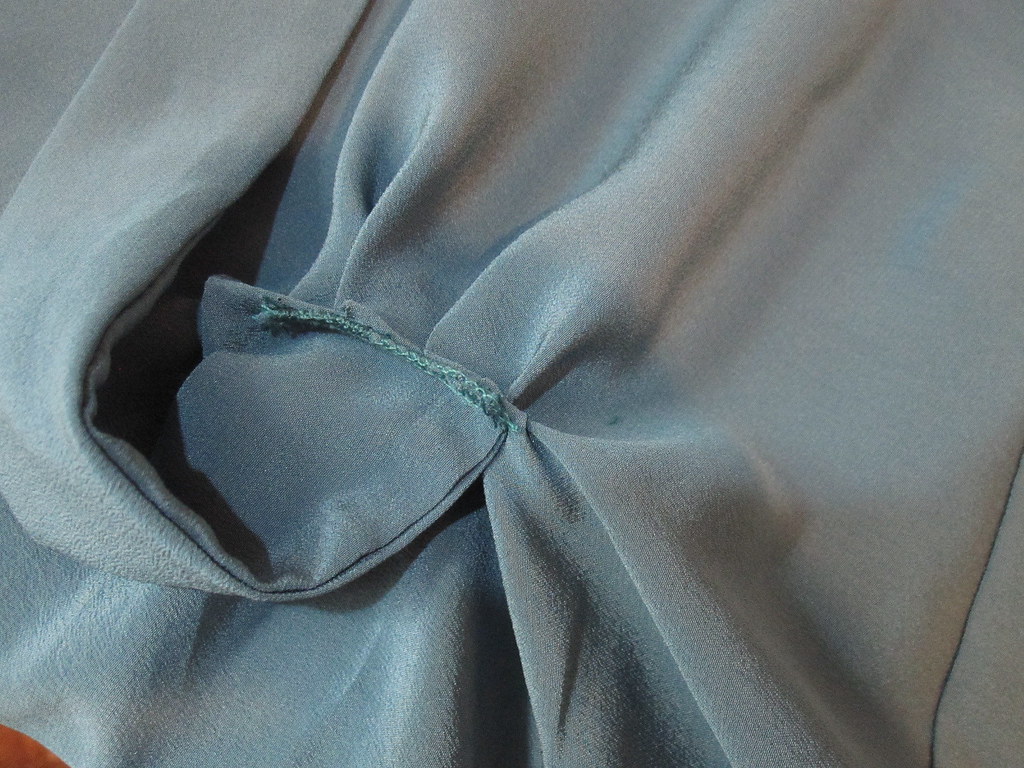
Tie-First Pass Sewn


Next, I took the tie and stitched it, with the end flush to the pleats, so the finished end of the tie was reaching toward the side on which it would be tied (sorry for my bad technical writing).
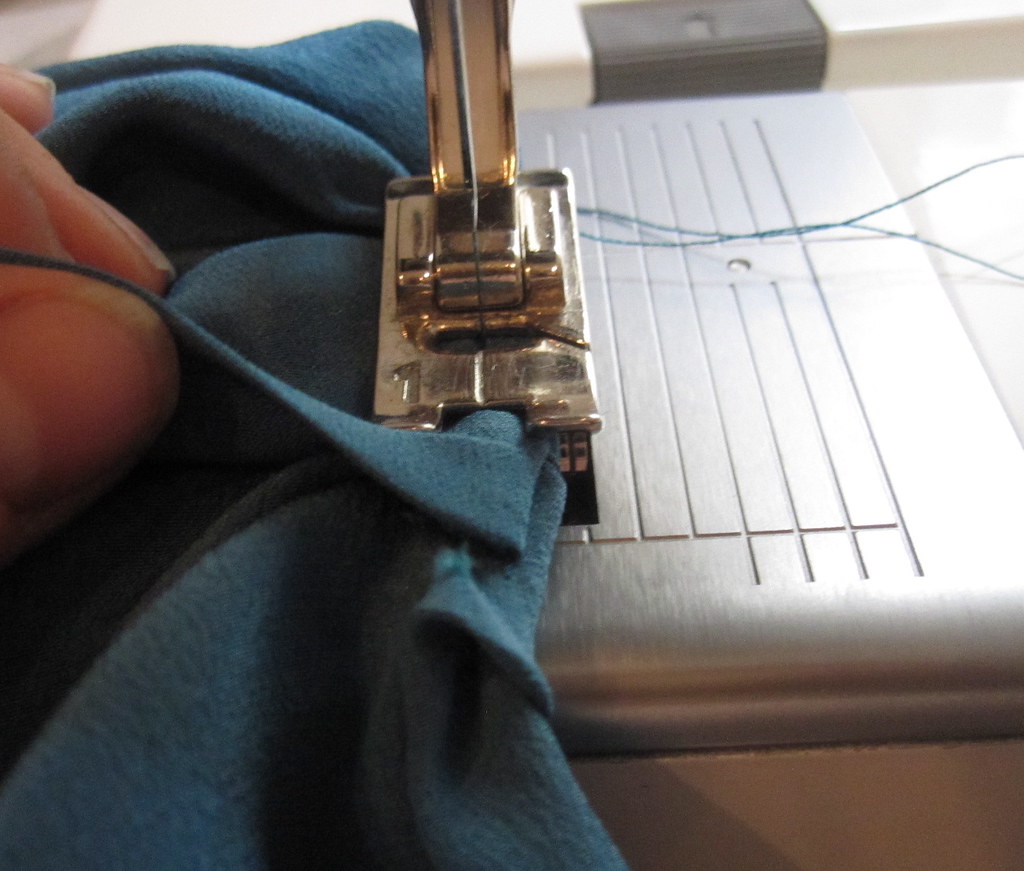
Stitch Tie over Pleats


Once it was stitched in place, I flipped the tie over to the other side and stitched again, enclosing that raw edge.  When the tie is pulled over to be tied, the seam is hidden.


Source: farfetch.com via Trena on Pinterest


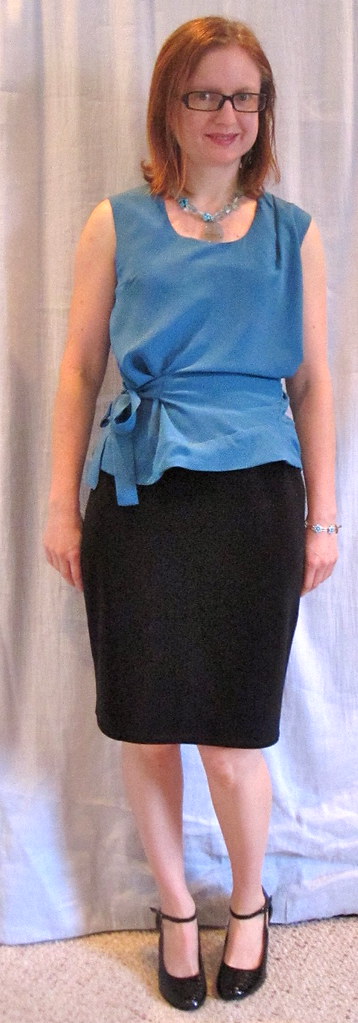
Alas, I did not crack the Grandie code.  I was hoping this would be a pattern I could use again with sleeves for Fall/Winter but I am not crazy about the final result.  Rather than cascading and draping, I just have a big bulge of fabric over the left side of my bust.

Sunny Optimist geniusly found this photo online where the seller had tied the top the "wrong" way, clearly exposing the seams.  Well, that would have been helpful!  With this information it would be a lot simpler to draft a closer approximation; I'm not sure I have the stomach to go back to this project.
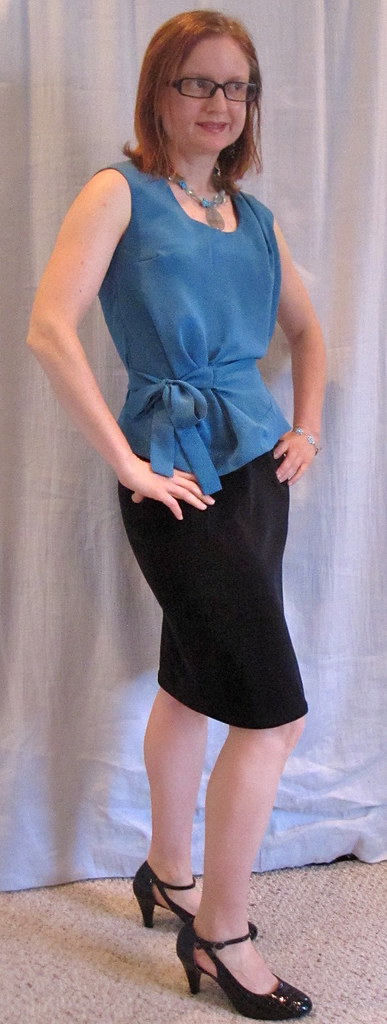


Side
Front


However, although it wasn't fully successful, it was still a highly educational project.  I learned a *lot* about pattern manipulation, and I can imagine all sorts of other patterns that can be drafted using this method.  And plus, the paper dolls are so much fun and no risk/cost in materials (I use scrap paper).

All photos are here and the pattern review is here.

Wednesday, April 25, 2012

DVF Grandie Blouse: Pattern Experimentation

DVF Grandie Top

There are a lot of PR contests that I enjoy, and the Ready To Wear contest is one I look forward to every year.  I am quite content to sew with patterns and very quick to correct real-life non-sewing friends who think I am a "designer," but drafting the occasional pattern challenges me intellectually and increases my knowledge of how to adjust and sew already-drafted patterns.

This year I went through my Pinterest boards and settled on Diane von Furstenberg's Grandie Top (originally $245).  It's a (deceptively) simple shape, and would be lovely with sleeves for Fall/Winter.  It's a great way to show off a beautiful piece of silk, and is office-appropriate without being boring.  Kind of the holy grail of patterns!  How hard can it possibly be to draft?

Oh boy.


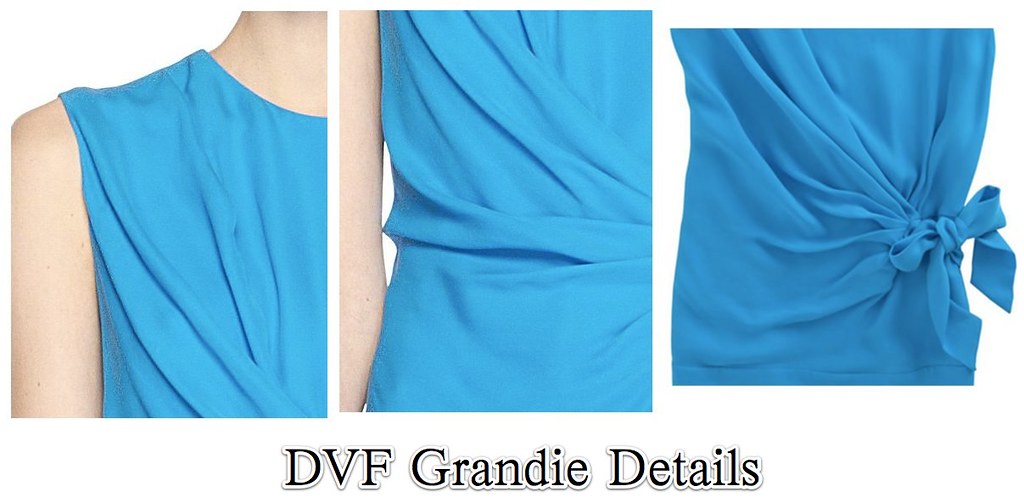
The thing about this top, is that it has all that volume in the front, but after carefully looking at all available detail shots (it's available on multiple websites, all of which did their own photos, so I saw it from as many angles as possible), there do not appear to be any seams where fabric was added.  So the front *seems* to be all one piece.

Grandie Details


Pattern 1.0
I started by developing my base pattern, which I'll have to write about at a later date because I haven't taken photos of that.  I started with an old BWOF tunic because I don't have a darted woven pullover top base.  I would like to finish the process of  fully developing that pattern.

My first idea was to play off the pattern drafting for my McCall 6363 knockoff.  I figured I'd truncate the growth and add a tie on the end and Voila!

I also thought I'd try out the idea I had at that time of splitting the pattern vertically about 1/3 in from the opposite side seam to reduce the growth.  I do not have a 3D mind people; I did not realize that would add huge amounts of width to the neckline or the shoulder seam.  So I split the pattern just along the waist as before.

Muslin 1-Tie Pulled Over
Muslin 1-Untied


Um, not voila.

 It was absolutely nothing like the Grandie top.  At that point I almost gave up on the idea.  I was so sure that my plan would work and when it was not even close I had absolutely no idea where to go next.

But after thinking about it for a while, I went on to muslin 2.0. I determined that the fabric all had to be added into the body of the blouse, no growths or extensions.  That means slicing and spreading, but where?  The Grandie top has a few small pleats in the side seam, so I started there, splitting at the side seam.

Pattern 2.0

I was still not getting nearly enough volume.  I took another look at the inspiration top and noticed it had a pleat in one shoulder.  Another point for adding volume.  So I split at the shoulder and the waist, adding volume from both locations.

Apparently I didn't take a photo of muslin 2.0, sorry about that.  Suffice it to say there was not enough volume.

So I went on to muslin 2.1, splitting muslin 2.0 to add yet more volume.  Although the top drapes and cascades down from the armscye, the armscye itself is smooth with no pleats.  However, I thought that I might be able to get that cascade if I added some pleats there. 


Pattern 2.1


I stitched up muslin 2.1 to see what I had.

Muslin 2.1 Composite

Just ok.  Not that much like the original.  A whole lot of length added to the side seam, which is not the case for the original, and not enough width underneath the crossover.  The armscye pleats didn't add much to the volume needed for the front faux-crossover, so I did not keep that in the final pattern.

I was making progress but success was not guaranteed.  I went back to the drawing board to do some more thinking.

All photos are here.

Wednesday, April 18, 2012

Variations on a Tee #3: Sweetheart

 Sweetheart Tee Thumbnail


Lace is big right now.  Using a lace inset rather than allover lace is a nice way to dip a toe into the trend, as in this Valentino point d'esprit and jersey top ($790).


If you do go whole hog, there is the issue of lace being transparent.  You can fully underline or go for a sweetheart look, as in this Milly Chantilly Lace Caterina Top ($275).


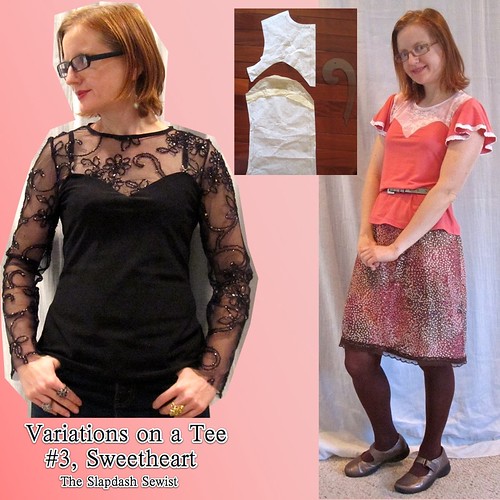
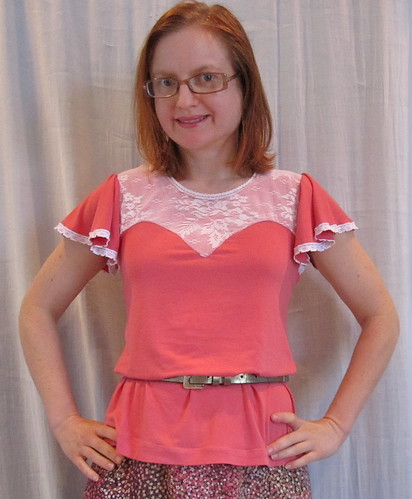
Or you can combine the lace and sweetheart trends, as I did with these projects.  An upper lace yoke is a more common look, but it can also be reversed as in this Love Moschino Lace Sweetheart Jersey Dress ($324.51.

Pattern


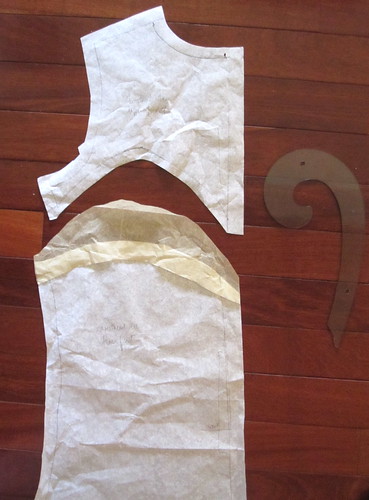
I drafted this from my t-shirt block, but McCall 6435 has since been released if you don't want to draft (I made the black top in mid-December).  As you can see, on my first try I made the sweetheart too flat and it was not covering my bra, so err on the side of curvy.


Pink Back
The back is just cut straight across.  The biggest decision I had to make was whether to cut the yoke above or below the armscye.  I looked at a bunch of pieces online and it seems to be done both ways.  I decided to cut it under the arm as I thought it looked a bit more luxe.


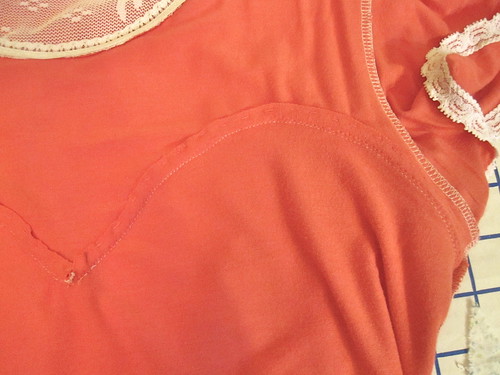
Sweetheart Seam Allowance
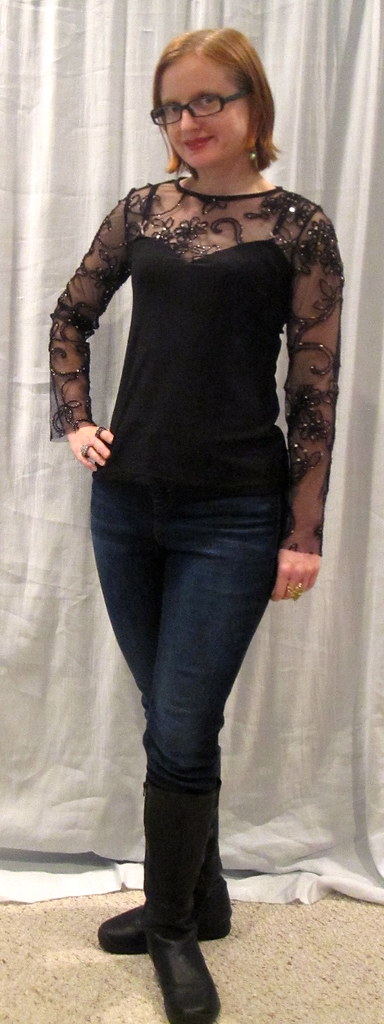
The black version, made of a sturdy poly/lycra ($6.99/yd from Uptown Fabrics on eBay) and a piece of embellished netting from the fabric swap at the PR DC meetup, I sewed entirely with the serger, wanting to minimize seam allowances.  I should note in response to Dilly's comment that I first sewed the sweetheart point with the regular sewing machine and then used the serger to stitch and trim very close to that original stitching; I don't have the skill to achieve a clean point using the serger on the first pass.

The pink version is made of a bamboo rayon from Fabric Mart ($6.99/yd), which I bought in 2009.  I was pretty disappointed with the flabbiness of the knit so it has been in stash for quite a while (I made a nightgown out of some of it).  I was concerned about the bulk of a serger seam on the sweetheart of the rayon, so I stitched it by machine.  I trimmed the yoke's seam allowance and then turned both seam allowances up and hand-stitched only to the underlining of the yoke to keep the stitches invisible.  In a beefier knit, I would just serge.

Sleeve Lace
I finished the neckline of the black version with fold-over elastic--my first successful application!  I found a two-step process was necessary, rather than trying to sandwich.

I went a little trim crazy on the pink version.  I used the flutter sleeve from Burda 03-2008-113.  I've never actually made the pattern but I used the sleeve before on my Vogue 8379 wrap dress.  I used a zigzag stitch to sew narrow stretch lace from Sew Sassy to the (raw) edges from the inside, making sure that the lace peeked over just a little, pink thread in the top and white thread in the bobbin.  Then I switched the thread and zigzagged again from the right side close to the inner edge of the lace.
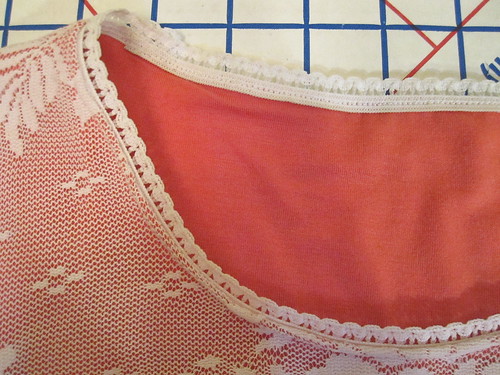
Neckline Finish

For the neckline I used a fancy picot elastic ($0.90/yd) I got from Steinlauf and Stoller the last time I was in New York.  I thought it might be too much, but in the end I preferred the look to a twin needle finish.

Black Front
Pink Closeup
This is a fun, easy t-shirt variation that is on-trend at the moment.

You can make the upper part sheer, as with my black version, which I wore to several holiday parties (be sure to wear a bra with nice straps!), or do it for day with an underlay as in my pink version, or reverse the lace as in the Moschino above, or do it as colorblocking.  It's a surprisingly versatile pattern!

All photos are here and the pattern review is here.

Wednesday, April 11, 2012

Simplicity 6110, 1973 Notched Collar Blouse

S6110 Thumbnail

The pattern came from a friend's grandmother and was passed along to me in February 2009.  When I posted about it, both Little Hunting Creek and Audrey of Sew Tawdry commented that they had made the pattern in high school!  What fun!  It's been on my list for quite a while, and Pattern Review's Vintage Contest finally got me to push it to the top of the list.

The fabric, a printed dotted Swiss, came from Fabric Mart in June 2010 for $4.99/yd.  I had just enough for the top and no more.  I love it when that happens--no jigsaw layout with questionable grain, no large scraps to contend with.

S6110 Instruction Sheet
It's a one size pattern, size 10 for a 32 1/2" bust.  Did these one size patterns come pre-cut?  I feel like all the vintage patterns I've made are already cut out, even if they don't show signs of having been used (this one had no pin marks).

The instructions are always interesting for vintage patterns.  One side of the instruction sheet covers the blouse, the skirt, and the pants, but somehow they don't feel truncated or cursory.  The illustrations are copious and good, better than current patterns, I think.

Yoke with Numbered Notches


As with modern patterns, there are copious notches.  Unlike modern patterns, however, they are numbered, which makes them much more useful.  Why did they stop doing that?

Check out the size of the groovy collar.

Front Yoke


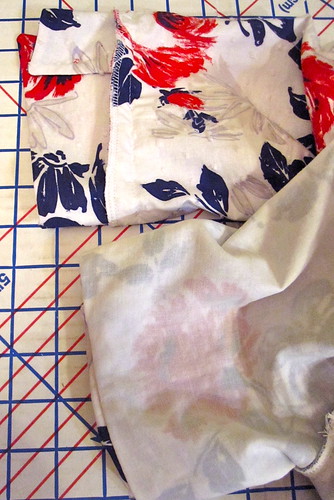
The only real change I made to the pattern was to cut an extra yoke so I could enclose it using the burrito method.  It ended up adding some bulk to my fabric, which had to be underlined, but the finish is so much nicer!


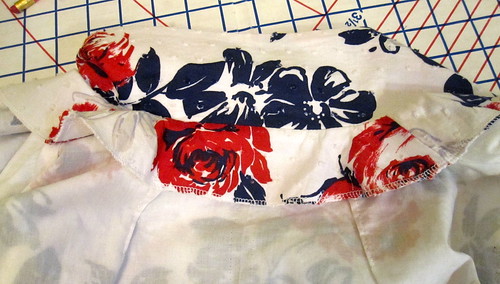
Back Facing
This has a back facing, which I think is pretty normal for notch collar sewing patterns. I don't know that the facing was drafted correctly, as the lower edge of the facing seems longer/wider than the back where it hits, resulting in the curling you see in the photo. Obviously, it's not as bad when it's on a body, which is round rather than flat, but it did not feel totally secure from flopping. I tacked it down to the back neck darts (another thing I wish hadn't disappeared).

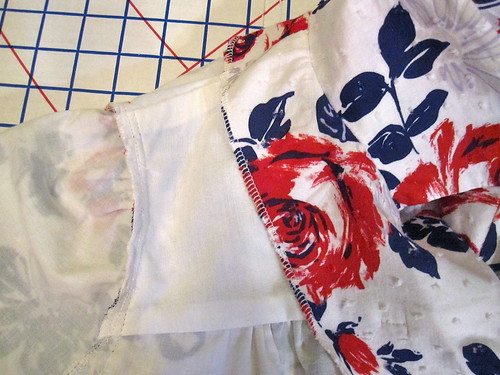
Cuff Construction

Cuff Closeup
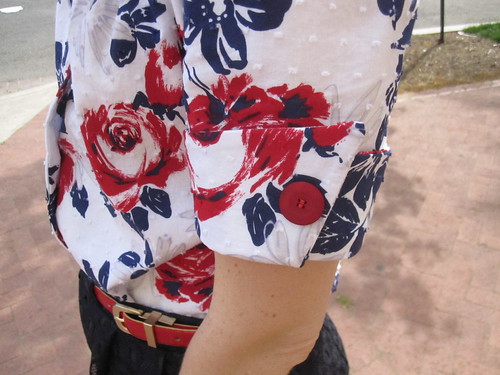
One of the great features of this pattern is the cuff. It's actually less Space Diner Waitress made up than on the illustration.

The right side of the cuff piece is attached to the wrong side of the sleeve so that the seam allowance is on the outside, as you can see at left.  The cuff is then folded up, enclosing the seam allowance.  There's no danger of the SA showing, it's just so weird to me to have it on the "business" side of the blouse.

Shapeless


The top is quite roomy and shapeless as drafted.  It has to be tucked or belted as shown on the pattern envelope.  The photo at left is untucked, but unfortunately it doesn't look as bad in the photo as in real life.  Trust me, it's quite unflattering.  Because the rules for PR's Vintage Contest are pretty strict I made it as is, but for the future I would definitely add darts or elastic shirring to bring in some shape.

If I made it again I would also definitely make that collar smaller.  It is huge!  Without the huge collar and with some shape, this can totally pass for a contemporary garment.


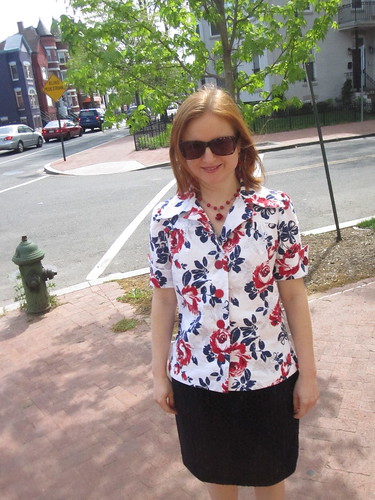
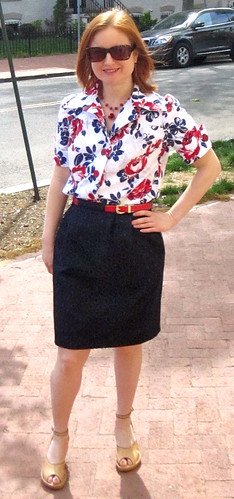
Front

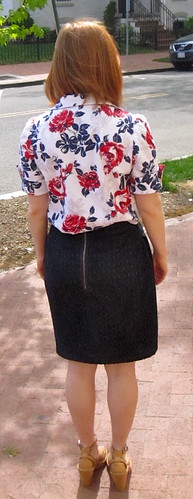
Back


My photographer started giving me art direction, telling me to "Look haughty" in the closeup shot, LOL.  Although nobody takes pictures of me like Cidell, they came out pretty good.  We did get one outtake for your amusement, though.  Also, he is taller than me and makes me look super short.  Which I am, but I mostly forget that.  Is this what I look like to him?

Because Josette asked, the skirt is Burda 09-2008-108.  I wear this skirt all the freaking time--it goes with everything.


All photos are here and the pattern review is here.


=================

Thank you all for your thoughtful discussion of What is a Wedding Dress Worth?  Very interesting conversation!  Like Lucia and others, I wonder what will happen when the world runs out of cheap labor.  As communication gets cheaper and makes the world smaller every day, disparities in standards of living get more glaring.  I think that will eventually lead to demands that the producers of consumer goods be able to afford at least some of them.  Will the pendulum swing the other way, back to more expensive goods, investment purchasing, and smaller closets?  Or is it impossible to stuff that cat back into the bag?  Only time will tell, and probably not in my lifetime, but it is interesting to contemplate.

(And in case I am coming off sanctimonious, believe me, I am not; I am just as addicted to cheap fabric as your average consumer is to cheap clothes, and I am under no illusion that it is woven from pussywillows and goosedown by fabric fairies.)

Friday, April 6, 2012

What Is a Wedding Dress Worth?


Before anyone gets all excited:  I am not in the market for a wedding dress.

However, this girl was (link goes to the video, in case it didn't embed properly). 


She ended up with "Eva" from the Enzoani 2010 Collection

The website's description of the dress is:  Venice lace, modified mermaid silhouette with strapless sweetheart neckline. Organza layered ruched bust with Swarovski crystal applique. Scalloped hemline with detachable train.

The lining/under-fabric was diagnosed as polyester, but the lace would sell at retail for about $150-165/yard, and was fully backed with and sewn to a netting.  It's worth a click on the link (annoying flash website so you have to scroll through to Eva) to see the ruching detail on the bust and the applique.  All in all, a very nice dress and the bride looks beautiful in her photos and videos.

She paid about $2700.  She goes to B&J Fabrics in New York and gets an estimate of about $1200 retail/$600 wholesale for the materials.  The she goes to a dressmaker and gets an estimate of about $200 for the labor (in China, in a factory--not in the US or custom-made).  Adding these up, with some unspecifed allowance for design services and overhead, she decides she's been ripped off.

Now, I am certainly in shock and awe over the prices of retail clothing generally.  $395 pull-on blouses made of polyester!  $695 sack dresses, also polyester!  That's insane, and I don't know how normal people dress themselves--the balance between price and acceptable quality (such as for work) is difficult to find.

I also know that adding the word "wedding" to anything automatically adds a mark up.

But I think this girl's outrage is misplaced.  I don't know what her estimate for overhead was, but I suspect she lowballed it.

First, there's design.  The cut and fit of this are pretty great, and the bodice ruching detail is flattering and intricate.  So you figure it took about six or 10 prototypes to get to the pattern. (This is based on my very amateur understanding from the great Kathleen Fasanella and discounts the fact that they probably have stock patterns for this mermaid silhouette and tweak it each year).

Then the pattern has to be graded to various sizes.

Next comes sourcing the fabric, or getting it custom-milled.

 Then samples have to be made for every bridal salon that carries the line.  I went wedding dress shopping with a friend once.  Those samples are trashed.  So that's just a loss.

She says she went to a bridal store and chose the dress.  Was it the first bridal salon she went to, and the first dress she tried one?  Doubtful.  That's a lot of rent, salary, electric bill, and advertising for her to choose a dress.  Then she called around to other bridal salons until she found the best price.  More rent, salary, electric bill, and advertising money down the drain.

Then she finally bought the dress, and it was (most likely) made to order in China.

I think she did the wrong math.  She added up the wholesale costs ($800) and went from there.  But I think she needed to start from the other direction:  ask how much that dress would have cost as a custom creation from a dressmaker.  $1200 for the materials at retail.  I have no idea what wedding dressmakers cost, but I'm going to aim low at $25/hr.  To develop the pattern, fit muslins, and make the final dress:  what, 100 hours minimum?  So we're well past the retail bargain she got, and I'm pretty sure my estimate for a custom dress is quite low.

The thing about the RTW I linked above is that I could make each piece in about 5 hours.  Even at splurge $20/yard "nice" polyester (is there such a thing?) and valuing my labor at $50/hr, I'd come out ahead.  (Granted, I would start with a pattern--but I purposely chose simple shapes that could be drafted from a block without much time or effort.) She cannot say the same for her dress.

It seems that because she doesn't know what it takes to put that wedding dress into her hands, it can't be worth much.  Now, I don't mean to abuse her.  She seems sincere and intelligent.  But unless you've cooked a fancy meal, you don't know that it's worth so much more than the sum total cost of its ingredients.  And unless you've sewn your own clothes, apparently, you don't know how much they're worth.  And this seems to result in a lack of respect for all the people who made those things happen.  Buying clothes for pennies at places like Forever 21 make this easy--how much can the people behind the clothes be worth if it has made it around the world and into your shopping bag for $12?

What do you think?  What is a wedding dress worth?

Wednesday, April 4, 2012

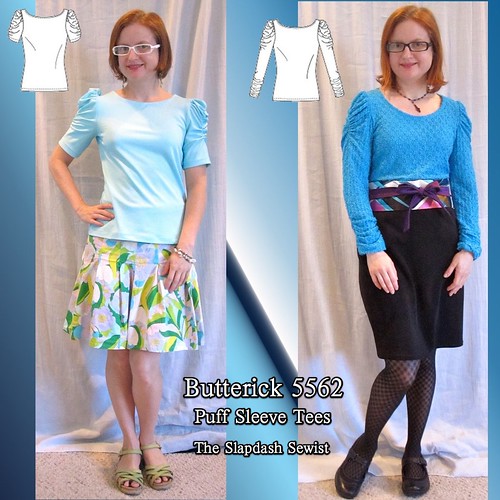
Butterick 5562, Puff Sleeve Tee

B5562 Thumbnail


Puffed sleeves have been a thing for a while, but they are still going strong, as you can see in this Bird by Juicy Couture Striped wool-jersey top ($230).


Source: style.com via Trena on Pinterest


Butterick 5562 is a good entry in the genre.  It lacks the drama of this Pre-Fall 2012 Thakoon (which is completely awesome), but is more wearable on a day-to-day basis.


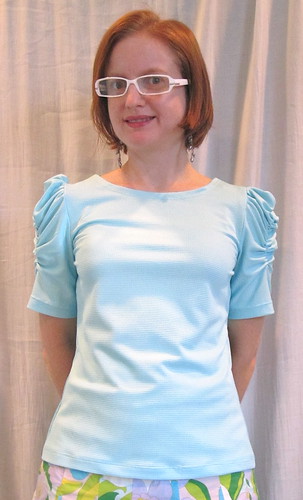
Short Sleeve Front Closeup

In addition to a shawl-style top, the pattern comes with two variations on the puff sleeve, a short sleeve version and a long sleeve version.

The two sleeves are not drafted the same, which is odd.  The short sleeve has a large dart at the shoulder, which gives more volume and a higher lift to the puff.  The elastic for gathering does not come up to the sleeve cap but starts lower down, which also allows for higher lift.  The long sleeve just has the rounded "microphone" shape at the top.  The short sleeve is definitely superior to the long sleeve in design.

However, I think there is an error in the short sleeve pattern, in the odious "guide for elastic."  The elastic length is only about an inch shorter than the area to be gathered.  I double-checked to make sure it wasn't my error.  I cut it to about 2/3 the length to be gathered.

Short Sleeve BackWhile the sleeves are great, I found the draft of the shirt appalling.  It is described as "close-fitting" but I found it quite huge.  It comes in RTW-sizing, XS-XXL, which sort of lulls you into thinking it might not have the Big Three Ease of Doom, but you'd be wrong.  I cut an XS at shoulders and bust, M at the waist, and L at the hips.  I should have taken a picture of the short-sleeve version before fixing the fit, but I took a good 3-4 inches out of the waist.
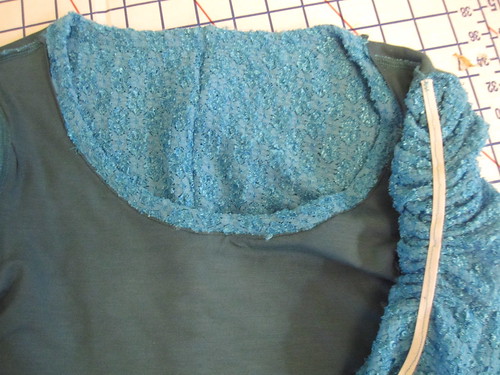
In addition to the general fit, I found the neckline too wide.

And then there are my personal body quirks.  You can see in the closeup photo how it is catching above the bust (which led me to take a tiny shortening tuck in developing my TNT tee).  You can also see the dreadful swayback, even though I added a CB seam.  Ugh!


Underlining


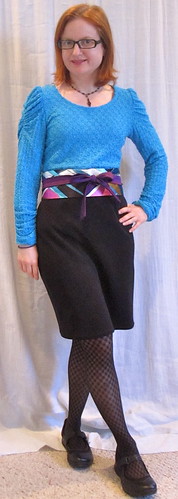
 For the long sleeve version, I played it safe and just attached the Butterick sleeves to my TNT tee pattern.  That solved my fit problems, though the bulkiness of this stretch lace fabric didn't help.  I'm afraid that whole set of purchases from Fabric.com was a mistake.  This fabric was $7/yd, and is only going to last a few wears as it snags on *everything.*

I underlined it with a rayon knit, one of the fabrics I purchased in Hong Kong with AllisonC in 2009.

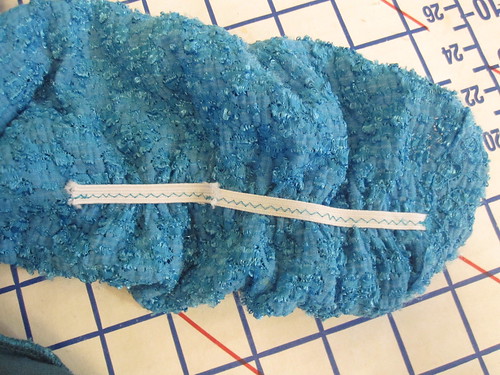
To make the elastic gathers in the long sleeve version, I found it easier to push the fabric underneath the elastic as I sewed it than to try to stretch the elastic to the proper length.  This ends up with sort of approximate gathering lengths, but it all worked out fine.
 Elastic at Lower Sleeve
The sleeves are looooong.  Even after gathering the ends they were way too long, so I had to cut off three inches and then add more elastic on the back end.

If I were making the long sleeves again, I'd do the sleeve cap elastic gathering before setting in the sleeve, so the top of the elastic would be caught in the armscye seam.


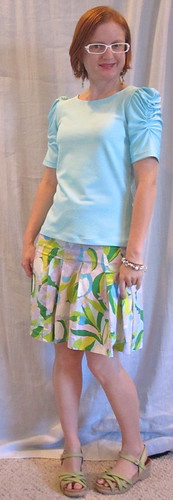
Short Sleeve Side Long Sleeve Front


The aqua version is one of the wicking fabrics I got from Fashion Fabrics Club.  I sewed it up at the last minute to take to Ecuador.  Alas, the fit is so terrible that I wore it on vacation but not otherwise (of course, it has nominally been winter as well).  Other than the swayback, though, in the pics it looks cute so maybe I'll give it another try this summer (weekend wear only).

All photos are here and the pattern review is here.