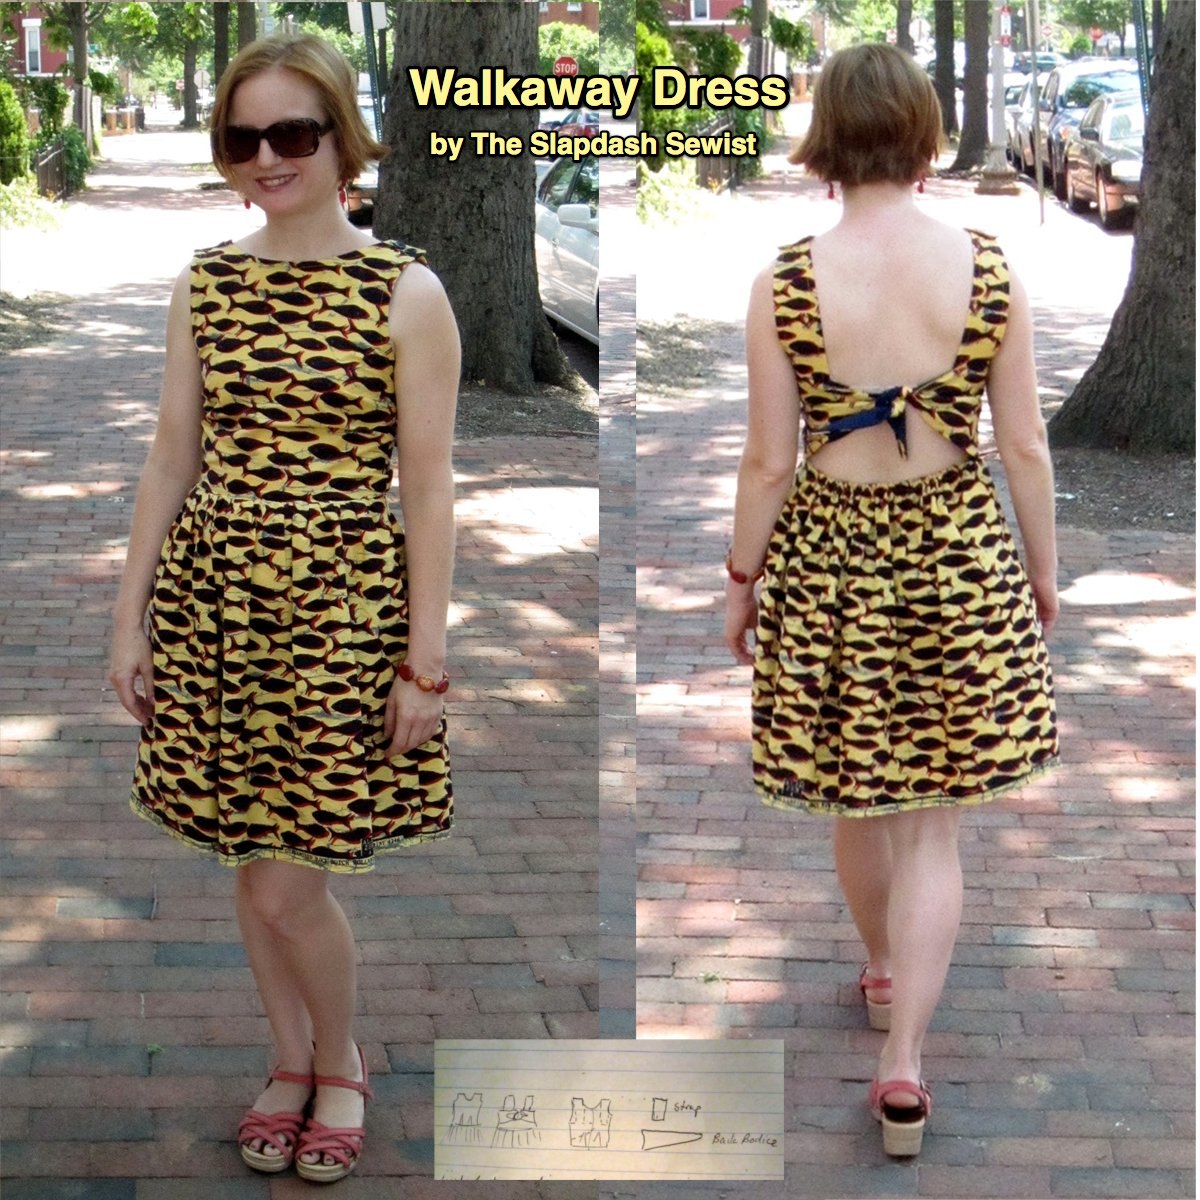
I always felt the vintage reissue Butterick 4790 Walkaway Dress was misnamed. First of all, I made this dress and let me tell it did not just take me an afternoon! I made my bias tape so that added some time, but even if you use commercial bias tape all that binding takes a while. And second of all, to me the term seems to mean that people might not notice you coming but all eyes will be on you as you walk away. So this is *my* walkaway dress! Demure and sweet from the front, and eye-catching (if not eye-popping) from the back.
I've already described my pattern drafting process for this dress, so now on to the construction. I made it out of a sturdy wax print cotton that a dear friend who is living in Liberia this year bought at the market in Monrovia. She said that this fish print is all the rage, and every time they come out with a new colorway all the women rush down to the market to get it.
The cotton has plenty of body and opacity and didn't need to be lined, so I finished the neckline and armscye of the front bodice with bias tape. As mentioned in the pattern drafting post, in order to get in and out of this dress I needed a variety of closures and release points. There is the back tie, of course; and also a side zip in the skirt and buttons on the shoulder straps.
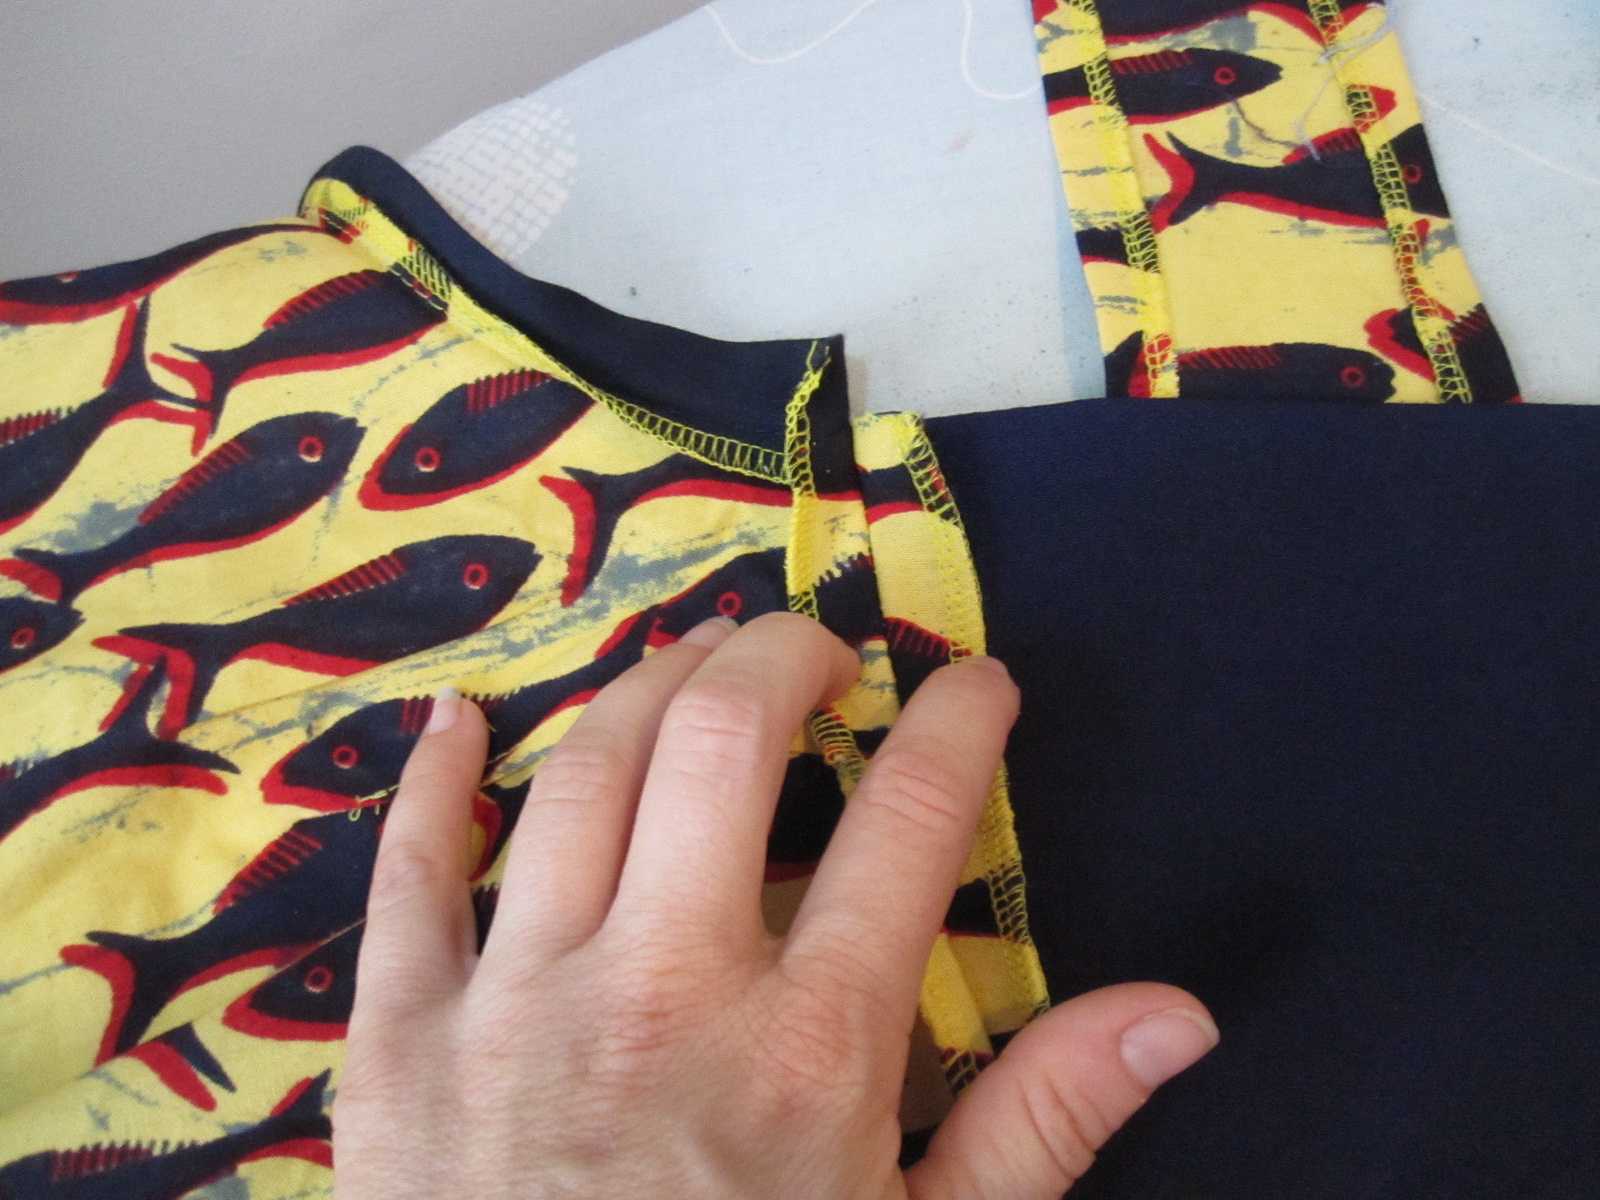
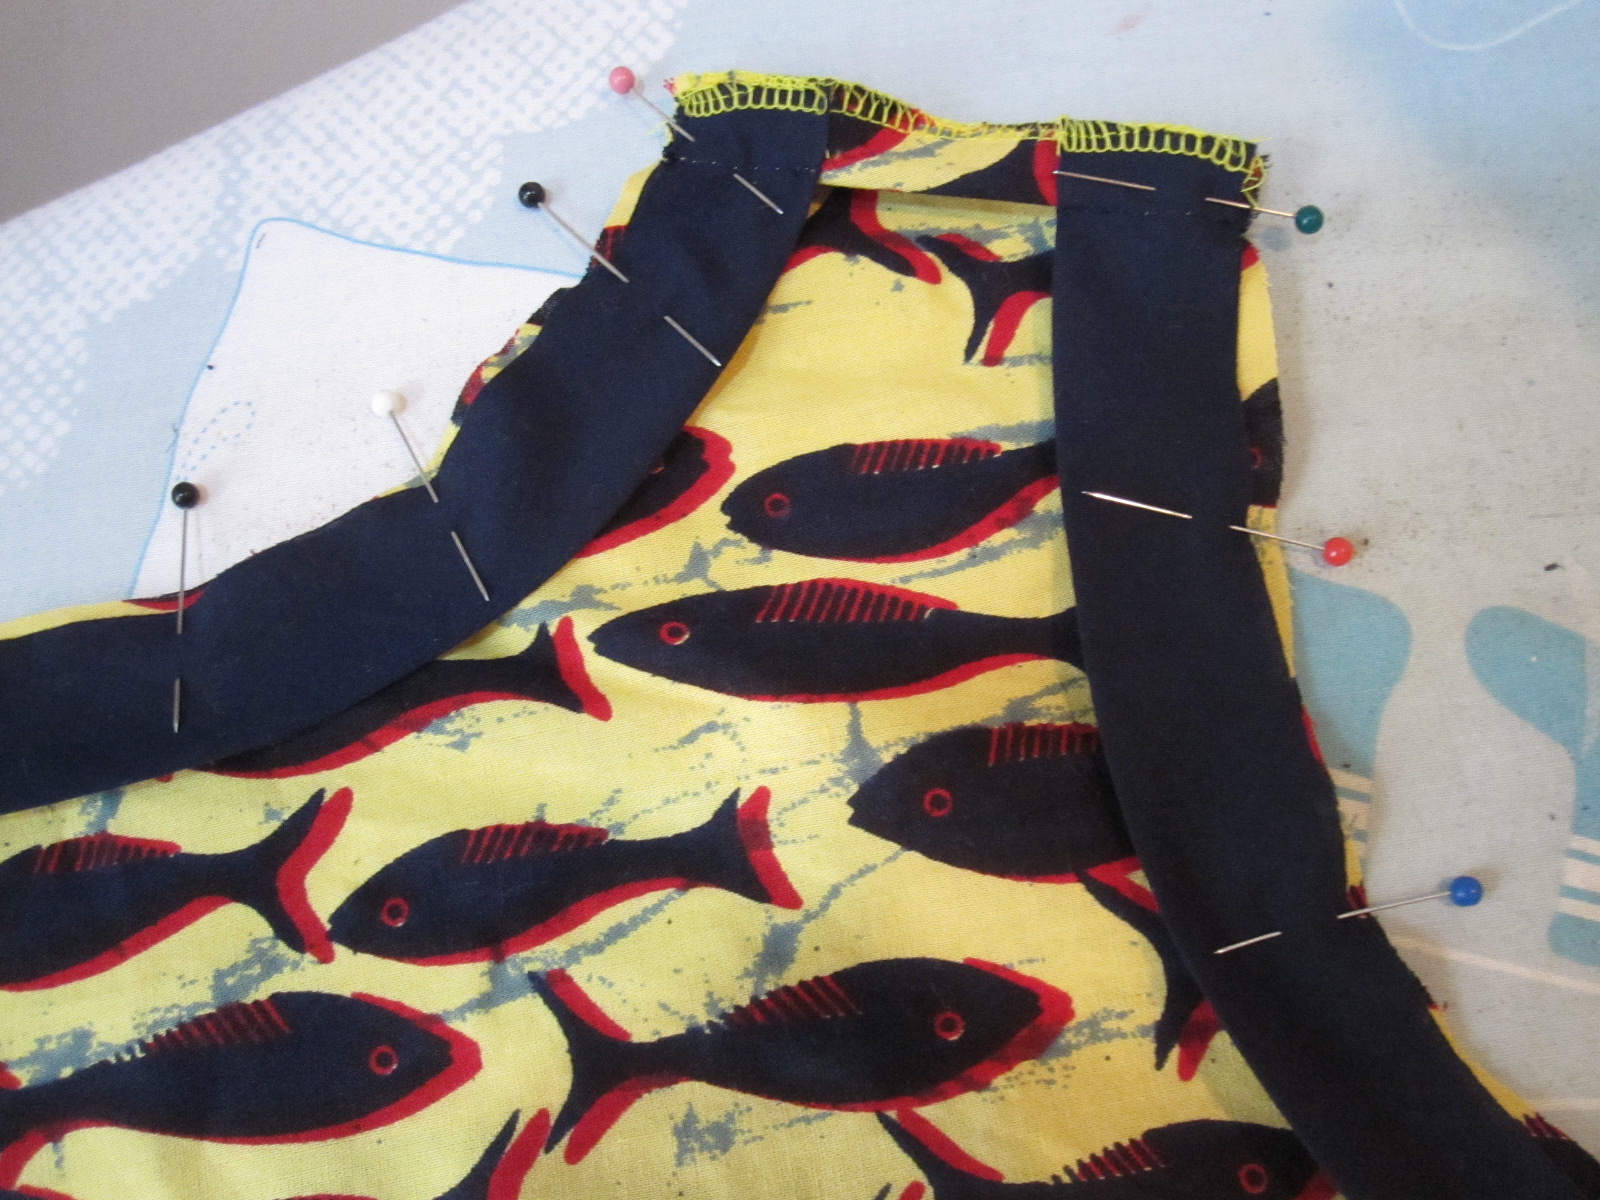 To get a nice finish at the shoulders I first interfaced the self-facing where the buttonhole or buttons would be sewn.
Next, I sewed the bias tape to the shoulder edge with a half inch seam allowance.
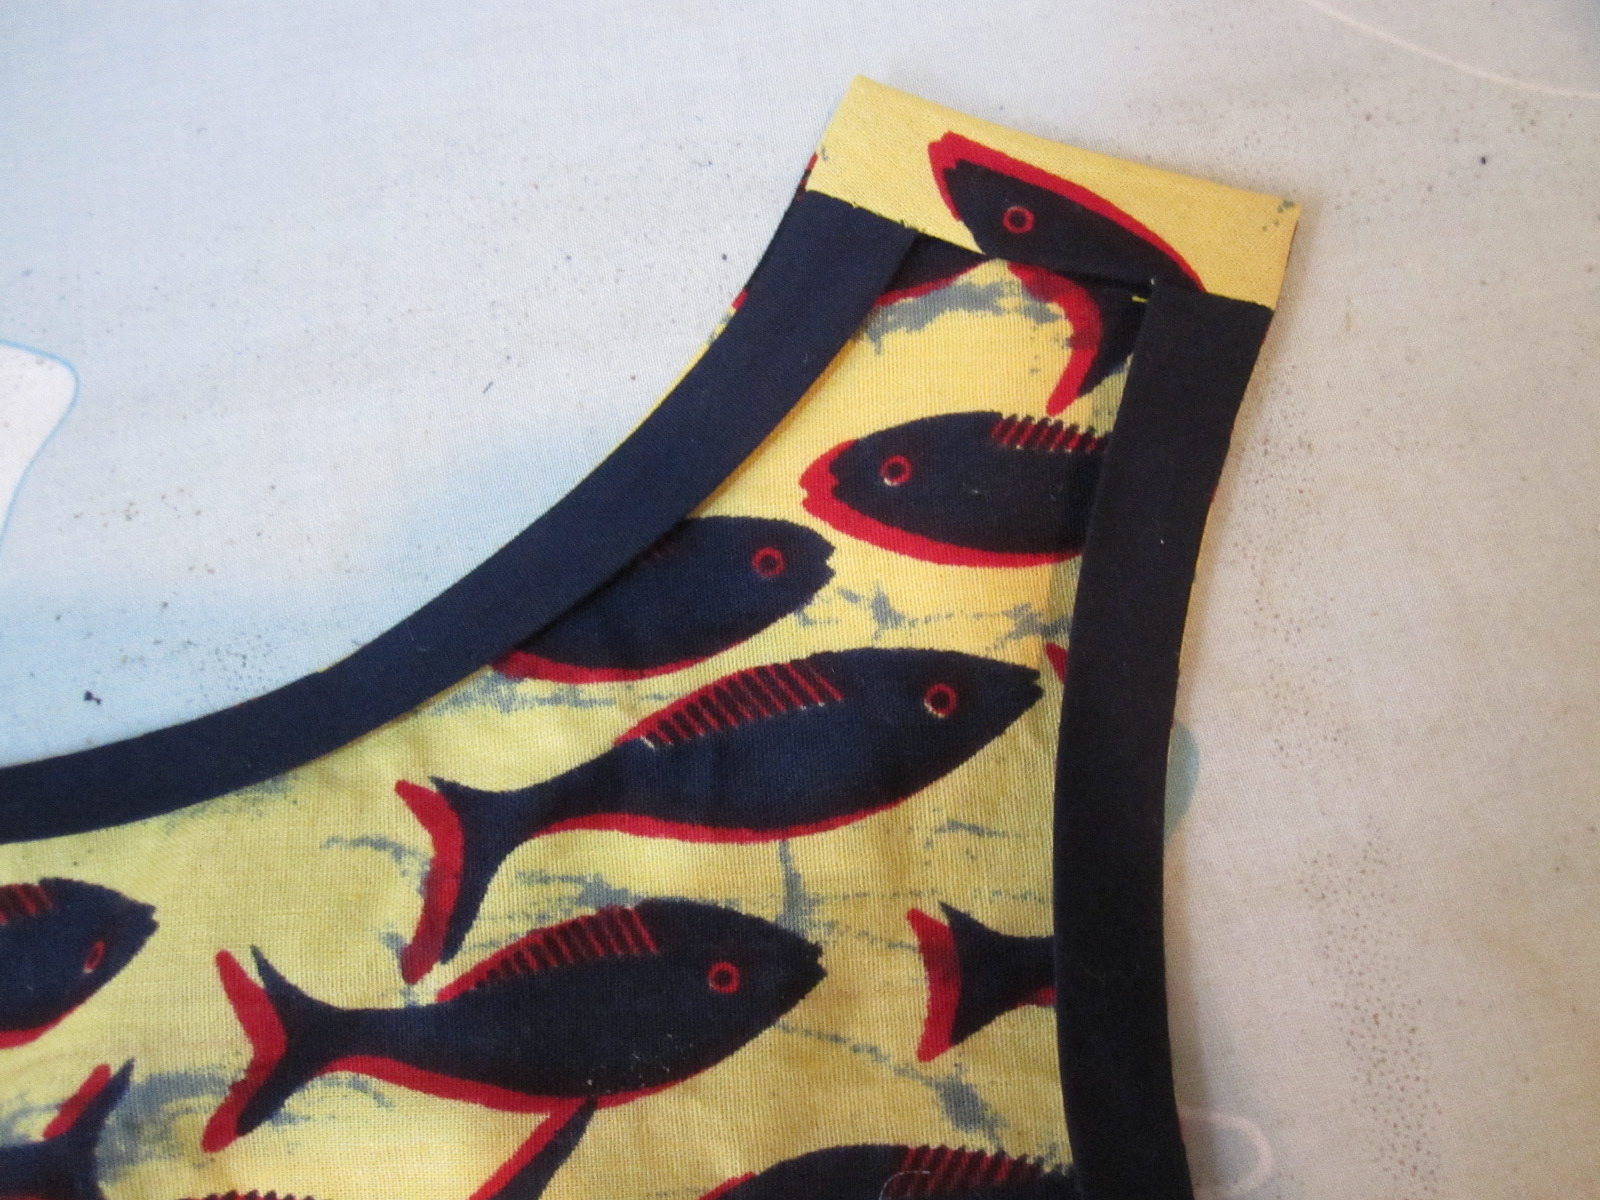 Finally, I folded along the self-facing line. I am not a technical writer and every time I try it does give me new respect for the writers of pattern directions. So this description is inartful. So, you have your seam allowance with bias tape attached. What you want to do is have the self-facing extend beyond where the bias tape will be. So you fold along the self facing line, so the two layers of self-facing extend above the sa/bias tape. Then stitch, right sides together.
When you turn it right side out you end up with a beautiful clean finish. Although I could have used a touch more length on the self-facing, as it turned out.
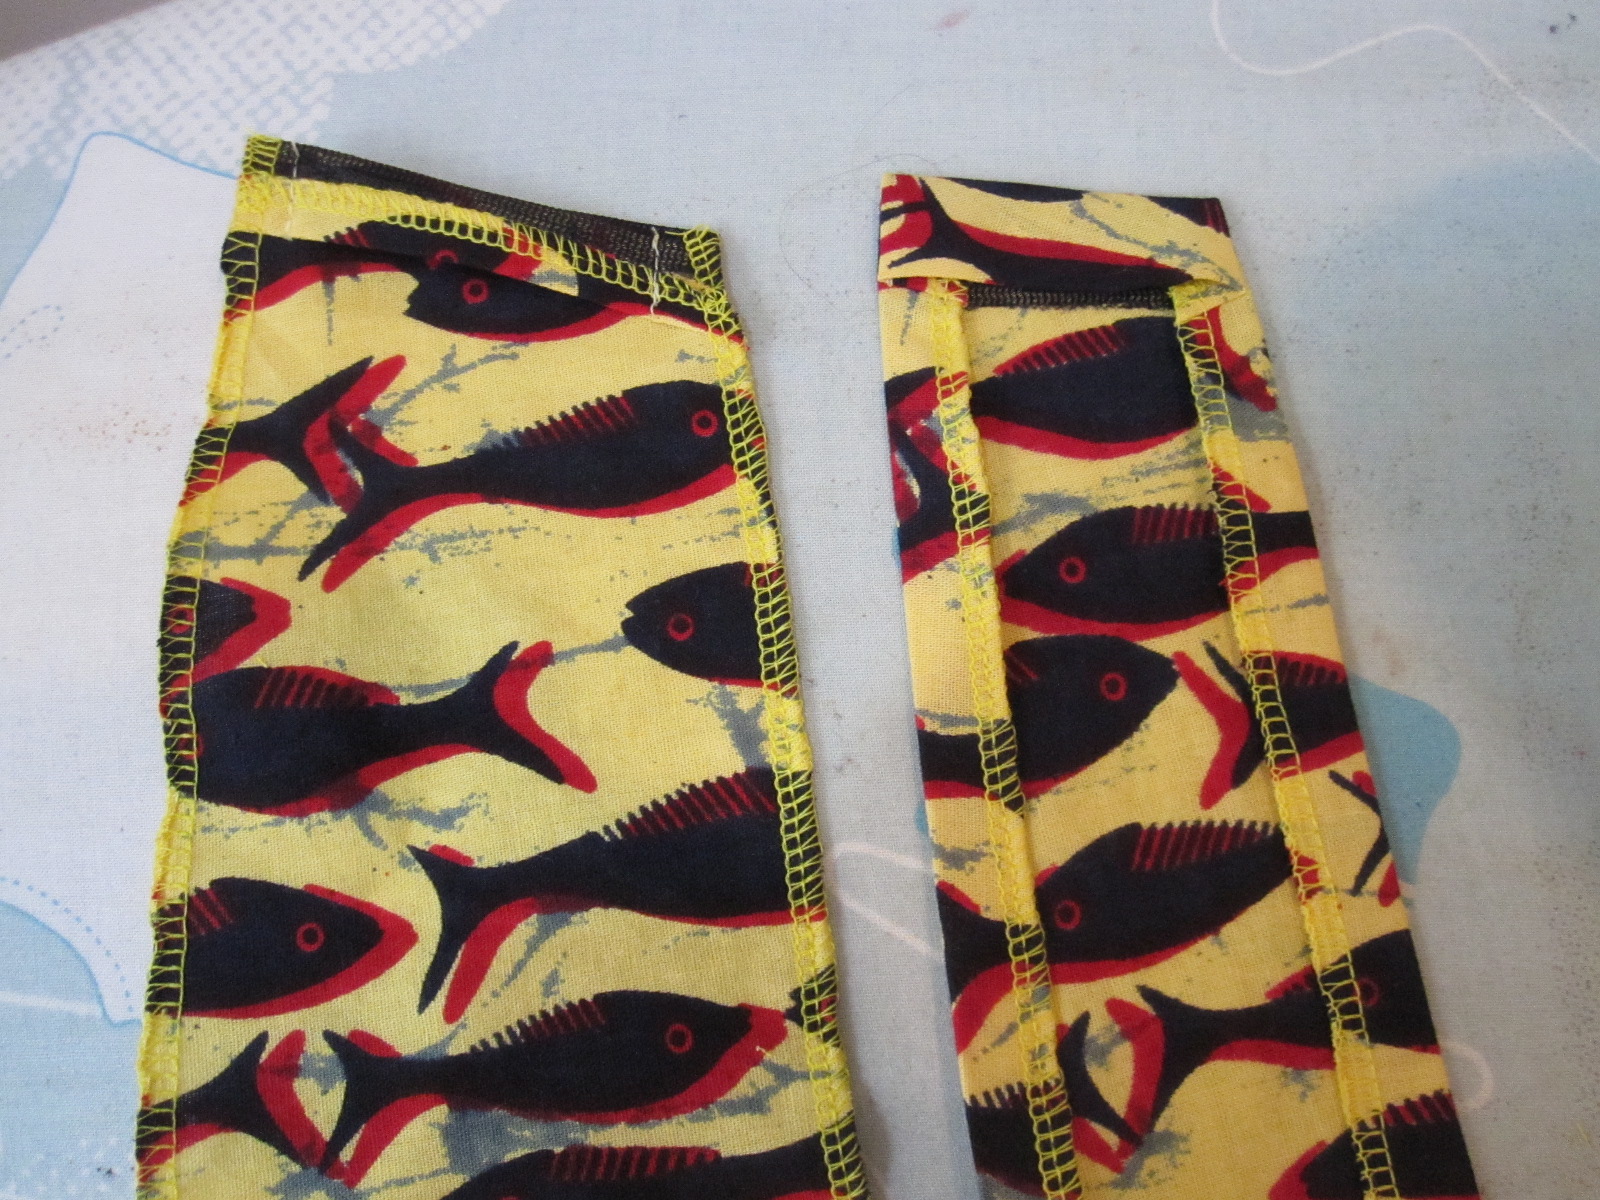
I did a similar type of finish for the back strap shoulder edge, although it's less complicated to explain and the photo is more useful. Interface and fold down the self-facing, stitch in place, turn right side out. Use the seam allowance at the self-facing as a guide for turning the rest of the seam allowance under. I could have done something fancy, like double-folded the seam allowance to hide the serged edge, or more bias tape, but I didn't want it to be too thick and plus I kind of enjoyed doing some simple, basic style sewing.
After all this was done I put in the buttonholes and buttons.
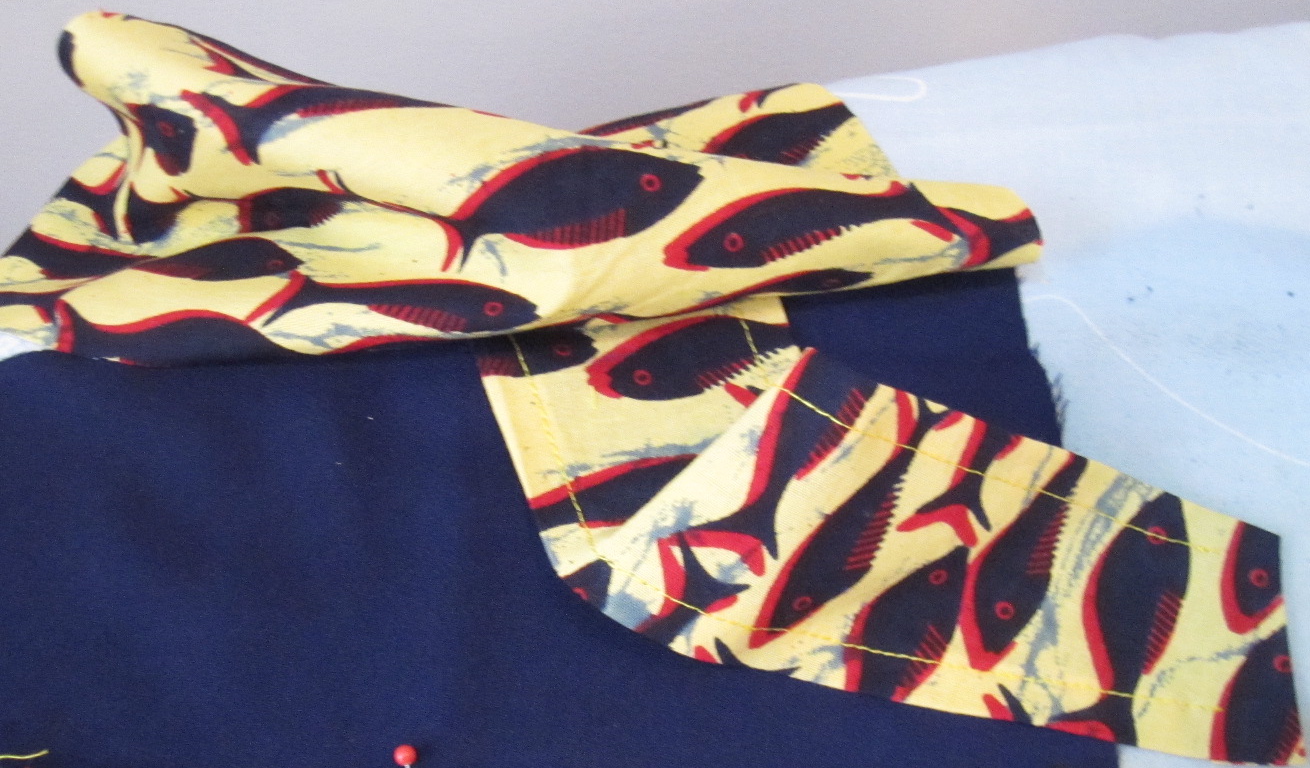 Because the wrong side of the tie would show when tied, I did line the tie portion of the back. Here I chose a contrasting navy rather than a self-lining, which I think helps emphasize the knot in a cute way.
To get a nice-looking, non-droopy tie, I interfaced the tie portion of the lining. I caught the back strap between the tie and lining, as shown in the photo, and stitched the tie and lining together along the top and bottom edges, turning right side out at the side seam.
 Once the tie portion of the back bodice was complete, I stitched it to the front bodice at the side seam. I spent some time debating whether I wanted to put in a full side zip, running from armscye past the waist seam, or just a short skirt zip. I concluded that I wanted to be able to press the seam allowances at the side seams onto the front so I could get a neater finish at the armscye and there would be no danger the SA would peek out at the top and bottom of the back bodice. If I made this again, I would probably do a full side zip. It is a pain to put the dress on, as I have to tie it in the front, then turn around, and if I need to tighten the tie it is nearly impossible. I think it would be a little easier with a full zip.
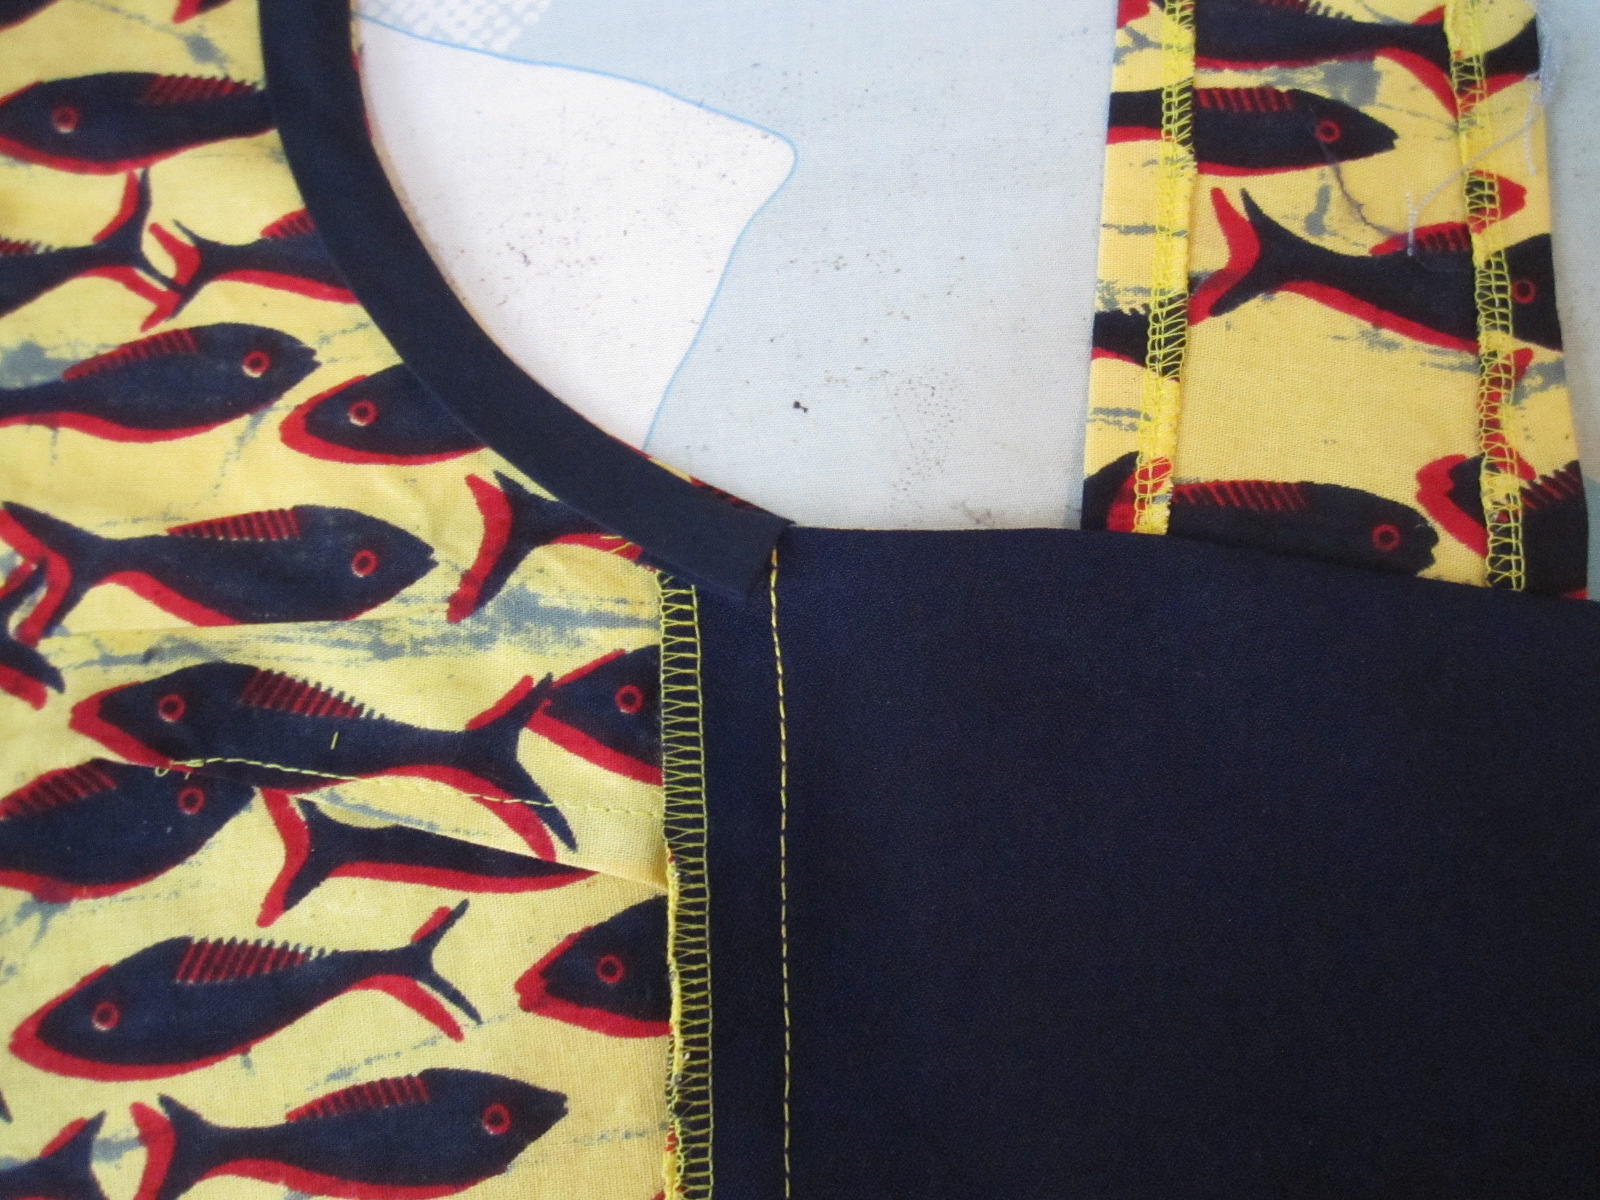 However, I did get a nice finish at the side seams, so I got something for my trade off! I lined up the finished upper edge of the lined tie with the finished upper edge of the front bodice, allowing the bias tape to extend, then stitched the side seam and pressed the seam allowance toward the front bodice. Then I folded the bias tape down over the seam allowance and hand-stitched in pace for a neat finish.
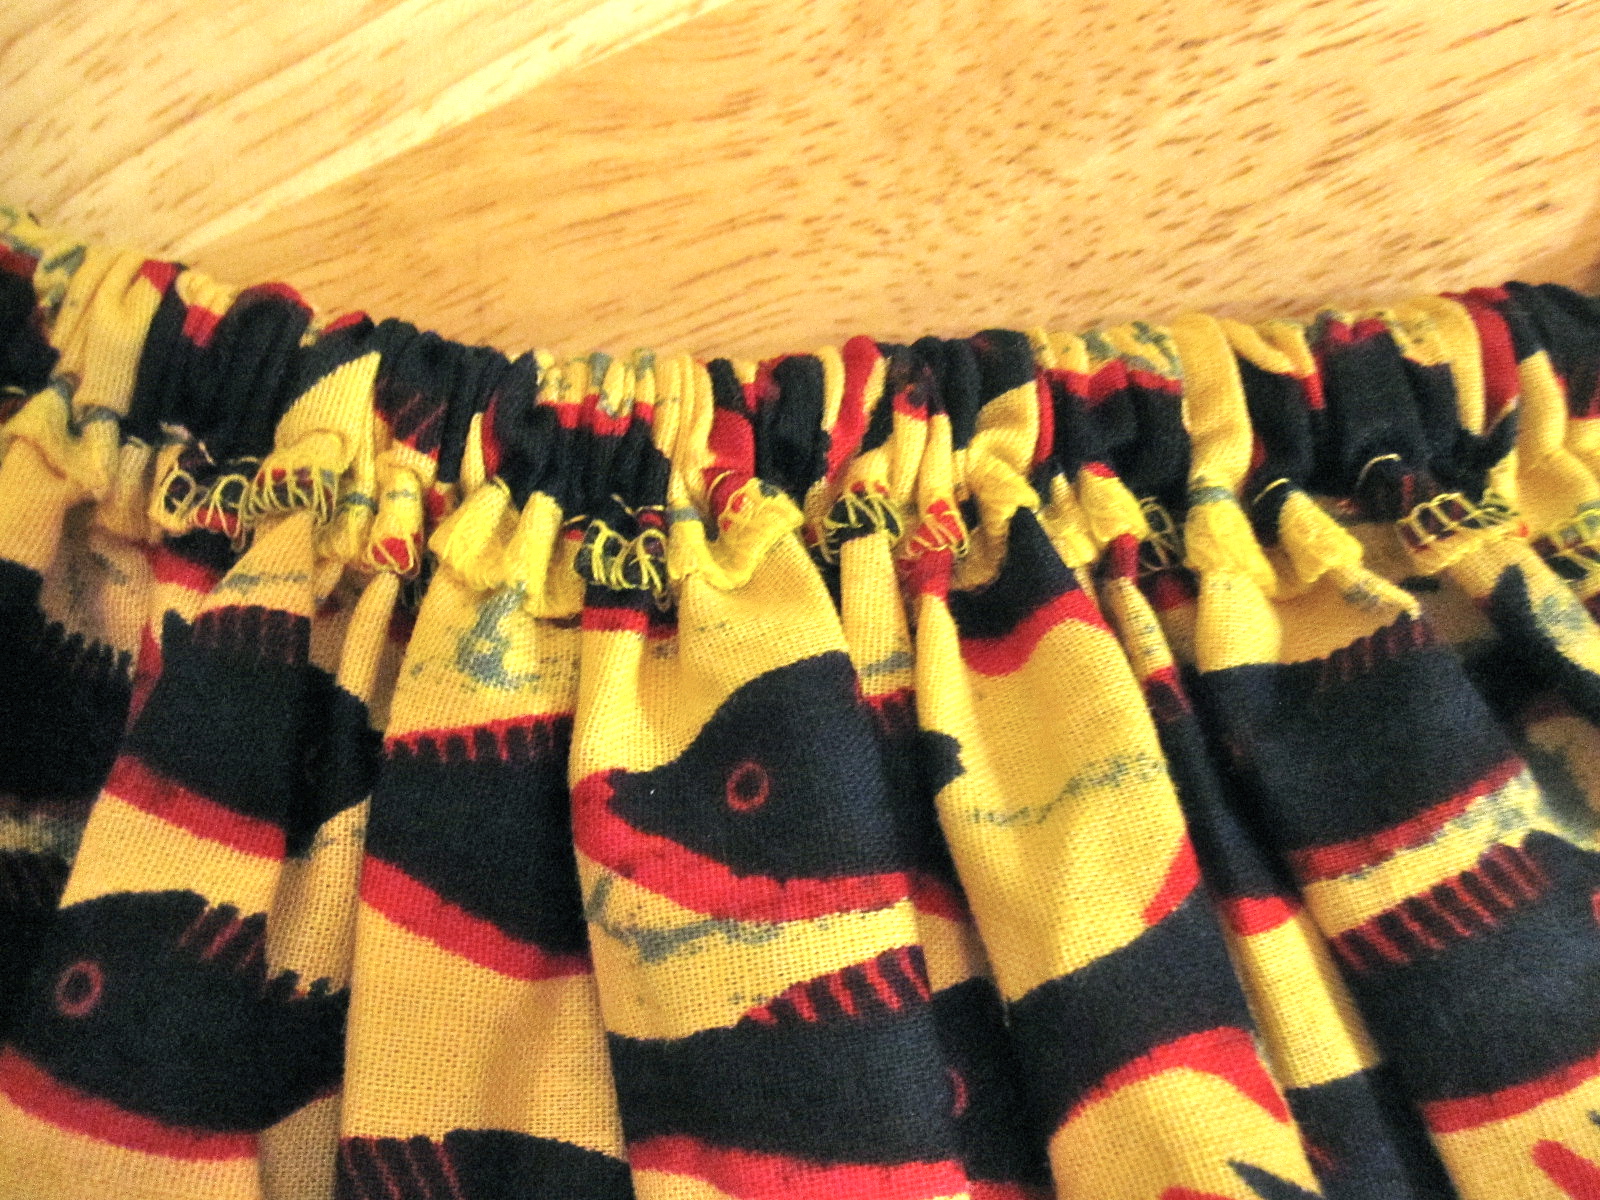 The skirt was easy, just a dirndl rectangle with one seam. I put an invisible zip into the seam and used it as the left side seam. Then I gathered the front half of the skirt and stitched to the front bodice, pressing the seam allowances open. I turned down the remainder of the seam allowance on the back half of the skirt and stitched it down for a casing. The elastic is tacked near the zipper and near the right side seam. I had to pull it fairly tight to keep the skirt from drooping in the back.
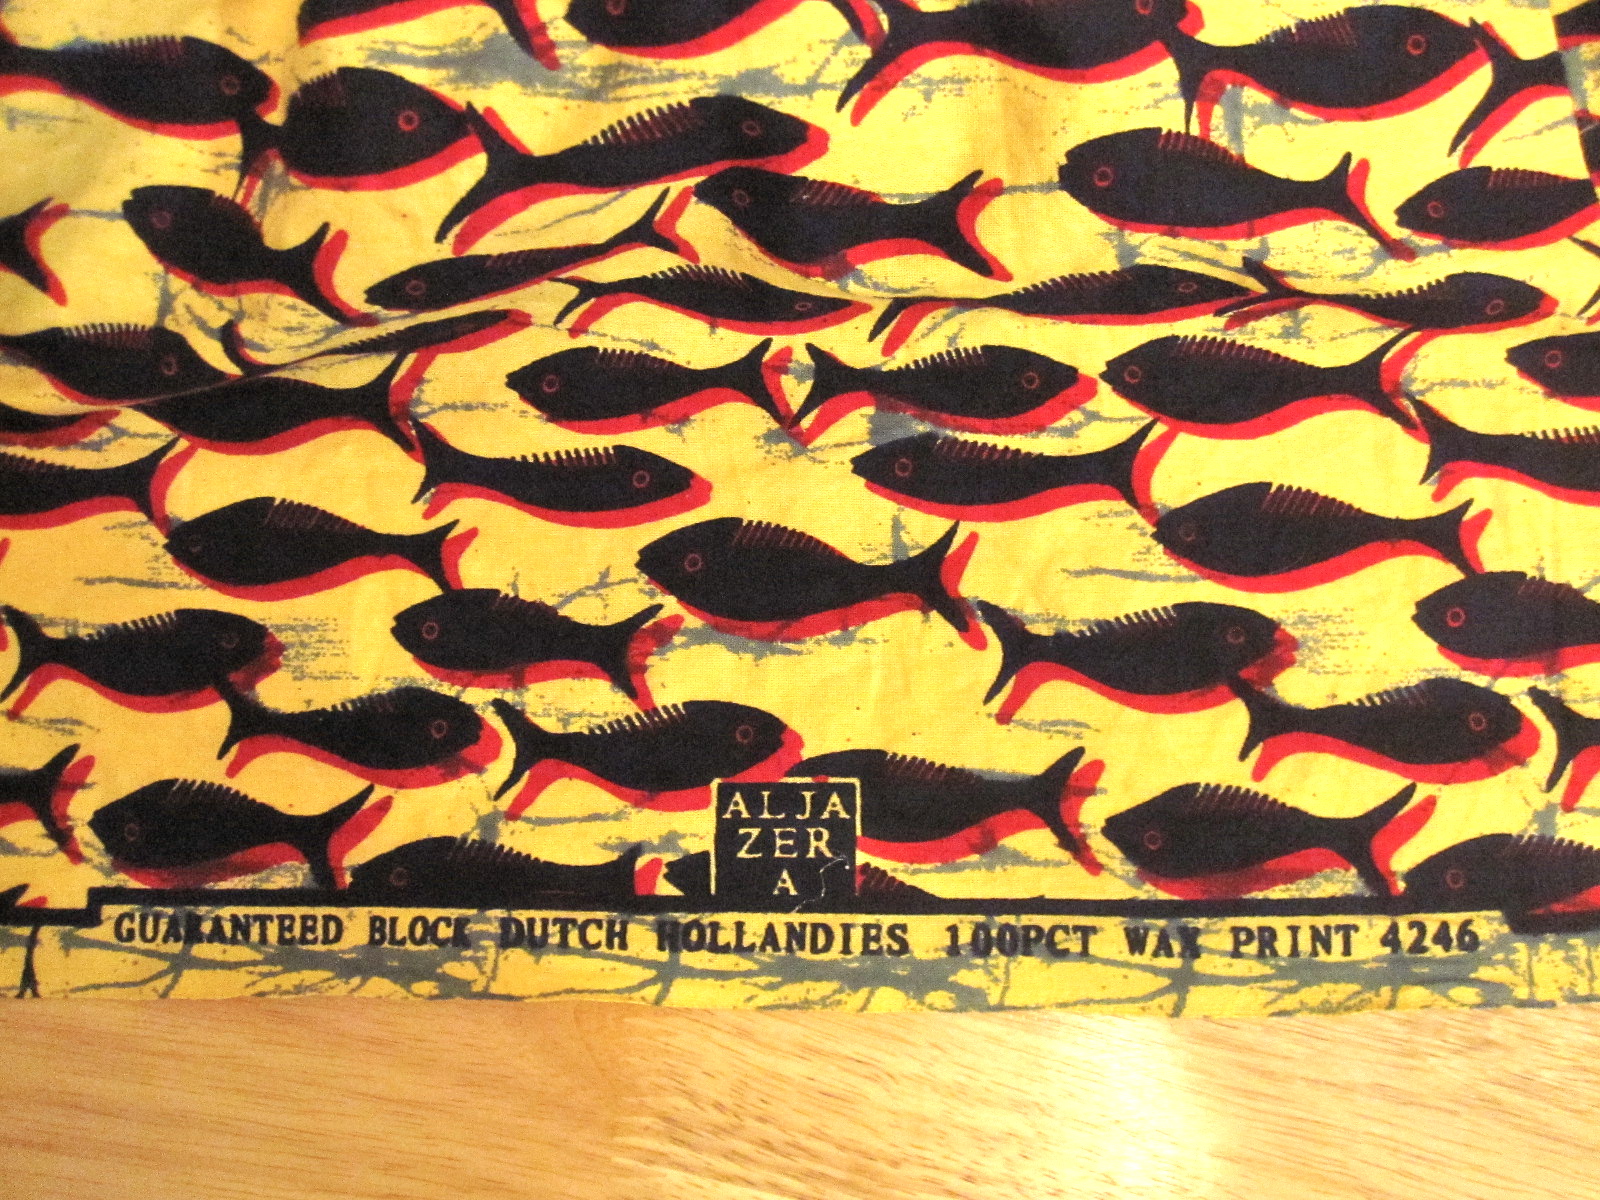
I could find no evidence on the internet that it is a tradition in Africa to use the selvage as the hem, as I have heard asserted. It makes sense to me, as it saves you hand-stitching. Certainly, the elaborate printing on the selvage of this fabric was meant to be enjoyed and appreciated by someone! So I made it as my hem.
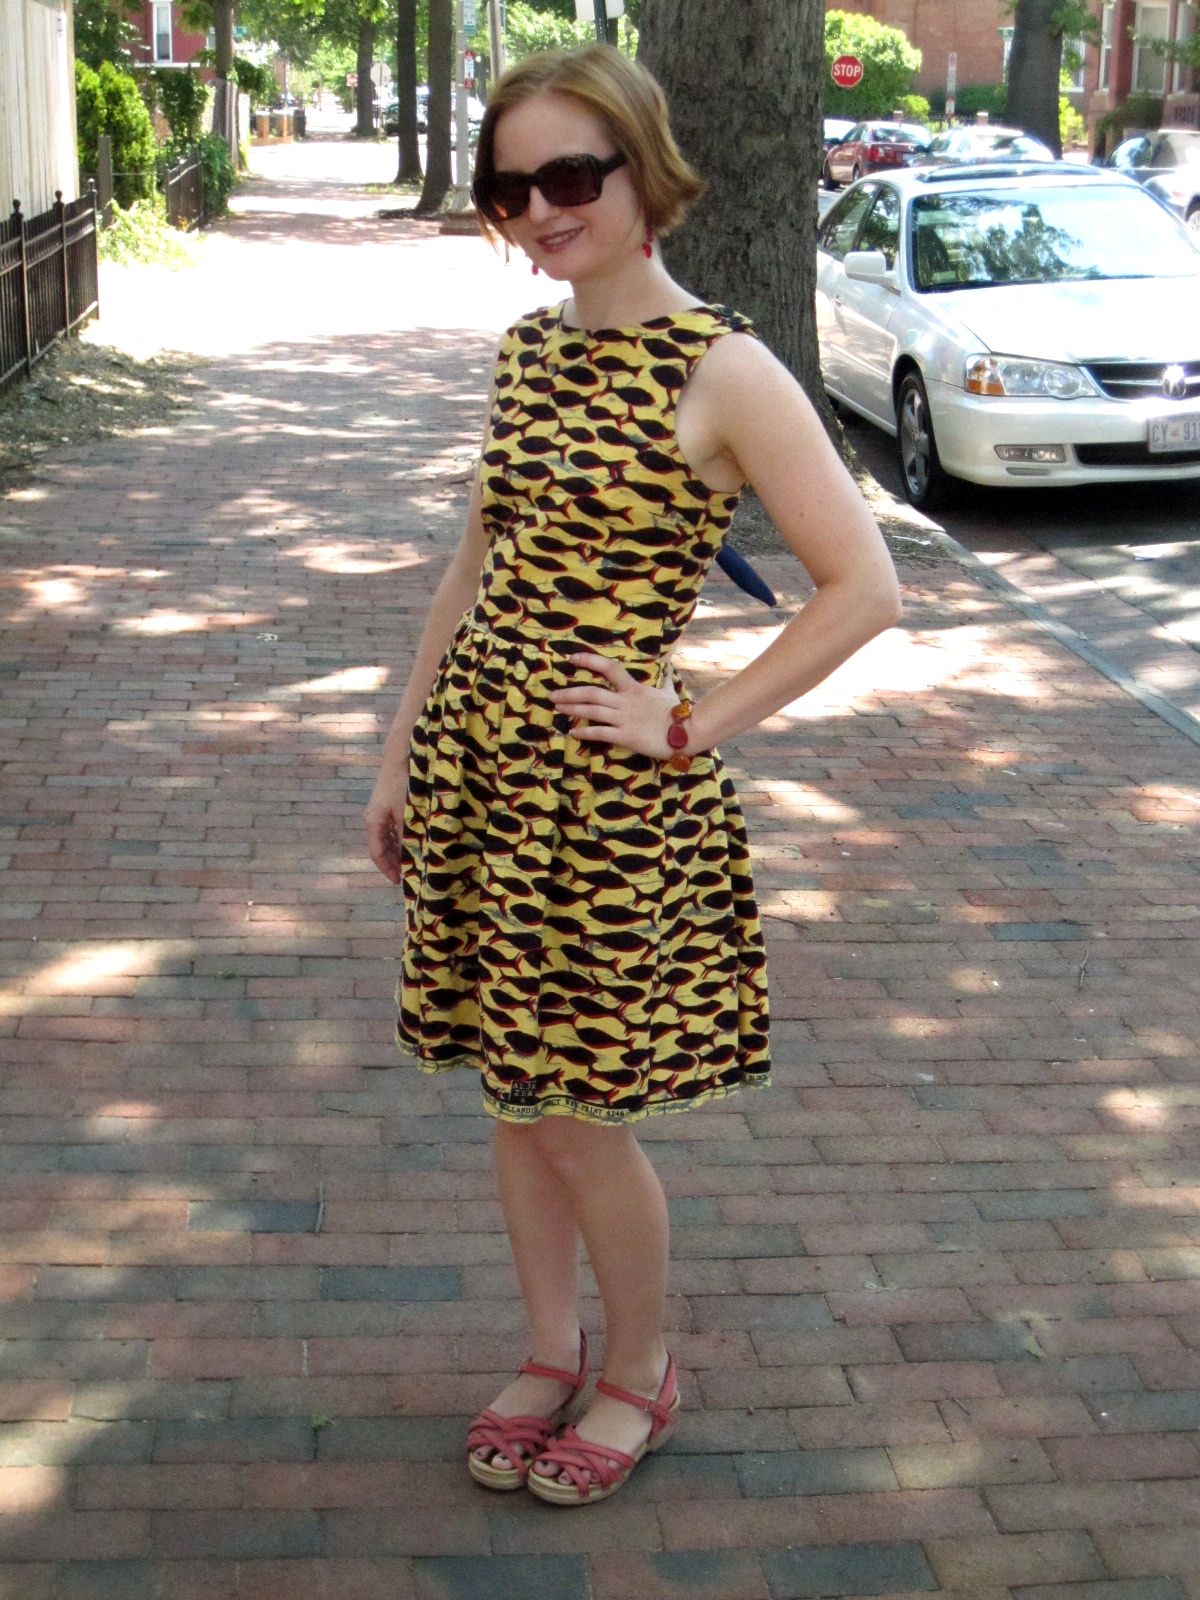
 Love this dress! It is so much fun for our super hot days and I feel like it is a great use of the print. I have never cared for the boat neck on me, because I have always felt like it emphasizes the smallness of my chest. However, I found this very flattering. So much so that I actually made a full-bodice version of the dress shortly after finishing this one.
I did not have my usual stylist to take these photos so the knot in the real life photos is a little wonky. The dress form photo illustrates the ideal.
I did not even realize there was a similar Simplicity pattern, as pointed out by Amanda S. I made the real thing contemporaneous with the muslin and was in it as much for the thrill of pattern drafting as the style itself.
All photos are here and the pattern review is here.


.jpg)


41 comments:
You look great coming and going. Great job on the pattern drafting.
Super cool dress! Great job!
Trena you did a wonderful job. The bodice front looks very pretty on you and the back! Well, it is wonderful.
LOVE, Love, love this dress!!! The back is fantastic and I absolutely adore the fabric! Great job on drafting!
It is definitely eye-popping in the back - in a good way. (On me, it would be like the typo I just almost made: eye-pooping ... lol!) Cute dress!
I LOVE this dress! And I would buy that fish print in every colorway too. Great Fabric, and great pattern drafting :)
Wow, Killer dress! I love the style as well as the fish print.
Such a cute dress! Congrats on your drafting success. :-)
Awesome! You pulled off pattern drafting! It's a great dress, really cute, flattering on you and just a little bit sassy. Just the way I think of your style :-)
The dress is great. The print is great. You should feel rightfully proud.
BTW, I was surprised in Tanzania by the lack of sewing machines. Most women wore traditional cloth, wrapped with the selvages at the top and bottom with used shirts that came from the western world.
Oh my goodness! That is adorable!!!!
Fantastic fabric! Great job on the drafting - especially the fact that you allowed for a bra. Perfect coverage. And what you call simple, basic sewing is still as good as, if not better than, what you'd get in lots of ready-made.
The boat neck looks great.
This turned out really really well. And I love the fabric.
Beautiful, and you did a great job hiding the bra straps (that what makes it most scandalous!!).
LOVE it! And the fabric, too. My problem with backless styles is how to wear a bra with it, and it seems like you've strategically handled that issue with the tie. Way to go!
My goodness! This is a cutie! What a great little dress! Looks nice on you and is really fun. :)
Oh, I love it! That fish print is awesome. It has kind of a 3-D effect. Love the color combination.
Love it, both coming and going! Interesting (if questionable) fact about the selvages.
Wow, that turned out so well! I love the fish print, and the dress looks great on you :)
Love this dress on you - great job! I love the fish print, and that you used the selvedge to effect. And the back looks great!!
The dress is excellent, so cool and crisp looking. I love the reverse print on the tie, and the construction details are very neat.
That looks great. Lovely work on the fit. No one (and I mean no one) wears the yellows like you. You look fabulous. Looks very cool and comfortable yet so WOW!
Such a cute dress for hot summer days. you did a brilliant job drafting this an the fabric is gorgeous. Is your full bodice version in the same fabric?
What an excellent project and great use of fabric! Good job!
Spectacular! Love the fishies!
Well done - the dress looks great, and it must have been so satisfying to not only draft the pattern (wow!) but then see it come out so well!
I LOVE this dress!!!
This turned out so cute!
Intrigued by your quick selvage hem.
SO. PRETTY.
ugh ;)
Pretty dress, the difference between front and back is eye catching inded. Great work.
So cute, I love the sun back cut.
From the hem to the use of print, to the overall style and fit, this is a wonderful creation. You look great.
You are totally cute, walking away. I love garments with back interest. This oneis awesome!
Great dress--that print is spectacular!
Cuuuuute! The fish fabric, the open back - everything!
Trena, I think this is, hands down, the cutest thing I've seen on you! (And you've made a bunch of really cute clothing!) *Everything* about it is just perfect, including the color and the cut!
The fish are so fun! The drafting paid off well.
This is a great dress. Love the fabric you chose; it is a fun print. Perfect for how I think your personality may be.
I love the colors and print of this fabric. It's perfectly quirky for the cut of the dress. You look great!
Killer print beautiful dress. Love your blog.
Post a Comment