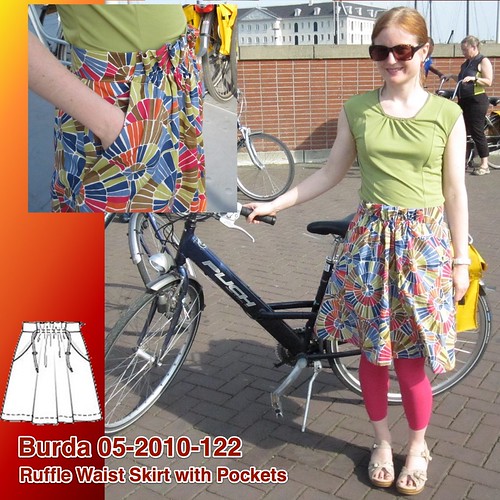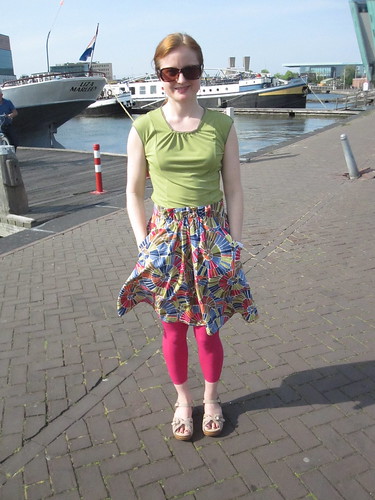
When I was looking for biking skirts my only criterion is really that it had plenty of volume for leg mobility. I liked the details on Burda 05-2010-122. The front waistband ruffle and the yoke pockets are nice details that take it up a notch from your average A line skirt.
 As with any yoke pocket, I felt that the yoke edge needed to be reinforced to prevent stretching. However, the fabric I used here is fairly stable and because the skirt is not fitted around the hips the diagonal pocket seam is not under too much stress. I ironed strips of fusible stretch interfacing along the edge of the yoke, but not the pocket. The finished product is very stable.
  Because of the upper ruffle, the center front portion of the skirt is wider than the yoke, which goes all the way across the front from side seam to side seam. Therefore, you need to mark the pocket placement on the yoke. I am mostly showing this photo to prove that, yes, I do know how to thread trace and even do it on occasion! But only when there is no easier alternative. Heh.
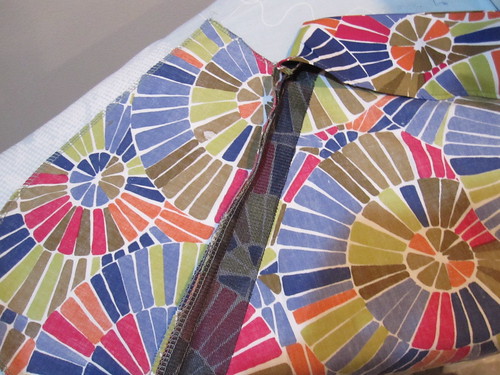
The construction of the yoke and pocket on this skirt is a little unusual. As mentioned, the yoke is like a front apron that extends all the way from side seam to side seam. The pocket piece, which is stitched to the front, is shaped like a pocket. I had a little bit of a hard time figuring out how to layer all the seam allowances at the side seam. I ended up clipping the pocket and yoke seams so I could layer them and press the side seam open. The instructions did not cover this portion of the construction so I have no idea if this was the right approach.
 Once the pocket is sewn onto the front and the yoke in place, you stitch the pocket onto the yoke (again, marking is important). I've marked the pocket stitching line with yellow on the photo so you can see it better, and
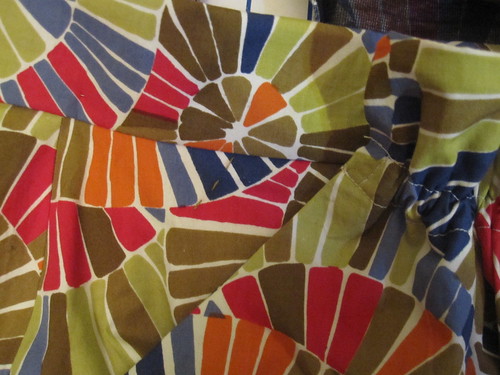
 here is a photo of the underside, where you can see the pocket piece. The marking for the end of the pocket stitching line is several inches below the waist seam. To me, that made the pocket a little unnecessarily insecure (in terms of things falling out of it), so I stitched it up closer to the waistband.
I went back and forth on the ruffle so many times while I was deciding on this skirt! On the one hand, the ruffle is the cutest feature. On the other, it means that this skirt can only be worn with a tucked shirt and I find tucking somewhat problematic--t-shirts always pull out so that it looks like I have a spare tire, while button shirts simply don't stay tucked. In the end, however, my sounding board pointed out that (1) I have a lot of skirts already, so this doesn't need to be The Skirt, and (2) I prefer cute. The ruffle is meant to have a drawstring through it, but that didn't appeal to me so I cut a length of elastic and permanently stitched it in. I probably should have used ribbon or some other stable item, but oh well. I can replace it if the time comes. While I interfaced the ruffle facing, I was still a bit concerned about my ruffle being floppy, so I invisibly hand-stitched it to the waistband to make sure it would stay up.
 The skirt is drafted with a side zip, but it seemed like too much trouble with the yoke/pocket situation. I've done the side zip/side pocket technique before (and actually here I think the zipper stops before the pocket meets the side seam so there is no particular technique involved), so I had nothing to prove. So I moved the zip to center back. The back of the skirt is not particularly exciting, except that I twinned the print along the back seam, argh!!!!
I am really happy with the skirt. The design is cute--about as interesting as a skirt can be without going overboard into crazy town. The design is clever and other than the issue of the intersecting front/yoke/pocket seam allowances it went together easily and well. The fit at the waistband is great; I didn't take notes while making this unfortunately, but I am pretty sure I added an inch or a little more to the suggested waistband length and interfaced the waistband for stability.
All photos are here and the pattern review is here.


.jpg)


16 comments:
I love the vibrant fabric you've chosen to sew your skirt from!
Great colors! I used to think this skirt pattern was boring; not anymore, it looks really cute!
This is really cute, exactly like you said interesting without being too much, plus it has pockets!
Yeah, this style suits you and it is really cute.
What a terrifc cycling skirt-and your fabric has "wheels" also. Very nice skirt which looks good on you.
This is such a cute skirt! I have no idea why I've not noticed it before. I must dig out the pattern.
Fantastic fabric! Looks very bicycle-y.
This reminds me very much of a skirt pattern I had back in the mid-80s. Very cute cut, and definitely suits you.
Great fabric and design for cycling! This is giving me ideas, thanks!
What a wonderful skirt! Looks to be so comfy for doing lots of things (not just biking).
oooooh, I have that fabric. I love it!!! Cute skirt.
That skirt is too cute. Love it.
How fun. Your sounding board was sage. Is that Rotterdam harbour behind you?
oh this is my next project lined up to do once I finish my current one, so thank you for the tips! Sadly though mine is going to be made of plain grey wool and not a vibrant print like yours - I love the pairing of the skirt fabric with the green tee, even the pink tights somehow work too
That is a really nice style skirt!
I love, love, love this skirt. The fabric colors and patterns are cute!
Trena, you are single-handedly changing the whole "athletic-wear" genre! I love these wild, so girly, looks you work up. They're practical, useful, and so much fun. All this and pockets, too!
Post a Comment