
As you may recall me discussing, I've been wearing the same hideous gym clothes for years and years. Despite how much I enjoy working out *and* looking cute, I hadn't bothered to make them two great tastes that taste great together. I finally reached my limit on my horrible gym pants and made four pairs of gym pants last year in September (I didn't post them until November due to The Boot). I hated my gym tops slightly less so I've still been living with them, even though they are too short and pop up over my belly. Yuck. The Pattern Review activewear contest finally got me to move on making some tops.
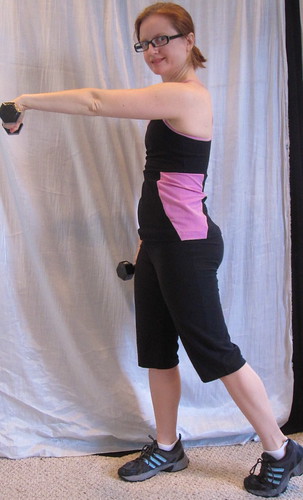 For the upper portion of the top I used Jalie 2563. It comes with both a traditional racerback sports bra and the strappy racerback bra I used here. This was my first Jalie, but I know that they are activewear experts.
 Burda published a racerback yoga top in November 2007 that I've had on my list since, well, November 2007. But I decided to go with Jalie because of their good reputation and because I wanted a separate upper and lower bodice. To ensure that I had adequate bust support(=compression in this style), I made a Size Q, which is on the "girls" side of the chart. *insert Debbie Downer whomp whomp sound*
I bought technical fabrics last time I was in NYC. The supplex for the main parts of the top was $12/yd from Spandex House. The powernet for the built-in bras came from Stretch House at $6/yd. All except the light pink contrast pieces were purchased from Fabric.com in January of last year for $3.50/yd. The light pink I've had in stash since 2007; I'm pretty sure I bought it at Spandex House.
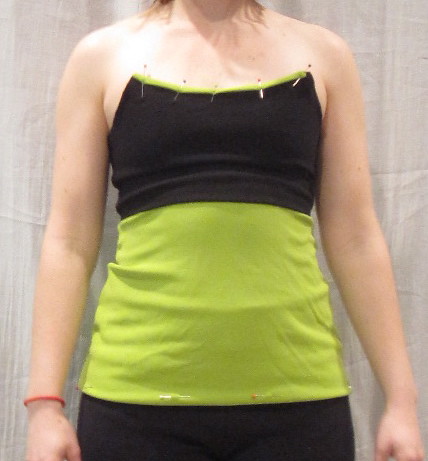 My original plan was to have a black bra with a solid colored contrast bottom. In terms of the science of colors and shapes, this is not the way to go. I would normally want a bright color on top to build up my bust and a dark color on bottom to minimize my belly. However, I had a very specific need here. The weights at the gym are filthy. I mean, truly disgusting. And so every time I put a weight on my chest to add resistance during abs work, I get a disgusting dirt mark on my top. It was a huge priority to me to have black on top so I would no longer have to worry about walking around looking dirty.
However, this turned out to be a fail. It doesn't even look as bad in the photo as it did in real life. But that contrast solid-colored lower bodice was AWFUL and made me look huge. Part of the problem is the fabric. The Fabric.com "sports" stuff is NOT suitable for activewear. It is way too drapey, way way way. The rest of it will be great for making cycling shirts that look like real clothes (but hopefully are better to sweat in than real clothes), but it can be used only in small doses for functional athletic wear.
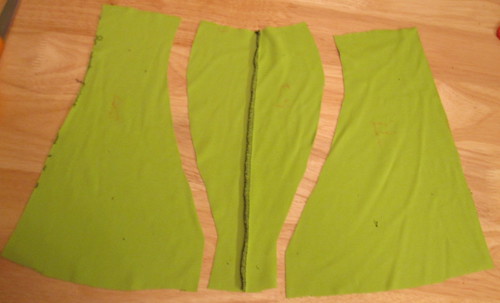 I had suspected that the solid colored lower bit wouldn't work, so I had only basted it in. I stopped work for the night to regroup and think. I didn't want to have an all-black top except for just the straps. That would be boring. Finally, I hit upon the idea of a contoured side panel that could be made in the contrast color. Again, I am violating the science of figure flattery here--better would be a colored center and black side panels to narrow my waist and hips, but the fabric was not sturdy enough to be the center panel.
 I fitted the lower panel as well as I could, given the fabric properties, and checked the length. Getting enough length was as much of a priority is hiding dirt. I tested the tops for length in Warrior 2, the worst belly-popping move, and the top covers the pants with at least 3 inches to spare. SO GLAD I will no longer be flashing that oh-so-attractive wedge of flesh. I then unbasted it from the top and cut it apart to make a pattern. The side panel seams incorporate the shaping of the original side seam; I did not add any additional shaping as I had already fitted that side seam.
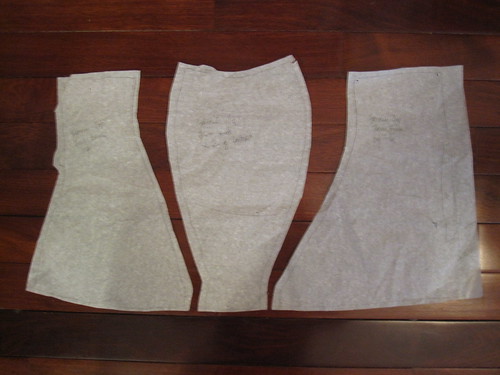 After making the first test version of the top, I refined the fit of the pattern for swayback and length. This is the final result. I can see why you all muslin. For the last two tops, I knew I could cut out this pattern and sew it up and it would fit perfectly and I could put in a 1 1/4 inch hem without even trying it on. I enjoy trying new patterns too much to go through this process for everything I make, but for a garment I will want again and again, being able to sew it right out of the box is awesome.
 You can see that I used two notches for ease in construction:
-At the top of the side piece to indicate which side is to be sewn to the back
-At center back, so I don't accidentally sew CB to the side panel
-I also added notches at lower CF and CB of the bra for elastic application.
After I had my pattern perfected, I made full size patterns of the front and back bra and the lower front. That way I could cut out two at a time for better efficiency. So handy!
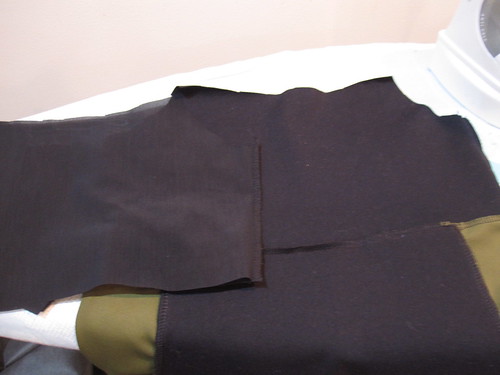 Construction:
Note: Because Jalie uses 1/4" seams I used them as well on my pattern for the lower bodice. All seams are 1/4" except one, as described below
1. Serge side seams of upper bodice and inner bra. Press side seams of inner bra toward front and upper bodice to back.
2. Serge lower bodice seams (front side panel, back side panel, center back).
3. Serge lower bodice to upper bodice in a 1/2" seam. I found the seam was a little too low otherwise, but I did not want to shorten the bra pieces because of the inner bra elastic construction.
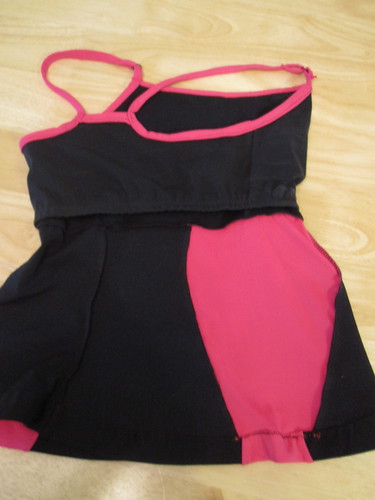 4. Place inner bra inside upper bodice, wrong sides together (that way no seam allowances will rub against me). Pin along front and back neckline.
5. Cut colored strips of fabric 1.5" wide and 5 1/4" (x 1 for front neckline), 2 1/4" (x 1 for back neckline), and 21 1/2" (x 2 for armscye and shoulder straps--I have short shoulders, measure your length!) long.
6. Pin neckline strips to right side of upper bodice/bra front and back neckline, right side against right side. Stitch in a narrow zigzag at 1/4".
7. Turn strips over to inside of garment, folding edges under and making sure the folded edges extend beyond the original stitching line. Stitch from the outside/right side in a narrow zigzag just inside the binding. Make sure you've caught the folded edge.
The binding is not beautiful from the inside because of this, but I did the first one the opposite way (sew binding to inside first, then fold over outside and stitch on top of binding) and I didn't like the way the stitch line looked on top of the binding.
8. Bind armscye edges as described above, having the strap extend two inches beyond the front and remainder extend beyond the back for the straps.
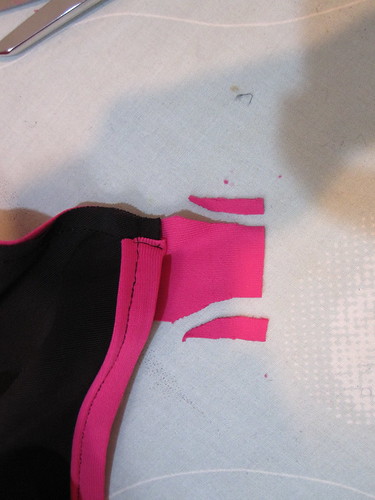 9. Taper ends of straps. Fold straps as for binding (in half with seam allowances folded to inside) and stitch 1/4" from edge (mine are not perfect or beautiful).
10. Fold extending front strap through a ring and stitch down. Fold extending back strap through other end of ring and stitch. Jalie has the rings in the back, but I like the detail of them in the front and it made it easier to try them on. Stitching these little ends down in an attractive way was truly the hardest part of this whole process. The edges kept wanting to roll out beyond the finished strap, thus the tapering.
I had one random set of square metallic rings (well, I guess not rings) in my notions stash, presumably cut from some garment I got rid of ages ago. I hate when I actually find a use for this stuff because it reinforces my pack rat tendencies! For the other rings, I euthanized some sports bras that hardly merited the title and were made of a cotton blend that stank of mildew the moment I sweated in them. Good riddance.
11. Cut a length of elastic 21 1/2" long (this is just to hold it in place during workouts, not to provide support, so it's need to be fitted but not tight) and sew into a tube. Mark the quarters and match up with the quarters of the lower edge of the inner bra. Fold the edge of the inner bra over the elastic by 3/8", such that the raw edge will face toward the outside of the top, and twin needle in place.
12. Tack inner bra to upper bodice just above empire seam by stitching in the ditch at the side seams.
13. Twin needle the hem.
This process involved a fair amount of changing needles and thread with my contrast colors, but I think the changes were worth it.
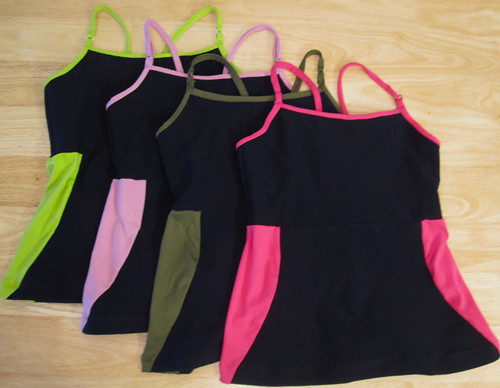
And here they are! I also did a catalog shot with their respective matching pants. I now have four matching and even cute sets of gym clothes. Yay!
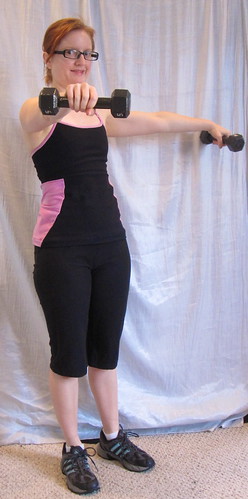
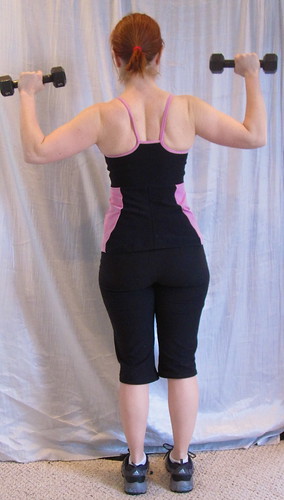 I amused myself by doing a "fitness" shoot for the photos. It can really take pictures to help you see exactly what you look like sometimes. I am always startled by my rear view. Doubt not that I am pear shaped.
 I didn't actually learn my lesson from making the pants. I realized that I should have made a test pair and then actually worked out in them before making more, which would have allowed me to catch the crotch wrinkles and beef up the elastic at the waist. But, as with the gym pants, once I got started I just wanted to get these done! All my sewing for 2011 so far has been utilitarian (coat and gym clothes) and I am so ready to move on!!! Will report back next week when I wear one of these to the gym on how it does.
All photos are here and the pattern review is here
.jpg)


.jpg)


29 comments:
I think the colored inserts are flattering--they make you look very curvy. I'm impressed by your active-wear-making skills!
Active wear is an area I am not brave enough to venture into. You make it look easy.
Cute! The color blocking is flattering, even if the colors are opposite what they "should" be. These are the cutest workout clothes I've seen in a while. And they look so well made. Well done!
Fantastic problem solving and I love the end results!! These are really flattering and fun, and there's nothing like new gym duds to motivate you to work out on cold, dark mornings...
Looking good! Great to have several sets.
Wow! People who make activewear, underwear, and bathingsuits are always SO impressive to me! You did a wonderful job figuring out how to get what you wanted and still maintain the cuteness factor.
Wow is right!!! These are great workout clothes. Fantastic job!
Functional sewing is a pain, but oh is it worth it.
Excellent effort with excellent results. Bravo!
So, So, So cute!!!
Nice fit, and wow, look how many you made!
Those look awesome! I love the 'catalogue-style' layout showing all the colours you made. Totally professional looking! Now you can work out in style :)
Fantastic, I love the contrasting colours and am really impressed you can make so many without going crazy through boredom. It is now my mission to find some good workout fabric this year.
I am the same pear shape and everytime I look in the three way mirror I think that can't be my bum!!! Cute cute outfits.
So cute, and flattering! I love the colored sides, they are just enough without being tacky or wierd. Two thumbs up!
Super cute and the colorblocking is genius! Good job!
What a stylish set of gym wear! I love the colored contour sides.
OMG, those are too stinking cute. What a great idea to do color blocking. I love it. You look great.
Fantastic gym clothes. I always look so frumpy with oversized t-shirts. This is a nice idea and instructions are most helpful.
great job! Now you have a whole wardrobe of cute workout wear. You look pretty strong, too!
These are very cool. I like your coloured inserts. You will look very chic at the gym. It is such a shame that sewing super useful clothes like active wear is not so exciting as frivolous outfits. I have truly hideous and ancient running gear.
Great! Now I feel like I need to sew some workout clothes and start working out... Isn't pushing the sewing machine pedal enough?
Love those shirts!
Wow! Beautiful gym clothes - you'll be the star of the gym!
I have a question for any Aussies out there - can you buy Supplex in Australia or is there an online store with reasonable shipping that sells quality Supplex?
So cute, and to have a top in every color? I'm jealous of them, and your technical fabric sewing skills...
Can't say this is something I would ever make since I avoid exercise as much as possible, but thank you for the detailed steps of how you did those spaghetti straps so neatly. In fact all of your tips on working with knits are helpful for me.
I'm impressed with your work out tops and your muscles!
Super cute! I'd be sooo motivated at the gym if I was looking that cute!
I think they look great! Regarding the rear view...the pink ends right above your widest point, so it's like an arrow. If you made the top just a little bit longer, so it met the widest point, then the pink would point to your decreasing curve instead of the increasing curve. But I don't think most people would notice cause they'd be focussing on your great shoulders!!
Who the heck makes their own workout clothes. You do! That is so cool and they look great. Great job mixing up the colors. One day....
So impressive!! They are really cute, too.
Post a Comment