The Pattern Review challenge for July is Designer Knockoff, which is always one of my favorite contests of the year. It is usually my opportunity to do actually draft a pattern. This year, however, it is a two week challenge. Also, I am not necessarily low on mojo as such, but I have definitely been low on energy and time for sewing lately, so I was not up to the challenge of undertaking a huge, challenging project anyway.
I still wanted to participate, but needed to start with a pattern. After realizing that I wasn't going to be able to wear pencil skirts in 95º+ weather and that my go-to dress when it's really, really hot is my loose-fitting cotton Tracy Reese sundress I decided to concentrate on styles like that.
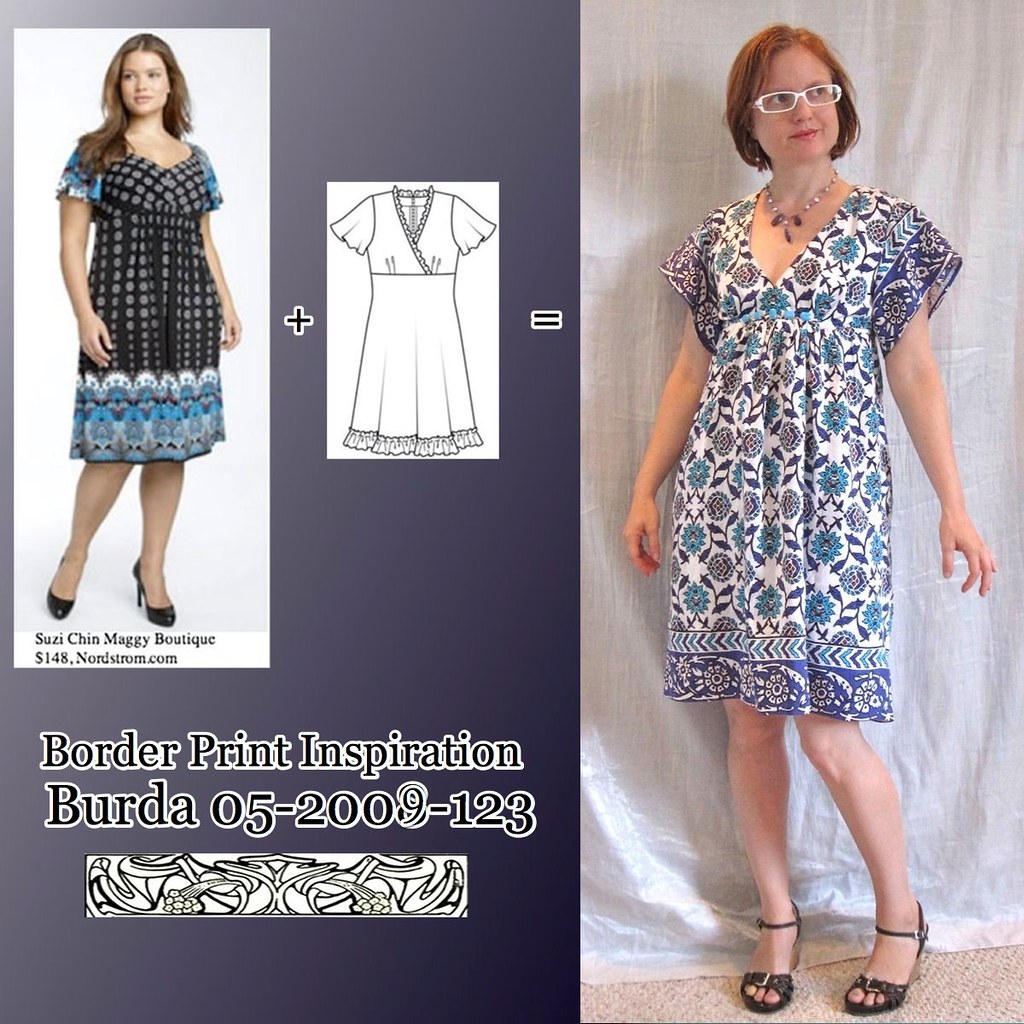
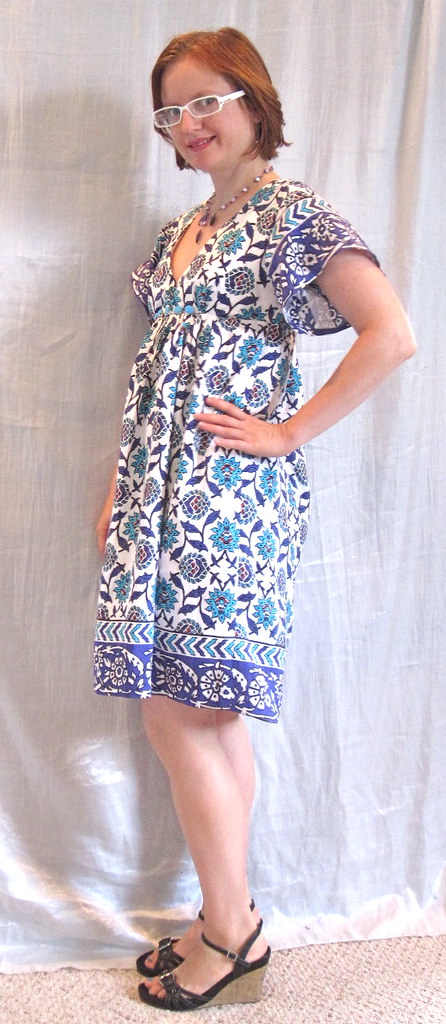
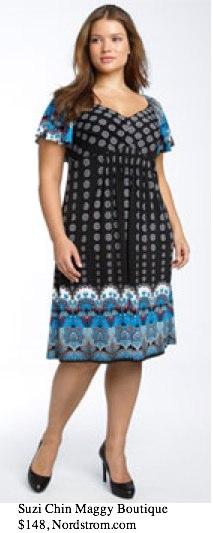 The fabric was a birthday gift from Karen two years ago. It's a really soft rayon in all my favorite colors. I have several border print pieces in my stash and in doing research on how RTW uses border prints I ran across this Suzi Chin Maggy Boutique border print dress. I really liked the way the border was used at the sleeves as well as the hem, and it just looked like a cool, comfortable dress.
The original dress is just a V neck, but I thought it would be a little nicer to do a surplice neckline (and honestly, they're easier than a V neck for me; I really, really hate clipping to within a thread of the V point because it makes me too nervous). Burda 05-2009-123 had the perfect upper bodice and a modifiable flutter sleeve.
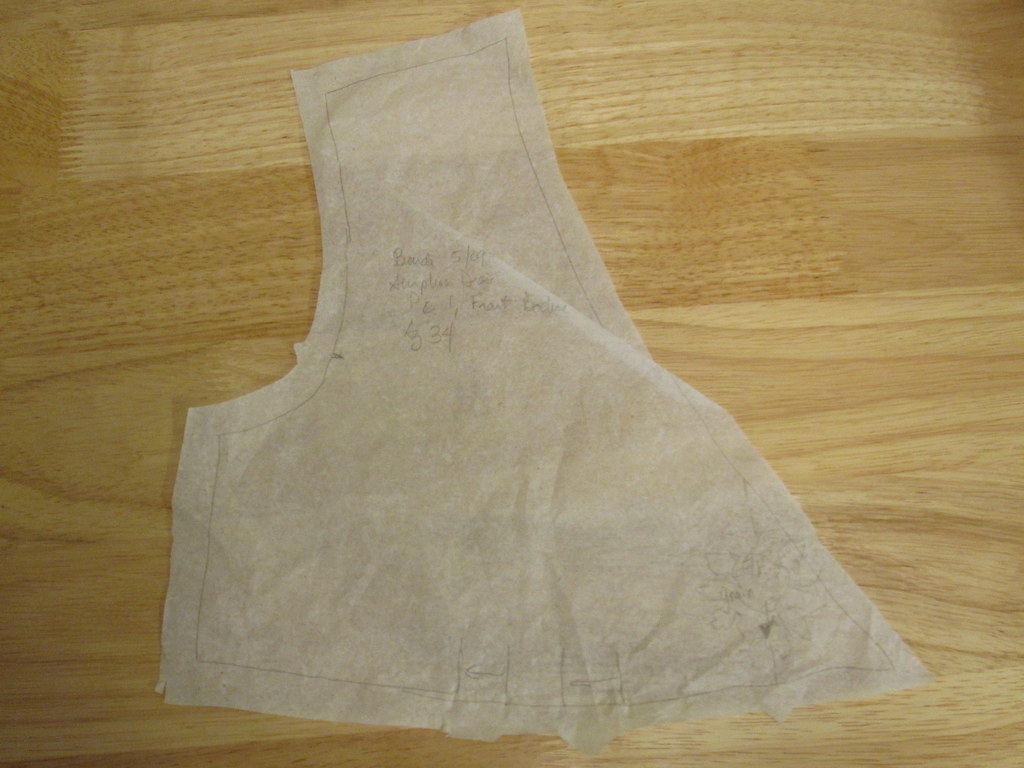 I started by altering the pattern. My standard small bust adjustment for a crossover or wrap neckline is to shorten the diagonal crossover edge. I folded out my usual amount of length. Unfortunately, this turned out to still be a little gapey and I should have used more. In the end, I had to hand-stitch the overlapping parts of the right and left neckline together which I hate doing--it is admitting defeat. (More on the neckline below). I wanted to make a real effort with this project to match the print, and if you click on the bodice you can see that I traced out the flower motif so I'd get it in the same place on both sides (somebody made a Hawaiian type blouse and shared this trick, but I cannot remember who). For me, it turned out to be easier and more precise to cut out the pieces single layer, laying the first cut piece upside down on the fabric and lining up the motifs that way. Single layer, people. This is me making an effort.
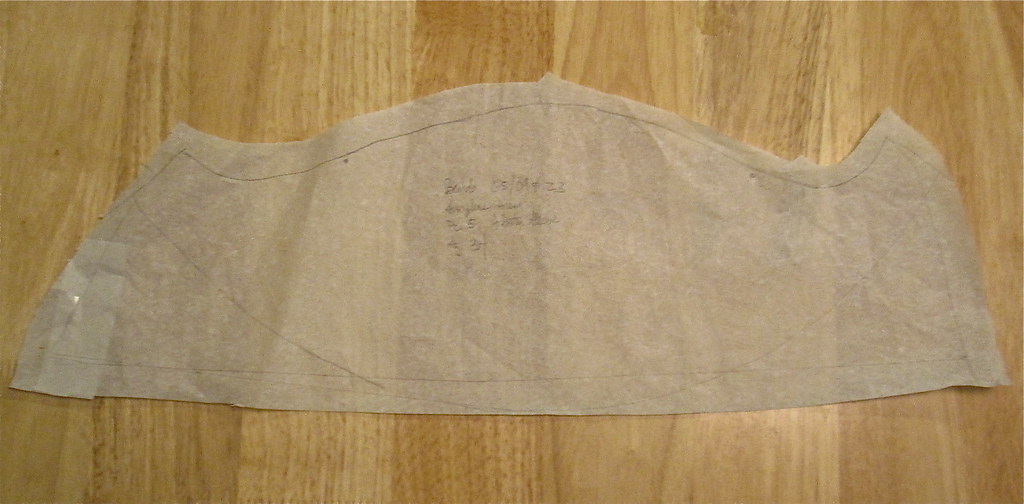 For the sleeve, I needed a flat hem. If you click on the sleeve pattern you can see my tracing line of the original sleeve. I pretty much just extended the length out diagonally so it would have fullness at the hem and drew an almost flat lower edge. The resulting sleeve has a lot of volume and kind of a kimono style vibe. Honestly, I didn't know what to expect as far as how the sleeve would end up looking, but I like it, although the arrows go in opposite directions because the sleeves are mirror images, which I didn't think about. I used this sleeve as drafted for my silk wrap blouse and it is a perfect flutter sleeve.
 Burda has you essentially underline the bodice of this dress, and finish the neckline with a facing. That makes sense for the dress as drafted because it is meant to be made of a chiffon. For my opaque fabric, I sewed the shoulder seams of bodice and lining, and then finished the neckline by sewing fashion and lining fabrics right sides together. I interfaced the edge of the fashion fabric to help it keep its shape. I turned, pressed, understitched, and after the neckline treated the lining as an underlining, catching it in the side seam and folding it into the pleats and darts. You might be able to see that I took a hand stitch along the right side of the neckline to try to ease it a bit--despite the interfacing it really stretched out and was gaping.
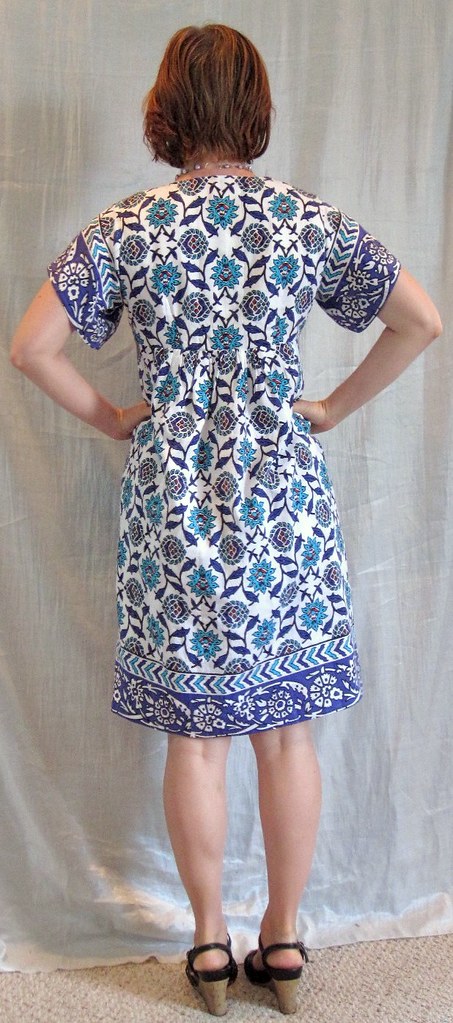
Both skirt and lining were cut 60 inches wide so there would be a lot of ease and room for whatever breeze might stir up to alleviate the heat. To line the skirt, I sandwiched the bodice between the fashion skirt and lining skirt. The fashion fabric was gathered, with the gathering concentrated at center front and center back as in the inspiration piece. I pleated the skirt lining as per usual in order to reduce bulk. The downside of a border print is that you have to know exactly how long you want the skirt before you cut. I think this could be a half inch shorter, but it's definitely not worth taking the whole thing apart.
I was able to use a short zipper at the side seam because of the width of my skirt. However, the dress is a little hard to get on and off because the bodice is fairly close fitting. I would recommend keeping the zipper in the back as drafted.
I finished the sleeves and hem with a machine blind hem. I really should improve my blind hem skills as I always take too large a bite of the outer fabric. I lined this with an Ikea Knoppa sheet. The sheets are a batiste-weight cotton-poly blend with a coarse weave that breathe well and hold their shape and are $1.99. I keep a stash of them in the sewing room at all times. For this project I was able to use the finished sheet edge as the skirt lining hem. Score!
 When it was finished, it felt like there was something missing where the bodice and the skirt meet. This is a very high empire line, way too high to wear a belt as would be my normal preference. I remembered that I had bought some turquoise (plastic) sew-on jewels in Hong Kong with AllisonC. The color is not an exact match but I felt that it added what I needed to that area to give it a little oomph.
 After wearing this all day yesterday, I admitted that the neckline is just too low. When standing it only just covers my bra. When sitting at my desk, it gapes open. I really didn't want to put in a modesty panel because something about this dress already feels like a Chico's Kind of Day (the high empire and skirt volume, maybe?) and I feel like the modesty panel nudges it deeper into Golden Girls territory (not that I don't love the Golden Girls). Oh well. This is probably me being insane and I will forget how much I hate the modesty panel next time I wear it.
 Quibbles aside, I really like this dress. The final result is more "inspiration" than "knockoff," but I prefer my changes to the original details. It is comfortable in the heat and I'm glad I finally got the chance to make up this birthday gift fabric. Thank you, Karen! Two years isn't *too* bad, right? Between this and my giraffe print cowl top I feel like I am stashbusting all over the place.
 All photos are here and the pattern review is here.
.jpg)


.jpg)


34 comments:
This dress is so darling. You did an amazing job.
Trudy
www.sewingwithtrudy.blogspot.com
We all need different kinds of dresses for different reasons. Your dress looks cute. I love the fabric and that you added the sew on jewels. TheY totally make it.
I like your dress even better than the one you "knocked off." Well done you!
What a pretty dress! That pattern would look nice as a maxidress, too. I know what you mean about starting to do a knockoff, and ending up with an "inspired by". I do that all the time.
This is a lovely dress on you and I like how you added the jewels to the neckline...it gave it a nice touch! What's with the Chicos bashing lately ~ LOL! They make some nice things!
What a pretty dress! These are my favorite colors and I especially like the jewels. I like it better than the inspiration dress
Not only does your dress look awesome on you, it looks very cool and comfortable for summer, too. Great job!
Beautiful dress. It's so your style and the colors and print suits you very well!
You look so fiiiiiierce and fun in this stunning dress! Beautiful interpretation of your inspiration dress!
This fabric is beautiful and looks fabulous on you. Great job translating the RTW design to your own. A perfect summer dress!
ooh, very nice! the beads are a really cool touch :)
I'm with Claudine; I like yours better than the original!
The surplus neckline is *much* nicer than the V-neck of the original!
I am jealous of this dress. It would be perfect to wear today.
I sooooo love this dress!!! You look great in it and the print is amazing. You've got to make more!!! This style suits you well:)
Lovely dress
This is lovely. I never know what to do with border prints. I agree about the jewels; they give just enough interest. I really like it.
I love how your inspired dress turned out. You did a beautiful job and it looks great on you. I also like the added extra touch with the jewels in the front.
By the way, check with your Joanns again. Buttericks are on sale again the 18th-24th this month.
Really, really pretty!
I love it! It looks fabulous in your border print. Nice job! Thanks for sharing all the sewing details.
Two years definitely isn't too long - of course now that I look at it made up, I'm thinking I should have kept it! Beautiful dress, I love your inspiration to use the jewels to finish it off.
This looks so cool and summery, I prefer it to the original style too.
A really gorgeous dress. That print looks like Turkish ceramics, it's perfect, and your use of borders is just great. The only thing I wonder about is lining a summer dress, especially with something with polyester content. Try not lining something once, you'll be amazed at how much more comfortable it is :-).
I love this dress . . . the style suits the fabric so very well (and I ADORE the border print). By the way, I stopped by G Street 7 Corners last night . . . they didn't have your lovely silk jersey border print, but I found a couple of pieces on the $2.98 table that came home with me. I think that's the first time I've ever bought something off that table!
Excellent job! I need to branch out a bit and use border prints!
On blindhemming without taking too much of the dress fabric - make sure you are using the blindhem foot and place the inner edge exactly against the fold, then use the needle position function to determine exactly how much of the garment to stitch. Thicker fabrics require more, thinner fabrics less - even down to a single thread or two. Lovely dress, btw.
Ooh, that's now a new favorite of mine. Great job!
The dress is really cute -- it looks like a very "Slapdash Sewist" dress!! I know what you mean about this weather, it has been H-O-T!!!!!!! My sons have even complained about the heat. When boys who LOVE being outside complain that it is too hot to play outside, you know it is HOT!!
Very nice dress. I don't see the golden girls in it, though, you look very young and hip ;-)
I love that dress and I agree the buttons really add to the "look." I disagree about the "modesty panel" being prim and old looking- when I saw it in the close-up photo I thought it looked like a designer element you had added to the dress.
Linda C
Beautiful, love your version of this dress. The fabric you've chosen and the border print is perfect.
I love your pattern cover model pose in the first picture in your post! You look so cute! You could moonlight as a pattern-cover girl! Augh, exclamation overload!
It's simply stunning. When you wear it, do you stop traffic?
It looks much more expensive than your Nordstrom's snoop find :)
Do you mind if I say the back hem dips at CB, could it be that you need more of a swayback adjustment?
Post a Comment