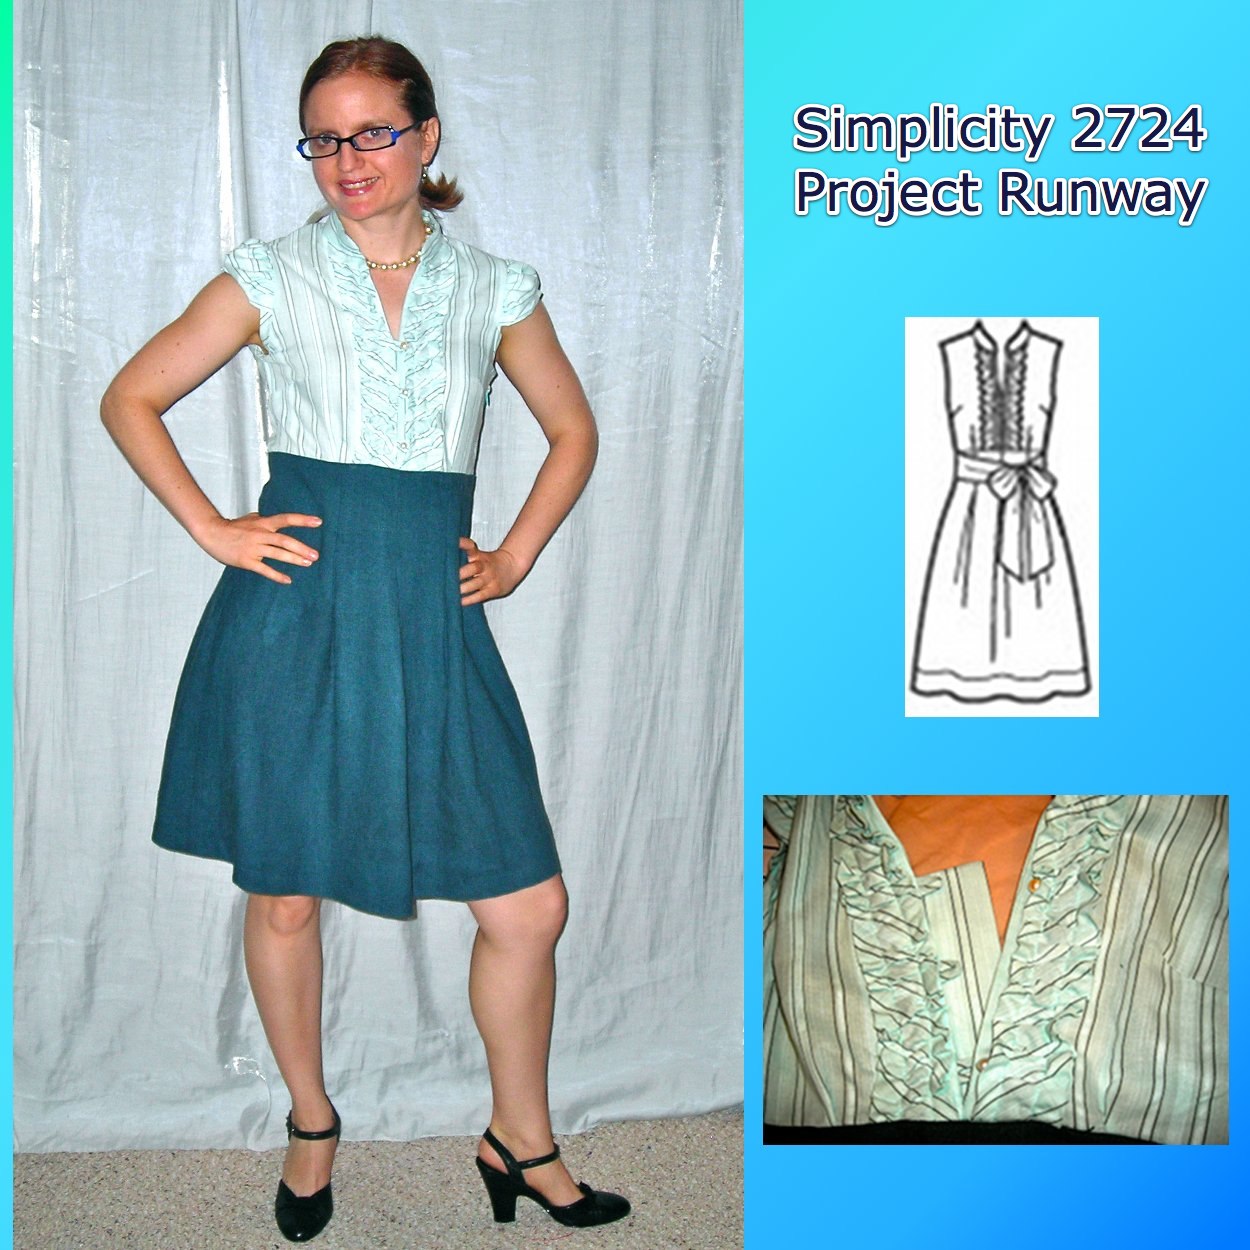
I loved Simplicity 2724 as soon as it came out, and the cute versions that have been made since then (such as Story of E and Danville Girl). Meanwhile, back when I received the amazing Carol Collection I fell in love with these two fabrics together. I'm not really sure why they were so adamant in being used together; while the blouse fabric is the same color family as the skirt obviously they are many shades apart. But I really wanted them together in some sort of shirtdress arrangement. When I thought of cutting the ruffles out of the striped fabric on the bias, I had to use this pattern.
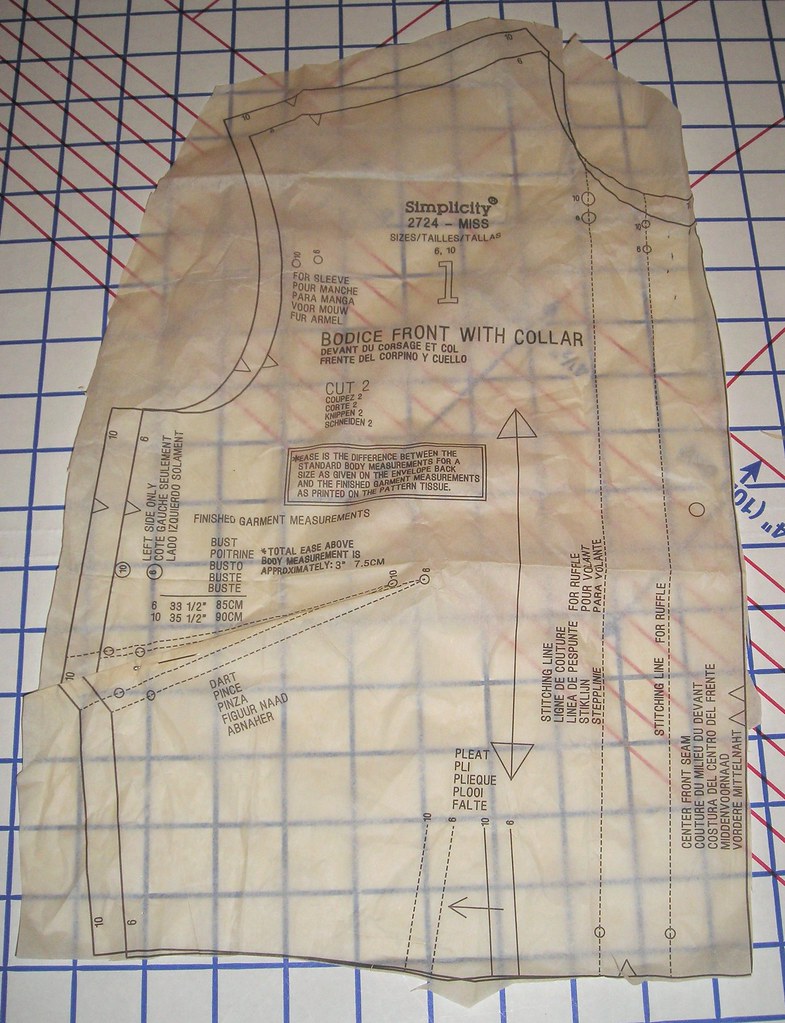 The first thing, of course, was to alter for a small bust. I narrowed the bust dart, but decided to leave the lower pleat alone. It is not very wide and seemed suited to my bust size. After sewing up the dress, I had to shorten the bust dart by about an inch and a half, as it was overshooting my bust. I don't do many horizontal bust darts (or many bust darts period!) so I don't know if that should be part of my standard SBA or is a quirk of this particular pattern.
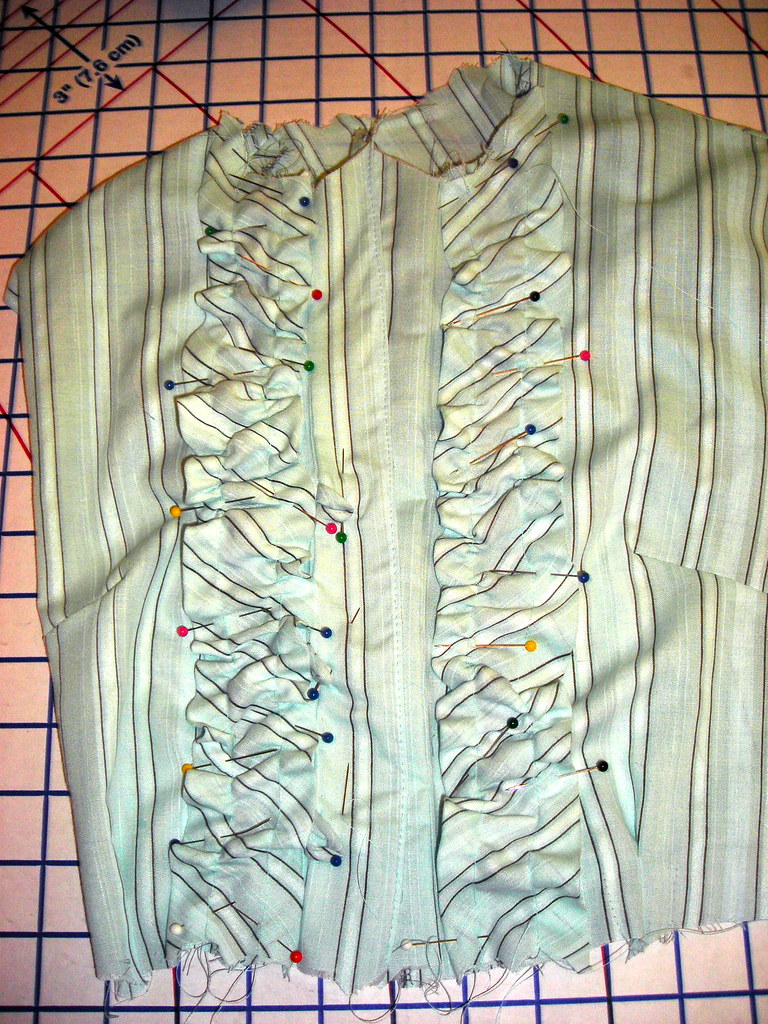 Now it was on to construction. The instructions for the ruffles are needlessly complicated, though they will spare you a visible line of stitching (I think). You are supposed to first press in your fold lines. Then sew one gathering stitch through both the ruffle and the turned under allowance, and one gather stitch just through the ruffle. You're the supposed to sew the single layered gathering long edge of the ruffle down right sides together, then turn it right side up and topstitch the other long edge (as far as I can tell). With a lot of gathering plus a bias cut ruffle this was just not going to work for me. I just ran the rows of gathering stitches through both thicknesses on both long edges of the ruffle and topstitched both sides in place. I don't feel like I lost anything by having two rows of stitching, though I it does change the look a bit from the way it was drafted (which Story of E and Danville Girl faithfully followed).
When I read through the directions a while back, I was very confused. I had in my head that this was a shirtdress, and it was having you do all this finishing at the neckline and I was wondering how in the world you were going to put in the button loops after you'd already applied the facing.
When I sat down to actually make the dress, I realized that it wasn't designed as a shirtdress, it only has the look of it. The bodice center front is sewn to the neckline, and the facing is short and goes only to the center front seam line. I had my heart set on this being a shirtdress, so I lengthened the facing to extend all the way to the bottom of the blouse portion and sewed button loops to the right side and sandwiched them between the facing and the fashion fabric.
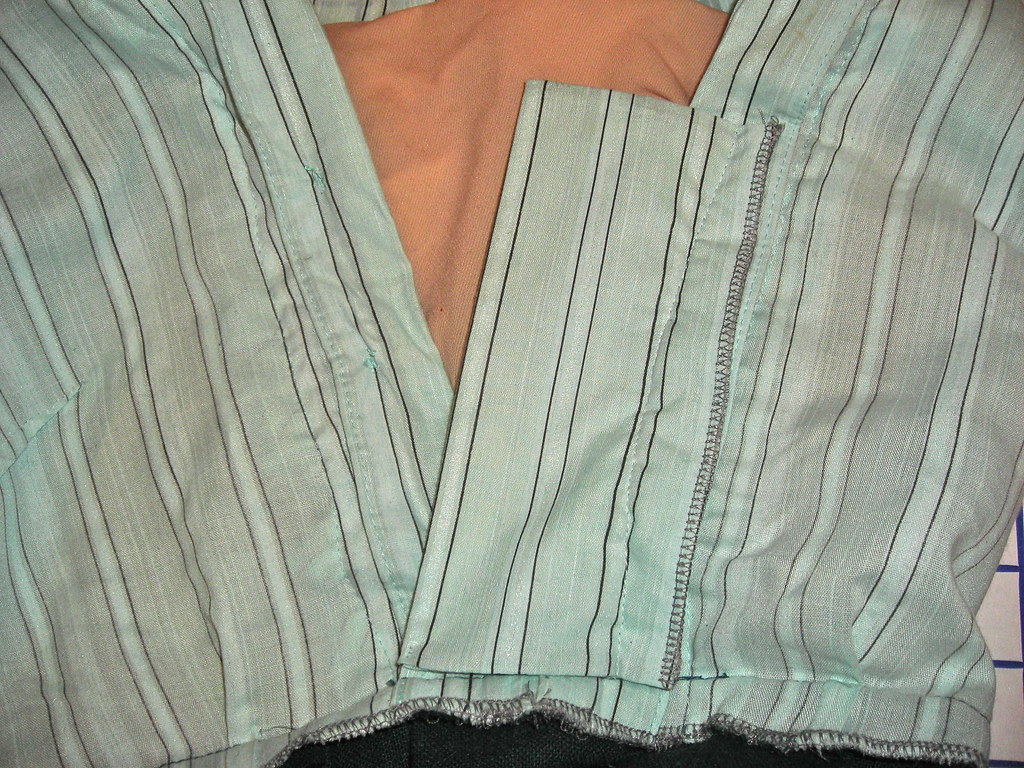 After I completed the dress I saw that I needed an underlap as my skin was showing between the buttons. Very tacky! So I just cut a rectangle of fabric, sewed the top edges, turned, and serged the long edge. LOVE my serger for this. If I didn't have it, I would have to have turned in that long edge, which would have created bulk. However, serging raw edges is a very RTW technique so it doesn't look homemade (I think) this way. I topstiched it in place by sewing over the inner row of stitching on the ruffle, so there is no visible stitching line. Had I thought about it before applying the ruffle, I could have hidden the stitching line underneath.
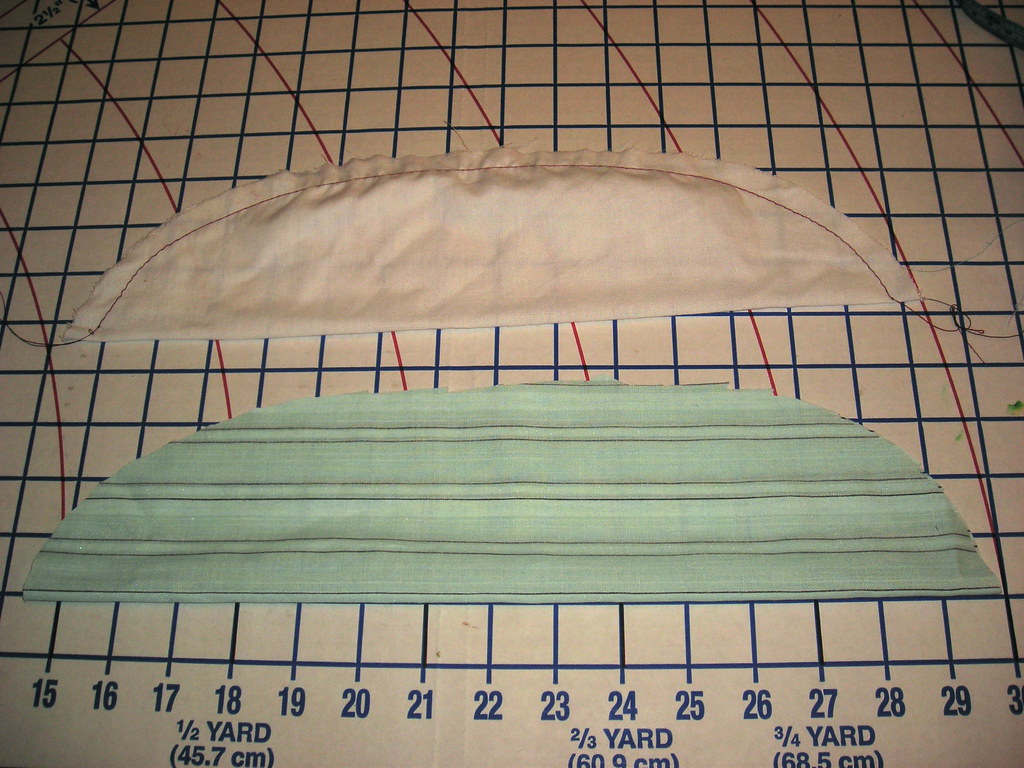 I intended to make this sleevless, but when I was getting close to finishing I thought sleeves would make it a little more professional for the office. Although the pattern offers several options for sleeves, they were not enough for me! I have been curious recently about what kind of sleeve a half-ellipse would make. Using an Ikea sheet as muslin, I cut out the shape on the fold (so it's actually a full ellipse, with the fold serving as the sleeve hem). I pinned it in place and found it cute, but trying it on I saw that even a sleeve like this benefits from more fullness in front and less in back. If you click on the photo to enlarge, you see that while the muslin is symmetrical, the actual sleeve is narrower at the back and fuller at the front.
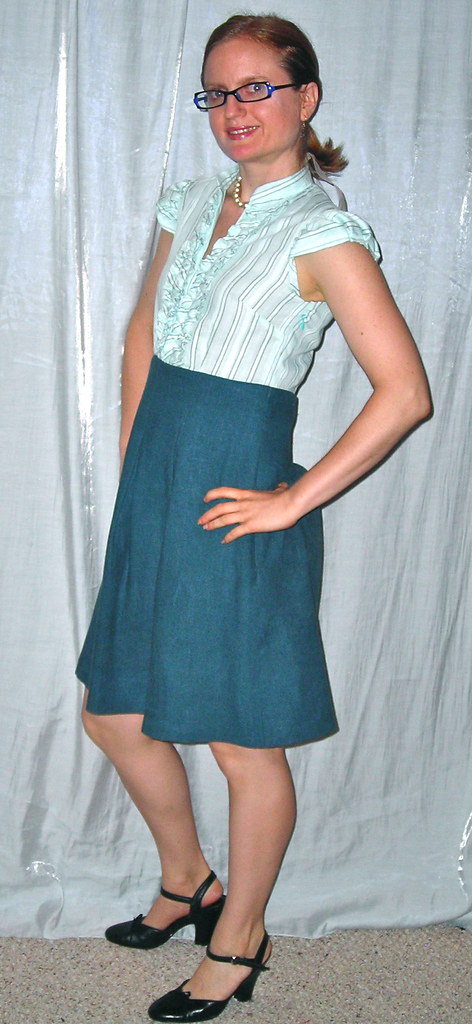 When I installed the final sleeve, it was sticking straight out a little too much for my taste, so I folded out and sewed down some inverted pleats to tame the futuristic look. I finished the armhole edges by running bias tape all the way around the armscye.
 Making this pattern, I realized that the Big 4 armscye does not fit me at all. The past several projects I've made it is just SO TIGHT and I have to lower by about half and inch and scoop out from the front and back. What I need to do is start narrowing the shoulders (which I think would be the same thing as scooping out from the front and back) and lowering the armscye as a matter of course. Cidell keeps getting on my case to make a sloper, and after this I definitely see the value in having a reliable armscye that I can slap on top of any project and trace out.
This was the most time consuming of my Four Projects in Four Days. I wasn't sure I was going to make it and I probably sewed a little later than I should have (I have instituted a strict "pencils down" rule at midnight), but I got it done and was ready to do the next project the next day!
I am really loving the result. It's cute, but because it has traditional blouse shaping at the top is completely appropriate for the office. I feel like it's a less formal, more everyday wearable version of the BWOF 11-2007-106 shirtdress, which I wear for meetings with opposing counsel and visiting dignitaries.
All photos are here and the review is here.


.jpg)


27 comments:
Love this. Can't wait to make it now... The colors look great on you!
Really great dress! I have found cap sleeves don't work for me but would really consider doing this with an alternate sleeve style. The striped fabric at the top is a real inspiration for a combo in several designs I'm thinking of sewing. BTW, I love your slapdash style, because it shows sewists of all levels a garment can be modified to personal tastes (sometimes at the last moment) and still look professional! Always looking forward to your posts!
I love the vintage feel. So cute on you. I read through the directions and put the pattern down...maybe I will revisit!~
Looks sensational. Love it.
I love how you chose a different fabric for the skirt part and top.
www.sewingwithtrudy.blogspot.com
Very cute! Love the fabric combination. And the ruffles are adorable.
I love those ruffles on you, and to cut them on bias? Brilliant. The sleeve really makes this dress, IMHO.
Love it! The fabrics are wonderful together and the sleeves are wonderful.
Good proportion for you; it's very 'lengthening'. Slimming too, I know that you are self conscious about your stomach and this really camouflages it, though if you ask me, its a kind of non existent problem. You look great in this.
You rock this look! Those shoes are awesome... wish it comes in my size. Thanks for the underlap tip!
This dress is super cute. I love the combination of fabrics.
Love it! I would never have given this dress pattern a second look, if it weren't for your excellent version. Thanks for the inspiration.
P.S. I can see why those fabrics insisted on co-habitating - they are very cute together!
Wow, that dress looks great! Love it with the cap sleeves.
I see why the fabrics wanted to be together, it's a great combination. I have been waivering about this dress for a while, but I think I will buy it. The idea of using two fabrics really adds something extra to the dress. It also extends the usefulness of a pattern, so it doesn't look like you have too many of the same dress.
Very cute dress. Your redesign worked beautifully.
Those fabrics work beautifully together and I love the ruffle detail!
Love it! The two fabrics work very nicely together, particularly with this pattern. I like the details on the bodice with the stripe then the plain skirt. Nice job.
I really, really like this dress, the fabric combo is perfect!
I love your dress! I think the two fabrics look great. I am glad to see you tried something different with the ruffles. As you put it, the pattern instructions for this "was needlessly complicated". If I make the ruffled top again, I want to do it differently from their instructions. I like the sleeve you added as well.
A question, this 4 projects in 4 days, did that include fitting and cutting the pattern out on the day or did you do that work ahead of time?
Very cute dress and the two fabrics are great together in this design.
Those fabrics were definitely made for each other. I do love this pattern and all the variations too - your version looks great, the colours really suit you.
What a great dress! Now I have to keep reminding myself we're shaped different and this will not look near as great on me as it does on you.
Loving the color choices too.
I second Nancy K's question - did you do it ALL in four days? Amazing, either way. The dress is so great! Love the colors, the stripes, the ruffles, the slight secretarial vibe... all of it!
Cute dress! the sleeves just make it perfect. Those two fabrics were meant for each other
Great looking dress, Trena. I love her interpretation of this dress.
How funny - I saw this post while having this pattern and fabrics I'd picked out for it on my sewing table, and the muslin for it cut out! And I'm doing the exact same version as you, minus the cap sleeves! Lol
I've gone through the muslin (didn't bother doing a muslin trial for the ruffles), and now have the bodice all sewn up. When I first read through the directions for the ruffles I kinda went: Huh? Buh? But decided to try it out. It's really not as fussy as it reads before doing. I was unsure how I would like the look of folded-over ruffles, but I think it's actually quite a nifty way to do them, and they look great!
I did decide I would fully line the bodice instead of use facings, so it's totally changed the way I'm constructing it - I'm doing the bodice lining like an all-in-one facing, sewing up the centre at the end.
I love this pattern too and can see myself making a whole bunch of variations from it! I don't usually buy Simplicity (or Butterick, or McCalls) anymore, but this one really caught my eye, and was only $1.99!
Thanks so much for showing your version, it's totally adoreable! The bias ruffles are a stroke of genius!
Post a Comment