Thursday, October 23, 2008

Turn That Sweater Upside Down

Someone on PR posted a link to this Craftster tutorial by MrsBowles for making something wearable out of a traditional Stay Puft Marshmallow Man shaped sweater that balloons over the torso and arms and snugs at the wrists and hips with ribbing. My interest was immediately piqued, and I went to the Goodwill the next time I could use my neighbor's car (we have a car-sharing arrangement where he parks in my parking space and I get to use his car once a month).

I guess everyone else has figured out that this style is not flattering, because there were virtually none of them at the Goodwill! I actually don't like the Goodwills in the DC area much because they're too nice. This sounds ridiculous, but the point of Goodwill is the thrill of the hunt. The ones here don't have much on the racks, and everything they have out is pretty current and good quality. Whither the funky vintage? Why no crazy bedclothes that can be made into fun skirts? I find the prices still reasonable and I'm happy to pay them, but others feel that $5 is too much for a sweater. I don't know of any crappier thrift stores in the area, though there must be some.

Anyway, I found a really nice grey lambswool Gap sweater that, upon getting home, I realized was great as is and just too nice to cut up. And this.

Before

I hate turtlenecks. My collarbones are one of my nicer features and I like to show them off; plus, I feel all choke-y in turtlenecks. It has the requisite balloon-y shape and ribbing at the cuffs and hip. But it was great raw material--I love the colors, and it's 100% wool and had been well cared for.

It's best to start with a sweater at least two sizes too large for you. Even bigger is even better, because then you can felt it before starting the project and you won't have to worry about raveling. This was only about a half size too large and was almost too short as is, so I knew I'd need to adapt MrsBowles' tutorial by adding in a midriff band to give me more length. I went through my stash and the best match was some grey wool jersey. It's just luck that this was wool; any jersey will work, though it needs to be a medium or heavy weight to stand up to the sweater.
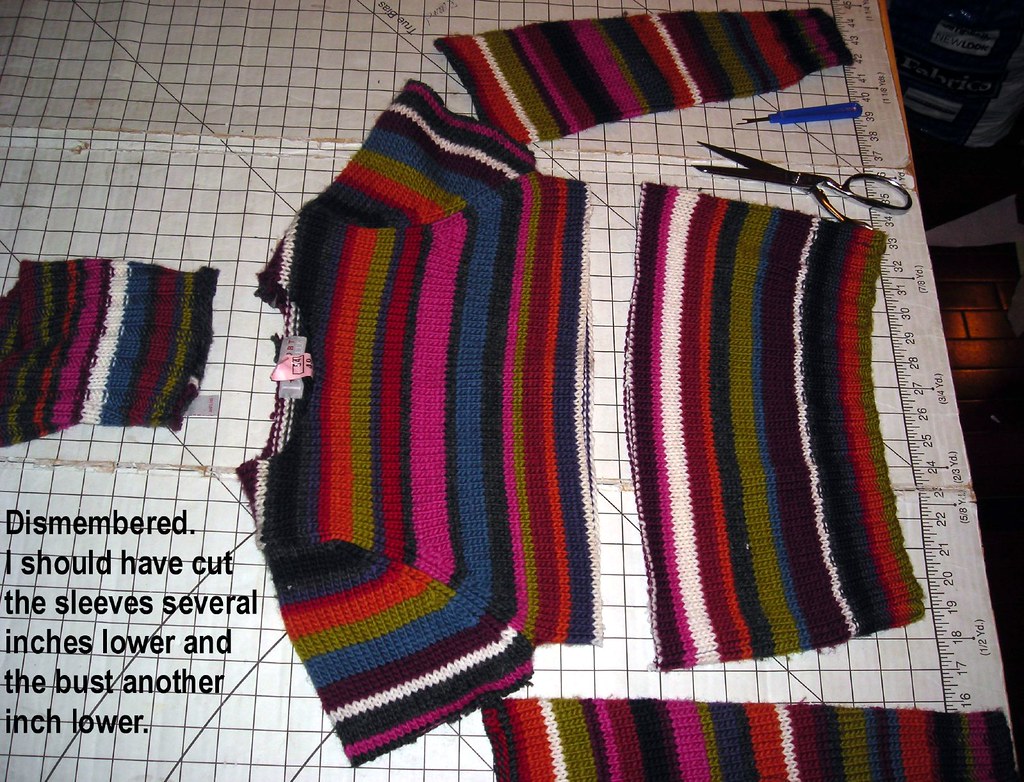
DismemberedThe basic premise of this refashion is to make an empire line, bell sleeved sweater by turning the lower halves of the sweater and sleeves upside down. Simple yet brilliant. Doing this on a striped sweater made it super easy to cut apart, I just had to choose a stripe and follow it. You'll want to cut about three inches under your bustline (I cut about an inch too high), and two to three inches above the elbow (I cut about 3 inches to high). I immediately finished all the edges with the serger so there would still be some sweater left to sew back together! I'm still working on optimizing the differential feed to allow stretch but not actually *be* stretched.

Once your edges are secured, it's time to make the V front. First, find and cut up the center, then cut your V opening.
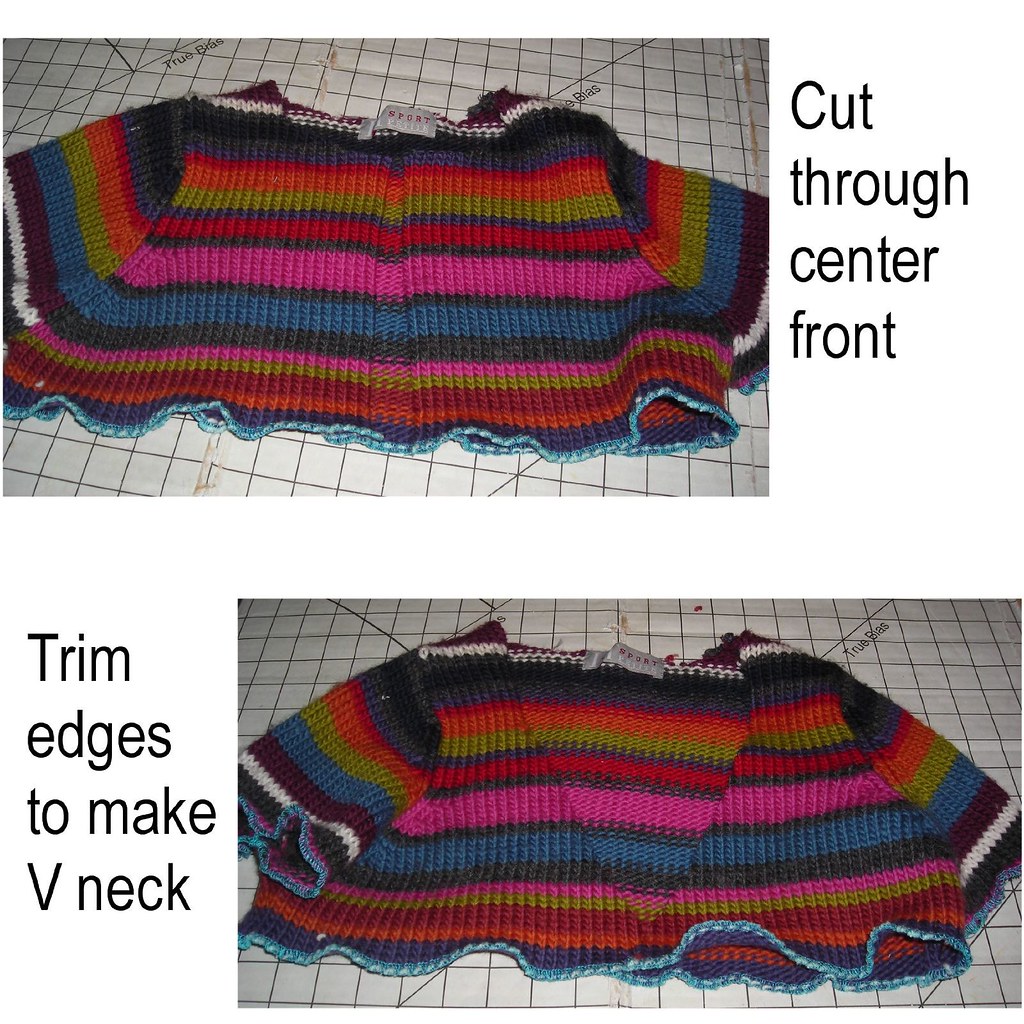
Making the V Neck

Again, secure your edges with the serger (or a zigzag stitch). If your sweater is a loose gauge as mine was, it might be smart to stabilize your neckline with twill tape or grosgrain ribbon or something. I didn't, so after it was done I took some yarn and wove it into the neckline just outside the ruffle, tightened the neckline a little, and tied off the yarn.

Now it's time to make the ruffle. My ruffle was three inches wide and about twice as long as my V neck opening. This might have been a little too much ruffle. I finished the edges with a contrasting thread color just for fun (and also because I didn't have a matching thread color), and cheated on the gathering by using only a single basting stich.
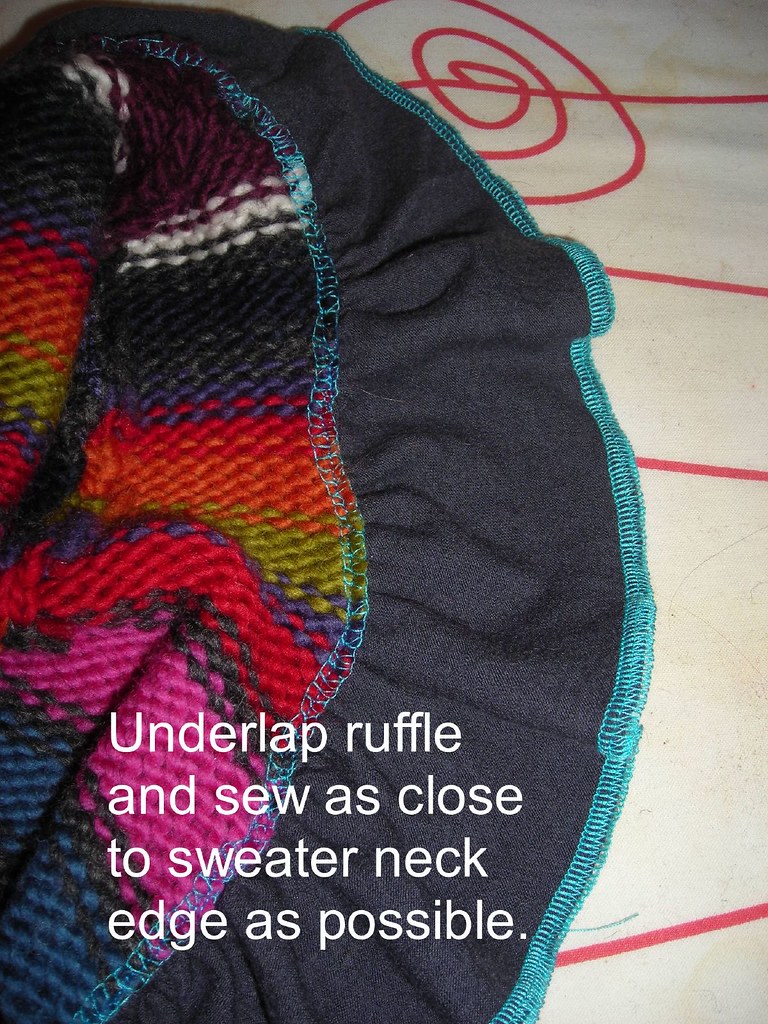
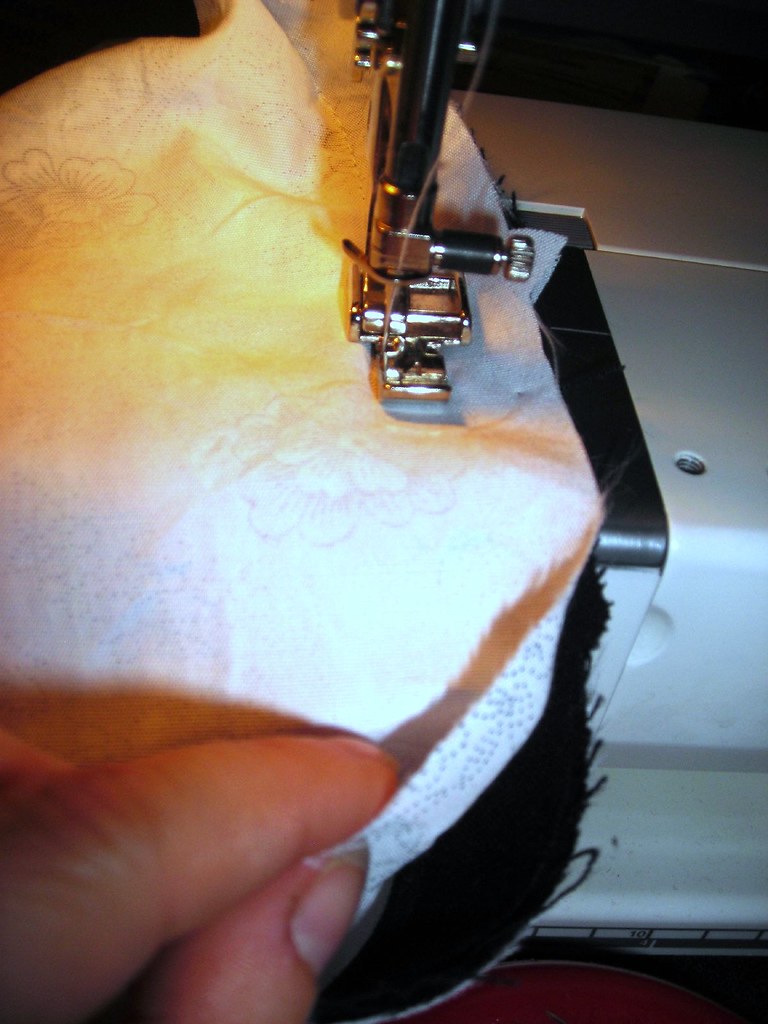
RuffleTo sew the ruffle to the neckline, underlap the ruffle. You're sewing right side to right side, but you're not lining up the edges and sewing as with a normal seam. You're just overlapping the edges kind of like you were shuffling cards. Sew with the sweater side up, as close as possible to the edge of the sweater. Here's what the underside looks like.

Now cut out your midriff band. Mine was five inches wide (including the half inch seam allowances) because I have a ridiculously long torso for being so short and I wanted the sweater to comfortably reach the top of my hips so there'd be no danger of showing my belly when I lift my arms. Sew the side seam so that it fits comfortably but not too tight (2 inches of ease or so). Put on the top part of your sweater and overlap the V neck edges so that the fit is good, pin and baste. Not that I ever baste. Then pin your midriff band and sew. Here's the overlapping V:
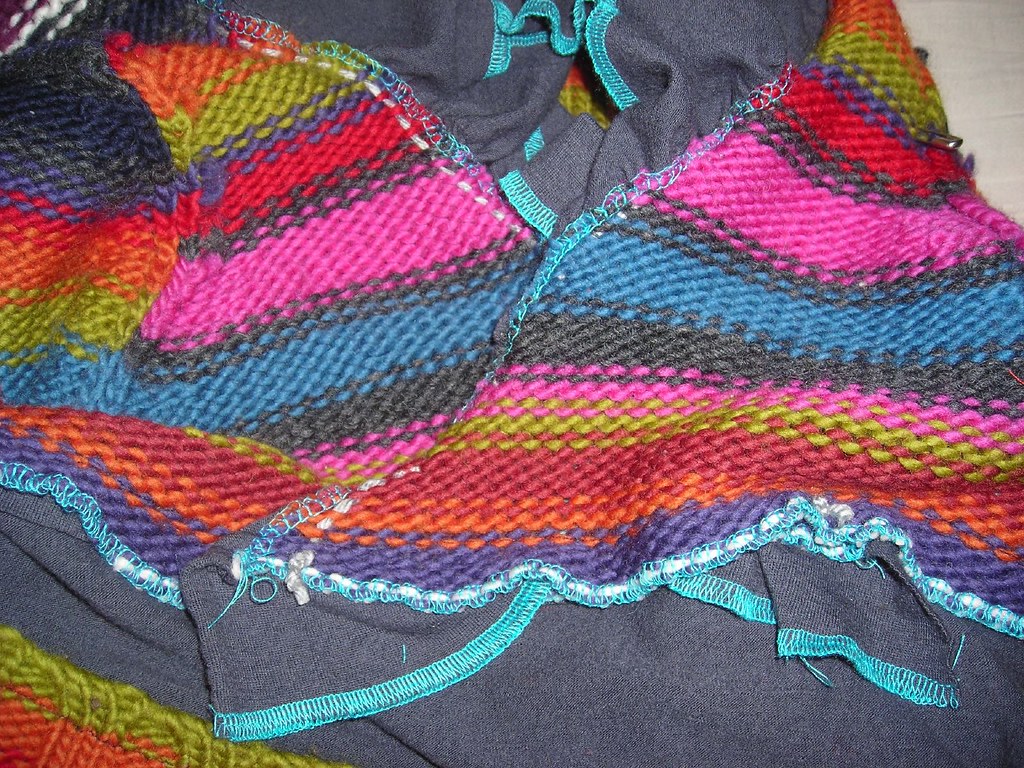
Overlap V Neck for fit

I found it best to sew with the sweater on the bottom so the feed dogs would help me ease it in. A loose weave sweater like this requires a lot of easing.

Now try on your upside down lower half of the sweater and take in the sides if needed. I had to take in the ribbed edge about an inch and a half on each side, tapering to nothing at the bottom to give plenty of room for my hips. I did this seam with the serger, but probably should have used the sewing machine as the seam stretched like crazy and I have little points at the side. Once it fits, sew the lower half to the midriff band.

For the sleeves, it's basically the same thing. Gather the edge of the upper sleeve (hard to do! It ended up more like easing), sew to sleeve band (add plenty of ease in sleeve band--the bulky seams will make it much tighter than you think), turn lower cuff upside down and sew to other edge of sleeve band. This is where, again, it would have been better to have a bigger sweater, so the puff was more obvious.

And voila! It took me about 2 1/2 hours because I had to mess around with things a bit.
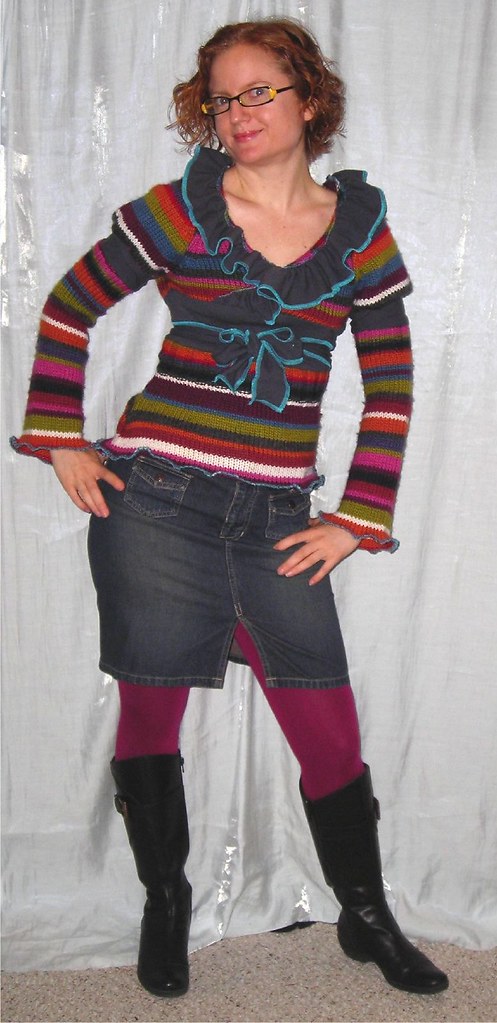
10-22-08

I felt like I needed to bring the turquoise overlocking into the rest of the sweater, so I made a little belt for the midriff, but actually I think it looks fine without the belt, which is how I wore it yesterday. All photos from this project are here.


I am now obsessed with sweater recon/sweater reconstruction/sweater refashion/whatever you'd like to call it. When I went to the Crafty Bastards craft fair in the summer there was one girl, The Devil Made Me Do It, who had done *amazing* clothes out of felted thrifted sweaters, but that kind of thing just doesn't come naturally to me so I have to use tutorials. Sad. I'm going to try to get Second Time Cool from the library, and I also searched online. My google searching didn't come up with a whole lot of ideas, but there were a few.

Sarah in NYC did an article for PR on refashioning sweaters last year; as a result I cut up the center of a sweater that was too small and crocheted the edges with embroidery floss to make a cute cardigan. Please note that single crochet is the extent of my crochet knowledge; other than this all I can do is sad and uneven scarves that curl up and even sadder and more uneven dischloths. You don't have to be an expert to do this.

There's a whole lot of turning sweaters into cardigans, such as this one from One Pearl Button and I love the little collar Erica Makes Stuff added. But I'm really not into cardigans.

I like this tunic from judethelost--check out the clever pocket she made of the ribbing cut off the sleeves! I can't quite master the wearing of the tunic, though. I don't know what kind of bottoms to wear with them. I feel like an oversized upper piece needs a fitted lower piece, but then I'll look like I'm in the 80s (and not the good kind of 80s).

Red Panty Crafts had a few cute ideas; I like the two piece cardigans at the bottom of the post.

There are several clever "Frankenknits" projects on Knitty by Kristi Porter; my favorite is the shibori felting technique, though I think it's best suited to scarves as demo-ed; I'd find it too cutesy for clothes. I also like her idea of turning a ribbed waist into a collar.

And of course Summerset has done a few refashions as well.

Anemone of FreePlayCraft cut up a very large sweater into an asymmetric cardigan and crocheted the edges, which suits me much better than a regular cardigan. Lee Meredith was also inspired by Anemone.

I'm looking more for clothes than accessories, but the photos on this Threadbanger tutorial are too adorable not to share.

There's a whole board on Craftster dedicated to reconstructing clothing; if you search "sweater" on that board you come up with some really creative projects people have shared.

================================

Can anyone think of a pink motorcycle jacket BWOF did recently? And can tell me how much yardage it calls for? Cidell is considering pricing leather in Egypt but I forgot to look last night and tonight will be insane packing for Germany (leave tomorrow!) and won't get a chance and by the time I'm back she'll be back.

Tuesday, October 21, 2008

Classic/Trendy

10-20-08 Front and Back Views

I was so tickled with my outfit yesterday that I had to share it. I am loving that argyle is in right now (I remember getting an argyle sweater vest as a birthday gift from my neighbors when I was 7 or 8 in the early 80s and it was a prized possession). I've had these tights for a couple of years, but have generally worn them with long boots so you only get a little peak, as it's a whole lot of argyle going on. But now that it's in style I could wear them full on.

Although this outfit is totally trendy right now, I've actually had most of the pieces for years. The belt is probably the oldest; I got it from WalMart 5 or 6 years ago. My mom gave me the sweater (cashmere!) for Christmas a couple years ago from Target. I made the skirt 2 or 3 years ago, Simplicity 5914; I love that pattern and have made three skirts of it so far (boucle version). The tights, as mentioned, are 2 or 3 years old--I got them from the H&M girls' department. The 13-14 year old size are around the same as the smallest adult size of tights. The shoes are the only new part, Fitzwell Willow from 6pm.com. They come in several sensational colors; I got gold and teal and am really tempted to go back for more. But add up all these pieces I've had for a while and it's totally au courant.

I love how you can put together classic pieces in a trendy way. My style, as you know, is "retro fantasy," not classic at all. I appreciate and admire a woman with timeless style, but I am not satisfied by elegance--I want pizzazz. Even the most respectable off-white cashmere cardigan is not safe in my hands. And I wouldn't want it any other way.

Monday, October 20, 2008

Making Piping

I have not seen a version of Butterick 4985 that I haven't loved, so I put it into my sewing queue. I plan to use it on some pinstripe silk dupioni I got from Paron at PR Weekend 2007, but since it's such a nice fabric I figured I'd make a wearable muslin first. I used the fabric I got at Fake Paron in NYC when I went there in March to see Xanadu (warning: site plays music), which is closing soon on Broadway I hear but will be touring. If it comes to your city you really should see it. It's hilarious. I saw Ricky from Season 4 of Project Runway in Fake Paron, which was my celebrity sighting of the trip.

Anyway, I wanted to emphasize the corset-like lines of the lower bodice, and I decided piping was just the thing.

I started by cutting strips of fabric two inches wide. For the vertical piping I just cut on the grain; for the piping around the neck I cut on the bias so I'd have better flow. I chose the width based on seam allowances of 5/8". If you use wider or narrower seam allowances, adjust accordingly. Remember that part of your width will be taken up with the piping.


Using your zipper foot so you can get snug against the cording, fold your piping strips in half and run cording down the fold. I used rattail braid I had handy. After the piping is made and cut for the seams, I sew over the top to keep the cording in place but leave the bottom loose so I can trim the cord at the hem.


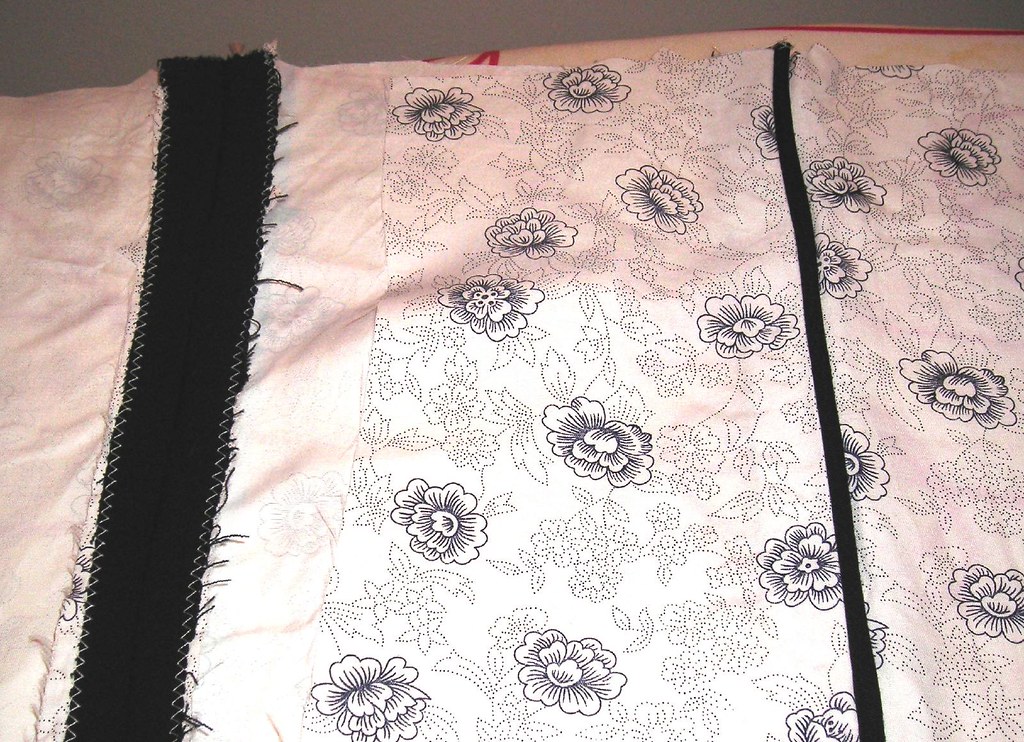
Again using the zipper foot, pin the piping into your seams and sew. As you can see, the two inch width on the piping strips ends up with perfect piping at a 5/8 inch seam allowance. Just line up the edges of the piping with the edge of the seam allowances and you're all set.


Finish your seams and press them open. Pressing didn't smush down my piping, though you do have to pick which side you want your cording to lie. You can see that I made this before I got my serger. I kind of want to go back through years of projects and serge all my zigzagged edges.


When hemming, you want to cut the cord slightly above the hemline so you don't have too much bulk, which can make your hem all bulgy. Press the hem under and then pull out your cording. Mine was easy to trim because I could see the fold that had been pressed into the cord and trimmed a little above the fold. You can also measure to double check. When you sew your hem, break the stitching at the piping so that you don't smush the piping and/or have glaringly unmatching thread.

The piping on this came out really cute, though I need to open up the right side of the collar and trim the neck piping even more, as it sticks out a little. All photos of this project are here and the review is here.

Hilariously Awesome Shoes

Wednesday, October 15, 2008

In with the Old, In with the New

So several weeks ago (um, about seven) I made mention of my birthday gift to myself but never followed up.

Well, here it is!

Treadle Head

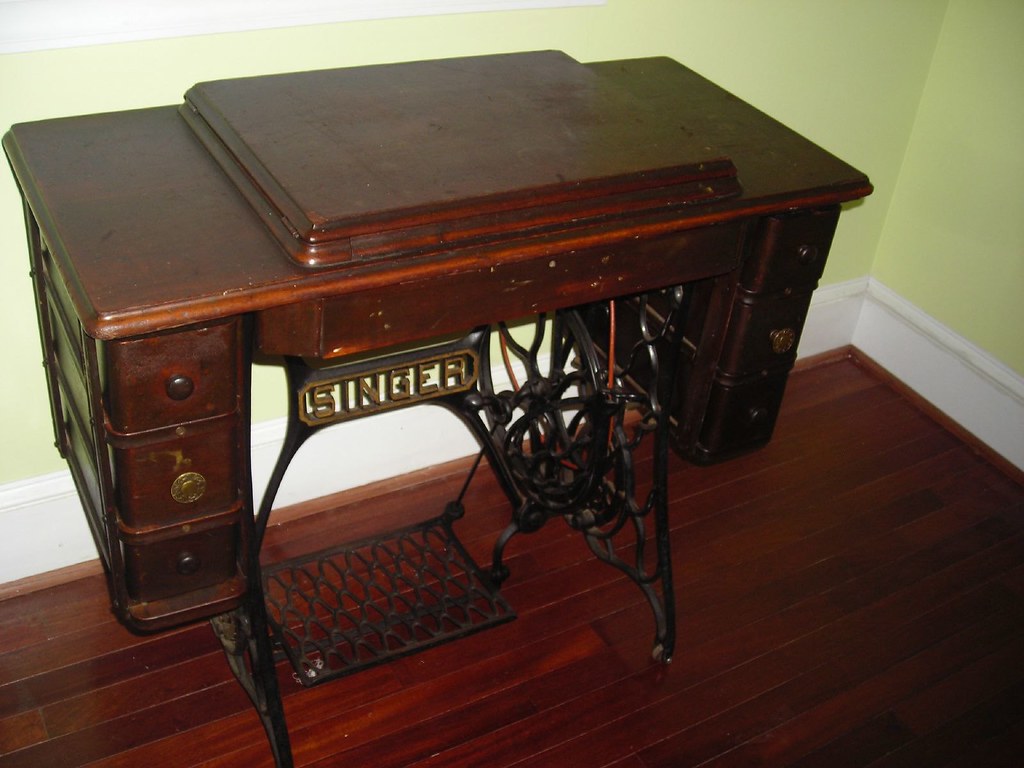
I randomly search Craigslist on occasion looking for a cheap serger. Assuming that most such items are listed by the children of mothers who sewed and might not know there's a difference between a sewing machine and a serger, I always search on both terms. Well, the week before my birthday I did a search and came up with this beauty.

Turning 34 was difficult because I'm basically in the last good year of my fertility and have not had a real boyfriend in more than six years, much less am anywhere near finding a partner to raise children with. I have known for many years that having children is something I will have to do by myself if it's what I want, but knowing doesn't make it easier to do. This is the year I'm supposed to make the decision, and I still don't feel prepared. So, it's a hard year.

When I posted the article on my birthday dress post about 34 being the most expensive year of your life, Vicki said I should *make* it the most expensive year by splurging on myself. Excessive shoe purchases notwithstanding, I am not much of a splurger, but this sounded like excellent advice.

When I was growing up, some family friends down the street had a treadle sewing machine in the front hallway. I LOVED it and always wanted to play with it, but knew I wouldn't be allowed to. Now I have a treadle machine all to myself that I can play with whenever I want! It's gorgeous. I assume it's from the 20s as it has the Sphinx decal from the Art Deco craze for Orientalism. It is in working order (though unfortunately the tension and stitch length knobs are completely immobile; if anyone has any ideas for loosening them I'd appreciate it, because the tension is set tight and the stitches tiny) and absolutely gorgeous. It's not in mint condition, which is infinitely preferable to me. I want a machine that was *used* by generations of sewists before me. I want to see their dreams and fancies etched into the wood and worn into the decals.

The sellers were entirely sweet; they delivered it to me for $15 extra, set it up, brought me a photocopy of the manual, and showed me how to use it. What's amazing to me is not how different it is from an electric sewing machine, but how much it's the same. It operates identically, even to winding the bobbin!

The head folds down so that it just becomes a little side table, perfect for serving drinks from at a party. And check out the tiny casters! I just love everything about it. I don't know that I'll actually use it as a sewing machine, but if we have a long power outage over the winter I'm set.

Treadle head stowed

Then last week I was idly searching for a serger again and somehow came up with an eBay listing for a White Speedylock 1600 listed at $75 with a buy-it-now price of $99 and, most importantly, a seller in the DC area who was willing to do a pickup to avoid shipping charges. I had decided I'd spend up to $100 on an impulse serger purchase, and there it was staring me in the face. I'm sure I could have had it for the $75, but the auction didn't end until Sunday night and I wanted it for my long weekend. I did the buy it now and the seller, another wonderfully kind person, met me at a metro stop (she lives in the far suburbs, outside metro's reach) on Friday, which was my day off. I serged all weekend long, I tell you what. I've already managed to serge through a pin (oops) and KNOW the day of doom is coming when I slash into the middle of a garment with the knife, but oh the beauty of my seam allowances!

Speedylock Serger

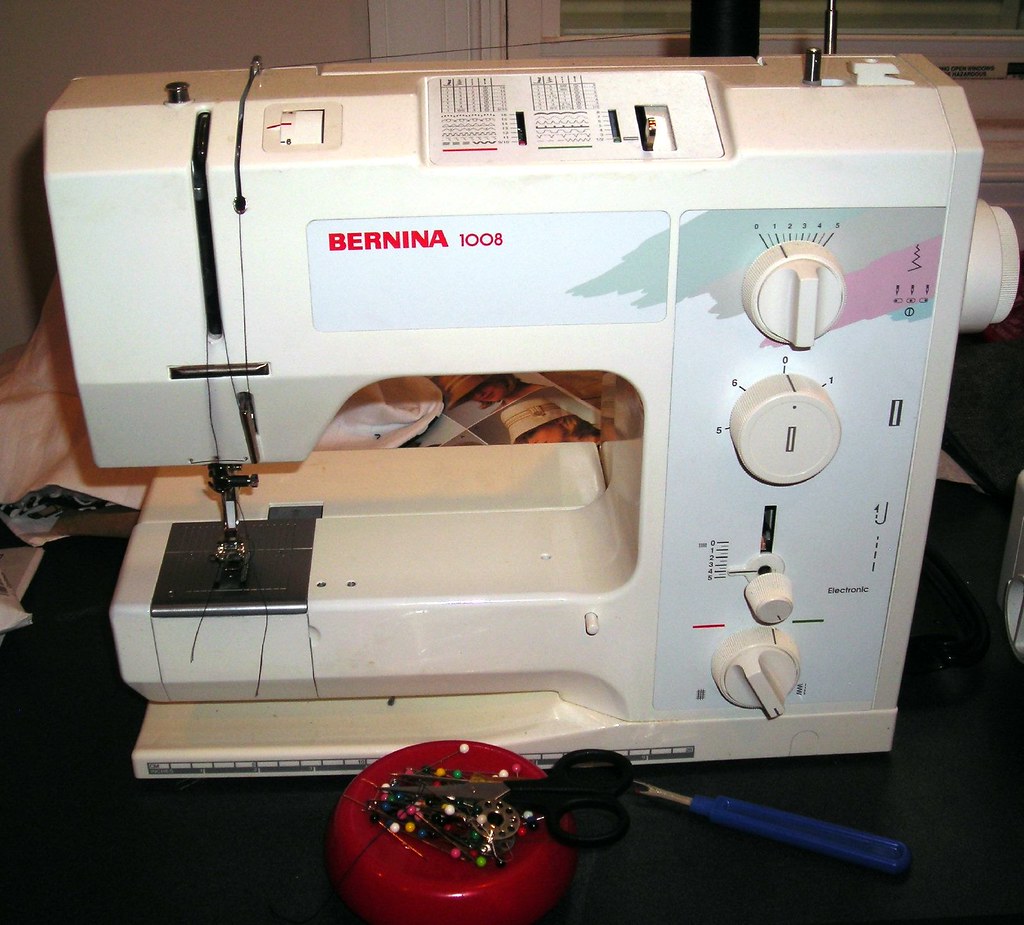
And just so it doesn't feel left out, here is my first love: my Bernina 1008. The pastel 80s paint splotches are god awful and I wish it had a few more decorative stitches, but after 10 years of sewing on a terrible, horrible, no good, very bad New Home machine every day with the Bernina is a dream come true. I've had it for four years now! Time flies when you're not sewing on a Machine of Doom. Really, I cannot say enough foul things about that old New Home. Blood, sweat, and tears don't even begin to cover how frustrating it was. But all that is behind me now, and ahead of me are miles and miles more with my 1008.

Bernina 1008

Thursday, October 9, 2008

Small Bust Adjustment (SBA)

Let me first state that I feel that I am in no way qualified to provide any advice or information about alterations. I have no theory, only practice. Over many, many years of owning and operating both a small bust (32AA) and a sewing machine I have worked out my slapdash ways to alter patterns to fit my bust. I am sure anyone with actual knowledge and education will be appalled.

I should say the lack of theory is not wholly my fault. I have tried many books and websites to get more information. Unfortunately, there's not a lot of literature out there about the SBA. Most books carefully explain the FBA, and then say, "And an SBA is the opposite." Totally not helpful. There is one huge exception to the lack of SBA information and that is Shannon's tutorial on Hungry Zombie Couture on how to alter a standard darted blouse for a small bust. It is excellent, clear, well-illustrated, and extremely useful.

I get a fair number of questions about SBAs, so I know I'm not the only one out there looking so I'll share what little I know, with the caveat that it's just stuff I made up, mostly.

I would also like to formally object to the term "Small Bust Adjustment." It does make an easier acronym than, say, "Petite But Well Shaped Bust Adjustment," "Mine Will Stay Perky Longer Than Yours Bust Adjustment," or "I Can Buy Cheap, Cute Bras Bust Adjustment," but those accentuate the positive rather than making us sound inadequate (and my positive needs a lot of accentuating, let me tell you).

I generally choose patterns that are easy to alter with my bust in mind. Despite Shannon's fabulous tutorial, it is very rare for me to make a standard darted blouse because of the difficulty in altering it to fit the bust. Other styles are much easier, and at the top of the list is princess seams. I looooove princess seams (as if you couldn't tell from this, this, this, this, etc. ad infinitum). It makes no difference to me whether it is shoulder or armscye princess, I love them all. Shoulder is less common, and I wonder if that's because it's less curvy--which means it might be better for us. I haven't tried out enough shoulder princess patterns to tell (because there are so few).

==============================

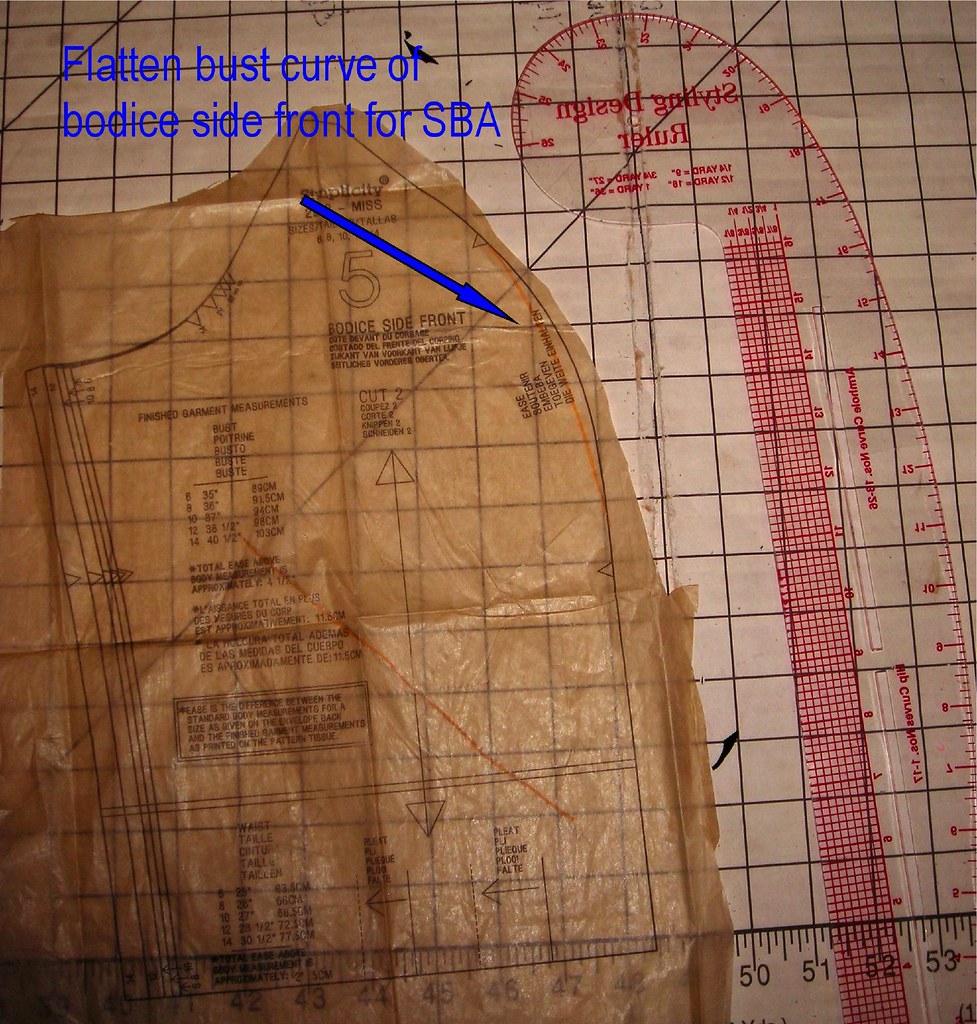
To alter a princess seam all you have to do is shave some width off the bust curve on the side front pieces. Super easy.

SBA

==============================

If it's not princess, I usually go for something in an empire line with a bodice that hits right under the bust. I generally reduce the width of the gathered section or of the dart, and if the bottom of the front bodice piece is very rounded I flatten that out a little, as I did here for Vogue 8386; here's a comparison between the final altered bodice and the original pattern. If you don't flatten, you get what I call "Empty Bag Syndrome," where the extra fabric spills out over the underbust seam; it's like the opposite of the pencil test:

Traced front bodice with edit marks

==============================

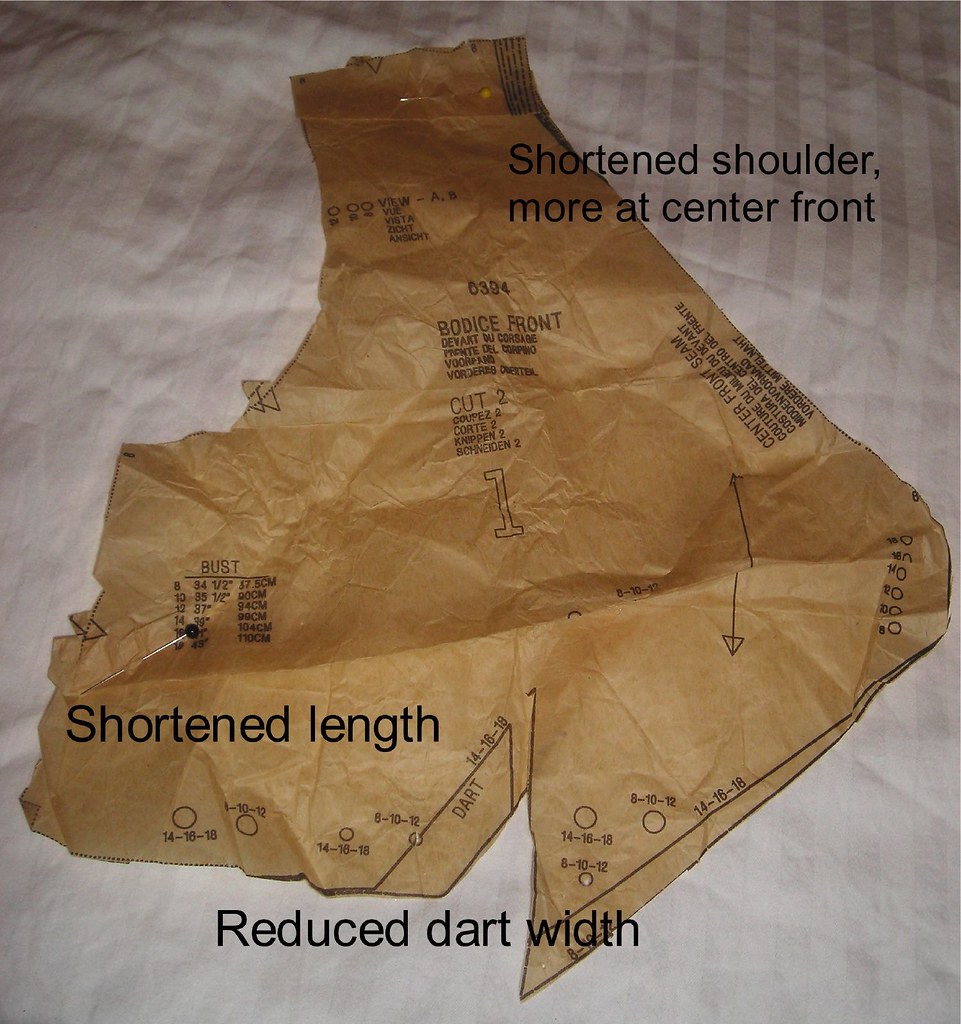
I have a short distance between my bust and my shoulder; I don't know if this is related to my small bust or my frame, but I suspect it's a little of both. I often shorten the front strap, usually taking in a little more at the neck edge than the shoulder edge (thus shortening the front neckline, which prevents gape). You can see that in the photo above for Vogue 8386, and here for New Look 6394. This is kind of a touchy alteration because it can create serious drag lines running from neck edge at shoulder to the armpit; this is especially a problem for styles with sleeves. I haven't found a way to deal with that problem and only go with the slanted front shoulder if there's no other way to get rid of the gape. I'd rather have drag lines than gape.

==============================

Wrap styles were always off limits to me until I discovered how to alter them by realizing that the problem really was as simple as the crossover neckline being too long. By taking out some length, I opened up a whole world of new styles. I am petite but have a long torso; Cidell was startled to find that our torso measurements are nearly identical though she is several inches taller than me (and well into the average height for which patterns are drafted). So I think this is not related to my shortness and the principle applies to SBAers regardless of height. For crossover necks, I take out a wedge of width at a 90 degree angle to the neckline. Don't forget to alter the facing if it has one, as with Vogue 8379 (though frankly I didn't love the facing on this pattern and will leave it off next time I make it). This one is still a work in progress because the angle of the marked pleats is wrong for my bust, I just haven't figured out which way to aim them:

Pattern Alteration

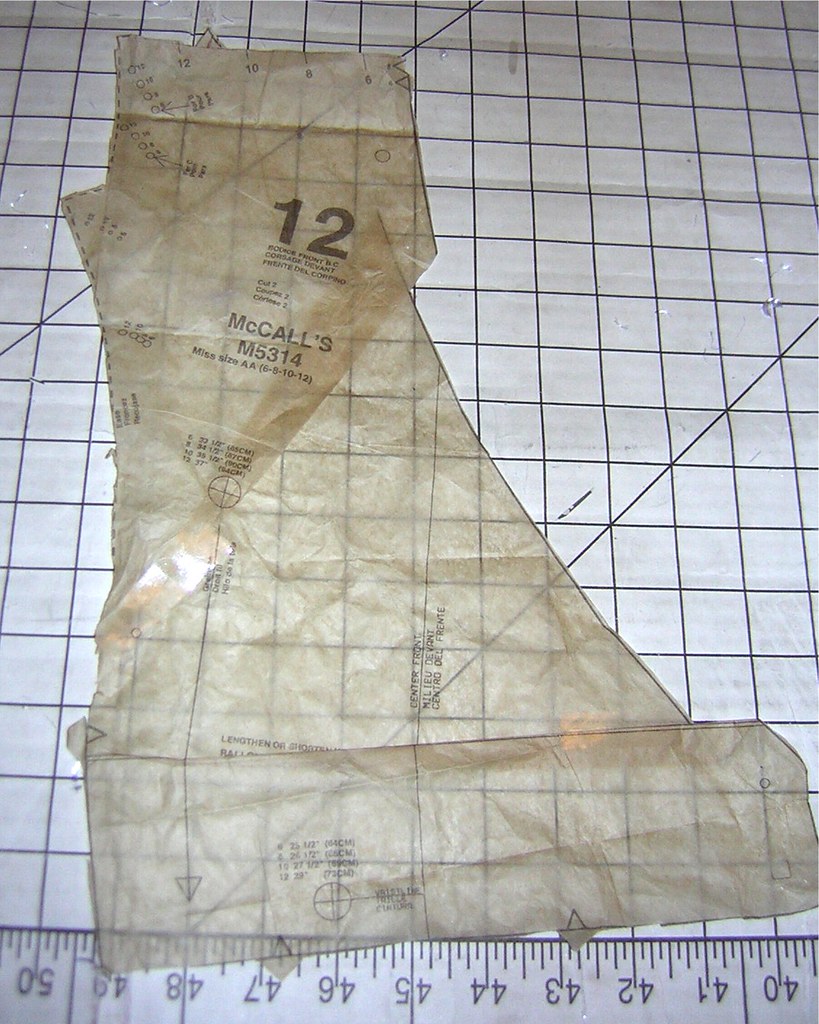
For McCall 5314, a woven wrap, the line got too distorted when I tried to take all the length out at one go, so I shortened at about 1/3 and 2/3 of the neckline distance:

Altered Front

I mean seriously! Check out how ridiculous that alteration is! I took out about three inches of length! I really don't know who that *wouldn't* gape on. But the pattern looks fab on me now and is as snug as a bug in a rug along that wrap. No gape at all.
==============================

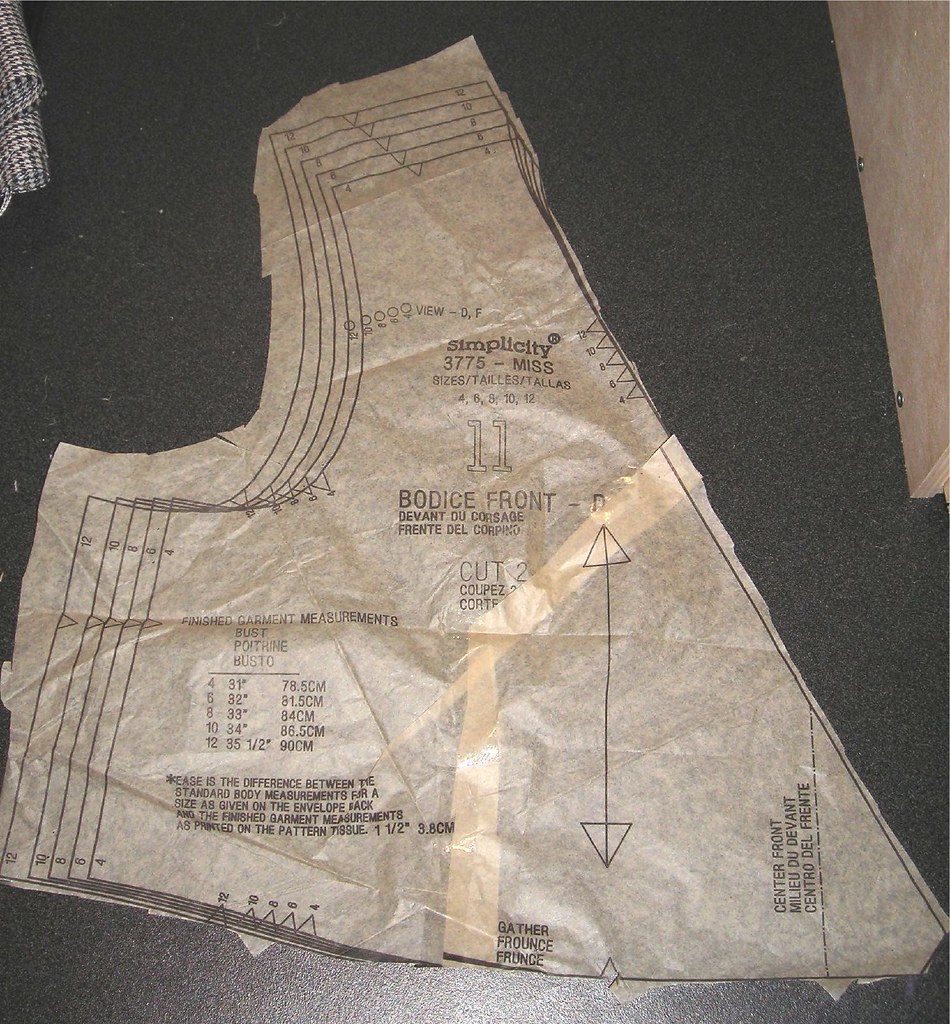
Sometimes you need to alter the pattern along more than one axis, as here for Simplicity 3775. I shortened the V neck/mock wrap to avoid gape, and narrowed the width of the gathering. When it comes to gathering, I also find it better to gather more toward the center front than to follow the markings. I don't know if it's my body in particular or general to a small bust to be more centered on the chest, but my girls seem closer together than patterns are drafted for.

Altered Bodice Pattern

==============================

For other miscellaneous styles, always, always, always narrow the width of a bust dart, whether it is vertical (a fisheye dart below the bust) or horizontal (a traditional dart to the side of the bust). It is invariably a mistake not to do this, and I made this mistake recently! Before I had any idea what I was doing I tried to deal with bad bust darts on the garment by taking in more fabric to try to reduce the bagginess. While that sounds like it will work, making a dart bigger makes it worse by increasing the difference in circumference between the bust and below the bust! It is essential to alter the pattern before cutting so there is less fabric to begin with.

Front Alterations

You might also need to reduce the length of a bust dart. It's worth it to do a quick tissue fit and mark your bust point (i.e., center of your bust, i.e., nipple) on the pattern piece. If the dart apex is going to overshoot your bust point it needs to be shortened.

==============================

This post is still a work in progress, because I think there might be something to shortening armscyes in some patterns. I just made BWOF 02-2008-103 and it looks pretty bad under the arms and across to the bust. I think a higher armscye would deal with that, and I think it has something to do with a small bust (since a larger bust would displace that extra fabric and prevent the bagginess under the arm).
Luckily, a small bust is usually fairly high so we don't have to worry about lowering the bust point. That's some consolation, right?

Tuesday, October 7, 2008

BWOF 08-2007-105 is Tops

Front

I just love 08-2007-105. It's incredibly versatile, and the bust was easy to adjust simply by taking some length off the bottom of the upper bust pieces and flattening the curve a little. I first used it as the basis to adapt plus-sized 04-2008-128 to my size. Then I used it for this. I haven't even made it yet as drafted!

I am a huge fan of a tie waist, to the point where I often feel like I need to cool it on that look because so many of my projects have one that I fear people will find me repetitive when, in truth, I'm pretty sure the only person who notices what I wear on a daily basis is the fabulous fashionista guy who checks me in at the gym. A tie waist works for me, so I'll stick with it. So when I saw Allison C's New Look 6729, I knew I had to have it. I didn't want to have to buy a new pattern, though. Luckily, Sharon M had linked a photo of the bodice in progress to her review. A light bulb went off as soon as I saw it--I already had the pattern, it just needed a little tweak.

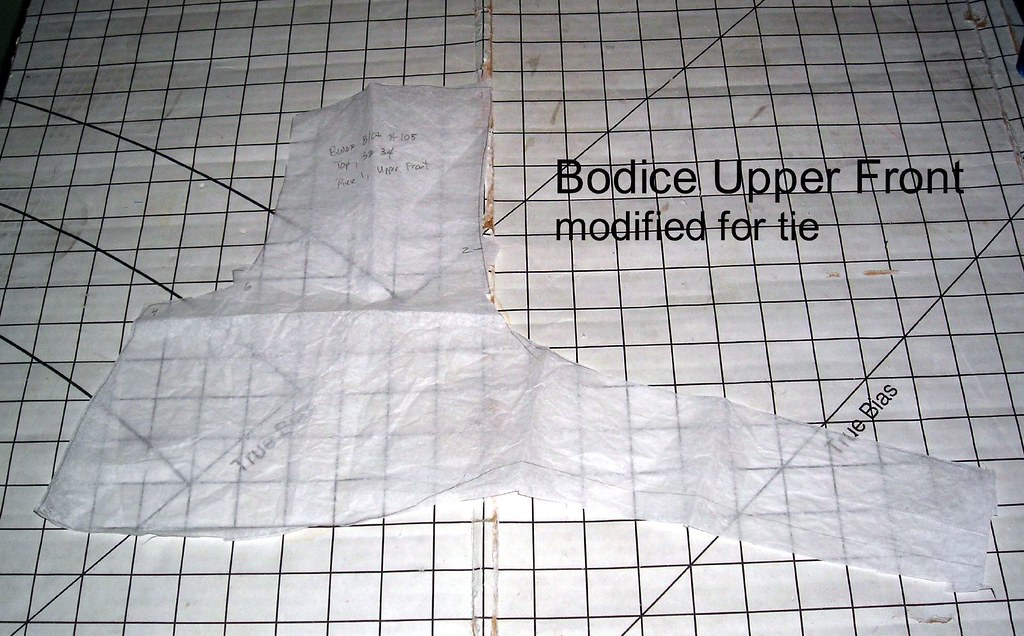
105BodicePatternTie

I cut the ties as long as I could with my fabric. I'll try to remember to add the measurement later. My knit had a distinct right and wrong side and was pretty flimsy. To deal with this, I cut out strips as long and wide as the ties, laid them right side to right side, stitched all the way around, and turned right side out.

This little top is really sensational. It looks great on me and makes the most of scant assets--a friend commented unsolicited that I was looking kind of "boobie" when she saw me in it. It took a yard of fabric and a couple of hours. I meant to make another before summer was done (this is from June-ish) but now it's chilly and too late! Of course, I could make something in long sleeves...

All photos are here.

Sunday, October 5, 2008

Podcast!

Cidell and I chat about the recent issues of BWOF (and she tantalizes me with the fact that she has already received October and I have not), our upcoming exotic travel (hers more exotic than mine), and current projects. Grab some hand sewing and hit play below, head to the page where it's posted, or find us on itunes! It's under trenabdc.

Wednesday, October 1, 2008

Going to Germany!

I'm heading to Germany for work! I'm pretty excited, as I've never been there. I get to visit the land of BWOF. I feel that can only be a good thing.

I'll be there from either the Saturday the 25th or Sunday the 26th of October and hope to stay through Sunday, 1 November. I'll be outside Frankfurt for a conference Monday through Wednesday, but hopefully will have Thursday, Friday, and Saturday to sightsee and then fly back Sunday. Does anyone have any ideas/suggestions?

I'd love to see Berlin, but I'm not sure it will be worth it with my short time. I don't think I'll be able to fly out of Berlin, so I'd have to go back to Frankfurt Saturday night to catch my flight, so I'd spend more time traveling than sightseeing I think.

My Sitemeter spies tell me I have some readers in Germany. I'd love to hear from you!