Often I will just substitute a sleeve from a similar pattern from the same line. I assume that pattern companies don't vary the shape of their armscye much from pattern to pattern, just drafting it straight from the block. However, if there's a chance the armscye has been customized or where I want a perfectly fit or a specialty sleeve, I will draft my own. I ran across this issue in two recent projects.
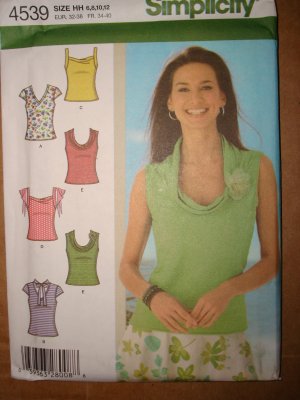 The first was Simplicity 4539. This now out-of-print pattern has a great cowl neck. While I like the first (sleeveless) version I made of it--one of the UFOs that resulted from my Great Craft Room Cleanup, a cowl neck is really more evocative of fall than spring. One view on the pattern (not the cowl version) does have some bitty cap sleeves that only go in half the armscye, but no sleeve that can be extrapolated to a longer length. I wanted a fitted regular sleeve with no puff in the sleevecap, so I decided to draft rather than copy for this one.
Drafting a sleeve was a little complicated by the fact that during the long dormancy period of this UFO I lost the back piece, so I had to draft that from the front and my armscye was pretty symmetrical. Kathleen Fansanella, a pattern-maker in industry, has very strong opinions about sleevecaps and their ease and shape and I kept that in the back of my mind. She says that (1) in industry, sleevecaps are drafted with almost no ease, and (2) the front and back of a sleeve cap should be different shapes. The ease that we contend with (especially in the Big 4) is to compensate for poorly drafted symmetric sleevecaps and armscyes, she concludes, not necessary for comfort or wearability. Very interesting.
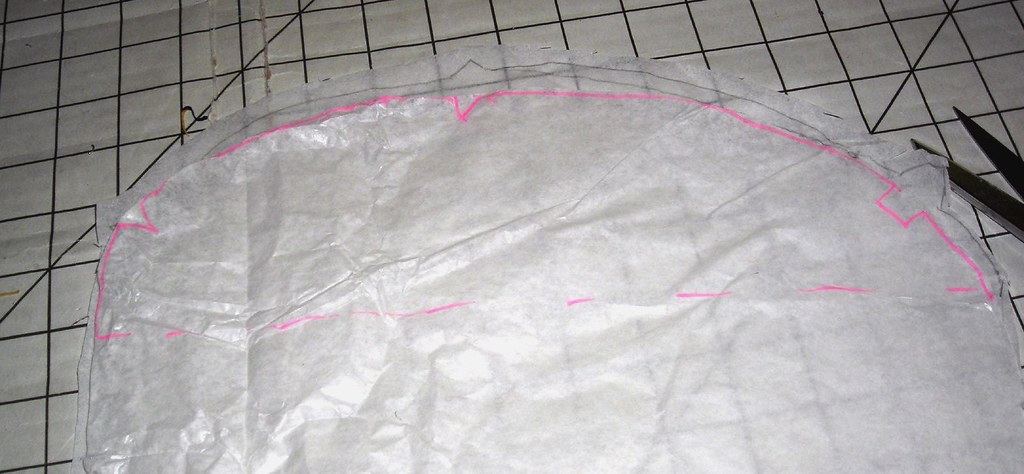
My first step was to sew the shoulder seam and then trace the armscye:

As you can see, I also made a dotted line across the lower edge of the armscye. When I draft my own sleeves I end up with a much more rounded sleevecap shape and I sometimes have a hard time figuring out where the sleeve seam ends and the sleevecap begins. I will often cut notches at the ends to make it easy when I'm sewing. I'm a big fan of adding notches where necessary (I ALWAYS cut one at the center top of the sleevecap to match up with the shoulder seam).
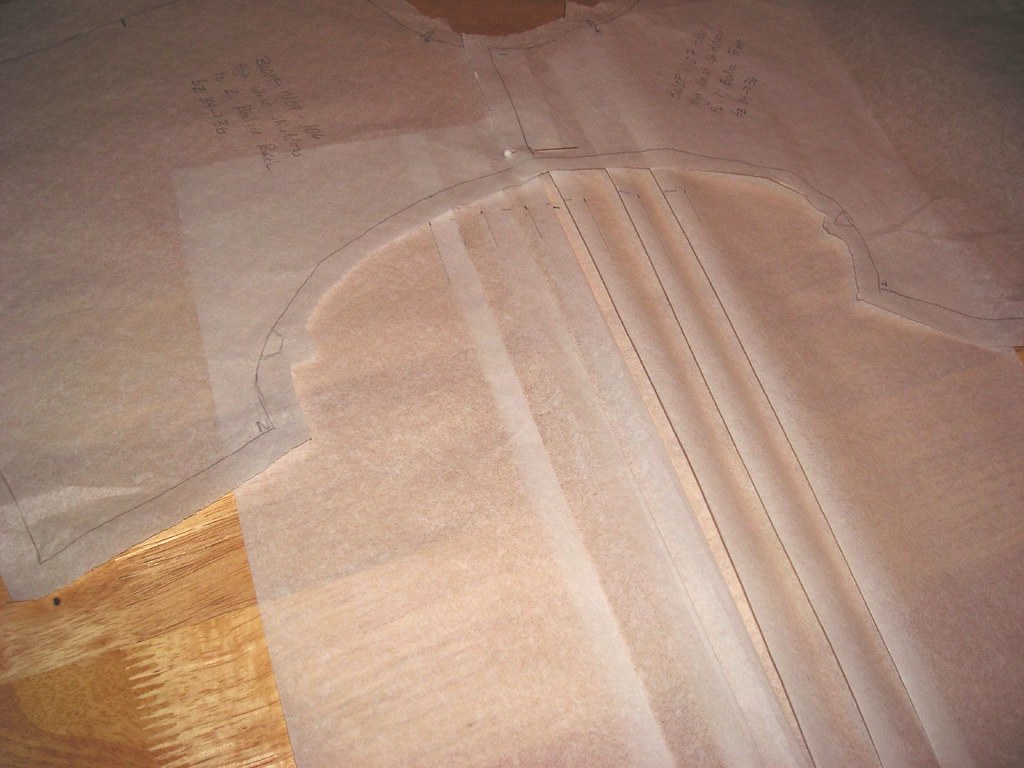
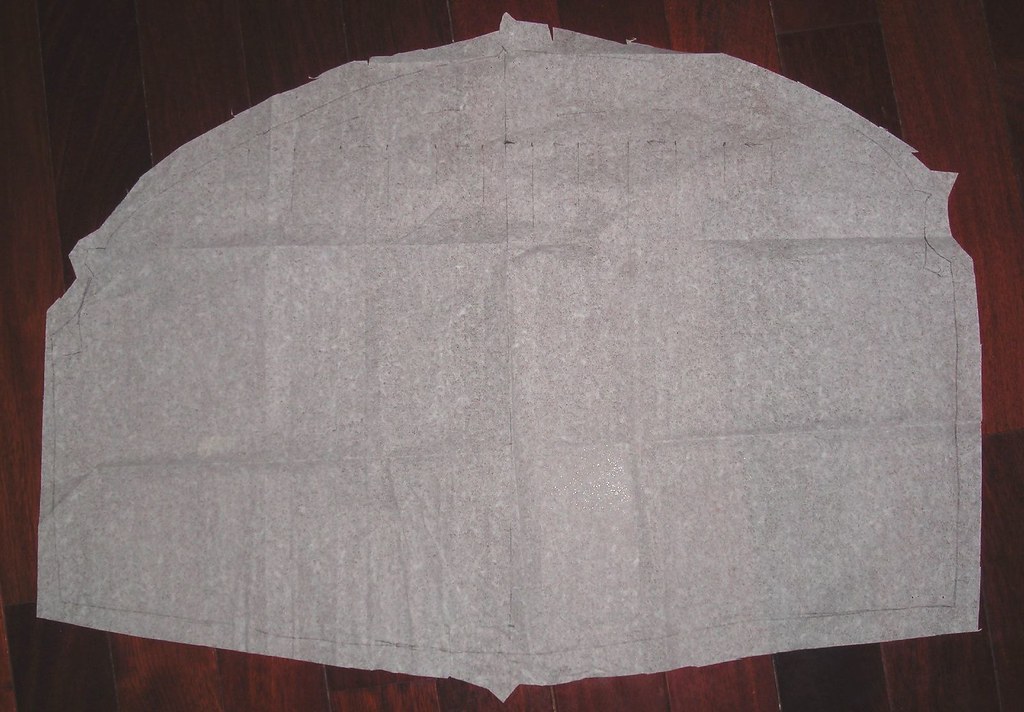
Here is my completed and cut pattern:
As you can see, I added a sleevecap of about 1 inch (the blank area above it is seam allowance, which I just added in cutting as I do with traced BWOFs). My pattern is assymetric, but actually in the opposite way Kathleen illustrates on her blog. I have a forward shoulder and when I bother to correct for it (usually only in sleeveless wovens) I have to take about an inch out of the back armscye to prevent gaping. So for me, having extra fabric in the back would not be attractive; I actually need more fabric in front to accommodate my bad posture (you can bet I just sat up straight in my chair writing that sentence!). Well, that's not true. I don't need more fabric in front, just a normal amount, with a lesser amount in back.
As this was a knit, I didn't add any ease along the width of it. The sleeve went in very easily and fits well, including in the back where I don't see any gaping at the lower back armscye.

I'll definitely be making at least one more of these for Fall/Winter, maybe more if I can make them different enough that I won't get bored (already have an idea for a sweater knit...). All the pictures of this pattern are here.
 Next pattern was BWOF 11-2007-106. Cidell made this one as a cocktail dress last year and wore it when she met Christian Siriano of Project Runway fame. I'll do a whole post about this dress later, but now suffice it to say I wanted sleeves, big puffy ones.
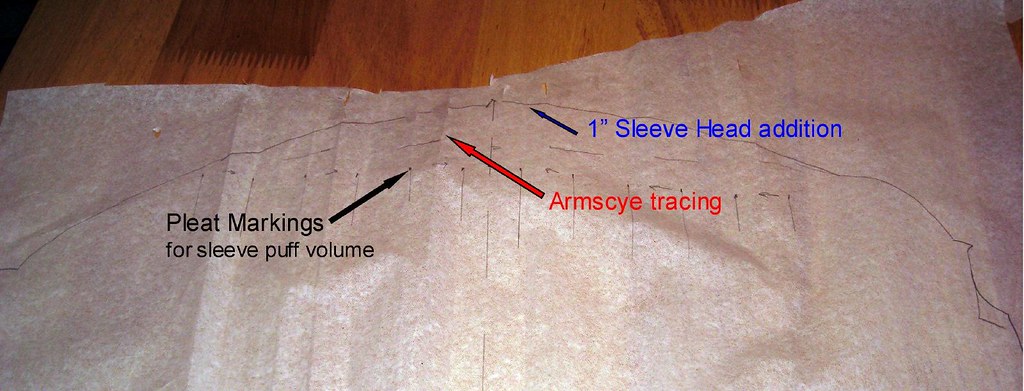
At first I was a little stumped. I've drafted puffy sleeves before, but my method was to trace it, then cut it into several pieces, then tape the pieces to a new sheet a couple inches from one another. I find it hard to line everything up correctly so I was trying to think of a new way to do it. My brilliant idea? Pleating the tissue paper before tracing the armscye!
It's a little silly but it works. To figure out how much puff to add I measured the sleeve and armscye of BWOF 01-2008-108, the yoke front blouse (review here and blog here). The sleeve is about six inches wider than the armscye, so I pleated six inches out of the tissue paper, then traced the armscye. This is where BWOF's lack of seam allowances make things easier, because I just had to join the traced shoulders and front and back and I knew the armscye was the right shape.
Next, I unpleated the tissue paper and added a 1 inch sleeve head to my armscye tracing.
The final pattern piece again has a very round sleevecap.
I think next time I will scoop a little out of the sides to resemble a commercial pattern sleevecap more because I had a little trouble at the bottom of the armscye getting the sleeve and armscye to fit together, but it turned out well, exactly what I was looking for:

All the pics of that project are here, more blogging and review to come.


.jpg)


13 comments:
YOU are a genius! That's very helpful info.
Did you get your hair cut? Looks really good.
Love the dress!
What about taking a top pattern you really like, with sleeves, and then changing the neck to a cowl neck? Curious to know if you considered this, as I am thinking about cowl necks for fall too, though via the easiest way possible. Cute top, BTW.
I also love a cowl neck and that is a really cute top - I love the fabric you chose.
Also love the dress and look forward to hearing more about it!
Thanks so much for the directions of how to do this! I was having problems figuring it out on my own!
The links to Kathleen Fansanella do not work though!
You, are a freaking genius. I can't wait to add sleeves to my pattern!!
The pleated tissue paper idea is sheer GENIUS. Why didn't I think of that? Thank you VERY much. I wanted to do a gathered sleeve and I have sliced pattern pieces and tape and it was a mess...your way is better!
I am lazy compared to you - I steal a sleeve I like and then steal the armscye that goes with it and trace that over the original pattern lines.
I love the pouf! I love that you added sleeves! Gorgeousness!
sleeves, armsyce, etc....is a scary area for me. thanks for the tutorial! your top looks great!
You make it look so easy! I'll have to try drafting sleeves sometime.
I love that you added sleeves to that BWOF dress, now it's work-wearable.
Wow I love the puffs on that blue dress!! Thanks for all the details!
Love the cowl tops! Very clever with the sleeves. All garments look great and from here the dress does not make your hips look big. I think the sleeves balance the look out well. The dress is especially lovely.
Your post gave me the courage and pictures so that I could sucessfully redraft a jacket pattern shoulder (narrowed it alot) and then redrafted the sleeve and sleeve cap.....never thought I could, so thank you so much....it worked like a charm! I know this is not timely, but I just remembered your blog post today when I needed it....thanks again, ML
You really hit on something here, truly a light bulb moment for me. Wow and many thanks!
Post a Comment