Although the Selfish Seamstress *purports* to be selfish, she actually sews for other people all the time. I, dear readers, am truly entirely selfish--to the point where it's actually almost a character flaw. There are only a very few people for whom I make an exception, and my mom is at the top of the list.
You may recall that last year I made her a jacket. This year was a tote bag. I got the quilted faux suede in a Fabric Mart bundle and was stumped as to what to do with it when it arrived. It was not my style, but at the same time it is high quality fabric, and with the pre-quilting saved an interfacing step. It finally dawned on me that purple is my mom's favorite color and that she might like a bag. Perfect!
The bag is made with two rectangular sides and then a long one-piece gusset. The dimensions below include 1/2 inch seam allowances.
Front and back: 16 wide x 14 tall
Gusset: 42 long by 6 wide
Handles: 5 1/2 wide by 49 long for a 22 inch drop (my mom is petite like me).
I used fusible fleece to give the bottom some structure. I wanted the fleece to go up the gusset sides about an inch so the bag wouldn't just flop over the bottom.
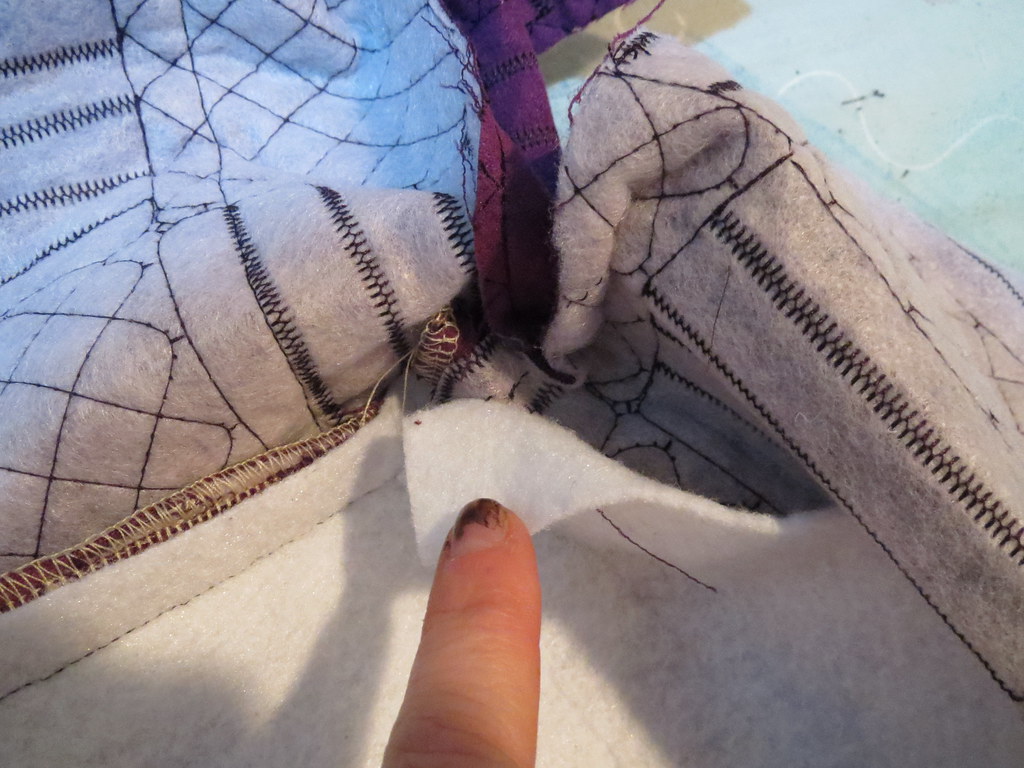
I started by sewing the gusset to the front and back along the bottom edge, catching the fleece in the stitch line.
Then I sewed from a couple inches up the side down to the corner, this time not catching the fleece in the stitch line.
Next, trim the fleece seam allowance close to the stitching, continuing the trim job into the unsewn part that goes up the side.
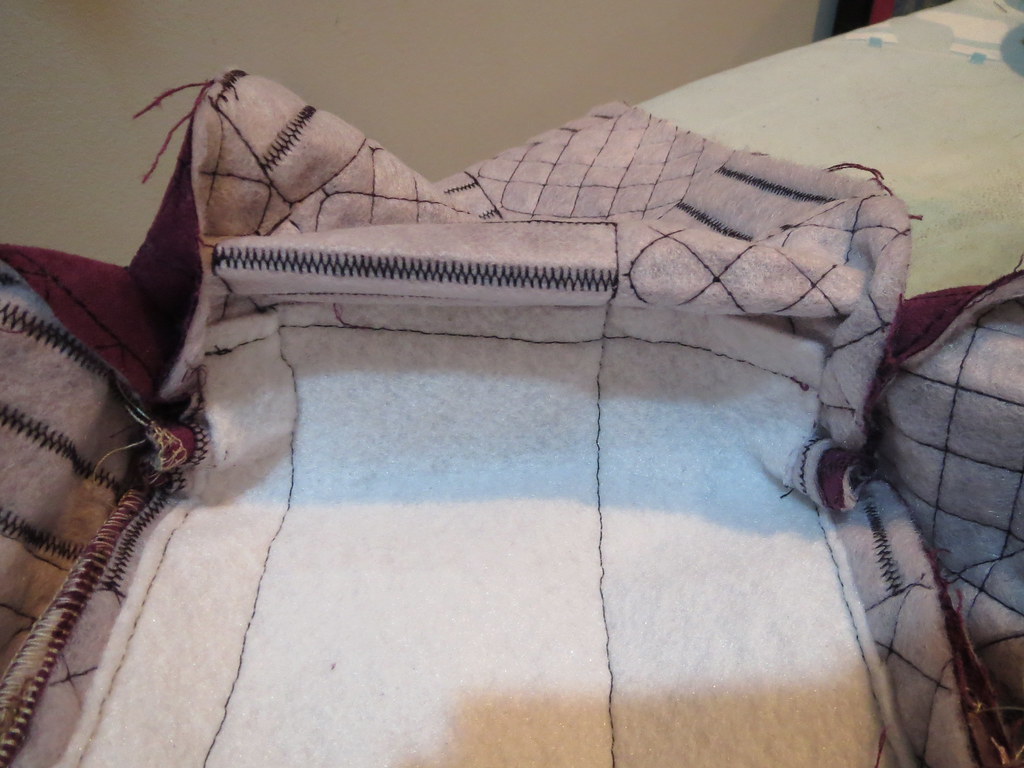
Finally, I did a little quilting to keep the fleece in place. It was really easy with this fabric, I just sewed along the lines that were already there on the bottom. Then I sewed along the short edges of the fleece to keep them in place going up the side. Once this was all done, I sewed the side seams up the rest of the way.

The most important part of a bag is, of course, all the pockets! I made a water bottle pocket for the inside of the bag, to keep the bottle upright and easy to pull out. I cut a piece of lining 9 inches wide by 21 inches long and folded it in half the long way. Then I folded it along the two lower corners and sewed gusset darts 1.5 inches from the corner.
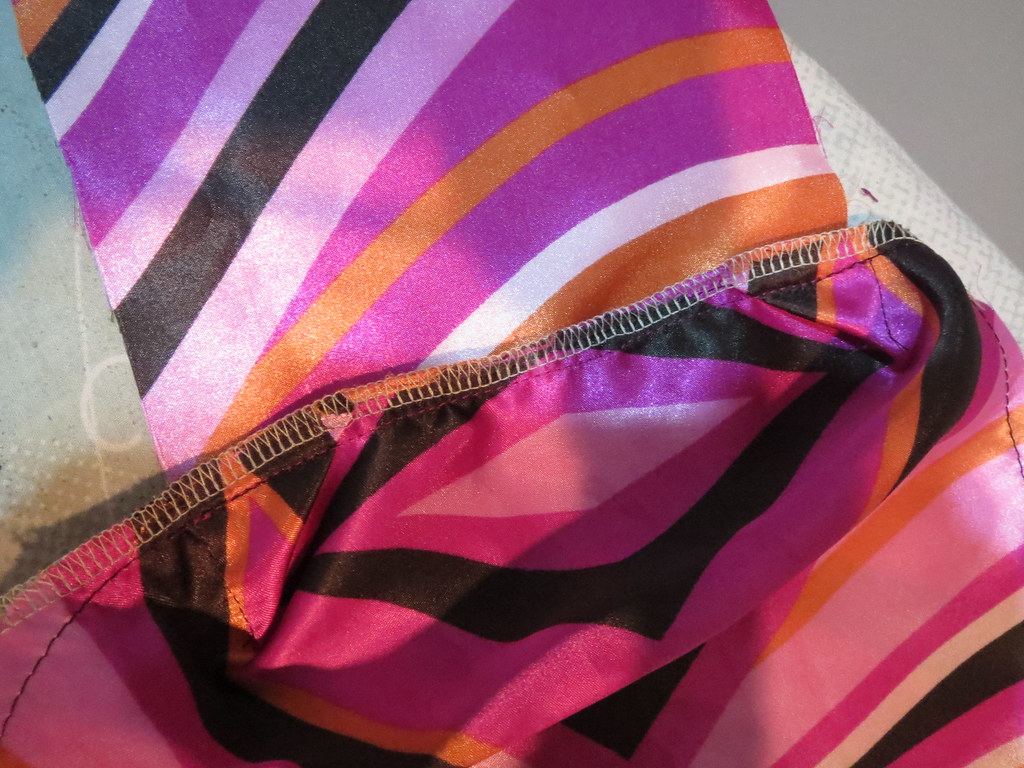
Then I marked where the one-piece gusset would turn the corner from the bottom to the side, and sewed the bottom edge of the water bottle pocket just above that marking. In the photo, the top of the gusset is going off to the left and you can see the water bottle pocket's darts on what will be the inside of the pocket.

Next, fold the pocket up from the stitchline, enclosing it, and pin the sides of the pocket to the sides of the gusset. Baste in place and then catch in the stitching when sewing the gusset to the front and back pieces of the lining.

And here's how it operates! I think that 9 inches was a little too wide for a small water bottle, but if you favor larger water bottles or 20 oz soda bottles it is probably right.
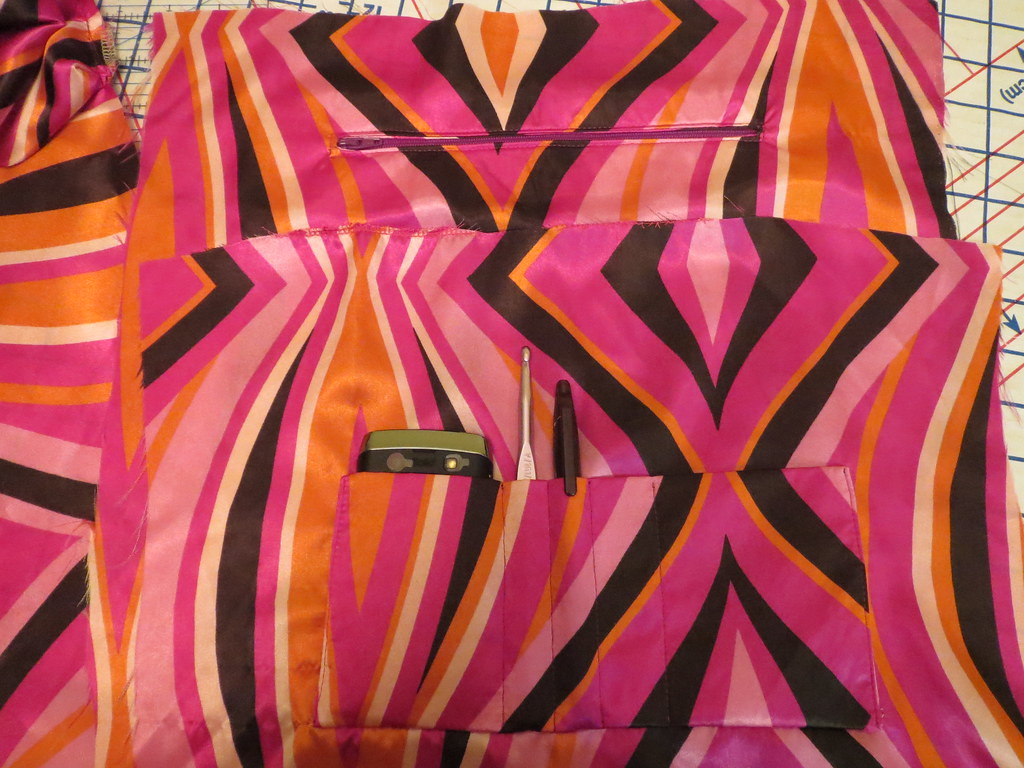
The front and back of the lining have a large zippered pocket, and a pocket for holding a phone and other sundries. Mom crochets so I wanted to make sure the appliqued pocket would be deep enough to hold a crochet hook. I cut it 10 inches tall by 9 inches wide, interfaced for stability, and folded in half along the 10 inch dimension.
I sewed the lining to the bag by leaving an opening in the bottom of the lining for turning and stitching right sides together along the top edge. The handles are sewn along the entire length of the purse and caught in the bottom gusset stitching. I left the top inch unsewn for joining the bag and lining together. Once they were joined I continued the topstitching from where it ended on the body of the bag all the way across the handle to the other side of the bag.
I got a new camera in the Fall and hadn't tried out the video feature, so I made a video showing a little bit of a shortcut in closing the opening left in the lining for turning.
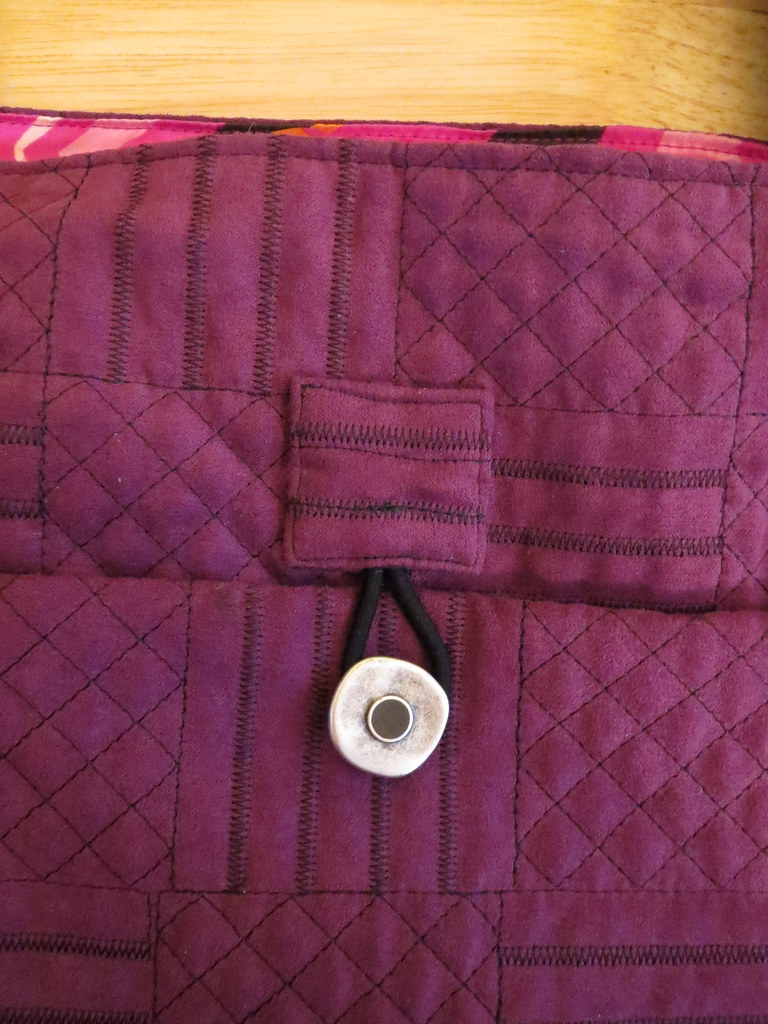
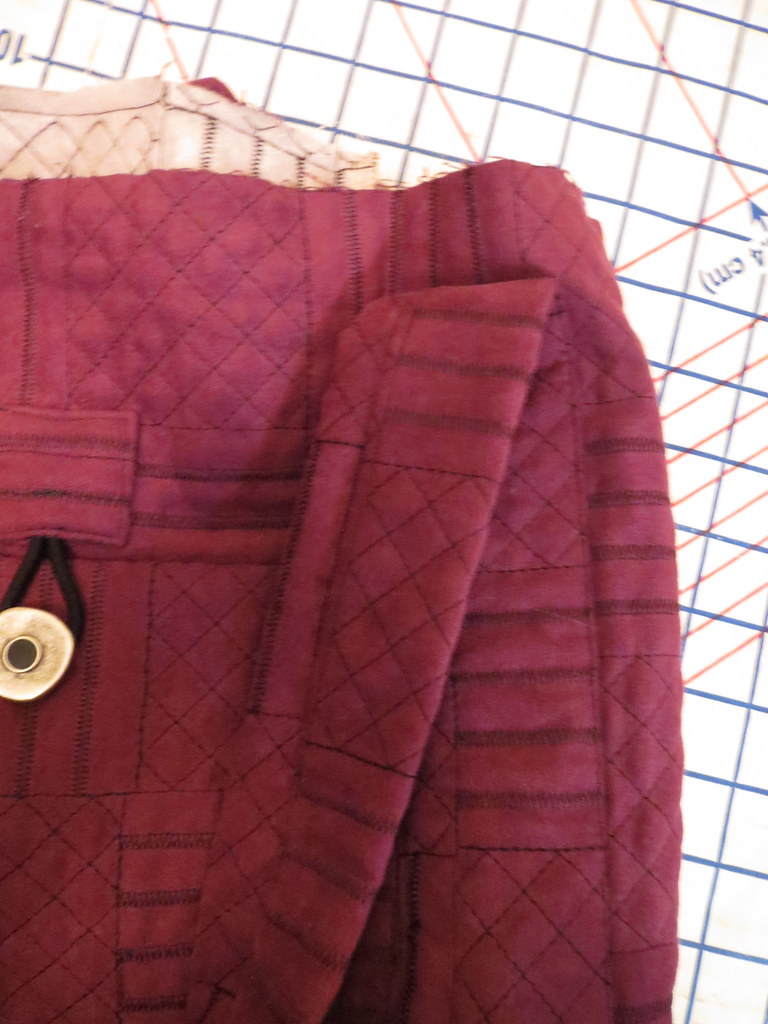
The bag also has pockets on the front and back of the outside. The front one is smaller, sized to fit her Nexus 7 snugly. The back one is larger, the whole width of the bag between the handles. I wanted a closure for the back pocket. I didn't want to use Velcro because it catches on everything. I didn't want to use a magnetic snap in case she wanted to put her Nexus in that pocket (I am paranoid about electronics and magnets). And I didn't want to use a regular snap because they can be too hard to open and close.
So I went for a shank button and an elastic loop. I used a ponytail holder for the elastic. I sewed the elastic into a square of the fabric and sewed the square in place. Hopefully it won't be too hard to replace if it wears out! I'm not in love with that particular button, but it was the best I had in stash and my gift was already late.
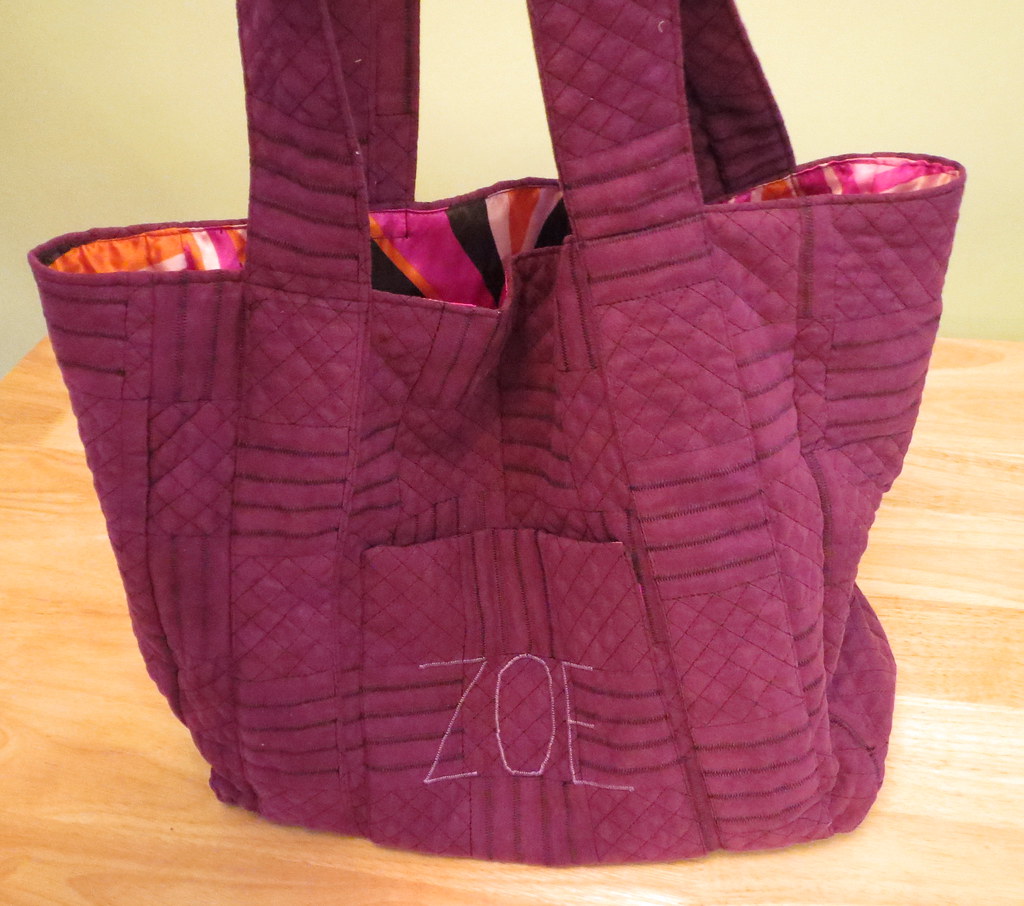
And here is the finished front (and back). When I told my mom I wanted to make her a bag, she got excited and had her friend show me the bag that the friend's daughter had made. The daughter had embroidered the friend's name on it and my mom really seemed to like that feature.
I don't have an embroidery machine and the fabric was impossible to mark on--anything that actually made a mark left a permanent marking. Thank goodness the fabric had lines to give me some way to make proportional letters! I marked it the best I could and then stitched it with a satin stitch on the machine. So the name is not great close up, particularly the wonky "o." Hopefully the effect with the whole bag isn't so terrible, though.
Mom loved her bag, so that's really all that counts! I am not good with spatial relations and it turned out way bigger than I meant for it to be, so there may be a mini version in the offing at some point...
All photos are here.
You may recall that last year I made her a jacket. This year was a tote bag. I got the quilted faux suede in a Fabric Mart bundle and was stumped as to what to do with it when it arrived. It was not my style, but at the same time it is high quality fabric, and with the pre-quilting saved an interfacing step. It finally dawned on me that purple is my mom's favorite color and that she might like a bag. Perfect!
The bag is made with two rectangular sides and then a long one-piece gusset. The dimensions below include 1/2 inch seam allowances.
Front and back: 16 wide x 14 tall
Gusset: 42 long by 6 wide
Handles: 5 1/2 wide by 49 long for a 22 inch drop (my mom is petite like me).
I used fusible fleece to give the bottom some structure. I wanted the fleece to go up the gusset sides about an inch so the bag wouldn't just flop over the bottom.
I started by sewing the gusset to the front and back along the bottom edge, catching the fleece in the stitch line.
Then I sewed from a couple inches up the side down to the corner, this time not catching the fleece in the stitch line.
Next, trim the fleece seam allowance close to the stitching, continuing the trim job into the unsewn part that goes up the side.
Finally, I did a little quilting to keep the fleece in place. It was really easy with this fabric, I just sewed along the lines that were already there on the bottom. Then I sewed along the short edges of the fleece to keep them in place going up the side. Once this was all done, I sewed the side seams up the rest of the way.
The most important part of a bag is, of course, all the pockets! I made a water bottle pocket for the inside of the bag, to keep the bottle upright and easy to pull out. I cut a piece of lining 9 inches wide by 21 inches long and folded it in half the long way. Then I folded it along the two lower corners and sewed gusset darts 1.5 inches from the corner.
Then I marked where the one-piece gusset would turn the corner from the bottom to the side, and sewed the bottom edge of the water bottle pocket just above that marking. In the photo, the top of the gusset is going off to the left and you can see the water bottle pocket's darts on what will be the inside of the pocket.
Next, fold the pocket up from the stitchline, enclosing it, and pin the sides of the pocket to the sides of the gusset. Baste in place and then catch in the stitching when sewing the gusset to the front and back pieces of the lining.
And here's how it operates! I think that 9 inches was a little too wide for a small water bottle, but if you favor larger water bottles or 20 oz soda bottles it is probably right.
The front and back of the lining have a large zippered pocket, and a pocket for holding a phone and other sundries. Mom crochets so I wanted to make sure the appliqued pocket would be deep enough to hold a crochet hook. I cut it 10 inches tall by 9 inches wide, interfaced for stability, and folded in half along the 10 inch dimension.
I sewed the lining to the bag by leaving an opening in the bottom of the lining for turning and stitching right sides together along the top edge. The handles are sewn along the entire length of the purse and caught in the bottom gusset stitching. I left the top inch unsewn for joining the bag and lining together. Once they were joined I continued the topstitching from where it ended on the body of the bag all the way across the handle to the other side of the bag.
I got a new camera in the Fall and hadn't tried out the video feature, so I made a video showing a little bit of a shortcut in closing the opening left in the lining for turning.
The bag also has pockets on the front and back of the outside. The front one is smaller, sized to fit her Nexus 7 snugly. The back one is larger, the whole width of the bag between the handles. I wanted a closure for the back pocket. I didn't want to use Velcro because it catches on everything. I didn't want to use a magnetic snap in case she wanted to put her Nexus in that pocket (I am paranoid about electronics and magnets). And I didn't want to use a regular snap because they can be too hard to open and close.
So I went for a shank button and an elastic loop. I used a ponytail holder for the elastic. I sewed the elastic into a square of the fabric and sewed the square in place. Hopefully it won't be too hard to replace if it wears out! I'm not in love with that particular button, but it was the best I had in stash and my gift was already late.
And here is the finished front (and back). When I told my mom I wanted to make her a bag, she got excited and had her friend show me the bag that the friend's daughter had made. The daughter had embroidered the friend's name on it and my mom really seemed to like that feature.
I don't have an embroidery machine and the fabric was impossible to mark on--anything that actually made a mark left a permanent marking. Thank goodness the fabric had lines to give me some way to make proportional letters! I marked it the best I could and then stitched it with a satin stitch on the machine. So the name is not great close up, particularly the wonky "o." Hopefully the effect with the whole bag isn't so terrible, though.
Mom loved her bag, so that's really all that counts! I am not good with spatial relations and it turned out way bigger than I meant for it to be, so there may be a mini version in the offing at some point...
All photos are here.
.jpg)


.jpg)


8 comments:
Love this bag and what a wild lining.
Cute bag! I can see how the embroidery could be tricky but it seems like you did a great job considering. Thank goodness there's no "S" in Zoe, haha!
Cute tote! What's really nice is that you know the kind of things that your mom would want to carry in the bag and can make pockets that are the right size for them. ?
What a nice thing to do for your Mom! *cough* I happen to be a Mom.....
What a great bag, I love all the pockets and the thought you put into it! I'm sewing for someone else at the moment and am already getting a bit resentful how this takes sewing time away from my own projects (although I volunteered!)... You're clearly a bigger person than me :-) !
What an awesome custom bag. I'm sure she loves it!
What cool fabric! The bag turned out great, what a sweet daughter you are!
Very nice! She's going to love carrying it around!
Post a Comment