
Pinterest really does have a use! Although admittedly the time I spend on Pinterest is disproportionate to the actual creative output that results.
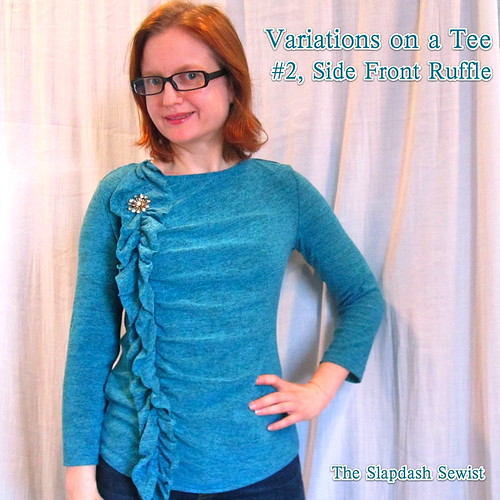
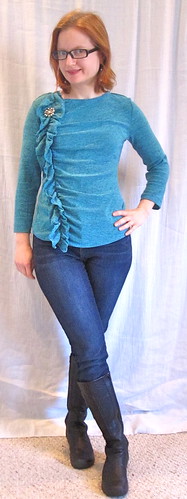
I pinned the top at left (from Etsy) a while back. I just love the ruffle. It's visually interesting without being too girly.

The asymmetric ruffle is a fairly common feature in RTW, as on this Travelsmith tee ($54), with its half neckline flounce that trails down slightly off from center front.

Another example is this RED Valentino top ($59.99 on deep discount at Bluefly), with applied ruffles in mixed materials.

A little wilder is this Shoshanna one shoulder top ($159, Bluefly). It's hard to tell for sure, but it looks like the ruffle is a couple inches in from the side seam. I like the way it meanders from the neckline to the hem.


This is a fairly simple pattern to draft from a basic t-shirt block (which I now have, yay!).
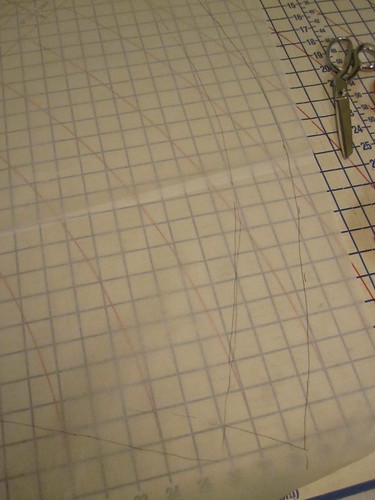
Start by making a full front. Mark a line from about an inch into the shoulder (exclusive of seam allowance) down to the hem, parallel to the center front marking. Measure this line and make a note of it, as it's the length to which you will be gathering your ruffle. Make hash marks along the line; mine are spaced 2 1/2 inches apart.
Cut the pattern apart along the line, then cut at the hash marks to the side seam allowance. Spread at the slashes and lay the pattern out on more tissue, as shown above at the right (in the absence of pattern weights I used scissors and my pincushion to keep the pieces in place).
A note on grain: patterns I have sewn in this style generally have the grain marked such that the hem is trued up to run along crossgrain. Since this is just a casual knit, I laid it out in the most fabric-efficient way. It seems to sit fine, but note that "proper" grain should probably result in the hem being straight on the crossgrain.
Trace the pattern, making a smooth line on the spread edge. Add ruffle allowance to your tracing. My ruffle is 2 1/2 inches wide. The ruffle ends at the shoulder seam allowance and hem allowance; you can see the notches at the top and bottom of the ruffle.

Measure your curved center front edge. Repeat the process on the other half of your front pattern, spreading the same amount. Because your pieces are different sizes, the angle on the smaller piece is more extreme. Also, despite my best efforts, I couldn't spread it to be quite as long as the larger half, so I had to take a few tucks when sewing the center front seam to get them to match..
Before assembling, finish the ruffle if you'd like. My knit was a rather loose weave, so I serger rolled hemmed it. Serger rolled hemming is such an easy finish it should be illegal. The way it looks is so disproportionately high to how much effort it is! I am LOVING my Juki MO 644-D for rolled hems.
I found it easier, to assemble the front before putting the rest of the top together. Start by sewing the ruffle seam, between the shoulder seam allowance and the hem allowance, WRONG sides together. You want the "seam allowance"--the ruffle--to be on the outside. You will sew along the line where you traced the cut edges. So in my case, I had a 2 1/2 inch "seam allowance."
Be sure to leave the seam unsewn in the shoulder seam allowance/hem allowance.
A picture is worth a thousand words so I'll let the pic describe the next part.
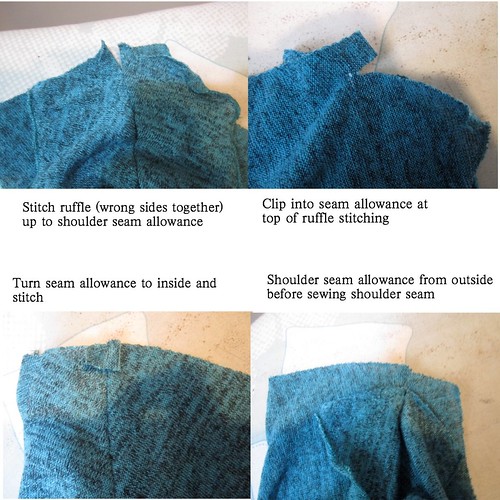
Essentially, clip into the seam allowance to the top and bottom of the ruffle stitching. Turn the seam allowances (shoulder seam allowance and hem allowance) to the inside. Stitch.
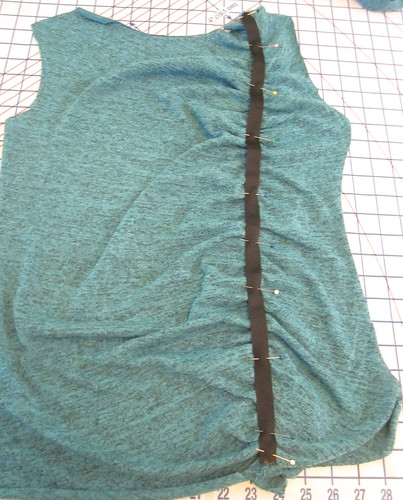
After the ruffle, shoulder seam allowance, and hem allowance are sewn and you have an intact front, gather the ruffle to your measured length.
As my red ruffle front dress was fresh in my mind, I used the same ribbon stay technique with the three rows of stitching--from the front in the ditch, and then on either side of the ruffle (also on the front--click on the link for details). Because this wasn't quite so formal a project, I did the stitch-in-the-ditch by machine, rather than by hand as I did for the dress.
Next time I make this pattern I will consider using a firm elastic rather than a ribbon. In my lightweight knit, the ribbon interferes somewhat with the flow of the top, though it does provide plenty of stability.
Now just assemble the t-shirt as you would any other.
I am having so much fun with t-shirt variations! I'm counting my McCall 6363 knockoff as Variation #1. I've already made another variation and have ideas for more.
I even have a special binder just for my t-shirt variation patterns. As I posted a while back, I keep my traced off patterns in page protector sheets in 3 ring binders. I was lamenting how costly the large 3 ring binders are, and people had a couple suggestions for obtaining them cheaper.
I was listing a bunch of stuff on Freecycle a couple weeks ago when it hit me that I should request some binders. I have never actually asked for anything on Freecycle, though I've given away a TON of stuff (probably a literal ton, oy).
Well, within 3 hours of posting I had 3 large 3 ring binders in my possession. It was amazing! Freecycle is a great way to pass along your unwanted items. I particularly like it for things that the Goodwill and other thrift-store type organizations would not be able to sell but are still useable, such as mostly full bottles of lotion or shampoo that I just didn't like or use. Plus, people come to your place to pick it up! For someone without a car, like me, this is a huge boon.
All photos are here and the pattern review is here.


.jpg)


29 comments:
Love the top - it's very flattering on you. Thanks for sharing how you made it.
How perfect for you!
Seriously cute and great tutorial. I'm pinning it. :)
Are you wearing jeans!?! They look very cute on you, as does your top—beautiful colour.
I would have slapped a ruffle down the side, but your variation has that flattering rouching worth copying.
Also, I wish we had Freecycle here. I could post about half the contents of our garage!
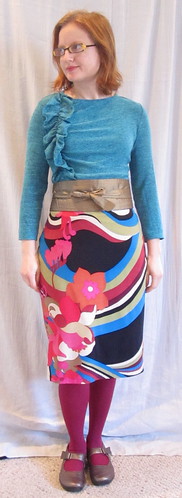
That is a seriously beautiful top! Well done. It looks just as nice tucked in the skirt as it does over jeans.
So cute, I love it! It looks great with the jeans, and the color looks fab on you.
Wow! What a cute top- I love it with the jeans! Thanks for sharing how you made it.
I totally love this. I am always looking for shirts that are casual but have a distinct style, this one is perfect. Thanks for the inspiration!
How cute!!! There is a Burda paper pattern that I bought a while back that has the same sort of side ruffle. It's 7379 and is for a woven. Not that you need one now that you've drafted your own!
Cute!
The Shoshanna top is so fun...I love how it starts in the neckline. Thank you for your hard work on the tutorial. This is a great top on you. The color is the perfect shade of blue--very flattering to your skin and hair color!
Oh wow, I love this! It looks great on you, the color AND the fit! I'll have to try it myself one day.
Love it! You look great! Thank you for sharing the construction details.
I like the top (thank you for sharing the details), but I have to admit that I adore the skirt! What a lovely combination. what a great combo for spring!
Rose in SV
This is great. I fell in love with a top similar that I saw @ Macy's and wondered how to do this. Now, I'm going to try it out!!! Thanks!!
Oh great tutorial thank you, I would probably have just stuck a gathered strip on top and wondered why it didn't look as good!
Thanks for the great tutorial, can I get your permission to lead my sewing group in making this top. It looks awesome!
Dressed2atee@yahoo.com
Now that's pretty. Thank you for the write up. Pinterest is very useful for ideas and you have the skills to create what you see.
I love this top and the colour really suits you. You're way more patient than me. One day I will have the patience to make pattern variations like this!
Very cute top! And, like you, I LOVE Freecycle. Being car-free in Paris, it makes moving things out so much easier. I've never asked for anything on Freecycle, but I'll keep it in mind should such a need arise. Karen
Great looking top! I have bookmarked this post for reference as I want to add this to my list of tops to try.
That is a gorgeous top!!
You have been awarded The Versatile Blog Award! Display the badge on your blog by using the HTML code below. I have removed the first left vee < and you will need to add it back in when you use the code. Go to http://itssewcreative.blogspot.com/2012/03/id-like-to-share-this-award-with.html for the simple rules. Congratulations!
Aroura
img border="0" src="http://4.bp.blogspot.com/-__GelmPSuz0/TptmHAlTDyI/AAAAAAAAD6A/xkbOUjXz9Zo/s1600/Versatile-Blogger-Icon.bmp" />
Just when I was thinking I've had enough of ruffles, you go and make this... and of course, I want it.
How do you do it??
All kidding aside, very nice!
Thanks for your nice comments about my pants. I hope to figure out a quick fix for my hooks and eyes soon!
Perfect - the draping is just right, and the ruffle is very flattering on you. (I love ruffly tees but am unfortunately not built for them.) Gorgeous colour too!
Cute cute cute!!!
I love the color and uniqueness of this knit top. You look fabulous in it!
This knit top is fabulous. So good on you and the color...well, couldn't be better. As always, just amazed by your sewing and the fact that you sew so many nice things and have a life outside of sewing that seems just as busy! :)
Thank you Trena! I have already made this shirt twice and I just love it. The ruffle is so much fun and it is just perfect for transitional weather.
-girdtmom
Nice work. The colour is very good on you too.
Post a Comment