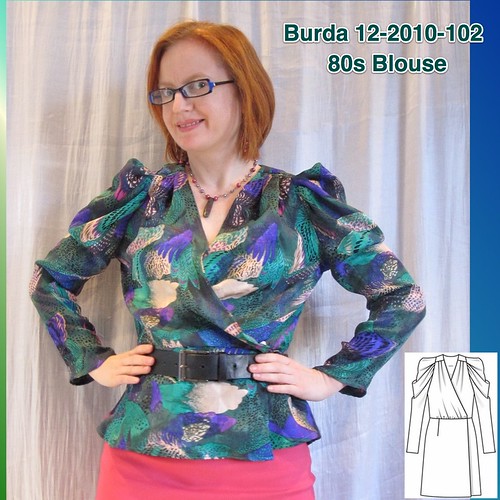
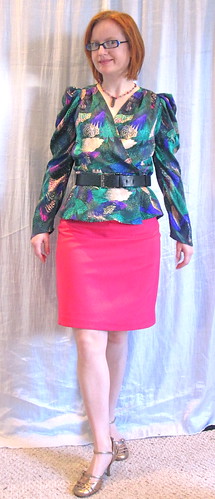
As with most recent Burda issues, I was underwhelmed by December. However, even in underwhelming months there is at least one item I'd like to make. In this issue it was the crazy 80s dress, Burda 12-2010-102. Love the Dynasty sleeves and overall casual vibe.
Included in The Carol Collection were a few pieces of very nice silk in crazy 80s/early 90s prints. I love them, but have mostly been using them as linings. This one is in many of my favorite colors and I couldn't quite bring myself to use it for lining. For this pattern, the retro (can the 90s already be retro?) print totally works. It would have been overwhelming in a dress, I think, and at any rate I had only barely enough to make this top. It is another piece to go in my Endless Combination (really must get around to making another skirt to match that set eventually).
Let me start by saying this pattern has a total of 32 darts and pleats (5 pleats on each side of the sleevecap=20 in the sleeve, 4 pleats in the upper front, 4 pleats in the upper back, and bilateral lower front and back darts). So you will be marking and sewing them until the end of time. Other than that, it's not too challenging, especially as it is unfitted.
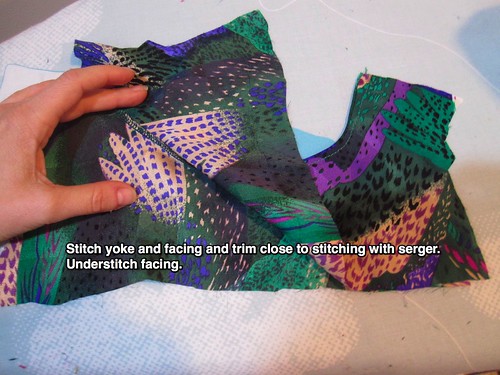
Before attaching the yoke, I stitched the yoke and yoke lining together at the neckline, understitched, and pressed to finish the neckline. It was much easier to manipulate the yoke neckline before it was attached to anything, particularly in my wiggly silk.
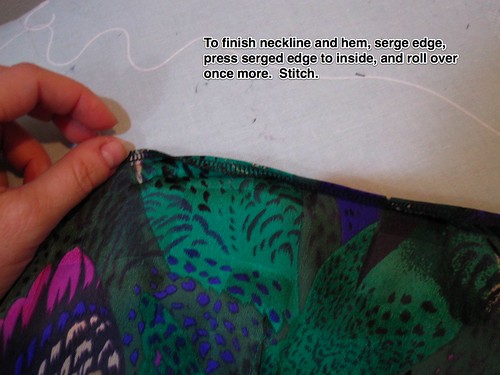
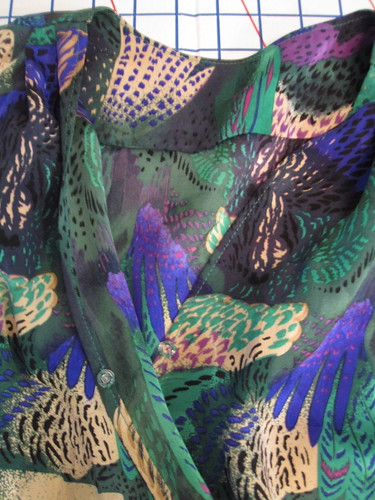
I finished the cross-over edge of the bodice front by serging the edge and then turning under twice for a narrow hem, rather than use the provided facing. I used the same treatment on the hem, as shortness of fabric meant I had to cut very small hem allowances. I think this is a great finish for silk. The serging gives some body so that the edges don't curl as they would with a narrow hem foot finish, and the 1/4" allowance looks neat and appropriate for such a lightweight fabric. You can see both the inside and outside effect on the finished front neckline.

As for making a cowl top, I snugged the finished bodice front crossover edge into the finished neckline of the yoke (sandwiching the front between the two right sides of the yoke pieces).

The upside of working with wiggly silk is that I was able to roll up the back into a small bundle and attach the yoke burrito-style. I first heard of this method on KBenco's blog, and there is also a a PR tip about it. It is genius! And the clean-finished yoke is just gorgeous on the inside.
Contrast this method with the instructions, which want you to do something crazy, as usual. You're supposed to first construct the outer shell, then sew the front facings to the yoke facing. Then stitch the facings to the neck edge (including front openings and understitch. Then "Turn in inside yoke and sew to joining seams." I'm not sure how that is supposed to be accomplished, but I assume it involves either stitch-in-the-ditch or hand sewing. Unnecessary! Even if you use front facings instead of turning under the front edges as I did, you can do the front facings before assembling the yoke and yoke facing burrito style.
Because this was silk, I did all French seams except for the armscye, which is serged. With the bulk of all those pleats there was no way to do a French seam on the armscye, which I often do. I briefly considered binding it with bias strips, but decided that would add too much bulk as well. I have a fairly wide range of colors in serger thread, and having a nicely blending color makes this finish a little nicer.
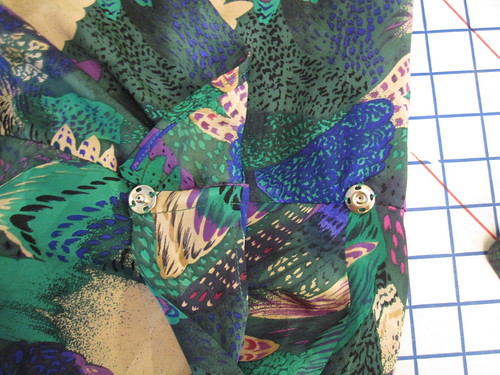
This is meant to close with a snap at the waistline. I considered making button loops and using shank buttons instead, but decided that I would probably always want to wear this with a belt and went with the snaps. I would have needed to elasticize the waist to leave off a belt, as I feel very schlumpy without waist definition (pear shape + no waist definition = looking bigger than you really are because the hips define your size), and I'm not sure I would have liked how it looked. I just used one snap because I wanted to keep the snap sewing hidden in the seam, but I think I need another snap above the waistline seam.
Even though I had made my usual Small Bust Adjustment (SBA) by shortening the crossover wrap, in this loose style with a lightweight, drapey silk a wardrobe malfunction seemed inevitable. Although such a fix is how one admits defeat in sewing a wrap style, I put a snap at the front crossover point. I'm not sure how I feel about these nylon snaps and may trade it out for a metal one, but they are slightly less noticeable. It's not noticeable while worn (I didn't change the crossover point, just secured it) and I feel much better about it.
My only real nit with this project is what Sigrid pointed out recently--that for some reason, when you cut out an irregular print the front always ends up twinned.
 Is it standard practice for textile designers to create a motif half as wide as the fabric so that when folded you have two sets of print? I don't know. It trips me up every time. Here it means I have two large beige swaths--the least attractive part of the print--right at center front, which is very meh.
However, other than that small quibble I love this blouse! It is crazy in both style, color, and print, and we all know my propensity for crazy. It looks great with the hot pink skirt (who knew I had so many items in my wardrobe to match a hot pink skirt?). I don't know how long it will be fashionable, so I better wear it a lot this season.
All photos are here and the pattern review is here
====================
This was a 2010 project, but I have finally managed to do something sewing-related in 2011. I cut out a coat last night--outer shell, lining, and interlining. I planned this coat before our bitter cold snap, for which it would not have been warm enough. Now is perfect weather for it (low 30s/high 20s at night, low 40s in day) and I don't have anything that really works for our current temperatures and I want it NOW. It's going to take a little longer than "now" to sew it up, unfortunately, and the weather will probably have changed by the time I finish. Such is life.
.jpg)


.jpg)


28 comments:
Beautiful blouse, love the pattern, colors and especially the sleeves. Always read your blog and love it.
Hugs
Eilane - Brazil
I LOVE that blouse. As always, your fabric choice is awesome
Love the Dynasty print and sleeves. Great 80's vibe!
I know you see it, but honestly, I didn't notice the twinning of the print until you mentioned it. I've gotten to the point where I don't cut fronts double any more, because I either want the print to match across the front or be totally random.
Love it! I thought the dress was a bit much, but it totally works as a blouse.
Also, I need a hot pink skirt...
Cool blouse! And I don't know why, but the full-length pic of you makes you look really tall. Maybe it's just as simple as all the proportions here are really perfect for you.
This pattern looks fantastic as a blouse. When I saw the dress in the magazine, I passed it by without a second glance.
Great top! Lots of great tips in your post, too. Thanks!
Lovely top. it's strange with those prints.
Thanks for all the tips in your reviews.
This must be so nice to wear in a silk fabric! I kind of doubted the style when seeing it in the magazine, but it looks great on you. I think wearing it with hot pink makes it very much "now" instead of the costume-vintage variety. ("Dynasty" would be with a tight black skirt, sheer black hose and stiletto heels, no? I kind of feel like perming my hair now.)
So 80's! I LOVE it!
I love this pattern. It's on my list for Autumn sewing :) Great work. Bummer about the unfortunate fabric placement at the front. I has similar problems with the starbursts on this frock ending up in an even more unwelcome place, which I managed to fix. http://littlebettydesigns.blogspot.com/2010/12/new-frock-for-me-hooray.html Unlike my dress, I'm sure most other people won't ever notice it on your blouse.
I love it and it is very flattering.Of course, I still haven't seen the December Burda, I only got November yesterday!
Great top, love the fabric you selected.
It's a lovely top on you balancing out our pear shape with the shoulders. In a poor month this one was about it!
The only way I've found to deal with the print issue is to only cut them in a single layer right side up. You have much more control over where your print lands on your body. I lay out the pattern until I get a pleasing print layout.
No Fallon, you can't marry Hunter. I love him. And Crystal is having his baby! -slap!-
Awesomeness.
Happy New Year!
This looks so good on you. I keep looking at this in the magazine, but have a nasty feeling it is not designed for my shape. I am also now feeling a bit faint at the thought of 32 pleats. Despite this I think it has snuck on to my sewing list.
Thanks for linking to my yoke post. I love a machine sewn substitute for hand sewing instructions.
Looks fabulous! Great with the pink skirt.
I like the style and love that print.
It is very Dynasty, but it works, and I just love those sleeves. Thanks as always for all the great tips in your review.
This looks great on you- and it is very 80's retro...in a very good way!
That is lovely! And it goes so well with the skirt. Looks pretty complicated tho. I just subscribed for the first time to Burda and can't wait for my first issue! Someone gave me one at a sewing meeting I was at but it's a summer issue and I'm not in the mood to sew summer stuff right now...
Great job! I'll bet your stylish grandma introduced you to sewing...?
That is so fabulous! Thanks for the review - I was really loving the sleeves and bodice of this pattern in the magazine, but the dress seemed a bit too much. So it is great to see it as a blouse - and it looks so good. The 32 darts (eek!) were worth it!
I'm no fan of 80s fashion, but this blouse looks really cute on you. Love the fabric! The pattern sounds horrifying, though. 32 darts? Yikes!
It's all about sleeves now! That's a pretty top and the sleeves are magnificient!
Hello you wanted feedback re detailed posts - I know these might be a pain but they really help me for part of my quest in sewing is to develop new skills. You write in a 'human' way too as the patterns are never one-size-fit-all and it's good to see how alterations are needed and you write with a sense of humour - so sorry I like your detailed posts! cheers Sally
I love it, it looks awesome!
Oh, so cute. The 80's style is starting to grow on me again. Lol This blouse is super cute. BTW- Happy New Year! You are already off to a great start with making beautiful clothes. You are an inspiration for style and thinking outside the box with matching colors and use of prints. Keep up the good work!
Post a Comment