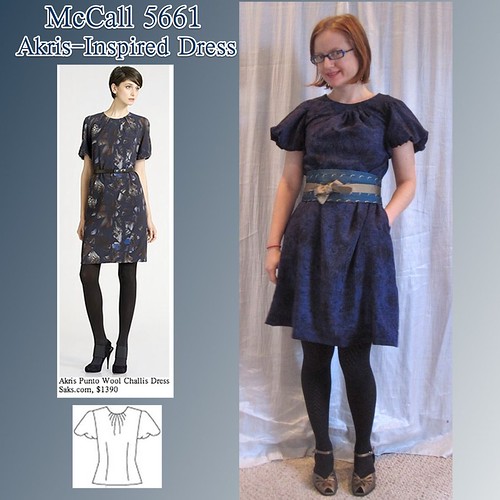
When I was snoop shopping for Fall/Winter dress inspiration a few months ago, one of my top picks was this Akris dress of wool challis. I had some wool challis in stash from The Carol Collection. I used some of it a while back for a frilled shirtdress (still one of my go-to pieces for not-quite-a-suit work occasions), but still had a couple yards left.
I bought McCall 5661 some time ago for its trendy neckline pleats and bubble sleeve, and it looked like a great match for the Akris dress. On the original, the sleeves appear to just be gathered a little at the bottom, but I always like a little more pizzazz.
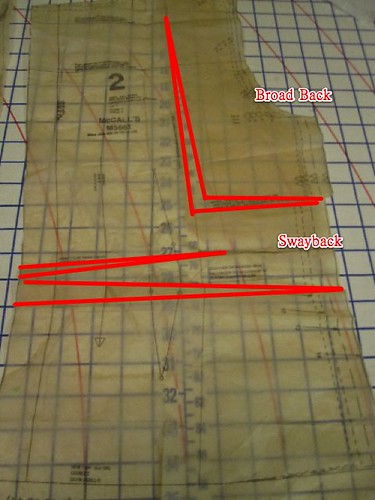 This is one of the Palmer-Pletsch patterns, and they are awesome because they have adjustment lines printed on them. The pattern insert contains information on how to make some of the marked adjustments, but not all. For instance, there are lines for a broad back adjustment and it is mentioned in the text, but there is no information on how to actually accomplish it. Luckily, I have the technology to do this adjustment.
 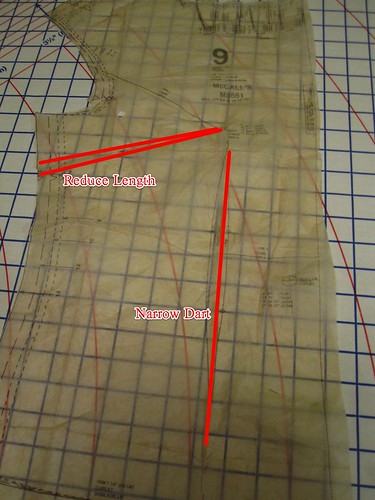 I found the swayback adjustment to be too skimpy, especially as I was lengthening this into a dress so I folded out their swayback line and took out an additional swayback wedge.
For the small bust adjustment, they had you narrow the dart (which I would normally do) and also shorten the side the seam. I don't know how to tell if that made a difference or not. I don't think I'll add it to my usual SBA repertoire, because a broad back adjustment adds length to the back at the side seam and then taking more length out in the front would result in a huge mismatch.
As wool challis is quite sheer, I needed to line the dress. The bubble sleeve is constructed with a stay, so it required a little decisionmaking to decide how to construct it. In the end, I decided to sew the sleeve and stay into the armscye as one and then hand-stitch the dress lining to the sleeve.
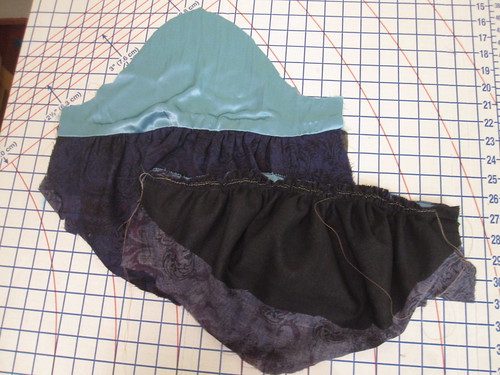 There seemed like just too much fabric and gathering to do it the other way (outer sleeve to fashion fabric, stay to lining). Although this made construction easier, it doesn't look perfect on the inside.
To ensure my lightweight fabric would retain its poof at the sleeve I interfaced the lower half of the sleeve with a lightweight knit interfacing. I then gathered the lower edge and sewed it to the sleeve stay.
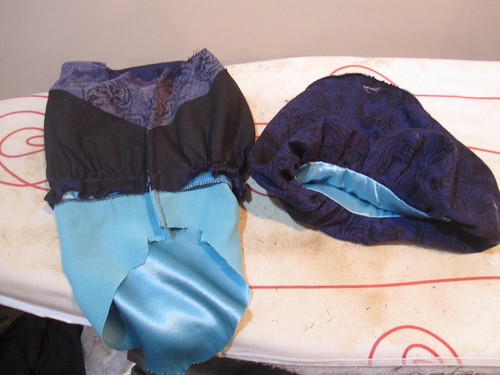
Then I sewed the sleeve seam. I constructed the dress with French seams, so I did that in the sleeve seam as well, even though it would be enclosed in the bubble. They're starting to look like sleeves!
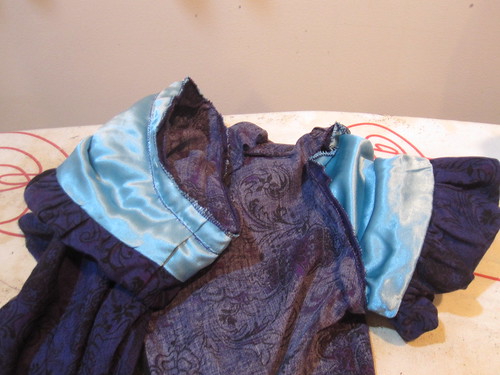
To sew into the armscye, I treated the sleeve and stay as one. I stitched in place and finished the seam with the serger.
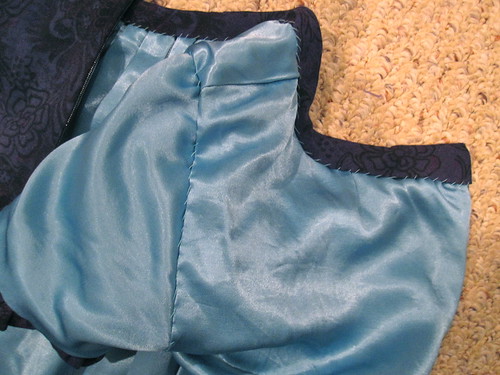
The final step at the end of the project is to hand-stitch the lining to the armscye just beyond the stitching line for the sleeve/stay. I had a hard time getting the lines to match up exactly, so it's a little ugly under the arm. I think the difficulty of this hand sewing might have negated the ease of constructing and sewing in the sleeve. Next time I do something like this I'll see how it is to sew the sleeve to the fashion fabric and the stay to the lining, though I'm having a hard time figuring out the order in which they can be sewn. Perhaps set in flat, sewing the side seams last?
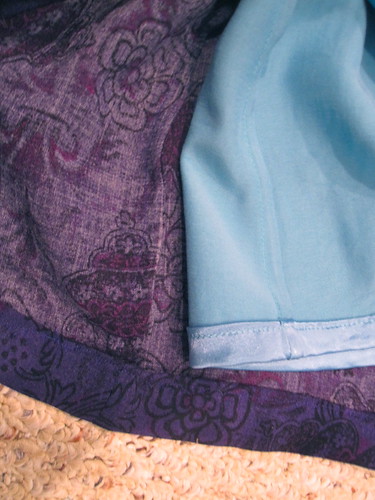 The rest of the dress is constructed with French seams, including the in seam pocket, as described in yesterday's tutorial and the lining. I wanted to make it deluxe since I copying such an expensive dress!
 It's lined in rayon satin from fabric.com. It was on sale in September for $2.79/yd, so I got a bunch of pink, turquoise, and ivory. It's heavier than a normal lining, but since I use slippery lining mostly for cool weather clothes in which I will be wearing tights the weight is actually perfect for my purposes. Love the pop of color inside the dress, and I even like that it shows a little bit as the sleeve stay. There are still a few colors left, though for $5.58/yd.
The pattern is drafted with a center back button closure and a facing for the neckline and button panel. I have no interest in a back-button blouse, as I live alone and have tight shoulders. I added a seam allowance to the marked center back line and put in a back zip.
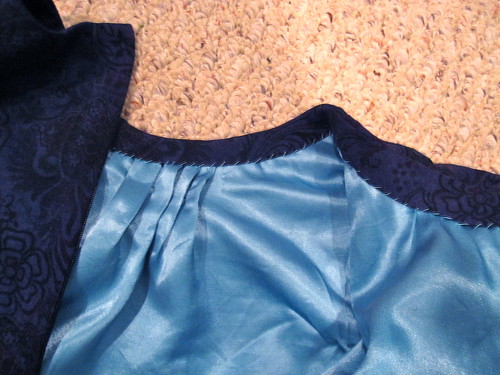 I did the neckline pleats last, after the bodice and lining were fully constructed. As with a pleat neck dress I made last year, I treated the fashion fabric and lining as one in doing the pleats. To finish the neckline, rather than use a facing, I used a bias strip (as I had for that project), sewn along the neckline and catch-stitched to the lining. I lowered the front neckline about 1 1/2 inches from where it was drafted. The back neck sticks out a bit and really needs a dart, so I may eventually get around to doing that, but I'm pretty sure I serged the bias strip on so it will really have to bother me for me to get around to it.
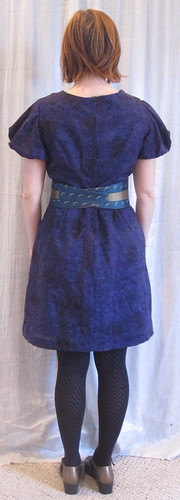
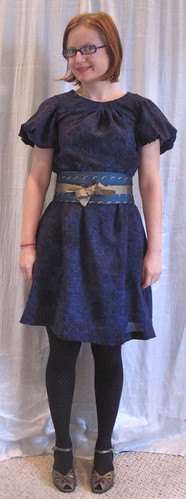
I am really liking this dress. It is a little more exuberant than the original, with the more voluminous sleeves and wider skirt. But I am more exuberant than the original, so I suppose it was inevitable. This was the first piece of my Endless Combination project for the PR contest and it looks great with the next piece in the combo (tease). The only problem with the contest is that I somehow have to find time to photograph and review five more pieces by the middle of next week. Challenging.
All photos are here, the in-seam pocket French Seam tutorial is here, and the pattern review is here.
.jpg)


.jpg)


24 comments:
It looks great - very similar to the inspiration piece. Your construction is wonderful. I love it with the blue obi!
Very nice. I always love your inspirational/ideas posts. You've done a great job on this dress and it looks great on you.
Angea
I love these posts! I like your dress better than the original, very, very pretty!
Nice. I especially love the belt, it's lovely!
I'm not sure you should be allowed to call yourself "Slapdash" any longer; you've really got yourself some serious sewing skills here!
Love the obi on this dress -- it works beautifully. And that blue is very nice on you, too.
Your version of this beautiful dress is fabulous. I love the exuberance of the sleeves and skirt - the overall look is stunning!
I too, love the obi BUT even more I love that you matched the ribbon on it to your shoes. SUCH a great detail!
to the "not AT ALL SLAPDASH sewist"... I love this dress better than the inspiration piece. It's beautiful on you.
The obi really makes the outfit. And I love the sleeves.
Good luck getting everything photographed and reviewed! Can't wait to see it all.
That's a great dress! The subtle fabric is great with its signature features, and the obi (must sew obi) is perfect on top.
All your adjustments have certainly resulted in a beautifully fitted, and very lovely dress.
Love the dress! So much better than the inspiration! I wish I were you and had lovely dresses to wear every day ;)
This is a great dress, I love the mix of a "sensible" fabric with the "exuberant" neck and sleeves. Great styling too!
"Endless Exuberance" should be your new title. What a fabulous dress on you. I love Akris and you have definitely made your perfect version.
V. cute dress on you.
Cute cute cute! I love snoop-sewing-shopping your projects. I have filed this away to rip off another day.
Gorgeous! I also prefer your version to the original. The sleeves have more oomph and I like the print of your fabric more.. and wool challis! What a delightful fabric! All the goodness of wool but lightweight. Love it!!
Cute dress. It looks so nice. BTW, i do love the different colored linning. It's just like a little secret detail that makes the dress even more special.
Love the dress.
So Sweet! I wish I could wear a belted dress! Great job. I love the tucks in the neckline!
Cute! The belt is so fun, too.
I really, really love this dress Trena! I thought I'd commented a long time ago - I actually set my homepage to your post for several days because I found it so inspiring. You look gorgeous and adorable at the same time.
PS : I think your rendition looks ten times better than the dress it was inspired from! ;)
Just saw this featured on McCalls facebook page--good for you! Love your posts.
Post a Comment