Well, ta da!
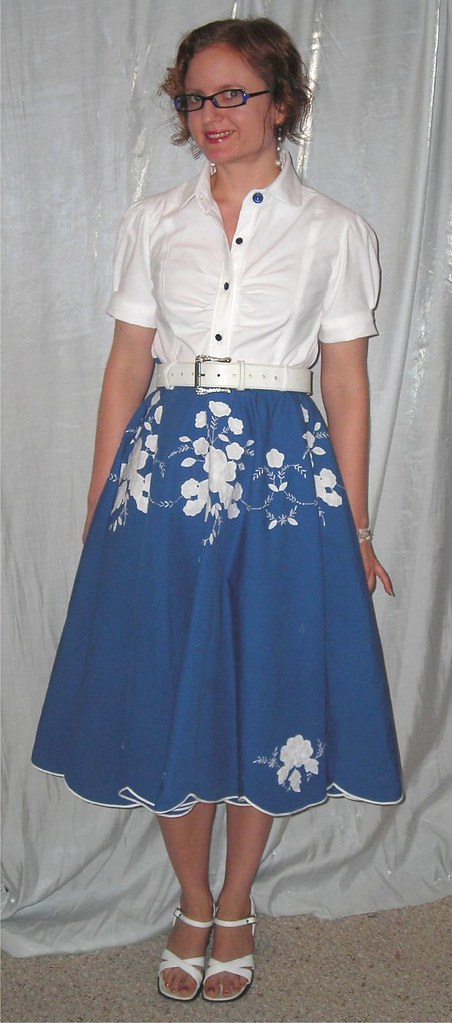
I love it! I normally stick with 20s-40s, as I do not have the figure to wear 50s fashions, but this bobby soxer look is ok by me. I wore it to work on Monday, though, and got zero comments, which is kind of unusual. So maybe it's weird and grotesque. Whatev. I think it's an awesome souvenir.
Here's how you do it.
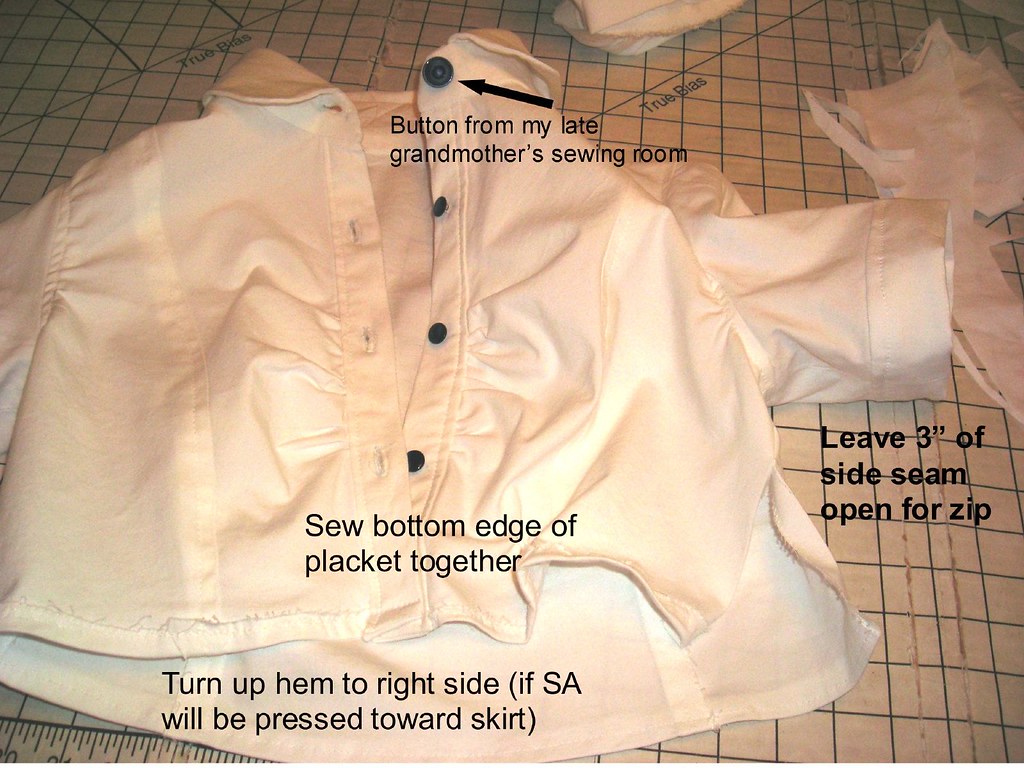
1. Make a blouse unit. Leave one side seam open for several inches from the bottom for a zipper. I used the left side, because then I can use my more dextrous right hand to operate the zip. I planned to press the waist seam down toward the skirt because of my white blouse and darker colored skirt (didn't want seam allowance show-through), so I hemmed the blouse unit toward the outside. I tacked the placket pieces together at the bottom.
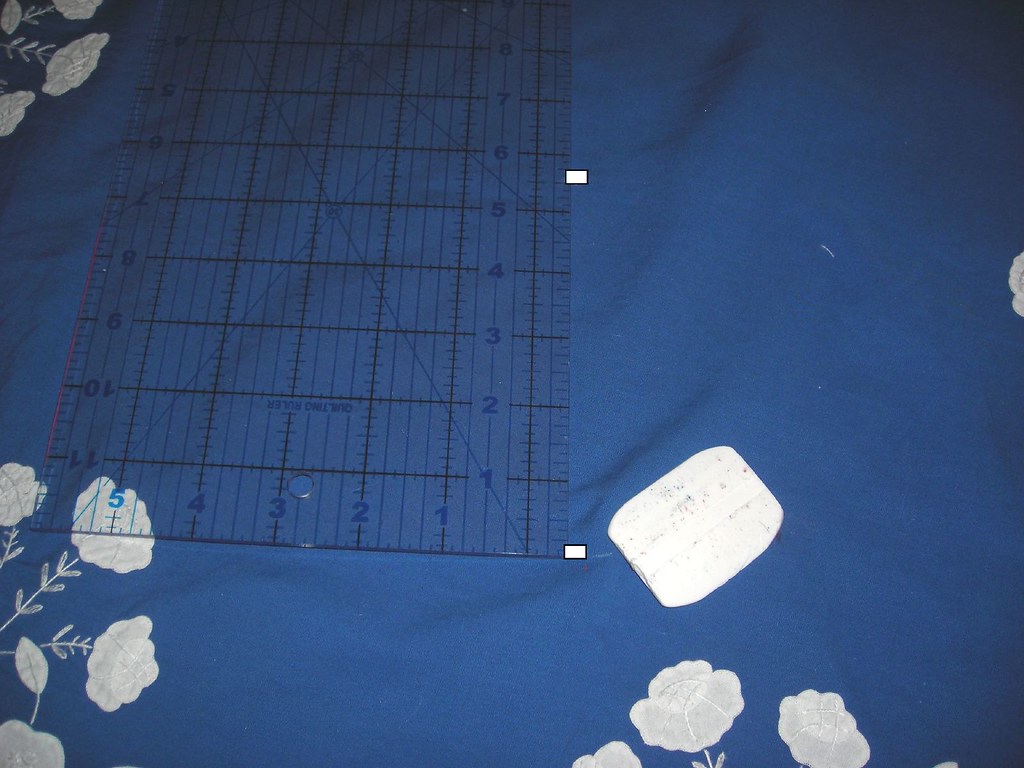
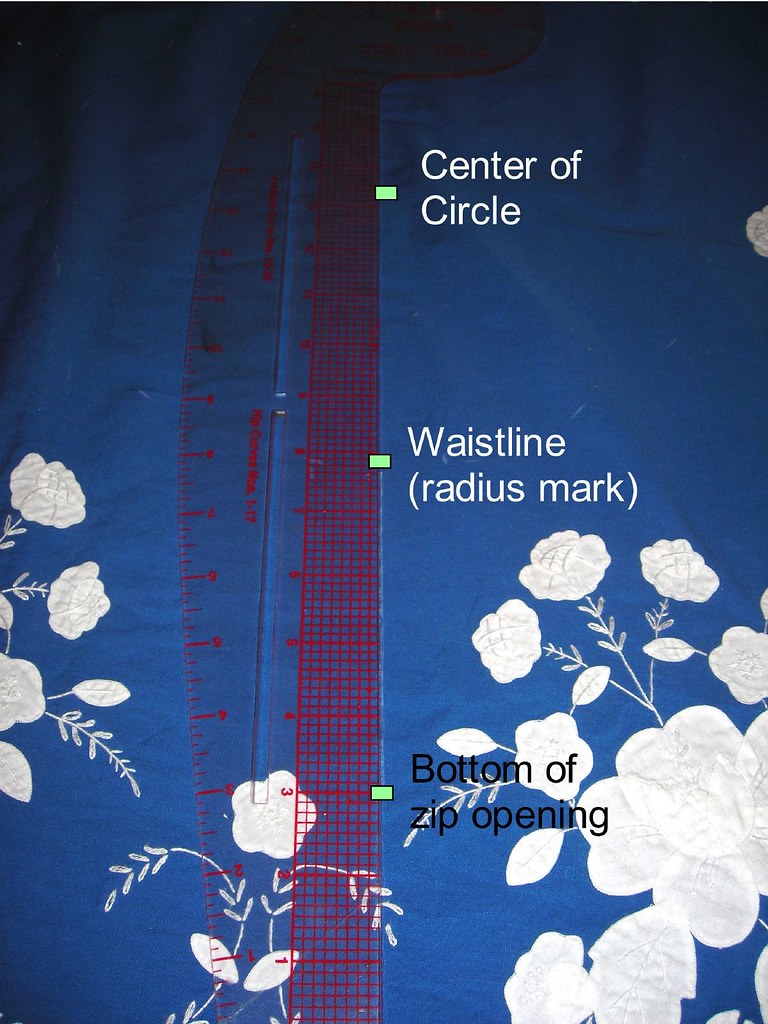
2. Find and mark the center of your circular tablecloth by carefully folding into fourths.
3. Calculate how large of an opening you need in the skirt. First, measure the lower edge of your blouse. This gives your needed circumference (but see my note on seam allowance below!). The formula for the circumference of a circle is 2πr. So let's say your lower blouse edge is 30 inches, and remember that π is 3.14.
2πr=30
πr=30÷2
πr=15
r=15÷3.14
r=4.77
However, be smarter than me. I cut my circle out with a radius of 4.77 (well, the equivalent for whatever my measurement was), not thinking about seam allowances. Doh! So you actually want your cut circumference to be at a radius 1/2 inch (or your preferred seam allowance) smaller than your lower blouse edge circumference so that your seam line is at a radius of 4.77. So for purposes of this exercise, you should mark and cut at a radius of 4.27. My skirt opening was a little larger than my blouse and I had to fudge using easing to get it together.
4. Mark your radii. I used a quilting ruler, placed it at the center dot, and measured outward every couple of inches. (Here's the complete marked circle.)
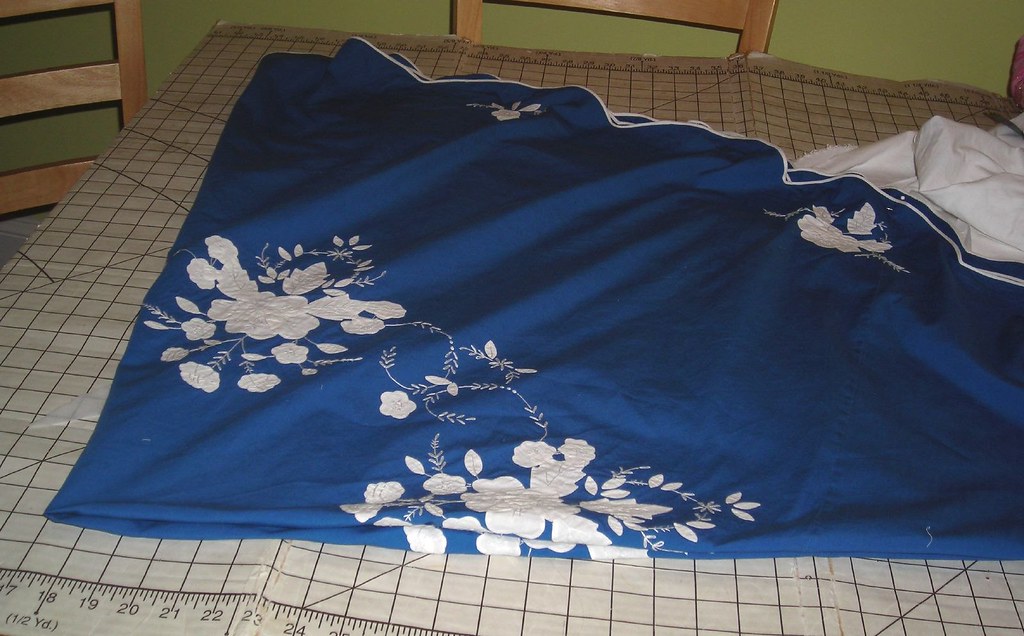
5. Now you need to mark a zip opening. My buttons are fully functional, but I didn't want to continue them on the skirt so it needed a side zip to open up the waist. I chose a spot where I wouldn't have to cut through any embroidery. I totally lucked out because this placed the large motifs at CF, CB, and sides. Sheer luck. You could get all fancy and calculate how far down you need the zip to go to make sure it will go over your hips, but I just brought it down about 5 inches or so and figured it would be good (I purposely made the waist pretty huge so I wasn't worried).
6. Cut out your circle, and slit down your zip opening.
7. Immediately staystitch around your waist opening, and then sew skirt and blouse together.
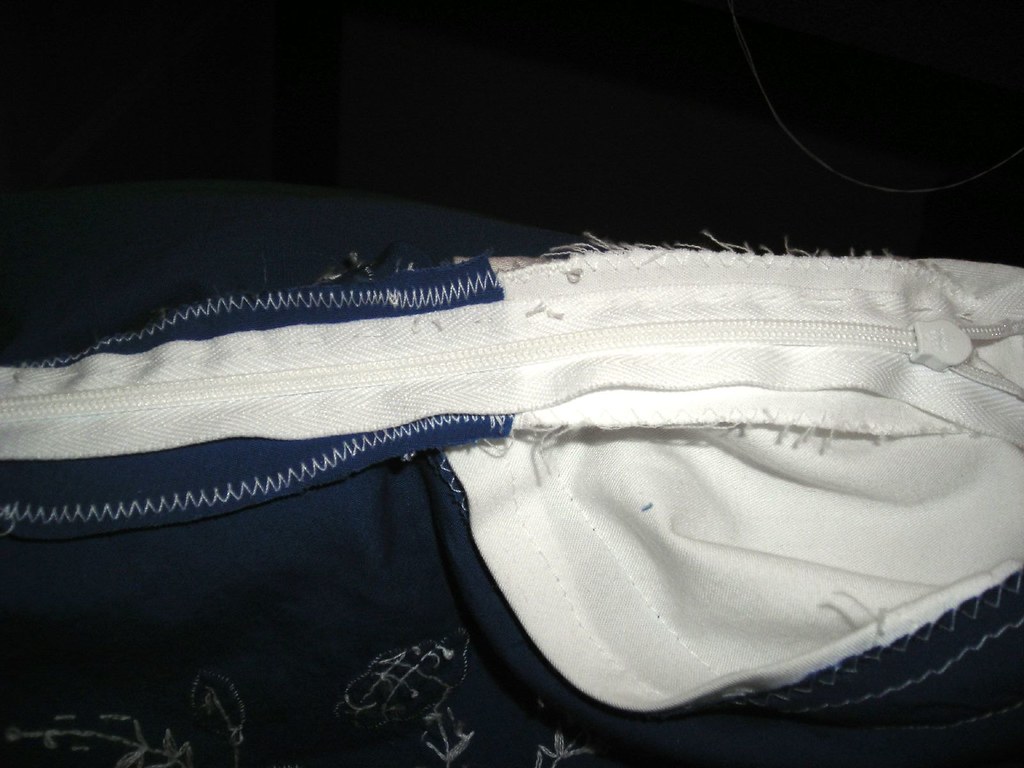
8. To make sure my waist seam matched up perfectly (which it does!), I first sewed one side of my invisible zip in place, and then hand basted the other side before machine sewing. I am really lazy about hand basting and I don't really know why, because I don't mind doing it and it doesn't take but a minute. This convinced me that I should do it more often. I finished the bottom of the cut edge basically by making a small dart that tapered to nothing. Normally for a circle skirt I just cut one edge all the way down to avoid having a bubble at the bottom of the zip, but I didn't want to cut through any embroidery--which, from what I can tell, was all done by hand!
And you're done! Since the tablecloth is already finished, no need to hem. I'm not in love with the length of this one, but I tried various ideas for shortening the skirt (without losing the gorgeous scalloped hem binding) and nothing worked. I think my best hope is a giant floofy petticoat, which I'm not sure I could pull off at work. But I would love to have a giant floofy petticoat, you know, just in case.
All the photos are here, and I will eventually get a chance to update the pattern review.


.jpg)


20 comments:
Love the vintage vibe and this is really adorbale. What a great tutorial.
Yes, absolutely adorable. I really like this dress.
Cute! Was there any certain reason you chose to make a dress instead of a skirt?
Really nice! I think it looks great at that length. Mary
Wow, that's really lovely, and very flattering!
This outfit is fabulous on you! How could your coworkers not compliment you on this?! You remind me of Julianne Moore in Far From Heaven, but you aren't hiding that you're three months pregnant.
Love it - and good thinking/planning. And making it from a tablecloth that is also a memory from Greece, GREAT.
You could have my co-workers. One not-so-subtly comments about my food choices, and truly believes a "booty" (her word) is unprofessional. She complimented me on wearing eye shadow today (uhh, I wear it most days, but today she saw me before I got my glasses on, so maybe that was it??).
Great dress! (And a good refresher course on algebra.)
What a great dress! It looks wonderful on you. Thank you for the tutorial. The Crate and Barrel outlet in Alexandria VA [near the metro stop at King St in Old Town] sells circular Marimekko tablecloths all the time, if you ever want to make another. Not as romantic as from Greece, but still nice. Now my daughter wants one.
I LOVE this. Your co-workers are nuts. Either that or they just don't understand that making a dress from a tablecloth is a perfectly viable use for the tablecloth. Actually, it's a better use. The blue and white is perfect - it's Greek without actually having to have the Acropolis marching around your hem.
thanks for the tutorial! I think the tablecloth makes a great skirt.
you look wonderful--i definitely pay you a compliment!
I love this dress. It looks great on you. I love reading your blog and appreciate the detailed descriptions of your sewing projects.
Cute, cute, cute. Hem length looks good to me.
Cutest outfit I've seen in ages. I love it!
I love this!! It's utterly perfect - from the flower placement to the line of the blouse to the hem. And your accessories are amazing - I mean, even your glasses are coordinated!!
That is one really cute outfit and I can't for the life of me figure out why your coworkers didn't comment on it. It's so unique and completely different from anything in the stores. Actually, the length is perfect, you wouldn't want that style to be any shorter.
Fabulous! Such a nice picture of you! It's only what's in your head that counts. At least that's how I try to think. Works for me.
Love this dress - it looks really great on you. Also love the short 'do. Thanks for the tutorial!
i really really like it.
Love, love it! There's a boutique here in Amsterdam that makes vintage-inspired outfits. Yours would reach hundreds of euros! I love how you have a flower that is not quite centered on the front bottom.
The blouse is beautiful by the way - hopefully I have this specific Burda issue at home.
Post a Comment