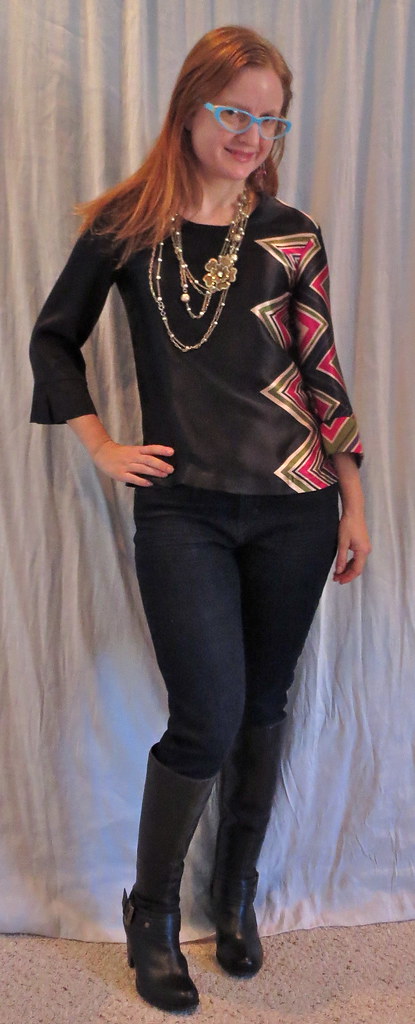
If you know me, you know that when the weather gets cold I start to whine because I don't have any cold weather tops. This year, as always, I was determined to deal with that situation.

I looooove silk, but I can't wear it when it's the least bit warm because I sweat like crazy in it. So Fall/Winter is when I get to indulge my fiber love, at considerably less than retail--like this GIULIETTA Silk-satin top, $475 from net-a-porter.
For my winter silk tops project I am loving my pullover woven tee pattern, perfected from a base of Burda 12-2007-123 as described here. The pattern still isn't perfect--I changed the dart to an angled one after this project but I don't have the length exactly right--but it is SO NICE to just cut it off the pattern as is and sew it up, knowing it will fit and is the right length. I marked the pattern with "skirt" and "jeans" hem lengths (the jeans length is about 1 1/2 inches longer, as skirts are worn at the waist and jeans below).
The star on this top is the fabric, so I kept the rest of it fairly basic. I got this zigzag print silk at London Textile at PR Weekend Philly 2010 for $5/yd. I used some of it to make an (unreviewed) negligee a couple years ago, but it was a large piece and I had a lot left.

The print is a little tricky because the zigzag portion is about 15 inches long, and there are about 24 inches of black in between the zigzag prints. It's hard to make the most of the fabric without waste! I felt fairly brilliant when I hit upon the idea of using the print sideways on this top.
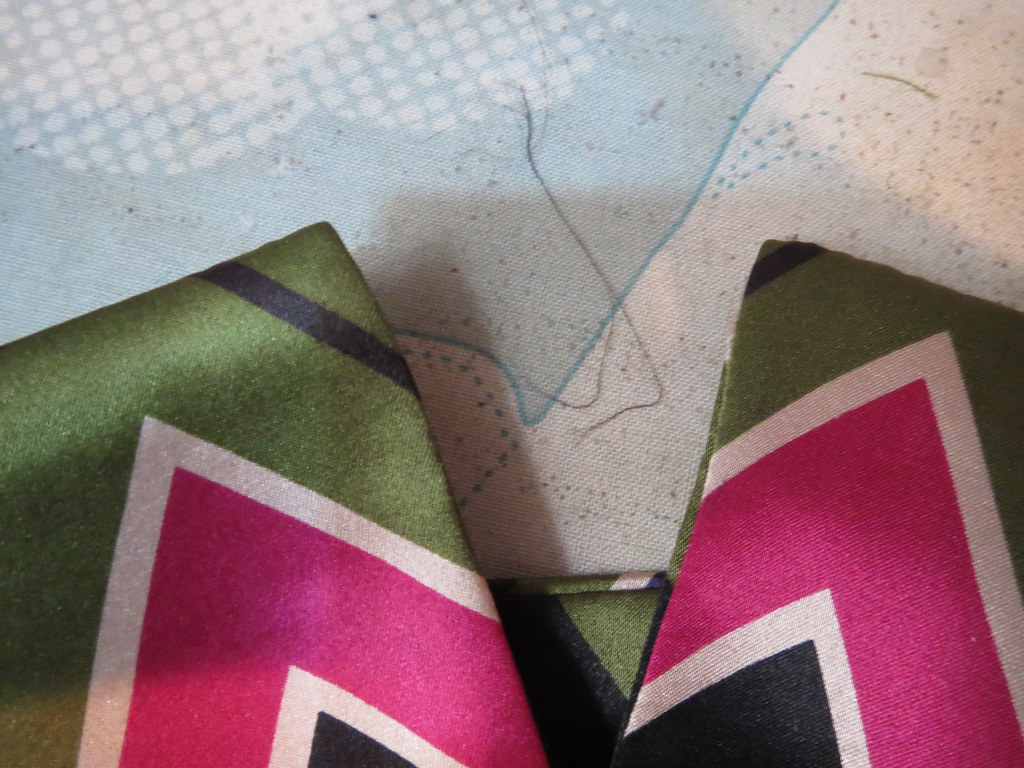
To get the print placement right I made a full-size pattern piece for the front, carefully marking the bust apex so I wouldn't have a big ol' arrow pointing to it. I cut the back so that the tips of the zigzags would be just outside the long back darts. Apparently, I didn't mark my darts well enough and they ate the tips of the zigs, but silk does not take kindly to unpicking so I decided to live with it.
My only flourish on this top was to add cuffs, which I took from Vogue 8379 (as seen in my perfect knit wrap dress). I just added width to the cuffs to match my sleeve pattern--as the Vogue is a knit pattern they would have been way too tight in a woven.

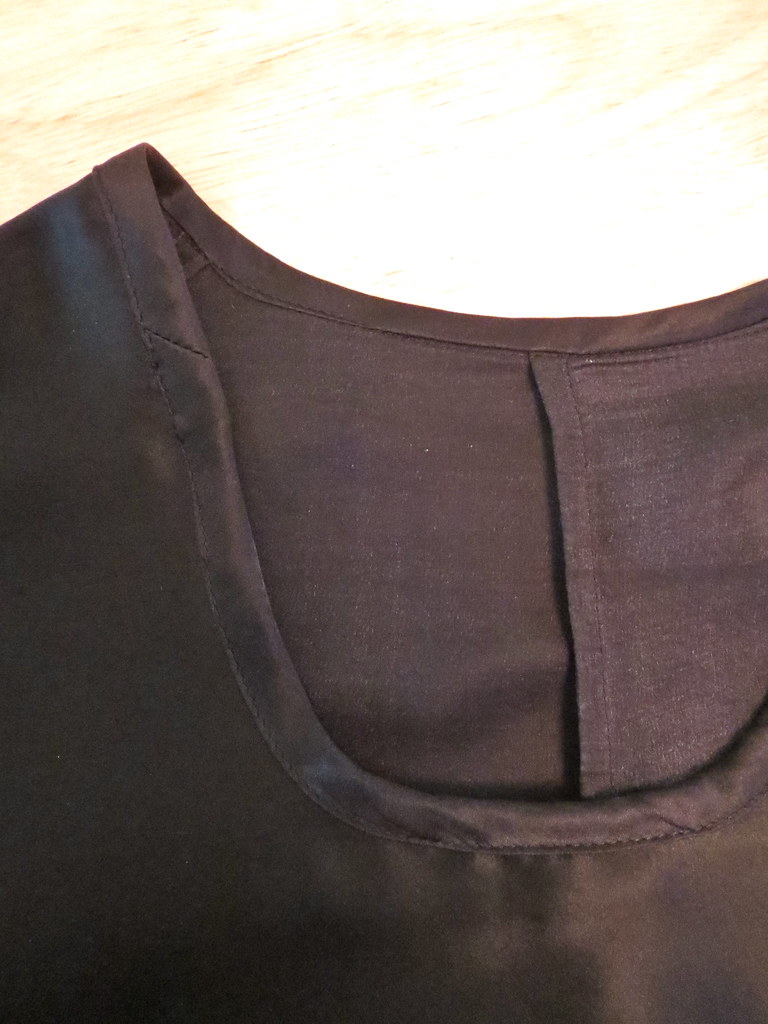
Making square corners is always a challenge. I have always dutifully followed the pattern instructions to clip the corner and then tried to sort of squish my way into a square. It doesn't generally work out too well. Lately I've been experimenting with *not* clipping the corner, but turning the seam allowances down at the stitch line, as shown in the photo, and giving that corner a good press before trying to turn it so it's as flat as possible.
It can take a few tries to get the corner turned with the seam allowances all staying in place, but the result is a nice, sharp corner I can be proud of. This doesn't work with bulkier fabrics, but for a silk with light interfacing it's a good strategy.
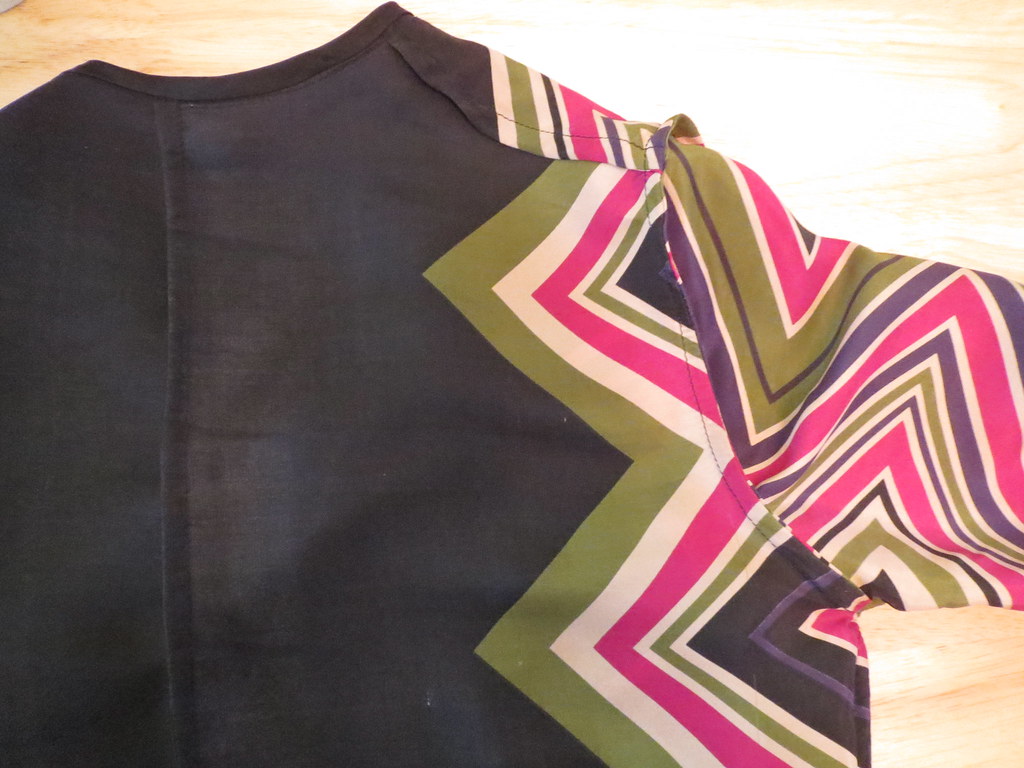
As is my usual practice for silk, I sewed everything with a French seam, including the armscye. It takes a little time and patience, but I do love how beautiful everything looks on the inside.
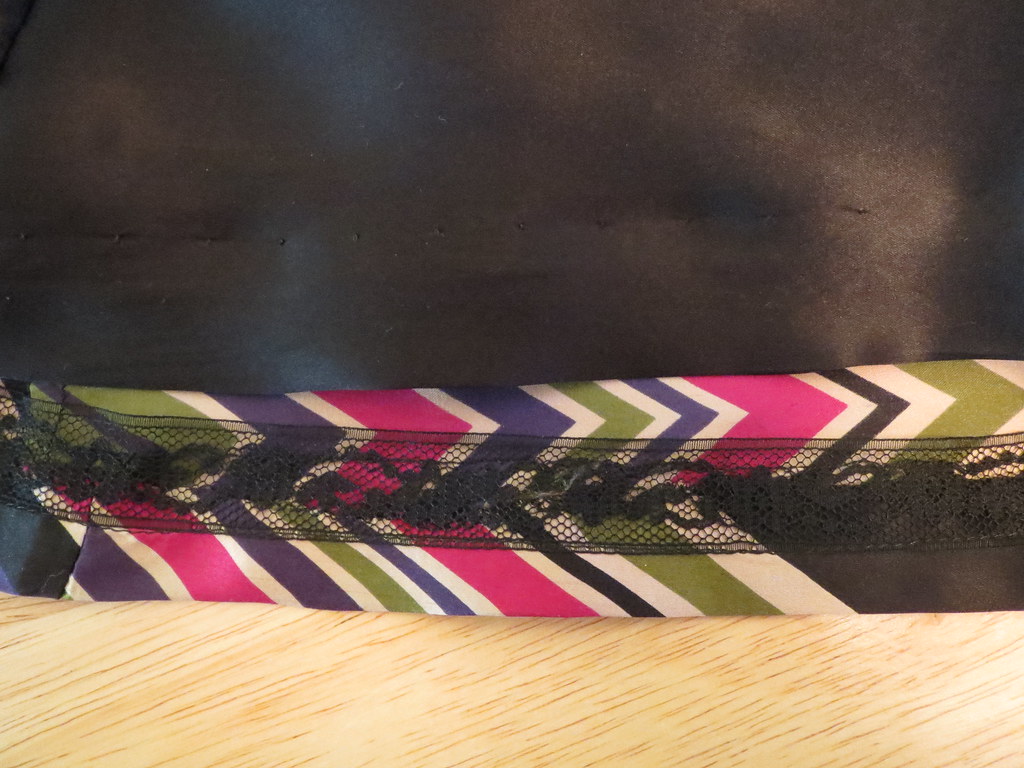
I had a hard time getting a double turn on the hem--this silk is fairly sturdy and it would have been a big production to ease in the longer inner curve. I used hem lace instead. It is stitched with a machine blind hem; it's not invisible, but I'm not fussy.
The neckline is bound with self-bias tape. I considered using the print for the bias tape, but I wanted to make this top classy rather than my usual zany/fun. I actually regretted adding the cuffs when I finished it, because I felt like it wasn't totally obvious they were cuffs but maybe some sort of ruffley thing. They've grown on me, but I am still glad I went with plain black for the neckline.
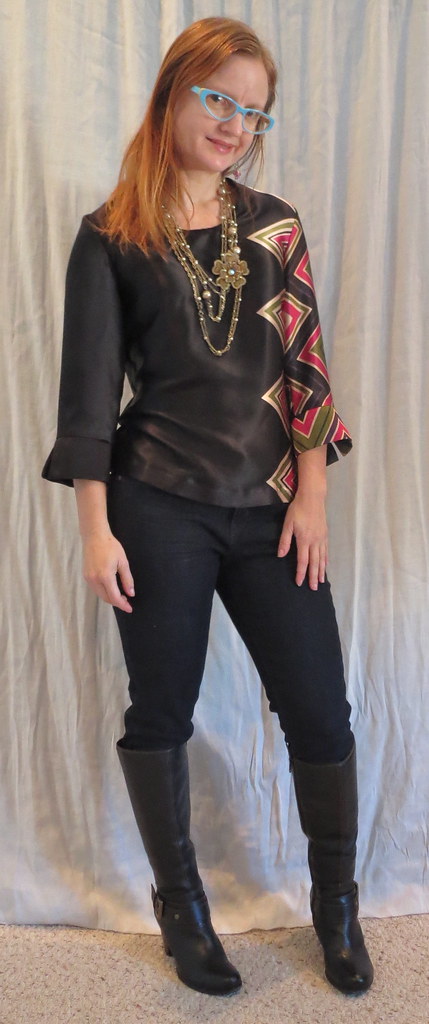
I wish I could claim credit for the sleeve perfectly matching the front, but that was total happenstance. Crazy! I put the sleeve in the most fabric economical placement I could come up with and didn't even consider trying to match the print.
I am very happy with this top, the first of several silk tops I've made for this season. I think I achieved my aim of looking classy and expensive without compromising my love of bright colors.
All photos are here.
P.S. Happy New Year!


.jpg)


.jpg)


44 comments:
Love it! Beautiful top!
This is gorgeous and I love how you used the border print!
This is a fabulous top. I love everything about it - fabric border placement is genius - well done!
Karen
This is a smashing success. I would never think to use the border as you did, but with a silk, the fabric is so stable, you don't have to worry about it stretching out. I admire your precision in figuring out length, too. Brava.
Classy. I want one of these.
I absolutely LOVE this top. It is very sophisticated and the pattern placement is inspired!
Lovely top! You placed the print so well.
Awesome top! The slik fabric makes it look really luxurious. I can't believe you didn't plan the sleeve and bodice matching: it's really a cool detail!
Pray tell: was it hard to make the neck binding out of slippery silk?
Love how you did the top! It really does look classy (and expensive!).
It is a great use of the print. I love this. I am looking for a simple woven top and will make a note of the number.
that is some genius print placement!!
Wow, your top is so much more appealing than your inspiration top--and at least $465 less expensive! That has gotta feel great. Speaking of inspiration, maybe you will get me cracking on making some silk pieces. Yours is sophisticated and yet still fun and quirky--just like you.
Gorgeous blouse! I love your use of the border print. I might have to steal your idea at some point.
GREAT use of the border print! It really makes a simple top into something special.
I love this top!
I get sooo excited by good print placement. This is fabulous. It reminds me of something Claudine made that I also covet. Why or why am I four sizes bigger than you!!
Pretty top!
I LOVE this! The design on the sleeve is awesome!
Love, love love it! Beautiful construction and a gorgeous result (and much more beautiful than your purple RTW example...)
Perfection. Love the sideways placement of the print. This style really looks great on you.
Very nice! And Happy New Year to you too!
I love having a woven pullover top ready to go. This blouse os great!
Your pattern placement is perfect!
Great fit too, and I love those cuffs.
I too have some border prints silks that I've been wondering how to style.
Your top is beautiful Trena!
You did a great job using that border print in a really neat way!
Have you tried the Sewaholic Renfrew? I'm going to try sewing it up again this weekend in a sweater knit. I need to reduce the armpit wrinkles.
I love the border print placement on this top... I will be copying you sometime. :)
Gorgeous! I love playing with border prints but wouldn't have thought of this - I love it. Glad you kept the neck band black.
This top is beautiful. It looks so class and is really ver you. Also, the print placement is brilliant.
Beautiful, beautiful result - so inspiring!
This is one of my favorite of your makes - ever! Its stunning, so sophisticated and unique. Gorgeous!
> I think I achieved my aim of looking classy and expensive without compromising my love of bright colors.
You certainly succeeded!
I didn't notice the points caught up in the back dart until you pointed the out. There really was no other option except to throw the back off-grain or to move the motif to the left (and lose a chunk of the color splash). I think you made the right design choice.
Love your pattern placement on this top! So cool!!
This top is absolutely brilliant ! You did a wonderful job! What a print placement, simply perfect. i love it and it suits you so much. This would sell so well if it were to be found in a shop.
Woo Woo! Great use of the border print.
Gorgeous, I would never have thought of using the border print in that direction but it makes the top so much more interesting and outstanding
What an inventive use of the print. The necklace really adds cool texture to your ensemble too.
You are amazing! I check in every once in a while to see what you've been sewing. You wow me every time.
When do you find the time??? I'm curious because I find that I can't commit to anything more than alterations or re-fashioning stuff I've found secondhand.
Wow! That is stunning!
This top is amazing. I love the unique way that you used the zig zag print.
Inspired print placement. Love it!
This top is fabulous! I love how you managed the print, it's beautiful!
Wow - stunning. Your top certainly looks classy and I rather like the cuffs. What a great use of fabric. I have a couple of border prints and fancy making something other than a skirt or dress with the print at the border. I love this non-symmetrical idea. Thanks!!!
Love the silk blouse. The CUFFS are my favorite part!
I am so very late in commenting on this Trena but your blouse is so couture. The print placement is genius. This style looks great on you!
Post a Comment