Tuesday, January 28, 2014

Lemony Beans and Greens Soup with Pesto

Lemony Beans and Greens Soup with Pesto

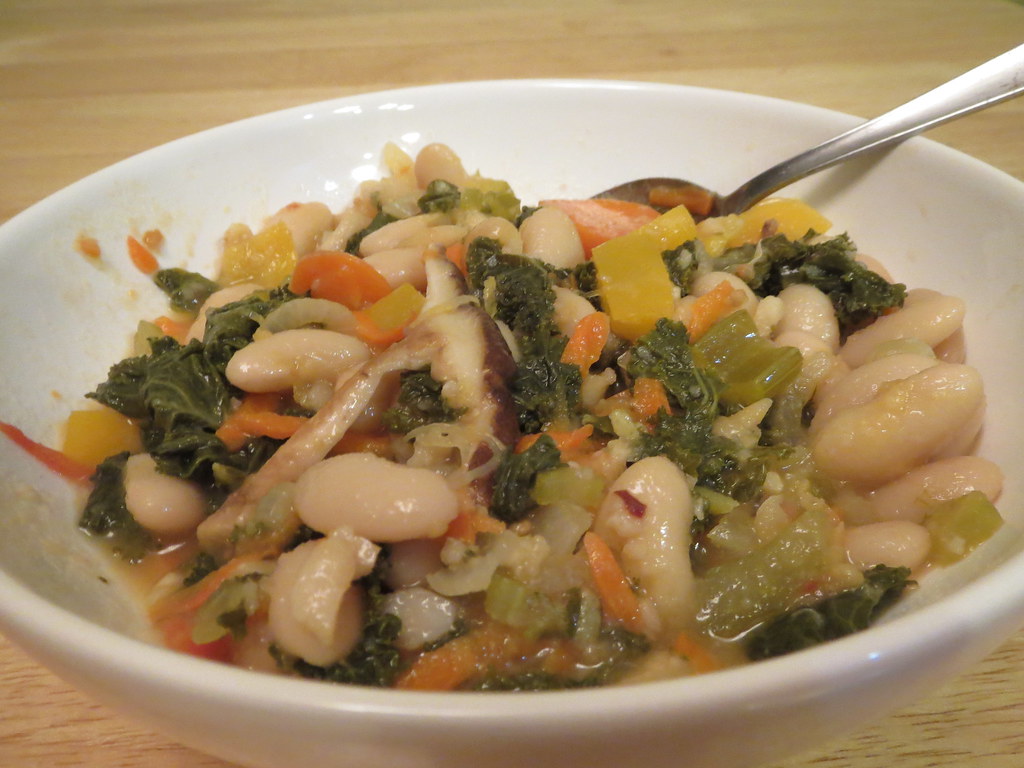
I cook a big pot of something on Sunday evenings and have it for lunch at work all week.  A couple of weeks ago I wanted a soup with white beans and kale and lots of lemon, and surprisingly couldn't find a recipe like that, so I had to improvise.  I kept track of my ingredients and process while cooking and it was SO INCREDIBLY DELICIOUS that I had to share the recipe.  I looked forward to lunch all week.  The lemon works really well, and the pesto is an incredible addition.  It also answers one of my perpetual questions:  what to do with pesto that doesn't involve pasta.

I am not a food photographer, so it doesn't look as good as it tasted.  You're just going to have to take my word for it.  I promise you won't be disappointed.

Lemony Beans and Greens Soup with Pesto
Makes 6-8 servings

1 pound dried white beans (canellini, navy, etc.), soaked
3 bay leaves
1  tsp dried rosemary
or 3 15.5 oz cans white beans

2 tsp olive oil
3-5 shiitake mushrooms, sliced
(The mushrooms are optional, but they add a nice chewy texture and umami flavor to the bowl)

2 tsp olive oil
2 medium onions, halved and thinly sliced
3 stalks celery, diced
2 carrots, one thinly sliced and one grated
1 yellow bell pepper, diced
3-5 cloves garlic, minced
3-4 medium tomatoes, diced, or 1 14.5 oz can whole or diced tomatoes
1-2 cups dry white wine (I used flat Prosecco)
Zest and juice of 2 medium lemons or 3 small lemons
1/2 tsp dried red pepper flakes, or to taste
1 tsp dried rosemary, if not added to beans
3 bay leaves, if not added to beans
1 tsp dried thyme
1 large bunch kale, rinsed and chopped
salt and ground black pepper to taste

For the Pesto (theoretically the pesto is optional, but it really makes the soup):
1 large bunch basil (I bought the 4 oz box at the grocery store)
1-2 Tbsp pine nuts, dry toasted
3 Tbsp olive oil
3 Tbsp (or more) grated parmesan and/or romano cheese
3 cloves garlic

BEANS
Drain and rinse the soaked beans.  Cover with water by 3 inches, add 3 bay leaves and 1 tsp dried rosemary.  Simmer until until tender but not fully cooked (the interior of the beans will still be grainy), about 45 minutes to an hour.  Remove from heat and drain off most of the water (this keeps the beans from continuing to cook).

MUSHROOMS
Heat a heavy soup pan, like a Le Crueset,  over medium-high heat (level 6-7).  Pour in 2 tsp olive oil and add the shiitake mushrooms.  Saute until the mushrooms give up their juice and then begin to brown.  When mushrooms are browned, remove from pan and set aside.

MIRAPOIX
Reduce heat on heavy pan to medium low (level 4).  Pour in additional 2 tsp olive oil and add the sliced onions.  Saute on medium low until the onions turn light brown and begin to caramelize, about 8-12 minutes.

PESTO
Meanwhile, heat a skillet to medium-high (level 7), or preheat toaster oven to 375 degrees.  Toast pine nuts in skillet, shaking frequently, about 2 minutes until they begin to brown.  If using toaster oven, check after 2 minutes and shake pan; they should take no more than 3 minutes to toast.  Pine nuts burn very quickly!

Pull the basil leaves off the stems.

MIRAPOIX
At this point the onions should be lightly caramelized.  Add the chopped celery, sliced and grated carrot, and red pepper flakes.

Saute about 3 minutes, then add the bell pepper, garlic, and tomato.  Let cook until the tomato begins to break down, about another 4 minutes.

Add the wine, lemon zest and juice, thyme, and rosemary and bay leaves if not used with the beans.  Pour in the mostly cooked beans (or drained, rinsed canned beans) and add enough water to reach the top of the beans.  You can use stock if you'd like, but I found this plenty flavorful with just water.  Add the chopped kale on top of the beans and cover.

Let steam until the kale begins to wilt, 3-4 minutes, then stir in the kale.  Cook until beans are done and kale is preferred consistency (longer=less chewy).  I cooked about another 20 minutes, but probably should have stopped at 15.  Add salt and pepper to taste.  I found this needed surprisingly little salt.

PESTO
While the soup finishes cooking, in the bowl of a mini-food processor, layer as many basil leaves as will fit, the garlic cloves, 1/2 the cheese, 1/2 the pine nuts, and pour 1/2 the olive oil over the top.  Run the processor until the pesto is finely chopped, adding the remaining basil leaves, pine nuts, cheese, and olive oil as the pesto compresses.  Taste the pesto and adjust cheese, nuts, and/or garlic as preferred.

TO SERVE

Place some of the sauteed mushrooms in the bottom of the bowl, ladle hot soup over the mushrooms (they get soggy if mixed in, though I deal with this for lunches at work).  Add a generous spoonful of pesto on top and stir in--the pesto is best the less it is cooked, so only add the pesto at the end right before eating.

The basil in pesto oxidizes into an unappealing black mash very quickly, and it does best in the freezer.  For work, I put the pesto in a container and divided it into wedges by running a spatula through it, one for each serving.  I froze it overnight so the wedge divisions would stay in place during transport.  I kept it in the work freezer all week, adding one frozen wedge each day after my soup came out of the microwave.

This will taste very lemony right out of the pan, but the lemon flavor dissipates over time.  If you're serving right away, add half the lemon juice as instructed and then adjust the lemon flavor at the end with the remaining lemon juice to taste.  If you're going to have leftovers, add all the lemon juice as directed.

TO MAKE IT EASIER

You can make this a little more quick and easy by using commercial ingredients:
-canned beans
-canned tomatoes
-bottled lemon juice
-bagged chopped kale
-pre-made pesto
Friday, January 24, 2014

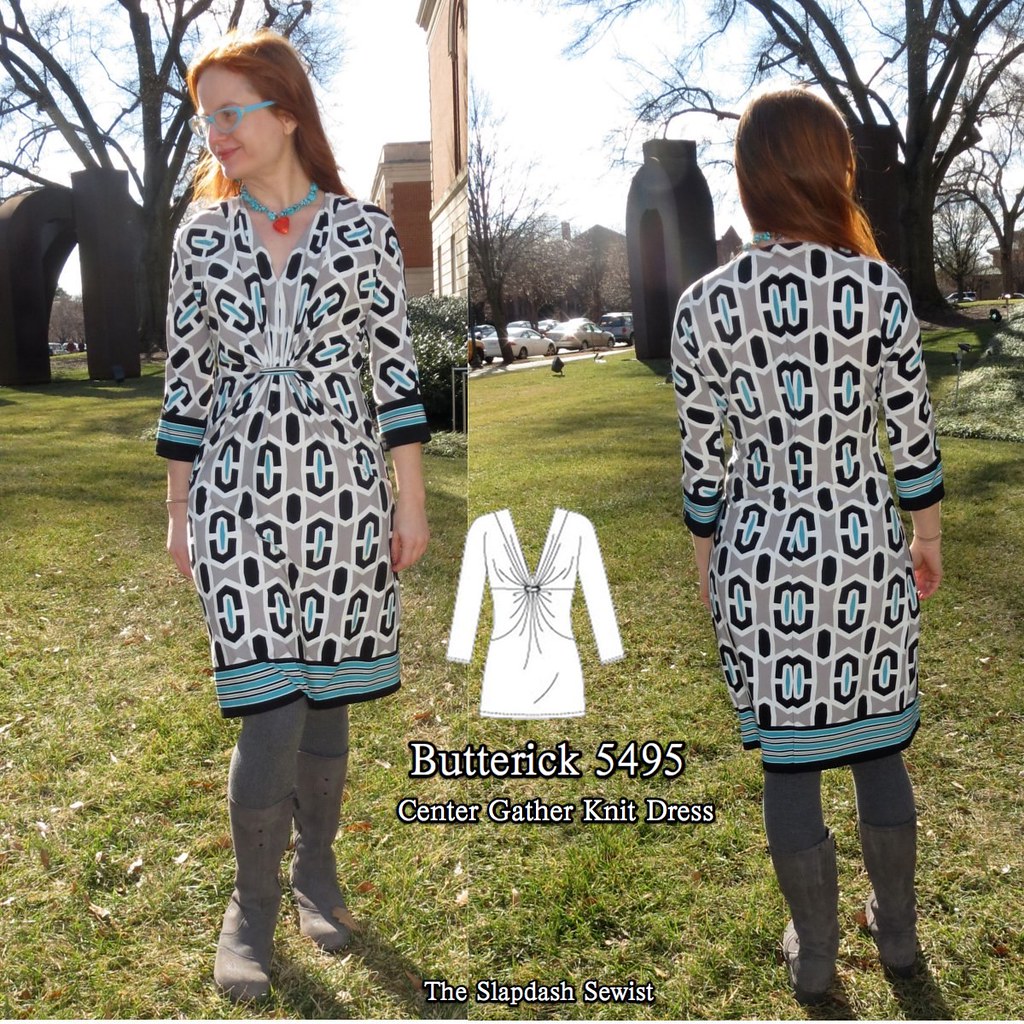
Butterick 5495, Gather Waist Border Print Knit Dress

B5495 Thumbnail

Cidell and I had a little tug-of-war over this fabric on our Pilgrimage to Fabric Mart in November 2012.  I won.  :-P  I figured I should sew up the fabric so that I wasn't being selfish for no reason.  It's ok to be selfish if there's a reason, right?  I perhaps should not have been so cruel as to force her to do the fashion photos, but a blogger's gotta do what she can to get good photos and she is my best photographer.

My first instinct with a border print is to go wrap dress, but I felt like that was too predictable so I dove into the pattern stash.  I made the Knip Mode version of this top in December 2008 and it is still in my closet but I don't *quite* love it as it is a little shapeless through the waist area.  From the PR reviews, the Butterick looked a little less bulky and more fitted.  After much consideration, I decided I would take a chance on Butterick 5495.

IMG_1441
I like the idea of the pattern with its belly-disguising front gathers, but my first order of business was to move the gather band from empire level closer to waist level.  After a triumphant run, the empire waist is over and I didn't want to feel dated.

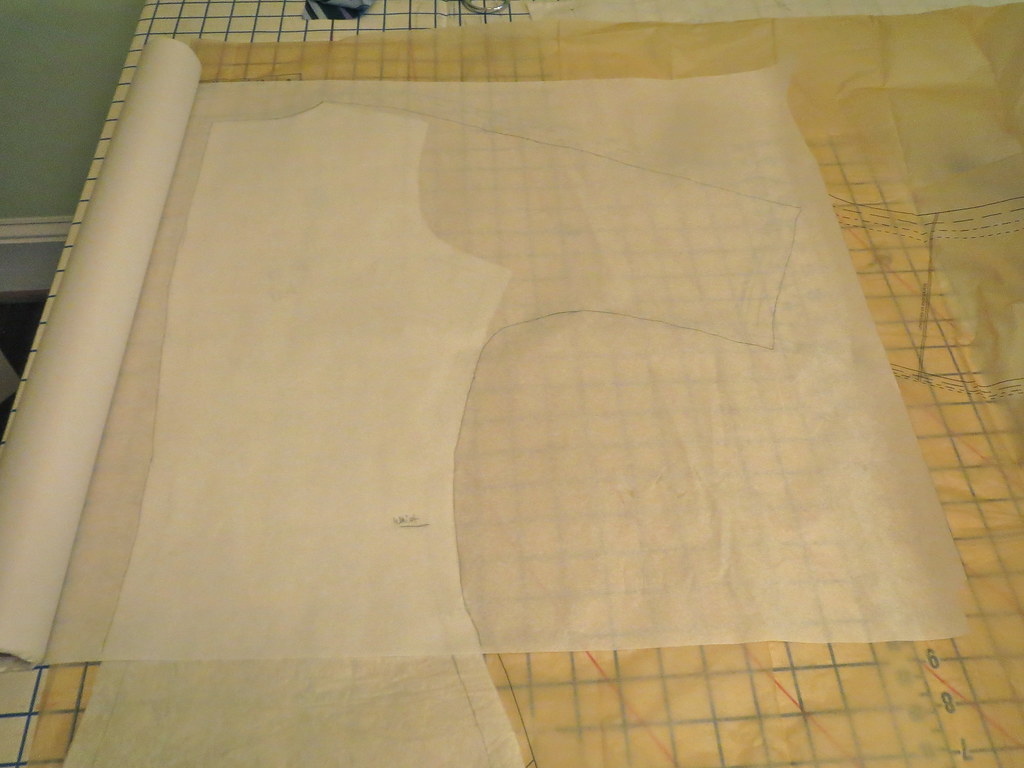
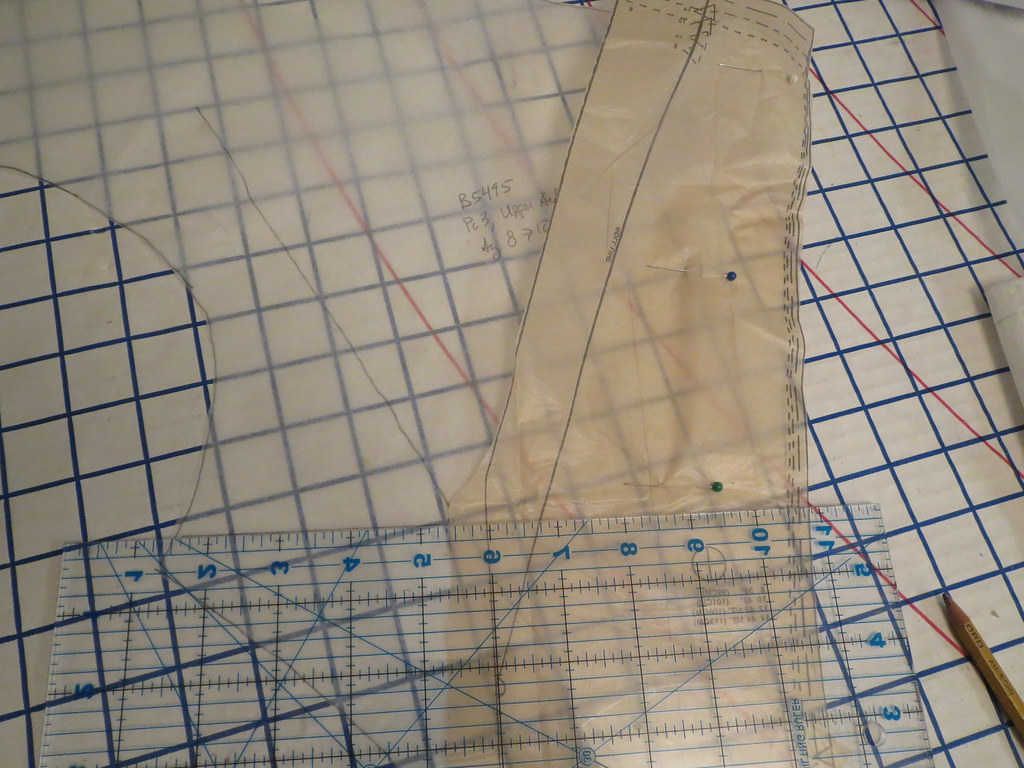
Lengthening the pattern is a bit of a challenge because there is only a very small space between the end of the neckline and the loop placement.  I marked the center front and side front in that small space.

Lengthened Front Pieces

Then I cut along my markings and added 1 1/2 inches in length above the loop opening.  On the center front piece (on the right) you can see that the length is added juuuuust where the neckline slant squares off to become the center front seam.  My addition kept the neckline the same length so it wasn't a navel-plunger.

I wasn't entirely sure this would work with the gather moved lower, but my instincts were apparently pretty good--I later saw this lovely orange Ferragamo  ($1007) with a similar vibe.

The only downside to the lengthened front bodice is that if I wanted to make this into a top I'd have to cut off the bottoms of the rounded side front panels--the lower seam hits me quite low on the hip.

The dolman sleeves are cut as one with the bodice, and I thought this vertical print would make for a fun/interesting direction shift at the sleeves.  The effect turned out less noticeable than I expected it would, but it is still a nice subtle detail.


Overlay Back Piece on TNT Tee


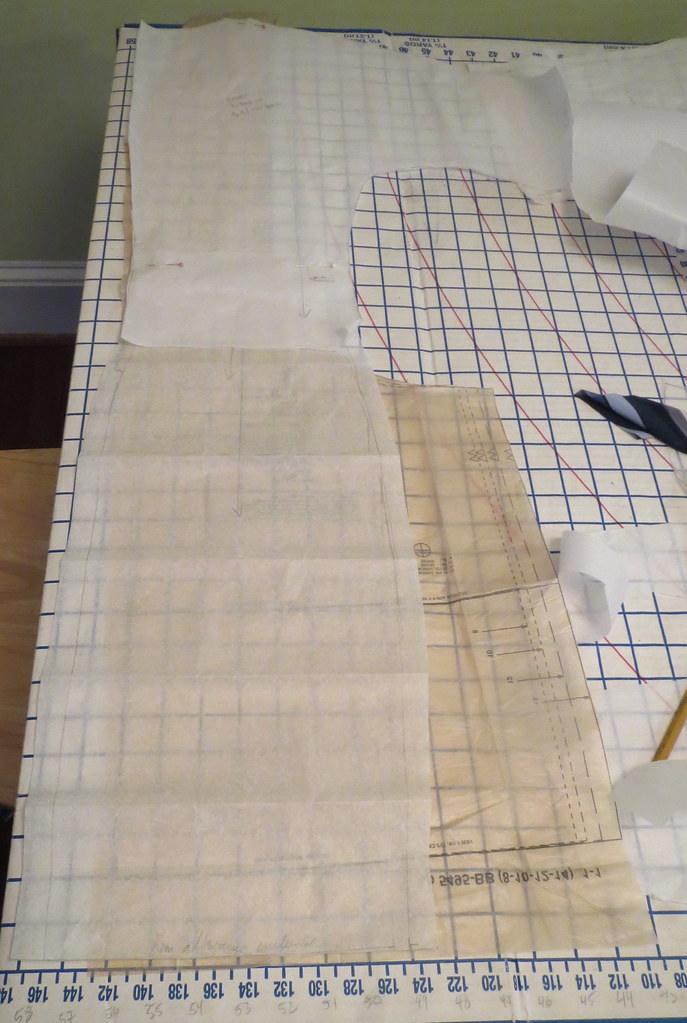
As drafted, the back is cut on the fold.  With the extra fabric in the front I knew that was a recipe for a swayback disaster.  I used my TNT tee back pattern, laying it over the B5495 pattern.  This ensured that I transferred my broad back adjustment to the dress, as well as my swayback and waist shaping.

Back Pattern Piece


I traced the back pattern piece to a couple of inches below the waist, and then matched it to the back piece of my TNT knit skirt at the waist line.  I matched the length to the front skirt.  With my added 1 1/2 inches this was actually the perfect length for me, though the longest length is only supposed to be a tunic.

The side seam travels a bit toward the back as a result of my alterations--my TNT back is narrower than the more shapeless Butterick--but the fit is good and the fabric doesn't seem to drape funny or off-grain, so I'm ok with that.

Back


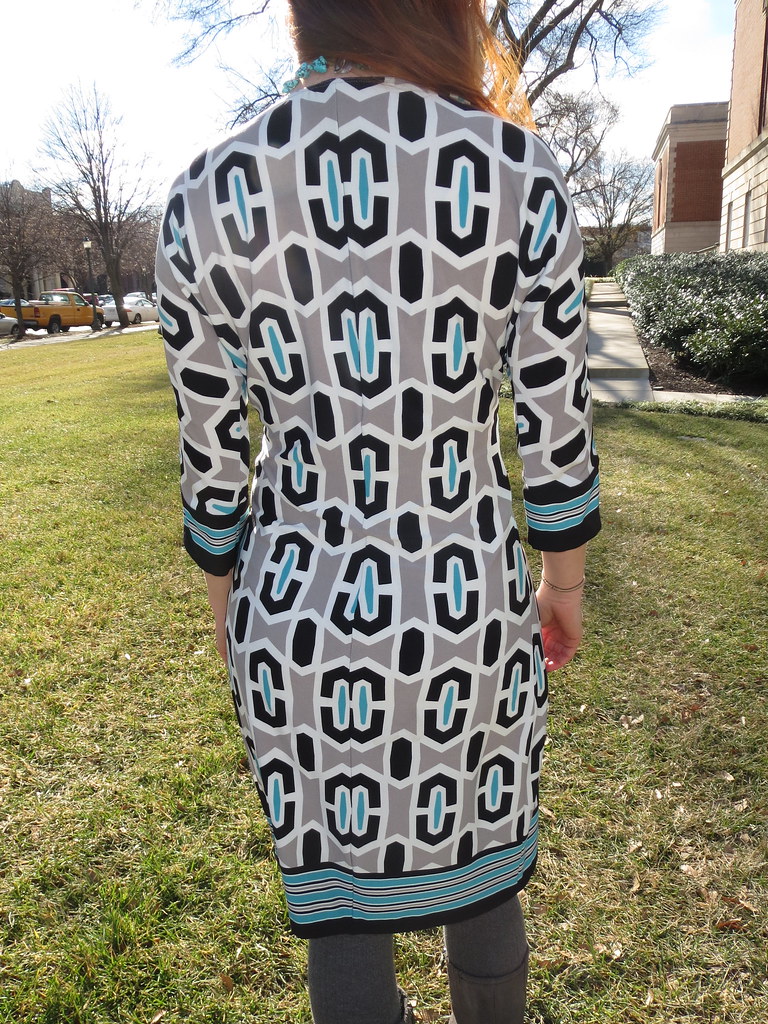
I was careful in cutting to ensure that my borders matched up perfectly at the center back and side seams, but apparently I paid slightly less attention to how the motifs would work out at center back.  So I have some cell mitosis going on back there.  But at least the shaping is good!


I have two small gripes with the pattern.  The first is that I find the front facing a bit skimpy, though I haven't had issues with it popping out.


Gather Band OPenings

The second is the construction method at the horizontal seam intersection in the front where the loop is inserted.  The instructions have you clip to the seam allowance--fine, very standard procedure--but the design of the pieces and the construction method leaves you with essentially a raw edge at the point of loop insertion.  This poly jersey isn't going to fall apart or anything, I just don't think it looks nice.  Before I wore it the first time I went in and zigzagged those raw edges together, making the opening narrower and taking some of the strain off that raw edge.

Front

I always feel uncreative with border prints and I didn't break any records with this one either.  I cut the skirt with the border at the bottom, and made "cuffs" with the border motif for the sleeves.  (The fabric is a double border print, and the top and bottom border are slightly different.  I used one border at the hem and the other border for the sleeve cuffs.)  I also used the border for the loop.  Perhaps I should think of my usage as "classic" rather than "boring."

Posing


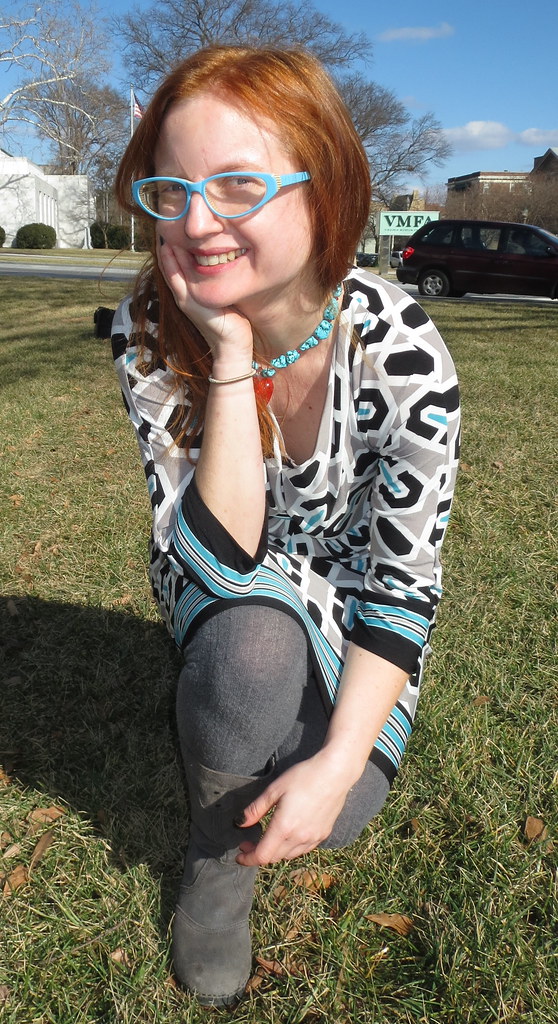
Cidell had me try some new poses.  I look all fashiony.  I feel like this could appear in a Burda magazine as it doesn't show the dress at all, but is so cute you kind of want to make it anyway.

I am really happy with the dress. I received a surprising number of stranger compliments when I wore it out one day. I like that the sleeveless version of this pattern is drafted with shoulder coverage; I can see myself using that for summer.  In fact, maybe I have found a pattern special enough for some silk jersey I've been saving for several years now?

All photos are here and the pattern review is here.

======================

Trena and Cidell


The occasion for forcing Cidell to take these photos was our visit to the Virginia Museum of Fine Art in Richmond over the long weekend.  The VMFA is hosting the Victoria & Albert Museum's Hollywood Costume Exhibit through February 17 and we just couldn't miss it.

VMFA


This was my first visit to the VMFA and I was just blown away.  The building itself is gorgeous both inside and out, and except for special exhibits like the Hollywood one entrance is free(!).  They have an extensive and diverse collection.  We had a little bit of time to duck into the Art Deco and Art Nouveau sections with their incredible furniture and jewelry as well as visit the small exhibit of photos from the Civil Rights Movement in honor of MLK Day.


Then we met up with Tommie of Unseamly Girl and Meigan of Get My Stitch On and entered costume wonderland!  No photos are allowed in the exhibit, but there were so many people in there it would have been impossible to get photos anyway.  They have so many great things, including Marilyn Monroe's famous 7 Year Itch dress (her waist was so teeny!), the green dress from Atonement, and an impressive variety of costumes from Elizabeth, Shakespeare in Love, Dangerous Liaisons, and Marie Antoinette, among tons of other pieces.  It is laid out well and a real pleasure to see.  The only thing is, the ruby slippers that feature so prominently in the branding of the exhibit are reproductions!  The originals, of course, are in the Smithsonian right here in DC.  They do have one of Dorothy's original pinafores, as well as the Wicked Witch of the West's hat.

Tommie, Trena, Cidell, Meigan

Another great thing about the VMFA is that it has a swank restaurant on the third floor with beautiful cocktails and lovely dessert.  Perfect for getting to know some new sewing blogger friends!  Cidell and I had a great time with Tommie and Meigan and hope to see them again soon.  They were both wearing awesome clothes they had made.  Meigan's pink coat was incredible, and Tommie was so styling in her tissue knit top that she made me think I could actually make use of tissue knit.

If you can get to Richmond RUN, DON'T WALK to this incredible museum and exhibit.  All photos from our visit are here.

Thursday, January 16, 2014

Selfless Sewing: Tote Bag for Mom

Although the Selfish Seamstress *purports* to be selfish, she actually sews for other people all the time.  I, dear readers, am truly entirely selfish--to the point where it's actually almost a character flaw.  There are only a very few people for whom I make an exception, and my mom is at the top of the list.

You may recall that last year I made her a jacket. This year was a tote bag.  I got the quilted faux suede in a Fabric Mart bundle and was stumped as to what to do with it when it arrived.  It was not my style, but at the same time it is high quality fabric, and with the pre-quilting saved an interfacing step.  It finally dawned on me that purple is my mom's favorite color and that she might like a bag.  Perfect!

The bag is made with two rectangular sides and then a long one-piece gusset.  The dimensions below include 1/2 inch seam allowances.

Front and back:  16 wide x 14 tall
Gusset:  42 long by 6 wide
Handles:  5 1/2 wide by 49 long for a 22 inch drop (my mom is petite like me).


Turn Corner on Fabric only, Not Catching Fusible Fleece
I used fusible fleece to give the bottom some structure. I wanted the fleece to go up the gusset sides about an inch so the bag wouldn't just flop over the bottom.

I started by sewing the gusset to the front and back along the bottom edge, catching the fleece in the stitch line.

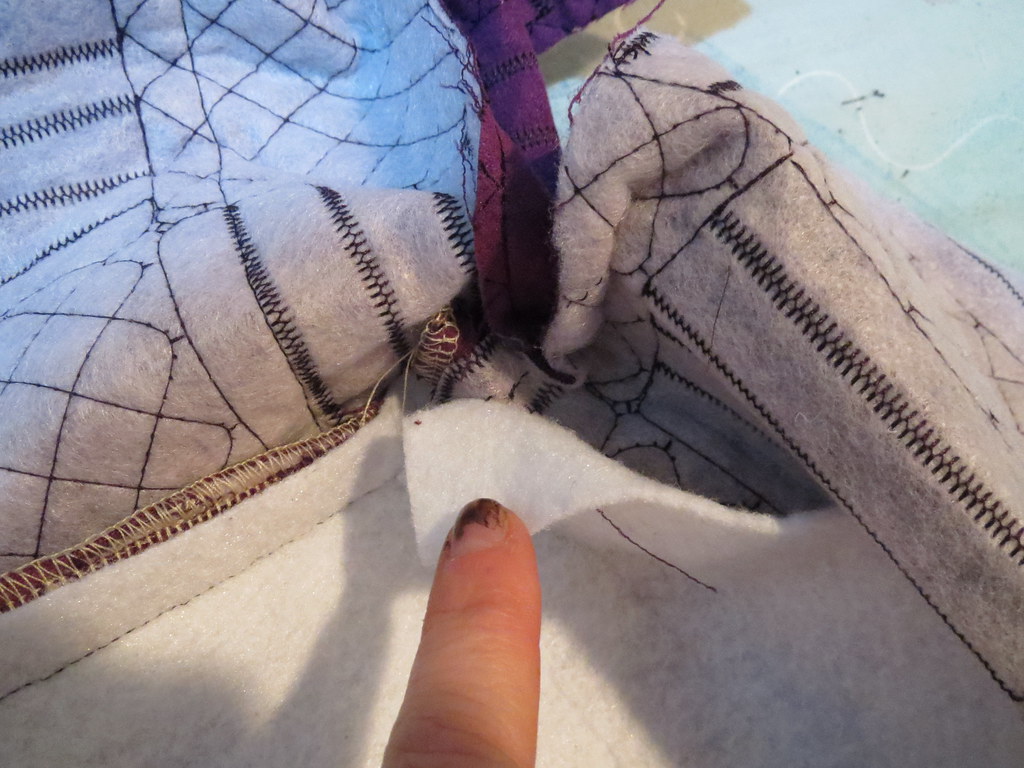
Then I sewed from a couple inches up the side down to the corner, this time not catching the fleece in the stitch line.

Next, trim the fleece seam allowance close to the stitching, continuing the trim job into the unsewn part that goes up the side.

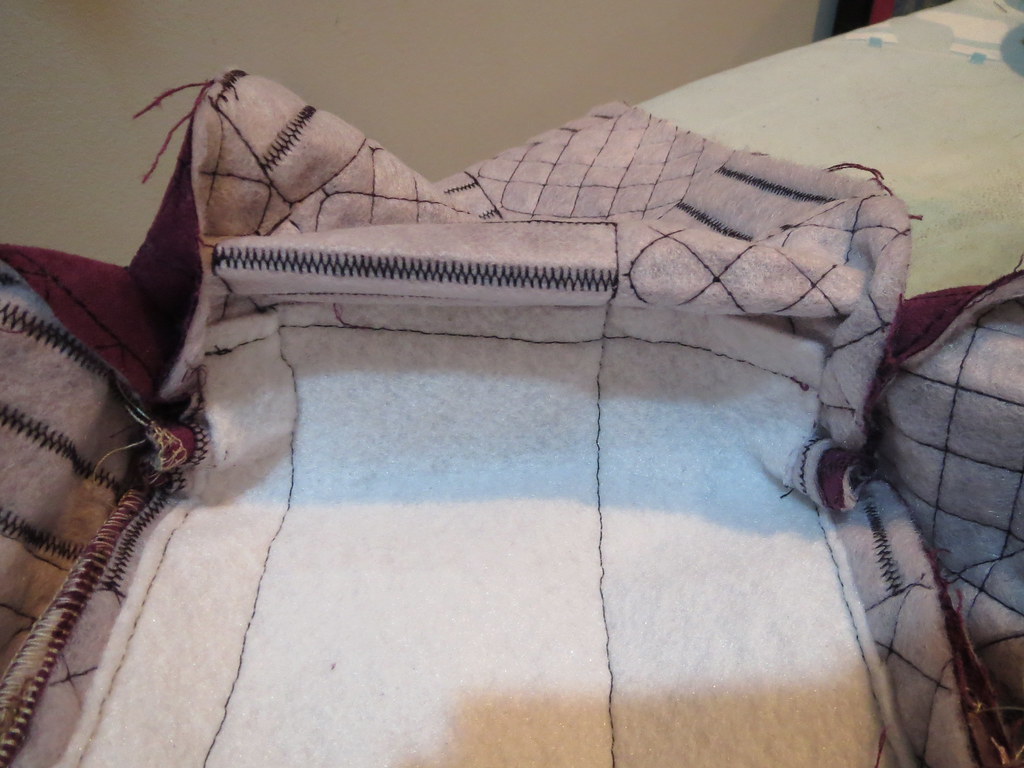
Fusible Fleece Folds Up Over Corner

Finally, I did a little quilting to keep the fleece in place.  It was really easy with this fabric, I just sewed along the lines that were already there on the bottom.  Then I sewed along the short edges of the fleece to keep them in place going up the side.  Once this was all done, I sewed the side seams up the rest of the way.

Darts to Create Gusset in Water Bottle Pocket


The most important part of a bag is, of course, all the pockets!  I made a water bottle pocket for the inside of the bag, to keep the bottle upright and easy to pull out.  I cut a piece of lining 9 inches wide by 21 inches long and folded it in half the long way.  Then I folded it along the two lower corners and sewed gusset darts 1.5 inches from the corner.

Stitch Bottom to Gusset


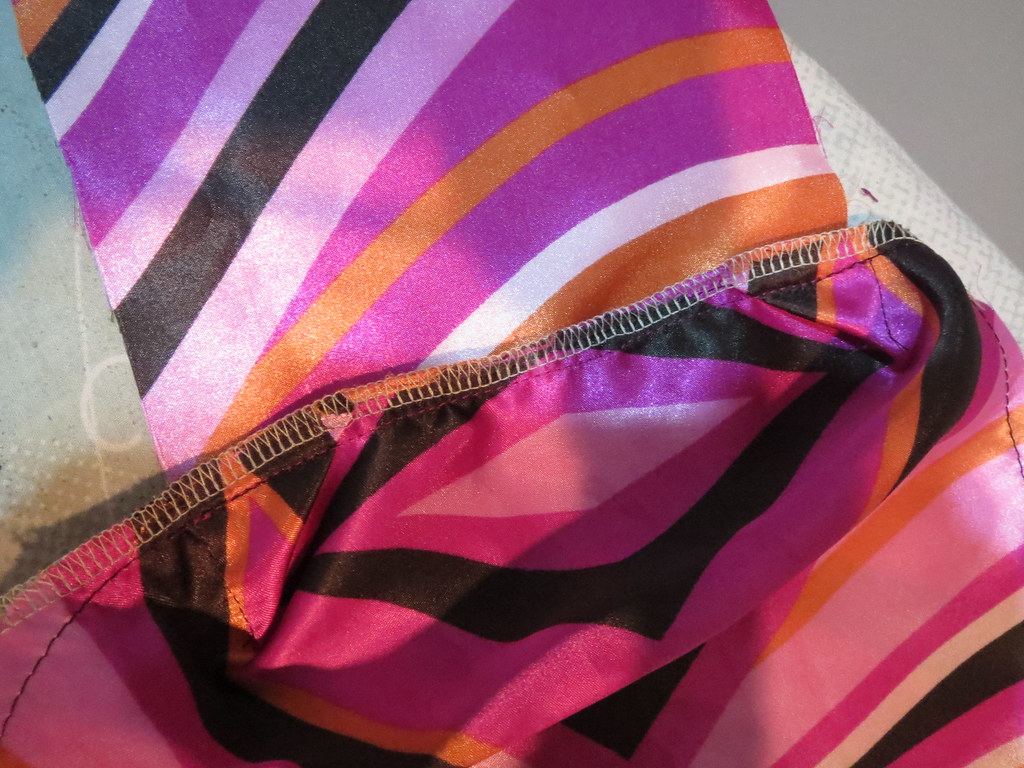
Then I marked where the one-piece gusset would turn the corner from the bottom to the side, and sewed the bottom edge of the water bottle pocket just above that marking.  In the photo, the top of the gusset is going off to the left and you can see the water bottle pocket's darts on what will be the inside of the pocket.

Pin Sides


Next, fold the pocket up from the stitchline, enclosing it, and pin the sides of the pocket to the sides of the gusset.  Baste in place and then catch in the stitching when sewing the gusset to the front and back pieces of the lining.

Water Bottle Pocket


And here's how it operates!  I think that 9 inches was a little too wide for a small water bottle, but if you favor larger water bottles or 20 oz soda bottles it is probably right.


Lining Pockets

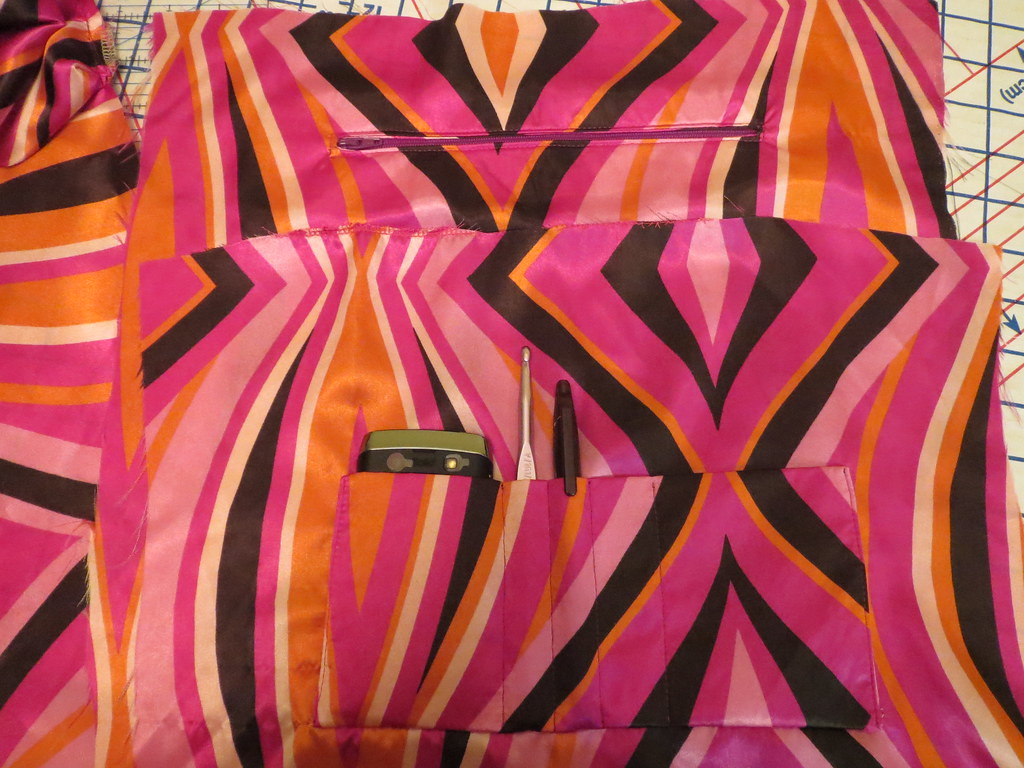
The front and back of the lining have a large zippered pocket, and a pocket for holding a phone and other sundries.  Mom crochets so I wanted to make sure the appliqued pocket would be deep enough to hold a crochet hook.  I cut it 10 inches tall by 9 inches wide, interfaced for stability, and folded in half along the 10 inch dimension.

Strap Unsewn Near Top


I sewed the lining to the bag by leaving an opening in the bottom of the lining for turning and stitching right sides together along the top edge.  The handles are sewn along the entire length of the purse and caught in the bottom gusset stitching.  I left the top inch unsewn for joining the bag and lining together.  Once they were joined I continued the topstitching from where it ended on the body of the bag all the way across the handle to the other side of the bag.


I got a new camera in the Fall and hadn't tried out the video feature, so I made a video showing a little bit of a shortcut in closing the opening left in the lining for turning.


Ponytail Holder Elastic

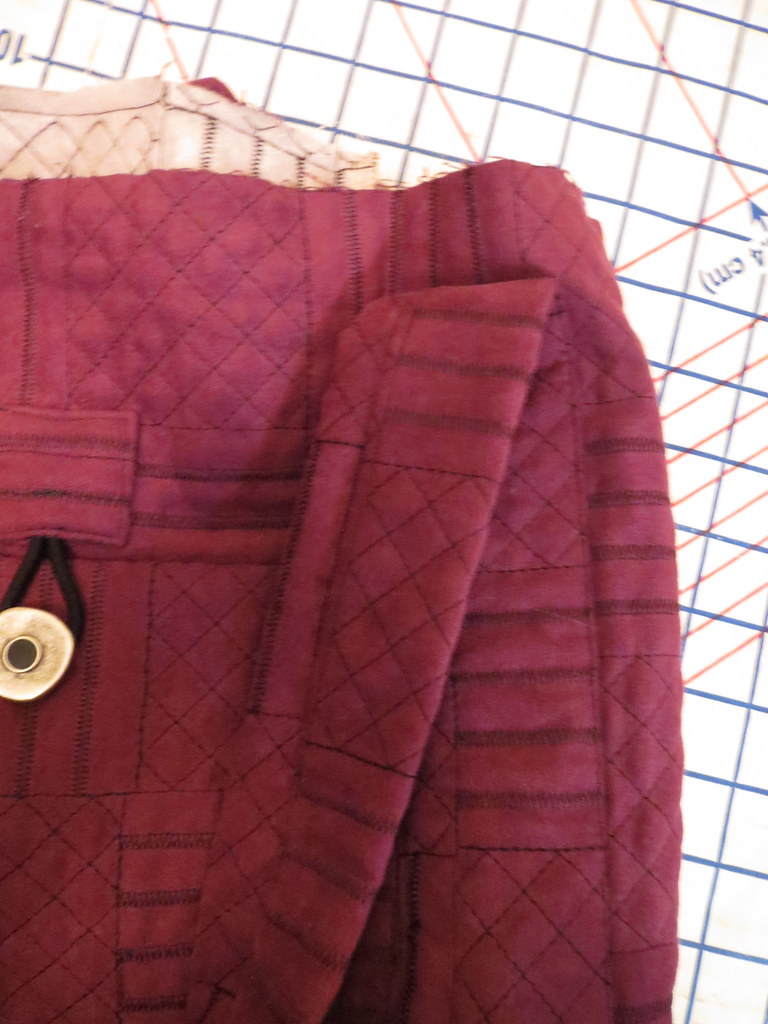
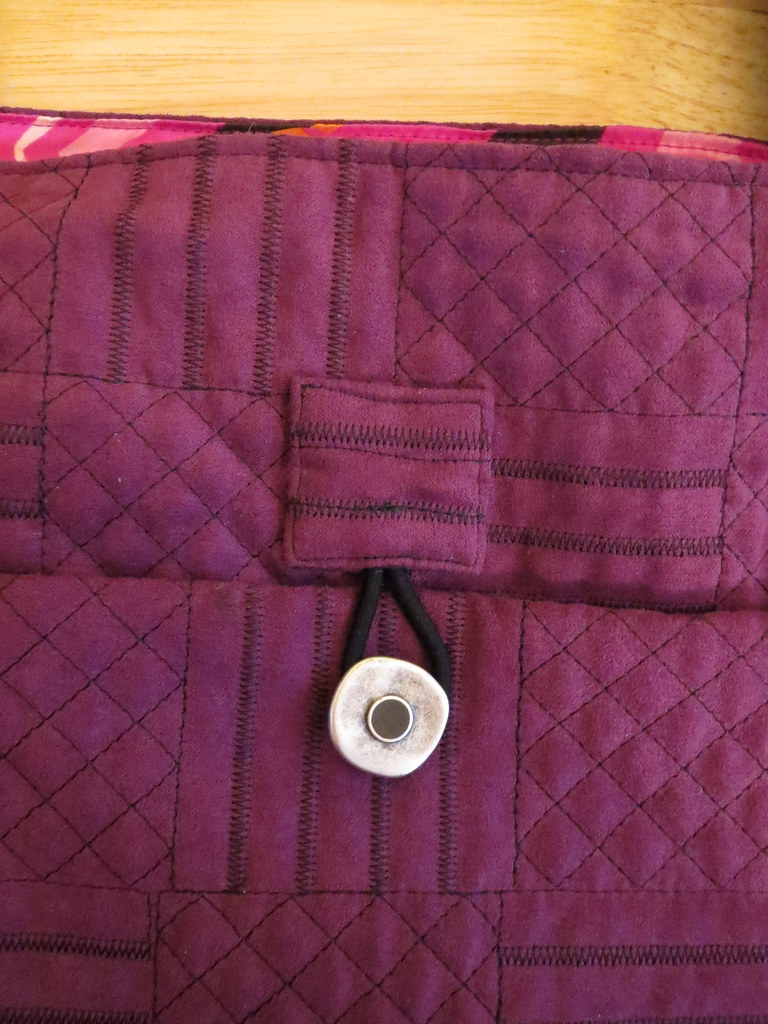
The bag also has pockets on the front and back of the outside.  The front one is smaller, sized to fit her Nexus 7 snugly.  The back one is larger, the whole width of the bag between the handles.  I wanted a closure for the back pocket.  I didn't want to use Velcro because it catches on everything.  I didn't want to use a magnetic snap in case she wanted to put her Nexus in that pocket (I am paranoid about electronics and magnets).  And I didn't want to use a regular snap because they can be too hard to open and close.

So I went for a shank button and an elastic loop.  I used a ponytail holder for the elastic.  I sewed the elastic into a square of the fabric and sewed the square in place.  Hopefully it won't be too hard to replace if it wears out!  I'm not in love with that particular button, but it was the best I had in stash and my gift was already late.

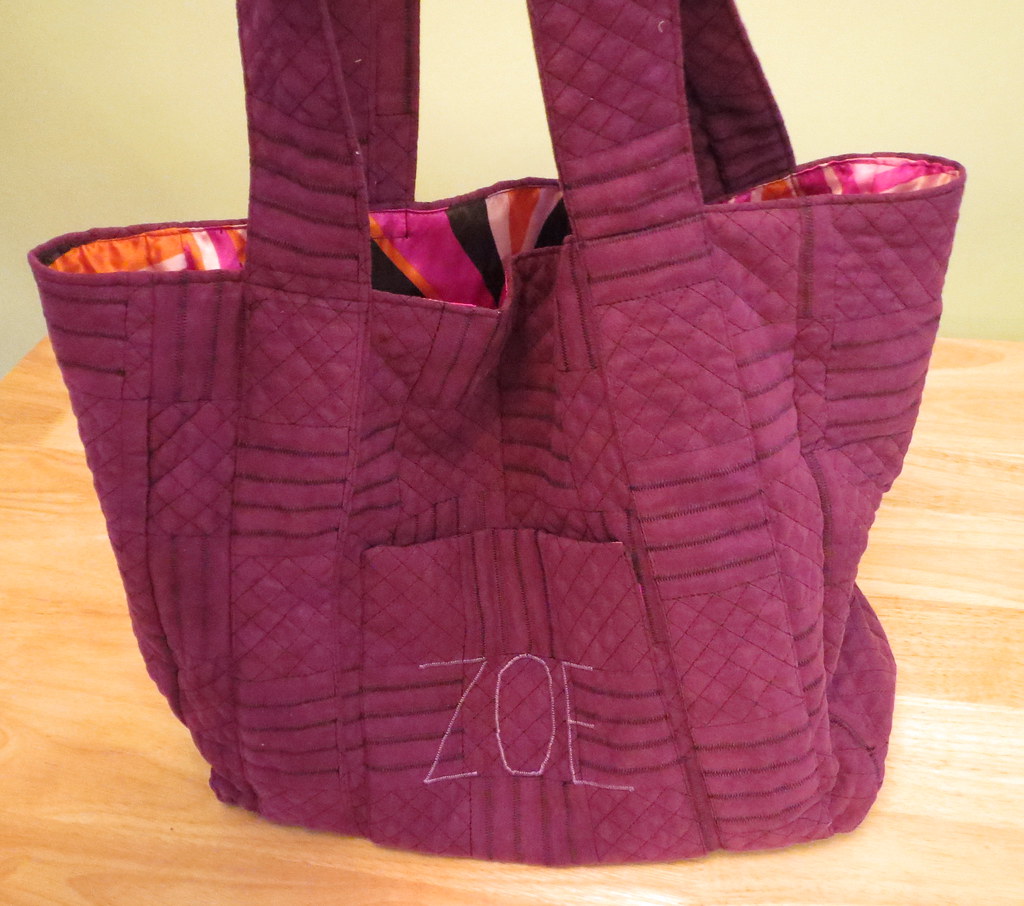
Finished, Front

And here is the finished front (and back).  When I told my mom I wanted to make her a bag, she got excited and had her friend show me the bag that the friend's daughter had made.  The daughter had embroidered the friend's name on it and my mom really seemed to like that feature.

I don't have an embroidery machine and the fabric was impossible to mark on--anything that actually made a mark left a permanent marking.  Thank goodness the fabric had lines to give me some way to make proportional letters!  I marked it the best I could and then stitched it with a satin stitch on the machine.  So the name is not great close up, particularly the wonky "o."  Hopefully the effect with the whole bag isn't so terrible, though.

Mom loved her bag, so that's really all that counts!  I am not good with spatial relations and it turned out way bigger than I meant for it to be, so there may be a mini version in the offing at some point...

All photos are here.

Thursday, January 9, 2014

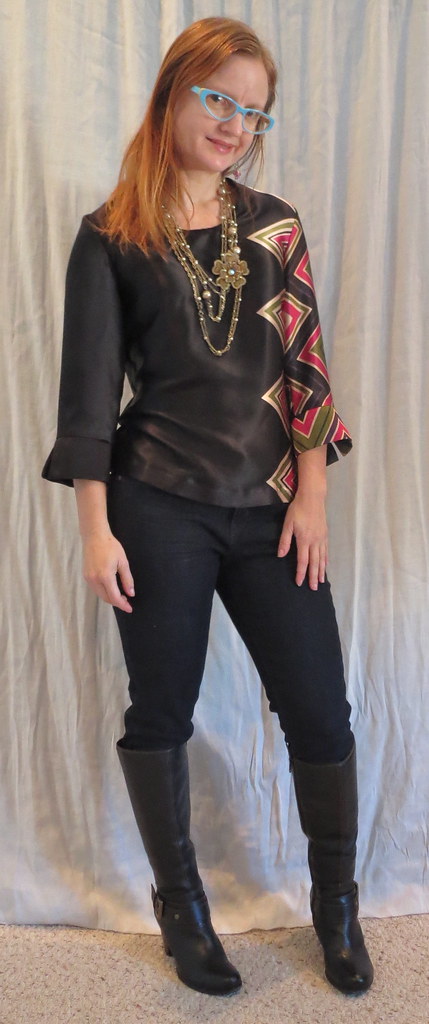
Silk Tops for Fall/Winter: Side Border Print Pullover Woven Tee

Front

If you know me, you know that when the weather gets cold I start to whine because I don't have any cold weather tops.  This year, as always, I was determined to deal with that situation.


I looooove silk, but I can't wear it when it's the least bit warm because I sweat like crazy in it.  So Fall/Winter is when I get to indulge my fiber love, at considerably less than retail--like this GIULIETTA Silk-satin top, $475 from net-a-porter.

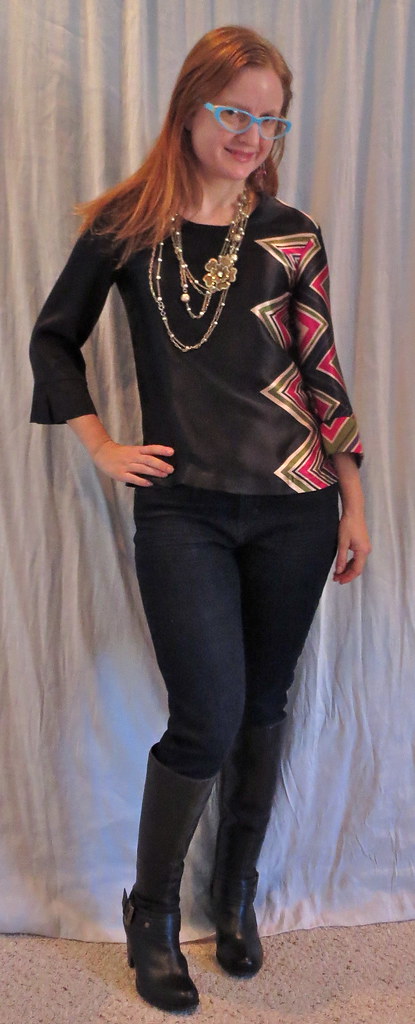
For my winter silk tops project I am loving my pullover woven tee pattern, perfected from a base of Burda 12-2007-123 as described here.  The pattern still isn't perfect--I changed the dart to an angled one after this project but I don't have the length exactly right--but it is SO NICE to just cut it off the pattern as is and sew it up, knowing it will fit and is the right length.  I marked the pattern with "skirt" and "jeans" hem lengths (the jeans length is about 1 1/2 inches longer, as skirts are worn at the waist and jeans below).

The star on this top is the fabric, so I kept the rest of it fairly basic.  I got this zigzag print silk at London Textile at PR Weekend Philly 2010 for $5/yd.  I used some of it to make an (unreviewed) negligee a couple years ago, but it was a large piece and I had a lot left.

Back


The print is a little tricky because the zigzag portion is about 15 inches long, and there are about 24 inches of black in between the zigzag prints.  It's hard to make the most of the fabric without waste!  I felt fairly brilliant when I hit upon the idea of using the print sideways on this top.


To get the print placement right I made a full-size pattern piece for the front, carefully marking the bust apex so I wouldn't have a big ol' arrow pointing to it.  I cut the back so that the tips of the zigzags would be just outside the long back darts.  Apparently, I didn't mark my darts well enough and they ate the tips of the zigs, but silk does not take kindly to unpicking so I decided to live with it.


My only flourish on this top was to add cuffs, which I took from Vogue 8379 (as seen in my perfect knit wrap dress).  I just added width to the cuffs to match my sleeve pattern--as the Vogue is a knit pattern they would have been way too tight in a woven.

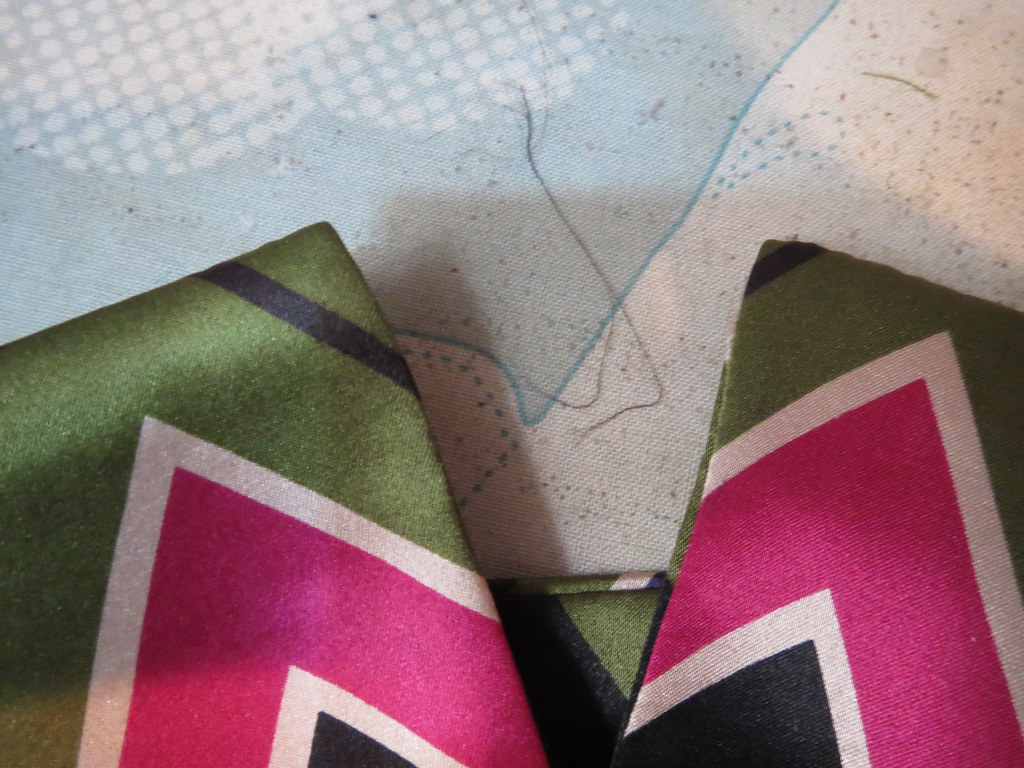
Turning a Sharp Corner

Making square corners is always a challenge.  I have always dutifully followed the pattern instructions to clip the corner and then tried to sort of squish my way into a square.  It doesn't generally work out too well.  Lately I've been experimenting with *not* clipping the corner, but turning the seam allowances down at the stitch line, as shown in the photo, and giving that corner a good press before trying to turn it so it's as flat as possible.

Finished Cuff


It can take a few tries to get the corner turned with the seam allowances all staying in place, but the result is a nice, sharp corner I can be proud of.  This doesn't work with bulkier fabrics, but for a silk with light interfacing it's a good strategy.


French Seams


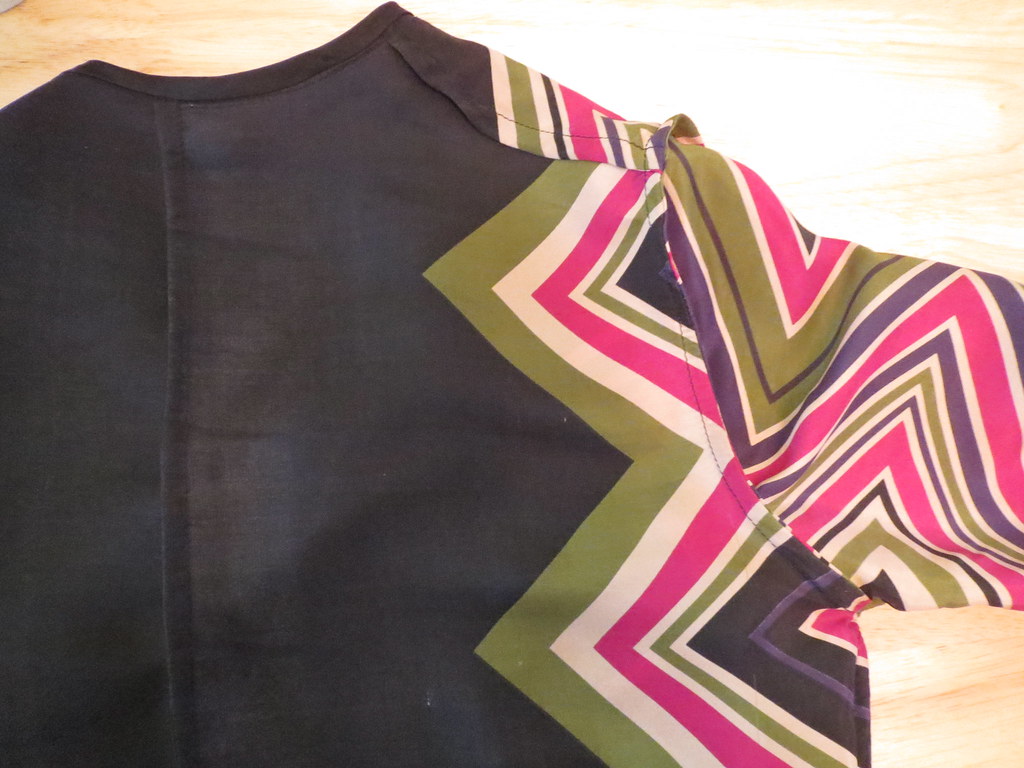
As is my usual practice for silk, I sewed everything with a French seam, including the armscye.  It takes a little time and patience, but I do love how beautiful everything looks on the inside.


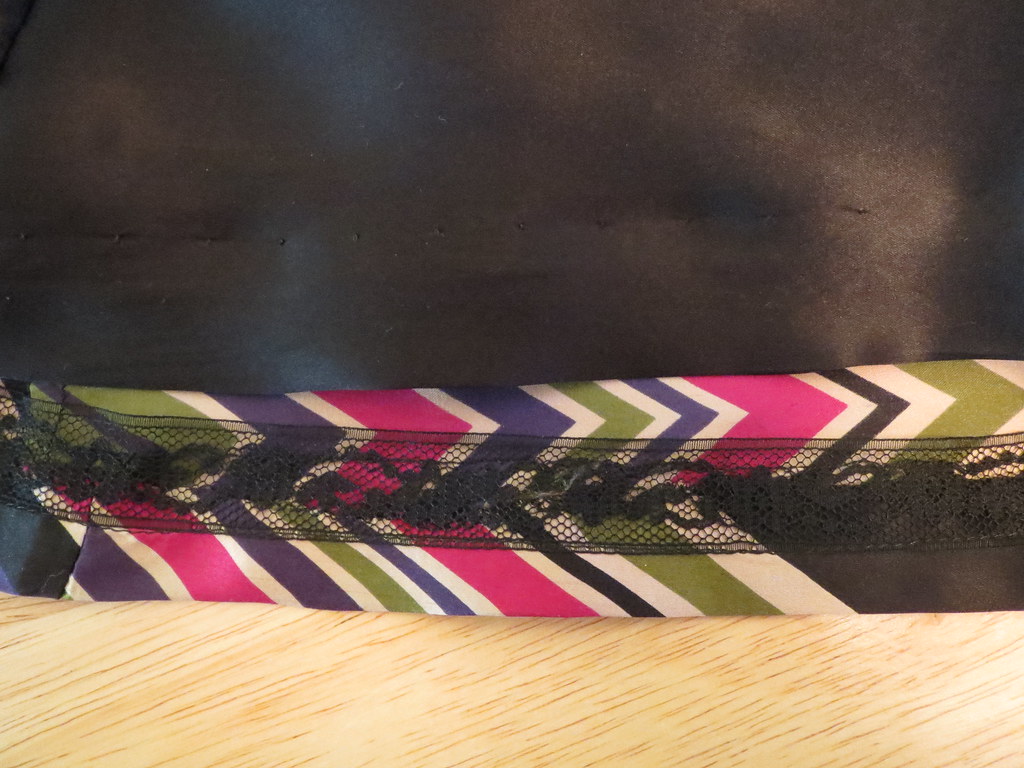
Hem Lace and Machine Blind Stitch


I had a hard time getting a double turn on the hem--this silk is fairly sturdy and it would have been a big production to ease in the longer inner curve.  I used hem lace instead.  It is stitched with a machine blind hem; it's not invisible, but I'm not fussy.

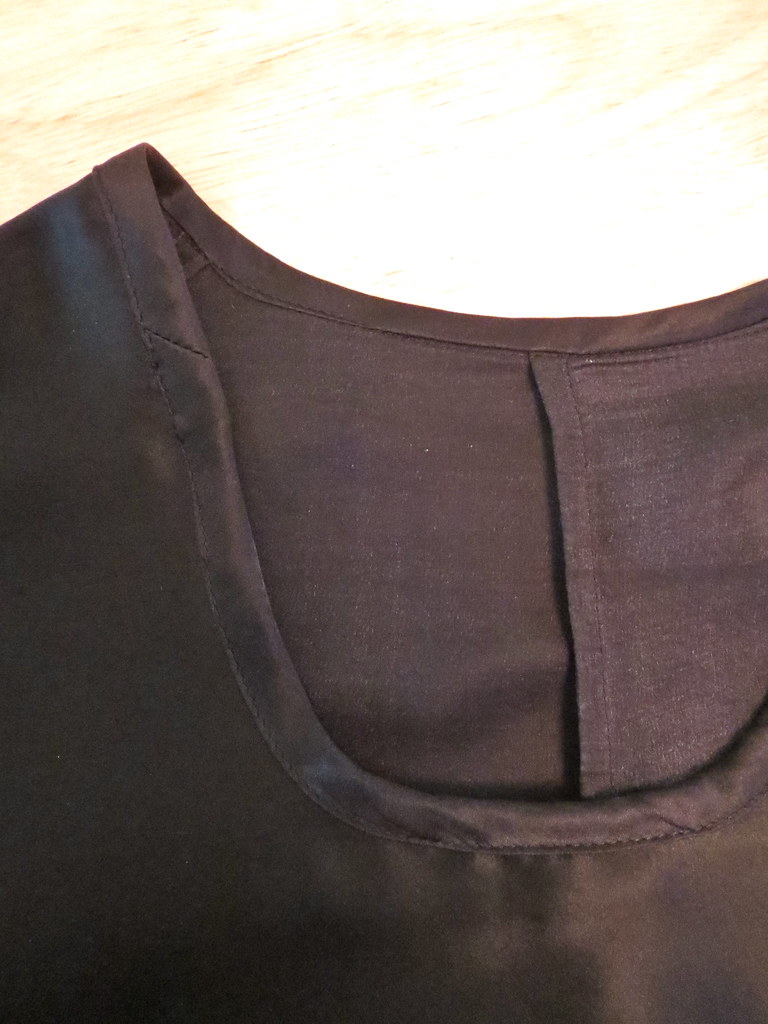
Self-Bias Neck Binding


The neckline is bound with self-bias tape.  I considered using the print for the bias tape, but I wanted to make this top classy rather than my usual zany/fun.  I actually regretted adding the cuffs when I finished it, because I felt like it wasn't totally obvious they were cuffs but maybe some sort of ruffley thing.  They've grown on me, but I am still glad I went with plain black for the neckline.


Front


I wish I could claim credit for the sleeve perfectly matching the front, but that was total happenstance.  Crazy!  I put the sleeve in the most fabric economical placement I could come up with and didn't even consider trying to match the print.

I am very happy with this top, the first of several silk tops I've made for this season.  I think I achieved my aim of looking classy and expensive without compromising my love of bright colors.

All photos are here.

P.S.  Happy New Year!