A couple months ago BadMomGoodMom stumbled across her local jobber selling silks at $2.99/yd. She very kindly facilitated my purchase of some of them, including this print. It's so wacky-cool, with not one, not two, but THREE different animal prints (blue cheetah spots, green zebra stripes, and the pinkish/brown wings) and such excellent quality (thick, fluid, doesn't crease too badly) that I think it has to be designer. It immediately made me think it was going to have to be a 20s inspired look. Although the cheetah/zebra isn't very period-correct, the wings seem just about right.
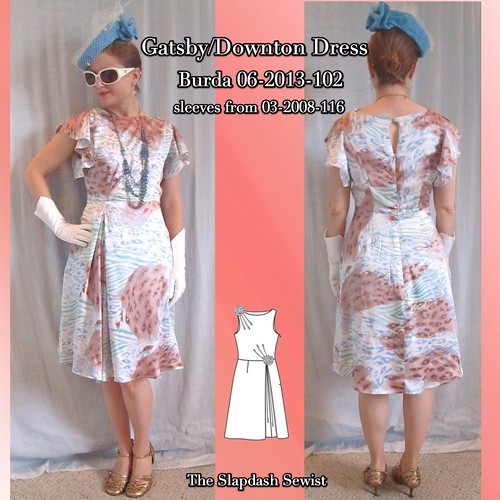
I had been thinking possibly Burda 03-2013-113, but when I got June's issue I had to make Burda 06-2013-102 right away. It's even a petite (though I've mentioned before that I don't think Burda actually has/uses a petite sloper), meaning I didn't have to grade to a 34 in the bodice. I cut my usual 34 at the bust, 36 at the waist, and 38 at the hips (or 17/18/19 in petite). This fits as a true 36 at the waist, with around an inch of ease at most; I wish I'd cut it as a 38 for more ease because it's a summer dress and in the DC heat I'm going to sweat wherever fabric touches me. I just can't seem to get the waist size right in Burda; occasionally, I will decide to start cutting a 38 at the waist because 36 is too close fitting, but then everything comes out huge.
The only way in which the dress actually seems petite is the very high waistline. I have a high waist and Burda's waist placement is usually spot on for me. This is actually about 1/2 too high, which contributes to the just-exactly-right size at the waistline. I'd recommend measuring and possibly lengthening the bodice if you are not extremely high waisted.
This was a fairly simple project, which I needed after about a month of not really being able to sew. I had to take my time and be a little bit slower than usual because I'm a little out of practice. I didn't have any major mishaps or "I coulda had a V8!" moments, so my plodding caution paid off.
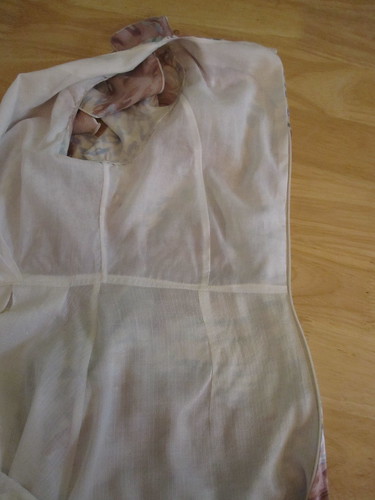
The dress is drafted with a facing, but I prefer to fully line silk because it makes me sweaty. I lined the bodice with cotton batiste, and the skirt with a flowy rayon. For the front skirt, I overlapped the left and right skirt pieces, making the skirt as wide as possible, and cut it in one piece rather than seaming. I considered trying to draft a regular darted lining instead of using the asymmetrically pleated front piece, but decided it would be a lot of trouble for not much reward. The batiste is lightweight enough that it doesn't add any distracting bulk.
I knew the drafted shoulders were going to be too narrow for my taste, and that the neckline would be too wide (further evidence that there is not a real petite sloper). I pulled out my altered bodice pattern for the Burda 08-2009-128 boatneck dress since they have the same neckline. Based on that pattern, I widened the shoulders in toward the neck by 1 1/2". I still get plenty of boat neck effect, but without any bra strap show-through or danger of shoulders falling off.
I thought I would need to lower the front neckline quite a bit for chokiness and flattery--I have a proportionate but short neck and really high necklines aren't the best for that. However, I only needed to lower the neckline by 1/2" to get it to a nice spot.

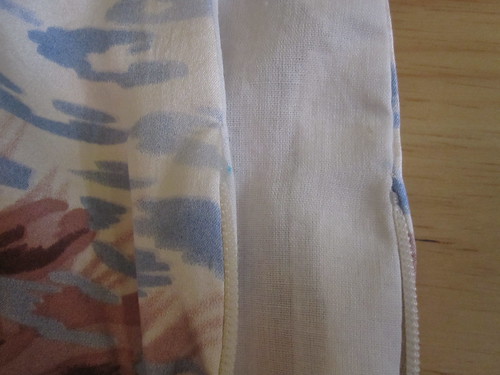
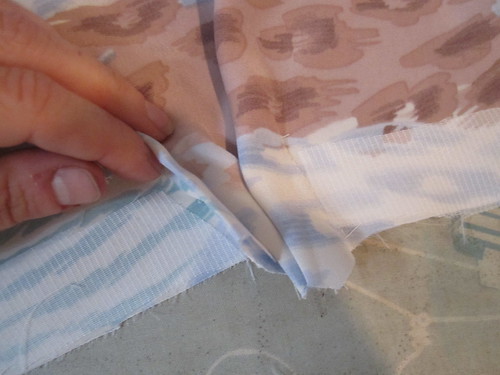
To up the vintage vibe, I used the drapey sleeves from the Burda 03-2008-116 Duchess of Windsor dress (previously made in knit). Rather than sew the shoulder seam of the sleeve (the sleeves are cut in two pieces), I finished the edge with a serger rolled hem for a split sleeve. To stitch it in place, I put the edges flush together when putting in the ease stitching. It worked like a charm!
I had trouble keeping the sleeve seam allowance pressed toward the bodice, so I hand stitched the seam allowance to the lining.
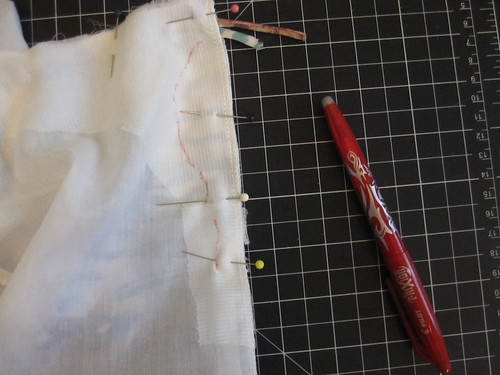
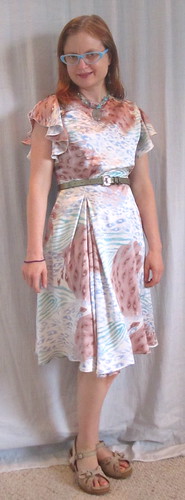
For further vintage-ness, I shamelessly ripped off Kristy at Lower Your Presser Foot and put in a keyhole neckline above the center back zip (I should mention that as drafted the dress has no CB seam and a side zip). I just sort of sketched the opening onto the interfacing using a Frixion pen, mirrored it on the other side, and followed the line when stitching the lining to the dress.
I used a rouleau loop for the button, tacking it into place on the fashion fabric before adding the lining.
To get a neat finish at the zipper, I marked the position of the upper zipper stop on my lining and stitched my keyhole, keeping the upper edge of the zipper to the right of the presser foot when I got there. Just above the zipper stop, I put down the needle, pivoted, and stitched two stitches over to put the zipper teeth to the left of the presser foot. Then I stitched down the zipper tape as usual to enclose the zip in the lining.

I used one of the buttons I inherited from my grandmother's sewing room as the closure. I don't know if the photo is clear enough to tell, but the brown dots are actually tiny flowers. I know these are meant to be buttons for children's clothes, but I look for every opportunity to use these special buttons. I sew so little brown that I didn't think I'd ever use these.
One thing I often forget to do, but thank goodness remembered this time, was to add some interfacing to the lining at the neckline and down through the keyhole opening.
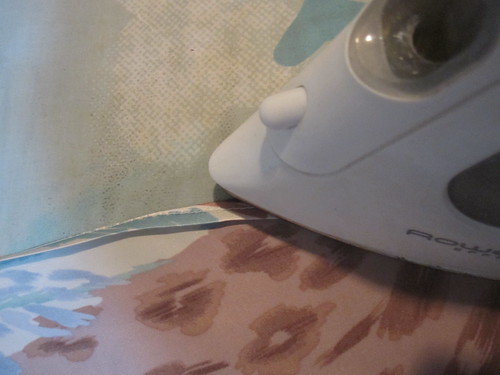
On the fashion fabric, I interfaced the zipper area. I also interfaced the waistline of the bodice, as it would be supporting a fair amount of weight from the skirt. So as not to interfere with the drape of the waist pleats, I broke the interfacing line there.
I shortened the hem nearly two inches before cutting. I probably should have only taken off one inch, as I think this could have worked at a slightly longer length. However, I like the length it turned out so that's fine. I did a fairly terrible job on the hem, doing a toddler (or even teenager)-sized baby hem where you stitch the raw edge under and the turn it under again. For the lining, I serged the lower edge, then used the serging as a marker for turning under twice. The lining hem is much nicer than the dress hem. *rollseyes*
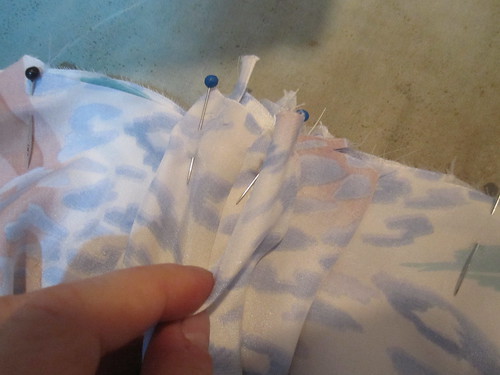
My "special feature" on this dress is a loop hidden in the skirt pleat to hold my work badge. I didn't want to put pockets into the side seams due to (1) laziness, and (2) I didn't want to add weight to the side seams that would interrupt the flow of the dress in motion. Mostly (1) though.
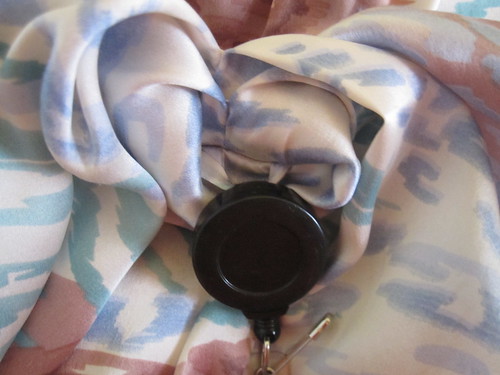
For dresses without pockets, I put a safety pin into the waist seam of dresses to hang my badge on. For silk, I didn't want to be poking a safety pin into it all the time. I've been intending to add a small hanging loop to dresses for a while, and with the inverted pleats in this one it was the perfect opportunity.
The skirt has essentially a really big inverted pleat that you layer into two inverted pleats. I put the hanging loop inside the innermost inverted pleat.
When I finally had some time to sew a couple weekends ago, I couldn't concentrate on one thing for longer than a few minutes. I wanted to do all the projects at once and was paralyzed (I ended up making a bias half slip, a hat, and some pot holders). For this weekend, I realized that PR was having its Natural Fibers Contest, which gave me the impetus to focus on one project. I am happy my brain calmed down enough to concentrate on one thing for more than 12 seconds!
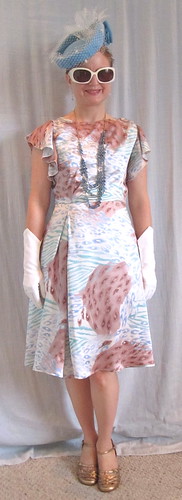
I like this dress. I'm not 100% sold on my print placement. I didn't want to have a wing motif anything like centered on the bodice front, as it would look like a strange superhero costume. But I didn't think about it being right at the neckline; it looks a little like a bib. Hopefully I will unsee that at some point.
At any rate, it's fun to dress up. You can embrace the vintage and go all out, but it can be styled more modern as well. It's one of those pieces I'll keep in the closet long after the current Gatsby trend ends in case a vaguely 20s look is ever needed.
I think this pattern would work equally well in a more casual cotton, and of course you could easily put a different skirt on the bodice to change up the look.
All photos are here and the pattern review is here.


.jpg)


40 comments:
Wow, love it. Great style.
oooh, it's so nice. I was eyeing that pattern, now I've got to try it. And that loop is pure genius.
This looks fabulous! I didn't think "bib" at all.
that colour at the neckline really pulls it all together as one because it draws your eye up to your hair (being in the same colour range) - especially with those glasses picking up the turquoise.
That back view photo of you is very stunning. The keyhole really makes it.
Sandy in the UK
This looks terrific on you. Figure flattering for sure and the "bib" thing? I think the print placement it looks awesome and intentional, almost giving the illusion of a deeper asymmetrical neckline. Huge win!
I have a hard time getting the right waist size with Sewaholic. The Crescent skirt in a 14 was very large and the Hollyburn in a 12 was very small. I feel your pain.
I love everything about the dress. You made excellent use of the fabric.
Agree with Sandy: you needed a jolt of color near your face. I don't see a bib at all! This will be a nice, floaty, summery dress for your event. Have fun!
Adorable! And I love the tips you gave! Will use them...
This is amazing...I love it! The design and fit are simply superb.
I Think It's Really Pretty And Chic :)
I don't see a bib-all I see is pretty
What a lovely dress! I have plans to grade this very pattern up to my size, even. My workplace just began requiring work badges so I also have dresses in the works with loops at the waist. Great minds...?! Well done.
I rather like the pattern placement, especially the wing at the neck! I love the photos where you've accessorized with blue! Just perfect!
This fabric is totally crazy and ir works perfectly with this style. Great dress!
I know I have the wrong decade, but when I saw how you accessorized your beautiful dress with the hat, sunglasses & gloves, I couldn't help but think "glamorous 1940s movie star". So it's very versatile!
What a super-duper dress, and I bet that yummy silk feels like a dream to wear. The sleeves are particularly gorgeous.
I agree with the previous commenters that the neckline motif placement is quite ideal--and I am impressed by their ability to articulate why that is so!
Just wow! You look amazing! I think you're right and this dress won't date, it will always look vaguely 20's, so you can wear it forever (if you want).
Fabulous Dress! Adore the way you have accessorized it. Both the style and fit look really good on you, and I love the unusual print. Hang on to this one!
This is a really flattering shape on you. I love the design with its side pleat and flutter sleeves - will be perfect for hot summer days.
Such a gorgeous dress. The features you added, the sleeves and the keyhole opening, are perfect for the pattern.
Super cute dress. And very flattering. I think the print placement is very good.
What a fabric find! The dress turned out really well.
That looks amazing. Love it and thanks for writing such a thorough review.
Just beautiful! Thanks for the details!
What a fun dress-I love the placement of the print patterns you achieved. It really looks nice.
You look so cute! The dress has a very vintage feel. Fantastic!
what a wonderful dress - you can really see the beauty of the drape. That must be some very nice fabric to wear, too.
The pleats really make for an interesting skirt, and flutter sleeves make everything better. How great to have such a beautiful project after not being able to sew for a month.
Love love love it! And it fits you perfectly! I really like all of the elements you added and the hemline is just right for you.
My eyes are opened. I totally discounted this dress, and now I want to make it up immediately! That fabric is beautiful, it looks like a floral from 5 feet away, you have to look closer to see all the animal print. The sleeves are the perfect finish.
So glad you have time to sew again, and hope your Dad is continuing to do well.
Gorgeous dress. Love the flutter sleeves.
Your badge loop gave me a couple of ideas over the weekend.
1 Where a loop would interfere with the style of your garment you could include it in a pocket.
2 (addressing a current problem for me with ready to wear dresses), two or more small ribbon loops sewn inside could be used for longer temporarily attached loops for hanging without the inconvenient of those long loops during wearing. I broke one last week getting out of my dress.
Love this dress! It is perfect style for you, IMHO. Pretty fabric and was perfect for this dress.
OOOH! Love this! Especially with the little hat. :D Good move adding the sleeves, too.
It's always very inspiring when I see things made up from recent burda issues. I loved this dress in the magazine and now I love it more. Your version looks great, I actually really like the print detail and that you cut the front skirt as one piece. Excellent and very thorough review as always.
Somehow I missed this post but this is just amazing—I love the way you styled it and the keyhole and I think you're too hard on yourself about the print placement!
Beautiful dress, looks great on you. I agree with everyone else, no bib noticed by me, fabric placement is wonderful. Do you think you could have a side note somewhere what you abbreviations stand for, I figured out SBA, small bust alteration, but some of the others have me mystified, I am a novice sewer. Your blog is wonderful inspiration. Thank you so much.
Wow! That's so fabulous! And so perfect with the hat and sunglasses, I'd wear the "vintage" ensemble for whatever reason, not just as dress-up. I hope you un-see the bib effect soon, because I think the pattern placement looks great at the neckline.
I love what you did with this dress. The fabric choice is perfect and your detailed workmanship is perfect. Great job!
Post a Comment