Thursday, January 27, 2011

Jalie 2563, Gym Tops

Jalie 2563 Thumbnail

As you may recall me discussing, I've been wearing the same hideous gym clothes for years and years. Despite how much I enjoy working out *and* looking cute, I hadn't bothered to make them two great tastes that taste great together. I finally reached my limit on my horrible gym pants and made four pairs of gym pants last year in September (I didn't post them until November due to The Boot). I hated my gym tops slightly less so I've still been living with them, even though they are too short and pop up over my belly. Yuck. The Pattern Review activewear contest finally got me to move on making some tops.

Front Raise For the upper portion of the top I used Jalie 2563. It comes with both a traditional racerback sports bra and the strappy racerback bra I used here. This was my first Jalie, but I know that they are activewear experts.

Burda published a racerback yoga top in November 2007 that I've had on my list since, well, November 2007. But I decided to go with Jalie because of their good reputation and because I wanted a separate upper and lower bodice. To ensure that I had adequate bust support(=compression in this style), I made a Size Q, which is on the "girls" side of the chart. *insert Debbie Downer whomp whomp sound*

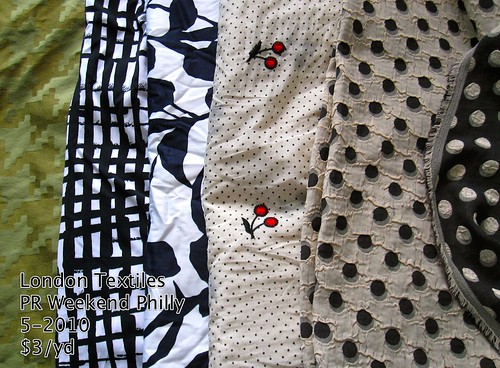
I bought technical fabrics last time I was in NYC. The supplex for the main parts of the top was $12/yd from Spandex House. The powernet for the built-in bras came from Stretch House at $6/yd. All except the light pink contrast pieces were purchased from Fabric.com in January of last year for $3.50/yd. The light pink I've had in stash since 2007; I'm pretty sure I bought it at Spandex House.

Muslin
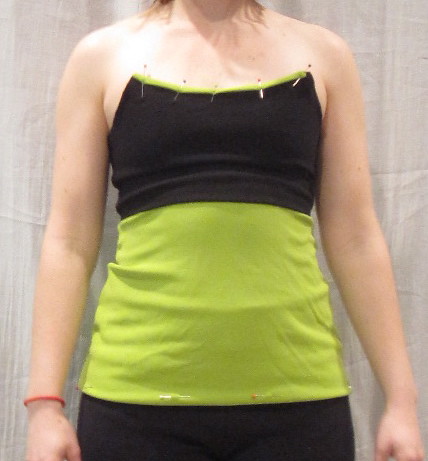
My original plan was to have a black bra with a solid colored contrast bottom. In terms of the science of colors and shapes, this is not the way to go. I would normally want a bright color on top to build up my bust and a dark color on bottom to minimize my belly. However, I had a very specific need here. The weights at the gym are filthy. I mean, truly disgusting. And so every time I put a weight on my chest to add resistance during abs work, I get a disgusting dirt mark on my top. It was a huge priority to me to have black on top so I would no longer have to worry about walking around looking dirty.

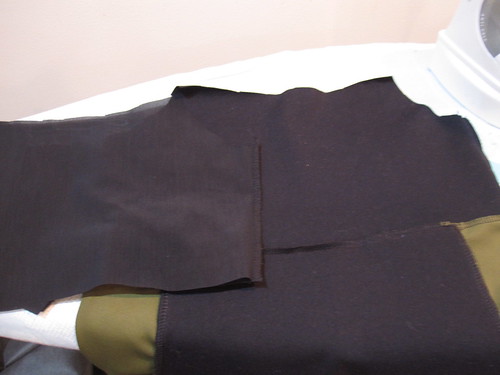
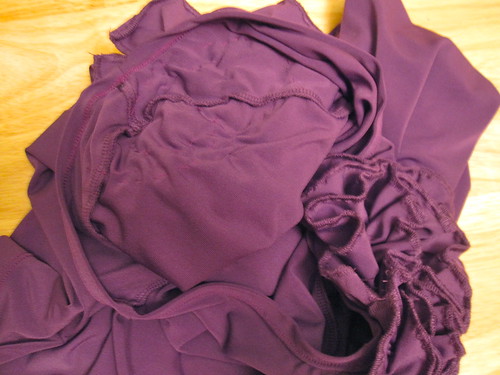
However, this turned out to be a fail. It doesn't even look as bad in the photo as it did in real life. But that contrast solid-colored lower bodice was AWFUL and made me look huge. Part of the problem is the fabric. The Fabric.com "sports" stuff is NOT suitable for activewear. It is way too drapey, way way way. The rest of it will be great for making cycling shirts that look like real clothes (but hopefully are better to sweat in than real clothes), but it can be used only in small doses for functional athletic wear.

Muslin Cut Up for Pattern 
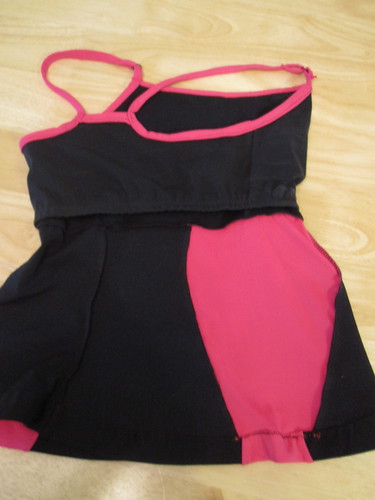
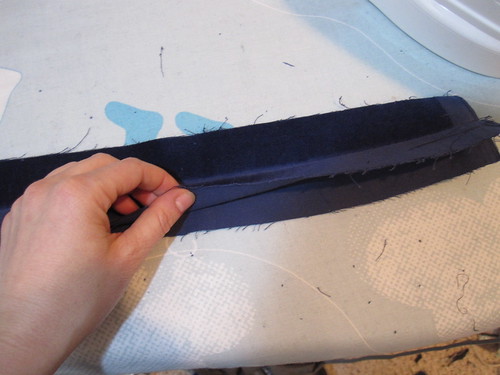
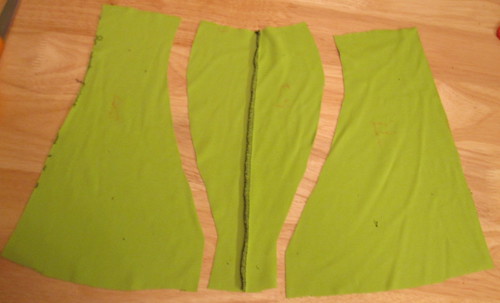
I had suspected that the solid colored lower bit wouldn't work, so I had only basted it in. I stopped work for the night to regroup and think. I didn't want to have an all-black top except for just the straps. That would be boring. Finally, I hit upon the idea of a contoured side panel that could be made in the contrast color. Again, I am violating the science of figure flattery here--better would be a colored center and black side panels to narrow my waist and hips, but the fabric was not sturdy enough to be the center panel.

I fitted the lower panel as well as I could, given the fabric properties, and checked the length. Getting enough length was as much of a priority is hiding dirt. I tested the tops for length in Warrior 2, the worst belly-popping move, and the top covers the pants with at least 3 inches to spare. SO GLAD I will no longer be flashing that oh-so-attractive wedge of flesh. I then unbasted it from the top and cut it apart to make a pattern. The side panel seams incorporate the shaping of the original side seam; I did not add any additional shaping as I had already fitted that side seam.

Final Lower Pattern 
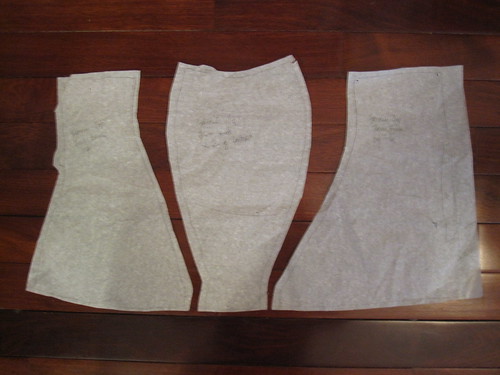
After making the first test version of the top, I refined the fit of the pattern for swayback and length. This is the final result. I can see why you all muslin. For the last two tops, I knew I could cut out this pattern and sew it up and it would fit perfectly and I could put in a 1 1/4 inch hem without even trying it on. I enjoy trying new patterns too much to go through this process for everything I make, but for a garment I will want again and again, being able to sew it right out of the box is awesome.

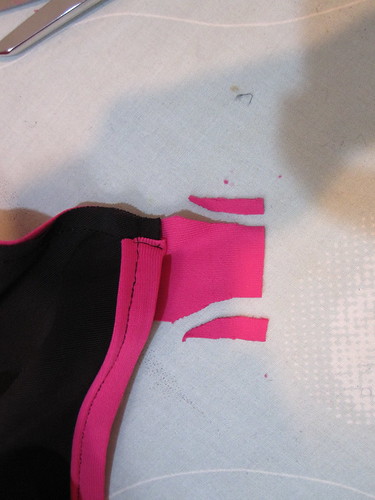
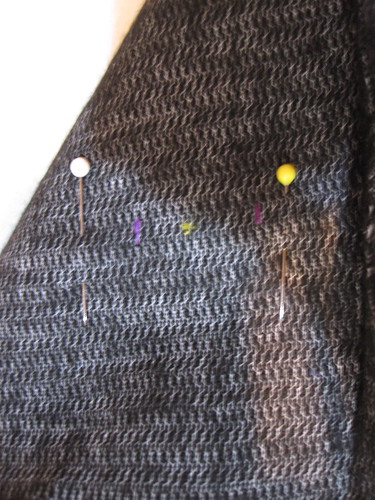
You can see that I used two notches for ease in construction:

-At the top of the side piece to indicate which side is to be sewn to the back
-At center back, so I don't accidentally sew CB to the side panel
-I also added notches at lower CF and CB of the bra for elastic application.

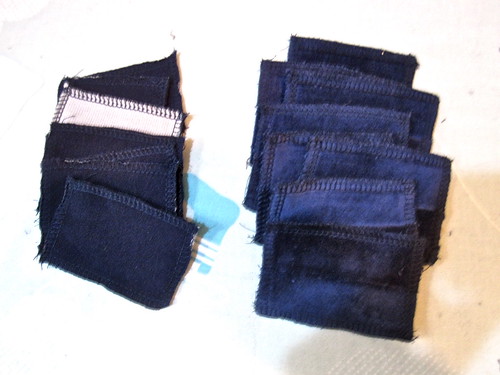
After I had my pattern perfected, I made full size patterns of the front and back bra and the lower front. That way I could cut out two at a time for better efficiency. So handy!

Separate Bra Construction:

Note: Because Jalie uses 1/4" seams I used them as well on my pattern for the lower bodice. All seams are 1/4" except one, as described below

1. Serge side seams of upper bodice and inner bra. Press side seams of inner bra toward front and upper bodice to back.

2. Serge lower bodice seams (front side panel, back side panel, center back).

3. Serge lower bodice to upper bodice in a 1/2" seam. I found the seam was a little too low otherwise, but I did not want to shorten the bra pieces because of the inner bra elastic construction.

Inside Top4. Place inner bra inside upper bodice, wrong sides together (that way no seam allowances will rub against me). Pin along front and back neckline.

5. Cut colored strips of fabric 1.5" wide and 5 1/4" (x 1 for front neckline), 2 1/4" (x 1 for back neckline), and 21 1/2" (x 2 for armscye and shoulder straps--I have short shoulders, measure your length!) long.

6. Pin neckline strips to right side of upper bodice/bra front and back neckline, right side against right side. Stitch in a narrow zigzag at 1/4".

7. Turn strips over to inside of garment, folding edges under and making sure the folded edges extend beyond the original stitching line. Stitch from the outside/right side in a narrow zigzag just inside the binding. Make sure you've caught the folded edge.

The binding is not beautiful from the inside because of this, but I did the first one the opposite way (sew binding to inside first, then fold over outside and stitch on top of binding) and I didn't like the way the stitch line looked on top of the binding.

8. Bind armscye edges as described above, having the strap extend two inches beyond the front and remainder extend beyond the back for the straps.

Taper Ends of Straps 9. Taper ends of straps. Fold straps as for binding (in half with seam allowances folded to inside) and stitch 1/4" from edge (mine are not perfect or beautiful).

10. Fold extending front strap through a ring and stitch down. Fold extending back strap through other end of ring and stitch. Jalie has the rings in the back, but I like the detail of them in the front and it made it easier to try them on. Stitching these little ends down in an attractive way was truly the hardest part of this whole process. The edges kept wanting to roll out beyond the finished strap, thus the tapering.

I had one random set of square metallic rings (well, I guess not rings) in my notions stash, presumably cut from some garment I got rid of ages ago. I hate when I actually find a use for this stuff because it reinforces my pack rat tendencies! For the other rings, I euthanized some sports bras that hardly merited the title and were made of a cotton blend that stank of mildew the moment I sweated in them. Good riddance.

11. Cut a length of elastic 21 1/2" long (this is just to hold it in place during workouts, not to provide support, so it's need to be fitted but not tight) and sew into a tube. Mark the quarters and match up with the quarters of the lower edge of the inner bra. Fold the edge of the inner bra over the elastic by 3/8", such that the raw edge will face toward the outside of the top, and twin needle in place.

12. Tack inner bra to upper bodice just above empire seam by stitching in the ditch at the side seams.

13. Twin needle the hem.

This process involved a fair amount of changing needles and thread with my contrast colors, but I think the changes were worth it.

Catalog Shot

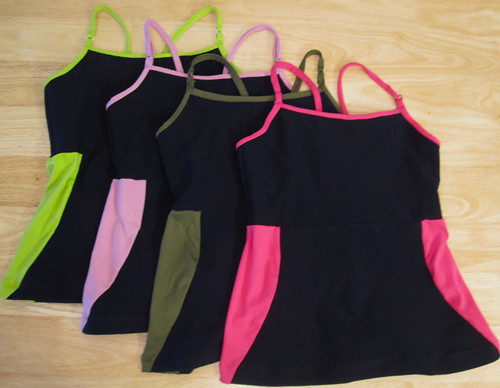
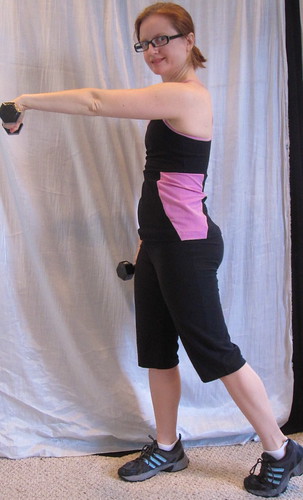
And here they are! I also did a catalog shot with their respective matching pants. I now have four matching and even cute sets of gym clothes. Yay!

90 Degree Raise Shoulder Press 
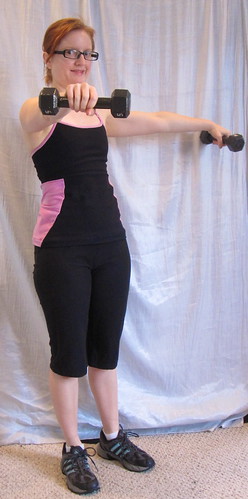
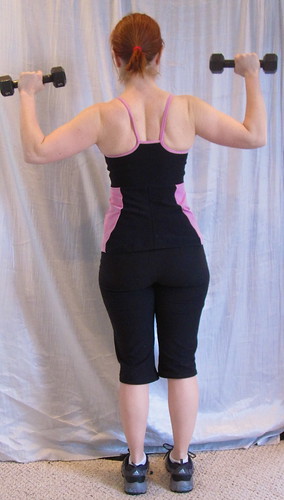
I amused myself by doing a "fitness" shoot for the photos. It can really take pictures to help you see exactly what you look like sometimes. I am always startled by my rear view. Doubt not that I am pear shaped.

I didn't actually learn my lesson from making the pants. I realized that I should have made a test pair and then actually worked out in them before making more, which would have allowed me to catch the crotch wrinkles and beef up the elastic at the waist. But, as with the gym pants, once I got started I just wanted to get these done! All my sewing for 2011 so far has been utilitarian (coat and gym clothes) and I am so ready to move on!!! Will report back next week when I wear one of these to the gym on how it does.

All photos are here and the pattern review is here

Tuesday, January 25, 2011

Outfit of the Week: Ankle Booties

I have enjoyed my fellow bloggers' participation in Me-Made-May and Self-Stitched-September, in which the goal is to wear something you've made every day and post about your adventures. Since my life is pretty much the Slapdash Sewist Self-Sewn Style Show (how's *that* for alliteration?) about 362 days a year--there might be 3 weekend days a year in cold weather when I wear RTW jeans and a RTW sweater--there's no real point in designating a month to do exactly what I already do anyway. But I have been getting the urge to do fashion posts lately, so when I have put together something I like, I'll share it.

I'm calling it Outfit of the Week, but I am certain I won't get around to it every week and probably won't do much in summer since I wear a dress every day and dresses don't style *that* differently one time from the next.

These two outfits were designed around my brown Born Gellar booties. I saw these on 6pm.com (if fabric.com is my dealer, 6pm.com is at least my runner) before I left for Turkey and instantly loved them. However, I told myself not to buy them because I never actually wear heels, like ever, and I really did not need them. I have a great pair of black booties (Clark's, totally totally comfortable) and I don't wear brown. But I kept thinking about them the whole trip and decided if they were still available when I came home I'd order them. They were, I did, they were too small and I had another crisis deciding whether to replace them. I did.

There looks to be one pair of black ones left in size 6 (I found them a half-size small) on 6pm. Even though Borns are generally great comfort shoes, these aren't so great. There is absolutely no padding in the forefoot. I put in the thickest forefoot gel pads I could find and it's better, but not great. The heel is as comfortable as a heel can be, though, and they are good quality. They're fine for wearing around the office.

Outfit of the Week: 1-7-10

I had a meeting on a Friday, when we are normally allowed to wear jeans. So to cheer myself up I went for bright, bright colors. I keep a variety of jackets on the back of my office door, and wore both these outfits with a green tweed jacket that has been in my wardrobe for about 8 years. I wore my Burda 10-2008-118 print dolman sleeve blouse, made out of a remnant of silk from a Fabric Mart bundle teamed with my lace-trimmed Burda 01-2008-127 green silk princess skirt, and bright orchid tights. The green in the silk print matches the skirt perfectly.

Wearing and looking at photos of this outfit has convinced me that I need to suck it up and fix the fit on the green skirt by taking in the waist. It sits too low and is therefore too long and slightly too large. Especially with the very roomy dolman blouse, the skirt needs to fit.

Well, the people who were supposed to attend the meeting cancelled at the last minute! I was so annoyed. I had dressed up on a Friday for nothing! I left the shoes in my office over the weekend, and wore this outfit the next Tuesday for the rescheduled meeting.

Outfit of the Week: 1-11-10 I reviewed my Burda 09-2008-108 lace tulip skirt in 2010 but actually made it on '09. Had I made it in 2010, it would have been hands down my favorite piece of the year in my annual wrap up. I cannot even tell you how much wear I get out of this skirt. I have never been a navy person, but this goes with everything (including the above dolman blouse). Because the lace is tone-on-tone with the under fabric, it is subtle and professional and just adds a little texture, rather than screaming "lingerie."

I teamed it with an oldie but goodie, my McCall 5314 wrap blouse of silk/cotton. I did not sew this blouse with French seams and I did not do a broad back adjustment to the pattern. It really strains and there are only a few wears left in it, unfortunately, before the seams shred. I've already opened the seams and darts to let them out and reinforce with interfacing, but it's not enough to buy me more time. I have been letting this blouse just sit in the closet, knowing it won't last too many more times. Why? I need to wear it up and wear it out!

Friday, January 21, 2011

Burda 02-2009-108, Ruffled Shoulder Boat Neck Tee

Burda 02-2009-108 Thumbnail

Cidell and I met up for some snoop shopping a while back and both loved a t-shirt from H&M with a ruffled shoulder. It was just a plain t-shirt with ruffles sewn on top, but the ruffles took it someplace awesome. I filed away the idea.

I bought this Vera Wang poly jersey from fabric.com a few months ago ($5.99/yd) because I loved the nude colored yardage I got last January. I made a Kate Middleton/Issa knockoff (coming eventually) and had enough fabric to make my ruffle top and a sleeveless cowl top.

The Burda 02-2009-128 boat neck top has been extremely popular on Pattern Review, so I thought it was time to give it a try. Also, I had traced it out for another project and figured I might as well use it.


This is one of those summary posts so here is what I did:
-Graded to a 34 at the shoulder and bust, cutting a 36 at the waist (though I ended up taking in the waist) and a 38 at the hip
-Added a CB seam and swayback adjustment
-Made the top extra long so it would definitely never show my belly when worn with jeans

Ruffles Hand Stitched to Shoulders For the ruffles, I cut strips about two inches wide (I was down to scraps so some are a little narrower), used the serger to finish the edges, ran a gathering stitch down the center and lightly gathered, and just hand-sewed in place, as you can see at left. I just sort of did my best to get the two sides to have about the same number of ruffles. I had to add more to the right shoulder after the first round. If you weren't cutting your ruffles out of scraps, it would be easier to plan for the same length for both sides as long as you were consistent in how tightly you gathered.

Mango | Mango Ruffled Shoulder Top at ASOS-1


I tried to find the original H&M top that inspired me. I didn't turn that one up but found several RTW examples of the trend. I really like the full sleeve ruffle on this Mango top. In the closeup of the ruffle you can see that they've mixed materials in there, with chiffon or organza and what appears to be some kind of metallic tulle or sequins. It lightly references a fur shrug or wrap, giving it an almost retro appeal.


3.1 Phillip Lim - Ruffled-Shoulder Long-Sleeve Dress - Neiman Marcus


I couldn't find any high end examples of this look, so I was pleased to finally find one on Neiman Marcus, a 3.1 Phillip Lim, no less. The proportions of the model looked a little unusual in the thumbnail photo, and when I enlarged I realized it was a child's dress, LOL. Clearly, I do not have the most sophisticated of taste.


Burda 02-2009-108


Unsophisticated or not, I adore this top. It's a great bit of drama in a solid color, and works well with jeans for Fridays. I'm wearing it today with a huge necklace, and under a jacket for a meeting it will look quite tame.

I'm less sold on the pattern. The poly jersey is very drapey, so there might be some degree of pattern and fabric mismatch if the pattern was drafted for a firmer t-shirt style knit. It just doesn't fit me that well. It almost looks like I could use more room in the bust, but what I think is actually happening is the upper part of the top gets caught up under the arms, catching the narrower underbust part above my bra. It's roomier than I expected at the waist and hips, and I ended up taking in an inch or so at the side seams. The neckline is very wide and shows my bra straps. Although the armscye appears high, the top still lifts several inches when I raise my arms (though the long length prevents belly showing). I don't think it will be an Old Reliable for me.

All photos are here and the pattern review is here.

===============

My own personal Annie Liebowitz (aka Cidell) and I hope to hang out next week, so I'm not going to do photos on my coat before then. Trust me, outdoor photos shot by a great photographer will be so much better than self-timer bedroom photos. It will be worth the wait.

Wednesday, January 19, 2011

Bound Buttonholes: New Technique for 2011, Checked Off

Finished Bound Buttonholes I am not one to make sewing resolutions, and although I have a list of things in my head that I don't know how to do but ought (*cough*fly front*cough*), I don't really feel the need to "grow" in my sewing. It is a hobby for *fun* and it clothes me quite well without knowing all that fanciness. I only turn to new techniques when they are the perfect touch for a project--I don't choose projects to try new techniques. My most recent coat project (this is a teaser for the finished product, which I have not yet photographed) involved velveteen trim and somehow I got my heart set on bound buttonholes with velveteen lips, so it was time to give it a try.

First of all, lest anyone accuse me of not being slapdash, let me note that I made ONE sample before going on to the coat, and it was rather wonky. My learning curve plan, an ingenious one if I say so myself, was to start with the bottom buttonhole and work my way up so that by the time I got to the top, where people were likely to actually see/notice the buttonholes, they'd be ok. It worked out pretty well for me. And where any possible shortcut could be taken, I took it (sewing the lips in a strip, marking only one side of the fabric, marking only the length of the buttonhole).

Though I have read many, many bound buttonhole tutorials over the years and sincerely appreciate every single one of them, the particular one that finally pushed me over the edge was Gertie's tutorial, with very clear step-by-step instructions with a photo for each step. This post is less a tutorial than a document of the blood, sweat, and tears that went into making my bound buttonholes.

Lip Strip My first shortcut was to make the lips in a strip rather than individually. This is really only a convenient change if you have a serger.

Start by cutting two strips of fabric as wide as you want the final lips to be with a total combined length adequate for all your buttonholes. I cut mine two inches wide and allowed 3 inches of width for each of my 7 buttonholes (well, originally 8 but I re-cut the collar). This was generous and I trimmed them down once they were sewn in place, but I want to have plenty of room to maneuver.

Place the fabric right sides together and sew down the middle with your machine's longest basting stitch. Then fold each strip onto itself, wrong sides together, and press. Use the serger to trim and finish the long strip into individual lip units. The serging should be enough to keep the center basting stitch from unraveling while you're handling it.

Stacks of Squares and Lips

You'll also need squares of fabric to sew into and pull through to the inside. For lack of a better word I call these "windowpanes." It's best to use the lightest weight fabric possible. Gertie recommended silk organza, but I didn't have any the right color and knew it was bound to show somewhere. I found some silky lightweight navy poly from the Carol Collection in stash. I cut it into a strip as for the lips, interfaced all at once (the white square in the photo was flipped over to show the interfacing), and serger trimmed to individual lengths. Once you have all your windowpanes and lips, you're ready to move on.

Mark Buttonhole on Wrong Side Now it's time to mark the buttonholes. I think technically one is supposed to do the bound buttonholes while the front is still a separate piece. I never use the marked position for buttons because isn't having custom-placed buttonholes in the exact right place for your body part of why we sew? I constructed the shell of my coat so I could mark the button position and then did the bound buttonholes.

I marked the buttonhole position on the wrong side with chalk, but unfortunately with a lot of handling the chalk rubbed off, so I did tailor's tacks to supplement. Although every bound buttonhole and welt pocket tutorial in existence urges you to mark the center line (the opening) of your buttonhole *and* the two legs, I don't bother. I just mark the two ends of the buttonhole and use the edge of the presser foot as the guide for the width of the space between the two legs.

The reason I mark on the back is so that I only have to mark once. After the markings are completed, just pin your windowpane squares to right side. They don't have to be perfectly centered over your marked buttonhole position, and therefore it doesn't matter that you can't see them while sewing.

Finished Windows Now you sew all the legs of the windowpanes. Using my tailor's tacks as a guide for length, I would sew one leg, then position the presser foot so that the edge was slightly past the first length (I wanted wide windows so my lips would really show) and sew the other leg.

Once the legs are completed, clip into the center and slit through the center to about 1/4 of the way to each end, then clip a Y to the corners. I really need to treat myself to a pair of nice embroidery scissors because my rinky dink thread snips are not adequate for this task, and shears are way too unwieldy and cumbersome.

Turn the windowpanes to the inside. They look like flowers! Until you press them. Then you have a nice set of windows, as seen at left.

At this point I was feeling cocky. All the preceding steps took little more time than making regular buttonholes would have, and were not at all difficult or fussy. Ah, hubris.

Hand Basted Lips Then came the lips. Hooboy, the lips. It seemed easy. Just pin them into the windows and sew to the cut out triangles and edges of the windowpanes. I don't know if it was a function of the nap of my lip fabric or if this is what is hard about bound buttonholes, but after many, many, MANY failed attempts I ascertained that the only way to avoid flying a scuba flag of 100% diagonal lips (I mean, truly, wouldn't chaos theory predict that at least ONE of them would accidentally be straight?) was to hand baste the lips to the little triangle and the side flaps. Pinning was a joke. Hand basting the lips to the windowpane square very near the opening but not actually along the stitching line made no difference whatsoever in the scuba situation, it had to be along the final stitching line. And even then they shifted during sewing.

The time efficiency I had just been crowing to myself about flushed itself down the toilet and into a black hole and installing the lips in my easy, breezy windows took a good five hours.

Although it makes logical sense in terms of construction order, I think the psychological sense of making bound buttonholes in the middle of construction rather than at the end is even greater. If you knew that a mere 7 hours of buttonhole work were all that stood between you and a finished coat, I don't think anyone would ever make bound buttonholes.

Spanish Snap Buttonholes for Facing But of course, you're not actually done. There is still the facing to deal with. My original plan had been to make windows as I had for the front, but of course without their own lips. But then I remembered a tutorial in Spanish Snap Buttonholes that Kay the Sewing Lawyer posted a while back. It sounded like a much better plan to make the windows all in one as an oval rather than messing with the Y cut and little triangle nonsense.

On this side I did use silk organza, figuring a little bit of white showing on the facing wouldn't bother me. I didn't actually look back at Kay's tutorial before starting so I didn't put my windowpanes on the bias.

The hard part here was that the coat was almost fully constructed. I knew the only way I would get the outer and facing buttonholes to line up was if I put in the facing buttonholes after the facing was sewn to the front. Especially with my thick velveteen ruffle between, there was no way to merely baste the facing on (broke 3 needles as it was!), mark the buttonholes, take it apart, and then sew it again in the exact same place. Absolutely no chance of that happening. So the hardest part here was maneuvering a giant lined coat under the sewing machine to sew the football-shaped buttonholes. I was actually panting by the end of it, and felt like I'd gone 3 rounds in a wrestling match.

Hand Stitch Facing Buttonhole to Outer Buttonhole The last step was to secure the facing buttonholes to the outer buttonholes, to make sure they'd stay lined up and to keep the button from getting lost in that void. Here, the thick velveteen of my lips was an advantage because I was able to whipstitch by hand, catching only the inner layer of the lip (remember, the fabric is folded on itself) and the edge of the Spanish snap buttonholes.

I ended up making 9 of these (in addition to my sample), as I put six buttons on the body of the coat, started with 2 on the collar but realized it just wasn't going to work (not enough length on the collar to place them properly), re-cut the collar and did another one. None of them are perfect, but they're all passable. And I realized to my chagrin that they hardly show at all when the coat is buttoned! I am a little concerned that the nap will wear off from the frequent friction of buttoning and unbuttoning, but as long as the fabric doesn't give I will survive.

All photos of this process are here.

I don't think bound buttonholes will be making a frequent appearance in my sewing, but I'm glad that I've tried them. Now I can coast for the rest of the year, since I've already done something new!

Monday, January 17, 2011

Butterick 5454, Knit Wrap Dress

B5454 Thumbnail

One of the projects in my purple and green wardrobe for my trip to Turkey last Fall was this Butterick 5454 wrap dress. It is definitely a winner!
The gorgeous border print knit was a gift from Marji and I wanted to find just the right pattern for it.

Pattern Adjustments I altered the pattern with my usual adjustments, broad back and small bust. For the broad back adjustment, last time I did this change I noticed that it added length to the back bodice so that it didn't match up with the front bodice. Which, duh, but as I've mentioned before I do *not* have a 3-dimensional mind. So I shortened the back bodice above the waist, as the lower set of red lines shows.

I did my normal swayback adjusting, similar to this.

I also shortened the front crossover for an SBA. In the Big 4 I find that I need to take out at least two inches of length (only about 1 inch is usually necessary for Burda). The reduced length, along with twin-needling over slightly shorter clear elastic along the neckline, keeps it nice and snug with absolutely no gapage.

Gust of Wind 
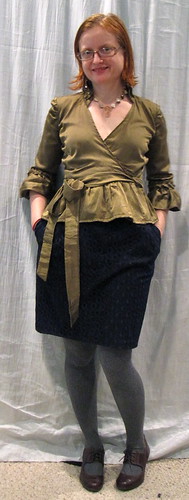
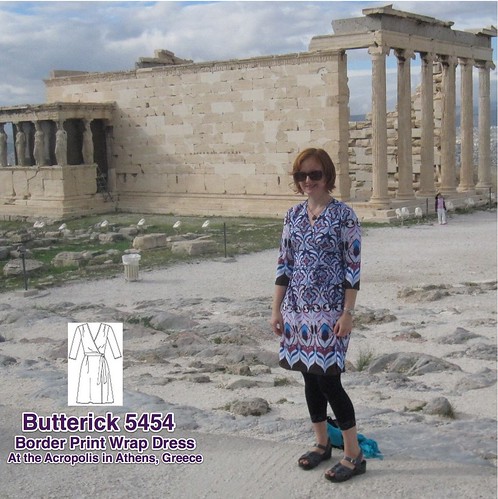
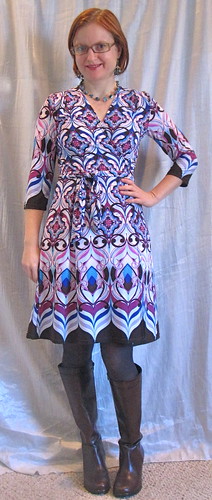
I wish I could say the same about gapage for the skirt, LOL. I was a little trepidatious about taking a wrap dress on vacation because the split skirt can make it a little fussy to wear, but I loved it so much when it was finished I couldn't leave it behind. I wore it the day I visited the Acropolis in Athens and asked a friendly German fellow to take my photo. Well, an inopportune gust of wind came along just as he snapped the shutter. Whoops! I convinced him to take another shot.

As an aside, clicking on the photo will not enlarge and it is not otherwise available on the internet anywhere--I put it in my flickr and it was instantly set upon by the flickr nasties. I hope that you pay attention to who has favorited your flickr photos--if it is someone unsavory, click on their name and it will give you an option to block them on their profile page. Blocking someone means they cannot favorite your photos to easily find them later and cannot add them to galleries. I choose to make my photos publicly available and understand that I am allowing the unsavories to see my photos and can accept that. However, I do not want them to be able to aggregate them and flickr provides the tool to prevent that in the block feature.

Shoulder Pleat

The only thing I don't like about this pattern is the shoulder pleat. It kind of opens up into nowhere and looks weird. Because I thought it would just be too much with the large motif of the fabric, I did not cut the bodice on the bias as directed, so it could be related to grain. It also could be that I should have sewn it down further, my small bust, or just bad design. When I make this pattern again, I will convert that inverted pleat in the front shoulder to a gather.


B5382

Marji sent me a little over 3 yards of this fabric and I was determined to make the most of it. It was a HUGE pain to cut, because not only was the fabric a double border print but the non-border motifs changed direction at not-quite-the-center-fold of the fabric. It took me hours to lay out and painstakingly make sure all the prints would match. Hours! I had to skimp on the tie (would have liked it longer and ending in the border), but the print matches at every seam on every piece. Scraps

I had only tiny scraps left at the end, as you can see at right.

In the end it was worth it, as I managed to get another Butterick 5382 pleat neck dress out of it. Though it is sleeveless, I've actually had a fair amount of wear out of it this winter with a sweater over it. It's my go-to casual party/festive dress. I cut the facing out a print part of the fabric and it doesn't look great at the neckline as the print facing peeks out over the brown neckline, but whatevs.

I also got a skirt out of it, but unfortunately it's not wearable. The fabric's stretch was along the crossgrain with very little on grain--but the border was printed along the selvages. So there is pretty much zero stretch when you use the border along the hem. I didn't think to put a zipper in the skirt to compensate for this, and I'm afraid it's going to pop a seam in putting it on and off. It is serger constructed, so I don't have enough seam allowance to put a zipper into it.

Front

I think I have found my wrap dress pattern for the ages. The Vogue 8379 DVF knockoff that is so great for so many people just doesn't do it for me. The pleats in the bodice make a little too much room for my bust and are angled wrong for me, and the bias of the circle skirt--in addition to taking up huge amounts of fabric--drapes a little too well over my saddle bags and emphasizes them. The virtually unshaped bodice of B5454 and the straight cut skirt (with additional width added in the form of inverted pleats) are much more flattering to my small-busted pear-shaped figure.

Based on the identical line drawings and pleat details, I'm pretty sure B5546 in the lower-priced See & Sew line is the exact same body with a slightly different flutter sleeve and minus the wide sleeve, for my non-US readers who don't get the cheap pattern sales we are lucky to have here.

The pattern review is here and all photos are here.

Tuesday, January 11, 2011

Stashoholism Confessional, Golden D'Or (Dallas, TX) Store Review, and The Inevitable Resolution

Golden D_Or 12-2010

My parents live in the Dallas area of Texas, so I was there over the holidays. I had heard of Golden D'Or, on of the fabric warehouses in Dallas's tiny garment district, several times. I went to the garment district once with friends when I was in high school (yes, I have been obsessed with sewing for that long), but my only recollection is falling asleep in the back seat of the car on the way back. It turns out to be (sort of) in between my sister's house and my parents' so I snuck in a quick visit. Oh my! This place is dangerous.

Sorry, long narrative with no photos. I didn't think to bring my camera into the store.

Like everything in Texas, it's huge. I mean huge. The fabrics are roughly organized by type (cotton, silk, wool, home dec), with a secret clearance room way in the back of the warehouse on the left. There is a room of stretch fabrics, but unfortunately it was almost entirely nylon/spandex swimwear type stuff (not great quality, not good prints) rather than everyday garment fabric, and I didn't find anything in there.

I had justified my visit to myself because I have been looking for a nice boucle for a skirt for a couple of months now and found absolutely nothing online. I visited the Joann superstore near my parents' house (superstore=super amount of crap that has nothing to do with sewing) where they had exactly one boucle, 100% acrylic, $19.99/yd. Even with 40% off, that is still $12/yd for nasty, low quality, synthetic fabric. Absolutely not. But Joann is a whole other rant.

When you walk into the warehouse area (after a little bit of a maze from front door to fabric), you find a table of (allegedly) cotton remnants for 99 cents/yd, where I found the little floral print. A burn test proved this to be a rayon/poly rather than cotton, but man, don't you love the print?

Then I asked someone to direct me to the wools. The selection is quite small, but the black and white boucle immediately caught my eye. It was labeled Versace (have looked through Versace's Fall and Pre-Fall runway shows for the past few years and seen zero boucle, so I doubt the veracity of that claim), has tiny metallic threads running through it for just a hint of sparkle, and has a wonderful hand. $20/yd is more than I have ever paid for any fabric, so I had to take a breather before making a decision.

I headed back toward the clearance room. It was mostly filled with uninteresting polyesters, but there were several of these sheer sweaterknits in different colors. Although I already have a transparent moss green sweater, I went with green. I probably should have chosen hot pink instead, but I love that green. At half price, it was $4.25/yd. A burn test shows definitely a man-made content, but I think I got a whiff of wool as well. I passed through cotton on the way into the clearance room and found this Hawaiian print perfect for boxer shorts.

I had now contemplated the boucle. I had come to peace with the price. I will wear a good quality wool black and white boucle skirt every couple of weeks for *years.* The end price will be pennies per wear. There are garments that are not worth splurge fabric, but a wardrobe staple is the exact right place for splurge fabric. I had originally been looking for a colored boucle, so I also picked up the second wool piece (only $10/yd). I would have preferred it to be more in the warm family, since that is what I wear, but the accent threads are purple, turquoise, and pink--all my colors.

What I love about boucle is that it is both a solid and a print. With a solid top, the texture of the boucle adds some interest to the outfit. But with a print top, the boucle acts as a solid. It can be worn with anything!

My total at the register was around $50. This place would be so dangerous for my stash shelves if I lived near it.

Though there are not quite enough of them for the size of the store, the employees were all very friendly and willing to help when I flagged them down. I almost wish I never got good customer service in Texas because it would help me get used to DC's non-existent customer service culture.

Golden D'Or has a small online store, but it is tiny in comparison to the real thing and doesn't have the deals. The prices for non-designer cotton are good, though, if you're looking for novelty-type stuff.

Liberia Gifts 12-2010

A dear friend is working in Liberia this year and brought me back some local fabrics! The fish print is the favorite local motif. She said that every time they introduce a new colorway in the fish print, everyone rushes down to the market to check it out. The tie-dye is a local specialty--it's very elaborate and the underlying fabric is jacquard to add even more texture.

She showed me one of the skirts she had made in Monrovia and it is sensational! I will have to get photos of everything she's has made when she returns home permanently (probably in a year).

=================

20 Projects From Stash Without Even Trying

1. Mustard wool crepe side pleat dress

H&M Fabrics, 11_2010 Raglan Sleeve Peplum Dress 2. For the awesome black and pink houndstooth wool I bought in New York a couple of months ago, another 80s throwback of Butterick 5520. With a peplum--lined in pink satin--and long sleeves, this will be an office power dress for days when I need a little drama in my life.

3. Red, white, and blue floral swiss dot Simplicity peplum blouse

4. Vogue wrap/drape dress of Turkey turquoise and black rayon

5. Silk organza plaid pleated skirt

6. Black/pink batik vintage dress

Goodman, Montreal, 6-2010 For Yellow Pique 7. I spent about four months last year obsessed with Vogue 8633 but couldn't find just the right fabric for it. I found it in Montreal, but didn't get a chance to make it before it got too cold for short sleeves (though I could probably wear my ubiquitous black Burda turtleneck under it).

8. Anna Sui black/pink/turquoise silk tank.

9. Blue/orange paisley shirtdress.

London Textiles 5-2010, $3/yd Wide Collar Wrap Dress 10. For the double-sided acetate polka dot fabric I bought at London Textile Warehouse at PR Weekend Philly, this Butterick 5451 wide-collared wrap dress. The body and undercolor will be cut with the light colored fabric as the right side, and the upper collar and tie with the dark colored fabric. I will add sleeves.

11. Purple silk/cotton pleat front Burda blouse

12. Green seersucker surplice pleat dress.

13. Paris white/blue embroiedered shirtdress.

Spain 2009 Fabric Purchases For Spain Green Dots Fabric

14. Simplicity 2360 with the flutter sleeves out of the silky green and white circle print I bought in Spain while hanging out with Paco. I keep seeing this pattern made on PR and am getting so impatient for Spring!!!


15. Vietnam silk Rachel Comey knot blouse.

16. Yellow eyelet shirtdress.

Fabric Mart, 3-2010 For Bandana Print 17. Butterick 5490 out of the bandana print fabric I haven't been able to decide on a pattern for, although I may possibly make this pattern out of the colorful wheel fabric seen in the same photo as the pink and black houndstooth wool above. By the way, why didn't I buy like 100 yards of that orange silk chrysanthemum fabric? I made a dress out of it this summer (one of my many unreviewed projects) and really wish I had some more.

18. Hot pink wool jersey Vogue 1191 Michael Kors crossover knit dress

19. Navy white/floral skirt

20. Green/black abstract print knit crossover Burda dress


Note that this list does not even include the two boucle skirts I plan to make soon, the coat I'm working on now, all the gear for my bike trip (supplex tops, rain pants, rain cape, biking skirts), and a thousand more of my ideas. Assuming one project a week, this list will keep me busy nearly half the year.

=================

So here goes the resolution: I am going to try to be more mindful in my fabric purchasing this year.

This is simple, but number restrictions just haven't worked for me.

I have very few regrets of things I purchased last year (I really wish I hadn't bought that $18/yd wool from Kashi--the color is really not quite right and it will take me years to get around to sewing) and, given enough time, all of it will get sewn eventually and what I don't love is already in the giveaway pile. But I bought too much for general stash, without considering whether it filled a hole in my closet or in my stash.

While some would legitimately dispute whether there can be a hole in stash that does not correspond to a hole in closet, I'm going to give myself that leeway. At Golden D'Or, I really tried to be mindful of those things. The boucle will fill a skirt hole in my closet. I have only one piece of sweaterknit in stash, and it is a completely different weight than what I purchased. The Hawaiian-style print is for a gift. I do not have any dearth of lightweight woven prints for summer, however, so the little green/blue floral was a needless indulgence.

Here are a few things that will fill holes:

-Animal print knit of the cheetah/leopard variety. The boyfriend comments *every* time he sees something in animal print, has made very clear that he would quite appreciate seeing me in a slinky animal print number, and gets very excited when a pattern envelope shows a dress made up in leopard (I don't think he quite understands that the pattern doesn't come as a kit with the fabric included). I have been looking for a nice knit in an animal print for over a year and found nothing!

-Boucle in the purple/pink/blue family

-nice solid t-shirtings in the type of rayon blend that RTW t-shirts are made of. Never seen this anywhere. All the rayon t-shirt fabric I've seen is way lightweight and unstable. I've not seen a decent cotton t-shirting fabric that won't fade and actually recovers, but that would do.

-I really want ruffled knit fabric in black for a LBD and gray for a skirt. Gray is out of stock here and has been for months, and I've not seen it anywhere else.

-Maybe fabric for a trench, but only if I'm really ready to sew it. Honestly, I don't even know what fabric is used for a water-resistant trench coat.

Wow. I can't even think of anything else. I have many, many cotton prints now. I don't have a lot of silk prints, but I don't have any particular ideas for silk prints. I have plenty of wool (thank you, Carol!!!). I even have several knit prints, though not a ton of them. Add to that the miscellaneous fabrics...and then add some more.

Mindfulness.

Thursday, January 6, 2011

Burda 12-2010-102, 80s Wrap Blouse

Burda 12-2010-102 thumbnail

As with most recent Burda issues, I was underwhelmed by December. However, even in underwhelming months there is at least one item I'd like to make. In this issue it was the crazy 80s dress, Burda 12-2010-102. Love the Dynasty sleeves and overall casual vibe.

Included in The Carol Collection were a few pieces of very nice silk in crazy 80s/early 90s prints. I love them, but have mostly been using them as linings. This one is in many of my favorite colors and I couldn't quite bring myself to use it for lining. For this pattern, the retro (can the 90s already be retro?) print totally works. It would have been overwhelming in a dress, I think, and at any rate I had only barely enough to make this top. It is another piece to go in my Endless Combination (really must get around to making another skirt to match that set eventually).

Let me start by saying this pattern has a total of 32 darts and pleats (5 pleats on each side of the sleevecap=20 in the sleeve, 4 pleats in the upper front, 4 pleats in the upper back, and bilateral lower front and back darts). So you will be marking and sewing them until the end of time. Other than that, it's not too challenging, especially as it is unfitted.


Yoke and Facing


Before attaching the yoke, I stitched the yoke and yoke lining together at the neckline, understitched, and pressed to finish the neckline. It was much easier to manipulate the yoke neckline before it was attached to anything, particularly in my wiggly silk.


Finish Neckline and Hem

I finished the cross-over edge of the bodice front by serging the edge and then turning under twice for a narrow hem, rather than use the provided facing. I used the same treatment on the hem, as shortness of fabric meant I had to cut very small hem allowances. I think this is a great finish for silk. The serging gives some body so that the edges don't curl as they would with a narrow hem foot finish, and the 1/4" allowance looks neat and appropriate for such a lightweight fabric. You can see both the inside and outside effect on the finished front neckline.

Attach Front to Yoke


As for making a cowl top, I snugged the finished bodice front crossover edge into the finished neckline of the yoke (sandwiching the front between the two right sides of the yoke pieces).


Burrito Roll Yoke

The upside of working with wiggly silk is that I was able to roll up the back into a small bundle and attach the yoke burrito-style. I first heard of this method on KBenco's blog, and there is also a a PR tip about it. It is genius! And the clean-finished yoke is just gorgeous on the inside.

Contrast this method with the instructions, which want you to do something crazy, as usual. You're supposed to first construct the outer shell, then sew the front facings to the yoke facing. Then stitch the facings to the neck edge (including front openings and understitch. Then "Turn in inside yoke and sew to joining seams." I'm not sure how that is supposed to be accomplished, but I assume it involves either stitch-in-the-ditch or hand sewing. Unnecessary! Even if you use front facings instead of turning under the front edges as I did, you can do the front facings before assembling the yoke and yoke facing burrito style.

Because this was silk, I did all French seams except for the armscye, which is serged. With the bulk of all those pleats there was no way to do a French seam on the armscye, which I often do. I briefly considered binding it with bias strips, but decided that would add too much bulk as well. I have a fairly wide range of colors in serger thread, and having a nicely blending color makes this finish a little nicer.

Snap Closure

This is meant to close with a snap at the waistline. I considered making button loops and using shank buttons instead, but decided that I would probably always want to wear this with a belt and went with the snaps. I would have needed to elasticize the waist to leave off a belt, as I feel very schlumpy without waist definition (pear shape + no waist definition = looking bigger than you really are because the hips define your size), and I'm not sure I would have liked how it looked. I just used one snap because I wanted to keep the snap sewing hidden in the seam, but I think I need another snap above the waistline seam.

Front Crossover Snap

Even though I had made my usual Small Bust Adjustment (SBA) by shortening the crossover wrap, in this loose style with a lightweight, drapey silk a wardrobe malfunction seemed inevitable. Although such a fix is how one admits defeat in sewing a wrap style, I put a snap at the front crossover point. I'm not sure how I feel about these nylon snaps and may trade it out for a metal one, but they are slightly less noticeable. It's not noticeable while worn (I didn't change the crossover point, just secured it) and I feel much better about it.

Front

My only real nit with this project is what Sigrid pointed out recently--that for some reason, when you cut out an irregular print the front always ends up twinned. SideIs it standard practice for textile designers to create a motif half as wide as the fabric so that when folded you have two sets of print? I don't know. It trips me up every time. Here it means I have two large beige swaths--the least attractive part of the print--right at center front, which is very meh.

However, other than that small quibble I love this blouse! It is crazy in both style, color, and print, and we all know my propensity for crazy. It looks great with the hot pink skirt (who knew I had so many items in my wardrobe to match a hot pink skirt?). I don't know how long it will be fashionable, so I better wear it a lot this season.

All photos are here and the pattern review is here

====================

This was a 2010 project, but I have finally managed to do something sewing-related in 2011. I cut out a coat last night--outer shell, lining, and interlining. I planned this coat before our bitter cold snap, for which it would not have been warm enough. Now is perfect weather for it (low 30s/high 20s at night, low 40s in day) and I don't have anything that really works for our current temperatures and I want it NOW. It's going to take a little longer than "now" to sew it up, unfortunately, and the weather will probably have changed by the time I finish. Such is life.