I already exhaustively catalogued the emotional issues surrounding the green coat, now it's time for the nitty gritty.
The Good
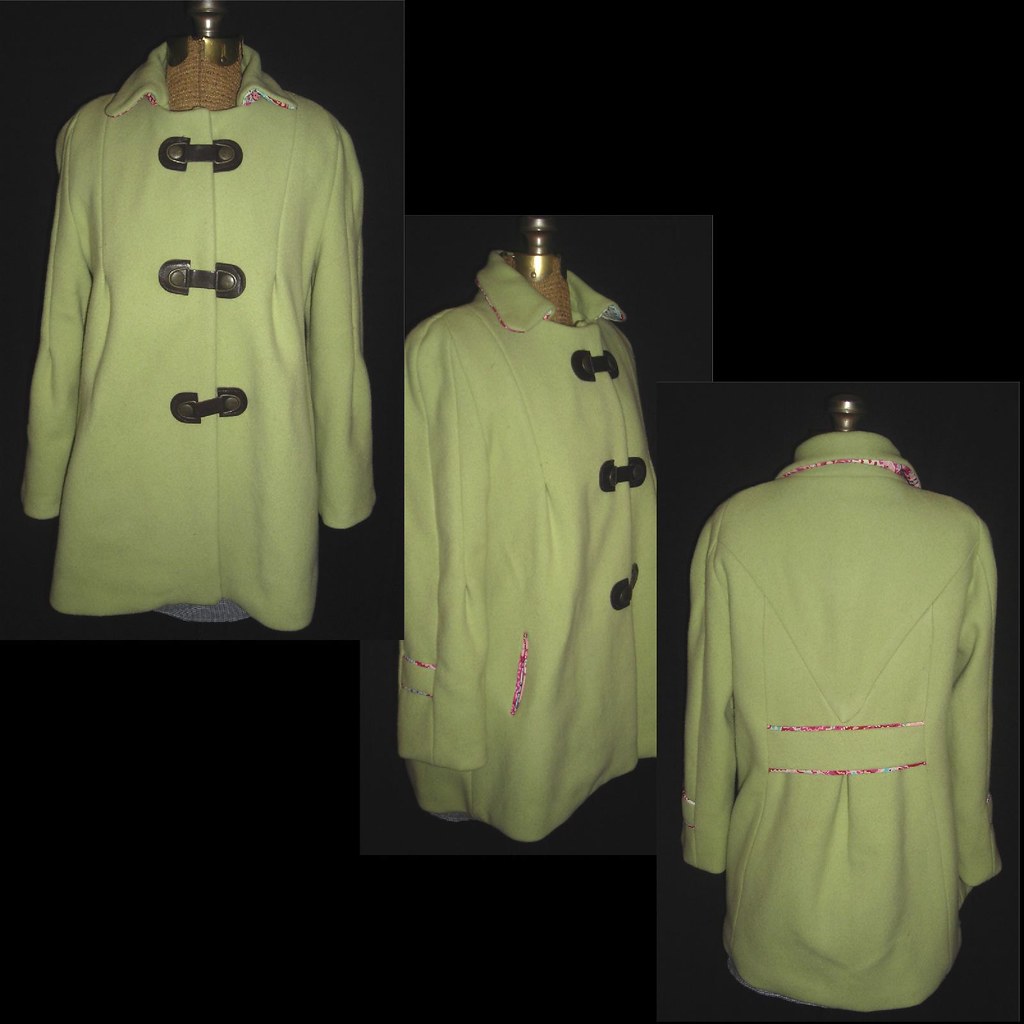
This jacket has really exceptional design. Now, I'm not talking about the style here, although that is fun and a little different than anything else on the market. I'm talking about the actual pattern draft. Sewing it is a treasure hunt, searching for the next really cool bit of design. I was truly humbled by the skill and ingenuity of the drafter, and I felt like it was really a sewist's pattern--the result is great, but it's the almost invisible features that keep you interested.
This was exemplified most by the sleeves and the collar area.
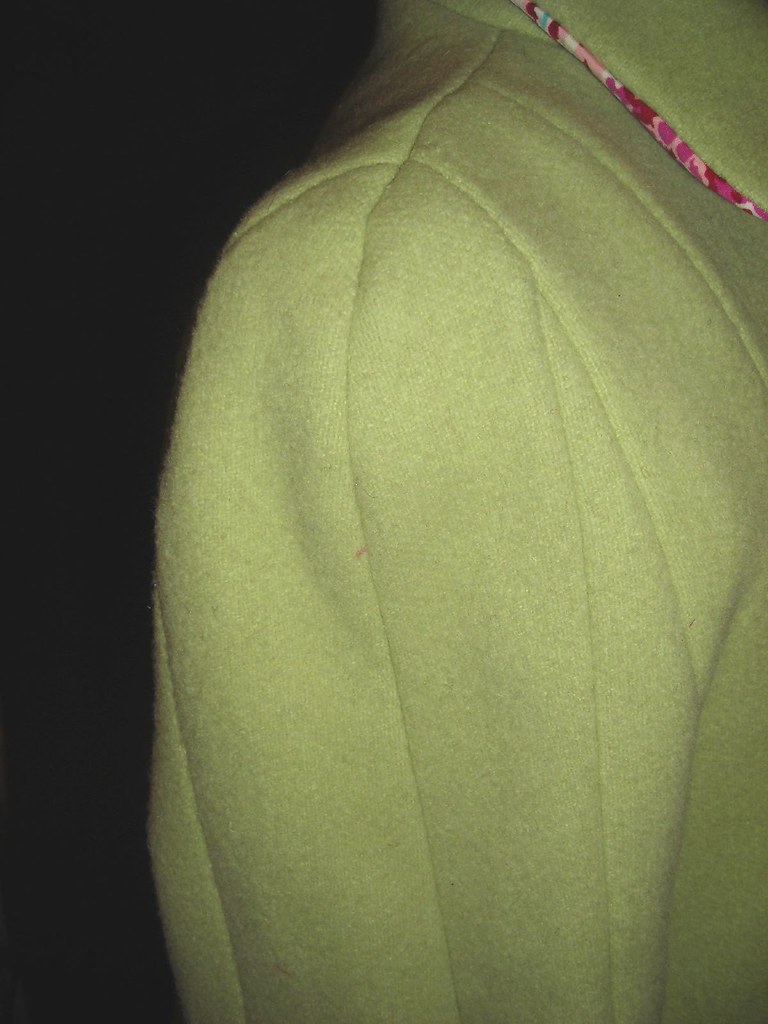 The three piece sleeve is just ingenious. It is the hybrid love child of a raglan and a set-in. The movement ease comes from the design--there was no easing involved, which was a big part of why I chose it. Easing heavy fabric is painful, and even with three pressing hams to choose from I knew I wasn't going to get a good eased sleeve cap.
 It's sewn in using an alternate in-the-flat construction (I have recently been converted to inserting sleeves in the flat). You sew the middle sleeve to the back sleeve, then sew the front and back sleeve units to the garment, and last sew the shoulder and front/middle sleeve seam as one. Very clever and very much easier to construct in heavy wool than a traditional sleeve.
The collar area also has a lot of moving parts that add up to a really interesting design.
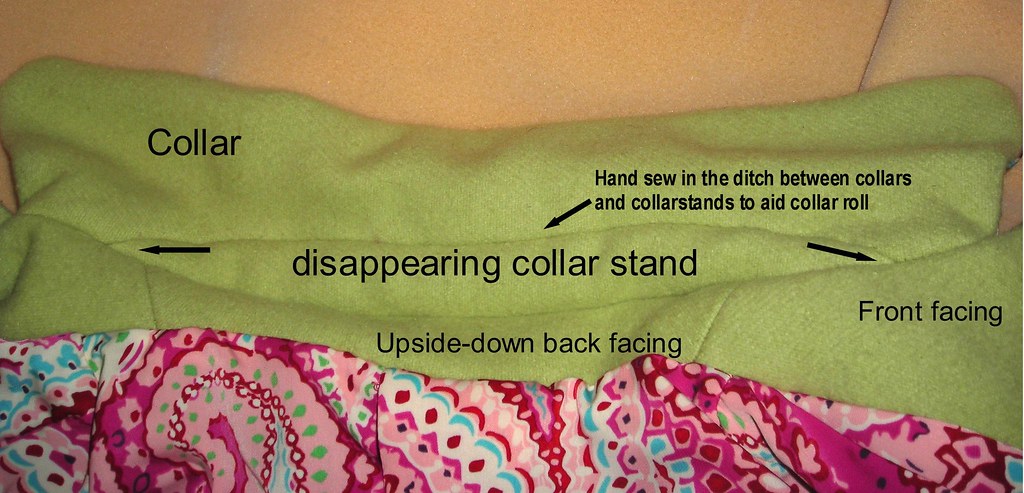
This was a little confounding at first. I couldn't get the pieces to fit together. The back facing was the problem. I hate facings and haven't used one in so long that I had to call Cidell and make sure that the narrow part of the facing goes around the neck. She said yes. But it wasn't working. I turned the facing upside down and everything went together. There was no indication in the instructions or on the pattern (such as through the use of seam numbers) that this was correct, but Melissa at Fehr Trade reached the same conclusion in a different BWOF jacket so at least I am in rareified company!
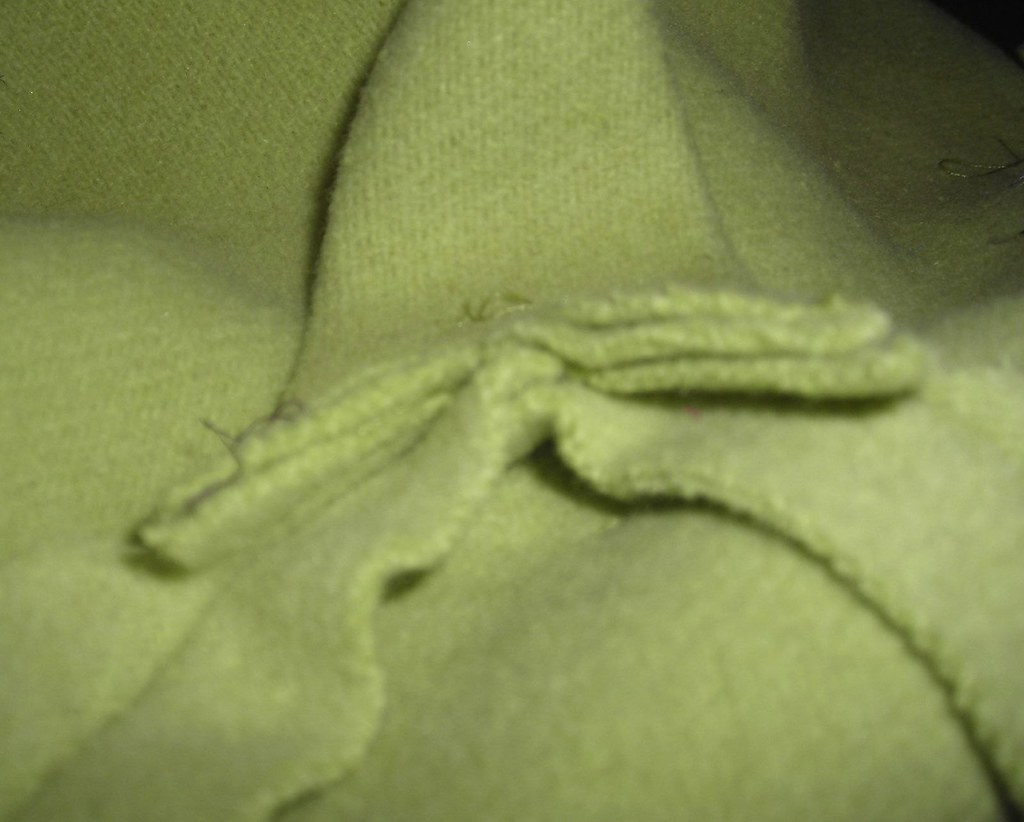
 I was nervous about doing both parts of the collarstand in the heavy wool--it was a thick fabric for such small pieces--but in the end decided using lining for one of them wouldn't look right. It turned out not to be as difficult to wrangle the fabric as I feared, and when it was done I saw the cool disappearing collarstand effect that gives a nice collar roll in back (after I hand sewed in the ditch between the collars as shown at right) while maintaining the tidy little 60s collar look in front.
The Bad
Other than not understanding some of the instructions, I only had one beef with this pattern. There was some sort of issue with the sleeve draft. You know how when a knit shirt gets stretched out by a hanger and has a weird bubble on your upper arm a couple inches below the shoulder? It looked exactly like that about three inches down from the shoulder at the front/middle sleeve seam. I kept flattening the curve more and more; in the end I think I flattened it about half an inch and I think I still see a bit of a phantom pooch.
The Ugly
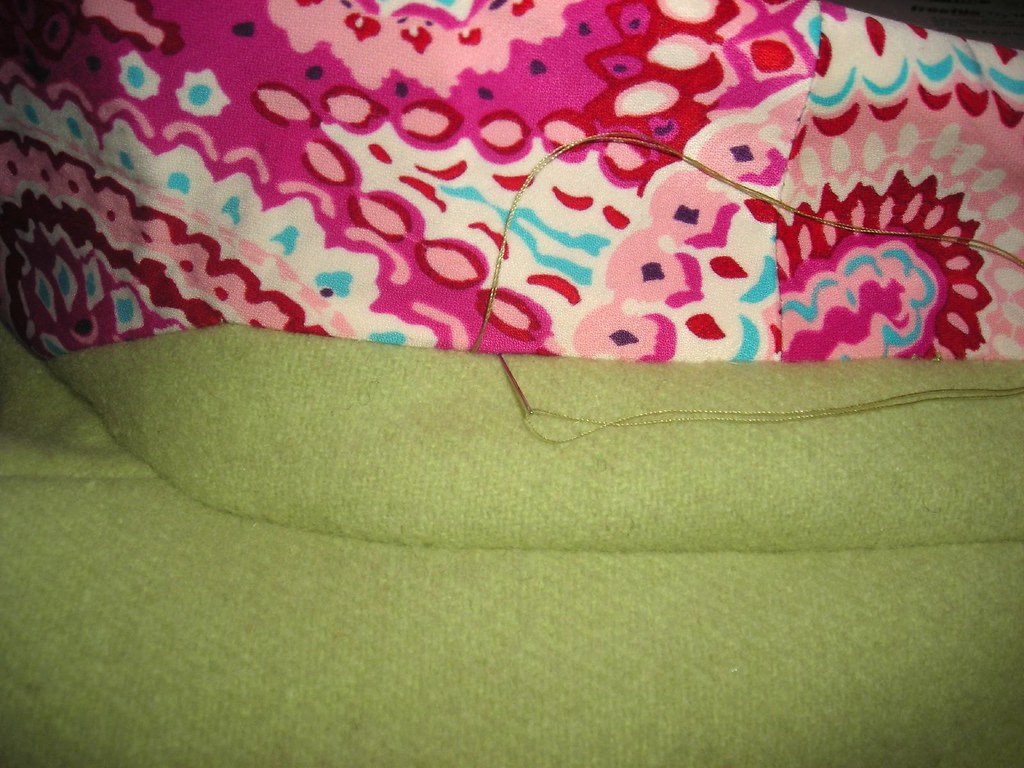
The ugly is all me. I couldn't get the back point straight and centered.
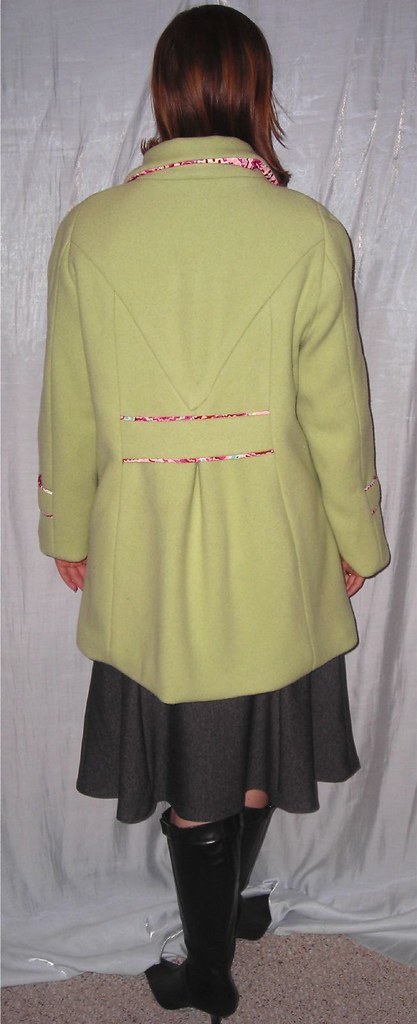
 I ripped it out a couple of times but that was the closest I came. I ended sewing one leg of the point by machine and the other by hand because I couldn't even get the machine to go in there. Check out how many layers I was working through there! I clipped the point of the upper back all the way to the stitch line, but it still didn't give me enough room to get it right. I am sure a more skilled and patient sewist could have done it, so I'll call it what's slapdash about this project.
Making it Mine
I had to add some little touches to make this coat mine. And what's more me than pink? Rather than the depressing lining I originally chose, I ended up with a bright pink paisley poly print from Joann.
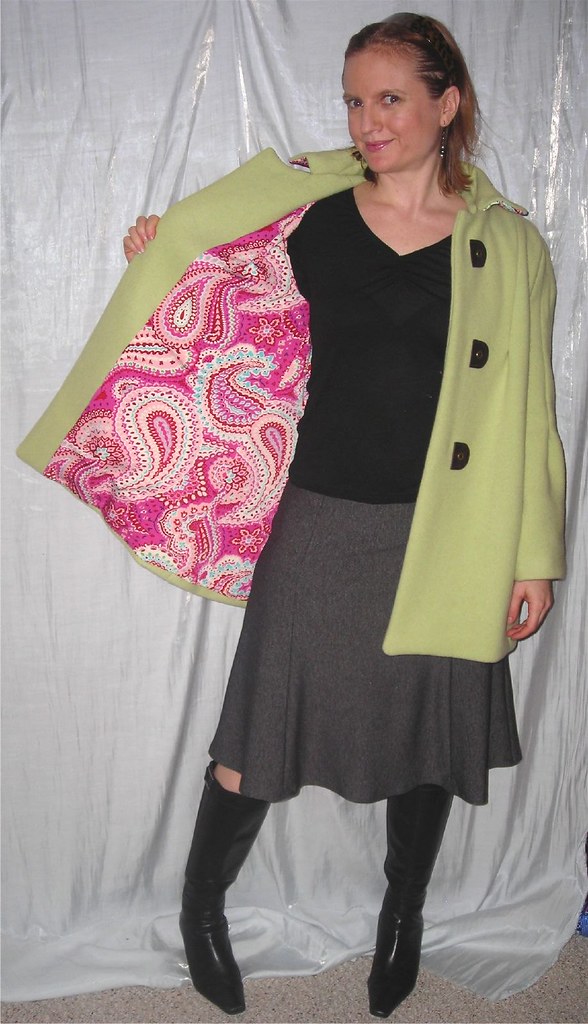
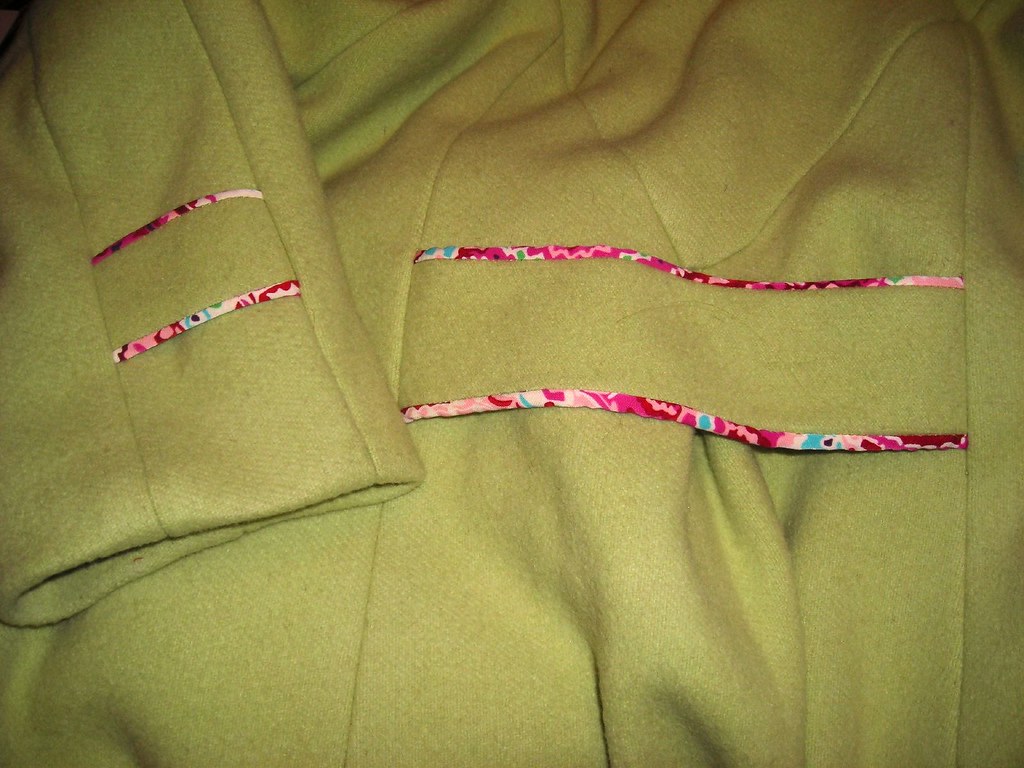 I used it for my pocket welts, and wanted to bring it into the rest of the coat somehow. I found a place for it on the back belt, cutting it about 1/2 inch wider than the coating so it would roll out over the seam allowances. Then I got the idea to add a sleeve belt, as I wanted to do something fun with the sleeves and I like sleeve belts on RTW coats. But I was in sort of a quandary. I knew I was going to use my Pacific Trimmings closures instead of buttons, so I didn't want to introduce buttons on the sleeve belts. But how to make sleeve belts without buttons? By sewing the ends into seams. I debated which seams to use for the sleeve belts and finally decided only to do little ones over the middle sleeve. It's an unusual look but I think it works. I also brought the lining fabric near the face by cutting the undercollar of it.
If you just can't get enough of my endless prattling about this coat, you can check out the review. If you just like pretty pictures, you can visit the photo album.

.jpg)
.jpg)


.jpg)


4 comments:
now it's not nice to be jealous. But, I am loving this coat! I love that green, I love the lining! I love what you did with the contrast! The snaps! All of it. Love. It.
And, I quite like how you are falling for the BWOF drafting and styling.
All that and welt pockets too? Welt pockets made with fabulous lining fabric? Love all the details. Obviously, it's gorgeous.
Cidell is right in being jealous. It's a WONDERFUl coat, those details and the fabrics you used. WOW.
Trena - I love the added touches to the jacket! The piping made from the lining fabric really makes the coat look like you!
Post a Comment