Thursday, May 15, 2014

DC Area: Want some patterns? Or, please take my stuff

Replace all these rooms with "Sewing Room"
 
EDIT:  I HAVE MOVED AND EVERYTHING IS GONE

Sorry for the long silence, which will continue a bit longer because...I just got back from my closing and I'm moving!  Next week!  Just 5 blocks, but it takes the same amount of work as moving 1200 miles (as I did when I moved from Texas to DC).  I have been in my condo 10 years.  Ten.years. worth of accumulation.  Before that I had moved every year or 1.5 years after moving out of the house for college.  So I was somewhat lean--but even only somewhat lean then.  In the intervening 10 years my worldly possessions have grown to become what could politely be described as "portly."

Obviously, the sewing room, along with everything else, is going through a serious culling.  I always thought my sewing room in my condo was small.  Well, I didn't know from small compared to the sewing room in the new place.  But at least there is a sewing room.

There is so much more to come, but I need to start moving things out of my place to make room for packed boxes.  I am going to list a huge number of things on Freecycle, but I figured I'd give you all first crack.


If you want any of the below items, let me know by leaving a comment telling me what you want with your email address so I can get in touch and we can set up a pickup time.   I've set the comments on this post to be screened, so your email address won't be published.

Also, because I need to move this stuff out, if you want something you have to take the whole set of whatever it is (all the patterns, all the picture frames, etc.).  What you do with the stuff you don't want I am willfully blind to.

So far I have:
-Kitchen garbage bag full of patterns
-A small box of random craft supplies and stationery,
-mosaic supplies (grout, a million glass jewels, mirrors to mosaic onto, and grout sponges),
-many many gorgeous costumes I've sewn,
-half my coat closet,
-a lot of size 6-6 1/2 shoes and boots,
-a big box of picture frames from small snapshot size to very large wall frames (about a dozen large and a dozen small),
-two Ikea floating shelves (white),
-a long, low white Ikea shelf like this one,
-two sets of plastic drawers,
-a 4 drawer lightweight wooden dresser about 4 feet tall (must be anchored to wall if used around children)
-Random kitchenware, mostly decorative (e.g., plates and platters)
-Grocery bag of jewelry
-a LOT of makeup, including a million eyeshadow colors (great for a girls' dress up party) and other grooming products


I am also hoping to sell a few things:
-Full size mattress and box spring along with utilitarian frame.  Mattress is firm and very comfortable, and I am sad to give it up.  If you'd like, I will throw in a "wrought iron" look canopyless bed frame (something like this) and matching floor mirror. 
-Beige microfiber sofa somewhat similar to this but only two cushions wide.  Very comfortable and nice for a small space. 

I haven't started the fabric packing, but obviously there will be some of that too eventually, and clothes, and probably more kitchenware.

I'll be at home Friday evening and Saturday during the day, and some time Sunday for pickup in the Shaw area--unfortunately, I can't deliver or meet you anywhere.  

Wednesday, April 23, 2014

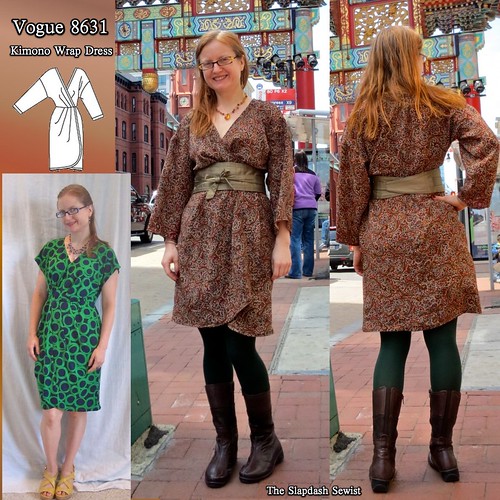
Vogue 8631, Sari Silk Kimono Dress

V8631 Long Sleeve Thumbnail

The boyfriend went to India for work(!!!) a couple of years ago, and brought me back a beautiful silk sari.  I had been sitting on the fabric for about 2 years, waiting for the perfect pattern.  The fabric is excellent quality but lightweight, so I didn't want anything that would put too much strain on the seams--but I can't wear shapeless so it had to have some waist definition.  A tall order!


 I made my knit version of Vogue 8631 as a test of the pattern for my special fabric and it passed the test.


I am hoping that the kimono look is one that never goes out of style.  Here is a Carolina Herrera ($799 on Gilt Group) version.


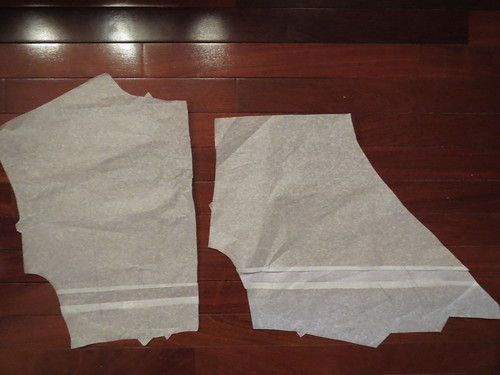
Lengthen Bodice


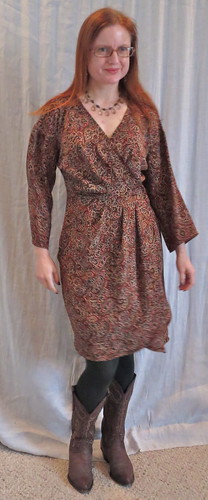
Other than making it in a woven, adding a zipper, and using the long sleeve, I didn't change a whole lot from the last version of this dress I made.  I had already adjusted the crossover not to gape on my small bust and everything else fit pretty well.  The only real change I made was to add some length to the bodice.  I have a long torso despite my petite stature, and I found the waist on the knit version verging on too high.  I added an inch above the waist and the woven version sits just about perfectly.

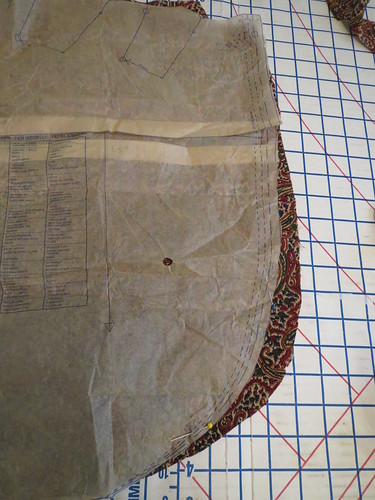
Widen Skirt


Although I really like the tulip-y shape of the hem as drafted, I wanted just a skootch more coverage and overlap, so I cut it with a little more width at the rounded edge.

While a strong wind can still blow it open (I always wear a slip under, of course), it has good overlap and in normal circumstances provides ample coverage.


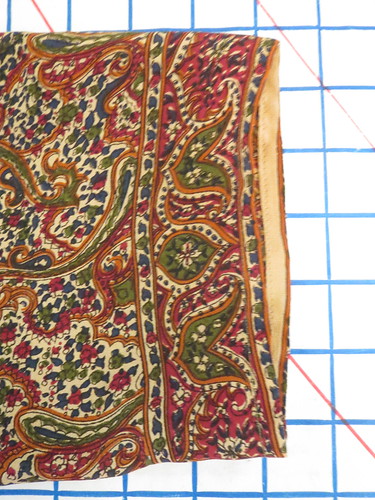
Border Print at Sleeve


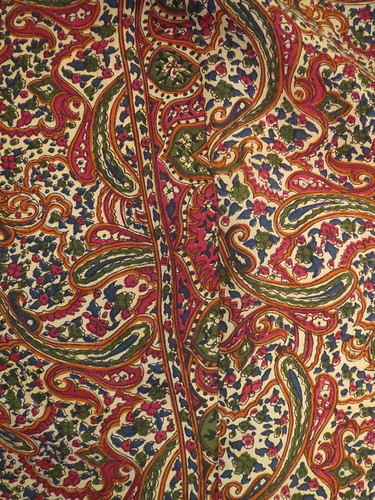
Let's talk about this fabulous fabric for a moment.  It was such a lovely and thoughtful gift!  As a traditional sari, it had a scarf piece, or "pallu" on the end.  I cut this off and hemmed the edges to make a scarf, which I wore with my Tweed Ride outfit.  It also has a double border on the remainder of the fabric.  I cut the sleeve hems on one of the borders.

Cutting Oopsie--Border Print at Side Seam


And that was the extent of my intentional use of the border.  When cutting the skirt, I somehow forgot that the fabric was a double border.  I carefully avoided the border on opening edge, but then completely forgot about it for the side seam edge.  Oops!  Luckily, the fabric blends so well that I don't think anyone will ever notice this phantom border.


Self Bias BInding


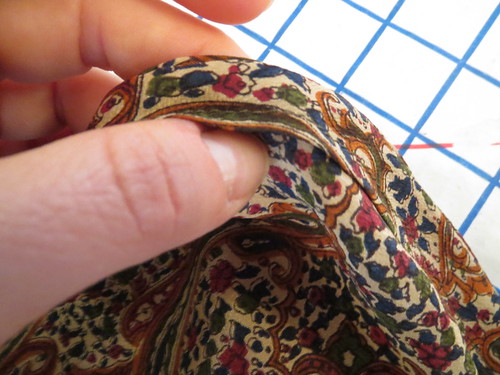
 To finish the edges of the dress, I made a million yards of self-bias tape.  Because it's a wrap the bias is a continuous circle all the way around the neckline/wrap openings.  It was so much self bias, but worth it in the end for the lovely finish.  The bias tape blends in so well that if I didn't know how it was done, I might think it was magic.


Interface Zipper Opening


The pattern is drafted to be worn as a true wrap, held together by inner ties.  I am not crazy about inner ties--they are so fussy to tie and then if you need to readjust you have to get all the way undressed to do it.

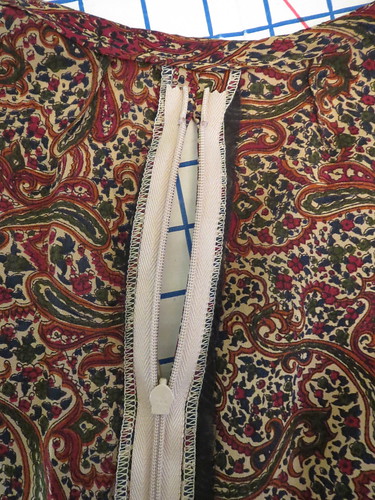
Instead, I put a zipper in the center back seam, interfacing the opening to support my lightweight fabric.  To get a nice clean finish at the back neckline, I closed it up about two inches from the top and installed the zipper below that.  The neckline is plenty wide to pull over my head.

Hand Sew Fronts Together at Waist


To keep the dress together, I hand-sewed the two fronts together at the waist's seam allowance.  This makes it much less fussy to wear.  I do need to keep an eye on my stitching and make sure it doesn't pull out.  That would be quite the wardrobe malfunction.


 The only thing I wasn't sure about for my sari silk version was the dropped shoulder.  I do not care for a dropped shoulder and it does not do anything for my petite frame, where shoulder width is always a challenge anyway.  But changing the location of the shoulder would have required extensive redrafting, so I decided to just risk the shoulder as drafted.

The only small issue in the finished project is not the location of the shoulder--with the wide sleeves it doesn't matter so much where the shoulder is located--but that my French seam sticks out a bit, emphasizing the dropped location of the shoulder.  But this is a tiny nit that I think only someone who sews would notice.

In Motion

I was so happy that not only did I finally find a pattern for my special fabric, but the project also worked out just as I envisioned.  It drives me crazy when I finally cut into a Too Good To Use and then the project ends up being meh and I only wear the finished item a few times before bitterly parting from it.  This special piece will be in my closet for years.

My only dilemma is styling.  I love the way it looks with the obi, but is that just too literal?  I feel like it needs something at the waist, and a narrow belt doesn't look totally great.  But perhaps that is just my obsession with always have a scarf or belt at the waist.

All photos are here and the pattern review is here.


=====================

And fabulous photos they are!  I wore this to the DC Area meetup a couple weeks ago and SewandWrite took these wonderful photos in front of the Chinatown arch.


DC Area Sewing Meetup 3-2014

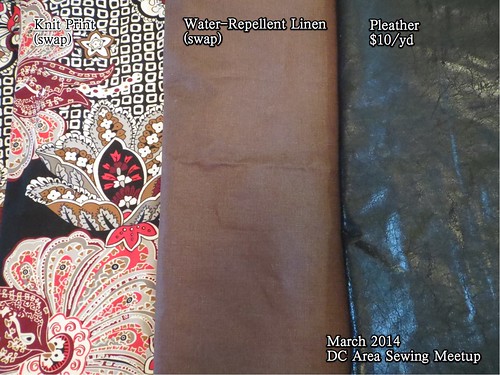
But of course that wasn't really the point.  The point was to eat some yummy food, gab about sewing, and of course swap fabric and patterns!   I forgot to take a picture, but I brought a *huge* bag full of fabric to give away.  I felt very virtuous for only bringing three pieces home with me.  I couldn't pass up that gorgeous knit print, and I had just been thinking that week how I wanted a water-repellant fabric to make a bag to go in the basket of CaBi bikes.

At the last sewing meetup, the fabulous DD was wearing some drop-dead leggings she made of McCall 6404.  I immediately wanted to copy her.  Not be inspired by, but straight up copy.  She very kindly agreed to pick me up some pleather at Hancock's next time she was there.  And meanwhile the pattern had gone out of print, but luckily BMV had an out of print sale and I got it in my hot little hands.  True to her word, DD brought me the pleather to our meetup.  I can't wait to make the leggings!

It will be a while yet before I get around to them.  First, you can probably guess that I have been working a.lot. the past couple months, and it's not going to slow down anytime soon.  I hope to get back to more regular blogging someday.

Second, after almost a year of not wanting to do anything complicated, I finally got in the mood to do a hard project.  I've been plugging away at it for nearly a month now and am not even halfway done.  Maybe I should rethink that "wanting to do a hard project thing," LOL.  But it will be cool when it is done, I think.  There will be a big reveal...someday.


Thursday, April 10, 2014

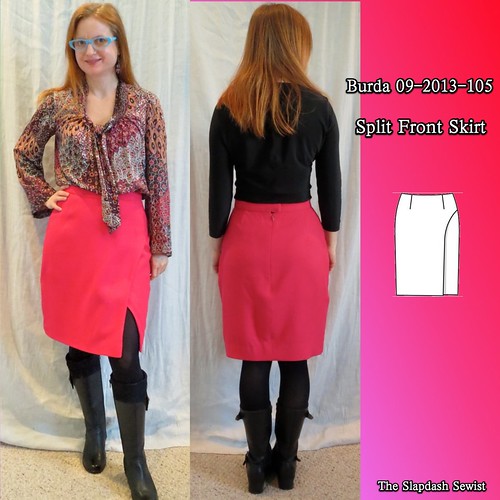
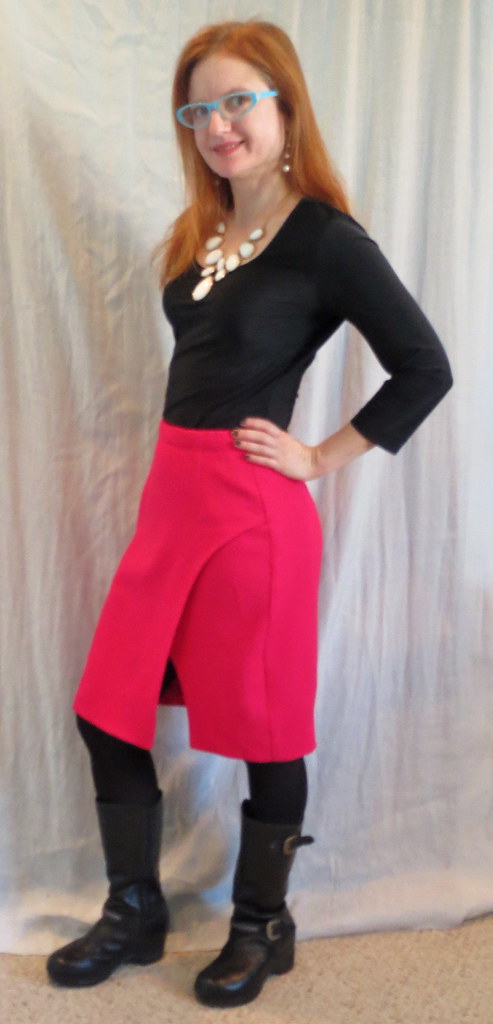
Burda 09-2013-105, Split/Wrap Front Skirt

Burda 09-2013-105 Thumbnail

After a long stretch of unappealing, Burda finally started getting interesting again late last year.  Burda 09-2013-105 was one of the patterns that went on my list as soon as the magazine arrived.  It has a pencil skirt silhouette, but the front wrap/split means that it's fairly bikeable.  Perfect!

I shortened the skirt three inches before cutting and still had a generous hem allowance for a skirt longer than I usually wear.  This would have been mid-calf had I not shortened it.  Because the shapes of the front openings is the major part of the design here, for my short legs the skirt needed to be at full knee length so the graceful arcs would have their full space to be graceful.  When I pinned it at a shorter length it lost a bit of its sophistication.

Basted Underlining

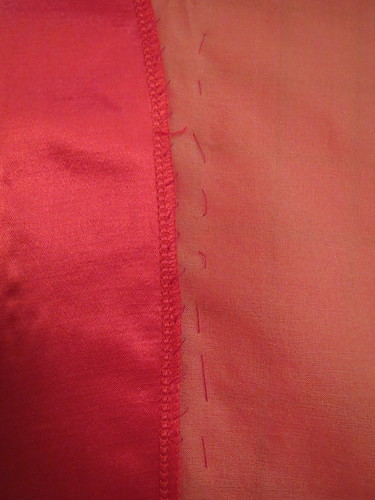
I love wool crepe for office clothes.  The only downside is that it wrinkles almost as much as linen.  To attempt to keep the wrinkling slightly under control, I underlined it with silk organza.  I stitched the silk organza as one with the fashion fabric at the darts and the seams.  To keep the organza in place I hand-basted it 1/2 inch in from the seam allowances.  Yes, I hand basted.  You can also see where I hand stitched the facings to the organza.

I was afraid that with four layers of fabric at the front waist and belly (two wool and two organza) it would be bulky and add unwanted depth to the gastric region, but it actually sits surprisingly flat.

Slit Facings

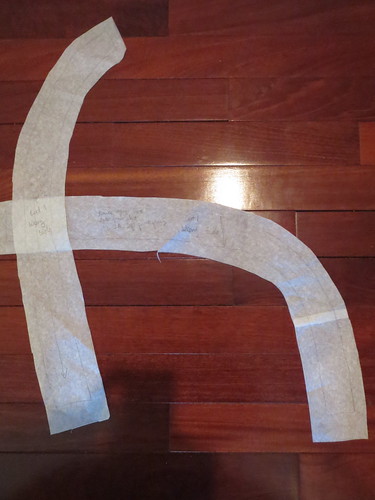
When cutting the facings for the skirt front opening edges, be sure to cut them wrong side of the fabric up.  Mirror images always trip me up.  I first cut them right side up, as I had the skirt fronts, and was then surprised when they wouldn't match up with the fronts.  I made a huge note on the pattern pieces to remind me for next time.

The pattern is not drafted with a lining.  Another downside of wool crepe is that it is surprisingly sheer, even when the fabric is relatively thick.  Wearing a regular half slip to deal with the problem was out because of the shape of the front slit so I lined it with a satin rayon.  I bought 3 colors of satin rayon when Fabric.com had them on sale in September 2010 for $2.97/yd.  This was the last of the hot pink and I am sad to see it end.  I've looked for satin rayon for linings since then and never found any as nice at a reasonable price.  I should have bought their entire stock.

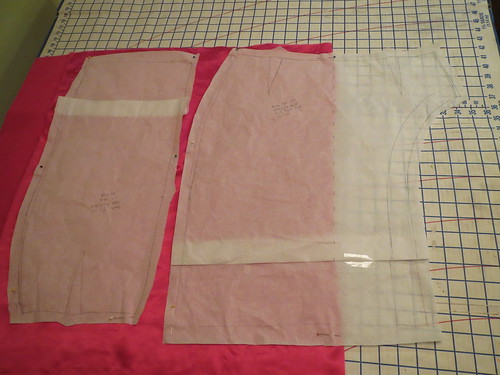
Lining Cutting Layout

To cut the front lining I used the pattern piece for the right front, which has center front conveniently marked.  I placed the CF marking on the fold and cut.  The darts on this are fairly wide set and really do sit well over my abdomen.  Normally I get some puffing but it is not noticeable here.  I might give this pattern a try as a plain pencil skirt, cutting using the same method as for the lining.

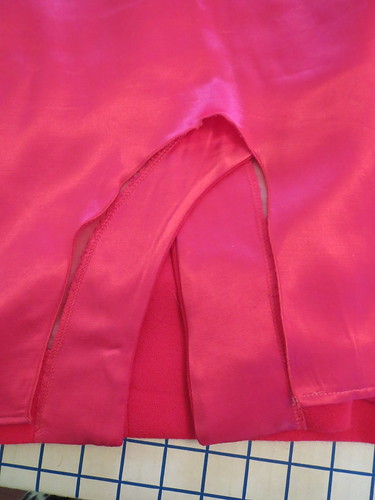
Lining Cut Out for Slit


To keep the lining from showing through at the front slit, I did not come up with an elegant solution.  I didn't want to use the skirt pieces as drafted and have SIX layers (two wool, two organza, two lining) in the front.  That just seemed like too much.  I just cut a big ol' upside-down U shape out of it and did a serger rolled hem on the edge.  If I make this again, I will likely just underline with the lining fabric and call it a day.


Tape Waistband

The pattern is drafted with waist facings, but a waistband is much more flattering on me.  I can never figure out tucking with a non-waistband skirt, and I feel like the skirt collapses and creases more at the front from sitting without being held in place by a waistband.  I just cut a straight strip of fabric for the waistband, which I interfaced for stability.
 
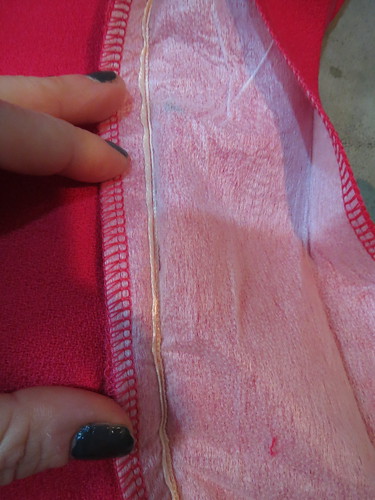
To attach it, I first stitched the right side of the waistband to the wrong side of the skirt.  I sewed a ribbon into the stitching to stabilize the waistband and keep it from stretching.

Then I folded under the seam allowances on the other edge and folded it over to the right side and stitched. 

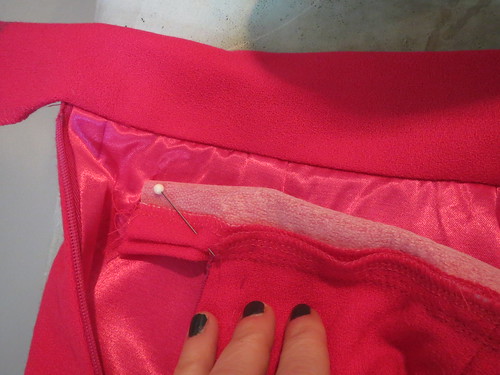
Fold Waistband Tab


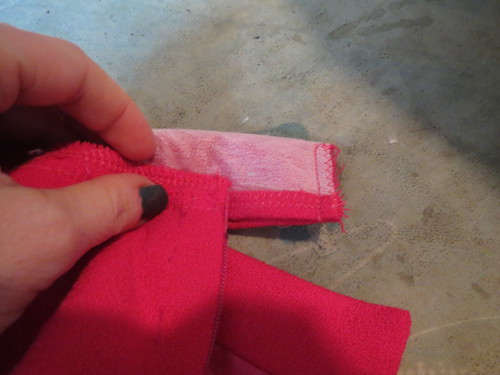
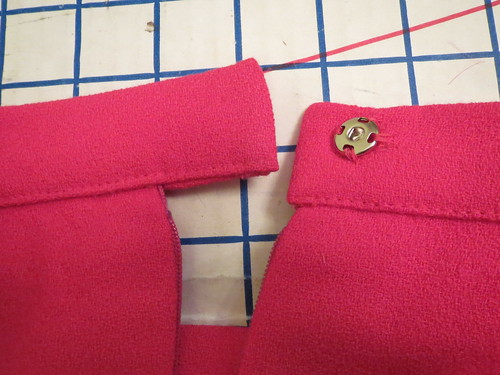
Waistband TabThe only tricky part was that I was having one side of the waistband overlap at the back and close with a snap.  For the squared off side of the waistband, I folded it so that the lower folded-under edge of the waistband on the outside that would be topstitched down at the front was longer than the back, ensuring the first row of stitching would be covered up.

Finished Waistband Outside


 For the extended tab side, this wouldn't work and I had to line up the two folded edges evenly, gradually changing the matchup as I got closer to the skirt, and then extending the front beyond the back to hide my stitching from sewing the first pass of the waistband to the wrong side of the skirt. 


The finished waistband looks pretty good (not perfect) on the outside and the inside.


Hem Treatment


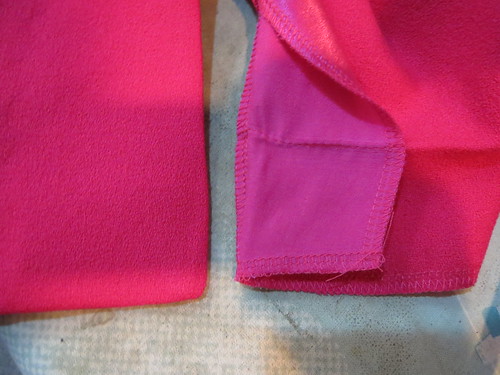
 To get neat corners at the hem of the front slits, I used the slit facings.  First I sewed the slit facings in place (before constructing the skirt--they have to be finished before the side seams are sewn).  Then to hem I folded the slit facings to the right side and sewed the hem, right side of facing to right side of fabric, as far as the end of the facing.  Trim the seam allowance, turn and press and you have a nice neat corner.

Hem at Front Slit


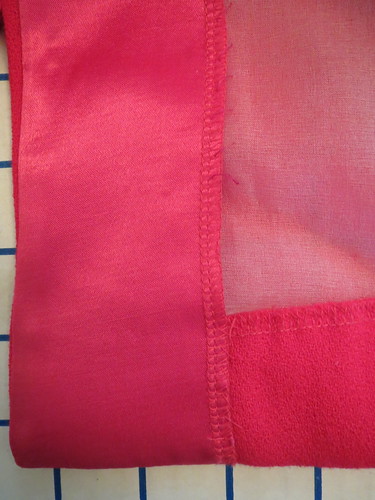
To finish the hem, I hand stitched the fashion fabric to the organza so it would be invisible.


Side


I am quite proud of how careful I was with this skirt and did everything "right."  The only unsatisfying thing is that the upper front does not side quite flush against the under front.  I was very careful in putting it together, laying it flat on the table and making sure everything lined up exactly.

What I *wasn't* thinking is that I am not shaped like a table.  Two pieces that sit together perfectly on a flat surface don't necessarily do so on a cylinder.  I should have folded up a towel to create more of a rounded human shape to line up the front pieces.  I'm sure eventually I will undo that side seam (serging and all, ugh) and align the front pieces better, but I have not been in the mood yet.

That quibble aside, I do like this skirt a lot, and it is fairly bikeable (not total freedom of movement to swing my leg over the frame, but it is possible without fearing ripping the skirt).  I love the color, but it made it a bit impossible to photograph as the camera just didn't know what to do with it--most of the photos are a little out of focus!  I redid them, but the second set was worse than the first.

All photos are here and the pattern review is here.

Thursday, March 27, 2014

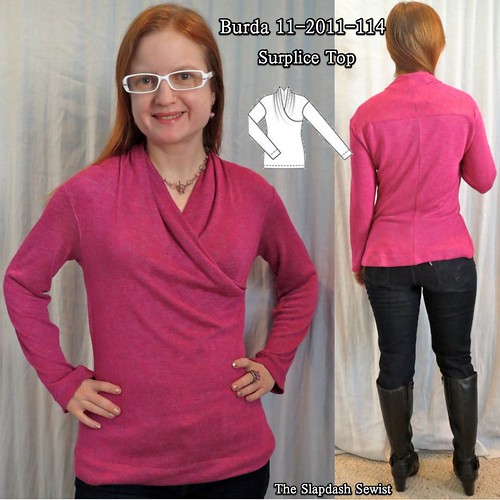
Burda 11-2011-114, Hot Pink Surplice Tee

Burda 11-2011-114 Thumbnail

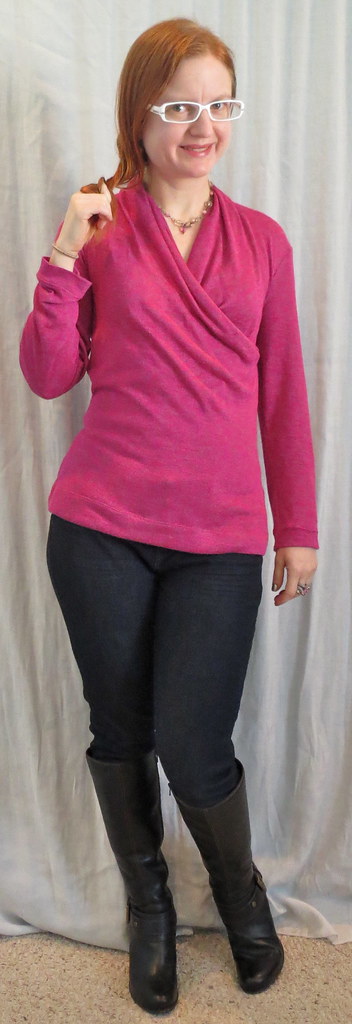
Burda 11-2011-114 has been on my list ever since the magazine was published!  I got this fabric at Golden D'Or in Dallas in December 2011 and way overpaid for it at $8.50/yd, but I love the color and the subtle "space dyed" gradation.  It is extremely lightweight with little recovery and I don't expect to get more than a dozen wears out of this top before the fabric stretches out beyond redemption. Alas.  

The biggest negative for this pattern is that the front piece is a giant fabric hog and I couldn't find an efficient cutting layout that didn't waste a lot of fabric.

The center back is drafted on the fold, which doesn't work for my swayback.  I used my TNT tee to shape the side seams and add a center back seam.

This is the "easy" sewing pattern with illustrated instructions for the November 2011 issue.  I am sure I would have figured it out eventually from Burda's written instructions, but it was really nice to have the illustrations here.

Back Neckline

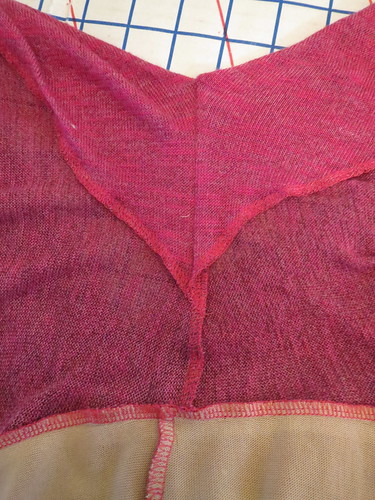
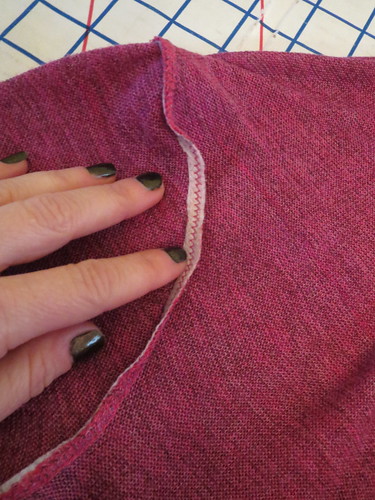
The back neck finish (which wraps around from the front) is quite clever.  You fold the right front's self-facing to the wrong side, then place the right front and left front right sides together.  Then you fold the left front's self-facing around the whole back and sew.  When you open it up the join is very neat and tidy.  In wearing, my top does not have the gathered V-dip at the center back neck shown in the illustration; it just looks like a plain old neckline.


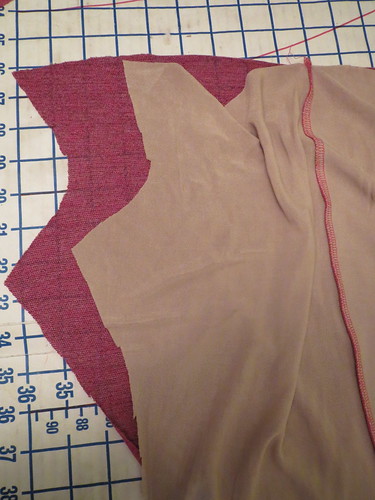
Underlined Lower Back


The fabric is very soft and lightweight, one of those fabric where sometimes you can't actually tell if you're touching it or not.  Surprisingly, it was not hard to sew.  The edges didn't curl or ravel, though it did like to spit out pins.

Because the fabric is so lightweight, I underlined the back only in a tricot.  With the front two layers already, a lining would have been too much (and would have interfered with the drape of the neckline).


Interface Armscye to Prevent Stretching

With the front's cut-on yoke, the shoulder seam is not at the shoulder but several inches below it in the back.  Combine that with the dropped armscye, and this lightweight fabric has no support at all on the shoulder.  The armscye opening will eventually be at about my knees as the fabric stretches and stretches in wearing.  
To try to contain the stretch at the armscye, I fused bias strips of interfacing to the seam allowance (retrofitted after it was sewn).  With the dropped shoulder, I'm not sure how much good it will do but maybe it will buy me a few more wears. 

The tunic length of this top as drafted was *not* flattering to me, especially in this lightweight fabric that shows every lump and bump.  I shortened it 3 inches from the drafted length.

Front


I couldn't tell from Burda's photos whether the neckline would be annoyingly low and require a camisole, but it sits perfectly fine on me--no gapage!  I really like the style of this top and the bright color offers some cheer in this neverending winter.  Seriously, it snowed on Tuesday.  Again.

Though the top will likely be short-lived, the pattern is a keeper.  With the dropped shoulder it would make a cute sleeveless summer tee with shoulder coverage, and I'll eventually turn the red merino wool I got from Fabric Mart into another version of the long sleeve top.

All photos are here and the pattern review is here.


Thursday, March 13, 2014

Burda 08-2013-131, Raglan Tee with Integrated Scarf

Burda 08-2013-131 Thumbnail

I'm always looking for an interesting t-shirt variation, so I had mentally bookmarked Burda 08-2013-131.  Then when Dibulous made it, I got really interested.

Fabric Mart 12-2013

I have a lot of fabric purchasing to confess.  A lot.  But let's start with these pieces from Fabric Mart back in December.  They had merino wool jersey on sale, how was I supposed to leave it on the table?

The merino is quite thin and not suitable for a fitted tee.  So I needed to come up with top patterns that are a bit loose and will work with this thinner fabric.  As a plus, it is quite drapey!

Original Swatch with Dyed Fabric

I love orange, but I was a bit disappointed in the unsophisticated color "Orange Pop" or whatever it was called turned out to be.  It was just not rich enough for my taste and I fretted that I'd made a mistake in buying it.  I figured I had nothing to lose so I tested a small swatch in a fairly dilute dye bath.  OMG, a million times better!  So I popped the whole piece into the washer with a little bit of fuschia dye and came up with a rich, deeper orange that is much more suitable for office attire.  I felt very proud.

Compare to TNT Tee Raglan Back
Now it was time to tackle the pattern.  I traced out the pieces and then compared the raglan top I drafted from my TNT tee to the pattern. It is drafted *large.*  Note here that I traced it to the cut line of my TNT, not to the stitch line of my TNT--that's how big it was drafted!  The finished back fits nicely, and still retains the eased look of the original without being humongous.

And also, the armscye is seriously dropped.  There is nothing more unflattering to a small bust than a dropped armscye, especially on a "petite" (aka short person) like me.  Well, maybe a giant dart to nothing.  Or empty bag syndrome.  But still, a dropped armscye is up there.  I slimmed the profile of the top a bit and raised the armscye to its normal position.

The sleeves were also very wide, and I slimmed them based on my TNT pattern, as well as raising the armscye.

I also raised the armscye of the front piece, matching it to my TNT.

The tie seemed like it would be too wide for my frame, so folded width out of the tie at the end, tapering to nothing by around 4 inches from the front neckline.  This had the added bonus of allowing me to actually fit the pattern onto my fabric.

Giant Pattern


The front pattern piece is spectacularly enormous.  Even though I had a generous 1 1/2 yard cut of this surprisingly wide fabric, I could barely fit the pattern onto it.  I had to copy the back and sleeve patterns so I could lay everything out at once to get it all to fit.  Getting this pattern to the point of sewing was incredibly time consuming and tedious!!!

Because of fabric limitations, I couldn't cut the sleeves as long as I wanted, so I finished them with cuffs.  The top has a bit of a 70s feel so I gathered the sleeves into the cuffs for a bishop look.

Clip at Scarf/Top Join

Once it was time to sew, this went together much more easily than you would expect.  The tie extends into the front by way of a long dart.  At the join between front and tie you have to clip into the very end of the dart to get a nice turn.

The tie is sewn right sides together and then turned right side out.  Because the tie is cut on the bias, it was a bit of work to get it folded properly and sitting flat; I had to press and steam it to get to that point. In a lightweight drapey fabric like I used here, I think the front could probably be cut on grain.

Untied

Here you can see how and where the tie extends out from the top.  It looks like the tie will be incredibly long, but it's actually not.

Original Neckline

The front neckline as drafted was very high for my taste.  I do not like a super high crew neck like that, so I lowered it about 2 1/2 inches, and it is still relatively high, especially compared to my usual neckline.  Given the shape of the front pattern piece, I don't think it would be worth trying to lower it before cutting; just wait until you have it sewn and adjust to your taste.  I finished the neckline with clear elastic and a twin needle.

Side


This top came out perfect for what I was hoping for.  It definitely has plenty of ease, but tucked into a top it blouses nicely.  It has a nice style, but doesn't seem too gimmicky or tied (get it?) to a particular fashion trend, so I think it will be able to stay in the closet for several years, depending on how well the fabric holds up (it's a bit fuzzy, but I can't tell if that's new abrasian or fabric characteristic).

I was surprised at how fussy the tie is.  It can really only be tied in that one place.  Theoretically I could wear it tied high (very unflattering to me) or tossed over the shoulder, but I think these clearly look like a stretch for the style and I will stick with having it tied where it extends out of the front.

A while back I tried to see if I could knock off the Temperley London Delilah top, but my attempts were comical.  Now that I see how it works with this tie--there has to be a dart extending into the bodice, I might give it a try again.  The results probably won't be great, but perhaps they will edge slightly above comical?

All photos are here and the pattern review is here.