Thursday, February 27, 2014

Simplicity 1805, Silk Dolman Tee

S1805 Thumbnail

One of the things I've been meaning to get into my wardrobe is a pullover top with a cut on sleeve.  It's a dolman top, so how hard can it be?  But I've been too lazy to draft my own, so when Joann had Simplicity at 5 for $5, I picked up Simplicity 1805.  Had it been $2 I wouldn't have gotten it.

Zooey Deschanel in Derek Lam
It turned out to be fortuitous because I got a haircut the next day, which is a whole other conversation, and while I was waiting I picked up the Lucky magazine they had out and was instantly enchanted with this dolman top on Zooey Deschanel.  It's Derek Lam, and I just love how the simplicity lets the fabric be the star, and the perfect proportions.  And I already had the pattern!  The "Eh, it's only a dollar, it's ok if I end up giving it away" pattern was muslined and earmarked for a fabulous silk within 24 hours!

This has been a popular style with designers for several years.  There are plenty more examples out there, like this Michael Kors satin top ($542) and this Rachel Comey from Fall/Winter 2012.  The silhouette seems simple, but if you make it in a high-end fabric it drips luxury.
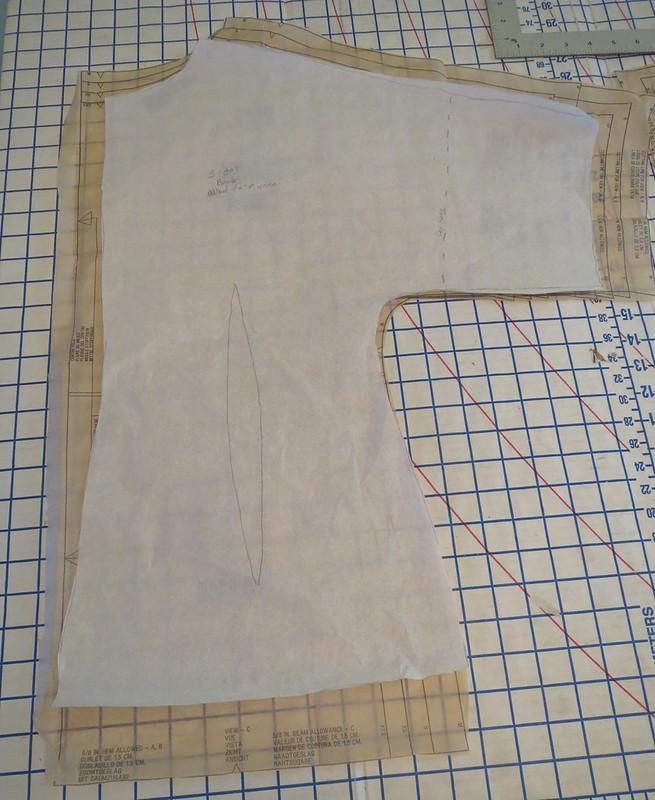
Back Pattern

Before cutting, I used my TNT pullover woven top pattern to determine the side seams, add a center back seam, and add darts in the back.

The back neckline was seriously, seriously wide.  Here is my final pattern laid over the drafted pattern.  And keep in mind that my final pattern has a center back seam, so the cut edge of the tissue is not even the seam line!  I normally have to narrow the back neckline of commercial patterns a bit, so I didn't think too much of it other than remarking at how ridiculously wide it was drafted.

Gaping Neckline


I actually muslined this *gasp.*  Although it is a wearable muslin.  When I sewed up the muslin I realized I should have had an inkling there was something going on with the front neckline too.  There was *serious* gaping at the front neckline.


Inverted Pleat to Take Up Excess Width


As a slapdash fix to the muslin, I took up 2 1/4" inches total in an inverted pleat at the center front neck.  I swear they rotated the bust darts to the neckline but then forgot to remove the excess width.  I don't see how this would work for anybody.
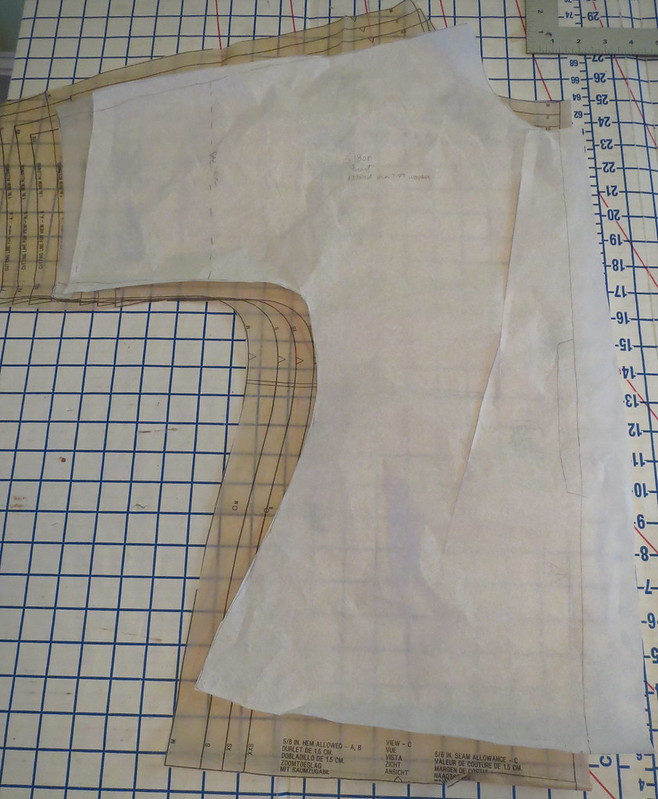
Front Pattern


You can see the dramatic change in my final front pattern where I folded out that gape!


After my muslin, the additional changes I made were to increase the width of the sleeve opening to match my inspiration, cut it to the length of the TNT (the tunic length just doesn't work for me), add a keyhole opening at the center back neck, and correct for sloping shoulders by shaving a slight amount off the shoulder edge from a few inches out from the neckline.  The muslin was sticking up a little at the neck edge of the shoulders.
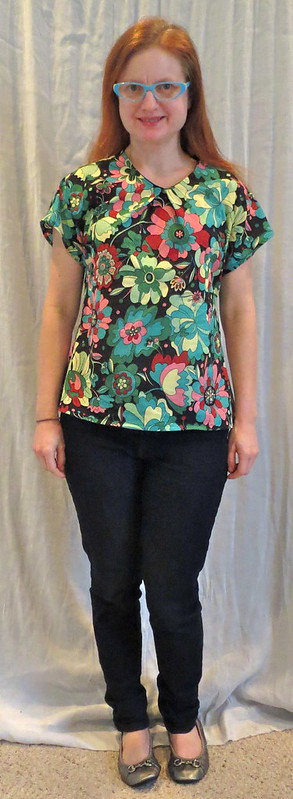

Floral Front


When I was done getting all the information I needed from the muslin I chopped the sleeves short.

This is an airy cotton batiste ($3/yd on our Pilgrimage to Fabric Mart) that will be nice to wear in summer.  
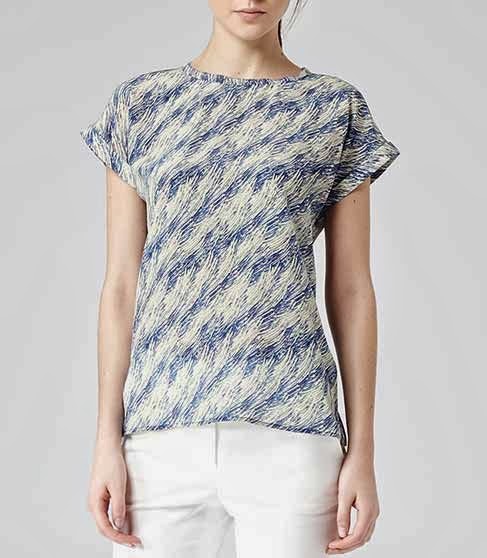
And designers haven't left the short dolman sleeved top in the cold--check out this Reiss silk top for $210.

With the pattern altered and it being two fairly unshaped pieces, the silk version was...not a breeze.  I was using a silk charmeuse from Paron, puchased last November; it was $15/yd, but with a Groupon I ended up paying an average of $5/yd for several silks.  A steal!  As beautiful as it is, though, silk charmeuse is just fussy to sew with.

Back


I used French seams, which makes for a lovely inside, but I am severely disappointed with the puckery back seam.  For some reason, although it has perfect tension on regular seams, my machine cranks up the tension when I sew the second pass of a French seam.  I honestly have no idea how the machine can "tell" that's what I'm doing, but I have to actively stretch the fabric from both sides of the presser foot to get a smooth seam and I clearly didn't stretch enough for the CB seam.  I am loath to unpick it because silk does not recover from needle holes and I'd rather live with a puckered seam than a shredded one.  Does anyone know why this happens?


Sew Bias Take to Wrong Side

For the back keyhole opening I first cut a shaped keyhole and staystitched it.

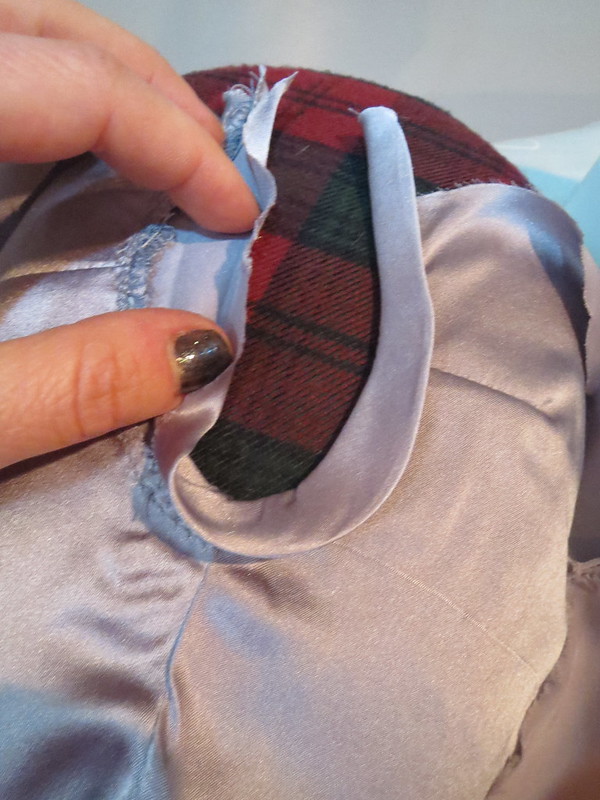
Next, I stitched self bias tape on the wrong side, right side of bias tape to wrong side of blouse.
Fold Bias Tape to Right Side


Once the first pass with the bias tape was sewn, I pressed the bias tape over to the right side and pressed under the remaining raw edge.


Hand Tack Upper Keyhole Edges Together

Next I topstitched that folded under edge in place, and steamed steamed steamed to get it as flat as possible.


Finally I hand tacked the neck edges together to complete the keyhole--this is just decorative, I did not need a slit to get it over my head.  Then I bound the neck in a continuous bias piece.
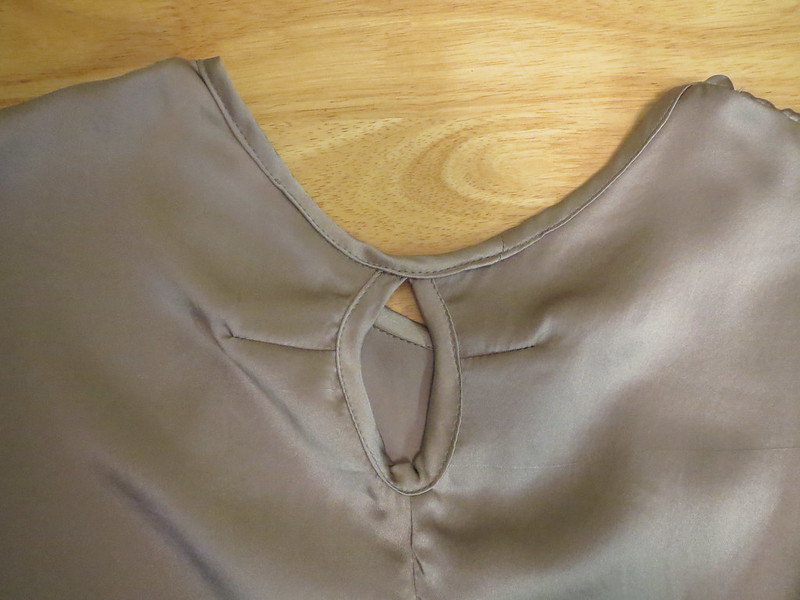

Completed Back Keyhole

Before binding the keyhole I made two tiny horizontal darts.  Because of my "forward head" (aka bad posture), I sometimes get gaping at back slit openings and I didn't want that.  I don't know that the darts were totally necessary, but they made me feel better.
Hair Clips to Mark Hem


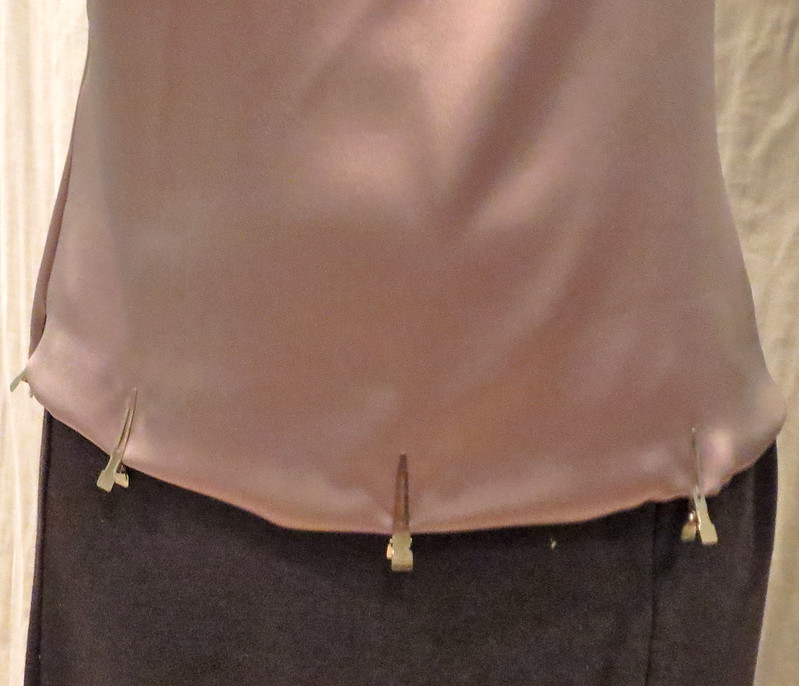
Marking the hem on silk is a pain because pin holes.  I have a couple of packs of hair clips for millinery and was like, duh, use clips to mark the hem!  It wasn't quite as easy as using pins, but I got a reasonably straight hem considering I am working with silk charmeuse here.
Sleeve and Lower Hems


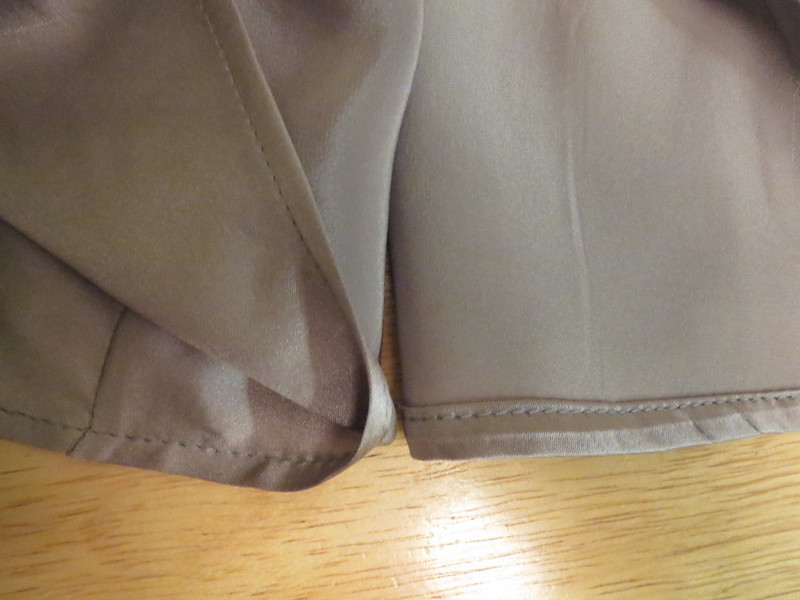
I decided to do a regular stitched hem for the sleeves and the lower hem.  I normally do a blind hem or a twin-needle hem, but somehow the stitched hem seemed right for the style.  I think it works.

Side


All the care taken on this simple top was worth it for the end result (other than that stupid center back seam, ugh).  It is as luxe and classy looking as I'd hoped, and looks and feels high end.  I have some dressy events coming up and I feel pretty confident this will be making an appearance at least once in the next couple of weeks.

All photos are here and the pattern review is here.


Wednesday, February 26, 2014

Burda 07-2010-120, Curved Dart Pencil Skirt

Burda 07-2012-120 Thumbnail

I had a fairly small piece of this Fabric Mart yellow wool crepe (purchased in October 2010 for $9.99/yd) leftover from a dress that I made last winter (and haven't blogged about because I want to change the skirt from dirndl gathers to darts but haven't).  I couldn't make my usual A line skirt so I looked for an interesting pencil skirt pattern.  The curved darts on Burda 07-2010-120 and I decided to give it a shot.

The dirty little secret nobody talks about with wool is that it wrinkles as much as linen, maybe more.  Or maybe this doesn't happen to anyone else?

Hand Sew Organza to Dart

To try to keep the wrinkling under control (I sound like I'm talking about my face, ha!), I decided to underline the skirt in silk organza.  For the back, I treated the organza and wool as one at the darts, sewing them together.  However, for the front darts I wanted to take maximum advantage of wool's moldability with steam.  Getting those darts flat was going to be crucial to making a flattering skirt, versus one that had two prominent arrows pointing to my belly.

So I stitched and pressed the darts in the wool and the organza separately, and then lightly hand sewed the organza layer to the wool at the dart.  I treated them as one at the side seam.

Fold Out Dart

For the lining, I wanted a traditional vertical dart coming from the front waist--I didn't want to risk adding a third layer of curved dart to this scenario.  This involved rotating the dart.  First, I marked where the vertical dart should go.

Next, I folded out the curved dart.  This created a bubble that needed to be released.


Rotate Dart to Vertical

Finally, I cut along my marked vertical dart line and let the tissue naturally open for the dart width.  I measured to be sure, and the vertical dart width was the same as the curved dart.  Normally, you would have cut along the new dart line before folding out the old dart, but here the vertical dart crossed where the curved dart had been and it wasn't possible.

The lining went in well and fits perfectly, so I think it worked!

The back darts are drafted very long.  I decided to give it a go and they surprisingly work.  Usually darts that are so long they go to or past the apex bubble or poke out at the end, but these sit very smoothly in the side and back view.  Somebody knew what they were doing at the drafting table.

Shape Center Back Seam

I often have a problem with straight and pencil skirts sticking out at the back hem--the most extreme example recently being Vogue 1329--but I never really understood why until I read this blog post about cylinders.  Ding ding ding!  Prominent buttocks cause a skirt to swing the back, and heaven knows I have those.  I need to do more work to find the right curve, but for this project I just shaved a little off, starting at the booty apex.  The fit along the CB seam is not perfect, but I think it is improved over a straight seam.


Close Coin Pocket

Even with this change, the back vent was not sitting flat and smooth, so I weighted the corners with a Swedish 1 Kroner coin on each side.  I took advantage of the organza layer to hand sew a "pocket" invisible from the outside.

Coin for Weight


I slipped the coin in before completing the pocket by hand closing the vertical seam allowance at the vent.  They hit the back of my legs when I walk, not in an uncomfortable way but in a noticeable way.  I probably should have used smaller coins, but that slit stays where it's supposed to!


Contrast Lining


I lined it with a silk crepe, this fabric that I had dyed orange a while back.  The orange wasn't rich enough for my taste, so lining was the obvious choice.  I love the way the two colors look together, though I was craving Rainbow Sherbet the whole time I was making this!

I would not use silk crepe for lining again.  Once it's in place, it sits well and it didn't ride or creep against my tights or inside the skirt (which I had been afraid of).  But when getting dressed you have to be careful to keep the lining perfectly smooth and if it rumples the only way to fix it is to take the skirt entirely off and start over.


Hand Sewn Hem


In addition to invisibly hand-stitching the hem to the organza layer only, I hand-stitched the lining to the skirt at the back slit and for a couple of inches along the back hem from the slit to keep it from peeking through.


Decorative Button


This skirt is drafted to sit above the waist, finished with a facing.  I find skirts without a waistband difficult to wear.  I really can't figure out how to tuck into a skirt with a facing.  So I added a straight cut waistband.  It closes with a snap above the zipper, but it was looking big and bulky there.  I did some random hand stitches to compress the layers and added a decorative button on top.


Front


These photos were taken in the morning on an empty stomach at its flattest for the day and the skirt looks great.  I don't totally love the look on the abdomen when I have, you know actually eaten, but it is not as unflattering as I feared it had the potential to be.  It is also oddly binding at the upper thigh, though it doesn't impede movement.  I don't think I'll be making this pattern again, but I'm glad I gave something new a try.

All photos are here and the pattern review is here.

Thursday, February 20, 2014

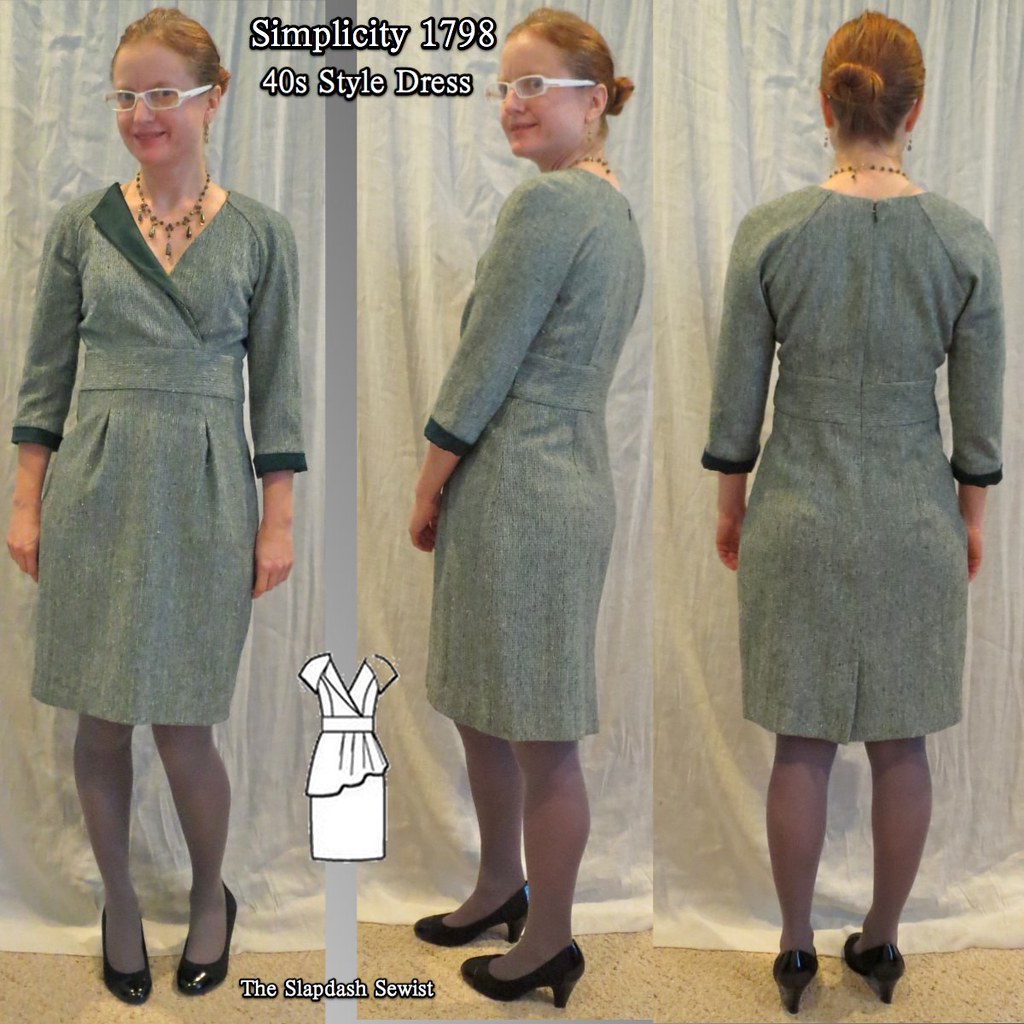
Simplicity 1798, 40s Inspired Surplice Dress with Single Collar

S1798 Thumbnail

Simplicity 1798 is a Project Runway pattern, so it has all kinds of crazy options, but one of the illustrations shows the surplice bodice with a collar only on the outer half of the bodice.  Pleasing asymmetry is ridiculously difficult for me to envision, but since they had done the work for me it caught my eye. I used a wool from The Carol Collection and accented it with one of the Vera Wang silk/rayon blends from Fabric.com's $1.99/yd blowout in January 2010.  Coupled with my $1.99/yd Fabric Mart lining, this dress is a lot of bang for very little buck.
I started the alterations by shortening the skirt 2 inches, and still had a very generous two inch hem allowance.  I've shortened it another 3/4" for the next time.

Shave Off Curve for SBA

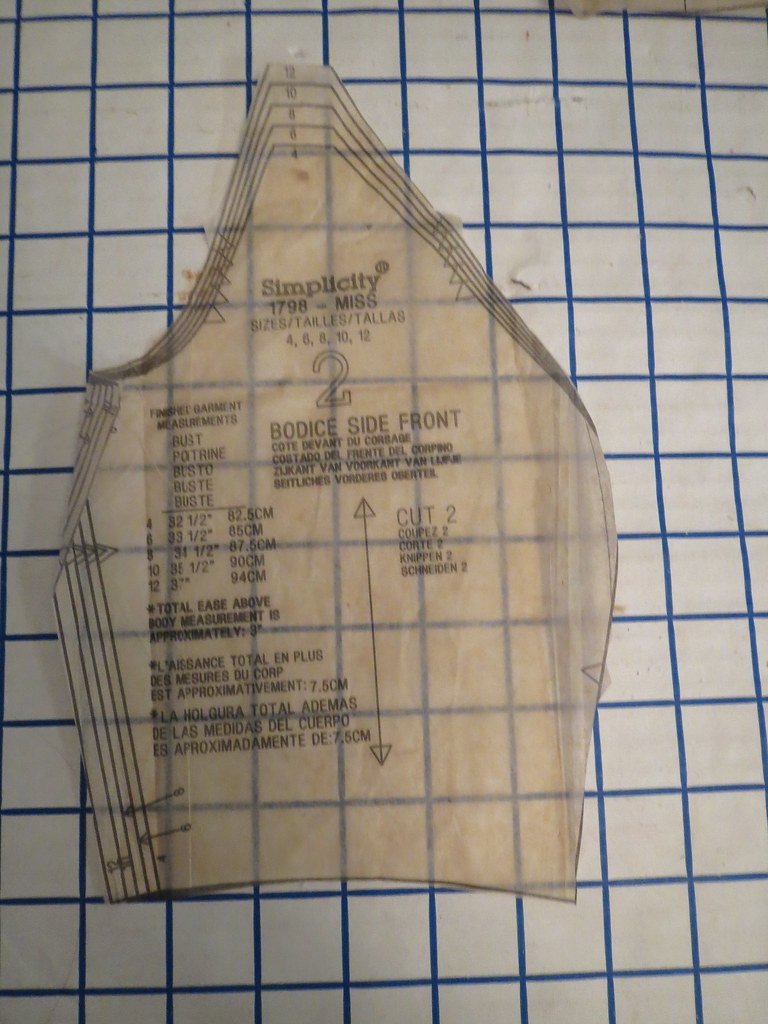
The side front bodice is *very* shaped.  I shaved off a bit of the curve for my small bust before sewing and it fit fine around the curve of the bust.  However, it was quite puffy above the bust.  I mean, I'm not saying they're where they were when I was 18, but they are not that low.  So beware that the fullest part of the pattern may not be at the fullest part of your bust.  I resewed the seam 1/4" deeper (for a total of 1/2"removed) from the fullness of my bust, tapering to nothing at the armscye.  The bust is still a squidge generous for me, but it is not noticeable to even a close observer.  I also shortened the front crossover for my small bust to prevent gaping.


Split Swayback Adjustment Between Bodice and Skirt


So as not to narrow the midriff, I split the swayback adjustment between the bodice and the skirt.  I ended up with a really nice fit.

The fabric is really interesting.  On one side the weave shows horizontal stripes, and on the other side it shows vertical stripes.  I suspect that the horizontal stripes is the "right" side, but I preferred the vertical stripes for elongation.  I used the horizontal striped side of the fabric for the midriff, to increase the hourglass illusion.  It's quite subtle, though--I doubt anyone will ever notice!

The only thing I don't like about a surplice bodice dress is that you can't line it in the traditional way.  The neckline must be finished and the bodice before attaching to the midriff/skirt, as the front bodice pieces overlap.  Normally, I just treat the bodice lining as flatlining at the center back zipper in this instance.  It's not beautiful but it works.  But this wool is somewhat scratchy, as it's more of a jacket texture than a dress texture, and I didn't want to risk having it irritate my skin.

I started by constructing and lining the bodice, stitching the lining to the neckline.  I had cut facings out of my fashion fabric, but decided that with the bulk and scratchiness I would just line to the edge.  I pressed it so that the fashion fabric overlays the lining by a good 1/8".

Grade Layers at Zipper Intersection

Sewing the lining and zipper presented some challenges.  First, this fabric is almost coat weight (and is certainly jacket weight).  I strongly prefer invisible zippers, but thick seams are a challenge for them to get through.  I severely graded my seam allowances at the midriff bodice and skirt seams.  Thank goodness it worked!

Leave Lining Free of Fashion Fabric at Midriff


Then came the challenge of lining. 
When sewing the bodice to the midriff, I layered as per usual:  The finished bodice with the fashion fabric and lining wrong sides together, midriff fashion fabric right sides with bodice fashion fabric, and midriff lining right sides with bodice lining.  I sewed this 4 layer sandwich to within 2 inches of the center back.  Then I separated the lining layers from the fashion fabric layers, and stitched the fashion fabric seam all the way to the end of the fabric at center back.

Lining Free From Fashion Fabric at Midriff

Then I separately completed the seam on the lining.  I turned the zipper opening edges of the lining in at the 5/8" seam allowance.  So the last two inches or so of the lining is free from the midriff seam allowance, but mostly the lining and bodice are sewn as one at the waist seam.

The skirt/midriff seam is sewn completely separately for the fashion fabric and the lining so that the lining hangs free.

Hand Stitch Lining to Zipper


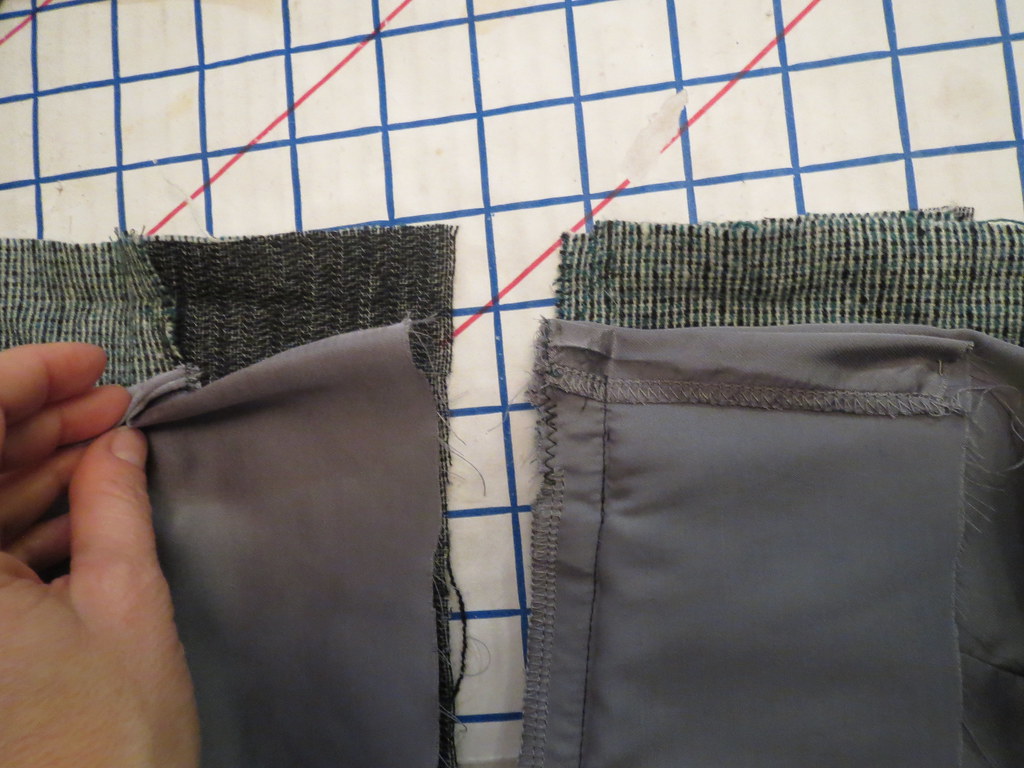
After the dress was fully constructed, I turned the lining under at the center back seam, pinned over the zipper, and hand-stitched in place.  It looks like a real lining, even though it isn't (in the sense of not being an entirely separate dress joined only at the outer edges).


Hand Stitch Lining to Cuffs

I wanted to bring the satin accent in somewhere else, in addition to the collar, so I added cuffs.

To keep the sleeve lining in place, I hand stitched the sleeve lining to the cuff seam allowance.


Front


I'm not sure this dress photographs as well as it looks (or at least as well as it feels), but it is sensational.  I love the vintage vibe, the single collar is a great detail I never would have thought of had Simplicity not illustrated it on the envelope, and the fit is incredibly spot on.  I can hardly believe this is a Big 4 pattern given how well it fits.  I feel very confident when I wear this for professional occasions--it is both totally my style and appropriately dressy, which is a hard combination to find.

All photos are here and the pattern review is here.

Thursday, February 13, 2014

Burda 03-2012-104, Cowl Drape and Corset Drop Waist Dress

Burda 03-2012-104 Thumbnail


This rayon/mohair suiting fabric was a Fabric Mart Crazy Price $2.99/yd item that I got in September of last year.   I wasn't sure if it would be too shiny (the description was slightly alarming) but it turns out to be a very lovely rich navy with a hint of sheen, though because of the high rayon content it wrinkles fairly heavily when sitting on it.  All in all a pretty good buy (not that I ever need more fabric).

In deciding what to make with it, I was heavily influenced by this Antonio Berardi ($2065).  I love the cowl, the wide corset-style midriff, and the slightly drop waist.  I remembered that Burda 03-2012-104 had very similar lines and just had to make it.  Spoiler alert:  Mine does not capture the magic of the inspiration dress.

Extend Shoulder Length

The major issue with the Burda was the narrow, cut-in shoulder.  I wanted full shoulder coverage with a sleeve so I needed to extend the shoulder.  The upper cowl portion of the front is cut with a full self-facing, so it wasn't as simple as just making the shoulder longer (what I would normally do).

My method added some volume to the cowl, but based on the magazine photo it didn't look like this would make the cowl too low.

I started by making a line between the front and the front self facing long the fold line, dividing the front from the self-facing at the shoulder.  Then I split along the line and spread the pattern by the length I wanted to add to the shoulder.  I continued the angle of the shoulder line from the pattern as drafted.  The now angled center front (at the bottom of the marked-up photo) is straightened and filled in with tissue.

Completed Upper Bodice Pattern


Because the front cowl is cut on the bias, I made a complete pattern piece that could be cut single layer, integrating my alteration to the shoulder length and added volume.

Use TNT Woven Top to Alter Back


The back was much easier to alter.  I do love having a TNT woven top.  I didn't have to do a broad back or calculate the shoulder length or anything.  I just popped my TNT under my traced pattern piece and trued it up.  Everything fits as it should in the back.

Clip to Point on Midriff


Construction was pretty straightforward.  I interfaced the front and back midriff sections because the fabric is somewhat lightweight and quite wrinkle-prone.  I wanted the corset lines to look corset-y, not collapsed and saggy.  To get the point at the front waist, I clipped all the way to the stitch line on the midriff.


Topstitching


To emphasize the corset lines, I used a twin needle to topstitch along the princess seams and the joining seams with the upper bodice and the skirt.  With the dark fabric, this very subtle detail shows pretty much not at all, but I didn't want to do a contrast thread for this work dress.


Silver Lining


It's lined with a silvery gray poly purchased on our Pilgrimage to Fabric Mart ($1.99/yd).  The back neckline has a facing that I stitched to the lining along the lower edge of the facing before attaching at the neck, as the hand is too different between the fashion fabric and the lining to line to the edge.

I may not love the dress, but at last it has a silver lining!  (I bought 10 yards of the lining, so get used to this joke.)

Unbelted

I know that I cannot wear a drop waist.  I am too short and too pear shaped for a drop waist.  Why did I think this would be different?  This is not a great dress on me.  I like the individual features of it, but the shape is not my best.

I was too influenced by the inspiration dress, and then after I finished this dress and went to look at the inspiration again, I realized that it doesn't really have a dropped waist, just a shaped one.

Front


Adding an obi helps, although then I started second-guessing myself thinking that I looked like an extra in Star Trek from a planet of peaceful peoples who put on elaborate military drills with dummy weapons as their cultural entertainment.  I don't know.  I'll keep wearing it like this but it will never be a favorite.  It does serve its purpose when I need to dress up, as it works well with a jacket.


Looking back through my woven top inspiration board, I also found this Vivienne Westwood Red Label Draped crepe top ($355) with similar lines, so maybe I can rescue the pattern by making a top from it?  Although I'm not sure if this violates my No More Empire Waist rule.

All photos are here and the pattern review is here.

Thursday, February 6, 2014

Vogue 8907, Asymmetric Collar/Cape Silk Chiffon Blouse

V8907 Thumbnail

I had never even noticed Vogue 8907 until Allison C showed hers as part of her Italy travel wardrobe and then I *had* to have the pattern.  A pullover top with a cool detail?  Yes please!

I bought the snakeskin print at Chic Fabrics in New York ($10/yd) in November 2011 to force myself to get rid of this wrap top; I didn't make a broad back adjustment on the pattern and the top was just too tight across the shoulders.  But I really loved the fabric and wasn't letting go of it; when I bought the replacement fabric I was forced to rotate the top out of the closet.

I don't like this fabric as much as the fabric in the top I had to get rid of because the huge print motifs were very difficult to manage.  I didn't want to center the medallion thing, but the print repeat is very wide so I basically had to just put it to one side.  It just looks kind of weird.  But I think the large collar/cape sort of minimizes the prominence of the medallions because the cape is the feature, rather than the print.

Match TNT Pattern to Neckline

Since I already have a pullover woven top that fits me (almost) perfectly, I didn't bother using the body of the Vogue.  I just used my TNT, tracing the Vogue neckline onto it.

Cut Cape


As drafted, the cape is cut longer than the blouse and is caught into the hem to create a blouson effect. I didn't have enough fabric to do the full length cape, so I used my large French curve ruler to trace a gentle curve onto the cape.  In cutting, I made the cape as long as I could with the fabric I had left after cutting the body and sleeves.

I also adjusted the neckline of the collar/cape to match the narrower back neckline of my TNT (back necklines on commercial patterns always gape on me) by taking tucks on either side of the center back marking.   I finished the collar with a serged rolled hem.  Easy peasy.

Lining a sheer piece always presents the conundrum:  to line or underline.  I prefer the lining to hang free, but I always get tripped up at the hem.  I have a very hard time getting the hems perfectly aligned with one another, especially when one of the layers is a tricky, slidey, unevenly drapey, impossible-to-keep-on-grain silk chiffon.  I have ruined at least one project at this final step.

Lining with French Seams

Combined with my fabric limitations here I hit on what I thought was a genius solution:  finish the chiffon layer with an opaque hem band, and then the lining would only have to fall somewhere within the confines of that hem band, and if it was a little crooked it would make no difference.  What a relief!  Of course, this added an extra 4 or more hours to the project given I had to construct everything with French seams twice (once for the fashion fabric, once for the lining) and them apply the hem and sleeve bands, but I'd rather spend more time on a garment I will actually wear.

Using the bands also gave me that little extra length of fabric for my collar. Win-win!


French Seam Armscye


The lining is joined with the chiffon at the neckline and the armscyes, hanging free at the side seams and the hem.  I am particularly proud of my best-ever French seams at the armscye.  Look how narrow and perfect!


Turn Cuff To Right Side and Pin


To sew on the bands (both hem and cuff), I first stitched the right side of the band to the wrong side of the fabric.  Then I pressed under the seam allowances on the other edge of the band and folded over to the right side of the fabric.  It's important to make sure that your folded edge extends a little beyond the first pass of stitching so it will be hidden.

Topstitch Cuff on Right Side


Finally I topstitched the bands in place.   Stitch-in-the-ditch while desperately trying to make sure you catch the underside of the fabric is way too much trouble for me.

The walking foot was a huge help with the silk, I don't think I could have gotten smooth hems without it.


FInished Cuffs Inside and Out


This creates a beautiful look inside and out.  I think the topstitching on the outside might bother some people, but it looks like a nice finish to my eyes.

Finished Neckline


To finish the neckline, I used bias tape on all the layers at once--collar, fashion fabric, and lining.  I hand stitched the bias tape to the lining to make sure it stayed flat.


Side

I am in love with this top!  The silhouette is not my usual.  Though it has shape, it is not closely fitted through the waist, and a defined waist with a belt or sash doesn't work with this style.  It can only be worn with jeans because it's too mono-column with a skirt and I don't want to tuck in and risk wrinkling the hem band forever.  But it is not *completely* shapeless and it looks current (at least I feel a little stylish in it).

Side

The cape is interesting and I hope not totally weird, even across the back.

I try not to buy sheer silk fabrics because they are such a pain to work with *and* have to be lined so they feel like quadruple the work of opaque fabrics, but I have (well, had!) two in stash, this gray snakeskin print and a purple floral sheer for summer.  I'm so happy with this pattern that the purple floral will be made into a sleeveless version of this top when the weather gets nice again.  I have only one yard of it so the collar may be quite small indeed.  I'm even considering trying to find a mesh knit that looks good on both sides to do View A, the symmetric cape version.  This pattern is a surprising hit!

All photos are here and the pattern review is here.