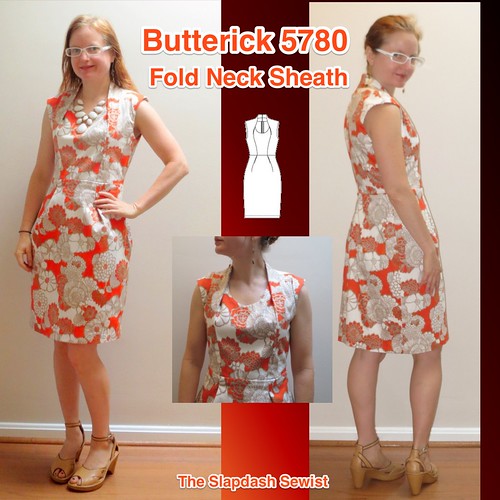
I sewed! Pattern Review is having its stash contest this month. I am not a contender, but it did help me focus in deciding what to make now that I can finally sew. I decided on Butterick 5780, a pattern that surprisingly has not taken the blogosphere by storm. It's a flattering, interesting sheath dress with nice design lines. It's a copy of the Reiss Taruca Sculptured Dress, which was $340 according to this blog post. I think the issue with the pattern that has held it back is its suggested fabric: ponte.
Let's talk about ponte. I think I have fallen out of love. One the one hand, it is a miracle fabric. A knit with all the easy-to-sew, easy-to-fit, easy-to-wear qualities we love, but that skims over all the lumps and bumps and is universally flattering. What's not to love?
One word: pilling. For the love of all that is holy, the pilling. While I've found a few gems of quality ponte, almost everything I make out of it is garbage after the second wear. Ugh! What a waste.
The other issue is that ponte is a rather thick fabric. This dress is necessarily constructed with a side front bodice stay/lining, and the pattern (and original dress) call for it to be fully lined. With the fold in the side front piece and all the seam intersections, every review on PR complains about the bulk.
I never had any intention of making this dress in ponte--it begs to be more structured--so I used a very stretchy cotton twill I got from Fabric Mart last July for $7.99/yd (they called it sateen, but I would call it twill).
Given the Ease of Doom characteristic of all Big 4 patterns (yes, even Vogue), I figured it wouldn't be a big deal to make it in a very stretchy woven rather than a ponte, especially as several reviewers mentioned that it ran large. They also mentioned, as I found to my chagrin, that there are no finished garment measurements anywhere--not on the envelope or the tissue. Seriously, Butterick.
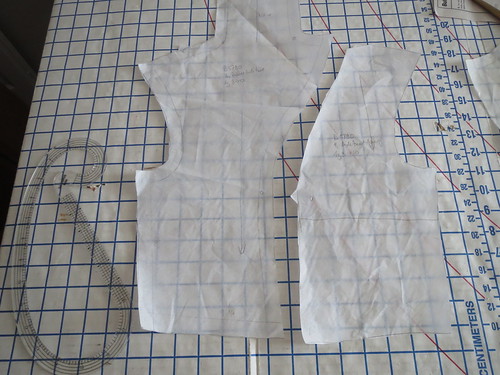
Luckily, my awesome brother and sister-in-law gave me an Etsy gift certificate for the holidays, which I used to buy 5/8" SA Curve rulers. I traced off the pieces, and used the rulers to mark the 5/8" seam allowances and was able to get my own finished pattern measurements. Which, as expected, were pretty close to right for a woven. I added to the waist--but ended up taking all that and more off when the actual dress was constructed.
The other thing reviewers complained about was the grody half-lining for the bodice. As drafted, the bodice lining only goes to about halfway down, right at boob level. The reviewers said you could see the line of the bottom of the facing/lining. Again I say: Seriously, Butterick. The center front bodice and back bodice were easy--just use the same piece for the fashion fabric and lining. The side front stay/lining just required lining up the armscye with the side front bodice, and completing the stay/lining from the boobs down.
I did a slight SBA by shaving a little bit off the curve of the center front bodice at the bust. The fit on the bust is not enormous, and the fold does a little bit of subtle bust-building for a flattering finished result.
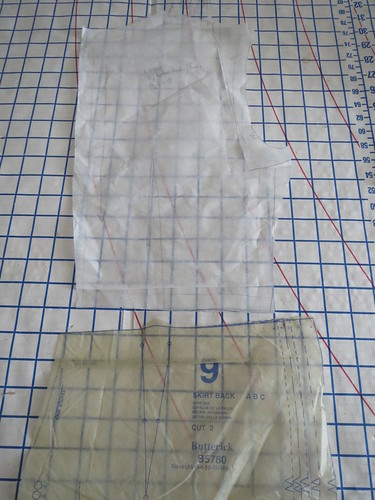
I also did a broad back adjustment on the bodice back, and split the swayback adjustment between the bodice and skirt. In addition to folding out length for the swayback, I also made the flat back seam into a curve over my swayback.
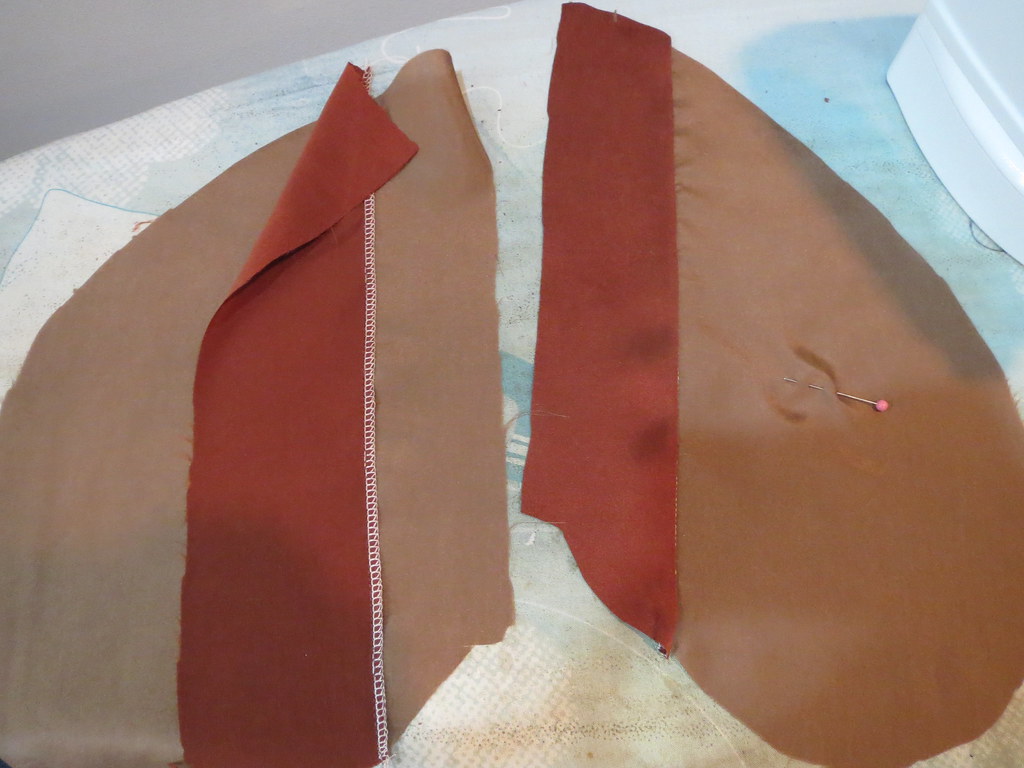
The instructions for construction are good but not great. There's a little bit of origami involved and there are some things that aren't covered, like which direction the strap flaps are to be sewn on the underside of the side front (I did one right and one wrong--and I still can't tell you what's right. I think you fold the strap toward the center--here's a look inside the fold).
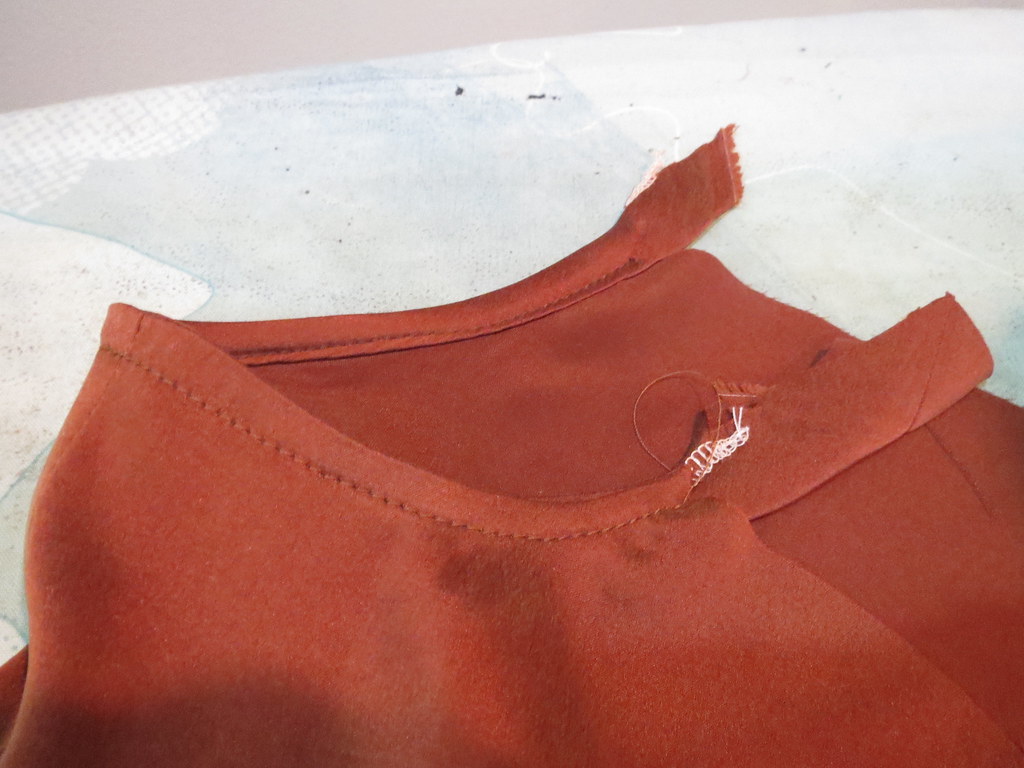
You start by sewing the center front and its lining together at the neckline to finish it. I raised the neckline by 1/2", I don't really know why. It's neither too high nor too low at the raised level, but I'll probably cut it as drafted next time. As I sewed it, I realized that unless your fabric needs lining, only the side front stay/lining is necessary. You can finish the center front neck and bodice back armscye with bias tape. Oh well, it looks nice on the inside.
Next, you pin the bodice side front to the bodice center front at the princess seam. Easy enough.
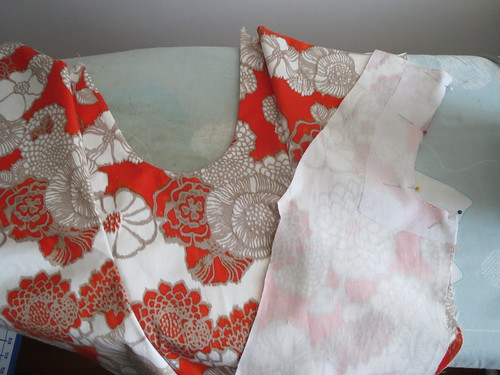
Now it's time to attach the bodice to the side front stay/lining. Start by pinning the side fronts together at the armscye to get a clean finish on the armscye.
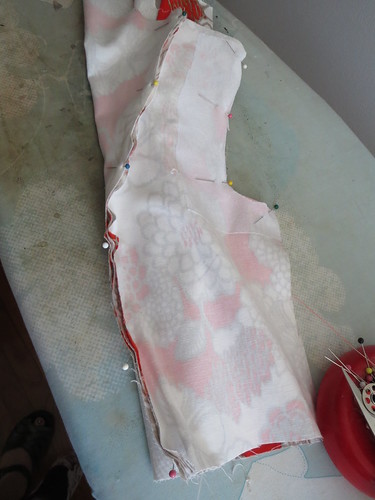
Then you burrito roll the side front and the center front together, and encase them in the stay pinned over the already-sewn princess seam. You can only do one side at a time, obviously, but once you do one side the other side is not any more complicated (you don't have to do any finagling with the already sewn side).
This is the part where the reviewers seemed to have trouble. I actually had more difficulty puzzling out how to attach the front to the back. It's not difficult and I've done plenty of projects with the same design of having a back "collar" extend from the front to the CB neck (including a self-drafted one), but somehow this one took me a minute to find all the match points. Maybe because it had been so long since I'd sewn. It was only a few months, but I felt so rusty on this project!
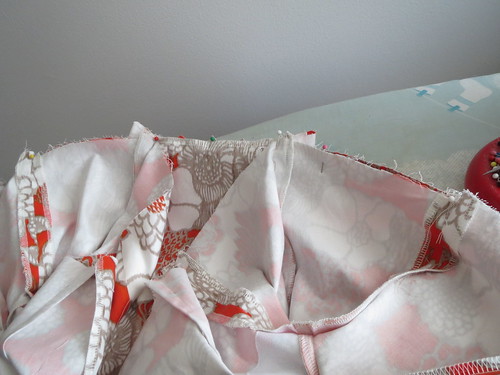
Because the bodice center front and lining were sewn as one to the bodice side front, the lining could not hang entirely free at the waist (with fashion skirt sewn to fashion bodice and skirt lining sewn to bodice lining). I prefer to have the lining separate from the fashion fabric to avoid weird bunching and twisting, so I sewed the skirt and lining to the bodice separately everywhere except at the bodice center front.
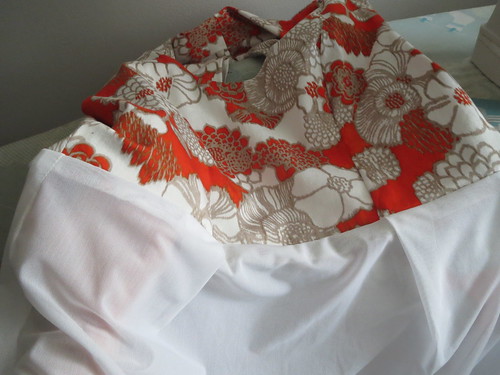
You can see my hand in there illustrating that the lining is hanging free past the bodice center front.
I never know what to line stretch wovens with. Here I used a stretch mesh purchased as swimwear lining, which is fine for this dress. It didn't need much opacity added to the fabric, and I don't anticipate wearing tights with it. If anyone has suggestions for a good stretch woven lining, I am all ears!
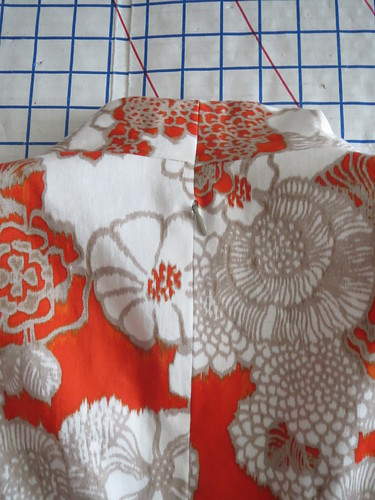
As drafted, the entire center back seam is open and the zipper installed. I don't have great success getting super-square corners at the top of a zipper, and I really didn't want a weird zipper at the top of the collar. So I sewed the collar and one inch below closed, and then installed the zipper below that.

Because of that, it was a little tricky machine-sewing the lining to the zipper tape (using this method). The first time I tried to pin the lining to the zip I ended up with a water weenie that couldn't be unfolded. Good thing I tried before actually sewing it!
I realized I was going to have to burrito it again, folding the entire dress to the inside and wrapping the lining around. It worked! And sewing the second side was no harder than the first.
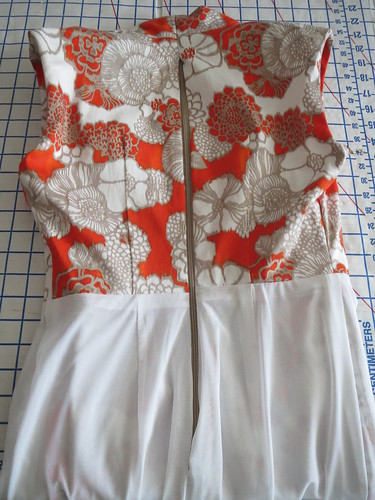
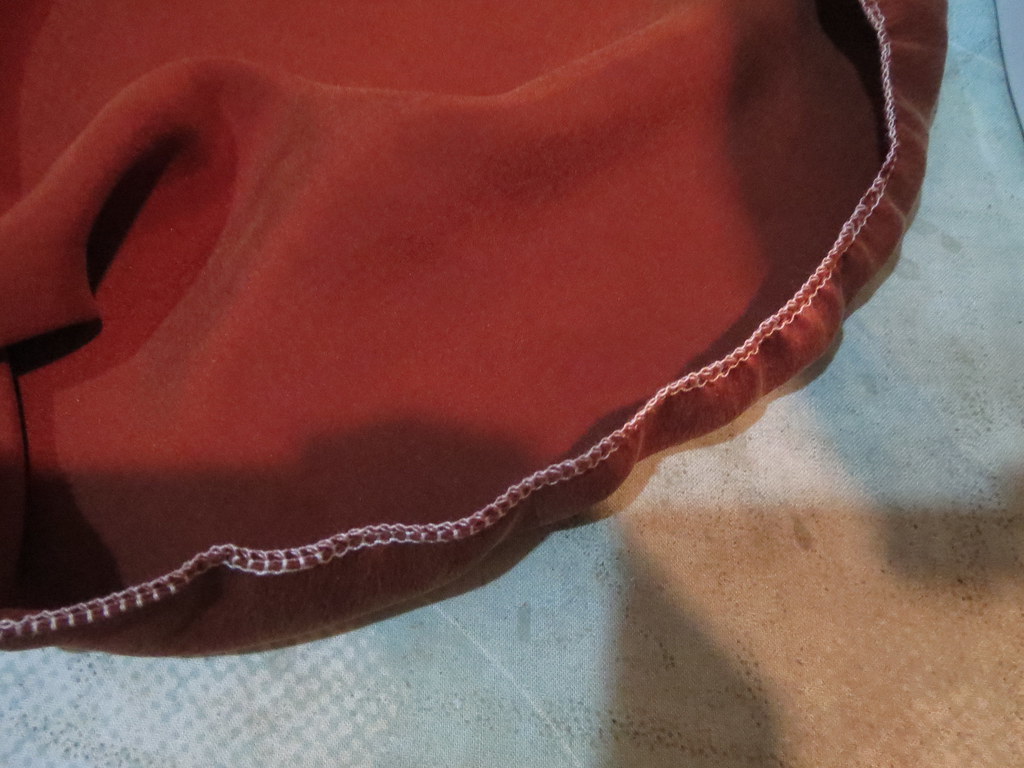
I ended up with a nice clean finish on the inside, no hand sewing involved.
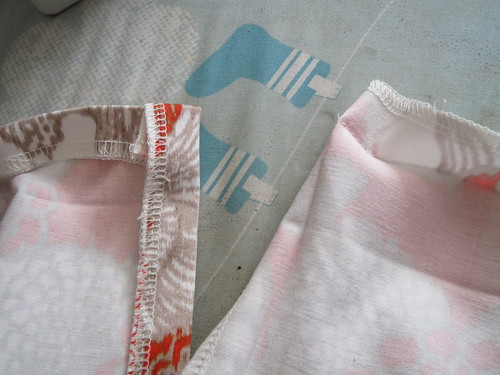
I did a double-fold machine blind hem. At the back slit, turned the slit allowance toward the right side and then accidentally stitched along the first fold, rather than the second. Fortuitously, this resulted in a nicer looking hem than if I had sewn the second fold, as I intended. I will have to remember that for the future.
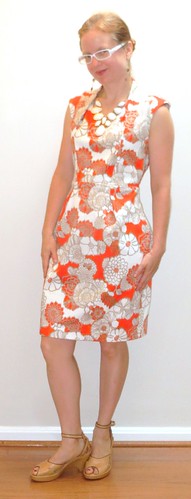
Along with the new sewing room (which is totally makeshift at this point, just barely unpacked enough to sew) I have to figure out a new photo location! I thought the spot at the top of the stairs would be good because there's a skylight, but the skylight is over the stairs, not the landing, and the lighting is uneven--a little too artsy shadowy. The photo from the thumbnail was taken without flash and you can see that all the light is coming from the (viewer's) right. With post-production, though, maybe that's ok. Using the fill flash (this photo) results in harsh colors and a flat photo. I'll figure it out!
And to make this post even longer and whinier, I lost all of my photos. Again. My hard drive died and my iPhoto library had never backed up in Time Machine. Again. (Everything else was backed up.) Tears were shed, and unblogged projects were lost (having learned from bitter experience, I usually don't delete from my camera until the photos have been uploaded to flickr, but wading through thousands of pictures will take many, many hours I don't have). And because Apple cannot currently generate codes for iPhoto credit in the App store (really?), I am having to learn new software. It's only $14.99, but on principle I absolutely will not buy iPhoto myself. (I'm told the issue is that in the old version I have the iPhoto library won't back up if iPhoto is open. Which it always is. So I need the new version.) Blogging will continue to be slow!
And then there's the photographic challenge of shared space: the self-timer photobomber!
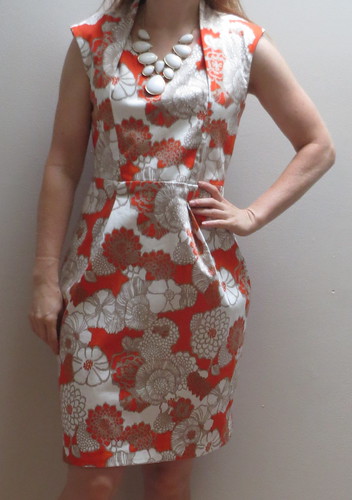
Meanwhile, however, whining aside, I am thrilled with this dress! It is super flattering, fits well, and was untraumatic to sew. An excellent entree back into the field.
It's well-drafted, and the fit alterations are almost there. I should have rounded out the center back skirt seam as I have a teensy bit of shark fin at the CB hem, and the shoulders are a smidge too tall.
The pleats on the skirt feel like they stick out weird when I look down at them, and maybe they do, but it's a weird I can live with (I prefer it to a tummy pooch).
I will definitely be making this again for winter with sleeves, though I will trim the armscye to a shorter/normal length, as a dropped sleeve isn't flattering to me.
All photos are here and the pattern review is here.

