Pages

Thursday, March 27, 2014

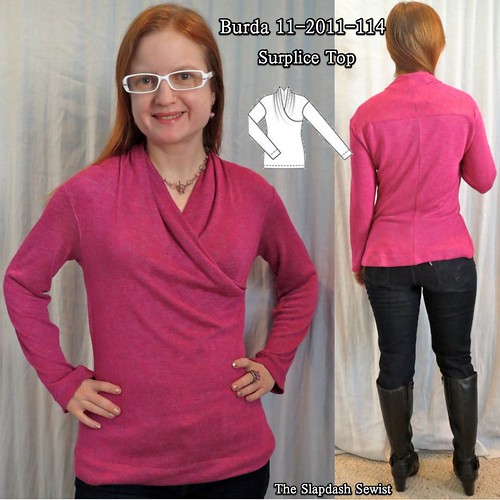
Burda 11-2011-114, Hot Pink Surplice Tee

Burda 11-2011-114 Thumbnail

Burda 11-2011-114 has been on my list ever since the magazine was published!  I got this fabric at Golden D'Or in Dallas in December 2011 and way overpaid for it at $8.50/yd, but I love the color and the subtle "space dyed" gradation.  It is extremely lightweight with little recovery and I don't expect to get more than a dozen wears out of this top before the fabric stretches out beyond redemption. Alas.  

The biggest negative for this pattern is that the front piece is a giant fabric hog and I couldn't find an efficient cutting layout that didn't waste a lot of fabric.

The center back is drafted on the fold, which doesn't work for my swayback.  I used my TNT tee to shape the side seams and add a center back seam.

This is the "easy" sewing pattern with illustrated instructions for the November 2011 issue.  I am sure I would have figured it out eventually from Burda's written instructions, but it was really nice to have the illustrations here.
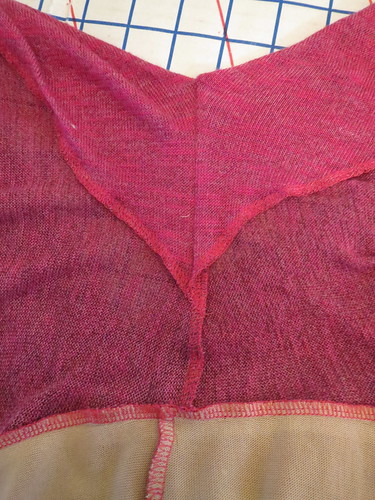
Back Neckline

The back neck finish (which wraps around from the front) is quite clever.  You fold the right front's self-facing to the wrong side, then place the right front and left front right sides together.  Then you fold the left front's self-facing around the whole back and sew.  When you open it up the join is very neat and tidy.  In wearing, my top does not have the gathered V-dip at the center back neck shown in the illustration; it just looks like a plain old neckline.


Underlined Lower Back


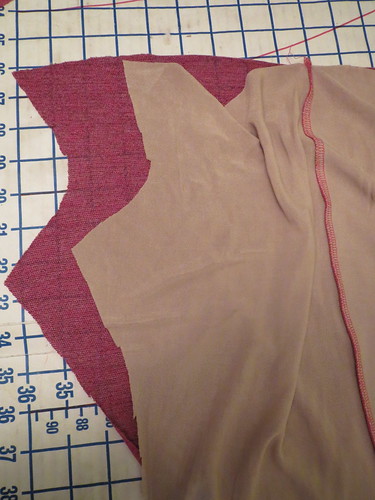
The fabric is very soft and lightweight, one of those fabric where sometimes you can't actually tell if you're touching it or not.  Surprisingly, it was not hard to sew.  The edges didn't curl or ravel, though it did like to spit out pins.

Because the fabric is so lightweight, I underlined the back only in a tricot.  With the front two layers already, a lining would have been too much (and would have interfered with the drape of the neckline).
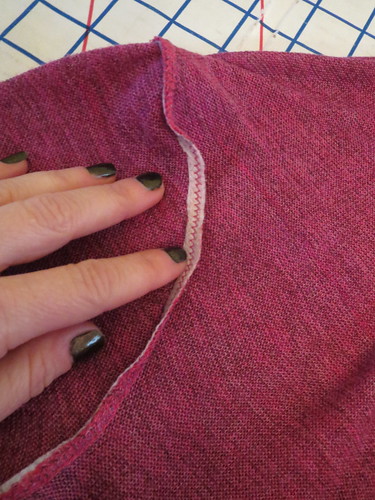

Interface Armscye to Prevent Stretching

With the front's cut-on yoke, the shoulder seam is not at the shoulder but several inches below it in the back.  Combine that with the dropped armscye, and this lightweight fabric has no support at all on the shoulder.  The armscye opening will eventually be at about my knees as the fabric stretches and stretches in wearing.  
To try to contain the stretch at the armscye, I fused bias strips of interfacing to the seam allowance (retrofitted after it was sewn).  With the dropped shoulder, I'm not sure how much good it will do but maybe it will buy me a few more wears. 

The tunic length of this top as drafted was *not* flattering to me, especially in this lightweight fabric that shows every lump and bump.  I shortened it 3 inches from the drafted length.
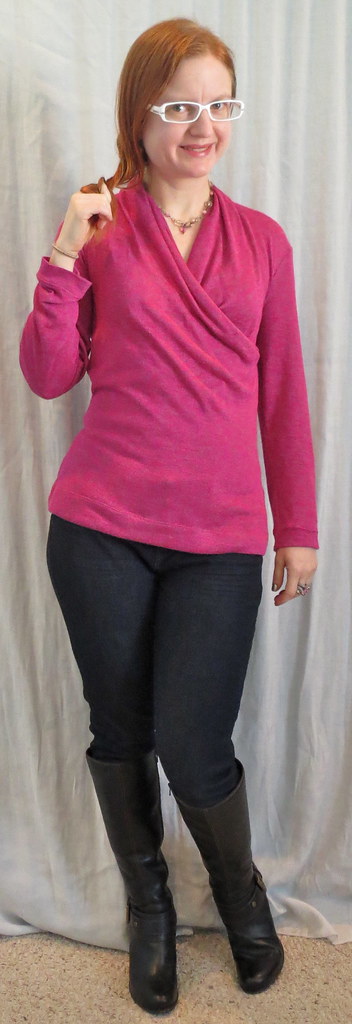
Front


I couldn't tell from Burda's photos whether the neckline would be annoyingly low and require a camisole, but it sits perfectly fine on me--no gapage!  I really like the style of this top and the bright color offers some cheer in this neverending winter.  Seriously, it snowed on Tuesday.  Again.

Though the top will likely be short-lived, the pattern is a keeper.  With the dropped shoulder it would make a cute sleeveless summer tee with shoulder coverage, and I'll eventually turn the red merino wool I got from Fabric Mart into another version of the long sleeve top.

All photos are here and the pattern review is here.

Thursday, March 13, 2014

Burda 08-2013-131, Raglan Tee with Integrated Scarf

Burda 08-2013-131 Thumbnail

I'm always looking for an interesting t-shirt variation, so I had mentally bookmarked Burda 08-2013-131.  Then when Dibulous made it, I got really interested.

Fabric Mart 12-2013

I have a lot of fabric purchasing to confess.  A lot.  But let's start with these pieces from Fabric Mart back in December.  They had merino wool jersey on sale, how was I supposed to leave it on the table?

The merino is quite thin and not suitable for a fitted tee.  So I needed to come up with top patterns that are a bit loose and will work with this thinner fabric.  As a plus, it is quite drapey!

Original Swatch with Dyed Fabric

I love orange, but I was a bit disappointed in the unsophisticated color "Orange Pop" or whatever it was called turned out to be.  It was just not rich enough for my taste and I fretted that I'd made a mistake in buying it.  I figured I had nothing to lose so I tested a small swatch in a fairly dilute dye bath.  OMG, a million times better!  So I popped the whole piece into the washer with a little bit of fuschia dye and came up with a rich, deeper orange that is much more suitable for office attire.  I felt very proud.

Compare to TNT Tee Raglan Back
Now it was time to tackle the pattern.  I traced out the pieces and then compared the raglan top I drafted from my TNT tee to the pattern. It is drafted *large.*  Note here that I traced it to the cut line of my TNT, not to the stitch line of my TNT--that's how big it was drafted!  The finished back fits nicely, and still retains the eased look of the original without being humongous.

And also, the armscye is seriously dropped.  There is nothing more unflattering to a small bust than a dropped armscye, especially on a "petite" (aka short person) like me.  Well, maybe a giant dart to nothing.  Or empty bag syndrome.  But still, a dropped armscye is up there.  I slimmed the profile of the top a bit and raised the armscye to its normal position.

The sleeves were also very wide, and I slimmed them based on my TNT pattern, as well as raising the armscye.

I also raised the armscye of the front piece, matching it to my TNT.

The tie seemed like it would be too wide for my frame, so folded width out of the tie at the end, tapering to nothing by around 4 inches from the front neckline.  This had the added bonus of allowing me to actually fit the pattern onto my fabric.

Giant Pattern


The front pattern piece is spectacularly enormous.  Even though I had a generous 1 1/2 yard cut of this surprisingly wide fabric, I could barely fit the pattern onto it.  I had to copy the back and sleeve patterns so I could lay everything out at once to get it all to fit.  Getting this pattern to the point of sewing was incredibly time consuming and tedious!!!

Because of fabric limitations, I couldn't cut the sleeves as long as I wanted, so I finished them with cuffs.  The top has a bit of a 70s feel so I gathered the sleeves into the cuffs for a bishop look.

Clip at Scarf/Top Join

Once it was time to sew, this went together much more easily than you would expect.  The tie extends into the front by way of a long dart.  At the join between front and tie you have to clip into the very end of the dart to get a nice turn.

The tie is sewn right sides together and then turned right side out.  Because the tie is cut on the bias, it was a bit of work to get it folded properly and sitting flat; I had to press and steam it to get to that point. In a lightweight drapey fabric like I used here, I think the front could probably be cut on grain.

Untied

Here you can see how and where the tie extends out from the top.  It looks like the tie will be incredibly long, but it's actually not.

Original Neckline

The front neckline as drafted was very high for my taste.  I do not like a super high crew neck like that, so I lowered it about 2 1/2 inches, and it is still relatively high, especially compared to my usual neckline.  Given the shape of the front pattern piece, I don't think it would be worth trying to lower it before cutting; just wait until you have it sewn and adjust to your taste.  I finished the neckline with clear elastic and a twin needle.

Side


This top came out perfect for what I was hoping for.  It definitely has plenty of ease, but tucked into a top it blouses nicely.  It has a nice style, but doesn't seem too gimmicky or tied (get it?) to a particular fashion trend, so I think it will be able to stay in the closet for several years, depending on how well the fabric holds up (it's a bit fuzzy, but I can't tell if that's new abrasian or fabric characteristic).

I was surprised at how fussy the tie is.  It can really only be tied in that one place.  Theoretically I could wear it tied high (very unflattering to me) or tossed over the shoulder, but I think these clearly look like a stretch for the style and I will stick with having it tied where it extends out of the front.

A while back I tried to see if I could knock off the Temperley London Delilah top, but my attempts were comical.  Now that I see how it works with this tie--there has to be a dart extending into the bodice, I might give it a try again.  The results probably won't be great, but perhaps they will edge slightly above comical?

All photos are here and the pattern review is here.