Wednesday, March 28, 2012

Vintage Sewing, Dreadful Tasks, and Hairdos


Back

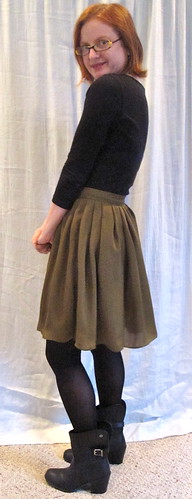
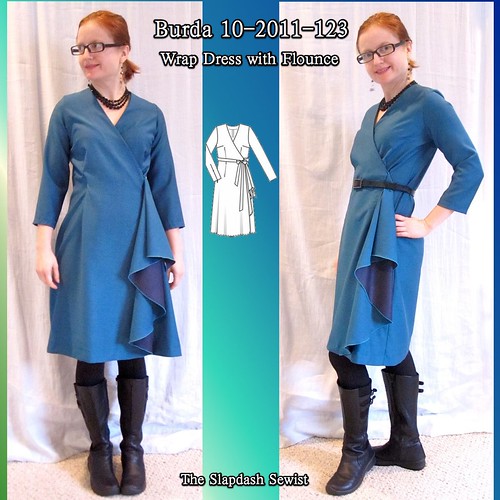
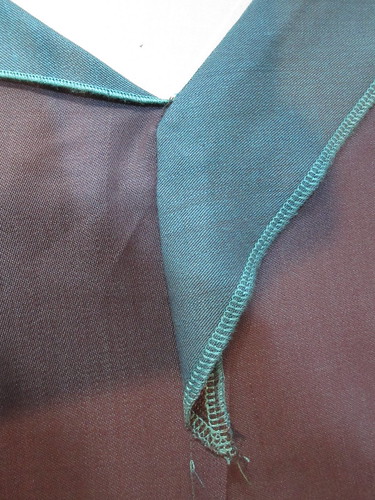
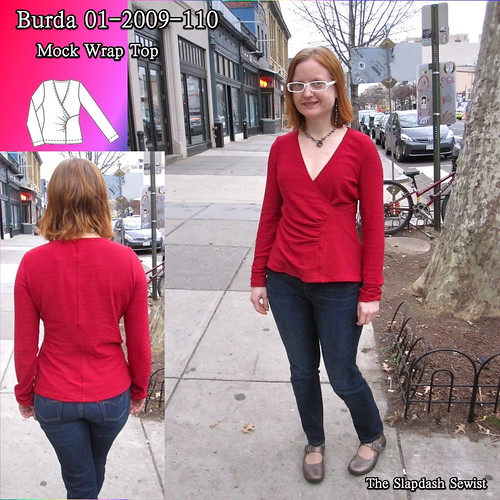
After seeing the horror that was the back of my Burda 10-2011-123 wrap dress (left), I decided to devote some time to rescuing it.  To me, going back to a project that is done is like mending:  soooo much worse than just starting from scratch.  So it took a lot of self-prodding to get back into it.

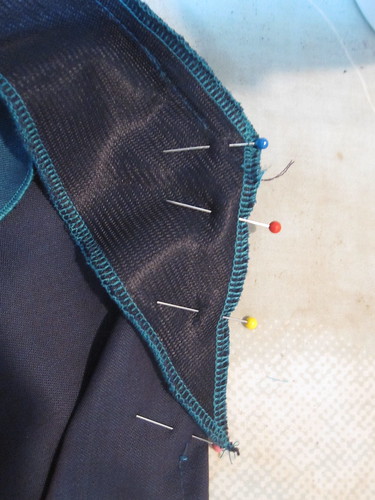
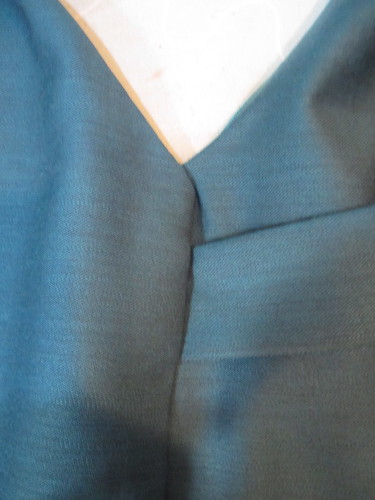
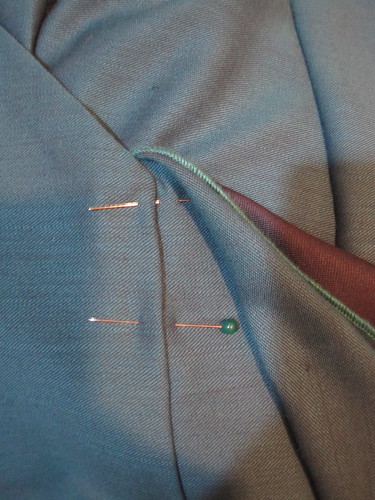
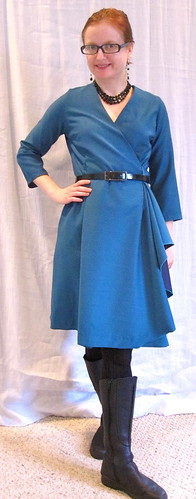
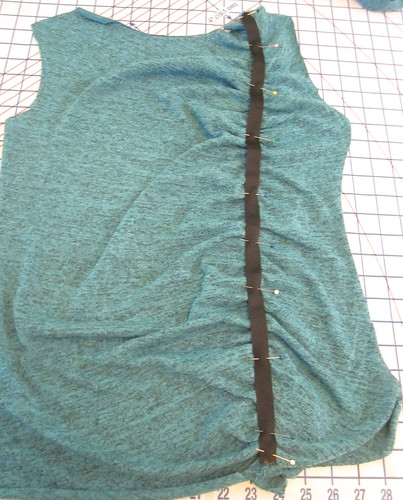
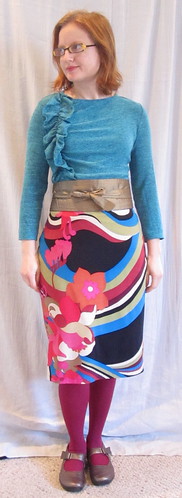
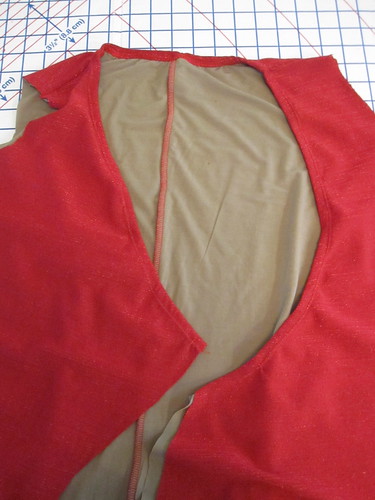
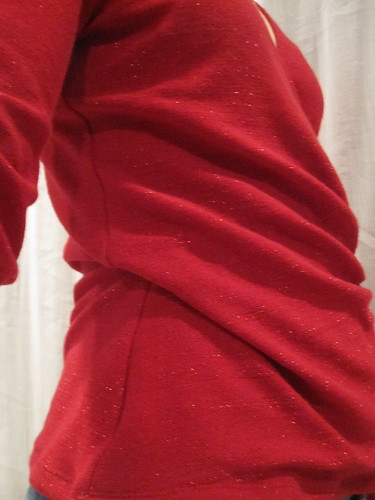
As drafted, the dress has released darts in front and back.  To improve the back fit, I made the darts wider and closed them up at top and bottom.  I experimented with closing the front darts as well, but it didn't add anything.  Adjusting the side seams wasn't effective either.  I also wore my silk slip to ensure it flowed smoothly over my tights.  The back fit is vastly improved, as you can see above, although it still does not look 100% great with a belt.

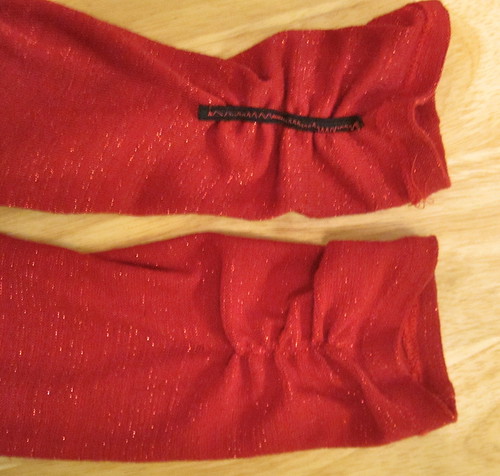
I also hand-stitched the two ends of the removed ties together to make a self belt.  The bow looks much better when tied on the same side as the flounce, though I opted for the obi when I wore it yesterday.  Although I was so sad to see it, the return of cool weather did allow me to wear this dress, giving me a more immediate return on my labors than expected.

Have I learned my lesson about sewing dresses without waist seams yet?


========================


Simplicity 6110 (1973)

Simplicity 6110 Envelope Back

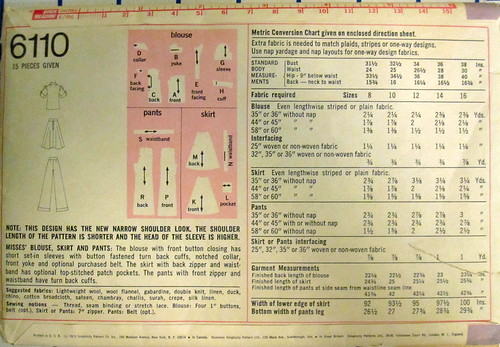
It's Vintage Pattern Contest time at Pattern Review!  This one is always fun.

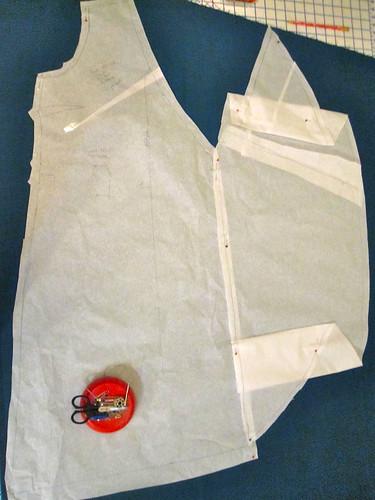
I've had this 1973 blouse on my list for quite a while and was glad to have a reason to finally get started on it.  It's going together more quickly than I thought--at this point all I have left is the buttons/buttonholes and hem.

Check out the goggles on Khaki Girl on the right. She was Steampunk before Steampunk was cool! Of course, she's got nothing on Turban Girl.

How great did pattern envelopes used to be?  Showing the pattern pieces is awesome for seeing at a glance how the pattern is put together and whether it is going to be beyond your skill level.

Who else is sewing vintage??? The contest doesn't end until April 15 so there is still time!  Patterns must be from 1977 or earlier (the contest rules say "before 1978"; I believe there has been an interpretation allowing 1978 patterns--double check if you're considering a 1978 pattern).

========================


Janice asked on my Burda 11-2011-120 ruffle front dress post how I did my hair.  There is a pin on Pinterest that is a better explanation but of course I didn't "like" or repin it so I couldn't find it, but this is a good explanation.  Just make a ponytail and then tuck the ponytail in.  Now, I have (1) short hair and (2) super, super fine hair.  So my teeny ponytail just tucks right in--the only trick is getting it to stay there (by the end of the photo shoot my little ponytail was sticking straight up, which was quite amusing and required a re-shoot of the back).  If you have longer/thicker hair you may have to pull it through twice.

Wednesday, March 21, 2012

Silk Georgette Pleated Dirndl Skirt


Pleated Dirndl Thumbnail

When I made my Burda 09-2010-111 wrap blouse out of silk georgette in my favorite shade of olive (from G Street's $7.97/yd silk novelty table; with discount and coupon I paid $5/yd) I managed to lay out the fabric to be able to make a skirt as well.


I am very drawn to the ballerina style skirt, as shown by my Pinterest picks!  While I don't know that I could go full-on tutu like the look on the right (at least for daytime/work), I could at least take advantage the airy properties of my silk georgette to get a little of the same feel.


Pleats Pinned


I just used simple rectangles for this self-drafted skirt:  two for the skirt, French-seamed together, and one for the waistband, heavily interfaced.

A traditional dirndl skirt is gathered, but I wanted a touch more sophistication so I pleated the fabric instead.  I didn't measure, just eyeballed and pinned out the pleats, using the waistband for the length.

I admit I had to pin them a couple times to get the fabric evenly distributed, so depending on your personality you might prefer marking.
Lining

For the lining, I cut an A-line with a wide hem (almost a half circle skirt) and pleated the waistline of the lining as well, taking larger and fewer pleats.

As per my usual procedure, I first stitched the waistband to the wrong side of the fabric, sandwiching the lining between the fashion fabric and the waistband.  Then I flipped the waistband to the front and topstitched.  That way, I don't have to worry about catching the underside of the waistband in my topstitch.


Zipper with French Seam
Invisible Zip


I always prefer to French seam silk, but a zipper creates a dilemma.

First, I interfaced it for stability and inserted an invisible zipper.

Then I French seamed from an inch or so below the zipper to the hem.  I wish I had a better description for the next step, but I don't.  You just kind of wing it to finish that last inch below the zipper.  It only works in a lightweight silk, but you can see from the outer photo of the zipper that it doesn't look too bad at the bottom.


Rolled Hem
I used my rolled hem foot to finish the hem of the skirt.  I love the rolled hem foot, though it is a bit tricky to use.  The trickiest part of a rolled hem is going over seams.  So here, I didn't.  I hemmed the two pieces of the skirt before seaming them together.  Then, when sewing the pieces together, you have to start your side seam from the hem edge to get them to line up.  This only works if you know exactly how long your want your finished garment.


BackSide

When I finished this skirt I realized it was my third olive green silk skirt!  I previously made Burda 01-2008-127 and one of Burda 09-2007-116 which I apparently never blogged but is made out of the leftover fabric from this project.

However, it's my only *bikeable* olive green silk skirt, so it's a justifiable wardrobe addition.  `-)

All photos are here and the pattern review is here.

Wednesday, March 14, 2012

Burda 10-2011-123, Wrap Dress with Flounce

Burda 10-2011-123 Thumbnail

When I was in New York a couple years ago, Kashi talked me into some gorgeous but expensive ($18/yd) double-sided wool.  The right side is a beautiful lustrous turquoise, and the underside is a rich black.  At the time, it was my most expensive fabric ever, so of course it was a huge dilemma of what to make with it.  I wanted to be able to use both sides of the fabric in a subtle way.

This has been on the list for a while, and I took advantage of a burst of cold weather a couple weeks ago to get it done and wear it.  Though tracing and cutting took a bit of time, the dress was actually fairly quick to put together.


Right Front with Extension
So when I got the magazine, Burda 10-2011-123 really jumped out at me.  As you can see on the left, the flounce is cut in an improbable shape and ends up showing both sides of the fabric. Tany made this shortly after the magazine came out and I just loved hers. 
Pin Tie Into Dart

This dress comes in long, longer, and longest versions.  As I am short, shorter, and shortest, that didn't work for me.  I shortened it 3 inches from the shortest (non-flounce) iteration, which was about 4 inches shorter than the medium-length flounce version.  As you can see, I had to shorten the flounce extension quite a bit.

For the flounce to sit nicely in the completed garment, I had to arrange it and then take a few hand tacks, but this strange shape makes a surprisingly handsome flounce.Pin Facing Over Dart


The tie construction on the flounce side of the dress is rather ingenious.  There is a dart between the flounce and the skirt portion of the dress, and the tie is enclosed in that dart.

The instructions are, unsurprisingly, hopeless, so I gleaned most of my construction knowledge from Tany's blog post and photos.

The neckline is finished with a facing.  Stitch the facing in place first.

Next, pin the tie into the dart on the right side, as shown at left.

Next fold the facing over the dart and stitch in place, enclosing the tie.  You might want to double stitch to ensure the tie stays in place.

Finished Facing Inside
Finished Tie Outside


This gives you a neat finish on the inside and the outside, as you can see from these photos.


With Tie
Unfortunately, once I tried the dress on, I was really unhappy with it.  After staring at it for a bit, I identified the tie as one of the things I didn't like.

Although it is not a problem on Tany's version, on mine I felt that the tie and flounce were too much together.  It doesn't look bad in this photo, but I think that's because the way I'm angled hides the flounce a bit.  It was just weird and unbalanced.
Stitch in Ditch

So off came the ties.  To keep the dress together I stitched in the ditch at the two front darts, as you can see at right.

Then I inserted an invisible zip into the center back seam so I could get it on and off.  I am a whiz at invisible zips in an open seam, she said modestly, but sewing one into a seam closed at both ends is a whole other issue.  There are tiny bobble at both top and bottom, but in the end I think it's fairly invisible.


Front BackUnfortunately, I still don't *love* the dress.  A dress without a waist seam just does not work for me.  I thought this would be ok because it's a wrap dress, but of course then it ended up not being a wrap dress!  In a softer fabric this might work, but the wool has a fair amount of body and looks sort of boxy.

The back is a hot mess.  I need to take in those released darts quite a bit so it's not so bunchy back there--maybe even un-release them.

However, I do get to show off both sides of the fabric and better to have sewn a Too Good to Use into a not-perfect project than to let it sit on the shelf forever, right?

All photos are here and the pattern review is here.

Friday, March 9, 2012

Stashoholism Confessional and Book Recommendation


Fabric Mart, 3-2012

So, I've been feeling a little out of control on fabric buying lately.  I decided that I would not buy any fabric during Lent.  It's not that long, and heaven knows I don't need more fabric, or at least no need would arise in 6 weeks.

I blame Cidell for this.  She sent me a tweet from Fabric Mart about it receiving a shipment of Dry Flex knit.  You know I've been looking for good quality knits for months.  They had it in peacock, one of my favorite colors.  I tried my mantra, "There will always be more fabric."  (My other mantra:  "Buying more fabric keeps me from projects I love.")  But in fact, this kind of fabric is not easy to find and definitely not at that price, and Fabric Mart's stock was quite limited.

Because it has flat rate shipping, it is just economically foolish to buy only one piece of fabric from Fabric Mart.  Right?  (OK, fine, I know that the best "bargain" is spending no money at all.)  But they were also having a 20% off sale.  (There will always be more fabric.)

At any rate, the knit print was so cheap I couldn't pass it up, and it turned out to be really lovely in person.  The print is high end-looking, if that makes sense, and the light parts are light gray rather than white.

The dupioni will be great for a silk shell, of which I don't have enough.

The purple silk was on deep discount as there was only one yard left and it was just so pretty I had to give it a home.  It will be a lovely airy blouse.

Oh right, and the dry flex knit is AWESOME.  Very high quality, thick, good recovery.  It could even be used as a bottom-weight for yoga pants.  I ordered 3 yards and will be glad to have this available in my stash for years.

I have to say, I'm not sorry and I would do it again.  But from now on I really will endeavor to keep my Lenten pledge.

=======================

Enjoying sewing does not mean that you enjoy fashion, and enjoying fashion does not mean you have any interest in the business of fashion.  But if you have an interest in the business of fashion (or , I would argue, business *or* fashion), you must read this fascinating book. 

It explores how luxury brands--couture houses such as Dior and Chanel, custom luggage makers such as Louis Vuitton and Hermes--went from tiny purveyors of wildly expensive goods to the very wealthy to aspirational and then to attainable by the middle class. Chapters cover the consolidation of luxury brands (LVMH being the behemoth), vertical integration of the supply and distribution chain, the development of smaller items such as perfume to drive revenue and brand recognition, the explosive rise in the market for luxury goods (or luxury-branded goods, at any rate) outside Europe and the United States, counterfeiting (chilling), and the move from fashion into "lifestyle."

I may not be making it sounds interesting, but trust me, it is *riveting.*

It's not perfect, of course, and I identified two negatives.

The first is not Thomas's fault: the book just happened to be published on the cusp of the Great Recession. So the tone that takes continued, free-for-all growth for granted is a bit quaint and the data is dated. In addition, one of the big stories of the Great Recession has been the stability of luxury brands. They are not recession-proof, but have not contracted to the same degree as other industries, from what I've read (the Wall Street Journal does an excellent job covering the business of fashion). It would have been interesting to read about that in the book.

The second is totally Thomas's fault, and is evident in the book's subtitle, "How Luxury Lost Its Luster." A more fitting subtitle would have been "The Democratization of Luxury" or "How Luxury Became Big Business." But there is a tone throughout that indicates Thomas's great regret is that "true" luxury disappeared before she could join the luxury class.  The last chapter is devoted to reassuring the reader that the rich still have ways to spend lots of money on things that ordinary people cannot obtain, such as $800 made-to-measure bras (to which I say, eat your heart out over Sigrid's gorgeous bras!!!!).


There is a link to my Goodreads shelf on the right hand sidebar.  Please send me a friend request if you join!  


Wednesday, March 7, 2012

Variations on a Tee #2: Side Front Ruffle

Side Ruffle Tee Thumbnail


Source: etsy.com via Trena on Pinterest


Pinterest really does have a use!  Although admittedly the time I spend on Pinterest is disproportionate to the actual creative output that results.

I pinned the top at left (from Etsy) a while back.  I just love the ruffle.  It's visually interesting without being too girly.


The asymmetric ruffle is a fairly common feature in RTW, as on this Travelsmith tee ($54), with its half neckline flounce that trails down slightly off from center front.


Source: bluefly.com via Trena on Pinterest


Another example is this RED Valentino top ($59.99 on deep discount at Bluefly), with applied ruffles in mixed materials.


Source: bluefly.com via Trena on Pinterest


A little wilder is this Shoshanna one shoulder top ($159, Bluefly).  It's hard to tell for sure, but it looks like the ruffle is a couple inches in from the side seam.  I like the way it meanders from the neckline to the hem.


Mark and Measure Cut Line

Slash and Spread Large Side


This is a fairly simple pattern to draft from a basic t-shirt block (which I now have, yay!).

Start by making a full front.  Mark a line from about an inch into the shoulder (exclusive of seam allowance) down to the hem, parallel to the center front marking.  Measure this line and make a note of it, as it's the length to which you will be gathering your ruffle.  Make hash marks along the line; mine are spaced 2 1/2 inches apart.

Cut the pattern apart along the line, then cut at the hash marks to the side seam allowance.  Spread at the slashes and lay the pattern out on more tissue, as shown above at the right (in the absence of pattern weights I used scissors and my pincushion to keep the pieces in place).

A note on grain: patterns I have sewn in this style generally have the grain marked such that the hem is trued up to run along crossgrain. Since this is just a casual knit, I laid it out in the most fabric-efficient way. It seems to sit fine, but note that "proper" grain should probably result in the hem being straight on the crossgrain.


Add Ruffle
Trace the pattern, making a smooth line on the spread edge.  Add ruffle allowance to your tracing.  My ruffle is 2 1/2 inches wide.  The ruffle ends at the shoulder seam allowance and hem allowance; you can see the notches at the top and bottom of the ruffle.
Front Pattern Laid Out

Measure  your curved center front edge.  Repeat the process on the other half of your front pattern, spreading the same amount.  Because your pieces are different sizes, the angle on the smaller piece is more extreme.  Also, despite my best efforts, I couldn't spread it to be quite as long as the larger half, so I had to take a few tucks when sewing the center front seam to get them to match.. 


Before assembling, finish the ruffle if you'd like.  My knit was a rather loose weave, so I serger rolled hemmed it.  Serger rolled hemming is such an easy finish it should be illegal.  The way it looks is so disproportionately high to how much effort it is!  I am LOVING my Juki MO 644-D for rolled hems.

I found it easier, to assemble the front before putting the rest of the top together.  Start by sewing the ruffle seam, between the shoulder seam allowance and the hem allowance, WRONG sides together.  You want the "seam allowance"--the ruffle--to be on the outside.  You will sew along the line where you traced the cut edges.  So in my case, I had a 2 1/2 inch "seam allowance." 

Be sure to leave the seam unsewn in the shoulder seam allowance/hem allowance.

A picture is worth a thousand words so I'll let the pic describe the next part.

Shoulder and Hem Technique

Essentially, clip into the seam allowance to the top and bottom of the ruffle stitching. Turn the seam allowances (shoulder seam allowance and hem allowance) to the inside. Stitch.

Ribbon Stay for Gathers
After the ruffle, shoulder seam allowance, and hem allowance are sewn and you have an intact front, gather the ruffle to your measured length.

As my red ruffle front dress was fresh in my mind, I used the same ribbon stay technique with the three rows of stitching--from the front in the ditch, and then on either side of the ruffle (also on the front--click on the link for details).  Because this wasn't quite so formal a project, I did the stitch-in-the-ditch by machine, rather than by hand as I did for the dress.

Next time I make this pattern I will consider using a firm elastic rather than a ribbon.  In my lightweight knit, the ribbon interferes somewhat with the flow of the top, though it does provide plenty of stability.

Now just assemble the t-shirt as you would any other.

Tee Shirt Variation #2: Side Ruffle Tee
Front with Skirt
I am having so much fun with t-shirt variations!  I'm counting my McCall 6363 knockoff as Variation #1.  I've already made another variation and have ideas for more.

I even have a special binder just for my t-shirt variation patterns.  As I posted a while back, I keep my traced off patterns in page protector sheets in 3 ring binders.  I was lamenting how costly the large 3 ring binders are, and people had a couple suggestions for obtaining them cheaper.

I was listing a bunch of stuff on Freecycle a couple weeks ago when it hit me that I should request some binders.  I have never actually asked for anything on Freecycle, though I've given away a TON of stuff (probably a literal ton, oy).

Well, within 3 hours of posting I had 3 large 3 ring binders in my possession.  It was amazing!  Freecycle is a great way to pass along your unwanted items.  I particularly like it for things that the Goodwill and other thrift-store type organizations would not be able to sell but are still useable, such as mostly full bottles of lotion or shampoo that I just didn't like or use.  Plus, people come to your place to pick it up!  For someone without a car, like me, this is a huge boon. 


All photos are here and the pattern review is here.


Friday, March 2, 2012

Burda 01-2009-110, Mock Wrap Top

Burda 01-2009-110 Thumbnail

I have been wanting to make Burda 01-2009-110, a mock wrap top with a side panel, since it came out in the magazine.  I even traced it about a year ago, but hadn't gotten around to it.  While the serger was threaded in red, I finally did it in the sparkle sweater knit I just got from Fabric.com.

Unfortunately, I didn't make a great choice in the fabric, as it is just too much bulk for this particular pattern.  The stretch and recovery are also not firm enough.  So beware:  if you want to make this top, to use a normal knit with a good lycra content, not a specialty knit like sweaterknit or rib knit.


Finish Neckline with Clear Elastic
I did my usual Small Bust Adjustment for a crossover top of shortening the crossover.  This top has separate right and left front patterns, so be sure to adjust both (or not, read on).

To further ensure that I would have no gapage in wearing, I finished the neckline with clear elastic cut slightly shorter than the neckline and a twin needle.

Note that although the instructions did not seem to tell you this, the neckline must be finished before the side panel is inserted.  I sewed the CB and shoulder seams and then finished the neckline before proceeding.

As I recall, the pattern is not drafted with a CB seam but I need one for my swayback.  I have also finally wised up on duplicative pattern tracing.  As mentioned previously, I have been developing a TNT tee.  I used my perfected back and sleeve for this pattern (actually, my TNT sleeve comes from this pattern), and only used the front pattern pieces for this particular pattern.  This is going to save me a lot of time in tracing in the future!  I have also developed a TNT woven sleeve for Burda projects and will stop tracing a new sleeve for each project that just uses a plain set-in sleeve.  Why didn't I think of this years ago?
Shortened Front Crossover Too Much!

I was so proud of my cleverness in making sure the neckline wouldn't gape.  Then I tried the top on.  Um.  As you can see on the right, the shortened neckline seriously pulls and distorts the side seam where it is attached.  I've not had that problem before with my SBA, but I can't think of another pattern I've done where the neckline is attached all the way at the side seam.

I marked about 1/2 inch below the crossover and removed the clear elastic below that marking and then just stretched out the neckline seam as much as I could.  The pulling is reduced, but not entirely eliminated (sorry, don't have a good after shot as I have obscured the side seam with my arm in this shot).


Underlining

Although the sweater knit is too thick for this pattern, it is also too thin to be worn on its own.  Oy.

I underlined the body pieces with a tricot type knit (a score on G Street's $2.97/yd table).  I thought about trying to do only a half lining on the underlap side of the front, but it got too complicated so I just lined the whole thing.


Sleeve Gather Detail


I cut the sleeves full length, and in this wimpy knit they ended up quite long.  Rather than cut them off, I stretched a piece of elastic on the inside and zigzagged over it to gather up the length a bit.


Front CloseupSide


I'm going to refrain from tagging this a "fail," but it's not a great project. You can especially see the bulk problem at the front hem, which is stiff and oddly-shaped.  If I make this again, I will cut the front underlayer several inches shorter at the hem and finish it before attaching the side panel.  That way the visible hem will only be one layer.

The style seems good, though, as long as I can find a balance between a non-gaping crossover and a non-pulling side seam (which may not be possible).  We'll see if I try this one again.

 All photos are here and the pattern review is here.