
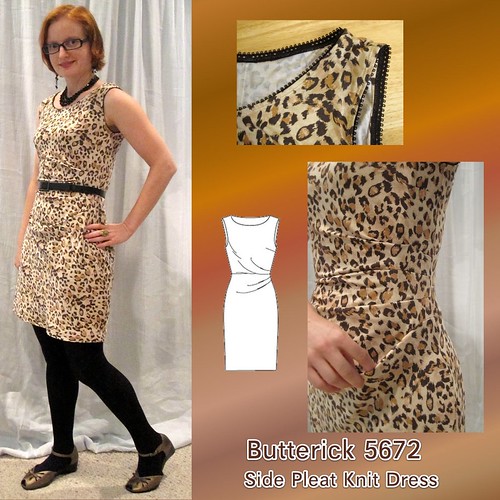
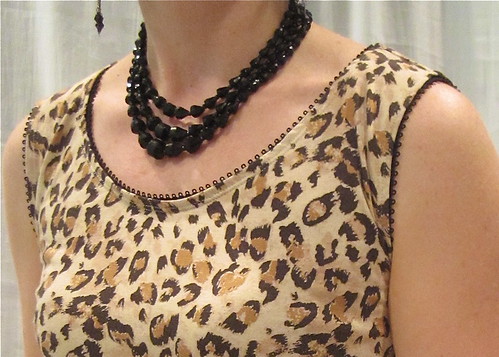
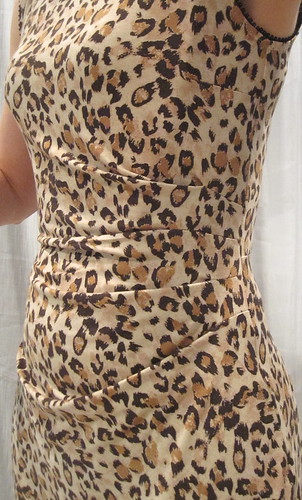
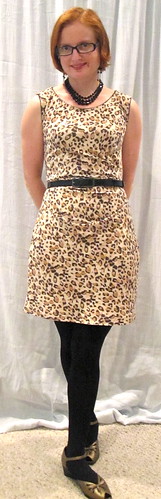
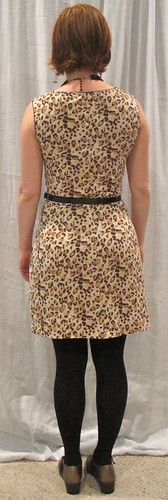
I mentioned in my
animal print dress post that rather than line the dress I opted for a slip. The only problem was, I didn't have a slip. I have a knit half slip I made last summer that I wear all the time. I technically have a full slip. I bought it in a secondhand store 20 years ago. I don't know if slip technology has changed since then (other than the advent of Spanx; I only go there when absolutely necessary), but the slip is kind of problematical in that it has no shape. So all the extra fabric around the waist bunches up under whatever I'm wearing (I have one or two sacks, but 99% of my looks have a defined waist) defeating the smooth-line purpose of the slip. Plus, it is a sweaty nylon and a weird length. It has lace on the bottom but with the lace it's too long, but turning up the lace makes it so short it barely covers the booty when belted.
The point being, I needed a slip, and preferably two: one in batiste to wear under knit dresses in summer, and one in silk to wear with tights in winter. When Joann had their Burda sale (the first I can ever remember), I snapped up
Burda 7418. Luckily,
Melissa has already made it and handily put up a
review on PR.
The pattern is designed for stretch satins. Melissa was trying it out for a non-stretch silk. Her muslin told her to go up a size in a non-stretch, so I cut a 36 at the bust, 38 at the waist, and 40 at the hip. I also cut the side panel (for both slips) on the bias. I think in the end I could have cut the side panel on straight grain, but I didn't want to take any chances.
I also flared out the pieces from the hips to the hem, to ensure that I would have plenty of biking mobility. I did not do this in any scientific way, I just added extra width in cutting.
I did not do any of my usual adjustments. No small bust on the batiste and no swayback. There is some swayback puddling, but surprisingly not too much.
At the bust, I found the batiste garment flared out a bit under the arms, presumably to accommodate a larger bust. For the silk, I straightened the flare at the yoke side seam, narrowing it about 3/8 inch at the top of the yoke, tapering to nothing at the bottom. The underarm is more flat/flush in the silk version.
The main challenge in sewing this pattern is the almost square bust seam. I have never executed a perfect inset corner. I see them fairly frequently in RTW and the corner is always sharp with no puckering. I wish I knew what they did. I should consult
Kathleen Fasanella...
Anyway, my first piece of advice: do not get a polyester or other synthetic within 10 feet of this pattern. You need to be able to press the seam well with a lot of steam. Pressing doesn't do much to polyester except melt it.
My second piece of advice: Mark the match point on the front piece carefully. It is marked on the pattern. The front piece is shaped like a T, with the upper yoke going to the side seam and the center panel the full length of the slip. The match point is on the inner corners of the T.
Once you have marked your point, put a dot of Fray Check over your marking and let dry.

After the Fray Check is dry, clip all the way to your marking. That is the nerve wracking part. I HATE clipping to the stitching line, due to my paranoia about finishing every edge of every garment. You cannot finish an edge that has been clipped to the stitching line. Hence the Fray Check.
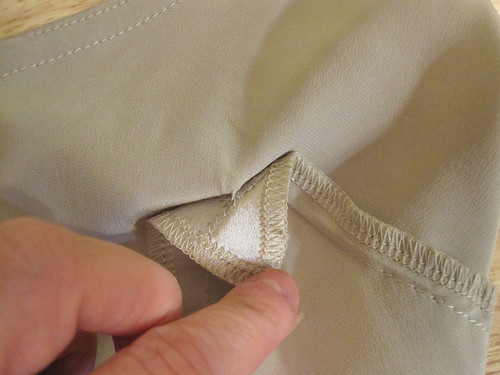
When sewing the front to the side panel, spread the clipped inner corners of the T so that they are a straight line. Pin your match points together. Stitch slowly. Make an offering to the sewing gods (they prefer seam rippers, in my experience).
I am afraid I have no real pictures of this process as I was holding my breath the whole time and that could only go on for so long. You can see in the photo above on the left the straight line made by spreading the front's clipped edges, zigzagged to the side's pointed seam allowance. The photo on the right shows that my seam still isn't perfect--I have some puckering--but the match point is not too bad.
I prefer to use French seams with silk, just because it's traditional (though I do cheater French seams, using the serger for the first pass). And in batiste, I love the garments Burda always does with the beautiful French seaming shining through the sheer batiste.
For this project, I did a combination. On the straight panel seams (side to back and back yoke to front) I used French seams. But for the front/side panel seams, with the above described inset corner, I used a regular seam finished with the serger. I did not even want to go there with French seams. Also, pressing is a huge part of that seam and I wanted to get it as flat as possible. I actually don't think the inside looks too bad with this mix of methods.
The second challenge with this pattern is not nearly so nerve-wracking or precision-requiring, it is more annoying. The way Burda proposes that you finish the neckline of this slip is to clip to the 5/8" seamline at the center of the V and then just turn the neckline under and stitch, leaving it completely raw and vulnerable at the V. No go.
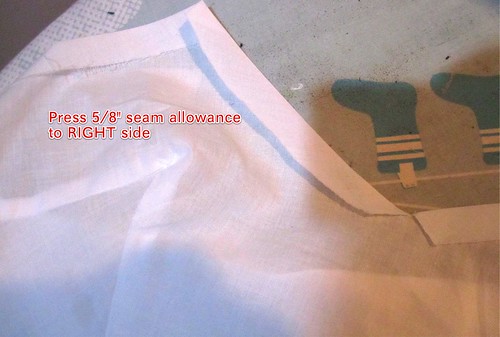
As with the match point, I started with a dot of Fray Check on the seamline at the center of the V, then clipped when dry. Next, press the 5/8" seam allowance to the
outside. It seems weird, I know. I confess I did it wrong first time around on the silk--which was the second version I made!
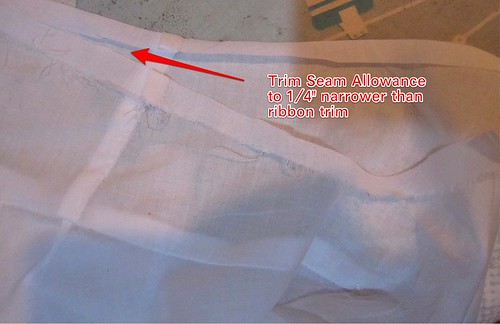
Once you have marked and pressed your turn down line, trim the seam allowance. The neckline will be finished with ribbon, and the seam allowance needs to be narrower than the ribbon. On both iterations I was a little too conservative in my trimming and should have gone shorter.
Once you have trimmed,
zigzag the now shortened neckline edges. Here I used the zigzag rather than the serger because I needed total control and wanted to minimize bulk.
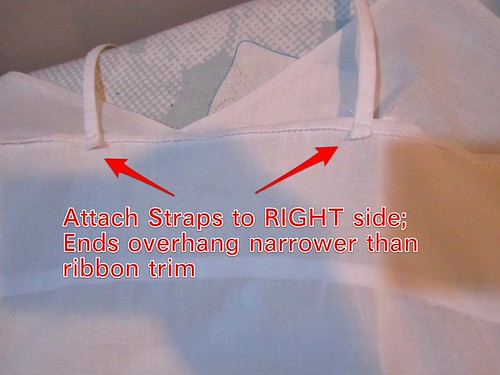
Now comes the other weird part: attach the straps, with the edges on the
outside of the garment. I know I have uneven shoulders, but wow does this project show it. In order to get both bust points in approximately the same place on my bust, the straps are noticeably different lengths and the back hangs crooked. I really don't even want to know what it takes to fix that problem, because I'm pretty sure I would never do it.
To reduce the problem of strap slippage off my sloping (and uneven) shoulders, I attached the straps closer to the center back than marked.
Once the straps are tacked in place, trim the edges even with the trimmed seam allowance.
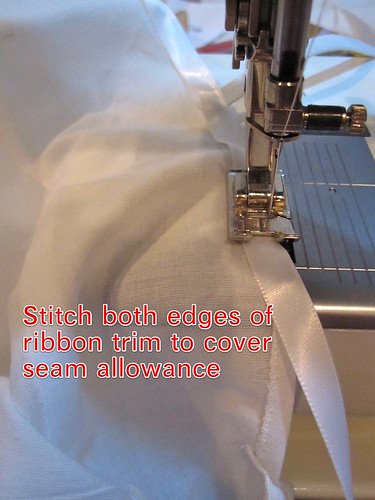
Now you are ready to neatly finish the neckline. Turn under the edge of a ribbon (I like to use Fray Check on the ends) and place it at the V, overlapping enough so that the center of the V at the turned under edge is fully covered.
Lay the ribbon over the neckline, keeping the edge exactly even with the fold. Stitch the ribbon as close as possible to the edge. I found it helpful to move my needle one click to the right.
For the batiste, I used a cheap satin ribbon from stash. I would have preferred a better quality ribbon, maybe even a silk so that it could be molded with an iron, but I didn't want to hold up the project until I could get to the fabric store. I also should have stay-stitched the neckline, as I think it stretched out a little with the ribbon application (didn't have that problem in the silk).
For the silk version, I made a self ribbon out of a 1.5 inch wide bias strip. I
folded it into thirds and pressed, so the raw edges were turned to the inside and the outside showed folded edges. I stitched it on the same way.
Miter the edges at the peaks of the fronts where the shoulder straps attach.
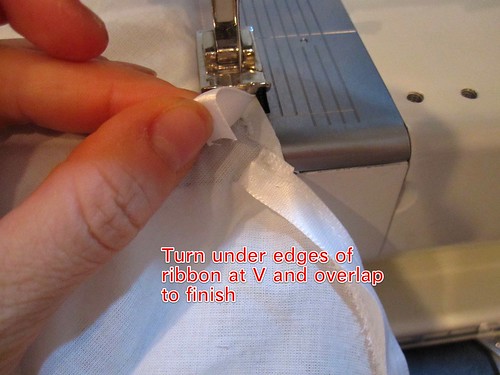
When you get back to the center of the V, trim your ribbon with enough to fold under, fold under, and overlap over the beginning edge. It takes a little massaging to get a good overlap. Mine isn't perfect, though it improved on the second go-round in the silk version.
While my ribbon application wasn't perfect, I think it is a vast improvement over Burda's terrible idea. What were they thinking??? Another option would be a facing, though I hate facings. You could fully line the back yoke and cut the front piece as a yoke as well (straight across the top of the T). I don't know how that would look on the inside with the center front piece being full length with a shorter yoke. Might be ok.
You can also do a traditional bias binding edge on the neckline, but you run into the issue of the straps. You could attach them with ends facing up (the strap running down into the inside), then bias bind, then turn the straps up. I suppose the bulk with this method wouldn't be too bad. You could also bias bind then attach the straps to the inside, but that leaves them with a raw edge and who wants that?

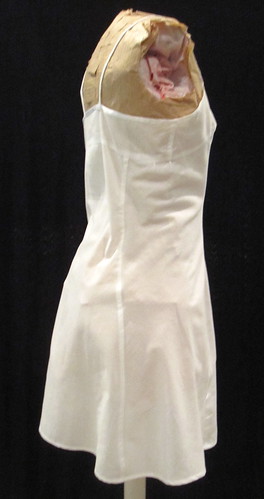
My one quibble is the length. As drafted, it is knee length on me. Who wants a knee length slip or negligee? I mean, I am short, but that is going to be too long on all but the giantesses among us. I shortened it by 3 inches.
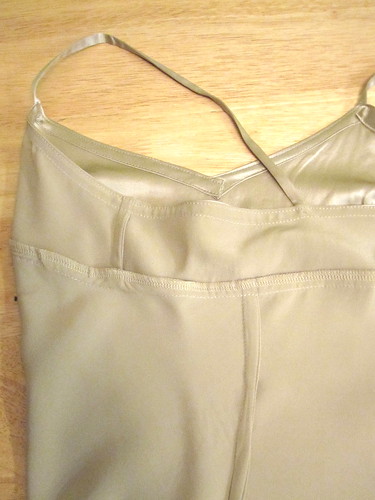
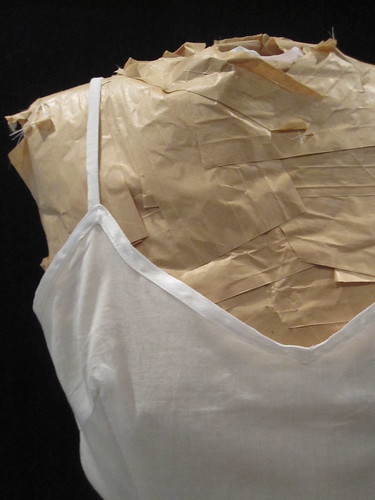
I am happy with this pattern. It is more interesting than just a plain slip and has a lot more shape to avoid that bulkiness at the waist. The design and style of it are interesting. In fact, when I was getting dressed on Saturday I came out into the front room in the silk slip to do something and the boyfriend got kind of excited about my "dress." I am just so glad to have filled the hole I have been avoiding for years! Now I don't need to fret about sewing knit prints with white in them (the white is always sheer). No need to line, I have a slip for that!
I can see myself making another one with the narrower as-drafted hemline for a negligee.
All photos are
here and the pattern review is
here.


.jpg)


