Wednesday, February 24, 2010

Fabric and Jewelry

I could not think of a clever title for this post. Sorry about that!

Last week Cidell came to visit DC, which was awesome as we hadn't seen each other in aaaaaages. When I made my Quotidian Fail Simplicity 2473 houndstooth dress, she told me that she had some similar houndstooth fabric that was not enough for the project she wanted it for and would give it to me. Yay! Here it is:

Houndstooth from Cidell

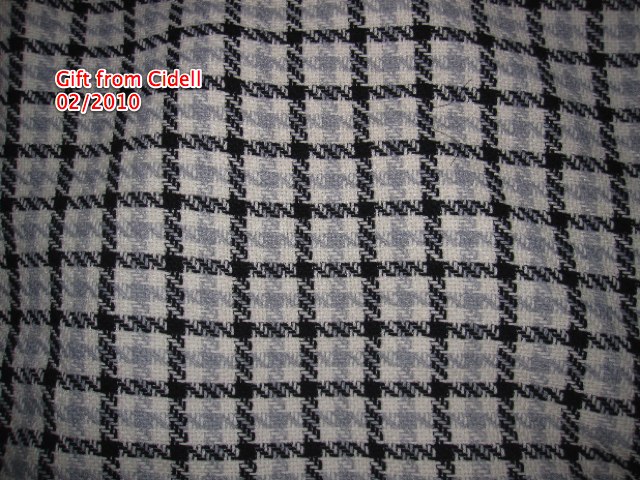
It's not identical to the Simplicity dress fabric, and I totally love it. I had intended to make Burda 01-2009-105, the skirt with the outside darts and bias hem band. I loathed this look in the magazine, but then just loved the version Kathigarn did on PatternReview, but the fabric is too thick to work.

So now I'm thinking jacket Burda 08-2007-115 (ignore the fact that Burda's link says it is blouse 117; it has the two items mixed up); I made this as a coat two years ago and wear it every day during this type of weather. So I know I like it! However, I don't know if I have enough fabric and that three piece sleeve would kill me to match. But the pattern is designed for plaids and Burda has those handy check marks so maybe it wouldn't be too awful. Maybe.

===========================

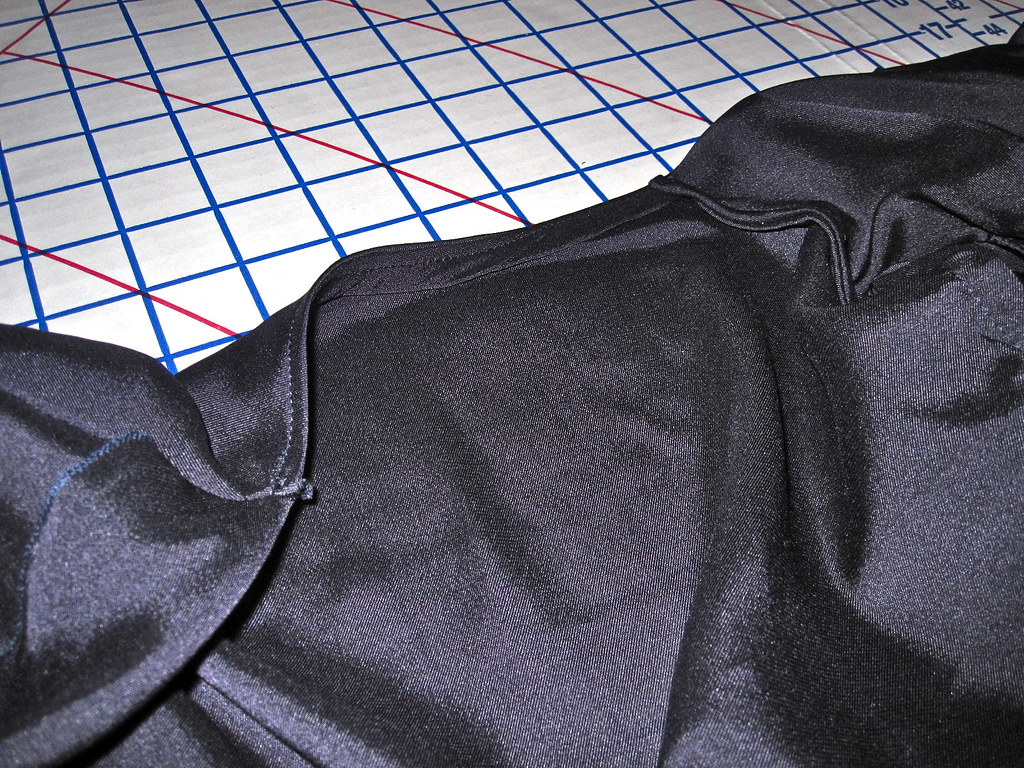
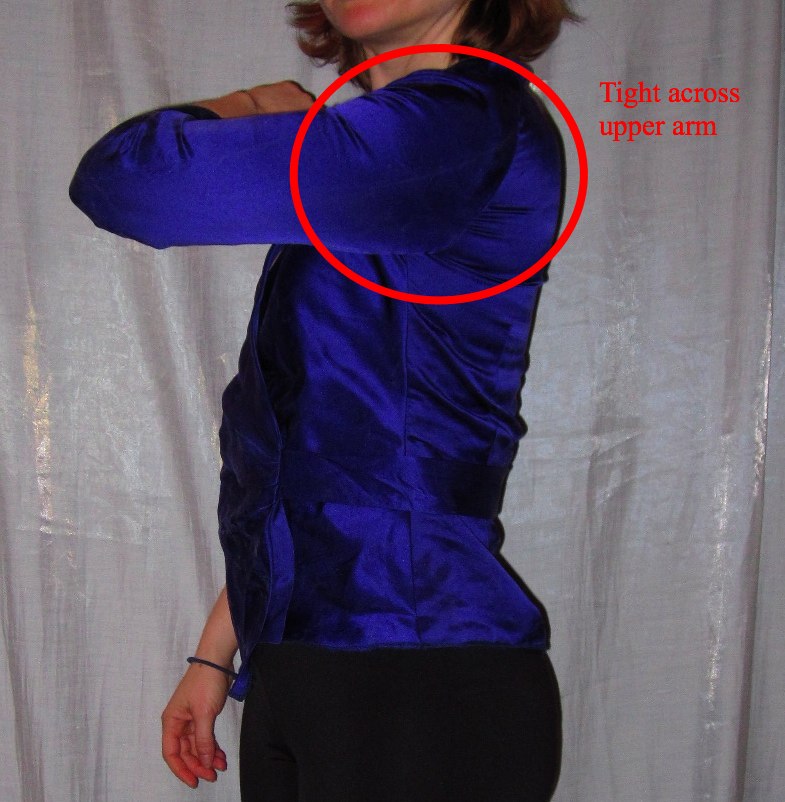
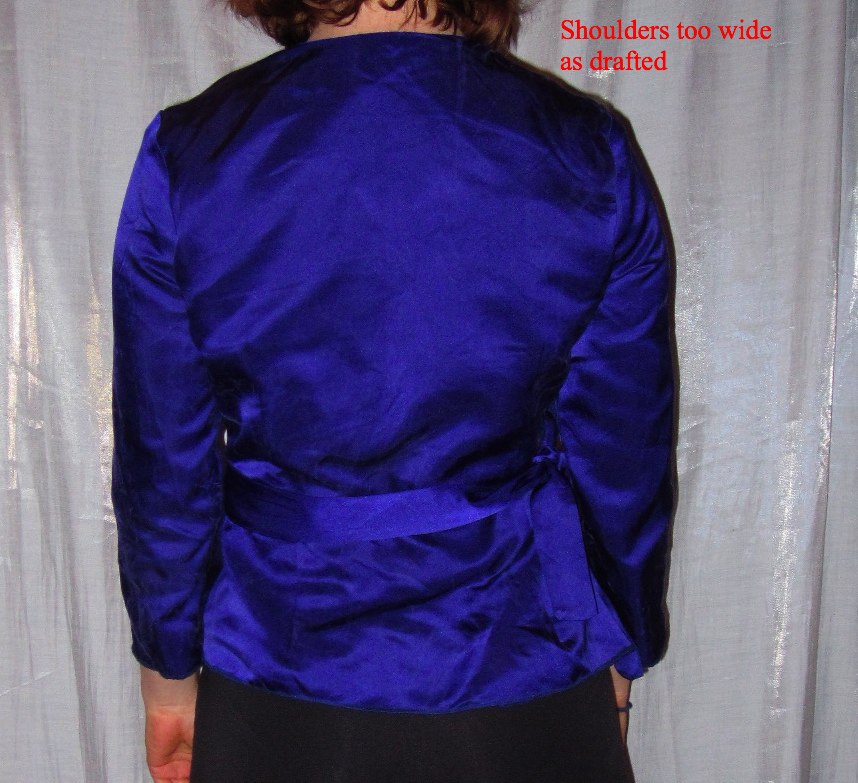
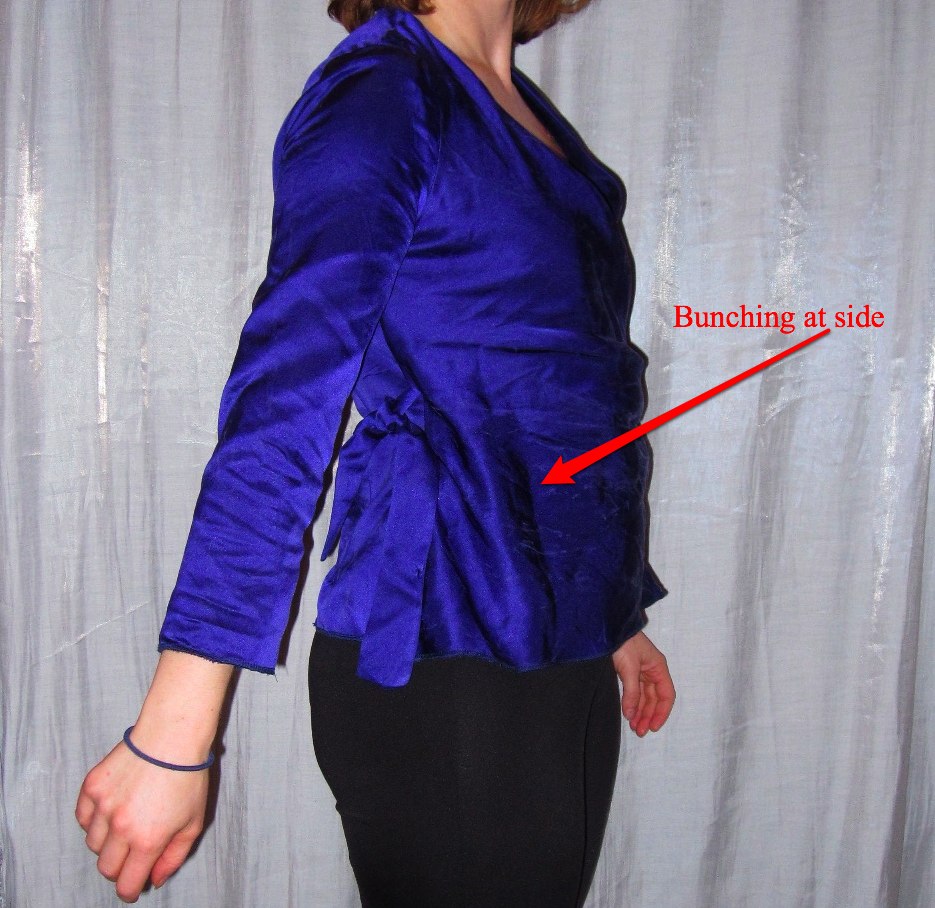
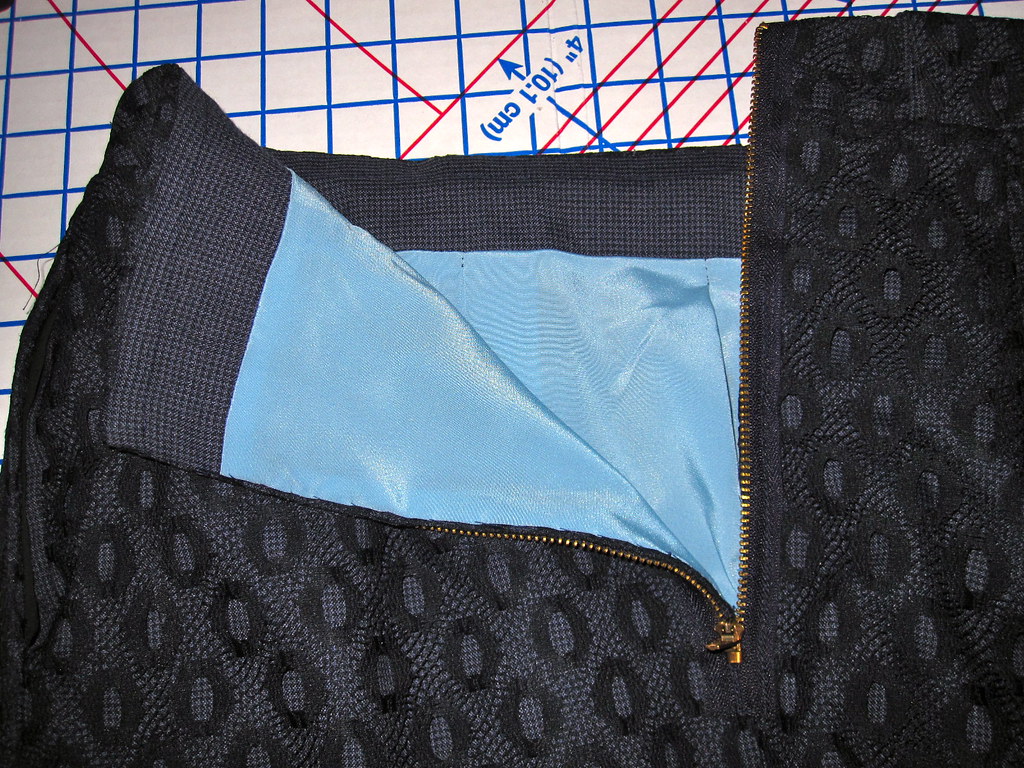
But before I start a new jacket project, I figured I should tackle the last jacket project I started. And abandoned. You may remember this mess that I wrote about last April

UFO or Work In Progress?

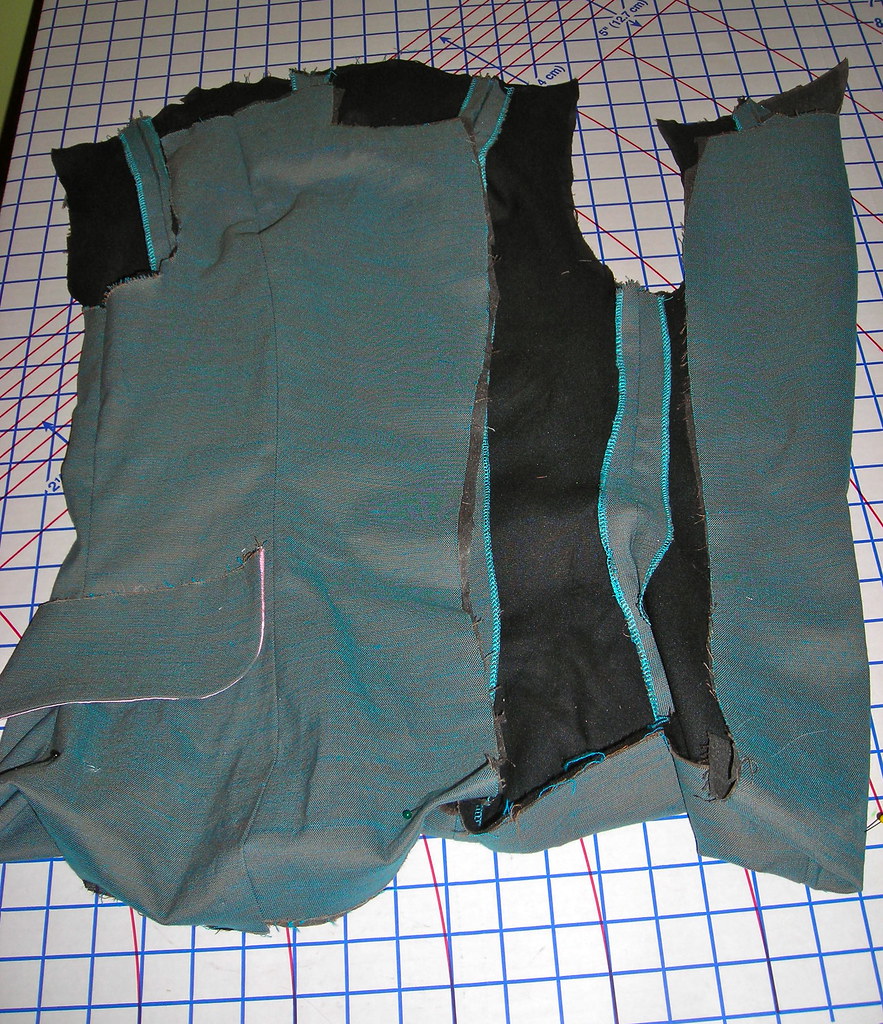
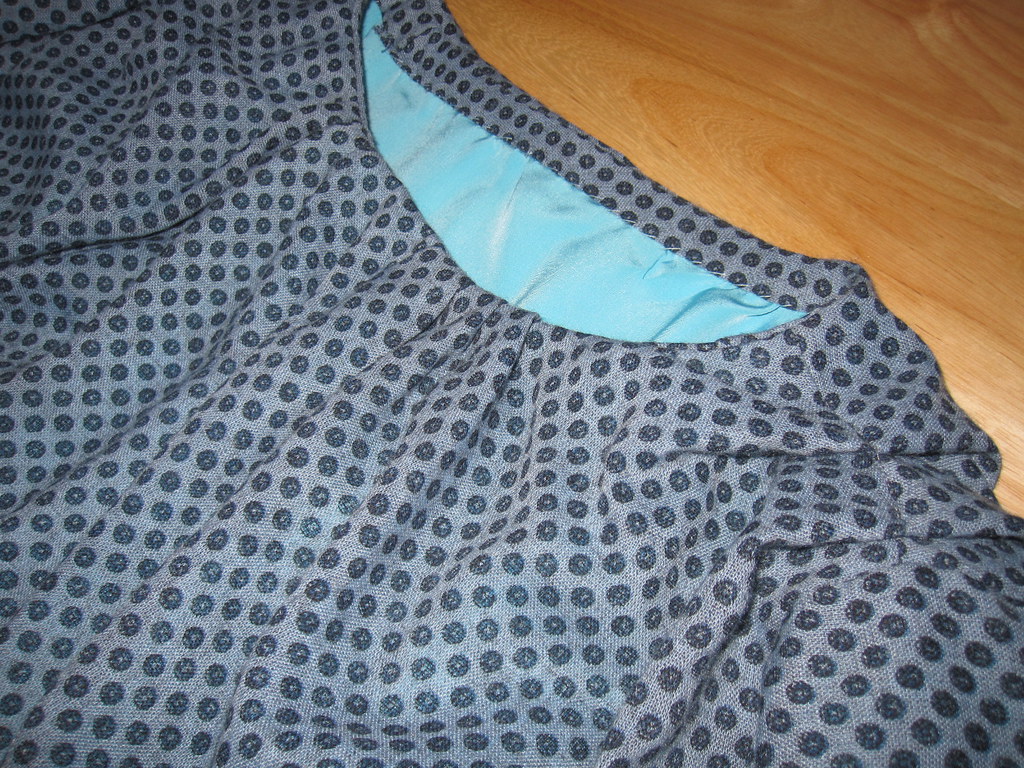
Yeah. I didn't touch it after that. So I have picked it back up. I put in the pockets, making the welts too wide and homemade looking. I put in the collar, of course putting the undercollar on top and the overcollar on bottom. This was after sewing the wrong edges of the collar *and* serging off most of the seam allowances, so I had to pick all that out and carefully line up the seam lines. I do not have the intestinal fortitude to pick out the collar. So it's going to be somewhat mediocre, but I told myself I had to either finish it or throw it away and I don't want to throw it away. There are still a good 8 or 9 hours of work left on it, or more. But at least some progress has been made.

===========================

Since I have no sewing to show you, here's what I've been working on of a creative nature.

Cloisonne Necklace Sparkly Bracelet

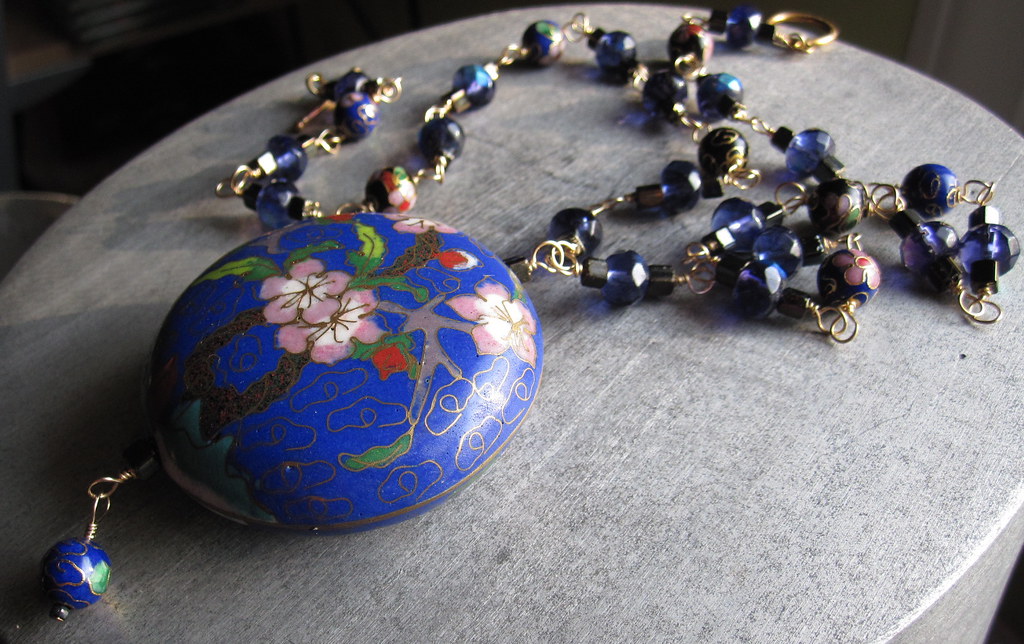
One of my neighbors asks me to donate to a fundraiser gala for the pediatrics center at a local hospital every year. I've had this cloisonne pendant for a long time and had not really been inspired by it. So I challenged myself to use it. I actually really like the resulting necklace. Hopefully it will raise some money.

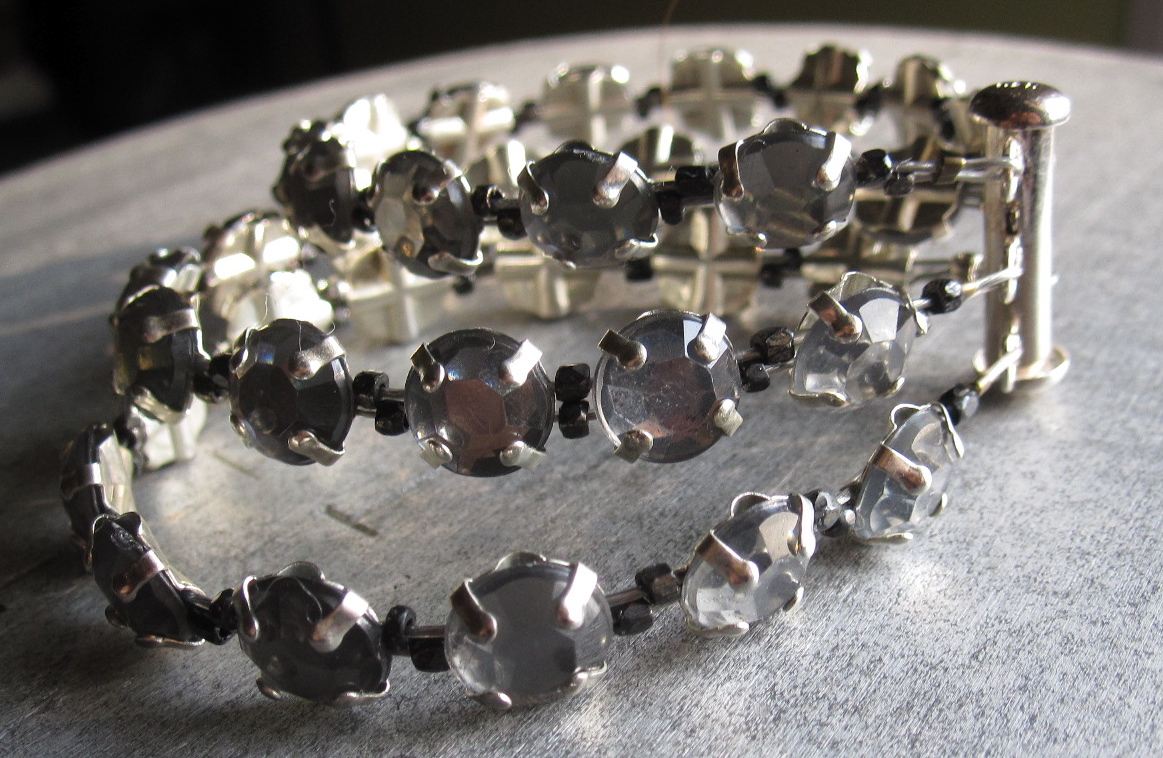
The bracelet is made of some of the sew on jewels I bought in Hong Kong. The Washington Post published a photo of some single strand using similar jewels with leather straps for closures for $85 each. Crazy! I assume the jewels were of higher quality, but such an assumption is not always warranted. I liked the look so I made one of my own, triple-strand for extra bling.

=======================

Has anyone else gotten snarky comments on recent pattern reviews from someone whose name suggests a level of expertise but has not actually posted any reviews? Ugh. I really can't stand those people. I just have to remind myself not to feed the trolls and that it is so not personal. It is just about them having a forum in which to feel superior and if that's what it takes for them to get through life I should not begrudge.

**edited to add this thought** It is really far-fetched, but I almost wonder if the troll could be the Vogue pattern drafter as they are both recent Vogue patterns? In which case, it would feel to him/her that my review is snarky because I didn't like the patterns. Who knows. Trying to let it go.

Friday, February 19, 2010

Burda 06-2009-110, Border Print Kimono Dress

Burda 06-2009-110 Thumbnail

I liked the kimono variation in Burda 06-2009-110, although without the front button placket, and made a muslin of it in some terrible, terrible black polyester shortly after the magazine came out in June. I decided I wanted to make the real thing in gray; I ordered some gray fabric online but it turned out to be green. I bought some in NYC in June but got it home and discovered that charcoal gray cotton is too blah.

Joie Border Print Silk _Leah_ Dress - Contemporary - Bloomingdales.com Then when I was researching border print images, the kimono dress at right really struck my eye. I received this wool challis as part of The Carol Collection and hadn't been sure what to do with it. I feared whatever I made with it would look dated (picture an 80s style ankle length broomstick skirt out of this fabric and you see what I mean) so I had to tread carefully. However, the kimono looked fresh to my eye and in no danger of screaming late 80s/early 90s, an era that, with all due respect to my high school and college self, was a total fashion dead zone. The stash contest going on at PatternReview was a good incentive to take the plunge. I would never be in any danger of winning the contest, but I like the camaraderie of seeing how much of our collective stash we can stitch rather than buying new fabric. It is a challenge and a good discipline to use up older pieces about which enthusiasm has waned.

At first I thought I would cut this as shown in the inspiration photo, which appears to have been cut as a true kimono with a cut-on sleeve, the border at the edge of the sleeve. However, I had only two yards of the wool challis and couldn't get this cutting layout to work. The Burda dress is drafted with a separate sleeve, so I lengthened the sleeve to 15 inches and cut. I cut the body of the dress on grain, and then attached the border print to the bottom of the dress with a seam. With the piecing, I could just squeak the dress out of the fabric. There are only tiny bits of it leftover.

I lined with a polyester, also from The Carol Collection. I knew I would need something drapey and fluid, but also not too lightweight to get this dress to hang correctly and be warm enough for Fall/Winter. I love that the brighter color shows through in the sleeves; in traditional Japanese kimono, giving a glimpse of the contrast fabric of an under-kimono at the sleeve was considered part of the art of wearing it. The only problem is the poly lining is SO staticky. I am not sure how it will wear.

Pleat SculptingAnyway, I thought I was being all clever by cutting the front along the self-facing foldline. It wasn't until I had it put together that I realized the self facing foldline is NOT center front. Oy. I am smrt. So I had extra fabric in front, which did not look good. I took the concept of the gathered neckline of the inspiration dress, and cut the neckline to a wide boatneck and then took up the extra front neckline fabric in pleats, as neckline pleats are very fashionable right now. I pleated the fashion fabric and lining as one and finished the neckline with bias tape. Messing around with all this sculpturing made this no-closure unfitted dress take waaaaay too long to make!

While planning the cutting, I had a hard time deciding on a length for the sleeves. Luckily, I could put on my muslin and see where the shoulder seam fell and measured from there, but that gave me no sense of how the sleeve would wear. The extra-long sleeves on the inspiration piece are part of what drew me to it, so I didn't want to skimp. However, once it was constructed the sleeves were just a tad too long. I couldn't just hem them because then I'd lose the border print. I could have shortened above the border and it would have looked like the hem, but I put in some crazy pleats at the shoulders just to test out various sleeve lengths and kind of liked the way the crazy pleats looked. I like the sculptural quality of all those pleats at the top. So I made them permanent. I know they are weird. The pleats at neck and shoulder show up best in this shot.

PocketsI considered leaving the pockets off as they just seemed like extra trouble. I like the idea of pockets, and I like to put my hands in them occasionally, but I never actually use them. But then I thought about it some more and realized that I *do* use pockets on dresses to clip my work ID onto them and keep inside the pocket. Wearing a work ID with dresses can be challenging. If I am wearing a belt I clip it onto my belt. If it has a waist seam I put a safety pin in the seam (which gives some support to the weight of the ID) and clip it to the safety pin. Dresses with no waist seam are impossible. I used to have a badge holder that had an actual clip on it, like a binder clip, which was awesome because I could just clip it onto a dress, but it broke and now I am stuck with the kind that's a passive clip, like a money clip. I refuse to wear a necklace/lanyard style ID holder because they are hideous and clash with my actual jewelry. Although this dress must be worn with a belt (check out the sexy unbelted nightgown look), my ribbon belt (tutorial is here) doesn't love holding the weight of my work ID. So I kept the pockets. After all that overthinking, I think they are cute.

I haven't had a chance to wear this dress yet and I am concerned about the staticky lining and haven't quite figured out the best boots**/tights combo for cold weather, so I'm not calling this an unqualified success. However, this fabric is now sewn up and no longer sitting on the shelf where it's been the past year and a half so in that sense it is a huge success!

All photos of this project are here and the pattern review is here.


**I love it with the cowboy boots, but after spending way too much money on these boots I don't think I can wear them. This happens every time I buy cowboy boots. I have spent hundreds of dollars on unwearable cowboy boots. The shaft collapses inward to my ankles at the seam where the lower boot and shaft are sewn together. The vertical seam is piped and this creates a very thick seam that protrudes into the inside of the boot, as you can see here. The seam is really harsh and it takes off layers of skin where it has collapsed into my ankle to the point that I am bleeding within minutes. I cannot be the only person in the world with this problem but all my googling has found NOTHING, not only no solutions but nobody else even having the problem. I have considered several ideas, such as buying metal rulers and taping them along the seam on the inside to keep the seams from collapsing but I don't know if that would work because tape won't stick very well. Wearing thick socks is not enough, and bandaids/medical tape are no match for those rubbing piped seams. Does anybody have any solutions????

Tuesday, February 16, 2010

Project Runway: Season 7 Episode 5 Designer Inspiration

Ben Chmura Kimono, Project Runway S7E5

So I've been keeping up with Lifetime's Project Runway (Bravo lost it two seasons ago) via the internet. I figured Season 7 would be a good season because on the first challenge there was no clear "throwaway" contestant. It seems in past seasons there would always be someone on the first challenge who would be revealed not to know how to sew or never to have heard of clothes or something and in this season there was no clear loser on the first episode. It is both exciting as a viewer but a teeny bit sad as a home sewist. I have never had any illusion of going on Project Runway--I don't draft and I don't know how to draft. However, I always could have been that first contestant who somehow against all odds manages to get on the show only to flame out spectacularly before anyone learns your name and you have the chance to cry/backstab on camera. I guess those days are over!

Anyway, back to this season. It does indeed seem like a talented group of designers, most of whom have a strong point of view (a little too strong in some cases where they keep churning out the same garment every challenge). None of the garments had really slain me until this episode, when Ben Chmura produced the kimono above.

LOVE. Man. I love everything about that dress. Love the kimono styling without being too literal, love that there is no obvious closure (I'm guessing his dress in fact has no closure but you could do hidden snaps), LOVE the color story, and how much do we love that open back with the lapels???? I've seen plenty of open backs, but I am not sure I've ever seen a lapel like that. It is genius. I also love that there is a back neck and the back peek-a-boo is a cutout rather than just a standard open back.

I hope this will be Ben Chmura's Kara Janx wrap dress (also a kimono style, hmmmm); even if he doesn't win it ought to put him on the map.

**edit** I didn't want to put a spoiler in but enough commenters have noted that this look didn't win the challenge that I will add my two cents! I knew it would be down to this dress and Anthony's teal confection (my favorite color); however, magazine covers generally favor solid colors and Anthony nailed Heidi's taste so I was not surprised by the win, and was very happy for Anthony. Heidi will look fab in his dress. Although, did anyone else see her look of alarm/resignation/depression/hunger when Anthony mentioned her having her "pre baby" body back by April (and considering magazines come out a month before their cover date and the cover shoot probably occurs at least a month before the magazine is released that gave her about five months from the baby's early October birth). I'm glad I'm not a model is all I'm saying.

So many of the other entries this week were huge fails! I couldn't believe how many people went with pale colors. Heidi is a blonde, people! With fair skin! Such people as us cannot wear washed out colors because we end up looking like a pile of dishrag. And *nobody* used the kiss of death words "Renaissance Faire" for Emilio's? Just add a pair of fairy wings and it could be walking ye olde dustie lanes.

Friday, February 12, 2010

Burda 02-2009-123, Self Shawl Collar Wrap Blouse

Thank you all for the fitting suggestions on the Vogue 7876 blouse. I am glad I'm not the only one who suffers from this issue! And I received several helpful suggestions for altering such patterns to fit. I really appreciate the help.

I really don't know how to characterize my shoulders. They are narrower than average and yet muscular, I guess (in addition to sloping)? It just seems impossible to have both overly wide shoulders *and* tight shoulders in the same pattern. But it clearly is not, and I am not the only person experiencing this mysterious phenomenon.

And Terri A asks where I buy all my glasses online. I loooove having a wardrobe of glasses and it has become one of my signatures to coordinate with my outfit. I have tried several online places but the best, in my opinion, is zennioptical.com. They have a great selection at insane prices--as low as $8.00 for the frame, lenses included unless you need ultralights, $4.95 for anti-glare, $4.95 for shipping (last I checked)--and they always get my prescription perfect. The only downside of ordering online is that you don't go in for a fitting and get the arms bent to sit perfectly on your ears. I am sure I could try a local optical shop for that, but so far (knock on wood) none of my glasses have been uncomfortable. How cute are these purple plaids for $8???? Standard disclaimer: I have no connection with Zenni except as a satisfied customer.

There is a *ton* of info on ordering glasses online at Glassy Eyes, including website reviews and discount codes, but here are some basics: You can figure out what size will suit your face by measuring your current glasses; all the sites give measurements for their glasses. To order online you'll need to know your prescription and your pupillary distance (PD), which you can ask to have measured at the optical shop or do it yourself or ask a friend to hold up a ruler and measure between your pupils. I've had friends do it themselves successfully, though luckily I got measured at the optical shop.

================

Burda 02-2009-123 Thumbnail

When we were at Jomar in Philadelphia in October I got two silks for $6/yd to make Fall/Winter tops. This navy stretch charmeuse is the fabric I had planned to use for Vogue 7876, but we saw how that turned out so I sought solace in Burda. I have been liking Burda 11-2007-104 since it came out, which is a couple of years now, but it wasn't the look I envisioned for this drapey silk (and there's no way I would have had enough fabric). Then I ran across the line drawing for 02-2009-123 and was like, "Why haven't I made this before?"

Looking back into the magazine (I have taken photos of all the line drawing pages and have them on my computer to reduce wear and tear of leafing through every issue when I am looking for a pattern) I found the editorial spread and realized why. Burda has this as an airy overblouse and I am not an overblouse kind of gal. Although I admire the look on other people and you'd think if anyone could find a way to wear (by which I mean show off) more clothes at once it would be me, I don't know how to layer and I don't particularly want to layer and I sure as hell don't want to have to make two pieces in order to get dressed in only one outfit!

However, the reviews on Pattern Review show a regular wrap blouse, not an overblouse. In fact, most reviewers said they weren't sure how Burda managed to make this look like an overblouse in the photo spread. Huh. I really had my heart set on a wrap blouse with a shawl collar for this silk, so I figured I'd just take the plunge. The pattern comes in 36-44, so I scaled it to a 34 at the shoulders and bust. I normally make a small bust adjustment in a wrap by shortening the diagonal line between waist and shoulder, but I wasn't sure how it would affect the collar so I really went out on a limb and cut it as is.

Burda, how I love thee. This is a simply fabulous pattern and incredibly easy.

The collar is cut on so the wrong side of the fabric will show, but that is what makes it so easy. It's also meant to be finished with a close zigzag. I used just the right needle on my serger and it looks good; in the closeup pictures you can tell that the thread isn't a perfect match for the fabric but that disappears at further than 6 inches or so. Normally I would have given the rolled hem foot a shot, but working in lightweight stretch silk on a curve would have been futile so I saved myself the heartache. I also finished the hem using the serger; it is not perfectly straight in the back but seeing the photo in which it is impossible to tell I won't stress.

Tie Opening in French Seams

Because I was sewing with silk, I finished the insides with French seams. Since the tie end has to go through an opening in the right side seam, I used the close single needle serger stitch to finish the opening edges and left the opening unsewn in both passes of the French seam. It worked well and I think it looks nice on the inside.


Back Neckline Bias Finish Burda wants you to finish the back neckline with bias tape, then stitch to the front at shoulders, leaving the collar to extend. Then you are to fold the collar over to sandwich this seam and hand stitch the collar in place to create a clean finish on the inside (I think that's what they were saying). Because I was doing French seams that wouldn't work. I finished the back neckline with bias tape before assembly as instructed; I topstitched the bias tape to keep it in place. I folded the collar against the front at the foldline and put in the French shoulder seams, catching in the collar. Then I rolled the finished shoulder seams over the back neckline (with its bias tape) and tacked them in place. Not the most elegant solution, but it works.

Side Although I didn't do an SBA on this pattern, the bust looks good and the crossover doesn't gape. Such luck!

The sleeves are meant to be elasticized with a bias-finished slit and little faux ties. I didn't have enough fabric to cut the sleeves full length, nor make enough bias tape to finish a slit. I might have been able to make little faux ties, but I had to piece one of the waist ties. For now I like them that 7/8 length; I just finished with a single needle serger stitch as for the collar and hem edges. I think the sleeve would need a little more width to look right with the elastic edge.

Really, everyone must immediately make this pattern if you have this issue. Just make sure the wrong side of your fabric is acceptable and go. I am already trying to decide what fabric to make it in for Spring with flutter sleeves.

All photos are here and the pattern review is here.

Tuesday, February 9, 2010

Vogue 7876: Am I Malformed or is the Pattern?

V7876 Thumbnail

This is Vogue 7876, a very cute design with a cool flounce collar variation. This is my pajama muslin, made of the Vera Wang silk/rayon blend from fabric.com (you can see it is utterly ruined by the washing machine). It looks innocuous, right?

Ugh. This is the second most uncomfortable thing I have ever made, the first being McCall 5466, the cute plaid dress with the exact same problem. I attempted to wear McCall 5466 last week for the first time this winter. I lasted about 10 minutes wearing it while getting ready for work and then took it off and put it in the giveaway pile. I would like not to do this again, so I am begging for your fitting help!

Tight Upper Arm Tight Upper Arm


The issue in both pieces:
-pulls very tight across the upper back when I move my arms
-very tight across the sleeve in the shoulder/upper arm (above the bicep) when I move my arms in any direction

Unlike the McCall, the armscye here is not unbearably tight around the arm, but it is definitely snug to the point of a little bit of discomfort.


Back relaxed Tight Upper Back

I know that the shoulders are too wide as you can see in the relaxed back; I always forget to fix that in Big 4. I need to make it a standard alteration to shorten the front shoulder about 1/2 inch and then take a dart in the back shoulder. However, merely having the armscye in the wrong place does not explain this fit, I don't think, because when I try to hike the armscye closer to my actual shoulder point (granted, this is difficult because it is tight) I don't get any more mobility, and of course the sleeve is still tight across my shoulder/upper arm.

Can't Lift Arms To get any mobility at all I have to hike the sleevecap up over my shoulder, and even then I don't have much movement going on.


So, what is going on here? It feels like I need more room across the upper back, but where do you add that? I tried in the past adding some extra room to the upper back at the Center Back on Butterick 4985 but the collar stands back from my neck and you can see the pouchiness of extra fabric and it didn't really solve the mobility problem anyway.

And then the sleeves--do I need a taller sleevecap? Do I need to slash and spread along the center all the way up to the top and add more fabric there?

It seems so simple: if something is too small you make it bigger. But it is not so simple when it comes to armscye/sleeves.

Fabric Bulge at Crossover And then on top of all that, there is a weird bulge of fabric at the crossover. Although the illustration makes it appear that the front wrap is supposed to cross all the way over to the opposite side seam, the line drawing and the pattern markings indicate that is not the case. Mine appears to wrap at approximately the right place, but then it's all bulgey there. I can't tighten the wrap any more, so I really don't know what that extra fabric is about.

And even though I shortened the wrap section two inches along the diagonal, there is still a little bit of gaping and the crossover is very low.

I had intended to make this out of some navy silk I bought at Jomar in October. It is a lighter weight than the VW silk/rayon and is mixed with some lycra, but there was still no way I was wasting it on this pattern. Luckily, I found a perfect Burda pattern in a back issue and don't have to mess with this pattern ever again.

But I am wanting to make Vogue 8413. I haven't yet gotten it out and compared the armscye and sleeve but I assume they are a similar draft and it would be useless to attempt V8413 without addressing this fit issue!

All the photos are here and the pattern review is here.

Sunday, February 7, 2010

Snowmageddon 2010

I fell in Snowmageddon 2010


Well, you might have heard about our little snowstorm in the DC area. In December I was bummed that I missed the big Snowpocalpyse, as I was already in Texas for the holiday. I had great stories from the President's Day Storm of 2003 (we have much better names these days) and seriously disappointed not to be able to update them. So Mother Nature decided to make it up for me with Snowmageddon 2010.

Alas, my stories from this one aren't that exciting. The night of President's Day Storm of 2003 I stayed with my best friend (now we are next door neighbors) because I was going out dancing in DC and her apartment was much easier to get to the District than mine way out in Huntington. I ended up snowed in there for three days. She undertook ridiculously arduous journeys to work as she was in private practice. I was clerking and the court was closed so during the days I foraged for food. We still talk about how much fun it was. So I don't think I could top that one. (There is also a story involving a houseboat but I won't go into that.)

For this storm I was at home safe and sound. I had spent an hour in line at the Safeway to buy provisions and ended up leaving my library book behind accidentally, about which I feel TERRIBLE. I spent a cumulative total of a couple of hours waiting for metro trains to visit Virginia. I made pizza for dinner last night and butternut squash tart tonight.

Good Neighbors ShovelI was supposed to have jury duty tomorrow but deferred it because I really don't want to slog down to the court (amazingly it is open!). I am fanatical about shoveling--the ONLY way in which I am tidy, lol--and most of our neighbors are too so our street is passable. But trying to walk along some unshoveled sidewalks I realized it would be a total nightmare to walk all the way downtown. And metro is a joke right now! Work is canceled so with jury duty deferred I have the day off. I was really bitter about Snowpocalypse because I took vacation on a day that ended up being a snow day. So I feel compensated.

I have been doing some sewing, but what with the riding of the rails I haven't been *insanely* productive. I need y'all's help with a fitting issue. And now I have all day tomorrow to write about it!

You can see all my Snowmageddon photos here.

Thursday, February 4, 2010

BWOF 09-2008-108, Lace Tulip Skirt

Burda 09-2008-108 Thumbnail

I rarely buy fashion magazines because they're too expensive, and then at the end I have a big lump of paper to add to a landfill. But when I am traveling, I do occasionally indulge and on the way back from Spain I bought the September 2009 issue InStyle magazine.

InStyle InspirationI enjoyed reading it, but wasn't inspired by much of anything I saw in it except for a spread on lace, one of those "at any age" features. Apparently, I am a slave to my generation because the item that most struck me on the page was a lace skirt for the 30s and 40s crowd. I immediately fell in love with it. When I got home I looked for it on the web so that I could study the details more carefully, but the brand has no web presence that I could find and of the few of their products being sold on retail websites none of them were the skirt. So all I had to go on was a small photos on the magazine page.

I already had the lace from Jomar in November 2008 (how time flies! it seems like that trip was just a few months ago); I paid either $1 or $2/yd for it. You might recognize it from my lace dress--and there is still so much left! The wool fabric for the underlay and the lining are both from The Carol Collection, so this was a very economical project. The only expensive part was the zipper, which was something like $2.50, and the magazine subscription. I learned my lesson with the lace this time and just sewed the lace and underlay fabric as one (and btw, I did go back and fix the horrible zipper on the lace dress--I unpicked the hand-stitching on the lace, trimmed off the seam allowances, and hand-stitched the lace back down; it now looks seamless).

Although looking at the closeup I can see that there are little vertical ruffles tucked into the pleats; I'm not sure I noticed that at the time. Even if I had seen the ruffles, I don't think I would have gone for them anyway. So I looked through old issues of Burda knowing that there plenty of variations on the tulip skirt in the magazine and found 09-2008-108. Not only was it nearly the exact shape I was looking for but I really liked the large center front belt carrier and the side-set belt, an unusual but interesting look. Although it has taken me months to post about it, I actually made it within days of seeing it in the magazine, I was so excited about it.

PocketTo get a look closer to the magazine, I moved the front pleats closer to the sides. I also added side seam pockets as pockets are so trendy in skirts and dresses. The combination of these two changes is a little unfortunate, as they cause the skirt to poof out over the hips a little. I hand-stitched the pockets closed for a couple of inches at the top, which helps.

I also moved the zip from the side to center back, adding a center back seam so that I could shape it instead of having a straight back for my non-straight booty. Because of this I split the back belt carrier into two.

I also decided to go all trendy and *finally* do an exposed zip. As with most trends, the first year exposed zips were out I hated them, the second year I got used to them, the third year I decided I wanted one, and the fourth year--as the trend is nearly passe--I finally made one. I like to think I have style, but I don't think I can claim to be fashionable!


Which zipper?

I bought a navy blue metal jeans zip and then got it home. Ugh. The lace is very dark and looks black if it's not next to anything black, and the navy zipper looked ridiculously bright against it. However, you can see that a black zipper reveals that the lace is actually navy, and didn't look right either. I was frustrated; I didn't want to give up my dream of finally doing an exposed zip, but I didn't want a garish non-matching one either. After a few days it finally hit me, such a simple solution: I put the navy zipper into a black dyebath for about 10 minutes. Perfect! I cannot tell you how proud I was to figure it out. I always have a bottle of the Rit liquid black dye so I can easily do small batches; it is most convenient.


Zipper Installation To install the zipper, I assembled the skirt and the lining separately; for the waistband facing I used the wool underlay fabric and stitched this to the lining.

Then I stitched the CB seam of the fashion fabric to the bottom of the zip, and basted the seam where the zip would be. Next I pressed it open and stitched the zip down from the top, having the top zipper stop just below the stitching line of the waistband/facing.

Finally, I stitched the waistband facing/lining to the waistband, catching in the upper edges of the zipper for a clean finish, and turned down the lining, turned in the seam allowances, and hand-stitched it to the zip opening. So basically, it was just like a normal non-invisible zipper, except the zipper was on the outside.

I was a little worried when making the skirt because my neutral is black, not navy. I was afraid I didn't have anything to wear with it. In fact, it has turned out to be a totally versatile skirt and I wear it all the time and LOVE it. When I was in law school and private practice and didn't have time to sew I pretty much only made skirts because they are so quick and easy. So I have had an unofficial moratorium on skirts for a while. I mean, ok, last year I still made 9 skirts but out of 60 garments, and considering how often I wear them and how many I *could*, it's not so many. But this project has sort of opened the floodgates of skirts! I want to entirely redo my skirt wardrobe. I really need to do a Great Closet Cleanout. If I get rid of some old skirts, can I make new ones?

All photos are here, including closeups of front/side/back, and the pattern review is here.

Monday, February 1, 2010

Mailbox Goodness from Marji and Musings on Border Prints

Marji is about to embark on her high seas adventure! To prepare, she is cleaning out the sewing room and found some goodies she wanted to share. When I saw that one of them was a knit print, I could not help but sign up. And, amazingly, I won! Thank you Marji!

Border Print Knit. 1-2010

Gorgeous, right? It's from Gorgeous Things, 60" wide, 3 1/2 yards so I can do a lot with this. It's a double border print with the border on both selvages. The stretch is crosswise, so there is not a whole lot of stretch along the length, parallel with the border, so the final result can't be *too* form fitting.

So of course, this got me thinking about border prints! In addition to this fabric from Marji, I also have a wool challis border print from The Carol Collection. Because the hem has to be straight, there are basically three choices for border print dresses: a straight tunic, a gathered/dirndl skirt, or a pleated skirt.

Quotation_ Hale Bob Silk Jersey Print Borders Dress - Contemporary - Bloomingdales.com Laundry by Shelli Segal Printed Ponte Knit Dress - - Nordstrom
I like the Hale Bob twist on the tunic on the left, because it has a little more fullness in front and just a little more shape overall. I also like the tunic on the right with the contrast upper bodice yoke. I particularly like the way the upper yoke obviates the need to do a complicated facing for the front opening! But I think that would only work in a woven with a fair amount of body.


Joie Border Print Silk _Leah_ Dress - Contemporary - Bloomingdales.com Ecote Knit Print Halter Dress


The wide kimono sleeves on the left are awesome, and using the border for the sleeves rather than the hem would allow me to cut with the crosswise stretch going around the body. However, I think this pattern would be better suited for the wool challis than the knit, because the colors of the knit make me want it for Spring/Summer. The dress on the right also uses the border print vertically, though you do end up with a seam at center front and center back.


Suzi Chin Maggy Boutique Border Print Dress (Plus) - - Nordstrom Maggy London Border Print Matte Jersey Dress - - Nordstrom
I like the way the dress at left uses the border print at the hem and the sleeves, particularly since the border is so bright compared with the rest of the print. The one on the right uses the border print every which way plus a contrast bodice, which definitely makes the most of the print. I liked using the border as the midriff in my Simplicity 3503 knit maxi dress.


boohoo.com | Womens Fashion Clothes | Womens Clothing


I think this style is the winner, however, for the knit print, although with a higher neckline! Burda has had several patterns in this style, 03-2009-113, 04-2009-122, 07-2009-119, and 10-2009-117 would all give me a place to start.


All my border print inspiration images are here.

What are your ideas for border prints?